Transcripts
1. Introduction: Hi, I'm Sofia Richard. I'm an illustrator, and
today is going to be a very quick course
on how to solve asymmetry problems on
digital portrait paintings. So you know when you're
almost done painting, and then you flip
your canva and you realize your portrait
is quite a few, we're going to see
how to easily fix it. So let's jump right
into the lesson.
2. Class Project: Project for this class is to take one of your
portrait paintings, if you have one
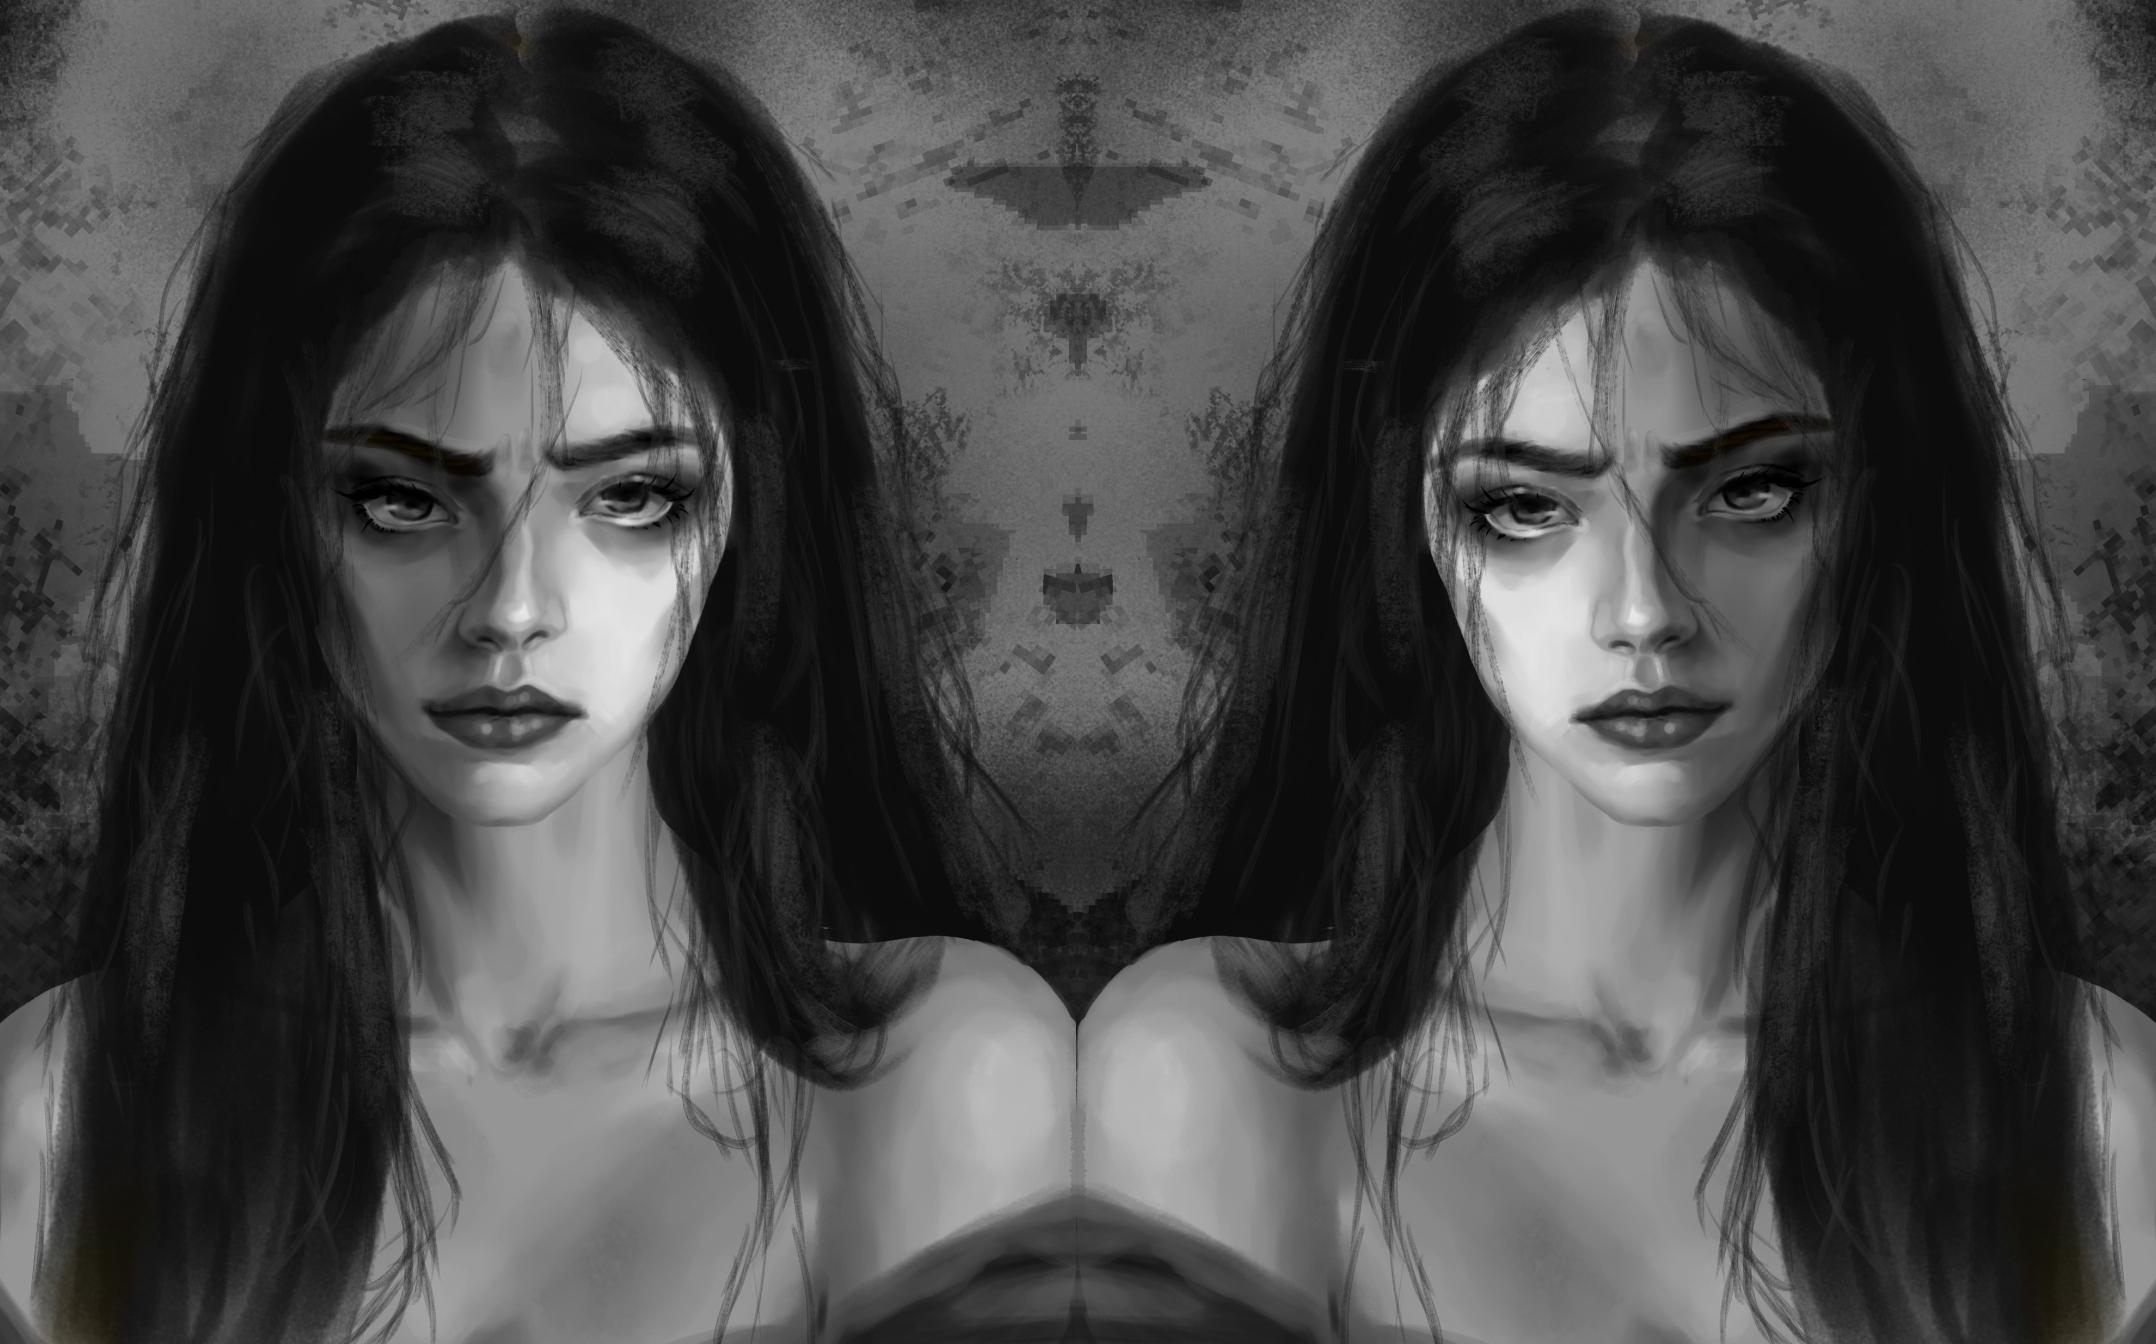
that suffers from that jump scare mirroring
problem and try to correct it. If you don't have
one and just want to train to remember
the technique, you can just take a random photo and try to move things around. For those of you that have
a painting to correct, you can post the mirrored before and after paintings
into the project section. Now let's jump into the course.
3. Correct Your Portrait: So for the demo, we
are going to take my own painting and we're going to see what
are the problems. So we can see that the eyebrows and eyes are not
completely aligned, and the left eyebrow is a little bit too
stretched to the left, and the nose bridge doesn't
really read symmetrical. And the mouth is not
symmetrical as well. So now let's just
see how to fix this. The first thing that you
need to do is to have your whole skin
painting on one layer. So I advise that
you make a copy of your work before obviously and keep the hair separate
so it doesn't get impacted by what we're
going to do on the face. So the main tool that I like to use to correct my portrait is the liquefied tool and
especially on push mode. So I'm using Clip Studio Paint, and over here, it
looks like this. But this is an option
that you should have on most digital
drawing softwares. And yeah, liquefy comes with
quite a lot of options. You can explore
them if you want. But I personally mainly
use the push tool. The first thing I'm
going to try to correct is the alignment of
the eyes and eyebrows. So make sure you have
your skin layer selected. And with the liquefy tool, what's important is
the size of the brush, depending on what
you want to do. So here I want to move the
whole area without deforming. I'm adjusting the size
of the brush to make it as big as the
area I want to move. And the second thing is the
pressure you will apply. The more pressure
you will apply, the more it will move
the painting at once. I usually apply
very low pressure to move things very gradually. Here you can see what it does. It does move all your paint in the direction where you push. The result is not terrible here, but it does always
deform things a bit. And for such an important area, I want to keep things intact, so I'm going to cancel it and
use the lasso tool instead. So with the lootol, I simply select the part I want to move and
just drag it down. And like this, I'm sure it won't deform my painting at all. And then I'm just
repainting over, and this is really minimal work. Then I have my nose
asymmetry problem, and if I look closely, actually, the painting is
fairly symmetrical, but it somehow
doesn't read as so, and I think the problem is because the shading is
not intense enough. So here, no particular tip. I'm just strengthening
the shading just to define the
structure better. And now for the lips, I'm grabbing the liquefy
tool on push mode again. And this time, I make
the brush very tiny. Like this, I can just grab
part of the leaps and push the painting in tiny places just to adjust
slightly the details. And like this, I don't
have to mess around with all my shading
and lighting and all. I can still smooth it out with painting and
blending afterwards, but it's still a big time savior compared to correcting
everything with painting. I'm just doing a
few back and forth to check for the problems. And I think her nose is not completely balanced
on the nostril area. So here again, I'm using the liquify tool to
adjust the symmetry. And actually, I thought
I would have to use the liquefy tool again to
adjust the left eyebrow. But I realized that if one of them looks more stretched
out than the other, it's because the right eyebrow is not properly painting
up to the edge, so I'm just repainting over it. And that's it with
just two tools and a bit of a painting. My portrait looks a
lot more balanced.
4. Conclusion: Congratulations for
completing the class. So as a quick conclusion
to correct your portrait, make sure all the
skin is on one layer, make a duplicate to be
sure you're not losing anything and make all the
proper savings prior to it, and then think about the
selection plus move tool to move the things that
really shouldn't be distorted and just do a
bit of repainting on top. Then the most versatile, the liquefied tool on push mode. Think about adjusting
the size of the brush to move big areas at once for the bigger sizes or to just distort some details or shapes
with the smaller sizes. And with just those two tools, you can save your paintings and a lot of time. So that's it. We're at the end of the course. I hope it was helpful
and don't hesitate to ask questions in the discussion section
if you have any.
 Sofia (Fanny) Richard, Illustrator & Concept Artist