Transcripts
1. Introduction: Drawing portraits is a lot of fun. Face features can add so much personality and stories to your character illustrations. If you want to feel more comfortable drawing stylized character portraits as well as explore different face designs, this class is for you. Hi, my name is Iva Mikles and I'm an illustrator and designer based in Central Europe. Creating characters with interesting faces helped me to successfully work on many projects big and small, such as Lego Friends, the animated series which aired on Netflix, illustrations for software companies, magazines, and explainer illustrations for various clients for their websites and presentations. In this class, I will take you through the journey of designing stylized portraits and faces using simple shapes so you get more comfortable and you have solid starting point when drawing characters for your illustrations. To make the learning more fun and personal for you, we will be using a theme and the theme is zodiac signs to design your stylized portraits. You will learn how to use simple shapes to draw a face starting from sketching the heads, eyes, eyebrows, noses, mouth, and lips, and finishing with the hair before putting it altogether in a character inspired by your zodiac sign. I will also show you techniques on how you can take inspiration from the references and you will learn how to simplify the real life in your character designs, and you will gain a solid scale for developing your character design style further. At the end of the class, you will have an illustration you could print out for your home, give to your friends or family, or take your designs further and even use it in your portfolio if you create your own custom zodiac sign illustration. In addition, you will also get a bunch of freebies, heads, eyes, and mouth, practice sheets, suggested color palette ideas for the zodiac signs, and the moodboards with photo references for your characters. I will be using Procreate, but feel free to use any other drawing software or medium you prefer. Last but not least, before we start, don't forget to follow me here on Skillshare to get notified when I release new classes and make announcements about the giveaways. I also invite you to join me on Instagram where you can see my newest artworks and explore the stories from my life as an artist. I would love to see and share your projects, so don't forget to tag me in the stories or the post. Now, let's get started with expanding your horizons and drawing awesome faces. See you in the class.
2. Project idea: [MUSIC] To make the practice and the project more unique and personal to you, I invite you to create a stylized portrait inspired by your zodiac sign, or you can create a stylized portrait inspired by the zodiac sign of someone from your family or one of your friends.
3. Sketching Brushes: In this lesson, let's look at the brushes, I will be using in this class, and if you choose so, you could do. Let's look at an example of one of my illustrations to talk about brushes. I didn't use that many brushes to create it. I mostly use the brush with a smooth edge for basic shapes, which I then fill with color. For the sketch, I use my favorite brush. I mean, the current favorite, which you can see here. It is a brush that comes with Procreate and you can initially find it in the inking folder. It is good to try different brushes for you to see which one you like the most. A great thing about testing the brushes is also the practice of drawing your strokes with more confidence. For example, try shorter strokes and longer ones in different directions and so on. Also, try using the whole forearm, not just the hand to achieve looser and more confident lines. Then try practicing circles too. It will help you with drawing more confident round shapes. But if you struggle with wonky lines when drawing open the brush and adjust the streamline. Like that, you will achieve more confident lines without much effort. While I was editing the class, the app was updated and some settings are different. Now you have more options to make your brushstrokes more smooth. The streamline option is now under Stabilization tab in the newer Procreate version. Now you can even see the live preview of the brush when adjusting and even draw and test the brush on the right side here. Try adjusting each slider to see if you like the behavior of the brush. For example, moving the slider on Amount in StreamLine on the top, together with the Amount slider under the Stabilization in the second one. The Motion filtering will remove even more bumps along the way. For example, if you have unsteady hand motion filtering will remove these unwanted bumps and edges. The programs are often changing and updating though sometimes is enough to click around to find the similar settings in the same place. To continue, let's try this brush with smooth edges. If you want more solid-looking line art and overall cleaner edges in your illustration, you can choose to work with this brush. It also comes with Procreate, which is quite convenient. It can be initially found in the calligraphy folder. As you can see, these two have a different look and feel, and it depends on whatever you prefer. A more pencil-look with more texture or cleaner lines and shapes. I will be mainly using these two brushes for this project and illustration. But I encourage you to try more brushes to find your favorite ones. Now let's move on to the next lesson. See you in the next video.
4. Face Proportions: In this lesson, we will look at the face proportions. Understanding proportions of the face and using them correctly will help you make your portraits look awesome. Following are some of the main things I think about when drawing faces. Let's turn on the grid to create the guidelines and indicate the general proportions of the face. You can imagine the head proportions by dividing it into even parts. One line for the chin, one line for the eyes, and one line for the top of the head. In the frontal view, the eyes are roughly in the middle of the head and should be leveled. In other words, I'm always making sure that the eyes are on one line, at the same distance or height from the bottom of the face. To measure the distance between eyes in the front view, just imagine another eye in between. Placement and alignment of the facial features are the most important when you want the characters to look natural. It is important because we as humans are so used to seeing faces all around us, so we spot when something is off right away. When you keep the expected face alignment, the face won't look bent or melted to us. In other words, always try to keep the facial features aligned and leveled. As a rough guideline for the adult portraits, divide the face into thirds and evenly place the facial features. I want to emphasize that this is just a rough guideline because we are all different which makes us unique and I encourage you to notice these differences. As well as when you are more comfortable with more realistic proportions on the faces and portrait, you can play with different placements and designs. Now, let's look at a different example. This time with a younger character. To achieve a younger look on the character, I'm thinking about facial features of a younger adult or kids. Kids usually have bigger eyes and more prominent foreheads. As well as they have a larger head in proportion to their body. You can also put eyes and nose closer together for an extra cuteness. As you can see in this example, I slightly exaggerated the forehead of this character. She looks a little bit cuter and younger. I also moved the nose lower and closer to the lips, which I think creates an interesting look. You can also play around with moving around the face features higher or lower on the face to achieve interesting looks. Let's break this in the next lesson. See you in the next video.
5. Proportions Practice: In this lesson, let's practice drawing the proportions. Now, I will mark the horizontal practice guidelines. We will first do a rough sketch to place the features and redefine them on a separate layer. When you practice enough, you don't need the proportion guidelines when drawing, of course, but I think at the beginning this will help you to place the features and then you can move them if you feel like it. In the first example, I plan to draw a cute character from the frontal view. I will start with five horizontal lines and create a circle within the top four lines. Afterward, I'm adding an overall egg shape to connect the circle with the lowest horizontal guideline. Then I will draw a vertical line in the middle. Ears will be in between the second and the third horizontal guideline from the bottom. I will have the middle of the forehead, eyes, nose, mouth, and chin on its intersection with the horizontal lines. Then I can round the jaw so it doesn't look like an egg. We'll talk more about the shapes in the head shape lesson. I will keep things quick and simple, and I will suggest the nose as an oval, mouth as a line, and a half circles to suggest closed smiling eyes. Then I will add eyes on the third horizontal line from the top and suggest the hair with loose strokes around the face. For the three-quarter view, I will do the same. I will start with a circle within the top four horizontal guidelines, but this time I will create something like a bend in the egg shape around the third horizontal line from the top. This is where the eye socket usually is. When you look at the face from three-quarter view, there is a variety in volume. The face area where the eyebrows are has more volume than the area where the eyes are on the face because of the eye sockets in the skull. You can think more volume and less volume. That's why I'm drawing this bend in the overall head egg shape. On the other side, I will add the ear. We will not see the other ear in this view. Then we can place the other facial features like eyes, nose, and mouth on the same lines as in the frontal view here in the first example. When we are happy with the placement, let's reduce the opacity and redefine the features. When you want to create the same character in the front in three-quarter view, try to align the features on the same height on both faces. You can also test out different placements of the facial features here. For example, as you can see, I tested a smaller forehead in the frontal view compared to a higher forehead on the character on the right in the three-quarter view. Looking at both, I think I like the one with the smaller forehead. Now, let's break this some more in the next lesson. See you in the next video.
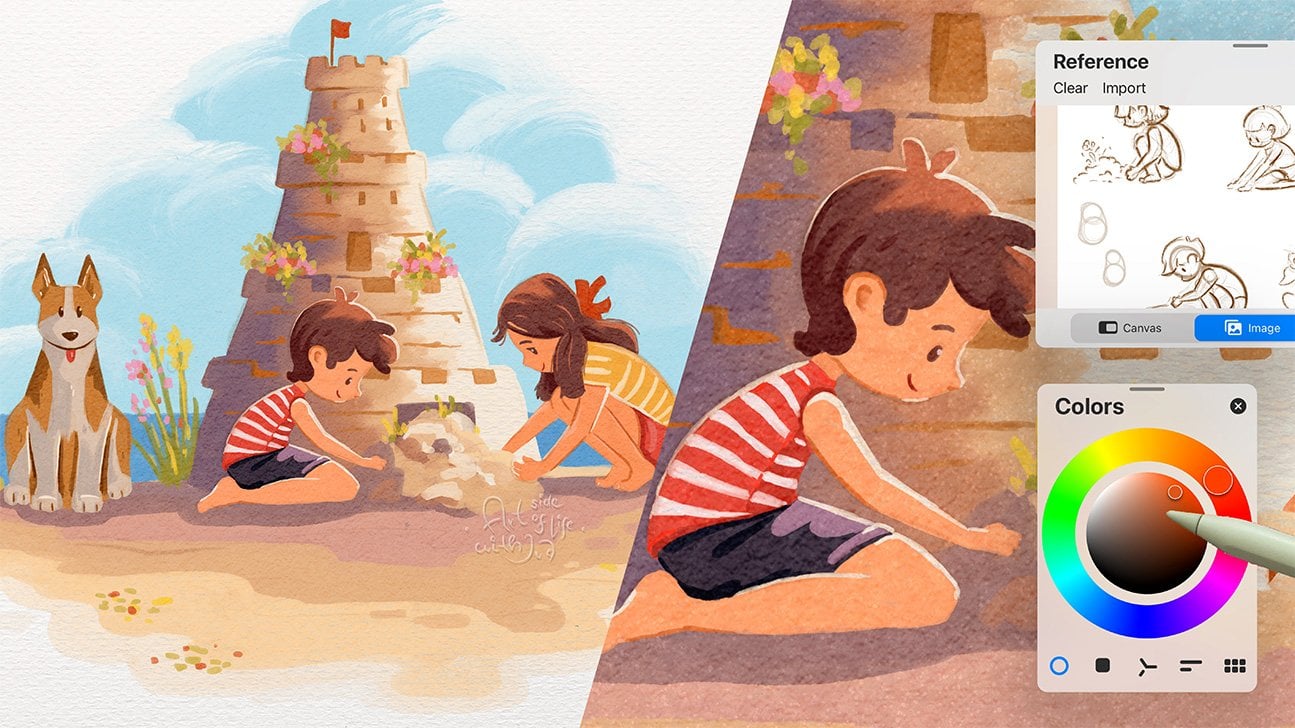
6. Practice with References: Now let's practice some more and this time with references. Try to find the reference photo you like. I will place a references in my file and reduce the photo reference layer opacity. Then I will draw on top of this layer. When searching for references to practice, look for portrait photography with a strong studio light, so you can notice the shape and shadows of the face easier. When drawing from real-life photos, try to notice the placement of the facial features. As before, I will draw the horizontal line as a guide, so it's easier for us to see the placement. As before, I will start with a round shape for the top part of the head and then add the jaw as an egg shape. Similar to the reference, I can make the jawline less round and more defined. Then I will add ears. For the three-quarter view, create a circle again, then add jaw, and notice the bend around the eye, as we discussed in the previous lessons. In the area of the eyebrow, more volume. In the eye socket area, less volume and more volume again, where the cheek is. Then you can add eyes on the same height and then the nose and mouth. Notice that the nose and the mouth are aligned right on top of each other. Always imagine the line going through the middle of the face. When you are happy with the placement, reduce the opacity of this layer and redefine your drawing on a separate layer above. The more you practice, the easier it becomes to draw faces without references and overthinking the proportions. Now let's move on to the next lesson where you will learn about head fields and angles. See you in the next video.
7. Head Angles: In this lesson, you will learn what to consider when you want your characters to look up or down. Because there is never enough practice, let's sketch the frontal view and three-quarter view first. We have something to compare to when drawing the head from different angles. As with the previous examples, I sketch the circle first and then add the egg shape for the jaw before attaching the neck. The neck is usually starting from the intersection of the circle and the egg shape. I mentioned this as well in the stylized character design class, the humans of my neighborhood, if you saw that among other topics. Now, as you might have noticed, I'm sketching the horizontal line to mark the eye placement, a little bit more curved. This helps me to have more fluid brushstrokes, and it adds a little volume to the face too. Just make sure that the eyes are at the same height. The jawline is usually tilted downwards in the resting head position. Then you can mark the face features on the line intersections. Then I will move these two sketches to the side and look at the head fields. First, let's draw the head looking up in the three-quarter view. Start with a circle and create the curved line to mark the middle of the face, where we will place the nose and the mouth. Then add a line curved upwards for the eyes and the egg shape with a dent or the side dent for the bottom part of the face. Afterward, I'm attaching the neck at the intersection where the jaw ends and the circle for the top of the head. The bottom layer of the eye follows the curved line upward as well when you want to show a character looking up. In this pose, as you can imagine, the neck will be bent more than in the relaxed head pose. When the head is tilted and looking up, the jawline looks more horizontal and the neck bends. The eye-line is tilted upwards too. The jawline is tilted upwards only when the head looks up in the very extreme angle. Now let's get to the character looking down. Starting with a circle again for the top of the head. Afterward, you will draw the curved line for the face, midsection, and the eye placement tilted downwards. Why three-quarter views for these head tilts? Well, the front view can be hard to decode for the viewer and not very appealing as the face features get distorted by perspective. When drawing faces looking up or down, I usually go for a three-quarter view, similar to many other illustrators. You can notice the details and the rules we just talked about, when you want to draw people on the street, in cafes, or from the photographs. But let's also look at some reference images. I will import some reference images on a separate layer and reduce the opacity. Try to notice where the circle for the top of the head would be on this person. Then try to see the jawline and the face features placement in these head angles. Then imagine the curved line to mark the placement of the eyes to help you level the features and show the head tilt. The photo on the right can be considered as a resting head pose too or even looking up slightly. It's something in between. For practice, I think it's always nice to sketch over photos like this. In addition to these, you can get nice inspiration. For example, I really like the hairstyle of this picture. It will be excellent to add this hairstyle to some of my characters in the future too. Now let's move to the next lesson and talk about head shapes. See you in the next video.
8. Head Shapes: In this lesson, we'll look at various head shapes. Drawing different head shapes is a great practice and it can bring nice variety to your characters and portraits. I will start with a oval shape, which is usually my go-to when drawing female characters. This face shape can be also considered a heart shape when you create the hairline on top of the forehead in a shape of a heart, as you can imagine. I will also add a hairband to this character sketch because as I mentioned to you, I liked it on the reference character before. As you can see, and you can imagine the inspiration comes from everywhere and at anytime. Next, practice drawing a portrait with the rectangle head shape. I'm always starting with a more extreme, very angular shape. But when finalizing the portrait, I would round the edges of the face shape more. Next, try out an inverted triangle face shape. You can also try a triangle face shape with more rounded jaw. As you can see, I am keeping the same hairstyle for all the characters, so it's easier for us to compare them to each other. Still, of course, you can add different hairstyles to each. Then there is an oblong face shape, which is basically a rounded rectangle. As you can imagine, you can try more forms for this practice, such as diamond or round face, which I find very lovely for cute characters. Then let's try the three-quarter view. Try practicing more rounded jawlines, as well as wider jawlines for the characters. Also, try out drawing and practice smaller circles and bigger circles for the top part of the head and pair it with a smaller or longer face shape. A variety of these shapes can help you bring different looks to your characters and portraits. For example, people usually connect a wider and stronger jawlines with strong personalities. You can also try drawing loose skin around the chin and the jaw, which suggests an older person as you can see in the example on the bottom right. As you have noticed by now, you can create various characters and portraits just by adjusting the simple shapes for the faces and the head. Now let's move on to the next lesson. See you in the next video.
9. Eye Shapes: In this lesson, I will give you a few ideas on approaching eye simplification when creating your own unique character designs. Most of us know how the real eye looks, but if you are not going for realism, which you probably don't, as you are watching class about stylized character portrait. Let's talk about how an eye can be simplified into primary forms. By the way, the eyes can look whatever you want them to you just need to keep alignments on the face so the face doesn't appear bent or melted. When sketching, I try to keep the eyes as simple as possible to focus on the face and expression. Then later when refining the sketch, I add details and more precise lines. Let me start with one of the most simple representations of an eye, which can be an oval or a circle. Eyes design is essential for face diversity and when you want to create your unique signature style for your characters. For example, if you decide to keep the eye represented by a circle, you can add a highlight to it to make it more look interesting but still simple. The circle will then represent the pupil and you will omit drawing the eyelids and other details. If you want to keep the eye design simple, but add a little more to it, you can add the top eyelid or the eyelashes in the form of curved line. Another interesting way to represent the pupil and the eyelids, eyelashes is to have the pupil light instead of dark color compared to the rest of the face and the face features. You can add a slight curve to the end of this line, this edge is longer eyelashes. You can also try playing with different thicknesses when drawing these eyelids, eyelashes. You can try bigger and smaller pupils compared to the eyelids, eyelashes or create an angle more straight line for this eyelid line compared to the curved line. As you can see, you already have some variety to choose from for your designs. Now let's look at some ideas connected with the eye shape in general, with both simplified eyelids and eyelashes showed with these shapes. The eyes can have all kinds of shapes and sizes when you simplify them into simple shapes. Here are some more ideas for forms to practice the eye simplification, you can work with the parallelogram, rectangle shape, angled almond shape, water drop shape, triangle shape, and more. Of course, these are just selected examples and you can combine and work with different forms. I think this is a great exercise to practice different eye shapes and you might discover a new favorite way of drawing eyes from your mind without looking at the references. These eye shape exercises can also help you notice and simplify the real eyes when drawing from real life. Now, to continue with this exercise, let us add iris with a pupil into these eye shapes. I will start with one bigger circle for both. Then I reduce the opacity of the layer and draw a pupil as a smaller circle on top of the bigger circle representing the iris now. When you want more details and realism, you can add a small highlight on the top of the pupil. When drawing both eyes and you want your character to look in one direction, make sure that the pupil and iris are placed at the same distance from the corner of each eye. Otherwise, you might end up with the eye placement like chameleons, when each iris is placed a little bit differently. Now let's move on to the next lesson, where we will explore the eyebrows and shapes you can use while drawing characters. See you in the next video.
10. Eyebrows: In this lesson, we will look at different shapes, which you can use when drawing eyebrows. I am sure you have noticed that there are many different types of eyebrows. Let's explore some shapes you can use on your characters. As a mini exercise, try to draw the first shapes that come to your mind. Then try to draw adaptations of those shapes. When you think of what you see on other people's faces around you and what you can see in advertising or animation, feminine and more elegant characters usually have more thin, polished, and curved eyebrows. Opposed to that, more masculine and cool characters have rectangular, bushier and wider eyebrows. Of course, this is just an example and there are exceptions. As another mini exercise, try to add a bit of variety to the eyebrows. For example, I like to add little details to the eyebrow shape, like few loose hairs at the beginning of the eyebrow shape. Another detail I like to add are gaps where maybe there was a scar or an eyebrow piercing. You can also play with the color of the eyebrows. Will they be the same color of the hair, or will they be darker or lighter? Or another idea is, what if you drew the eyebrows only as an outline of an oval or elongated oval or a teardrop shape. Try to experiment with color or shape and see with what you can come up with Here is an idea for another mini exercise. Before drawing the whole face, try combining different eye designs with varying designs of eyebrows and see how many versions you can come up with. For more personalization and experiment, maybe you can add details like birthmarks, freckles near the eye, or elongated eyelashes on the eye designs. Let's also talk briefly about eyelashes. There are many eyelashes in the realistic depiction of an eye. But as we are going for a simplified version and we want to create a representation of an eye, you can omit eyelashes altogether. I usually don't draw the lower eyelashes, for example, because it adds quite a lot of complexity and details to the eye design I like. Though, you might like it. So why not try it? For example, when you suggest just some of them on the top eyelid or both, top eyelid and bottom eyelid, it can create a unique look that can also be part of your style. Coming back to the eyebrows, if you want to play with expressions, eyebrows help you a lot with portraying emotions. Exaggerated eyebrow placements are often used in cartoons and animations to show emotions. For example, arch eyebrows that are high up on the face show surprise. Eyebrows, tilt it down towards the middle of the face, show anger. I will probably do another class just for the emotions to keep this class not super long. Now, let's move on to the next lesson where you will learn how I usually color the eye in more detail when drawing close-up portraits. See you in the next video.
11. Eye Details and Coloring: In this lesson, let's practice drawing the eye with more details and let's also add some color. I usually start with the curve representing the eyelashes and the circle for the iris and the pupil. You can suggest the fold in the upper eyelid with a thin curved line above the eyelashes as well. Then another thin line for the lower eyelashes and a small curve near the inner corner of the eye to suggest a shadow that is usually there. The upper eyelid is another feature that you don't have to draw when simplifying the eye. I usually don't like to edit in much detail. Depending on the person, the upper eyelid is often visible in the real-life though. You can also indicate emotions or adding more realism to the character by drawing the upper eyelid. So it's all up to you. Try it out and see if you like it. You don't have to draw the lower eyelid for the viewer to imagine where the eye ends. For example, the lower eyelid can be added when you want to create an older character because this feature is more pronounced compared to the younger character. As I mentioned, I usually don't close up the shape by drawing the lower eyelashes or even the lower eyelid. I suggest the shape of an eye with the top eyelid and the pupil and the iris. [MUSIC] To easily add color to the eye, you can draw the iris color on a separate layer under the layer with the pupil. [MUSIC] I also like to add shadow under the eyelashes on top of the layer with the iris and the pupil to create more realism and depth in the eye. To do that, I draw a simple shape in an interesting color, maybe blue or purple. [MUSIC]. Set this layer to multiply. [MUSIC] Then I like to add highlight to the pupil as well as the lower part of the iris. [MUSIC] If you want even more details, you can always draw radial lines in the area of the iris highlight. For the reference, you can see these lighter details also in the close-up eye photography. I'm sure you can find some good references. You can also suggest a few eyelashes at the end of a eye, as we did in some of the exercises before. When adding eyelashes, you will create a more feminine look for your character. As you know and can imagine, not all girls have long eyelashes, and of course, nothing forbids you to add gorgeous eyelashes to the male character. Some guys have super nice eyelashes in real life to too. You may discover cool new designs for your characters just by looking around in real life. [MUSIC]. Here I want to show you a quick trick for the eyebrow alignment. The eyebrow usually start before the inner corner of an eye and ends after the outer corner of an eye. You can mark the end of an eyebrow with angled lines like this. To find the top of an eyebrow curve, you can draw an angled line which goes from the middle of the eye through the iris. [MUSIC]. That's it for the eyes. I hope you tried few versions and you have some favorites. Now, let's move on to the next lesson where we will talk about noses. See you in the next video. [MUSIC]
12. Nose Shapes: In this lesson, we'll look at how you can simplify the shapes of a nose. Here, let me start with the front view, which you can think of a nose of a triangle without the top tip. This is how you can simplify the nose in the three-quarter view with the same shape in mind. Of course, this is just one way of simplification. Let's look at some more examples. After imagining this triangle shape, you can add an oval to represent the bottom part of the nose. To create the shadow under the nose, you can imagine an inverted triangle. As you can see on the example on the right, you don't have to draw the bridge of the nose to create a cute, button-like nose. You can just draw the oval shape for the nose base, an inverted triangle for the shadow to start with, and then you can define the edge of the nostrils and the nose shadow. I usually start with the bottom part of the nose, not the bridge of the nose, to decide on the placement of the nose on the face. After creating the oval base, you can add the simple arch line for the bridge of the nose. For variety and developing a unique style for your characters, try different nose shapes. For example, you can try a wider nose base or a longer nose bridge. In the three-quarter view, you can, for example, try more pointy or angular lines, compare to the round, cute shapes on the example on the top left. For the side view, you can try a cute, upwards pointing nose or half circle nose and many other variations. As before, you can try different combinations for the face features. For example, you might create the eyes more realistic, but you will create the simplified nose shape in the form of a pair or a triangle for your characters without adding more realism to those nose shapes, or you can think of the traditional perception of feminine and masculine shape. For example, you can create more feminine eyes and then go for masculine nose. Let's look at more examples. Maybe you want to draw only the nostrils or a simple triangle, teardrop, or two triangles in different colors for the nose representation. You can also try hook curve, soft double V-shape, V-shape combined with nostrils, and then maybe paired with more realistic-looking eyes. I think this can create an interesting look for your character design. Or maybe, you draw eyes in the front of you and the nose is in the three-quarter view in a simple shape like elongated triangle. You can try different positions as well as placing the nose higher or lower on the face. As with the other facial features, there are many options for stylizing the nose when drawing your characters. Don't forget about the nose when trying different designs for the face features. As you can see, you have quite a few options for how you can make your characters unique. I encourage you to try and practice as much as possible. Now let's move on to the next lesson where we will look at drawing mouth and lips. See you in the next video.
13. Lips and Mouth: Now let's take a look at simplifying the shape of the mouth and lips. I will again show you different versions of how you can approach simplifying the mouth when illustrating a character. The approach here depends on how much realism you want to inject into your designs compared to staying just with a simple representation of the mouth. In its simplest form, you can draw the mouth, just making a line curve upwards, indicating a smile, or a straight line to show more neutral expression. Quite obvious. Let's make this line a little bit more realistic by adding more curves representing the volume of the lips. Even if I want to create a more realistic mouth and lip design, I start with this line shape indicating the mouth, and then I add lips. What I want you to notice here are these areas. Not only is there a shape change in the line, but also you usually see stronger shadows in these parts. Let me quickly sketch how you can imagine the volume on the lips, which is casting the shadow. On the left is the mouth in the three-quarter view, with the curve blue lines representing the volume of the lips, opposed to the example on the right, representing the flat shape with straight lines. You might ask, how can you imagine, and how can you translate this into color if the light source is on the top? For example, when sun is above us, the strongest shadows will be usually in the middle of the mouth, under the lips, and in the corners of the mouth, as well as under the lips in general. But let's focus on the lips for now. The top lip can appear darker than the bottom lip, which is getting more light. We can simplify by drawing the whole top lip darker if we want to use just one or two colors. Then we can add highlights if you want more details. You can also imagine lips like two cushions for the sofa, or two tubes with rounded shapes in terms of shading. After a bit of the theory, let's look at different fun ways of simplification. As you can imagine, you can play with the shapes of the lips, as well as the middle line representing the shadow area. For example, you can create a wider mouth or more narrow. It can be curved upwards or downwards, or just with a straight line indicating the neutral expression. You can create fuller or thinner lips, play with the round, or square shape, or anything in between. I like to usually go for more oval and round shapes, but you can work with rectangles or trapezoid shapes to get an interesting look for the lips on their characters. The mouth is often an essential facial feature , which communicates emotions. Keeping the mouth straight, as I mentioned already, suggests a neutral expression. Moving the corners upward suggests happiness, and moving them downward suggests sadness, and so on. Now let's have one more look at the references we used before. This is another great practice. Try practice observing what you see and think how you would simplify it. Notice the shadow areas, the highlights, the shape of the lips, as well as the colors. Now let's move to the next lesson, where we will talk about hair. See you in the next video.
14. Hair and Hairstyles: [MUSIC] In this lesson, we'll look at the hair. There are so many interesting hairstyles and hair shapes and I think they always add so much personality to the characters. Let's look at some ideas and examples how you can approach simplifying hair. I will import a few reference images, so I can show you how I think about drawing hair in general. [MUSIC] You can then take any reference you like and try to simplify it on your own. I will place all the references on one layer, reduce the opacity, and draw on top of the layer above. Then I will sketch a base shape of the head as we practice before, so I have something to start the hairstyle from. [MUSIC] Every time I want to draw any hairstyle, I try to notice the overall silhouette and the form of the hair first. In other words, I'm trying to see the simplified shape and outline of the hairstyle. [MUSIC] In this case, you can go even more simple than this and not implement any waves or curls in the overall silhouette as I'm doing here. But I still like to include some waves which I think create a nice flowey feel to the hair. When creating loose strands of hair, I'm thinking in C-shape or S-shape, something like this. [MUSIC] Because faces are different, you can imagine that there can also be different hair lines too. Usually though, the hair line will come halfway between the eyebrows and the top of the head. Let's mention the hair line and parting your hair in a hairstyle a little bit too. In terms of different hair lines, well, if you're thinking what is the hair line, it's a place where the hair starts on top of your forehead. In terms of different hair lines, when drawing, you can define how far from the tempos and the forehead, the hair will start to grow on the character you are drawing. In terms of shapes, you can imagine different shapes of these hair lines. For example, you can draw and implement more heart-shaped hair line, rectangular hair line or curved hair line as well as you can create different styles for parting the hair. This is the way how you style your hair. For example, will most of the hair on your head or the character you are drawing be on the left side or the right side? This is where you will draw the parting line of the hair. When we look at this third example, you can create a very simple silhouette if you want to work with basic shapes, which I think looks very cool or you can add more detail and realism to this hairstyle with C-curves representing the curls. [MUSIC] To summarize, I always keep some volume and nice flow in almost every hairstyle and I try to imagine the direction the hair is flowing from the hair line and the roots on top of the head to the ends of the hair style. [MUSIC] Now, when you have practiced all the facial features, it's time you put them all together and if you haven't done yet, start thinking about their own zodiac inspired character, adding your own personalized details. See you in the next video. [MUSIC]
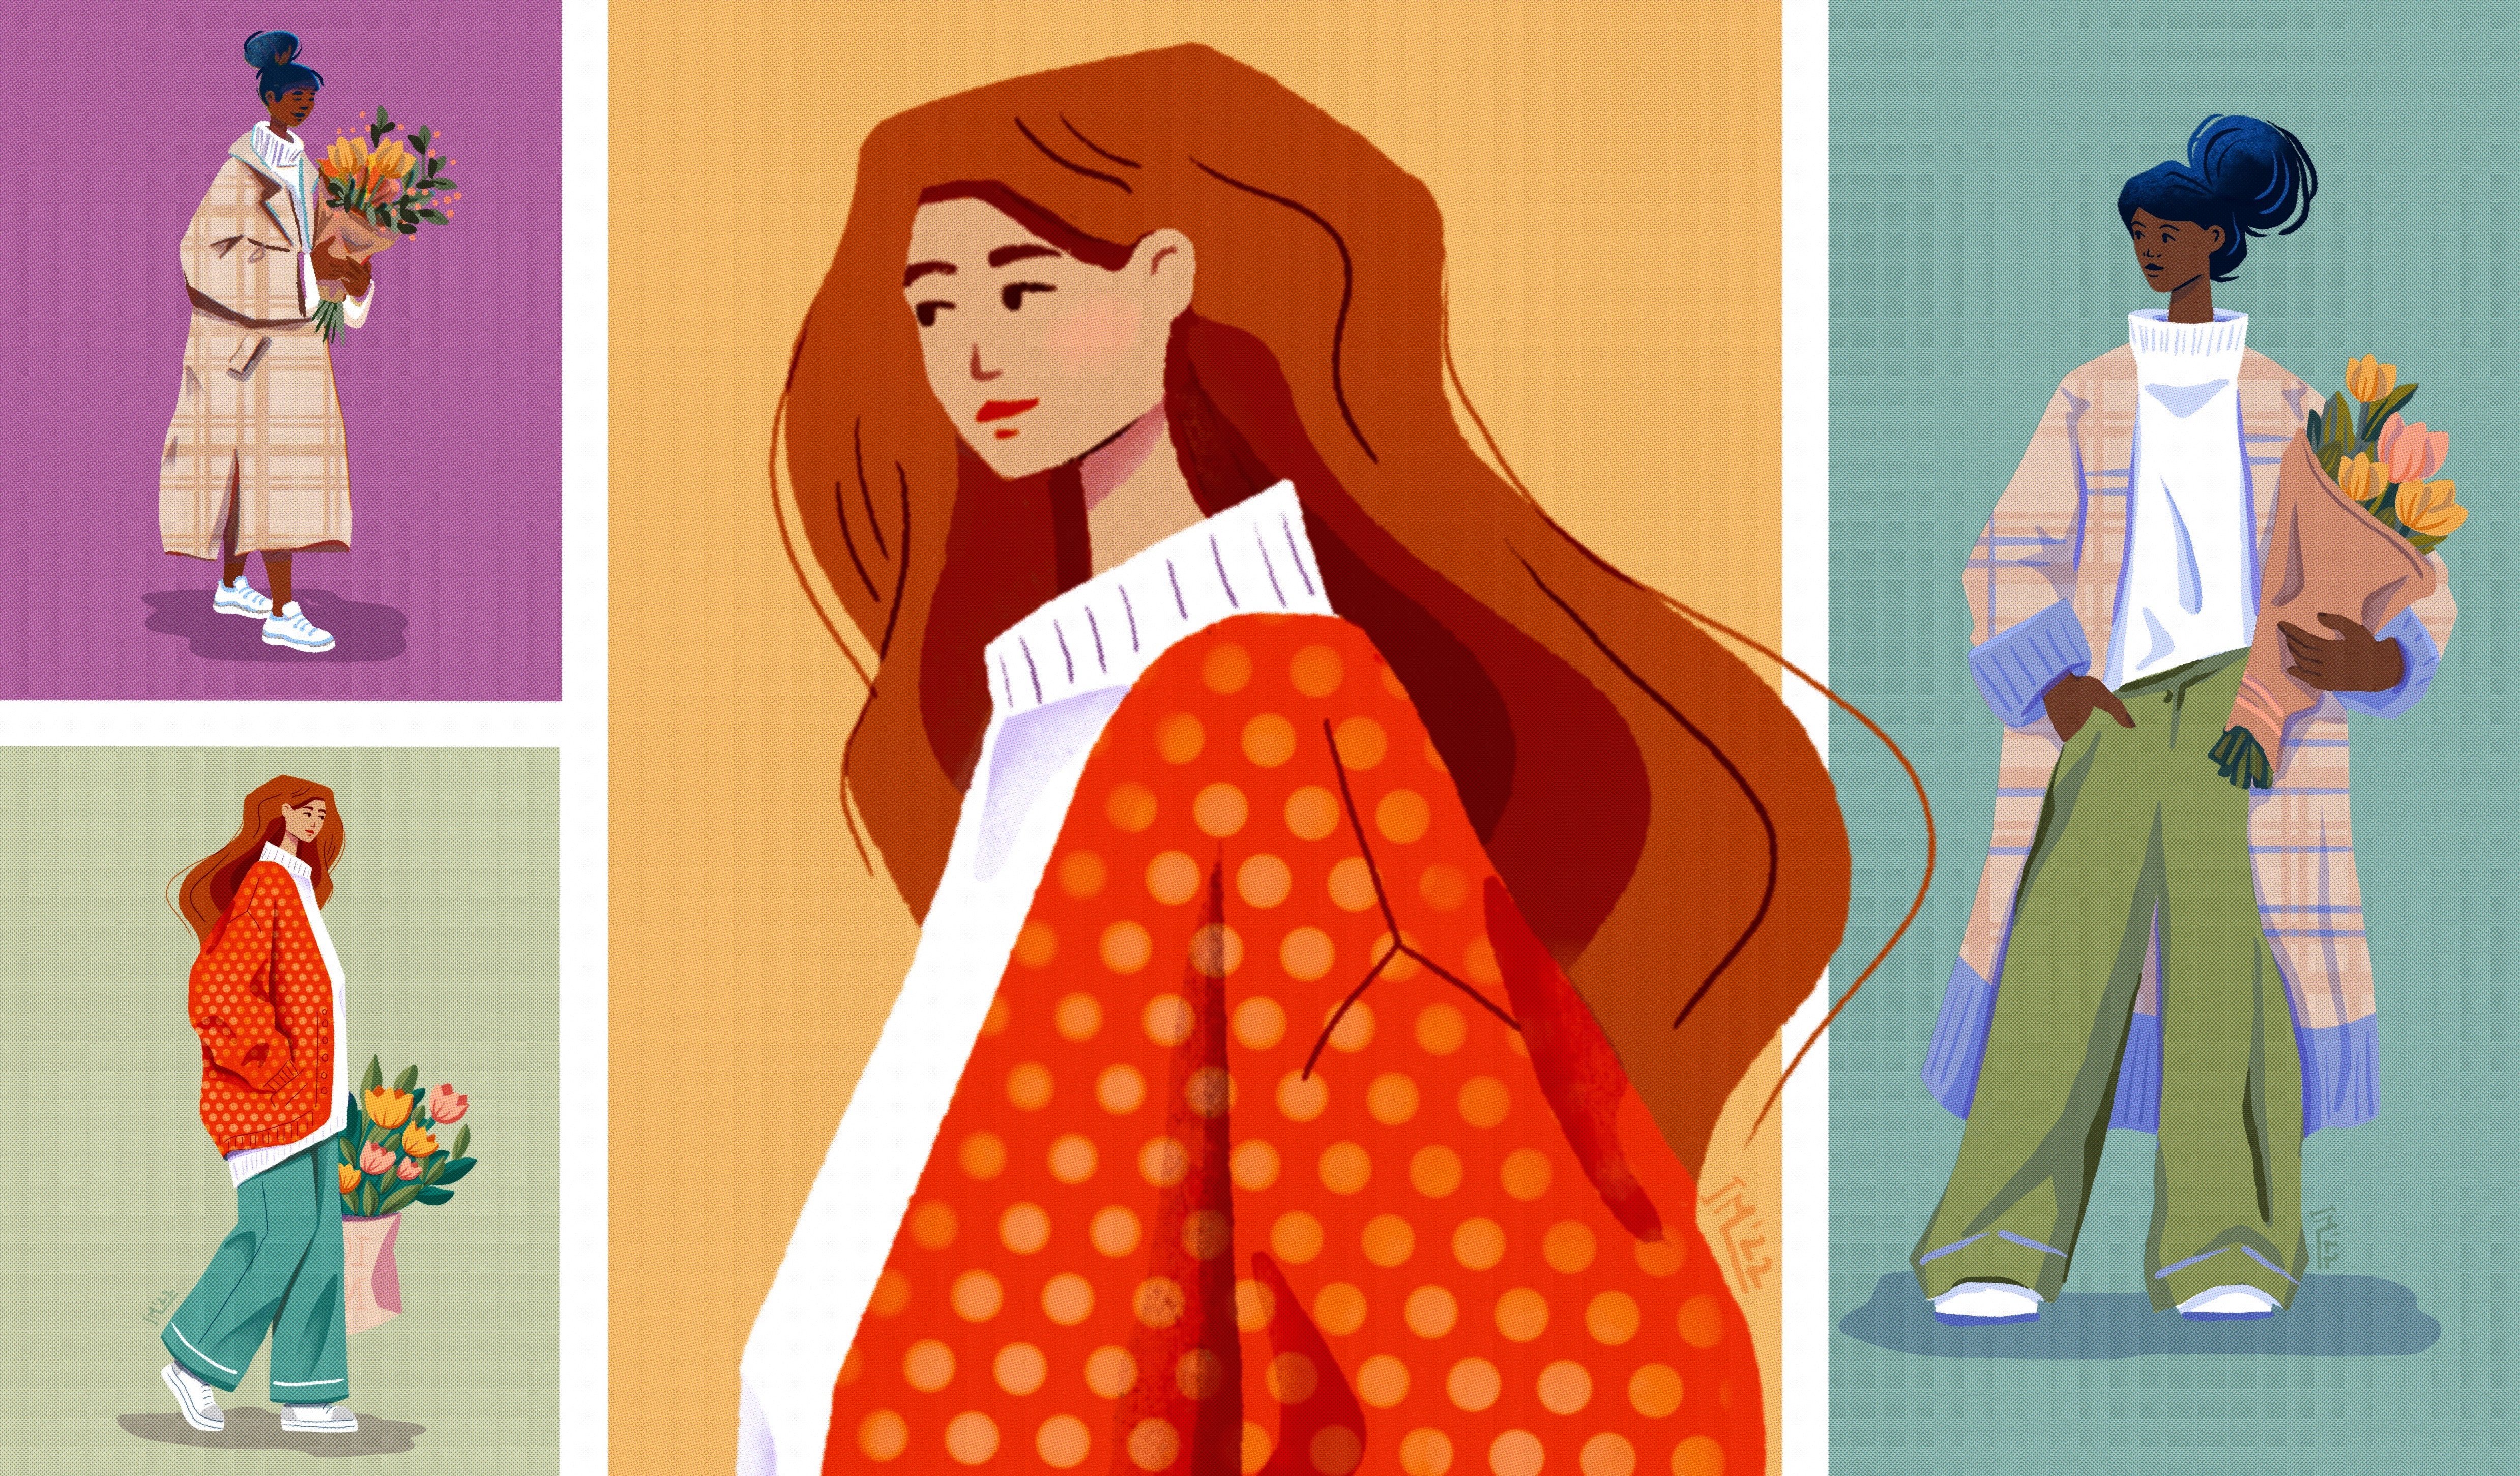
15. Project Composition: In this lesson, we will look at the initial composition idea. At this stage, I will start adding the zodiac topic and the personalization to my illustration. As I mentioned before, I will be drawing three characters to share more ideas with you. You can, of course, approach this project with just one character or as many as you want. I encourage you to make your own design choices and be as creative as you can. The sky is the limit. Here I will be using a triangular composition. A triangular composition can help make an image more coherent and the form appear more dynamic. In an illustration, a triangle will guide our eye to the triangle's three separate points, which I will use to place my characters. To learn more, I invite you to watch my class about composition, which you will find in My Teacher's Profile. If you are drawing one character, you can add different items to each corner of the triangular composition, for example, star or a star constellation of your zodiac sign. To add variety to the illustration, I will draw different hairstyles for each character, as well as drawing each character with a different tilt. As we practiced the head angles in the previous lessons, I will implement it to our characters here too. One character is looking a little bit up, the other character will have her head tilted downwards, and the third character will be looking at us. Each character will also have a slightly different outfit to bring up more personality. For this step, you can find references or just freestyle. I will show you different references and inspiration in the next lesson. As the last thing now in this layout sketch, I will mark down the star constellation into the composition. If you are well-versed in astronomy and constellation, don't worry, these are not the correct ones yet, just random shapes. Taking the composition in consideration, as you can notice, these star constellations are little out of the triangle composition. But I want them to be more subtle in color compared to the three main characters, so I think it will still work. You can imagine that the star constellations will be more like decoration elements in this illustration together with the moon, sun, and the clouds. Now let's move on to the next lesson where we will be redefining this concept sketch. See you in the next video.
16. Refine Project Sketch: In this step, we will define the sketch some more, and we will add personality to the characters using the zodiac signs. At this stage, I like to add the face features to the marked areas on the face, making sure that the eyes are leveled and other face features are aligned. As in the other classes, I am sketching in two steps; rough sketch and then redefining it is the next step. When creating a rough sketch, try to focus on simple shapes and loose lines. Dividing the process of sketching into few steps it's more manageable and helps you keep looser lines than thinking about all the details and having everything perfect in the first go. You can always add more details in the next step when redefining the sketch again, and if you want, one more time. You can redefine the sketch as many times as you want. To add personality to the characters and story to the illustration, I'm adding the earrings with the zodiac signs and the star constellations near each character. I use the reference to look up the correct constellations now. In this stage, you can open more references to help you with designing the hairstyles as well as the outfits. When you find a reference photo you like, try to get inspired by only one part of it or just some details, so you don't copy the whole photo reference for your illustration entirely. In this way, you can also come up with new unique combinations. For example, get inspired by the hair in one photo, and then use an outfit you like from a different photo, and the colors may be from the third photo. You get the idea. As we practice before, every time I want to draw any hairstyle, I try to notice the overall silhouette and a form of the hair first. In other words, I'm trying to see the simplified shape and outline of the hairstyle. I always keep some volume and nice flow in almost every hairstyle. I try to imagine the direction the hair is flowing from the hairline and the roots, on top of the head to the ends of the hairstyle. [MUSIC] While looking at the references, you might get many more new ideas for your illustration, for example, this tropical pattern on this photo reference which I can combine and use with the zodiac sign character on the right here to create more unique look. Then you can always add more cool details to add personality to your characters like a hat, as you can see on this photo reference, or glasses, or you can add flowers to the hair and so on. Now thinking about it, I think I will add flowers to the hair on one of the characters. As a last step in this stage, choose one of the facial feature styles we looked at previously to define the face of your characters more before moving to the next step. For more personalization and experiment, maybe you can add details like birth marks, freckles near the eye, or elongated eyelashes on the eye designs. You can also play with the color of the eyebrows. Will they be the same color of the hair or will they be darker or lighter? Another idea is, what if you drew the eyebrows only as an outline of an oval, or elongated oval, or a teardrop shape. Try to experiment with color or shape and see what you can come up with. For variety and developing a unique style for your characters, try different nose shapes. For example, you can try a wider nose base or a longer nose bridge. As before, you can try different combinations for the face features. For example, you might create the eyes more realistic, but you will key the simplified nose shape in the form of a pair or a triangle for your characters without adding more realism to those nose shapes, or you can think of the traditional perception of feminine and masculine shape. For example, you can create more feminine eyes and then go for masculine nose. You can redefine the sketch as many times as you want. I'm happy with the concept now, and I hope you are too with the sketch, what we have so far. Now let's move on to the next lessons where we will be coloring our illustrations. See you in the next video.
17. Color Palette: In this step, we will test out a few color combinations which you can choose for your final project. For this exercise, I will copy this sketch a few times so I can compare the color palettes next to each other when I try them. I will open a few reference images along the way as I really like some of the colors from the images that we looked at. For example, this lovely hair. In addition to the hair color, I also really like the combination of the red color together with the green, so I will try adding that into the mix. But you may already have some color palettes you like in mind. I also have my current favorite color palette here, which is more vibrant than the more pastel colors I usually like to use. I got into habit of saving color palettes I like when browsing online or seeing nice colors outdoors. Save your favorite color palettes, maybe in one folder on your computer, or in one Pinterest board, or wherever you like. You can get a great inspiration from nature, architecture, fashion, or interior design. All is up to you and your creativity. For the stars, I'm thinking yellow. You might want to implement some of the colors which represent stars, magic, and zodiacs. You can see purple and blue used in combination with magic and constellations quite often, which I will probably use as a background to get use of some of these color combinations. [MUSIC] You can also research colors for each zodiac. I found out that for Leo, for example, gold and orange is used often, so I think gold earrings would be great. For Virgo, colors green and brown are quite popular, so I'm thinking of green leaves. Maybe you can use these popular colors, which are often used in the zodiac descriptions for your whole character color palette. For example, Virgo may have a green outfit and brown hair if you want to keep that color palette. All it's up to you and your creativity. When looking at the references, I quite like these blonde and light brown hair color for the shorter bob hairstyle. To make it more interesting and trendy, why not make half of the hair different color. Which I think can be quite fitting because as I researched, Gemini is represented by the twins, which exhibit dual personalities, so dual hair color style it is. I will be adding the zodiac mainly with the star constellation next to the characters and stick to my color palette. Of course, I encourage you to be creative and you don't have to follow these zodiac colors suggestions unless you want to. When you are happy with your color choices, select each color and save them into a new color palette for your illustration. Now let's move on to adding color to the faces. See you in the next video.
18. Face Design: In this step, we will be adding some color to the faces on our characters. For the face features and the skin, I will keep the edges of the shapes clean and I will not add texture, especially for the eyes, which I want to have a crisp look because they are quite a small part of the illustration. Eyes add a lot of character, so I want them to be more readable from the distance. But if you struggle with wonky lines when drawing, open the brush and adjust the streamline. Like that, you will achieve more confident lines without much effort. The streamline option is now under Stabilization tab in the newer Procreate version. Try adjusting each slider to see if you like the behavior of the brush. After looking at a variety of ways to simplify the face features, now it's up to you to choose and define one style for each of the face features; eyes, nose, and the mouth, and try it out on your characters in more detail. You already have the placement down from the previous step. Now you can just play and test different styles. As you can see, I like to add eyebrows in different colors than the hair color. Also, the eyebrows are not very thin and I like to use a thicker shape for the eyebrow. But again, try to use different shapes and experiment than what do you see I'm doing here. To make your design more unique and more you, maybe try bushier eyebrows, maybe with few loose hair, or maybe very thin eyebrows, or different eye shape. I mean, you get the point, we looked at many examples. I made the nose from a triangle representing the nostrils and the shadow under the nose, combined with a simple line to suggest the bridge of the nose. For the mouth and lips, I opted for the darker top lip and lighter bottom lip, as well as the shadow under the mouth. To draw the skin tone for the face and the neck, I'm using two layers so it's easier for me to add the shadow under the neck. As you can see for this step, I'm using the drag and drop coloring within the outline shape. This method is quite quick and efficient when you want to create solid color shapes. From my other classes, you might know that I also like to use Lasso tool to fill the shape with color, either drag and drop or with the texture brush. In the next lesson, I will show you another method, how you can fill in the shape with color and texture. [MUSIC] Regarding the skin tones and the colors, the skin tone colors sometimes become too gray or too muddy when we want to go from the lighter tones to darker tones, so here is a tip. When I want these colors and the overall illustrations to look more vibrant, I always use more saturated shades when using darker tones. This means going to the right and down on the color wheel. Where is this applied? You might have guessed it, the neck shadow. As you can see, whether I used lighter or darker skin tone for the character's face and the neck, I used a little bit more saturated shade of the same color for the neck shadow. Now, let's move to coloring the rest of the illustration with more texture. See you in the next video.
19. Base Colors: [MUSIC] For this illustration, I decided to keep the edges defined with little texture. I will be redrawing the line work on a separate layer, focusing on more defined and strong lines. You can, of course, choose more textured brush to finalize your illustration if you want a more painterly and textured look. Now, I will reduce the opacity of the line art layer and I will start creating color on a separate layer below the skin tone color layers. For the skin tone layers, I used full opacity color without much texture. [MUSIC] Now to color the clothing and the hair, I will use a texture brush with a nice pencil and chalk-like texture. I will take the color I tested on the thumbnail layer and color the sweater in a pencil stroke style. First, I will keep the brush tip size small for the outline to achieve a textured, but more clean outline, and then I will fill in the shape with a pencil stroke. When creating outlines, don't forget that you can rotate the canvas to make the lines creation easier. When I'm happy with the outline, I will start coloring within the shape. You can, of course, make the process faster and drag and drop the color, or take a different texture brush as this process can take longer, but I like this look of a pencil stroke for the sweater texture. [MUSIC] When I'm happy with the light green, I will also take dull green to create the sweater's color in different tone for more visual interest. [MUSIC] I'm adding all the colors for this character on one layer because I don't plan to add many more textures. But if you want to add more textures to parts of the illustration later on, don't forget to keep the elements on separate layers so it's easy to use Alpha log and big texture brushes on top of your layers. [MUSIC] Then I will approach the hair the same way as the outfit. First outline and the color in shape with a texture brush. [MUSIC] On the sweater outfit, I used one layer of this texture with the brush, which means I didn't lift the brush when coloring. But this time on the darker hair, I'm going over the texture one more time to achieve darker tones. It all depends on the brush you decide to use for the coloring. [MUSIC] If you are planning to move the characters around in the future, create a separate layer or a group of layers for each character, so you will not have to fill in and adjust the drawing if you want to make some changes. [MUSIC] Now, if you like the texture, but you don't want to draw very carefully around the edges all the time, let's look at another approach. You can create an outline first and use the Automatic Selection tool to select the area you want to color. Then with the selection active, you can make the same nice pencil look as before, but much faster. You can even paint the different texture with a bigger brush while you have the selection active. To use this feature, go to the Selection tool, choose Automatic Selection, and click and drag within the area you want to select. You will notice the percentage threshold on top of your screen, which indicates how much selection will be considered. [MUSIC] Then I can continue with the same process on the t-shirt and the hair on the third character. [MUSIC] For the stars and clouds, I need to increase the opacity of the sketch layer again to see them better. [MUSIC] The stars and the moon will be on the separate layer because I want to have an option to move them around if I want to change the layout. Plus when I draw stars on a separate layer, I can easily copy them around the canvas, so I don't have to redraw each star separately many times. This method speeds up the process a lot. In addition, every time I copy the layer with one star, I merge the other layers with stars to limit the number of layers. [MUSIC] Then I reduce the opacity of the line art again, and I do the same for the smaller stars. I think it's nice to combine the pointy stars and the smaller round stars for the constellations. It creates a nice visual variety. [MUSIC] After creating all the stars, I'm adding the sun. [MUSIC] I'm adding small sun rays in a form of triangles. To speed up the process, I'm copying the triangles and not drawing each separately as with the stars. [MUSIC] Now let's move on to the next lesson, where we will be drawing hair and adding more details to our characters. See you in the next video. [MUSIC]
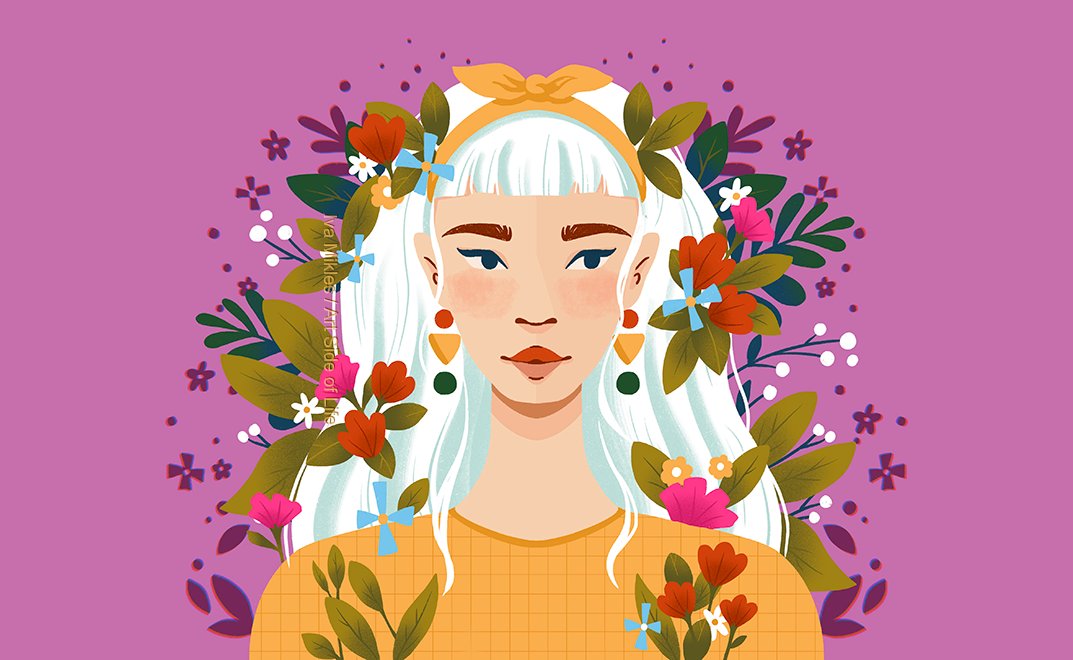
20. Visual Interest: In this step, we will add a little more visual interest to the illustration in form of some nice details. I will create another layer above the base color layer and select the area to which I want to add details. This way, I don't have to be careful about drawing around the edges of the shape. Then I will add a darker area behind the neck first, and then create some darker strokes within the hairstyle following the flow of the hair. As you know, there are many different hairstyles and hair types. One of my favorites to draw are wavy and curly hair. One of my favorite details is adding more definition in the form of lines and C-shape shadows to the hair, and additional shapes which represent loose strokes. Then I will add pink to the half of the hair. As I mentioned to you in the previous lesson about the description of Gemini's two sides. As you can see here, I'm implementing these two cool colors to the hairstyle. Brown on the top and pink at the bottom. Then as before, I'm thinking about S shapes when adding shadow details to the red hair of the Virgo similar to the shadow shapes in the brown hair of our Gemini character on the right. For the curly hair of a Leo character, I will suggest more volume and details in the form of half circles in the overall hair silhouette in the lighter tone. I'm imagining the curls catching the reflection of the light, that's why they are in the lighter tone. Of course, this is more simplified representation of the beautiful curls in this hair type. You can add more details if you want. I'm also adding more details to the clothes to have more variety in the illustration, like the lines on the beige shirt or white color on the yellow shirt. Because I think that the flowers are always an excellent addition to any character and the Virgo sign is considered earthy and green is one of the colors connected with the zodiac sign, I'm adding the leaves and flowers to her pocket and the hair. Plus as you can imagine, I generally like adding flowers to the characters, so I usually find an excuse to do so. I'm also adding leaves as a pattern to the shirt of a Gemini character, as I was inspired by one of the references with the tropical shirt, and I quite like tropical patterns. It always makes me feel like I'm on holiday. Maybe you can relate. Plus, Gemini zodiac sign is described as being extroverted, so wearing more bold patterns on outfits can be a good fit for our story. In addition to these, let's add even more colorful flowers to the pocket on the red hair Virgo character to create more connection with the earthy sign. I imagine this character spending a lot of time in the garden. Now let's move on to the next lesson where we will be adding more story details. See you in the next video.
21. Final Touches: [MUSIC] In this step, we will add a little more story and personalization to our characters. What are some more details you can add to your characters to make them more fun? What about more patterns on the shirts. Patterns like stripes or dots always make the characters and designs visually more interesting. [MUSIC] What about adding more personalization within our topic, which is zodiac, and adding the zodiac pattern to our outfit? I like that idea, so let's do that. [MUSIC] Another tip how to make your designs more interesting and more unique is the backstory for your characters. Try to dive into research on different places, cultures, time periods, professions, or design trends. Because I'm thinking these characters are in the modern world, I'm adding big earrings, which are still quite popular these days. To make the characters even more unique and connected to our topic, let's make the earrings in the shape of the zodiac signs. [MUSIC] After you're happy with the story details on the outfits and some of the accessories, you can add a few details on the hair. I like to think of these characters living a modern life, so naturally, their hair gets sometimes messy during the day and they are not so smooth anymore. Maybe you know the feeling. We had winds reaching 30 kilometers or 20 miles per hour the other day, so the hair got pretty messy after that. To make these characters contemporary and more realistic after a day of running around, I will add few loose strands to their hairstyles, but still keeping the overall silhouette of the hair. I will do that by just deleting parts of the overall silhouette. [MUSIC] To finish off the illustration, I will emphasize the shadow in some areas, like the face under the hair strands, [MUSIC] as well as on the fault of the clothing. This will make the illustration more readable too. [MUSIC] Talking about personalization and storytelling here, am I placing myself in these characters? For example, I love spending time among the flowers and plants, as well as the tropical patterns, stripy shirts, big sweaters, big earrings, and being extroverted. I think we always bring a piece of ourselves into our art that we are making. What about you? Are you adding your likes and dislikes into your art? If you haven't tried it yet, you might love it. Well, definitely try to do that for your personal work. It's quite fun. If you already do that, I would love to know what are the traits and details you like and then reflect on your characters. [MUSIC] If you use the same textured brush in the process as me and you feel like the whole illustration can be more saturated and bright, copying the base color layer will help you with the opacity and more solid bright color. We are almost done. If you feel like something is off on the face and the facial feature placement, a great way to check your artwork is to flip the canvas and it will help you see if you need to make any adjustments. Looking at the face here, I can move some parts around. [MUSIC] We are done. I hope you really loved the [BACKGROUND] characters that you created in this project.
22. How did it go?: How did it go? Please share your drawings and illustrations in the project section because I can't wait to see all of your awesome artworks and if you want to expand on the knowledge you learned in this class, you can watch my other classes about characters called Illustrate People and Illustrate Expressive People, and about colors called Color Palettes, and color and light masterclass. Visit my teacher profile to find them. If you would like me to share your projects on Instagram, please tag me in the Instagram stories or post so I can help you and your art to be discovered by more people. If you enjoy the class, please leave a review because first of all, I learn a lot from your feedback, and second, you will also help other students to discover the class, and you might contribute to their artistic journey too. If you have friends or family who would love to learn to design portraits, faces, and characters, please share this class with them. If you have any questions or suggestions, please leave a comment in the discussion section and I would love to help out. Thank you so much again for being here and see you in the next class.
 Iva Mikles, Illustrator | Top Teacher | Art Side of Life