Transcripts
1. Course Introduction: Hey, everybody. I'm Digi, the creator behind DGI Kios, which has generated over 100 million combined
views across Tik Tok, Instagram, and a little bit of YouTube in just a few months. All using the same frameworks, I'll be teaching you
here in this course. Over the past months, I've
helped over 3,000 students. Master video creation
and AI workflows. And look, I'm not here to
waste your time with theory. I'm here to teach
you a skill and a proven system that
has worked for me. You're going to be
able to work smarter, better and faster than
most people out there. Here in this course, I'm
going to give you templates. I'm going to give you information
that you can adapt to your own workflows so you can make your
creative life easier, no matter what your goal is. If you're a brand, if you're a new creator or
you're just looking to level up your process and get a new skill, you're
in the right place. So let's get started.
2. Introduction to Figma Weave (Weavy) : Today, we're going
to talk about weave. I'm going to show
you a workflow. I'm going to show you the
exact way I built it, and then I'm going to make it available for you
if you want to go ahead and use that without having to build it from scratch. But I want to show you how it was built so you can
understand how it works in case you
want to modify it or create something
completely different. Once you have the structure and how to build those workflows, the sky is the limit
for what you can do. So weve is an AI platform that combines all the AI models, all the main ones into
one single login, one single membership,
one single cost. So this is like you having to go everywhere
to pay your bills. You have your cellphone bill. You have your card payment,
you have your credit card. Imagine having all
these different logins, which we do, right? And here, instead of having
all different logins, all different monthly
costs for AI memberships, you can go ahead
and just get Weev and everything is
under one umbrella. There's no more logins, one
monthly cost, one place, one membership, and
you can combine all the different AIs
under one workflow. So let's go ahead and
talk about one of the most important
things to consider when it comes to this platform, which is the cost, right? So the cost is on
a monthly basis, you have $0 to start. They gave you 150 credits, which you can generate
about 375 images, which is pretty good or
25 seconds of video. I mainly use We eV for images, and I use Google V
three for video, and I have a different
membership for you can use Vo three inside of V. I just choose not to just because
of cost reasons, right? The startup plan is $24 a month, and that gives you
1,500 credits. You can do the professional
plan for $45 a month and that gives you 4,000 credits
or 10,000 images. The one before is
the one I have, I get around 3,700 images
or 400 seconds of video. But I do my videos
outside of WeV, but you can definitely
do the videos inside of V if you
don't want to create a different account and
have a different membership to Vo three or Higgsfield. You can do all inside of WeV. That's why it's awesome that you can just do that in
one single login, one single monthly membership,
one single platform. Now that we know all
the cost information, let's dive into it and
create our first workflow.
3. Workflow Overview: So once you are in here
in your dashboard, once you log in, this is
all going to be blank. All these are
projects that I have already started, my files. This is going to
be blank for you. Up here is all the templates
that they give you. So all the workflow templates already prebuilt are
going to be up here. And that doesn't always necessarily apply to
what I'm building. So I like to know how to
create them from scratch. I probably use one or two of
these pre built templates. But what I like doing is
creating a new file over here. I'm going to show the main
components of a workflow. So that way, you have the skill of knowing how to
build a workflow, and you can create
infinite numbers of workflow for yourself. So let's go ahead and
create new file here, and it's going to
give us a brand new canvas, brand new Canvas. And the way you
manipulate this Canvas, on the bottom center here, you have the hand, which
drags it left and right. Right now, you can't
really see it moving because there's
no element in it. So let's put an element in
here so you can see it. Or as I like to call it a
node. So here's a node. Now I can move it
left and right. The whole canvas is moving,
not the node itself. The node itself
moves through here. You grab it, or you can move the canvas and just move
it left or move it right. So that's the basic
controls of this canvas. So if I put another in here, you can see that
now I'm zoomed in, I can zoom out, hitting
control and scrolling out, hitting control on my
keyboard and scrolling in. You cannot use
this on the phone. It has to be on the
desktop computer. If you want to go ahead and
select both of these at once, let's say to delete them, you go back here to this
cursor, select that. Now you can just click
on the blank spot and then select all of these. And then you can
either run them, we're going to
talk about running these specific nodes
in a second here. For example, let me just hide my screen so you
can see behind me. It says, Run selected. You can run it, and that's
going to run both of them. Right now, they're blank, so that's not going
to run anything. I'm going to show you how to
populate the information. So this is how you can
select multiple nodes. It's just selecting
the cursor here. Now, if I try to move my
Canvas left and right, like I was doing before,
see, I can't do. So the way you do it is
either you go back to the hand or you just hit
Spacebar and hold it, and that creates the
hand tool for you here. It turns it into the hand tool. And now let's dive into the
nodes on the left side panel. These are the different AI
models that you can use. Here you have Open AI, you have Gemini, you have
Higgsfield. You have Sra. You have all the
different image, video, large language models. Every AI that you can
imagine are in here. So you can use that as part of your one membership
cost for Weave. So let's dive into
it. On the top right, it says, You see
Create New File. Let's click on that.
And this is it. This is a brand new template. So now, this is where
all the tools are. It's kind of very minimalistic, but you can go so
crazy with this. If you click Search, all the AIs that's available to
you in one single scroll. So you keep
scrolling. Look, keep scrolling. It's in
categories, right? So you have right here, for example, video models. You have Google VO three,
SO two, HicksfieldO, Moon Valley, lean, and
then you have here your image models,
Higgsfield GPT Image. Imagine, Flux Bro, to all
the different models. So this is what I'm saying by you can go to
one place and have your entire basket of AIs
in one single platform. You don't have to
go sign up for you don't have to go
sign up for Mystic. You don't have to
sign up for Flux. You don't have to
sign up for Google. You don't have to sign
up for Hicks field. It's all in here. And
also, guess what? It has all the large
language models. What does that mean?
Like Chat GPT, Gemini. Alright, so let's start
with the basics, okay? This is a prompt. Did
see where it says, prompt right here?
I just dragon drop. This is where you
type your prompt, right now, it's just a place
that you can type text. For example, make me
an image of a dog. Now this is where it comes in. Where do you want to make
your image at? What platform? Let's say you want
to use nano banana. So if I can't find it here on the left, which
is right here. Se it's right here, nanobnana. But if you can't find it, just search and just click Nano. Just type Nano and there it is. It comes up. Okay, so this
is where it all begins. This is the very
basic of creating your first image inside
of this platform. As you can see on
the right side, I put myself out of the way. Behind where I was,
it says four credits. It's going to use every time
you run a nano banana image. Every time you create
an image, four credits. And then you can have the amount of images you run here too. You know, it's going to
create two images for you. That's eight credits.
It's going to keep piling up by force. So I'm going to keep
it at one, okay? Aspect ratio. This is on
the right side, by the way, is where you can control
the settings for this node. So every time you
put a node in here, for example, let's say
I want this one, 2.2, see the settings on
the right, one, 2.2, that's the settings that you can address for this
particular AI model. So I'm going to delete that one. So nano bananas right here. Now, it says, What's the
default aspect ratio you want? I want a nine by 16 because that's going to
be my social media standing, okay? Nine by 16. So my prompt is make an image of a dog. It's kind of vage, right? Making an image of a
husky puppy at the beach. So now I need to connect
this nodes together. So I'm going to connect
prompt to prompt. Let's run it. So right
here, it says Run model. So you go ahead and
click Run Model. So this is the husky
puppy, okay, guys? What do you do with this?
You can do a few things. You can create different angles. This is why I love this because let me show you now the
potential of this, okay? So now that you understand
how this sort of works, I wanted to give you a quick
idea of what this does. You can create
something like this. Watch this. I created a model. Okay, wearing what I
wanted her to wear. And then I branched
out from that model, and I created a close up of her. This is the one before her. This is not her. This
is the one before. It's gonna be this model, okay? So once it's automated, all you have to do is
it's already built. So you run. This is this
model right here, right? Look how nice that came out. This is a macro shot of
her. This is a close up. Now, let's get this is
very similar to this one. Let's run this one and
see what this one does. Yeah, this is the model before. I was building with this model, and then I decided to change it. This is a medium shot. Then this is going to most
likely be a shot like this. And by the way, you
don't have to do one by one. This is
what you can do. Once it's built, I'm going to make this available
to you and you can use it on your own without having to build it.
You can use this template. So you can also do this
instead of doing one by one. You see the little
arrow right here on the bottom, there's a hand. The hand moves it around. The hand moves the canva around. If I hit Control and
scroll out on my mouse, this is only available
on the desktop computer. This is not available
on a phone. You can't do this on the phone. So if I hit Control on my keyboard and scroll
out, look at that. It brings it all
out. If I scroll in, obviously, it brings it all in. And then if I want
to move it around, the little hand is what
I click on to do this. I can go left. I can go right. If you hit this arrow on
the left here on the tool, I can select
everything like this. Click on the blink spot, select it like you select
in a bunch of files. Okay? And look what happens. On the bottom right,
it says Run selected. It says 16 credits
to run selected. Why? Why does it say that? Because it's one, two, three, four image
how many images? One, two, three, four, five, I should have
been more than that. Hold on. Yeah, 20 credits.
Okay, selected all of them. 20 credits because it's five
images that I selected, and each one is
four, four credits. So instead of doing
this, look, run, run, run, I can just select
them all and run in bulk. So let me go ahead and do
that for the last two here. So I'm going to
select these two. And now, obviously, it's going to be eight
credits because it's four credits
each for Nano banana. So Nando banana is the image model behind
now I'm hit run, and I have 6,657 credits.
You see a P on the right. So it just took eight
credits away from that. And there she is. Okay, so you got a side and you got a full
front profile of you. And this is how I made
this model, by the way. I'm going to break down all the nodes for you
guys to see, okay? This is just your brain is
going to map it all out. Once you know the
basics, you can create the same thing
that I'm creating here. There are some very basic
nodes that you can use. Remember when we started
here, look how basic this is. You're going to create
these step by step by step, or you can just use
my template that I made available for you. A
4. Creating Your First Workflow: First of all, I added a prompt. Remember this? I told you
guys how to add a prompt box. You just click, you
just go to the side, get the available notes,
drag the prompt in there. So I put a prompt gender. I put another prompt, age, ethnicity, body type,
clothing, style. I didn't type on that prompt. This is just a
instructional box. I'm not going to type the stuff that I want the results in here. I'm not going to say
gender, female, male. I'm not going to
type it in here. This is just a template. As a guide. Think of it as a form. You build
in like a form. So this is the form fields that you want
the user to input. So once you put your
prompt in here, you make sure you
lock it because then you don't accidentally
type in there. So every node has a little thing that you can
click and you can delete, duplicate, unlock
or lock, right? So yours is going to look
like this. Lock, boom. So I locked it. I
locked the gender in, I locked the age. I
lock the ethnicity. So if I come back here a
week from now and I forget that I'm not supposed to type in here, that lock reminds me. This is where you type. Now,
you put another prompt box, you drag it in there,
the to match it. So you got one, two,
three, four, five. So these are all prompt nodes. And it says gender of year
because you rename it. So right here, I just rename, and it said prompt before,
and I just type gender. And this said prompt
before, I just type age. Get it. This is prompt, I just type ethnicity. So you rename it to match the field that you
previously had input it. That's just a
renaming situation. These are all prompt nodes. Now, this is where it gets
a little dicey, okay? And I'm going to try my best to explain this to
you where it's not. But once I got my fields, and then once I have the actual values that
I want to type in, I'm going to put
all of them into a place called
prompt concatenator. And the way that
works is like this. I'm going to put one here. I'm I'm just going
to type in prompt. It just combines
everything, okay? The concatenator
combines everything. So I'm going to get the
prompt concatenator. I'm going to drag it in here. And now watch what happens here. You see this? This
is a brand new one. There's nothing in here. Add another input. So how many of do we have here
so you guys can see it? We got one, two, three, four, five, six fields, right? So then we have to
have six fields here. We got one, two, three, four, five, six. And then what we do
is we're going to connect every single
one of them to here. Actually, we need 12 guys because everyone has
to be connected. So we're going to connect
this one to one, okay? Just like it's right
here. You see that one? That one to one. And then we're going to connect
the gender to two, and then we're going
to connect age to one and then the age
value to two to four. So one, two, three, four,
and then we're going to get the ethnicity to five, the value to five, and
then we need six more. One, two, three,
four, five, six. So you guys understand, right? It has to follow this order, so you got to get
your field connected, seven, the value, eight. I know it looks like
a mess right now, but that's because we are
doubling it up, okay? So now let me delete that so you guys understand
what's going on here. Now, this is where
the magic is, right? I'm going to delete this
little link right here. Okay. This is essentially
what I just did. Look at this. It combines
everything for you. So now the combiner connects. Now, this text here,
I didn't add this. This is already from the
values that we inserted here. So if I change this to African
watch what happens here. Look, woman 30. Let's change her age now. So all you have to do is
type in your values here. Let's make it 25-years-old.
So now it's 25. Essentially, every node it
plugs into this combiner. So it's combined, okay? Now, what is it going to
do with this information? That's when the prompt comes in. So now I just literally put a prompt in here, prompt node. That's the prompt
node that I dropped, and then I wrote
this. I locked it. Let me unlock it so I can
manipulate it better. Create detailed text to image prompt that will
describe a model, clothing and setup for contemporary fashion
campaign photoshoot. Describe the model and clothing characteristics in detail. The model should be
a hyper realistic high end model with futuristic. You can create your own prompt
in the way the photo shoot that you want to create for whatever look you
want to create. This is what I have in here. This is telling essentially this combiner to do the
following with this information. So then this is what
we're going to do. We're going to put the prompt in this prompt number one box right here. So now it combines it. Look, everything that we
said here comes up here, and then it tells you, here here are the
details about the model. Perfect. This is what we want. This is essentially
a prompt template with different fields that
you can populate, okay? Alright, so that is
what this is, okay? We just combined all of that. Now, this is where this
combiner or concatenator, this is just a dumb node. It doesn't have any
intelligence whatsoever. What we need to do now
is put in any LLM, which is essentially watch.
I'm going to drag this. I just typed any LLM,
large language model. So when I click and drop
it, look on the right side. Now I can use you don't have to have a membership
of Chat GPT. You don't have to have a
membership of Mato AI. You don't have to have
a membership of Gemini. You don't have to
have a membership of Claude. It's all
in here for you. They bring all the AI platforms, all the large language
models in here for you. So now I want this
to be on haGPTFive. So this is the brains, okay? So you just drop the cell. Now you pick the brains
that you want on that cell. So this is what I want.
I want haGPTFive. So what happens here is I
already did this up here. You see a N NLM up here. Okay. This is what I
just added here as well. So essentially,
this is what I did. I just put that
combined prompt into the prompt box in here,
and then you hit Run. I'm not going to run it because I already
have it up here. All you have to do is
take the combined prompt and put it into the prompt
box, and then hit Run. Hit and Run on this is the
equivalent of going to CaT PT and typing all this
stuff and saying, Hey, create me a hyper realistic high fashion model
with this look, you know, age, whatever, this dress, and
then you hit Run. So once it hit run, nothing happens here with the image yet. It's just going to the point of this was to create a prompt. This is just to create a prompt. Remember the instructions was to create a detailed
text to image prompt. So this is what it did for us. It created a text
to image prompt. So now it says
here, look, this is a text to image prompt,
a happy realistic, high fashion African
woman model 25-years-old, stands tall with a statuesque
and powerful posture against an infinite
white background. All this stuff was
pre instructed in a previous node that combined my preferences
for the model, and now we have a perfect prompt to create that model for us. So then we drag this over
this text node, okay? Drag it over to another. Now, this is optional,
but remember, the concatenator, where we talked about
combining prompts, I combine that prompt. So here, I'm going to bring it up again so
you guys can see it. So this is how you access it. Prompt, Concatenator.
Put it right here. And I dragged this one
to it doesn't matter, one or two, one or two. And then up here, I put another prompt box that says realistic photograph full body. You can actually do
this right here, guys. You can put that in here. So we avoid this step. But the reason why I separate it was because I
want to be able to customize it if I want it to be something else
other than full body. I don't want to have to go
back in there and find in this mess where the full
body stuff happened. I want to be able
to come in here and manipulate what kind of, you know, if I want
a cartoon style, I can put in here
cartoon style two D, cartoon style three
D. So I want to be able to not just
create realistic photos, but also other types
of styles, okay? So that's why I broke that down. So now that you have
those two nodes connected to your
combiner, right? I just marry those two, and
this is just a complete dumb. There's no intelligence in this. This is just I call
it a dumb node. It's just a combination
of this and this. This is an intelligent node because it took all
the instructions, and when I ran it, it
gave me an output. So now we're going
to take that output, combine it again with this right here because this is
the way I want to be able to manipulate the style. And now we're ready
to cook the image. So then I'm just going to
either go to Nano Bun. So I'm going to delete
this connection here, so you guys can see how
I was able to get this. Again, you just go get the
image model that you want. In this case, nano Banana. Boom. Now you just connect your prompt to the
prompt of the image. So this is essentially like if you went to Gemini or
nano Banana and said, Hey, make me an
image of this model, hit Send. This is
what this does. It creates the
prompt for you here, and then you go ahead and put that prompt into the Gemini. Let's say you don't want
Gemini to be your image model. Go on the side here, find the
image model that you want. Maybe you want Higgs
field. Maybe maybe you want HAGPT to
be the image model. They also have an
image model, remember. So then once you click
on the hATPT node, you can connect the
prompt to that. And then when you click on it, like click and make sure you select it,
look on the right. What kind of size do you
want for your image? So if you want, let's
say, a vertical, so that's going to
be 1024 by 15 36. This is essentially
1080 by 1920, right? 1080 by 1920. Theirs is 1024 by 15 36. So let's say you want that
and you want to compete, you want to see which one
does better. No problem. Just put that node in there.
So here's a node for GPT, and I'm going to use
one for Nando banana. Okay? Now, let's run it. I'm going to run. This is going
to cost me eight credits. Ta GPT is going to
cost me eight credits, and Nando banana, which is a much better one only
costs four credits. So I'm going to run that. So this model is
going to be gone. After I'm happy with this model, then I create the
different angles. You don't create the
different angles before because you
don't know what it looks like yet. So, here it is. This is Nano banana
to the rescue, quick, and I think I
asked for a dress, right? I asked for a spring
dress, minimalistic, so it's going to be a
minimalistic dress. Alright, let's see. This is what haGiPT gave me. Similar, right? Cha JBT is actually a better
quality, man. I thought it was gonna
be a worse quality, but no, it gave me
a better quality. So now we're gonna have
to make some changes here because we
aGBT won that race. And look, we can make
more. We can go ahead and say Daly three, put it in here. And then see what that gives us. But we're not doing that because
I want to waste credits, but you get the point, right? You can put all the image
models that you want to see mystique or mystic,
whatever you say that. You can put all the image
models that you like, Flux Pro and then
start connecting this. Connect that prompt to that. Connect this prompt to that. And then let's run Flux Pro
real quick. Seven credits. Let's run this one
to see how it looks. Maybe that's a better
option for us. Let's do Flux. I'm
going to delete the other one because I don't
care about making more. So right now we have our model, and we're going to see
which image model creates, I forgot to change the settings. Can you change the
setting on this? Yeah, I could have looked See,
this is a mistake I made. This is a one to one ratio. I didn't want that, so
I have to run it again. I'm going to do nine by 16. I messed up. I don't
want one to one ratio. So I'm going to run it again
and burn seven credits, taking a few seconds here. Once it makes it,
we're going to see which one of the three we
want to branch out from. Alright. Yeah, it doesn't give me the full body,
but that's right. In this case, you would want
the full body. You know why? Because we don't know what when you create the
other angles here, you don't know what the bottom
of the dress looks like. So you might get different
bottoms of different looks, different styles according to how it interpreted, you know? So even though this is a good quality one, it
doesn't have the bottom, and I won't feel like running it again to get the This was supposed to give me
the full body because this right here
says so, full body. If it didn't because you have to just keep trying
until you get it. But I'm going to leave that there so you
guys can see what it did, but I'm going to go ahead with this one right here
in the middle. So I'm going to delete I'm going to delete this
connection because this is not This is the auditioning part. We audition the China TBT model. The other ones are going home. Oh, let me see what
that went before I do that. I forgot to. Okay, yeah. Okay. Because once you start disconnecting,
then you can get confused. So, this one is
going to go right here and we're going to see
what that does in a second. And then this one is
going to go right here. So I just replugged it. Okay. So this is
what this is saying. It's a prompt, okay? It's a prompt. And
the prompt says, describe five distinct camera
angles for this model, focusing on their face, including macro
shot, close up shot. This close up shot twice. Let me link that. I'm going
to put medium shot here. Medium shot, full body, side angle, and wide shot. Perfect. All right,
so we're good. So now let me lock it again. Lock it. So that's
what this does. It's just a simple text field. It's not N LLM. Now we're going to create N LLM, which is, again, this
is the smart node. You can pick what large
language model is going to follow the prompt
that you just entered. So in my case, I want GPT five, and then I went ahead
and got this prompt. Connected it to the
prompt box right here. And there's one
called system prompt. So if I clean this up a little more so you guys can
see it, here we go. You see, prompt? That's
where this came from. And then the image is
going to be right here because it's going to
now look at this image, and it's going to
look at this prompt, and then it's going to generate five different camera angles, and it's this is the key. Separate each with an asterisk
at the end of each prompt. This is why we're going to
do that. I want to show you. So let's run this.
This has to be Rn. So I'm going to run and now it's going to
look at this image, and it's going to understand
what I'm asking for, and it's going to give
me five different angles separated by an
asterisk at the end. Here it is. Macro shot capturing the model's eyes
and smooth skin texture, highlighting subtle details of your expression.
Boom, separated it. Close up focusing on
the model's face, emphasizing bone structure,
confidence gaze, and natural lighting,
separated it. Very very important
that it does that. If it doesn't do that,
it will do that. But if it doesn't the next
part will get messed up. The next part is where
we're almost done. We're almost done with
this if you're following. The next part is an array. An array is on the
side here, array. So I just typed array
and I dragged it. Okay? This is what
an array does. Look, I'm going to do it
again so you can see it. Connect this over here,
boom. And then look at this. Split text by. It
does a comma there. See how it has all the different It breaks down your
lines for you. So now it's breaking
down all these lines, but it's not separated, right? Because it's separating
it right now by a comma. I want it to separate
it by an asterisk. Look how brilliant this is now. Watch. Look at that. Now we have one, two, three, four,
should be five. So what happened
here? Should be five. Let's see why it doesn't
do that. Okay, I see why. I see why. See, look,
this one didn't finish it with a unless I
accidentally erased it. So I can fix that by just manually going in
there and adding it. So I added it manually.
I don't know if I erased it by mistake.
And now we have five. Look at this. One, two,
three, four, five. So I'm gonna delete that because I already
have it right here. I already have it
right here, okay? Alright, so we have
split text by Star. We have one, two,
three, four, five. The next step, I'm just showing you it's better if you
understand how it all works, so you can create
your own crazy stuff. Like this, you can go as many
ways as you want with this. This is just me showing
you how I created my so now we're going
to do an array, we're going to do a list now. A list, as you
guys can see here, it's going to break down every single array into a single prompt box
into a single node. So once I drop the
list, watch this. You drag and drop the list. We need five, one, two,
three, four, five, right? One, drag and drop
two, you get it. One, two, three, four, five. In the list, now you have
a dropdown in the list, you have a drop down
of every single one of these that is separated
separated for you. So we have macro shot we have Cls upshot
we have a medium, we have the fourth,
we have the fifth. Now, essentially,
what this list is is a prompt box prefilled
with drop down options. So it's a prompt
box. It's not smart. It's just a complete text
based prompt instructions. Now we're going to
be able to make the images. Okay,
how do we do that? We're going to do
the image model that we're going to
use as nano banana. This is the previous
model that we did before. So now we're going to
do this new model. So the image model
is nano banana. So I did create five of these, so I drag and drop one. Drag and drop two, you get
it? So that's how I did it. I dragged and drop five different
nodes for Nando banana. Now, in here, when
you click on it, look at the option, nine by 16. Look at the option, nine by 16. If it says default,
what it does is it's going to default
to the reference image. Okay? If the reference
image is a landscape image, it's going to give you
a landscape output. So for us, it's fine because the original source
here is a portrait. So default is fine. This
one's default. That's fine. So, you know, the first
few ones are nine by 16. Either way, it's going
to be nine by 16 because our source
image is nine by 16. Now, this is where the
magic happens, okay? You're going to go ahead and I'm going to erase all this stuff, guy, so you guys can see
how to map this out. And the way you erase
the connection, it took me forever
to figure it out. You just click on it and then hit the lead
on your keyboard. You just click on the
line, click on the line, hit delete, click on
the line, hit delete. I couldn't figure it
out for the life of me. I was trying to delete
it all different ways. You have to click on the line and hit the lead
on your keyboard. So now, this is the
key right here. We're going to select
this and put it into this prompt
connection of Gemini. So we hit Prompton there,
and we're going to hit Prompton here. Connect that? This is so satisfying. Four, five. Now, it doesn't know what
the model looks like. It does not know what
the model looks like. So this is just saying, macro shot capturing the model's eyes. It doesn't know what
she looks like. So it's going to create a random person. This
is where this comes in. So this was the model that we auditioned from Chat
GPT, so we liked her. So now, instead of going
branching out like a bunch of confusing wires to plug into the connection
here where it says image this is the
reference image now. This is the model that
we're talking about, this girl right here.
So this is the model. So instead of doing that and looking like a crazy spider web, we're going to do
something called a router. So a router it cleans it all up. So I'm going to
drag a router over. And then with one line, I'm going to connect that
router to this image, and this is going to split it. So it's nice and
easy, nice and clean for my timeline here
for my workspace. So the router is here, and now you can drag it
as close as you want. You can put two routers,
maybe, you know, if you want to put a router
here and then one here, so it looks cleaner
look. Better, right? Because if you just do this,
it doesn't look as clean. So if you do down here, so it doesn't overlap
with anything, and then you can route
it again to that router, and then all the masks
can come out of here. So then you can plug
that into here. You're going to plug that into
the second one. That's it. Now, the easiest
thing for you to do is understand how
to control things. So for me to zoom in and
out, I'm hitting control. I'm using my wheel on my mouse, heat in control in and out. This is how you zoom in and out. If you want to move
left and right, you can go down
here and click on the hand and then move left and right with your mouse,
click and hold, and move or because I like to leave mine
on the cursor here, this little cursor button, which allows me to select
multiple things like this. Look, click and drag, I can
select multiple things. Because I don't want to have to keep going back
here to the hand, all you have to do is click and hold the space bar
on your keyboard, and that turns it into the hand. So if I just either click here and move
it left and right, this is the most
challenging thing to get in your brain to manipulate this timeline is to really understand how
to go left and right. So if you want to keep it on the cursor, then if
you want the hand, instead of going manually, you just hit Spacebar
and then look, look how it changes
to a little hand. So now look, Spacebar and
then I can move it around. Now that we have
everything connected, we're going to select, make sure this is the
arrow, select everything. Click on the blank
spot, drag it. Hold and drag it.
Now, look at this. One, two, three, four, five. Every one of them
is four credits, four credits, four
credits, four credits, four credits, total
cost 20 credits, total cost 20 credits. Let me get out of
the way so you guys can see the total cost. There, total cost right here
on the bottom, where I was. So run selected, that's gonna
generate our model, okay? Hopefully, I did this right, and it's going to
generate this model right here in five
different unique. There you go. It's
already coming up. So now we have a close upshot. No, this is a macro shot, right? Yeah, macro shot. Close upshot. Full body. And then the side profile.
Now you have a model. If you have a company
with clothing, if you want to
serve your clients, you can help them select
a model that they like, you know, select an actress
to represent their brand. So now you can do
this multiple angles. So, by the way, I asked
for a white screen. You don't have to
have a white screen. I wanted to have it's called the infinite white background. I wanted to have that
because now you can use her as an asset for video
models like Val three. Val three, you can now
upload a ingredient, which is you can put a person in there so you
have a consistent character. You can put an item in there so the person can be
holding an item. If you want to do like user
generated content for, like, Tik Tok shop and things like that, you have a spokesperson. So here's what you would do now. So this is everything
that you have. I want to redo this
one, actually. So this should have been a
medium shot, not a full body. See, it says medium shot, medium shot framing,
shoulder to waist. Run it again. Oh, there you go. So it was just a fluke.
This is what I wanted. I'm going to show you now how
are you going to use this. How are you going
to use this model. So let's say you like
this shot right here. This shot right here, you like that. We need to download it. On the right, hit
that right here, and then you hit
Download current, and then you save that
to your computer. If you don't want to click on the three dots and you want to export it in a different way, you can just add another
node called Export. All your nodes are on
the left, by the way. So Export, I drag it in here, and then I can connect
it right here. So it's easier. Now
if I want to Export, all I have to do
is click Export.
5. Creating Videos using Weave + Google VEO: So now, once you export this, which I did, this is how
you're going to use it. You can either use it
to post it as a photo or you can go to Google
Flow and animate it. Since I already have an image, I'm going to do frames to video. I'm going to add I'm going to add that model
that I just created. I'm going to change this
setting to portrait. Now we just audition that model. We chose the best
shot that we liked of her. And guess what? If you want to get
creative, guys, get a second shot of
that model and do a start frame in the end frame. So, watch this. Let's take
this frame right here. Let's take this right here.
Look how nice this is. I'm gonna download it. And now the start
frame is this one. And then the end frame
is that second image. Now we're going to be able to
perfectly do a zoom out of her and end it right there. So now we can say, create a smooth zoom out
shot for this model. No cuts. She says, My name is Zeta. And this is my style. Alright, let's send it. So
I got first and last frame. Create a smooth Zoom out
shot for this model. No cuts. She says, My name is Zeta, and
this is my style. While this is making
this video for us, if you want to use Val
three inside a IV, you can. Let's just delete this export. Let's say you want
to make her in here so you don't have to have
Vo three membership. Val Image to video. You see the node, Vo
three text to video, Vo three image to video. This is what I want.
Image to video. So now you're going to
create the connection between her and
your first frame. And then if you want
the last frame, you can do the same thing
I did in Google Flow. You can take the last frame, maybe this one and put
it as your last frame. And now we need to
write our prompt. So how do you write your prompt? You have to put a
prompt node in here. Not at any LLM, because you're not
asking it to have any you're not asking
it to solve any issues. You're just literally
just typing. So the prompt is what
you're going to type in. So then if you go back to my Google Flow prompt,
let's just copy this. Create a Zoom out
shot for this model. No cuts. She says, My name is
Zero, and this is my style. So we're going to copy that
and then paste it right here. So this is my prompt.
So I have the node, and now I put that prompt
into the prompt connection. So now we have the same thing without having a
membership to Google Flow. So instead of you
going through here, like I just did, you can just do it right
inside of there. And now, if you run this, it's going to cost
you 120 credits. I'm not going to
run it because I don't want to waste 120 credits. Remember, to do the
image is four credits, and now to do this video, it's going to be 120 credits. So you can see how that adds up. If you want to run
this inside a Weave, that's exactly how
you would do that. You would connect the prompt
and then your first frame, and then optional,
your last frame. And then you run it, and then you get a video inside of Weve. And then watch this. If you create multiple videos in here because you want
a video for each one, let's say I want
to copy this over. So I can just select it
and hit Control C and then Control V. I can paste that video model in
here. Look, see it? Control C, Control V,
just like you do a text. Look, it puts it right there. All right, so let's see let's say I want to run a video for
every single one of these. I would connect this results, first frame, results,
first frame. And obviously, you would have
a different prompt, right? You would have a
different prompt for every video because not all
going to be the same action. But let's say it is
the same prompt. You would just prompt, put
it into the prompt box. Or you can put that
right here look. So it's a little
cleaner looking. Put that prompt into
the prompt box, put that prompt into
the prompt box. So you use that same prompt
five times, let's say. And then let's say
you want to run this, you select it all, and you run. Now you have your
five videos made. It made your five
videos for you. And guess what? You can combine all those five videos without having to take to
the video editor, without having to take this to a video editor with
five different files. You can combine
it into one file. So if you type
video concatenator, video concatenator, right there. And then this is how you would do it. We
need five, right? One, two, three, four, five. You just connect all
the video outputs. Once your videos make once they're generated
and you like it, you're going to connect
all your videos to just like we did the text concatenator, you're
going to do the video. It only takes 0.1
credits to combine them. It says nothing. So it's
not even one credit. It's a tenth of a credit. So on the bottom
here, it says 0.1. So once I do run model, it's essentially going to
take all these five videos, and it's going to give
me one single video for that that I
can then download. So let's go ahead and see what Google Flow made us
for these, okay? And then we're going to
wrap it up right here. My name is Zeta, and
this is my style. Perfect. This is it. You can either do 50 videos
inside of Google Flow for $20 a month or you
can just do the videos. You don't need a membership of Google Flow if
you're going to cook your videos up in here, so
you can do them in here. You have to do the math to see which one is more
economic for you. You got to make that
financial decision. But this is a tool that
it's amazing to create photos that you can then take it to a video
Builder like this, like image to video
builder like Google Flow.
6. Multi-Angle Scene Builder Workflow: Okay, so going back to our model builder or
character builder. Let's say you want
to create a piece, a short film or just a
reel for social media, and you have a specific
character already in mind, whether it's a real person that you want to take a picture of or you generated the
character outside of here. You don't necessarily
need to build all the character information
with this stuff back here. You can simply drag and
drop that character file. So I'm going to drop the file
that I want to put in here. You're going to drop the file
right into your workflow. See, I just dragged it from my computer and I just
dropped it in here. Now, we're going to bypass this entire operation
here with this model. I'm going to delete the string that goes from here to there. I'm just going to click on
the string and hit delete, and then I'm going to reconnect this guy to this
string right here. Okay. And now I'm
going to delete the router string that branches out to all
of the image nodes. And I'm going to redirect that and plug it in
right over here. So now we're back to normal. So all this stuff right here, we can park it to the side, and now all the connections
are right here. So when we run this any LLM, to describe five camera angles, it's going to change
our array prompts. Let's run that because now it's drawing information from this
particular character here. So it's going to
be unique to him. Now, why would you
want to do this? Again, you're going to be able to use something that you
already have or a real person. You can take a
picture of yourself, whether it's landscape
or portrait. Now you can have five
different angles that we already created
by running that. So we have five different
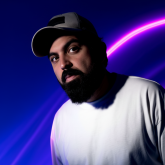
prompts for the angles. Let's run the first one here. It's going to be macro shot capturing fine
beard and skin texture. You see how it made
that specific for this model right here as
it talks about his beard. So that's how you do that for a different character
that you already have. So here's one. Perfect.
Gave a macro shot of that. Let's run the other
one. So I'm going to click outside of the Canvas, select everything, and
then I'm going to hit Run. So now here we have our
character generations. Let's see. We have a
closed upshot here. This one we got an error. So if this happens to you, just click outside of the Canvas because we had everything
selected before, right? So now just individually
run this one again and see why there was a problem. Maybe we'll get
the problem again. Maybe we won't a side angle. This one didn't work
out quite well, guys, because let's see. Let's see why it
didn't work out. I don't see legs because the image we generated
here didn't have legs, so maybe that's a problem. This is Whit shot place in
the model in open space, face still visible yet contextualized within
minimal white background. Let's run this one
again and see. See, this one got fixed. Fix this? Let's
run this one here. I'm pretty sure because this is a wide shot and he
doesn't have legs, it's going to just
make up legs for him. Maybe it'll put pants on him. Maybe it'll just be his legs. Oh, it's even smaller. So there you have it. This
is I want to make sure I leave this in here
so you guys can see that sometimes there are
little glitches like that. Let's just ignore this one. Let's go with something
that we can work with. Let's download this
image right here. I want to click on
the three dots. I'm going to download current. I'm going to show you what
to do with this next because obviously this is just
to cast the model. This is just the
character casting, okay? I'm going to download
this one right here. So these two are okay. What I want to do next is
show you how now we can get this character and instead of dressing him
up from a prompt, like we did with the information back here somewhere that we said minimal spring dress,
minimalistic spring dress. Now we're going to
be able to have this blank canvas here
of this character. He's wearing just
a white T shirt. What if you want to put
your character in a time specific wardrobe or a
specific T shirt, for example, your company T shirt
or your client's company's T shirt that
has their own logo on it, you want to be able to dress them in an outfit
that you saw online, and you want to see how that
would look on somebody. So there's various
reasons why you would want to customize something that he would wear from something
that's real already exists or an inspiration that you saw on the
website, for example. So once I downloaded these two images that
I like from here, I'm going to take
you to a different workflow that I'm going to link here to the resources
of this session, and that is the multi
angle Scene Builder. Okay? This is the multi angle
Scene Builder workflow. And don't be overwhelmed
by the way it looks. I showed you every
single thing that I used before I used here. And in addition to that, I have directions right here. So here's let's read the
instructions together, and I'm going to show
you how this works. So enter your prompt. Number one, see, number one, your prompt. Enter your prompt. For example, character
in the uploaded image in a 13th century
castle as a knight. So in this case, you can
say whatever he's wearing. For example, here, I said that
he's going to be a knight, so it's going to be
like a knight armor. And I also put a
setting description. So it's going to be in
a 13th century castle. And because I already
have a wardrobe, I have in mind for him, I have an image that I'm going to
upload for him to wear. I'm not going to say what
he's going to be wearing. I'm simply going to say here, I'm going to just
type this character wearing the referenced image. I'm just going to
leave it like that, and you see where
this is going to go. Number two, upload at least two character
images as references. Alright? So let's go ahead and upload the two images
that we just saved. So we're going to do this one. I literally just dragged and dropped the file
from my computer. This is why you need a desktop. This does not work on the phone. And then I'm going to get
the close up shot because it will give me finer face
details for this character. The other ones kind of far away. And one more thing
here, it says, Noe, the output aspect ratio of your image will be the
same as the Iported image. Example, 69 will
yield a 69 image. In this case, here
we have a 916 image, which means that it's a
portrait image like this. Think of it as a YouTube
short or an Instagram reel. And when you're
talking about 69, it's a landscape image like a
YouTube video, for example. So because this is
a nine by 16 image, whatever we have
here is going to be the default for this
output image here, the final image that we're
going to get to in a second. Because the aspect ratio
on the right side, where you have your settings, once you click on the node, it's going to give you
settings for that node. So here, I'm going to click here and here are the settings. So by default, if you
want to change it, if this image is a portrait
and you want to make it a landscape because you have in mind to make a
YouTube video for it, you can certainly change the output image ratio by going to 69 right here, selecting it. It's right behind let me move
myself here. So here 69. Now, when you run this, when it's ready, it's going
to yield a landscape image. Well, let's go with nine
by 16 just in case, just so we don't
have any issues. By default, images
have a brain of its own and give me
whatever image it wants. Especially if you have
mixed ratio images. If you have image
that's nine by 16, and then another one that's 69, and then one that's like 121, like a square image, and
one that's a custom size, make sure that this
instead of default, has your output exactly
how you want it. So here, what I want is 916. Now, let me get back
to our third step. It's actually a second step. It's part of the
step number two. Upload clothing in
environment or an object you want to include in your
master reference image. In this case, because
I'm giving you the example of changing clothes, it's not optional for us. We're definitely going
to do this. Alright? So let's go ahead and upload
clothing for him to wear. I'm going to get something
here for my computer. Let me see right here. I'm going to drag
and drop this file. Right inside of that node. Here's a clothing that
I want him to wear. In addition to this, guys, you can also put an
environment, okay? So I left that out of this so I can show you that you can
do this part as well. If you don't want a
white background, I built this to have
a white background. But if you don't want
a white background, you want a certain environment,
for example, anything, your backyard, a
photo of a castle, whatever specific place you
want this person to be in. You're going to get that image. Let me find something
that's going to be appropriate
for him to be in, especially if he's wearing
what he's wearing. Here's an image of
an ancient place. You can see that this is a
square image, 1024 by 1024. It's a one to one ratio. So this is why it's
important that when we go back here that we have
this aspect ratio, exactly how we want it
because by default, I have all different sizes now. This is a different
size, different size. It's not going to give
you exactly a portrait or exactly a landscape. You have to make sure
that you select that. Now that we have that imported, we're going to see you
see the node right here, it says add image output because there is no other
connection that we can add. So if I drag this here, look,
it doesn't have a home. You don't want it
on the third one, and there's no fourth. So you just click here and it will add a
fourth one for you. Now we can drag that over here. Now, because we
added another node, we have to change the prompting. This character wearing
the reference image in the referenced setting. That is a setting
that we just dropped. Now that we have that, let's
look at our next step, which is number three. Run this master
reference image node to generate your
reference image. And the reason why
this is called the Master reference image
is because from this image, we're going to generate
ten more angles. So this is the master
reference image, okay? I can rename it right
here if we want. If we rename it, I'm
going to put number three, master reference image. Rename. So now we have
it labeled, right? We have Step one,
which is right here, see the renamed node, one, two, upload your character, three, run master reference. So that's three, and then four, we have another step,
but we're not there yet. So let's go ahead and run this. Now it's going to
combine the character, the clothing, and
the background. Let's see how this
is going to look. Alright, this is done, and
it's not quite what we want. This looks silly.
It looks photoshop. There's people in
the background. This is where a quality
prompt comes in. So now this prompt here obviously didn't yield the
results that we wanted. So we go back to the prompt and here's
what we're going to do. It gave me exactly that
angle of this environment, and it did have people here, by the way, so I missed that. I didn't know there were people. I don't want people
to be in there. So this what we're going
to do in the prompte. This character wearing
the reference image in reference setting. I'm going to put this close. Actually, I'm going
to do a medium shot. I don't want the whole
background to be exactly as that picture shows because it's
an awkward angle. I'm going to say medium shot. He stands by the castle. And then I can say remove all
people from the background. But because I want him to be standing by that
castle right here, it should be a medium shot. This is a wide shot, and they placed him in an
awkward position here. It looks very photoshopped. So this does not
work. Now, I'm not mentioning to remove
the people because it's gonna be a close up shot. Hopefully, he will be like,
standing right here by this castle. So let's
run that again. And actually, before I do that, I'm going to also change
the clothing item here. I'm going to make it
this very simple tunic. And then I'm going to
have a sash around it. You'll see what I
mean here. So now let's change the prompt
here a little bit. So this character wearing the referenced image in the
referenced setting, medium shot, he
stands by the castle. I'm going to say
that is behind him. So it's not just any castle. I knows that the castle is
the one from the image. And I'm going to add
a sash to his tunic. And it's going to
be neutral color. So it's not like a
different color. It's going to match the tunic. Now that we have that done,
let's run this node again. Alright, here we have
it. I had to run it a few times to get something
I was happy with. So there we have it. We
have him wearing this with a sash around it,
and it's the same guy. You can see it's
the same character. Now, all we have
to do is connect the output to this is a router, same thing as before,
so I don't have a mass of webs going
from here to ten places. I just had a clean
line over here. We put a router in here. See the router,
put that in there. And now the router
gets routed to ten different nano banana image models, ten
different ones. But before we get there, let's take a look at our
instructions again. Number four, run this
large language model, node to generate
various image prompts. Now we need to generate our
different image prompts. What does that mean? Right here. This is the node that we're
going to run number four. So the node has a
prompt that reads this. Describe ten distinct
camera angles. Zoom in so you guys can see it. For the scene, each highlighting
different elements and objects from the image and
capturing the look and feel. Keep every description
under 30 words, separate each with an asterisk
at the end of each prompt. No numbering of prefixes. So that is the prompt that's
going to go into this N LLM. Now we need to go ahead and link the image. Somehow
it got linked. So we have to get this
file into the image node. So it understands that's
the image right there, and now it's going to create ten different angles from
this image right here. The prompt only. So
it's going to create ten different image prompt for these angles.
So let's run it. And that's going to
separate it in the array, which will then
separate it by a list. Each one will be listed in
a separate prompt box here. That's why we have the
list nulled in here. Let's see if I already
did its thing. Yeah, I did a low angle shot capturing the man's
dignified stance. So now we have all
different prompts here. So we have that make
sure it all lines up, meaning this is the fourth node, so that means it's
the fourth prompt. This is the fifth node. So that means it's
the fifth prompt. It should be all lined
up. You line this up. When you build this
out, right now, it's lined up
because I built it. But when I built it out,
I had to manually click the dropdown because every single one of them is going to default to the first prompt. So it's going to be
the first 110 times a low angle shot right here. You have to make
sure you select each one according to the order.
But I already did that. So if you reuse my template, which I'll make available
for you in the resources, it's automatically going to line up all the prompts in here. After you run this model. So number four is done. So let's go to number
five. What is it? Run these ten nodes to
generate your output images. So I'm selecting our
Nando Banana image model. You can definitely
go with another one. If you want, for example,
go to the menu right here. You can do flux. You can do ideogram. This is one of the best ones
right here, CDream four. So if you want to do CDream, you have to re map everything, meaning put ten nodes in
here or maybe just one. You want to test
it out. And then you see how the mapping goes. One goes to one, two goes
to two into the prompt. For example, here, let's say this one is our last one.
You put that in the prompt. And then in the image node, every single box has the image that's coming out
of here into this router. It has this routed image
output into the image. So it understands what the image is and what to do with the image because the
prompt will guide it. I'm going to keep this one here. I'm going to run this one to see what number ten looks like, and I'm going to
run number ten for nano Banana, which
is right here. I'm not going to
run all of these because it's taking
up my credits, and I don't need to run ten. I just want to show you how you'll be able to
use this to now generate not only a character wearing and at the same
place that you describe, but now you can have
ten different angles of that character wearing that in this place for
your story angles. So if you're building a story, which I'll show you in a minute how I was able to use this in the real life situation
for Instagram. So here we have it,
guys. It's very dark. This angle didn't
come out right, probably because the prompting. Let's see what the prompt said. The prompt said this number
ten, a diagonal composition, sunlight splitting
the frame between illuminated stone
and shaded serenity. So that's what happened. It's asking for it to be, like, a cinematic kind of
sunlight hiding him. Let's run number nine, just because I'm not
happy with number ten. I want to show you
a great example. And then here's a mistake, guys. Because I didn't select the output ratio, I
think I did this before. It says default. It should be nine by 16. This
is what I wanted. Remember, it said
sunlight splitting. I think Seadream did a better job at
splitting the sunlight, but also keeping him within
the light as a shadow. And Nano banana gave
me a very dark split. See? Here it is. So
this is number nine. Number nine is very similar. It's a very similar prompt, and it actually came out
pretty close to Sea Dream. So if I read the other ones, you can see what these
were calling for. This is calling for
a low angle shot. This is calling for
a close up shot, a wide shot, over
the shoulder shot, all different angles
that you're going to get from a single image because of our prompt
automation right here. Now, let me show you how to use this in the real life situation for a piece that you want to do for your Instagram
or maybe for a client. You can literally put a
client's photo right here, a real person, okay? Maybe they can be
wearing this shirt already with their logo on it. I saves you the step
of having to then get an image of their shirt and put it in here to
then combine it. What if they were just
wearing the shirt right away? Drop their image in here, and then you can place them in
whatever setting you want, a construction site, candy shop, a big mansion, anything. Now, this is going to
combine your client with either uniform or logo or just regular clothing
in that environment. And then you can prompt by running this model ten
different ideas for shots that you will
then have it for either marketing images or you can use it for
video creation. Every time you create a video, it's going to be in
a different angle. So it's going to be a complete
piece, a complete video. So now, watch this. This
is the same template. Same thing that I just
used, I just showed you, but this is actually
something that I used, and I made something
for my Instagram. I did something a little
different here, right? Instead of having the
different nodes for the man what he was
wearing, the setting, I made an image on Chat GPT because this image is a complete just a fantasy image, right? I made this image on Chat GPT, and I already had this
image for a while. So I dropped it in here, and I just made one clean connection from the file to my output from the file to the any
LLM that's going to look at the image and then describe ten different angles that we can run from that image. So essentially, I cleaned
up all the inputs, and I just kept the output
of the image right here. It's still the
same instructions. I just bypassed the first step. Now, I ran I ran this. I gave me ten prompts, and then it gave me ten
different image angles. I gave me a wide shot, and
this one is kind of weird. It has some colors. Close up, side angle, back angle.
Look how nice this is. And then I put it all together. I downloaded the Bast angles, and then I went to Vo three, and I prompted with
the first image, starting with the
frame that I liked, I prompted a movement. I prompted actions, and this is how I was able to build
this video right here. You can see that side angle. I took all these
images and took it to Vo three and animated
them with just the prompt. And I started the frame with the image output that I was
able to download from Weave. So here's the entire short
piece, and it has music to it. Got Oh. So there you can see. And this video got
17,000 views, 17,000. So now I see it right
here on the right, 17.4. So let's go back
to the workflow. Every time I saw
something I liked, I downloaded it right here.
Download current frame. And once I had the frame saved, I then went to Google Vo three, which we can do right
inside of Weave, go in here and
type in Val three. Image to video because
this one's text to video. We want image to video
node, dropped it in here. Now I'm going to need a prompt. All I'm going to do
is select the winner. I like this angle here, take the results, put
it in my first frame. You don't need a last frame.
You can just leave it empty. Now, let's plug in the
prompt into the prompt box. And right here, you
can just simply say, let's see an action
that makes sense here. Zoom in shot towards the
angel behind the wings. Let's write that in Zoom in shot towards the angel
behind the wings. So how many credits is this? This is 120 credits. So I'm not going to run
this year because, again, I have a membership
to Google Flow, and 120 credits is a
lot of images for me. So if you run this, you're going to be able to get a video that the camera zooms in
past those two wings, and then it closes up on the angel that's
behind it right here. That's how our prompt works. Zoom in shot towards the
angel behind the wings. So just use common sense plain language,
direct the camera. If you want it to zoom
out, camera zooms out to reveal Angel's wide angle shot, for example, because
then it zooms out, and it goes all the way
back to a wide angle shot. If you need help with prompting, I have a whole entire
course on how to do video prompting for
VO three, especially. So check that out if you
need help with prompting. But just use plain language and direct the camera as
you want it to move. So there you have
it, guys. This is the workflow for the
multi angle node. You can get a link
to this template in the resources on this class. You'll be able to copy
exactly what I have here. And then this workflow will
live in your dashboard. And if you mess
with it, it won't change anything that I
have here on my side.
 Diego G., Generative AI Educator