Transcripts
1. Class Introduction: Are your holiday
photos falling flat, leaving your products overlooked during the most profitable
season of the year, you've spent countless hours preparing for the
Christmas rush. But your photos
don't do justice to your amazing products or worse, they don't stand
out in the sea of festive promotions.
I totally get it. As a small business owner,
creative, professional, or entrepreneur,
the holiday season is a crucial time
to boost sales. But without festive eye catching and professional
looking photos, it's easy to get
lost in the crowd. This class is
designed to help you stand out by teaching you how to create stunning holiday themed photos using simple and
accessible techniques. No expensive gear or
expert skills required. You'll gain practical tips to showcase your products
in a way that grabs attention and helps elevate your brand during the
busiest time of the year. Hi, I'm Rose, a food and
product photographer who has helped business
owners increase their holiday sales with eye catching photos that stop the scroll and
drive conversions. Over the years, I've
developed techniques to make food and product
photography both simple and effective
for businesses. And now I am excited to
share these tips with you. In this class, you'll
learn how to create beautiful festive food
and product photos that capture the holiday spirit and help you stand
out from the crowd. Whether you're working
with a professional camera or just your smartphone, I'll show you how to
style your products, use lighting to make
them pop and create a holiday vibe with
easy to find props. We'll cover everything from DIY setups in year,
festive prop styling, basic lighting techniques,
composition and angles, and quick editing tips to give your photos that polished
holiday ready look. By the end of this class, you'll not only have the skills, but also a stunning
Christmas themed photo you can use in your
business right away. You'll put everything
you've learned into practice with a hands on class project
designed to help you create visuals that will
boost your holiday sales. So if you're ready to take
your holiday marketing to the next level with scroll
stopping festive photos, keep watching, and I'll
see you in the next video.
2. Why Is Festive Photography So Important?: Hi, and welcome to class. I'm really excited you're here. Let's start by addressing something you might
be feeling right now. Maybe you're a small
business owner or creative professional, and you're wondering how to take your food and product photos up a notch this holiday season. But you're not sure how to create professional
looking photos that capture the festive spirit and get people excited
about your products. I totally get it because I
used to feel the same way. When clients ask me to photograph their products
for the holidays, I would overthink everything, go crazy and
complicate my setups. For example, here's a photo from an old holiday shoot when
I thought that adding all the Christmas
decorations and adding all my clients products in the frame would make
the shot festive. It's not bad, but it needs
a lot of improvement. Now, look at this one from
my latest holiday shoot, where I used just
a few props and gave each element
space in the frame. I learned the hard way that with just a few well chosen props
and the right techniques, you can create festive, professional looking
food and product photos. But enough about me,
let's focus on you. The holiday season is a huge opportunity
for your business. It's when people are shopping, looking for inspiration and
making buying decisions. Your visuals need to stand out, and festive eye catching
photos are the way to do that. If you don't have fancy gear
or a professional setup, you might think these kinds
of images are out of reach. That's where this
class comes in. Throughout this class,
I'm going to show you that you don't need
expensive equipment or a big budget to
create photos that sell with just a
few simple props, basic lighting, and some
easy to learn techniques. You can take photos that look professional and help
boost your sales and engagement during the busiest shopping season of the year. Don't worry. I won't be boring you with
technical photography jargon. I'll keep it simple
and hands on. I'll walk you through exactly
how I did it for a client whose goal was to
make her product look festive and appealing
for social media ads. To get your creative
juices flowing, I'll be styling three
different Christmas themes, a white and snowy Christmas, an elegant golden look, and the classic
festive red and green. These live demonstrations will give you hands on inspiration, and you'll see how
easy it is to pull off a stunning
holiday photo shoot. Now, still wondering
if you really need festive Christmas photos or
if you can do it yourself. First of all, yes, you can. And here's why
it's so important. When people are scrolling
through social media or browsing online stores
during the holidays, they are bombarded with
offers and visuals. A well styled festive image
can immediately capture their attention and trigger
an emotional connection. It brings that warm, cozy Christmas feeling to life, and that's what makes
them stop and click. This kind of photography is
not just about looking good. It's about driving action, whether that's
clicking on your post, visiting your website
or making a purchase. The best part, you can achieve these results without
overcomplicating things. This class will show
you how to get things done using the gear
you already have, even if that's just your
smartphone and a few easy to find props to create
stunning festive setups. With all that said, we'll talk about essential gear and setup for DIY festive shoots in the
next lesson. See you there.
3. Essential Gear & Setup for DIY Festive Shoots: In this lesson, we're going to tackle a concern I
hear all the time. I don't have a professional
photography gear, and I'm not sure how to
set up issue at home. Sound familiar. Don't worry. You're definitely
not the only one. My clients pay me to photograph their food and products,
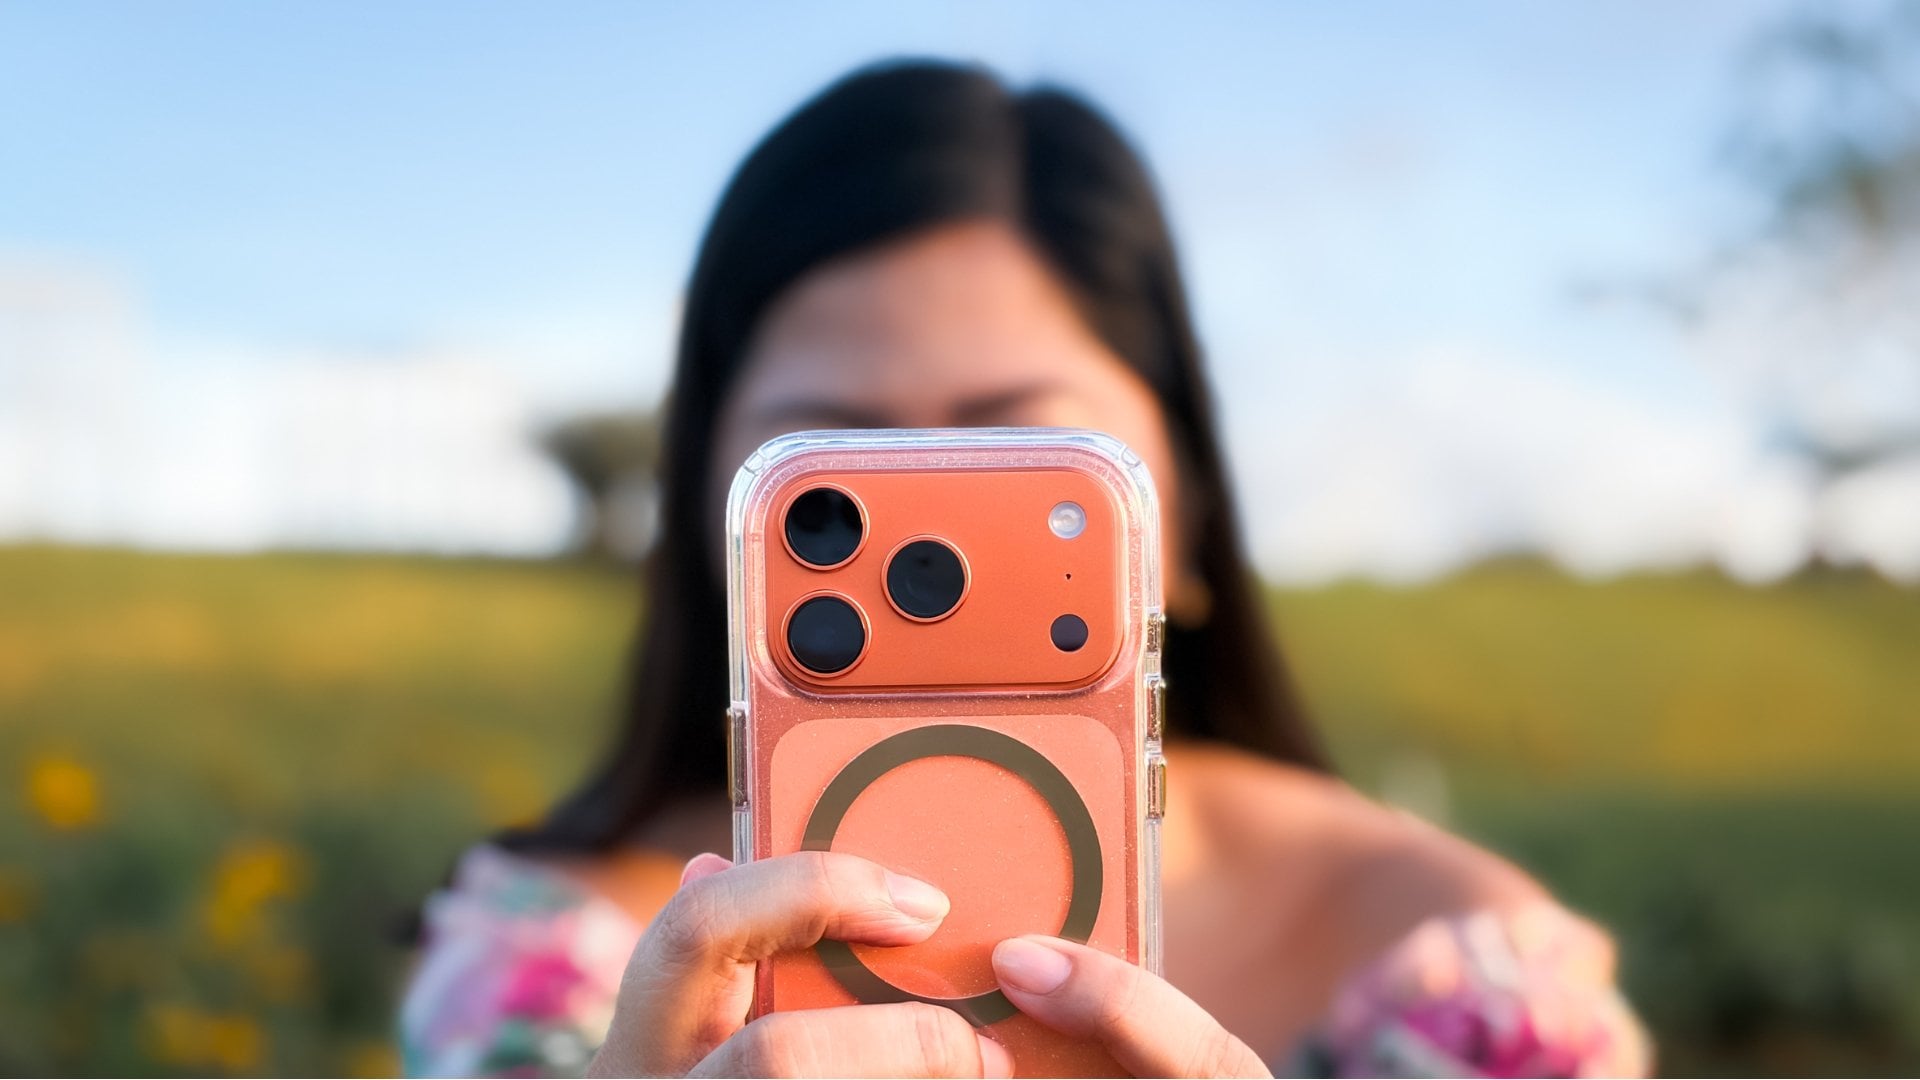
and guess what? I do most of it in my small, far from magazine level kitchen. So if I can do it, you can, too. Here's the thing. You don't need
fancy equipment or a professional studio to
take amazing festive photos. Whether you're using ADSLR
or just your smartphone, you can get beautiful
professional looking results with a gear you already have. Let's start with your gear. If you have ADSLR and
know how to use it, feel free to skip this
part of the lesson. But if you're new to ADSLR
or mirror less camera, I recommend adding my
beginner's guide to camera settings class
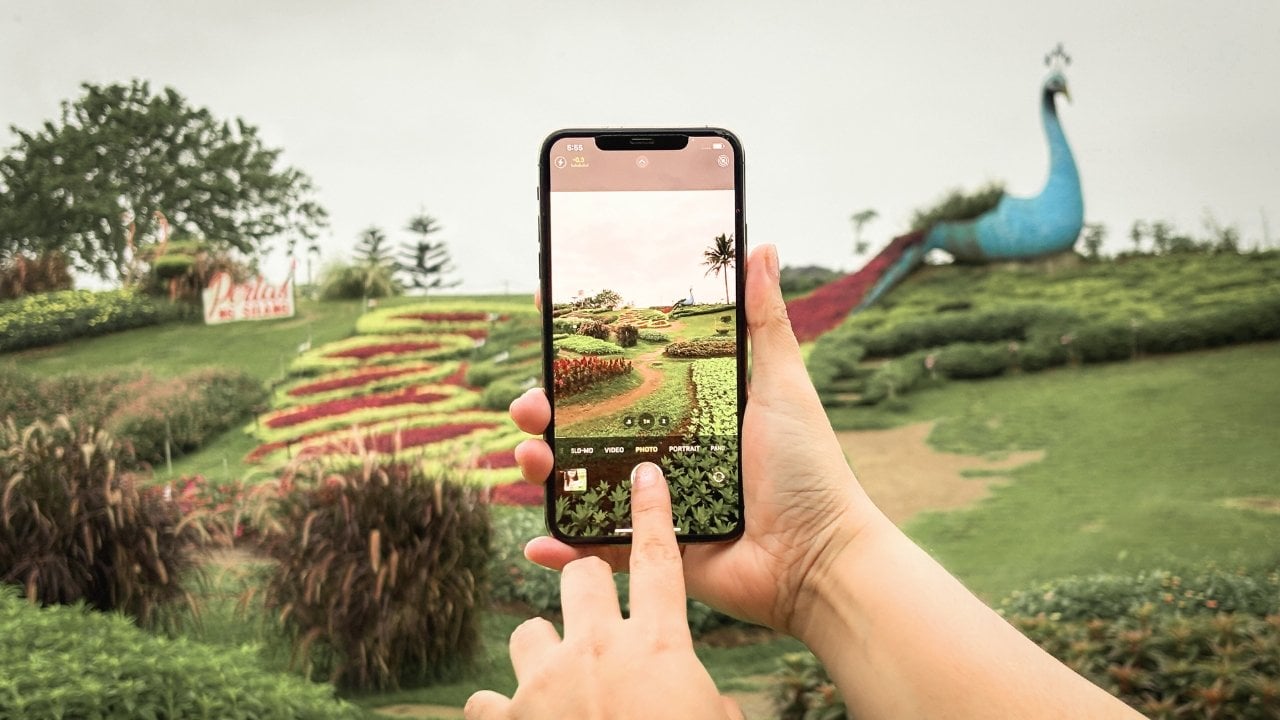
to your watch list. For most of you using
smartphones, which by the way, is totally enough for
high quality photos, this lesson will focus on
making the most of that. With today's phone technology, you can capture sharp,
high quality images. The key is knowing how to maximize whatever
device you have. I'll show you how to
adjust settings and make a few small tweaks to give your photos that
professional look. Let's start with two key
basics focus and exposure. For focus, tap on your subject to make sure
it's sharp and in focus. For exposure, after
you've tapped to focus, you can adjust the
exposure by swiping up or down to brighten
or darken the image. This helps capture all
the details without blowing out highlights
or losing shadows. I mentioned these first because no matter what
camera you're using, if your image is
overexposed, underexposed, or blurry, it's tough
to fix it in editing. You can't really recover a completely underexposed
or blurry photo. So it's super important
to get your focus and exposure right
before anything else. Now, here are a few tips to make sure your
images stay sharp. First, keep your camera
steady to avoid blur. Use a tripod or prop your camera against
something stable. If you're using a smartphone, a simple but often
overlooked step is to clean your camera lens. It sounds obvious, but it
makes a huge difference. My friends are
always asking me why my iPhone photos look
so sharp and clear. And they're always
surprised when I say, it's just because I
keep my lens clean. Since our phones go
everywhere with us, it's easy for the
lens to get smudged. Even the most high end
phone won't give you sharp photos if
the lens is dirty. Next up, tip number two, enable grid lines in your camera settings to
help with composition. These grid lines help you follow composition rules
and improve framing. If you're using an iPhone, here's how to enable them. Go to settings, tap camera, and under composition,
turn on the grid. While you're there, I recommend
turning on the Level two. This helps keep your photos
straight and balanced, especially if you have
straight lines in your scene. Crooked lines can instantly make a photo look
unprofessional, and level ensures everything
looks aligned and polished. Tip number three, turn live photos off for
crisp, still images. While live photos can be fun, they're not ideal when you're aiming for sharp, clean photos. Static images are easier to control and generally
come out sharper. Also, remember to keep
your phone steady and your hands level for balanced,
natural looking shots. Now that we've
covered those tips, let's talk about your DIY setup. You don't need a fancy studio to create beautiful
festive setups. DIY props and household
items work just fine. For example, as I
mentioned earlier, I shot all my holiday
photo shoot demos in our tiny kitchen right on top
of our small dining table. I used a cheap felt paper
as a surface background, an old curtain as the backdrop. And added our small
Christmas tree in a few decorations. And
here's the result. In another setup, I used the same table with
a paper backdrop, a scarf, and some fairy lights, and here's the final photo. Last example is this DIY setup
beside our bedroom window, where I used a chair and a
flat surface to set up shots. And here's the result. The key to DIY
setups is to create a scene that tells a
story or follows a theme. It's not about randomly
placing items and hoping for the best.
Be intentional. Believe in yourself, your style, and let your creativity shine. I know you're probably
wondering about lighting. Sure, I can use old
curtains and decorations, but do I need
expensive lighting to make everything look
professional? Good news. You don't. You can start
with the most accessible, most affordable light
source there is the sun. We'll dive into lighting
in the next lesson, so I'll see you there.
4. Lighting Techniques for Festive Warmth & Vibrancy: Now, let's dive into one of the most important
elements of your shoot. Lighting. Good lighting can
make or break your photos, especially when you're
aiming for that warm, cozy holiday vibe. The goal is to illuminate
your subject in a way that gives it
depth and dimension, not flat or poorly
lit. And don't worry. You don't need fancy lighting
here to achieve this. I'll show you some budget friendly options
and tricks to get beautiful festive lighting using natural light or
household lamps. Let's start with the easiest
option, natural light. Making the most of the
natural light you already have can give your photos
a vibrant festive feel, whether it's the soft glow of morning or the golden
light just before sunset. Natural light brings out the best tones in
holiday themed shots. These photos were taken using only natural light and
a simple DIY setup. By the way, we live
in a tiny apartment, so this is the only
place in the house where I can get decent
natural lighting. But it's sufficient,
and I love it. If you have a house
full of windows with natural light, then
you're very lucky. Experiment and have fun with it. The key is positioning
your subject to get that cozy festive warmth. If you want a brighter scene, you need a larger light
source like a big window. To tone it down, you can
use a light blocker like a blackout curtain to control the amount of light
hitting your setup. If the light is too harsh, creating strong shadows,
just use a diffuser. Something as simple
as a shear curtain or a light blanket can work
wonders to soften it. But what if you're shooting indoors or after
the sun has set? No problem. You don't need professional studio lights to make your photos look great. If natural light
isn't available, you can use a simple desk
lamp to light your setup. For example, in my kitchen, I used a desk lamp and a reflector to create
these festive shot. Next, let's talk about
shadows and highlights. When done right, they add depth and warmth to your images. A great way to play
with shadows and highlights is by
using side lighting. This means placing
the light source to the side of your subject, which creates shadows
and highlights that bring out the shape,
texture, and details. It gives your photos
that three D effect. Now, if you're looking to add a little sparkle to your
images, try back lighting. This is where your
subject is between the light source
and your camera. It gives a dreamy
glowing effect. With a hallo or am light around your subject that helps it
stand out from the background. This trick can really
make your photos pop with that magical holiday
glow, a top tip. Don't be afraid to
move things around. You can adjust
your light source, subject or camera until you find the best
lighting for your scene. The key is to practice
and experiment. Trust your instincts and
let your creativity shine. One last lighting pro
tip, use reflectors. No need for fancy gear here. Something as simple
as white paper or a foam board works perfectly. Reflectors bounce the light
back onto your subject, softening shadows and
creating a warm even glow. If you're using
back lighting and the front of your
subject is too dark, a reflector in front will
balance out the exposure, and that is it for lighting. Remember, your goal is to light your subject well and
avoid making it look flat. Use natural light and everyday household
items to create that festive warmth
in your photos. In the next lesson, we'll
talk about prop styling. We'll explore how to
create festive setups and backgrounds to bring
your holiday photos to life. See you there.
5. Prop Styling for Christmas: Festive Backgrounds & Themes: In this lesson, we're diving
into something crucial for creating eye catching holiday
photos. Prop styling. One of the most common
challenges I hear is, I don't know how
to make my photos look festive and aligned
with a Christmas theme. It can be tricky to capture the holiday spirit without
overwhelming your shot, like I did here, but don't
worry, I've got you covered. Let's start with color schemes. When you think of Christmas, what colors come to mind? Red, green, and gold are the classic holiday hues that instantly bring
that festive vibe. But it's not just about throwing these colors
into your shot. You need to be intentional. My top tip, choose a theme. This helps get your creativity flowing and gives you a
solid starting point. For my class project, I experimented with three
different holiday themes, a white and snowy Christmas, an elegant golden look, and the classic
festive red and green. Once you have your themes, you can start creating
a mood board. If you're a Pintras fan, simply create a board. Name it and start saving photo ideas that match
your theme and vision. For example, these
photos served as inspiration for my holiday
photo shoot in the white, gold, and red and green themes. The key is selecting a color
scheme that not only screams Christmas but also complements the food or product
you're photographing. Whether you're using bold
reds or subtle metallics, focus on creating a balanced, cohesive look that draws
attention to your subject. Now let's talk about props. You don't need a
massive budget or a huge collection of items
to make your photos festive. Simple props like fairy
lights, garlands, ornaments, and even wrapping paper can work wonders in evoking
that holiday mood. The goal is to
elevate your product or food, not distract from it. Look back at your mood board and see which props
from those images you already have or can easily
get from a nearby store. But before you go shopping, I recommend creating a
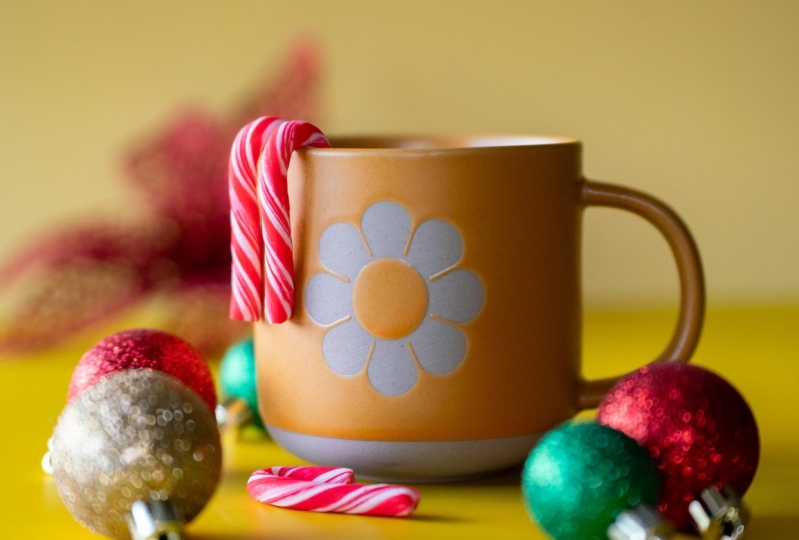
layout for your scene. For example, in this
photo of a mug, I created a rough draft on how I will style my scene,
including the props. This gave me a clear
idea of what I needed, preventing me from buying
unnecessary items. A couple of prop tips. First, choose props that match
the size of your subject. If they're too large, they'll
overpower the subject. If they're too small,
they'll seem insignificant. Next, start with a few props and use what you already have. One mistake I made
as a beginner was overloading my scene
with tons of props, thinking, the more the merrier. Unfortunately, that
doesn't apply here. Intentionality is the key to success when it comes
to prop styling. Finally, we need to think
about theme cohesion. We want to create a
festive atmosphere without overcrowding the shot. The goal is to strike a balance using just
enough elements to set the holiday mood while keeping the focus on
your product or dish. It's about creating
a visual flow, guiding the viewers' eyes
straight to what matters most. I know that sounds
easier said than done. So in the next lesson, we'll add some extra tools
to your styling toolkit. Composition and angles. This will help your photos stand out even more. See you there.
6. Composition & Angles: Make Your Photos Stand Out: In this lesson, we're
tackling one of the most important aspects of photography composition
and angles. I know many of you
might be thinking. I don't know how to compose my shots to make them
look professional. It's a common frustration, and I struggled with
this for a long time, too, creating plenty of cringy photos that I can
barely look at today. The good news is, once you understand a few key principles, you'll see a huge
improvement in your photos. And with practice, mastering composition will
become second nature. Now, let's start by
defining composition. Composition is the arrangement of the elements in your photo. This is the foundation
of any grade shot, and I'm going to
introduce you to some simple yet powerful
composition rules that will instantly elevate your food and
product photography. First stop is the
rule of thirds. This classic technique
helps you position the most important elements of your photo in a way that's
naturally pleasing to the eye. Remember the grid we
discussed in the gear lesson. That's your guide for
following the rule of thirds. To apply this rule, place your subject on either
the left or right third of the frame instead
of dead center. Each intersection
point on the grid can serve as a potential
point of interest. Align your main subject
and other elements along these points to create a balanced and visually
engaging image. Next is the leading lines. This technique directs
the viewer's eye toward the subject by using natural
lines within the scene, whether it's a countertop, a table, or even the
edges of your props. These subtle lines
help guide the viewers attention to what matters
most in your photo. Then we have the rule of odds, which states that an odd
number of subjects in an image is generally more
appealing than an even number. I find this rule particularly
helpful when deciding how many stacks of products or items to include in a shot. It's also useful for selecting the number of props
to add to your scene. Next, one of my
personal favorites is diagonal composition. This is when the
elements in the image are arranged along
a diagonal line. Diagonal lines add
depth, create tension, and give your photo a sense
of energy and movement. They tend to be more dynamic and impactful compared to
horizontal or vertical lines. Of course, there are many more composition rules out there, but I've shared my favorites
that are easy to follow. And remember, don't feel
restricted by the word rules. The beauty of photography is that once you master
these principles, you can start to break them
and follow your creativity. Now, let's move on to angles, which are equally important for creating professional
looking photos. The angle you shoot
from can completely transform how your food
or product is perceived. Top down shots are perfect
for flat lay compositions, where you want to capture
everything from above. Straight on angles work
best for tall subjects, showcasing their
height and structure. 45 degree angles are great for adding depth and
texture to your images, making the subject pop. Side angles can be
used to highlight intricate details and features
that may attract buyers. Finally, let's talk
about creating visually balanced scenes
for your holiday shoot. When styling for
the holiday season, it's tempting to go all out
with props and decorations. But the key is balance. Use the composition
rules I've shared to position props
like ornaments, fairy lights, or
garlands in a way that enhances your subject
without overwhelming it. This way, your photos will feel festive and polished,
not cluttered. Don't worry. We'll go over
more hands on examples in the live demonstrations
happening in the next lesson.
See you there.
7. Demo: White and Snowy Christmas: It's time for demos. Yay. This is my favorite part because I get to show you hands on how to take photos for both my personal
projects and my clients. When I was just starting out, I loved seeing the behind
the scenes of photo shoots. It not only gave
me tons of ideas, but I was also amazed by what
happens behind the camera, the creativity and
the troubleshooting that go into every shot. Notice how I said creativity
and troubleshooting, not fancy gear or
professional studio. Because for me, those
two are the key to leveling up your food
and product photos. Pay close attention because
the steps I follow in this demo are the same ones you'll use for your
class project. So step one, choose a subject. Pick a food item or product that represents the
holiday spirit. It could be a festive dessert, a holiday drink, or any product you'd like
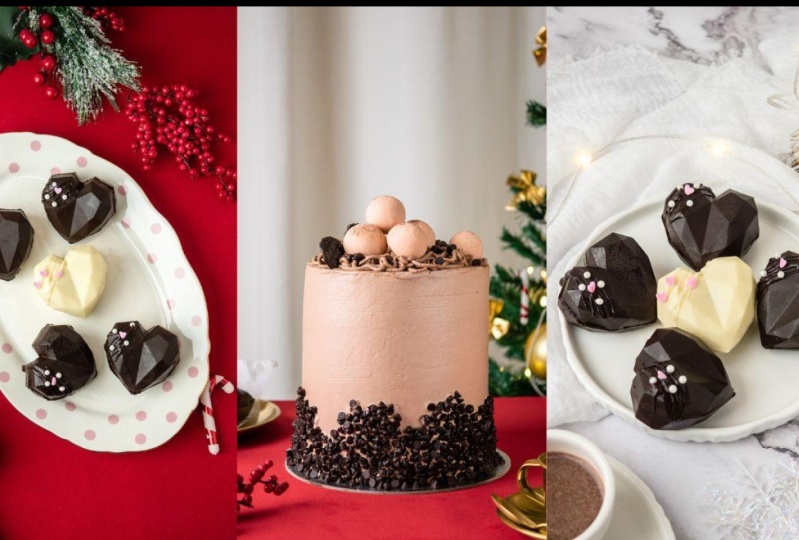
to promote this season. In my case, I'll be
photographing these heart shaped chocolate bumps in a
tall chocolate cake from one of my regular clients. By the way, they're called
chocolate bumps because they melt when you pour hot milk
or hot chocolate over them. Inside, you'll find marshmallows
and chocolate powder. A sweet little surprise. The goal for this shoot is to create festive
Christmas themed photos that my client can post on her social media during
the holiday season. Step number two, lighting. Apply the lighting techniques
we discussed earlier. Whether you're
using natural light or a simple lighting setup, focus on creating a warm, cozy and inviting atmosphere
that screams holiday joy. Since it's nighttime here, I'm using an
artificial LED light with a soft box to
diffuse the light. Now, this setup might look a bit more professional because it's the same one I used
for my talking head videos, but you can achieve similar
results with natural light. Just set up near a
window and aim for side lighting similar
to what you see here. Step number three,
set the scene. For the backdrop, I'm using a paper backdrop I got online. I love it because it's simple, versatile and works well for both food and
product photography, especially when I want
a minimalist vibe. For this surface,
I'm using the same, a double sided paper backdrop, but this time with
a different design. So I'm choosing the one that
complements my subject. I also have an old white scarf, which reminds me of snow, so it fits perfectly
with my winter theme. You can really improvise and get creative
with what you have. To style the scene,
I've gathered some props, plates,
teacups, snowflakes, which is super cheap
from a nearby store, and a fairy light string to
add that warm festive glow. I have some white
Christmas trees to stick with a snowy theme. Step number four,
styling the scene. When styling, make sure that the props don't
overpower the subject. For food photography,
I prefer to style the scene first before
adding the food. One of my favorite
techniques is layering. For this setup, the paper
backdrop is my first layer. The white scarf is the second layer and the
plate is the third layer. As you can see, I'm following
the diagonal composition, positioning everything
diagonally for a more dynamic feel. I'm also sprinkling in some snowflakes for
extra holiday cheer. This is why having a color
skin is so important. It helps keep the
scene cohesive. Notice how nothing
looks cluttered because everything follows the
white and snowy theme. Step five, take te shots. Before adding the food, I always take a te shot to
see how the seam looks. Here, I'm trying both
the standard lens and the telephoto
lens on my iPhone. I'm happy with the results, but we'll make some minor
adjustment for balance. The goal is to create a visually
appealing balance scene while following composition
rules to guide us. But don't be restricted
by the rules. Let your creativity shine. Next, add the subject. Now it's time to add the
heart shaped chocolate bombs. I'm following the rule of odds, placing five of them in the scene to keep it
visually interesting. Again, this is all
about trial and error. Arrange the food so it
looks balanced and natural. Since we're working
with chocolate and it's starting to melt, I'm cleaning up the plate
to keep things tidy. Next, I'm adding a cup of hot chocolate to
complete the scene. I want to maintain that
bright, snowy vibe, so I'm using a reflector to add extra glow and
soften the shadows. Once everything looks
right, I take the photos, making sure my subject is in
focus by tapping the screen. I am happy with the
results so far, but I realize I forgot to
include the fairy lights, so I'll add them in. So I'm following the diagonal composition for consistency. After adding the fairy lights, I'm adjusting the snowflakes to avoid overwhelming the scene. Again, it's all
about the balance. The setup looks amazing. The fairy lights really add
that cozy holiday feel, creating a warm and
inviting atmosphere. Time to take the final photos. The top view angle or flat lay
works well for this setup, since we're working
with flat products. It's the best way to
showcase the entire scene. It's good, but I notice
some white spots in the hot chocolate that
are a bit distracting. So I'll steer it to remove them. This is one of the challenges
of photographing food. You have to be
mindful of how food changes appearance over time. I think everything looks good, so let's take more photos. And I'm super happy
with the results. Next, we'll be photographing the tall chocolate cake using the same white
and snowy setup. But now we're shifting our
focus to a straight on angle. Since the cake is tall, this angle will help emphasize its height and make it
stand out beautifully. Now, instead of
spreading the snow, the white scarf and snowflakes
all over the scene, I'm focusing it in
the background. Since we're shooting
from the front, the background becomes
more prominent and I want the snow effect to
be a subtle backdrop rather than distracting. This is also a great
opportunity to highlight the tall Christmas
trees in the scene. Since our subject, the
cake is also tall, we have to ensure that trees in the background don't
compete for attention. The key here is balance
and placing the trees in a way that enhances the cake
without overpowering it. Already, it's looking
fun and festive. Once the scene feels balanced, it's time to introduce
our main subject, the tall chocolate cake. Look at that. With just a
few props and a small space, we've created a
festive magical setup that looks like
it's straight out of a holiday wonderland. This is the magic of food
and product photography. It's like you're a kid, bringing your
imagination to life. It brings me so much joy to
see the final result and to know that it makes my clients happy and boost their sales. Now I'm just
arranging everything, placing the Christmas trees
on both sides for balance. Adding fairy lights for
that cozy holiday feel, as always, it's a process
of trial and error. I'll check how the scene
looks on my camera to make sure everything is
coming together as planned. It's important to
remember that what you see in real life may look
different on camera, so adjustments are always
part of the process. Once I'm happy with the setup, it's time to start
taking photos. Just like earlier, I will
be using both my mirror less and iPhone to take photos. And here are the results. I love how everything
turned out. The tall chocolate cake
looks so fun and festive, perfectly fitting the holiday
theme we were going for. That's it for our white
and snowy Christmas. In the next lesson, we'll
set up another scene where we'll create an elegant
golden look. See you there.
8. Demo: An Elegant Golden Christmas: For this demo, I'll be
photographing the same products, heart shaped chocolate
bombs, any tall cake. Now let's dive
into the props for creating this elegant
golden scene. To set the mood, I have a Bige table cloth to serve as the background
for our scene. Bige is a great neutral that complements the other gold
props we'll be using. Next, I have a gold tray, some gold ornaments, A a cup of hot
chocolate transferred into this beautiful
gold cup and saucer. As you can see, it's not a lot, but the props follow the same color scheme to maintain a cohesive
and elegant look. You've already seen my
lighting setup earlier, so now we'll move on
to styling the scene. We'll start by laying out the tablecloth as our
surface background. By covering the dull white table with this timeless tablecloth, we're already transforming
the vibe of the setup. Next, let's place the tray
where we'll arrange our food, and I'll start
positioning the props. I'm simply
experimenting here and giving each prop some
space to breathe. I don't want the scene
to look too cluttered, so I'll take a test shot to
see how it's looking so far. Let me add a few more props
to balance things out. Now I can see a more visually
appealing composition. These props around the tray
will serve as heating lines, guiding the viewers' eyes
toward our main focal point, the heart shaped
chocolate bombs. I'll do one more test shot
before we bring in the food. I love how it's turning out, but I feel like it needs more ornaments to give
it a festive touch. However, I'm being
careful not to overcrowd the scene as that
could make it look chaotic. Now, this looks perfect for me. So let's place the
chocolate bums. I'm following the rule of odds with a number of
chocolate pumps, and once again, I'll
place the white one in the center to
draw the viewer's eye. It's looking fantastic, but
I'll add a reflector to soften the shadows on
the right side and give us that warm holiday glow. Here's how it looks now. I love how it turned out, except for the hot chocolate. It looks a bit off with those white specks on the surface. Just like earlier, I'll give it a quick steer to smooth it out. While I'm at it, I'll use this chance to adjust
the spoon's position, so the end of it serves as
a leading line as well. And here's the final result. It all came together
beautifully. Now, let's move on
to our next subject, the tall chocolate cake. Just like earlier, we'll
be shooting straight on, so I'll need a backdrop. This time, I'm using an
off white curtain to match the tablecloth and
keep the scene cohesive. It's okay, but it looks
a little too plain, so I'm thinking of adding
a tiny Christmas tree to bring some life and
festivity to the setup. Already has golden
ornaments which fit perfectly with
our golden theme. So I'm just removing the
white snowflakes on the tree, as they don't quite
match the look we're going for and might
distract from the scene. Here's the lighting setup again. And now we'll start
adding the other props. I've got some elegant glassware, the gold tray from earlier, and some gold utensils. It's a very simple setup following the diagonal
composition and using leading lines to guide the viewers' eyes
throughout the scene. Next, let's include
the cake in the scene. I'm really loving how the
vibe is coming together. Now let's not forget
the reflector to soften those shadows
and add a bit of warm. It's looking good,
but I feel like the composition
and prop placement could still be improved. So I'll try adding more props, including the chocolate
bombs from earlier to see if it makes the
scene feel more festive. In case you're
wondering how I know where to place my
prop so quickly, I have to give credit to the composition rules I've
learned and practiced. After taking a lot of cringy
photos early in my career, I became obsessed
with improving. Over time, the more I
applied these principles, the more natural
it became for me to arrange everything
in a balanced way. The worry if you feel
overwhelmed when starting out, the key is to add
one prop at a time, take a test shot, and
then see where you can adjust to achieve
that visual balance. So I experimented with different arrangements
and here's the result. As you can see, you
don't need a ton of props to make your photos
look festive and stand out. Sometimes a few well
chosen props and thoughtful styling
are all you need to create that
elegant festive look, and that's it for our
elegant golden sera. In the next demo, we'll create a classic festive
red and green scene. See you there. Oh
9. Demo: The Classic Festive Red and Green: For our next setup, we're going for a classic
red and green festive theme. It's similar to the
previous setup, but I'm swapping out the
surface background with a red felt paper to really bring that festive
red into the scene. Again, nothing fancy,
just ordinary felt paper. I also added candy canes
to the Christmas tree to bring in more red since all my other
decorations are gold. Then I added some
red holyberries to match the red
and green theme, followed by a few
Christmas balls. Finally, the star of
the show Our cake. I didn't feel the need
to take Tahot since the arrangement is almost
identical to the earlier setup. I just switched out a few props. Hmm. I feel like
something is missing, so let's add some of the
props from the earlier scene. And let's not forget
the fairy lights. And here's the result. I love it, but I
want to try swapping out the curtain for a green one to see if it looks even better. With a green curtain,
it looked a bit dark, so I moved the fairy lights
closer to the subject. It worked, but for me, the original setup with off white curtain and fairy lights in the background had a more festive inviting
and bright vibe. Now, let's move on to photographing the heart
shaped chocolate pumps. For this setup, I am using
the same red felt paper, red holyberries, candy canes, and more red and
green ornaments. I also switch to a cute
platter with pink polka dots. As I arrange everything, I'm sticking to the
diagonal composition, just like before, making sure everything looks
balanced and natural. I'll take a quick test shot before we add the
food to the scene. It looks perfect to me, so now it's time to add
the reflector and take our final shots. And
here's the result. Everything came
together beautifully, and that wraps up our
classic red and green setup. Amazing, right? But here's
something to think about. Why do we often
limit ourselves to just red and green
or feel like we need to stick to
a specific style when decorating for Christmas? As you've seen
throughout this demo, playing with different
color schemes and themes can make
a huge difference. We've now created a simple yet inviting white
Christmas theme, an elegant golden Christmas, and a classic red and
green one. And guess what? We didn't have to
splurge on props. All of the props I use
cost less than $50, I think, because I reuse
decorations I already had. The real magic came from
creativity, troubleshooting, and using our photography skills to enhance the food product, tell different holiday stories, and bring out that festive vibe. I hope that was super
fun for you to watch, but trust me, it's even more
fun to try it out yourself. That's why we have a class
project before we wrap up. But before we get
to that, I'll be sharing some easy
editing tips to really level up your holiday photos and give them that
professional polish. See you in the next lesson.
10. Editing for Festive Flair: Easy Holiday Touch-Ups: Now that we've got some
beautifully composed shots with festive props
and great lighting, it's time to elevate these photos with
some editing magic. Some of you might be thinking. My photos don't look polished
or festive after shooting. That's where editing comes in. It's the final step
to make your photos pop and capture that
holiday spirit. In this lesson, I'll show you quick and simple editing
tips to add warmth, vibrancy and polish
to your images without spending hours
in complicated software. These techniques are beginner friendly and they'll
require expensive tools. You'll be amazed at how just a few adjustments
can transform your photos from good to
professional eye catching shots. First, we'll be
using the built in editing features on your phone. Whether you have an
iPhone or an Android, our goal is to polish the photos and make the colors stand out while still looking natural. I'll guide you through some
basic color correction which will instantly make your
photos look more polished, we'll adjust exposure,
white balance and vibrancy to make the colors pop while still keeping
them true to life. We'll also find tune key
settings like brightness, contrast and saturation to bring up the cozy holiday tones. These simple tweaks
will help you highlight those warm and vibrant colors without making your
photos look artificial. First is the exposure. Slightly increasing the exposure
brightens up the image, making it look more vivid. This can help the
product stand out, especially if the original
photo is a bit dark. So you can play around with
ten to 20 in your slider. For brilliance, I tend to
play around with ten to 15 because this adjusts the
image mid tones to make them more vibrant without
overexposing the highlights. It adds a natural
brightness that makes the product
look more appealing. So contrast, I'll play
around with 22 30. Increasing contrast
makes the dark areas darker and the light
areas lighter. This setting can help
your product stand out by giving it more
depth and definition. Lowering brightness
slightly after adjusting contrast can prevent the image
from looking washed out. It balances the contrast
to keep the details clear. Raising the black point deepens the darkest parts of the image. This setting helps bring
out shadows and add dimension to the
product, making it pop. Increasing saturation
makes colors more vivid. This is great for
product photos as it enhances the colors without
making them look unrealistic. But it just play
around with ten to 15. Vibrance increases
the intensity of the more muted colors without oversaturating the
brighter areas. It's useful for adding
life to the image while keeping skin tones or delicate
hues looking natural. So for me, I'll play around with ten to 20 and see which
one looks better. For the warmth, you adjust it
depending on your lighting. Plus five for warm and
negative five for cool. Adjusting the warmth can make your product photos
feel more inviting. If your images feels too cold, adding a touch of warmth can
make it look more appealing. If the lighting was too warm, reducing it can
balance the colors. Next, I'm increasing
the sharpness to enhance the details. So I'm playing around
with ten to 15, making the product look
more defined and crisp. This is important to
make textures stand out. Last but not the
least is the clarity. This setting adds clarity
and detail to the image, making the edges and fine
textures more noticeable. And here's a look at our original versus
the edited photo. You can also crop your images depending on where you
plan to upload them. It's a subtle edit, but it really helped elevate
our food product photo, giving it a more polished
and professional feel while maintaining
that natural look. Remember, this isn't
a strict rule. You can play around
with sliders and adjust settings based on your
photo for the best results. Next, we're going to
explore Lightroom mobile, a free yet powerful
third party app that's both accessible
and beginner friendly. While the basic
editing steps will be similar to what we've done with the phones built in editor, Lightroom offers a few
additional features that can really take your
editing to the next level. Let me walk you through it. So this is how it looks like
inside Lightroom mobile. So the very first step
is import a photo. And once you have
your photo open, you have all these options. So we'll start with exposure
under the light settings. So for the exposure, I'm going to add 50
to make it really bright because my original photo is not too bright for me. For the contrast,
I'm going to set it to negative 20 to
soften the look. The highlights, I'm going
to play around with ten to 30 to keep
details in bright areas. For the shadows, I'm going to add around 20 to
lift dark areas. For the white, since we want
a white and snowy vibe, I'm going to add plus 30 to really brighten
the white tones. Then for the blacks, I'm
just going to set it to negative ten to add some depth. Next, let's go to
the color settings. For the temperature, I'm going
to set it to negative ten. So my goal here is to get cooler tones to give
a wintery feel. For the tin, I'm going
to add just a bit, so plus five to add
a slight magenta. For the vibrance,
I'm going to set it two plus 20 to boost color
without over saturating. And then for the
saturation, this time, I'm going to set it
to negative ten. So that I can keep
the colors natural. Now, let's go to the color mix. This is actually the
feature that my built in photo editor doesn't
have, and Lightroom has. So this is my favorite
feature of Lightroom mobile, actually. So let me show you. So in here, you have
different colors and you can adjust the hue, saturation and luminance
of each color. So let's start with the red. So I'm going to set
the hue to zero, and then I'm going to desaturate it because we want to soften
the reds in this photo. So I'm going to set the
saturation to negative 20. And then the luminance,
maybe plus ten. For the orange, I'm going to
set the hue to negative ten. Saturation negative
30, luminance plus 20, so this one is just
force of habit for me because I do this a lot to make skin tones look bright. But of course, you
can play around with a slider when you do
it for your photos. For yellow, I'm going to
set the hue to negative 20. So my goal here is to
get muted warm tones. So I'm setting the
saturation to negative 40 and then luminans plus 20. For the blue, I'm going
to set the hue plus ten, that twenty's too much.
So just plus ten. And then saturation I'm
going to set it to plus 30. And then I'm going to set
the luminans to plus 20 as well because I want to
enhance that sky colors. Now let's move on to
the effects settings. So for the clarity, I want to add some details, so I'm going to do
or select plus ten. And then to get
that softer look, I'm going to set the
dehaze to negative five. To add a slight dark
frame around the photo, I'm going to set the vignette. So maybe ten or 20. I love it. So now let's
move on to detail settings. So to sharpen the details, I'm going to add plus
30 for sharpening. And then to smoothen the image, I'm going to add plus 20. And here's our before and after. I love how it turned out. The edited photo truly captures that winter vibe
we were going for. And the best part, we achieved this using just a
free third party app. Imagine the possibilities
you can create with it. Can also crop your edited
photo however you need, depending on where
you'll be using it. For example, crop it one
by one for Instagram post, four by five for Facebook or nine by 16 for
stories and reels. Now, let's move on and edit one of our classic
red and green shots. So I'm done importing the
red and green photos. So let me just choose one. And again, let's start
with the light settings. So for exposure, again, I want a brighter image. So I'm going to
set it to plus 40, and I want to add
a bit of punch, so I'm going to add
contrast, just plus ten. And of course, we want to
reduce the bright spots, so I'm setting the
highlights to negative 30, but I want to lift shadow area, so plus 22 25 for the shadows. Again, I want to
brighten the white tone, so plus 15 for the whites. And then for the blacks, I'm going to set it to
negative 15 to add contrast. Next for the color settings, I'm going to set the temperature two plus five,
just a bit warmer. And then for the ten, I'm
going to add plus ten, or I'm going to set it to plus ten for slight magenta touch. The vibrant, I'm
going to set two plus 30 so that we can make the
reds and greens stand out. And to enhance the colors, I'm going to set the
saturation two maybe plus 15. Now let's move on to
my favorite color mix or the HSL panel. So let's start with red. For the hue, I'm going to
set it to negative ten. Saturation. You can play
around with plus ten to 30, and then the luminas again, five to 15 maybe. So your goal here is to
get rich festive reds. Now for the green, I'm going
to play around with a hue. Plus ten, I think is okay. Saturation playing
around with ten to 40, and then the
luminPlaying around with ten to 20 to make the
greens more vibrant. For the yellow, I'm
going to set the hue to Negative 20. Our goal here
is to enhance warm colors, so I'm setting the
saturation two, maybe 20 as well, plus 20, and then the
luminans maybe plus 15. Next for the color blue, I'm going to set
the hue to zero. Saturation negative,
so maybe negative ten. So we want to reduce
any strong blue. So luminan is just plus five. And we're done with
the color mix, so let's move on to
the effect settings. So the clarity, I'll set it plus ten just a bit
to add some detail. And then the dehaze plus five. For rich colors, the vignette, I'm going to set it to
negative 20 so that we can get that dark
frame for a cozy feel. Finally, the detail
settings for sharpening, we want sharper details, so we can play around
with 20 to 40. So maybe just 35. And then the noise reduction
to smoothen the image, I'm just going to
set it two plus 20. And here's hour
before and after. The change is subtle
yet remarkable, giving the photo that perfect
festive holiday vibe. Just like with other images, you can crop it based on
where you'll be posting. Personally, I like to use
the four by five crop, especially since these photos
are going up on Facebook. And that's a wrap on editing. As you can see, from the before and after
transformations, even small adjustments can make a huge difference
in your photos. Now, I know this process might seem like a lot to remember. So to make things easier, I've created a preset package that includes all the
edits I demonstrated. My Christmas preset pack is available here on Skill
Share for just $9. It's perfect for streamlining your editing process
with just a few clicks. So here's how to use it. Download the preset
from the provided link. Open Lightroom mobile and import the DNG file like
any regular photo. Once it's imported, tap the three dots in the
top right corner, select Create preset, give
it a name, and save it. Now you can easily
apply the preset to any photo with just one
tap in the presets pannel. You can also make
adjustments after you apply the preset to match the
look you are going for. So you can adjust the light, the color, et cetera. Amazing, right? Just
a quick tip, though. If you're using the
snowy white preset, choose a photo with some white
or winter like elements. For the elegant gold preset, use it for photos that include golden elements like
lights or holiday decor. And for festive photos with
red and green elements, like Christmas
trees or ornaments, the festive red and green preset is perfect, and that's it. You're ready to enhance your
holiday photos effortlessly. Of course, if you're like
me and enjoy experimenting, feel free to rewatch this demo and play
around with the sliders. Find what works best
for your products and your scene and
make it your own. Congratulations. You now have all the tools to
give your photos a professional polished look with that extra bit
of festive flare. Your images will feel
warm, cozy, and vibrant, perfect for grabbing
attention on social media or
boosting holiday sales. Now it's your turn
to make it happen. In the next lesson,
we'll talk about your class project.
See you there.
11. Class Project: Create Your Own Festive Holiday Photo: We've covered a lot of
ground in this class, and now it's time
to put everything into action with
our class project. You might be feeling a
bit nervous thinking, I'm not confident I can apply these skills to my own
business, but don't worry. This project is your
chance to shine and prove to yourself that
you've got what it takes. For this project, you'll create your very own festive holiday themed photo using food or
a product of your choice. Think of this as a fun
opportunity to express your creativity while applying all the techniques
we've learned so far. So here's how it works. Step number one,
choose your subject. Start by selecting a food item or product that you
want to feature. This could be a beautifully
baked holiday treat, a festive drink, or
any product that represents your brand
during the holiday season. Step number two, light it up. Apply the lighting techniques
we discussed whether you're using natural light
or a simple lighting setup, focus on creating a warm, cozy, and inviting atmosphere
that screams holiday joy. Step number three,
set up your scene. Use the prop styling
techniques we discussed to create an inviting
and festive backdrop. Incorporate elements
like garlands, ornaments, and fairy lights. Remember to keep
your color scheme aligned with that
holiday spirit. Reds, greens, and golds
work beautifully. Step number four,
focus on composition. Use the composition
and angles we learned about whether
it's the rule of thirds, leading lines or
diagonal composition. Experiment with different
angles to showcase your subject in the
best way possible. Step number five, edit
for holiday vibes. Finally, use your editing
skills to polish the image, play with the colors,
adjust the contrast, and give the image
a festive flare. You want your photo to feel vibrant, cozy and professional. Once you've taken and
edited your photo, upload it in the class
project gallery. This is a great way
to get feedback, inspire others and learn
from your classmates. Don't forget to
leave encouraging comments and support
each other's work. Remember, this is a
learning process. Every photo you take will
teach you something new and sharing your progress is an important part of
growing your confidence. By the end of this project, you'll have a stunning
holiday themed photo you can use in your marketing
or personal projects. More importantly, you'll feel
confident in your ability to apply everything
you've learned to your own creative journey. I can't wait to see the
amazing photos you create.
12. Final Thoughts & Tips for Promoting Your Festive Photos : And that's a wrap
for this class. I hope you're feeling
confident and excited to start promoting your brand or
business this holiday season. If you have any questions
or need clarification, feel free to hop over to the discussion section.
I'm so excited for you. You've developed an
impressive skill set in festive food and
product photography. But before you go, I want to leave you with my
final tips on how to use your festive photos
to increase holiday sales. Let's dive into how
you can leverage those stunning images
for marketing. Tip number one, create
holiday marketing campaigns. Use your new festive photos to craft engaging
holiday campaigns. Whether you're running
limited time offers, spotlighting a
particular product or spreading holiday cheer, your photos should lead the way. Visual storytelling is powerful. So make sure your images reflect the message and the vibe you want to send
to your audience. Tip number two,
social media content. The holiday season is packed
with social media buzz. So make your post
stand out by using your festive photos for
eye catching stories, posts and even ads. Share behind the scenes shots or showcase your product in
a holiday themed setting. Pair your photos with
engaging captions to grab attention and
connect with your followers. Tip number three,
email marketing. Don't overlook email marketing. Include your festive photos in your newsletters and
promotional emails. A well placed image can
boost open rates and click throughs encouraging people
to explore your offerings. Tip number four,
enhance product pages. Update your website
or e Commerce listings with these
holiday photos. A consistent festive look
across your product pages will attract customers and make your offerings look
even more enticing. Use your photos to highlight the unique features
of your products. Tip number five,
promote consistently. Be sure to promote
your festive photos consistently across
all channels, whether it's social media, email, or your website. Consistency builds
recognition and anticipation, helping you create momentum
for your holiday sales. Remember, your
festive photos are more than just pretty pictures. They are tools to help
you drive holiday sales. So don't be shy about
sharing them wildly. Now is the time to capitalize on this seasonal opportunity. I hope you had fun and
found this class valuable. If you enjoy this class, I'd really love for
you to leave a review so others can see how it
might help them, too. I'm a bit of a cheese bull, so those sweet supportive
words mean the world to me. So don't hold back. If you feel like
you need a more in depth class on topics
like lighting, prop styling or composition,
I've got you covered. I have classes that go deeper into these areas for both food. And product photography. So make sure to check them
out on my teacher profile. Don't forget to hit that
follow button to stay updated on new classes,
announcements and giveaways. And one last thing, if you share your festive
photos on Instagram, please tag me and scale share. So I can show some love and support for your
brand or business. Thank you so much for sticking around and joining
me in this class. I can't wait to see the
incredible images you create and how they help you
shine this holiday season. Good luck and bye for now.
 Rose Nene, Photographer & Videographer