Transcripts
1. Introduction: Welcome to my Skillshare class where I will be teaching you how to create a fashion inspired illustration. By the end of this class, you'll be able to create a fashion inspired illustration showing a figure from head to toe, as well as showcasing the clothing, the accessories, and the unique style. I'm Leanne, I'm an illustrator and designer, and I especially love to draw people. I get my inspiration from street style, how people like to dress, how they like to show their unique personality through what they wear. By understanding my step by step process, I'd like to give you the tools and confidence to create your own illustrations in a way that is unique to you. Whether you're already an illustrator and you'd like to expand your portfolio, or maybe refine the way that you draw people, or whether you're someone who's just starting out with drawing figures. This class will give you the tools and confidence to create illustrations that reflect you as a person and then have a bit of a unique flavor. I'll be creating this illustration digitally using my iPad Pro on the Adobe Fresco app. However, you can use it on any other drawing app. Also, if you don't have a drawing tablet, you're also welcome to follow along with the lesson and use these principles whether it's on paper or canvas using paint. Before we get going, download the project resources, which is the mood board, the body proportions cheat sheets, the face proportions cheat sheets, as well as pets and design examples. Grab some pen and paper, or your iPad, or drawing tablet, and let's get going.
2. Class Overview: By the end of this class, you'll be able to draw your own figure from head to toe and style them in a way that expresses their individuality. I will take you through how I get inspiration and reference poses in the form of a moodboard. Using the body proportion template that is available in the project resources, you can draw with confidence knowing that you're getting the proportions right, and it gives you a little bit more freedom when it comes to trying out different poses. We will then look at how to create a digital illustration based on your rough sketch. An important part of creating a striking illustration is using pattern design, so we will play around with some really simple patterns before adding them into our illustration. As we go through the process, I'm going to invite you to share your progress in the form of mini-projects. With that being said, let's jump straight in with creating our first step, which is the moodboard.
3. Moodboard: Let's start by getting some inspiration in the form of creating a mood board. My go-to is, of course, Pinterest, but you can also gain inspiration from your surroundings by sitting at a coffee shop and watching people go by. The first thing we're going to do, is gather some images together that give us a feel for what we want our illustration to look like. Here are some nice keywords that you can have a look at to really help you see what you should include in your mood board. Here's the example of my mood board, and you're welcome to use this if you're not quite sure where to start. It's just a few ideas that will really get me going and enable me to start my illustration and know where I'm heading with it. The first mini-project to share with the class is your mood board. I'd love to see where you're drawing your inspiration from, so please do post it and share with us. Next up, we'll be looking at body proportions and get started on the under sketch for our illustration.
4. Body Proportions: We're going to start our sketch by looking at body proportions and beginning to draw our figure. There is a free cheat sheet that you can download under resources, which shows you the body proportions broken down into eight parts, and you'll see I've also filled in a figure so that you can have a reference visual. We will be starting with the head and the face. You'll see that I've also uploaded a resource which you can use to really guide you through the proportions of the face. It's also good to decide whether the face will be facing you directly or looking at a little bit to the side. Once you've drawn the shape of the head, you are basically dividing the head into four parts. There's a line vertically down the middle which guides the direction of the face. Then you get the horizontal line, which is halfway down the face, and that's where the eyes go. Halfway between the eyes and the chin is the nose and halfway between the nose and the chin is the mouth. I'm doing this under Sketch in Adobe Fresco, so I'm drawing on my iPad. However, you're more than welcome to do this stage on paper if you like and take a photo which you can then use as an underlayer on whatever drawing app you're using. Once you've drawn the face in, then you can start looking at the rest of the body and really just follow the proportions that I've given you on the cheat sheet to really help you out when it comes to using the correct ratio. Remember to also have a primary pose reference from your mood board. This will really help you get the pose looking natural. Next up, we'll be adding clothing and accessories to your figure.
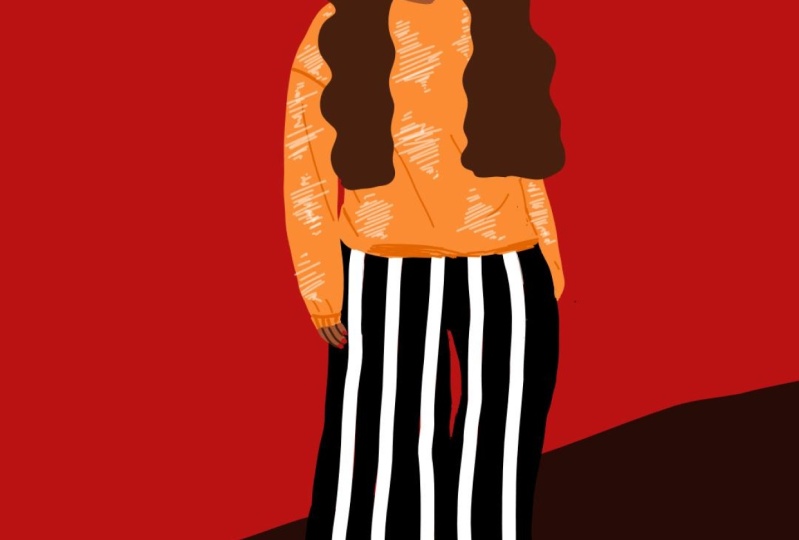
5. Clothing & Accessories: Now it's time to add clothing and accessories. I'm going to do this by creating a new layer on top of what I've already drawn and use a different color so that I can see what I'm doing over the figure. Have a look at your mood board and see what accessories and clothing you think would suit your figure. I'm going to start off with some sunglasses and I'm going to use the guiding line of the face showing where the eyes are to really place those sunglasses in the right position. You can see that I've used the vertical center line of the body to align the v-neck and I've used the natural waistline to play some highways to trousers on the figure. If in doubt, use simple silhouettes when it comes to the close because you really can add interests through texture and pattern. I'm drawing in a simple block hill which conforms to the natural shape of the foots. Once you have added in the lines of your outfit, please do share your progress. I'd love to see what your rough sketch is looking like. Now that all the paperwork is done, we'll be starting on our vector illustration.
6. Vector Illustration: You've done all the prep work, now, it's time to start your illustration. If you're using a digital drawing apps such as Adobe Fresco, I really recommend using your layers. My tip is to start each step on a new layer and start with a vector shapes. You'll add a vector layer and then you'll select a vector brush. Vector means that whatever you create is scalable and completely editable. If you don't like the color you've chosen, such as the background, you can easily swap it out to another color if it's vector. Let's get started on creating the first vector shapes which are going to be solid shapes filled with color to start defining the figure. I'm going to create this layer under the sketch layer so that I can actually use a sketch layer to guide me as I draw in the solid shapes of my figure's skin and then onto her clothing. Remember your vector shape has to completely touch around all edges so that it contains the shape before you can use the paint bucket tool to fill in the color. At this stage, you are just creating really basic solid shapes which form the foundation of your illustration. Don't worry if it's not perfect, you can always go back with the razor tool and even out any rough edges. If it works better for you, you can also create each different colored elements on a separate layer. However, remember then each will have to be its urn own contained shapes so that you can fill it in with solid color. Remember, you can play around with the opacity of each layer. If you're struggling to see through your under sketch to the solid shapes you creating below, you can always decrease the opacity so that you can see it. Now that you've completed the vector shapes, hide the layer that has the rough sketch on. You should now only be seeing the clean vector shapes and you can have a look if anything needs a touch up. If anything looks slightly off, you can fill it in or change the lines. Now I'm going to show the sketch layer again so that I can finish off on the face and fill in all those details. Remember, I'm still doing the clean vector shapes and I'm filling in the eyebrows, the eyes, and the lips. I'm going to finish off the vector part of my drawing by creating some defining lines. For example, on the face, it would be the outline of the noise. It would be the line between the lips. It would also be the ears and then any lines around the face that need defining such as the side of the face or the chin. You would then also define anywhere where this edge of clothing. Then also of course, if you can see the fingers or the outside of a limb, you might want to outline that. Next step, let's play around with some basic patterns.
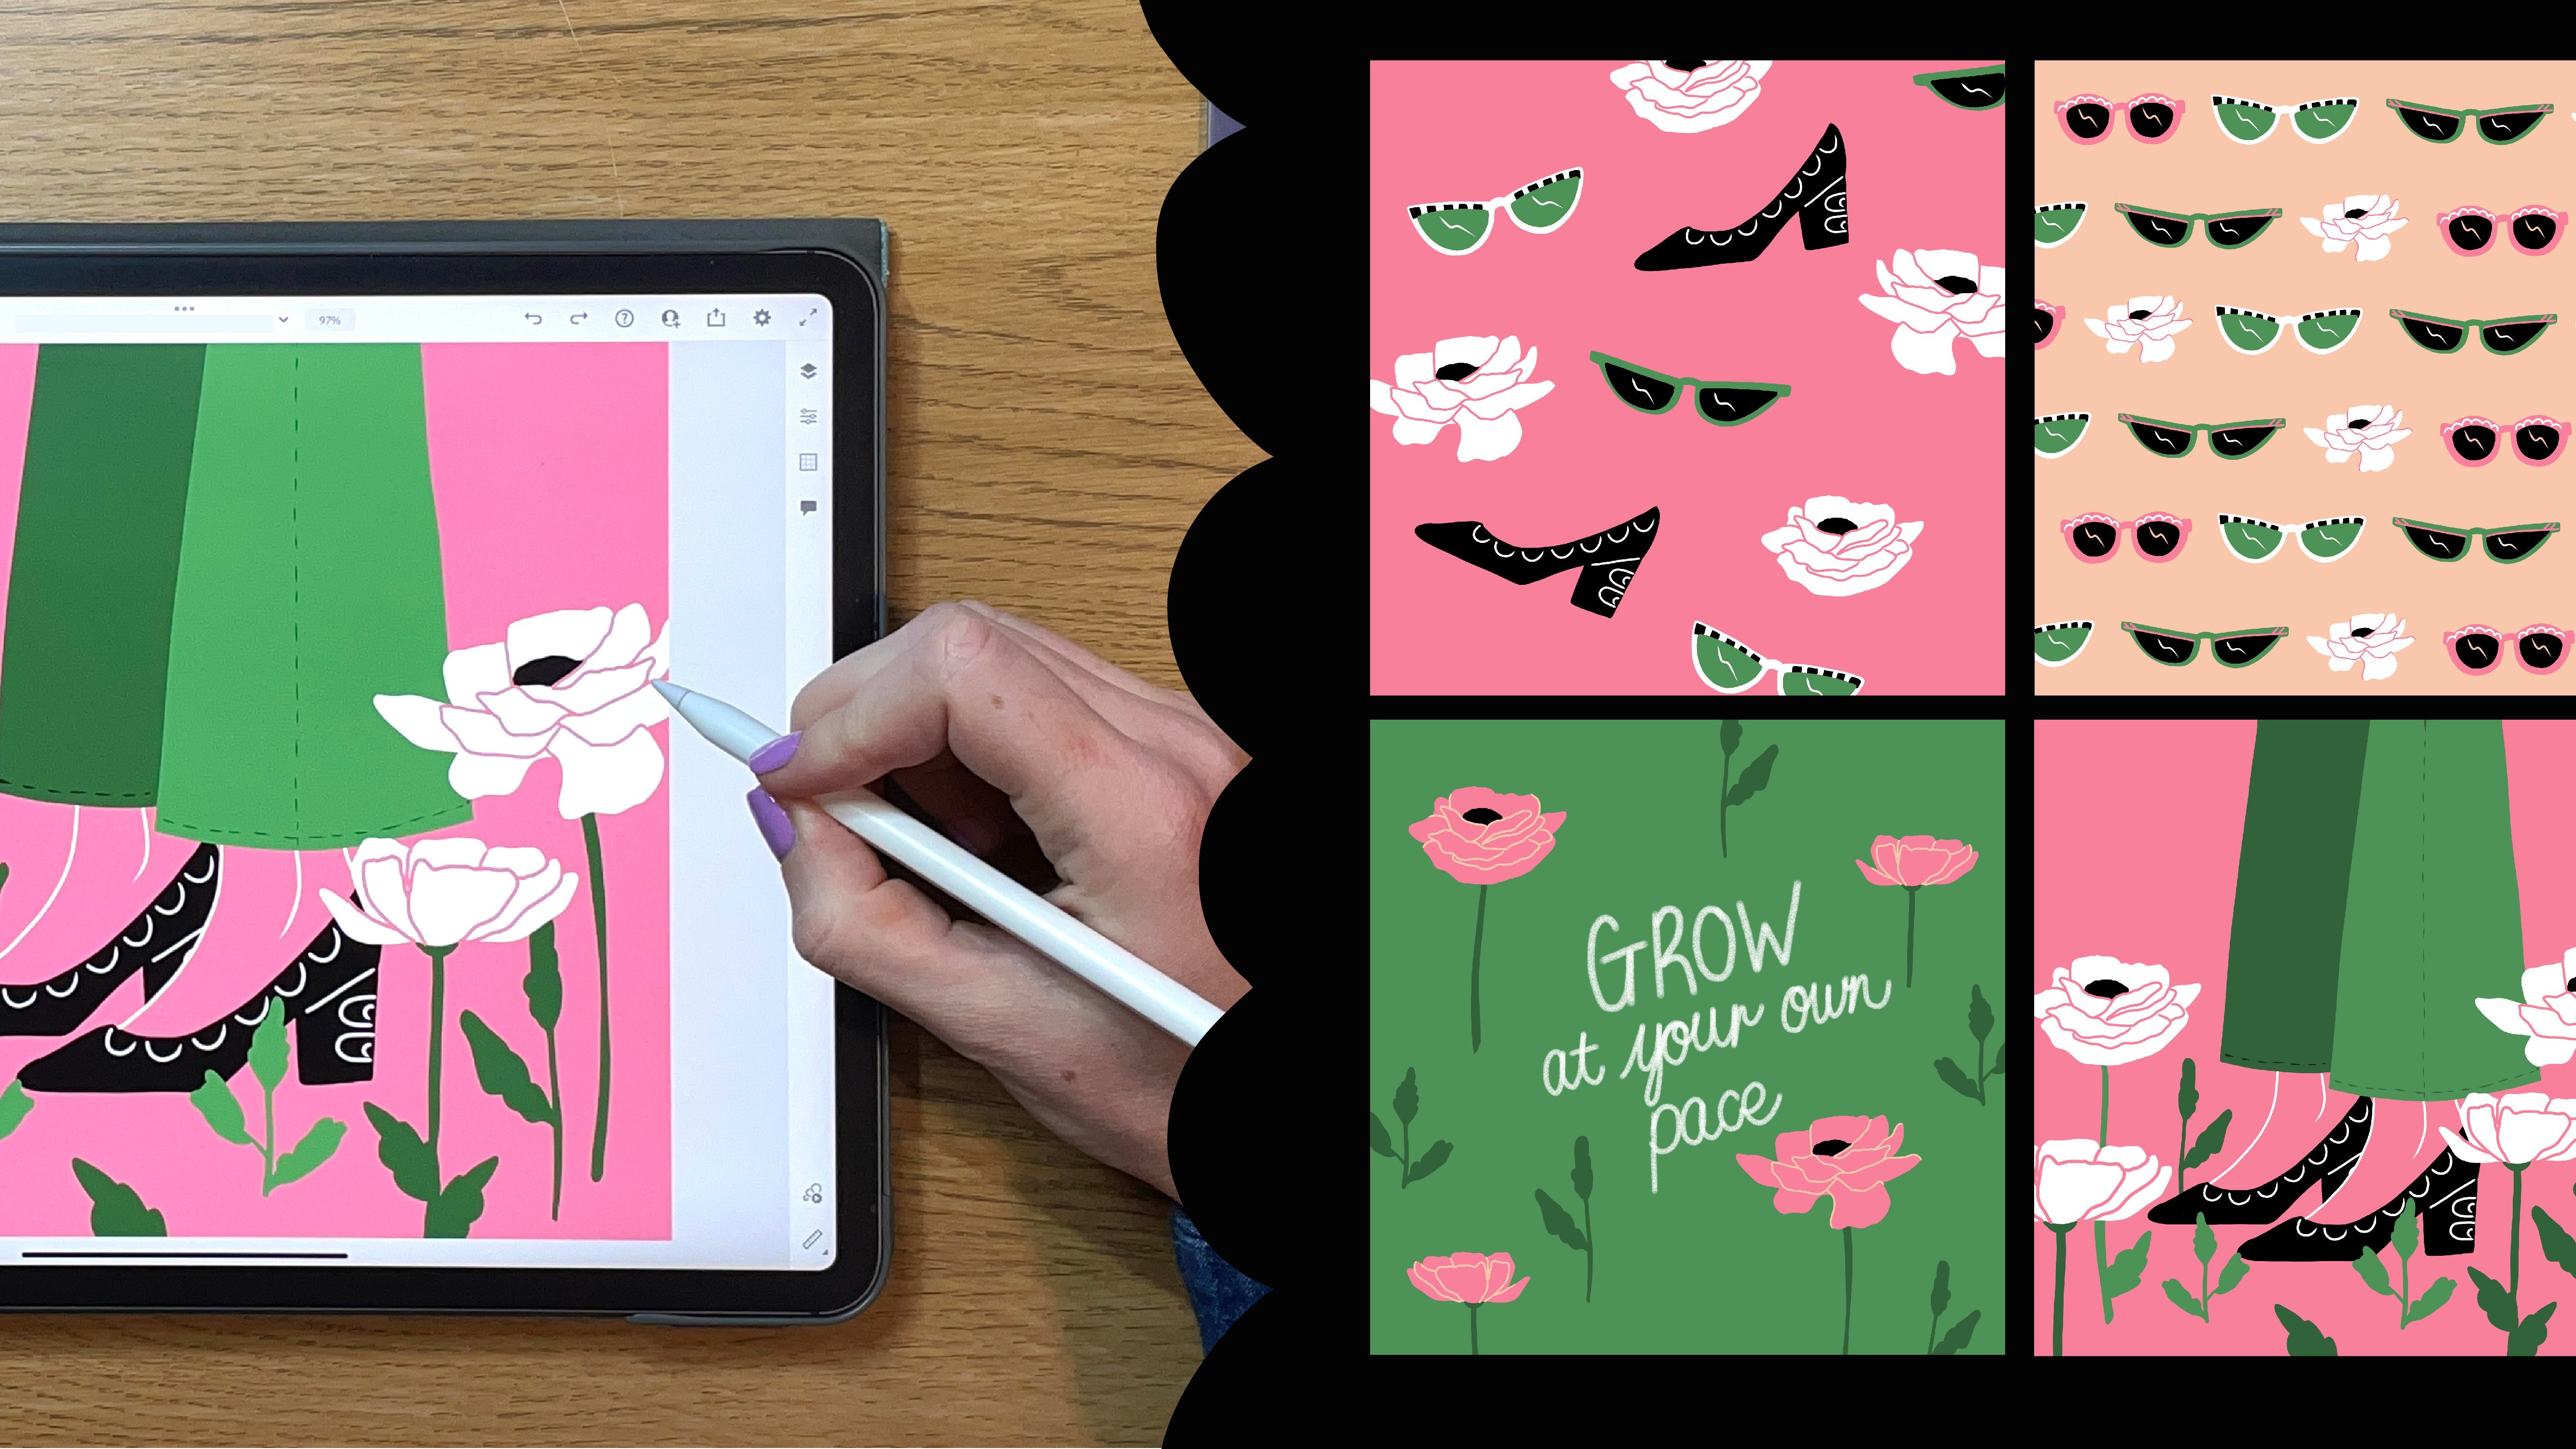
7. Pattern Play: I love to add some bold and simple patterns into any illustrations idea because they make them stand out more and look a lot more unique. Playing around with some bold pattern design can really contribute to you creating your signature style of illustration. I really would recommend trying some loose hand patterns and see what comes out, see what you like, and see what comes naturally to you. You're welcome to use my simple block templates and create four different pattern designs. These should be really loose, really simple. Just go with the flow and see what you like. Don't put too much pressure on yourself. Firstly, I want to recreate a pattern out of solid shapes. I used my vector tool to create the shapes and to take away the center of the flower. Then I decided to try some pixel brushes and this is where you can really have a bit of fun. Try out different textures, different paint brush strokes, and see what looks right to you. Please do share your pattern play with the class. I'd love to see what you've created. Now that you've played around with some patterns, let's add it into our illustration. Whether you're adding this into a jacket, or the trousers, or maybe your character's wearing a dress, this will really make your illustration stand out more. Next up we'll be adding some textured strokes with the pixel brush to really make your illustration come alive.
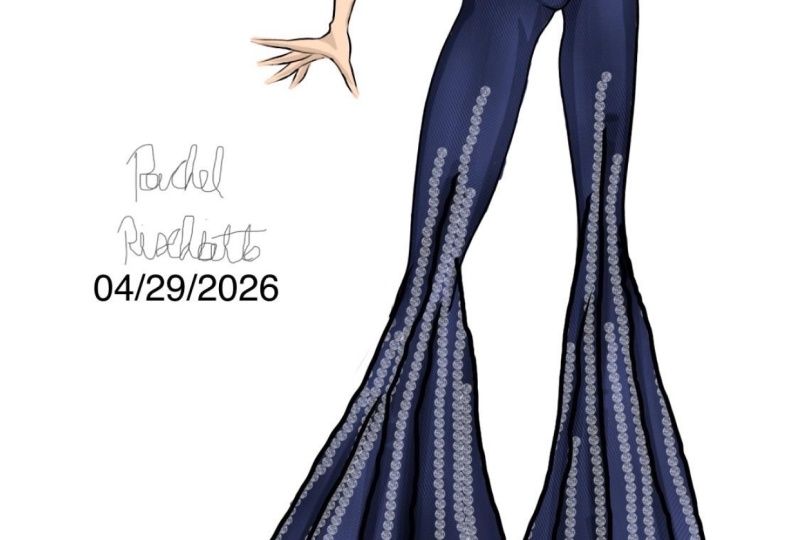
8. Strokes & Texture: I love adding in the final strokes and the texture to an illustration, because that's where you can really add some interest. I'm adding a new layer where I'll be using a pixel brush to add texture to the trousers. I've decided to go for a soft chalk brush, because I'd like to create some directional lines. Next up, I'm going to move on to the hair and create some textured highlights. I'm going to choose a color that's lighter than the hair color, and I'm just going to use a simple pencil brush stroke, which is still a pixel brush. I'm going to create some shading on the skin tone by using a simple pixel pencil brush, and I'm going to make it a few shades darker than the skin tone and then just place it in areas where the shade would fall. I like to add these strokes in just to give it a little bit more depth, but you don't need to add too much. At this stage you can add as much detail as you like, but I'm going to finish it off by just using some defining strokes around the outfit that she's wearing. Just the outline of the jacket, I wanted to show a little bit more detail on the blouse, and the trousers, and also the shoes. It's a good idea not to use a solid black stroke, rather use a color that is a few shades darker or lighter than the shape you're drawing on. That makes it look a little bit more soft. Remember to add in a few details like wrinkles in the clothing or folds or seams. As I mentioned, you can really decide how much detail you'd like to add at this stage. I decided to draw a little pencil overlay onto the floral pattern design, and then I also finished off by creating some directional lines on her eyebrows giving her a slightly darker winged eyeliner, and then also just adding a sparkle in her eye. Next step, we'll be adding accessories and the finishing touches.
9. Accessories: Let's add the final accessories and finish off our illustration. This is a good time to refer to your initial sketch and see what accesories you'd like to use just to finish off the outfits. I decided to add two hair clips with jewels on, and then I decided to draw in some sunglasses. I drew the accessories in as vector because I wanted them to be solid shapes. I added a shadow in under the sunglasses just to give it a little bit more dimension. At this stage, you're almost done with your illustrations. Have a look, have you missed out any areas? Is there anything you'd like to fix or change? I realized I wanted to add in the pattern fold to the handbag and add some detail there. In order to ground the artwork, I decided to add a darker color at the bottom in the form of a scalloped edge shape. Then I also decided to play around with a jacket to make it higher contrast by giving it a black base instead of the pink base. You've now completed your illustration. I'm so excited to see what you've made. Please share it in your class projects.
10. Thank You: I really hope you enjoyed this class, and I can't wait to see what you created. Please make sure to share your class project, as well as any in-progress steps that you did, because I really I'm interested in seeing how you got along. Let me know what you found the most challenging and what you found the most helpful in this class. If you'd like to see more of my work and stay in touch, you can head over to Instagram to my profile @leannevanloves. You can also have a look at my website, where you can see a lot of my digital illustration work. I hope this class gave you the tools and confidence to keep creating, and I can't wait to see what you come up with in the future.
 Leanne Van, Freelance Illustrator & Designer.