Transcripts
1. Introduction: Expressive doodles is all about mixing
thoughtful journaling and doodle art to create
something calming and beautiful. Doodles are a simple
drawing that can have a concrete
representational meaning. And when added to your
personal thoughts, they become unique,
insightful, and cathartic. I believe doodle art
isn't underrated. Art form is a fun way
of expressing yourself, but it's also a brilliant way of experimenting and learning to draw the doodles each person will instinctually gravitate to, offers an insight into their artistic style,
their innate creativity, conveying parts of
their personality, not necessarily shown
through other art mediums. I originally created
this technique as an art therapy activity. I use it as a way for
clients to express all those jumbled
feelings by journaling along the line without
space or punctuation. It's just a free-flow
type journal. You get a great relief
from this activity. Adding the doodles within
the loops brings about calmness and reduces
anxiety levels. The best part is expressive
doodles can be done at any age and any level
of skill in this class, I'll share a breakdown
of the process for creating the line,
adding new journaling, and adding doodles to create
a beautiful piece of art, but also a creative,
expressive flow. So grab your paper and your pen, and let's jump in.
2. Supplies: For this class, you're
only going to need two things, paper and pens. This can be done with
a blank printer paper, sketchbook, or even
thick card stock paper. You can use fine liners,
Sharpies, markers, Tombow markers, ballpoint
pens, or even pencil. It's really not about
the tools as much as the freedom that the
tools will give you to create these calming,
expressive doodles. The two basic things
are going to be the paper and the markers. I typically work in
this type of journal. And it's actually a speed ball, five-and-a-half inch
by 5.5 and square. And the reason that I like
this particular journal is I can use this in many
different orientations. I can use it straight across
in more of that landscape. I can use it in a really
tall portrait mode. So it allows me to
work on two pages. Or I could actually work on just one individual
page if I wanted to. You could use, in a
regular sketchbook, you could use any sort of
paper that feels right to you. We're going to be doing a lot with the larger sheet
paper in the class. That's just so that you
can see me working. It's harder to see on
the smaller notebooks. That's for paper. Really just use whatever
you have on hand. The other thing is obviously
going to be markers. Now, I have a pencil
and an eraser here. I don't typically use
them if you feel more comfortable with
them when we're into the doodling part
of the lessons, you feel free to use
that if you want just a ballpoint pen, if that's what you have on hand, Go for it. Sharpies work great. Also, just makes sure that
the paper that you're using can handle the
ink that you're using. If you're using a Sharpie, it's going to bleed through. And you can see in some of mine, I was testing out
alcohol markers on this and they bleed through. So I just put
something in between and to protect the papers
before and after that. But Sharpies are
really good one as long as you have the
paper that can handle it, but printer paper
handle Sharpies do. Other than that, I've just got a collection of different
fine liners here. I have microns, I have
the Faber Castile, king art, and obviously I have some tom bows for
those liners as well. I use a combination
of them and I use a combination of sizes. And that's just because when
I'm working in a doodle, I'll have areas that
are going to be filled in like these dark black areas. And that I use a typically a larger marker tip and select a lot of times I'll
use the favorite crustal, the SC, or in the
one-and-a-half. So it's just the different
size nibs are going to allow me to fill in a
little bit faster or a Sharpie works
really well as well. And then some of the fine
lines all either use a micron or even one of the
fine liners and the Tombow, the different size
tips allow me to have different
thicknesses of line and also to be able to
color in and fill in certain areas if you only
have one size, that's okay. Work with what you have
ballpoint pens, same thing. As far as pens, I do prefer the look of a black marker against
the white paper, but you can use any color. I've done this project with cheap Crayola markers and
expensive zebra markers. They all work great. One of the most
important things is a fine line thickness that
really does work for you. I prefer a thicker line
with a thinner text. So I'll show you when
I get into that. When I'm working with my line, I prefer a thicker line and then my actual handwritten texts, I use a thinner line. And then obviously
my doodles are going to be a combination of both.
3. Drawing the Line: When drawing the line, There's really no right
or wrong way to do this. It's just a squiggly line
that you're going to have loops and curves
across your paper. Whether you're working on a large sheet of
paper like this, or even in a small
journal like this one, this one I'm using and
I create my squiggles in curves and flips and
turns across both pages. I'm careful when I meet
the scene and I move on to the next page on
the larger paper here, I'm just going to
demonstrate how I do it. The key is to start at one point on your page and
move to the other. I found that the more circles
are loops that I make, it will give more areas
for me to add doodles, but the longer the curved lines give me more room for text. So play with which
one you like better. The curves are going to give
you a lot of texts if you have a lot to say and there's a lot you want to get out
and you're journaling, maybe you're going to
want more surface area. If you have a lot of doodles
that you want to add, have more loops in curves. So in drawing the line, I'm going to start on one end. I typically eat and
start with a blunt end. You could add an
embellishment at the end. You can start with a little
twisty curvy squiggle. Let's start at one end. And then as I travel and this is very intuitive,
Don't overthink it. You want your line to flow
and feel really authentic. Otherwise, the flow of the
line can feel very stilted. I'm just going to start
up here in the corner and I just kinda start
with a little circle and then I just start scrolling
around the page and I just let my hand do
this all by itself. And when I'm done at the end of the side of the
page, then I'm done. Now, I can leave it like
that switch that I did. You can add hearts or circles or different
embellishments at the end. For now, let's leave this here. Let's try another one. I'm going to switch
to my sharpie so you can see how the Sharpie handles. Again, I'm just
going to start over here and I'm just going
to let my pen move. I'm just letting that be super
free and super intuitive. Now you don't have to
start from left to right is just how my hand flows. You could always go
the other direction. You can go from top to bottom, from bottom to top. So let's change it
up a little bit. I'm going to start down
here and I'm going to make some squiggles
and then I'm just going to start traveling across
my page as I have before. And now I have a
different shape. So the whole point of the line is just to be free with it, just let yourself drag your pen, loops and curves and create something that you can
then build off of.
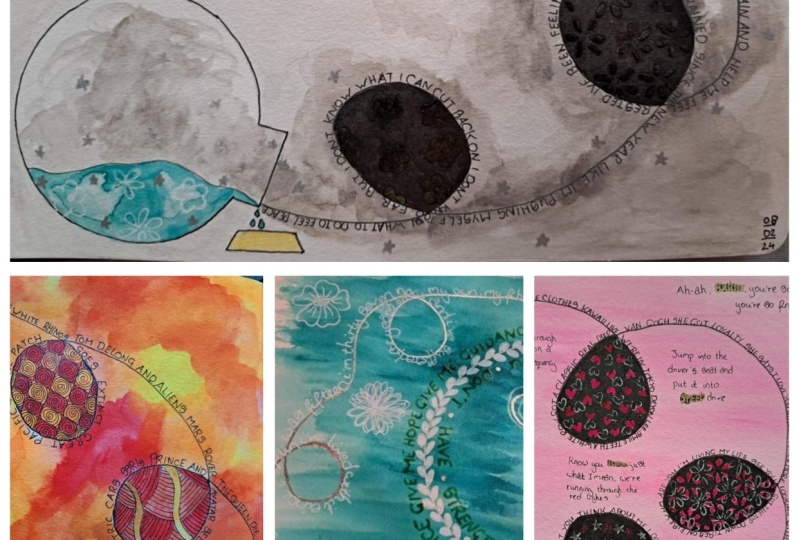
4. Adding Text: Now the question becomes, what do you write? Well, the beauty
of this project is the ability to
write out anything. Whether you're dealing
with stressful day, grief, loss, or maybe it's just how you want to practice your
daily journaling. Maybe the idea of writing three morning pages
is overwhelming. Maybe you just want to create
something with thoughts, maybe their song
lyrics that really speak to you and you
want to put them down. I like to write my words
all in lowercase with no punctuation and not necessarily in a
particular order that I'll explain later. It's not about going
back and re-reading these words or for anyone
else to be able to either. Instead, it's about
releasing your story, putting your feelings and your thoughts down
on paper to have your emotions travel that
line gives them movement, which is very cathartic. If you aren't sure
what you want to write or you're struggling
to find the words. Maybe start with song lyrics, or maybe your favorite poem, maybe using somebody else's
words until you feel ready to release your own
is a good place to start. So you're going to
write along the line that you drew during
the line lesson. I like to ride along
the lines that flow instead of traveling
the twists and turns. Again, I'll show you
that in just a moment. In other words, if
the line is going to curve and it
turns into a circle, I will stay on the outer side of the line and not follow the
curve all the way around. When I reach the end and
there's an open area, I then go back and I
add additional texts. I love that no one can
really go back and reread the things that I wrote
because they can't easily follow the
line that I traveled. The words are out
there on the page and they're moving and
they are beautiful. Again. Just play with it
and see what fits for you. So here's my line. I'm going to start here. So when I travel with my words, I stay on the outer side. And then when I
get to this loop, instead of looping
around, I stay here. So I travel over this way. I go around and I
stay on this outside. And now over here I come up
and over and I just keep traveling the outside of this line and then
I would stop here. But if you followed my finger, you'll know that this
inside curve and this inside curve
won't have text on it. Now you don't have to
if you don't want to. But if I have more
that I want to say, I'll go back and I'll
add additional texts on this side and additional
text on that side. Again, do what works for
you if you want to travel your circle with your
texts, that's okay. I keep it on the outside
because when I add the doodles inside
of my loop circles, that way, it gives
me enough space to create my doodles
without losing the text. But if you do, that's fine too. Because again, you're not necessarily going to be able
to go back and reread these. That's not the point
when I write on here. I don't use any capitals and
I don't use any punctuation. And a lot of times I
won't even use spaces. Sometimes I just let the
words all flow together, becomes one long word. You can go back and add your t's and dot your
i's if you want. So I pick up my pen
when I intended to. It, it doesn't have
to be perfect. It's really just about
getting the words out there. Now, I can break all of
those up if you prefer. Again, do what feels
right for you. I liked the ability to flow
all my words together. It's freeing. I don't
have to punctuate. I'm not capitalizing anything. I'm just letting the words all spread across this loop in line. Okay, so let's go back
to our line here. And the other thing is, I turn my page around because I want to keep my
handwriting consistent. You do what you need to do also. But I'm going to
start over here. Then. Remember when
I get to this point, I'm gonna go up and around. Okay, So I finished the line. Now, I could go back and I can add my text here if you
don't want to, that's okay. But I'm going to again, it's just about doing
what feels good there. Now I've journaled all of my line and the next thing I need to do is add the doodles.
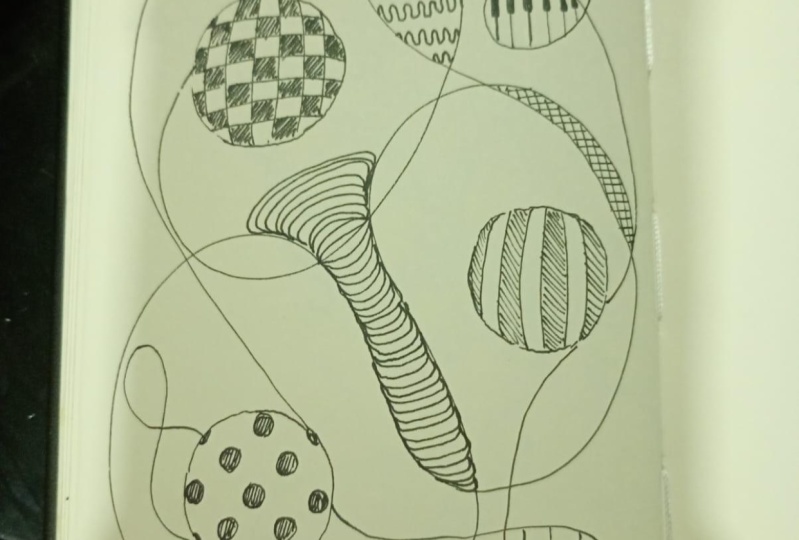
5. Adding Doodles: I think every kid use Doodles, has a way to get
through a boring class. Or maybe you'll find that you doodle when you're on the phone. Doodling is just a very calming, therapeutic type of
artistic technique. And I think that it's a
very underrated art form. It's fun, it's expressive, It's a brilliant way of experimenting and
learning to draw. So in this lesson, we're going to focus
on practicing some of these doodle drawings
that I've put together. Now, I have a
worksheet that you can download and this offers
ideas that you can practice. Here's some basic
doodles that you can read duplicate here
in the circles. There's tons of doodle patterns out there and you can find them in books and online, do a Pinterest search. There's so many doodle
art type drawings out there that you
can inspire you. You can focus on more of those entangle type
drawing if you want. Or you can actually
get in there and start doodling different
characters and things. It's really whatever
speaks to you, I was lucky enough to be a part The Art of Fashion tingling
book a couple of years ago. And there's some really fun doodle
techniques in here that you can explore and interpret
and add into your drawings. There's also books called the Thousand tangles
and doodle designs. My artwork was also
put in this book. There's lots and lots of ways to find doodle art
that inspires you. And really it's just
about practicing them and getting out there and seeing
what really inspires you. I've got quite a few downloads
that you're gonna be able to use as practice
sheets, download them, practice the different
lines and curves, and start mimicking some of the patterns that I have here on these
digital practice sheets. Then there's gonna be some blink part practice
sheets that you can also use this as a step-by-step of how
to create this one. If you do the steps, you'll get yourself to these
end, patterns and drawings. And then I have a series
of patterns and drawings. You can also use these to
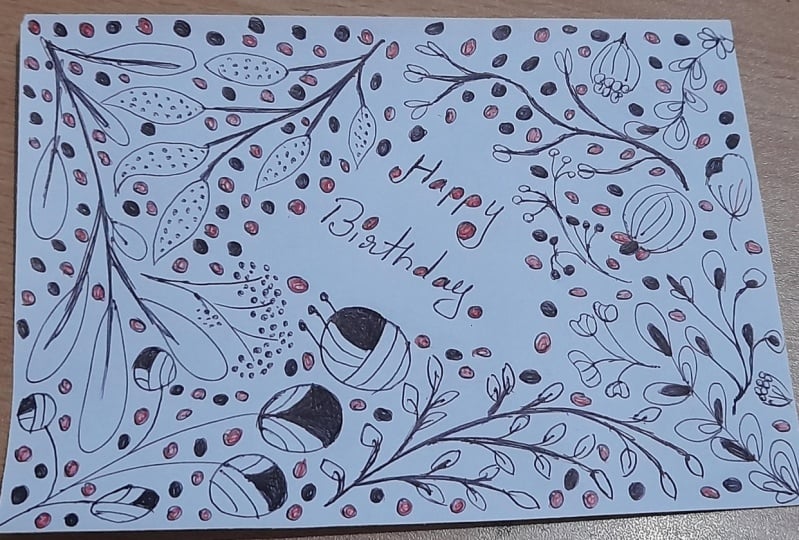
inspire your drawings. Now it's time to add
doodles to this piece. I've got three circles here
that I'm going to fill in. You can either do
patterns or mixture of patterns and flowers if
you want, or just flowers. Use the sheets that I've given
you to help inspire you. If nothing else, just
fill it with a bunch of circles and doodles and
hearts and stars and things. So let's start. I'm gonna do this one
with some flowers. I think that I'm
going to use this one on top here for one of mine. So let's set this here and you can follow
along if you'd like. I'm actually going to put it
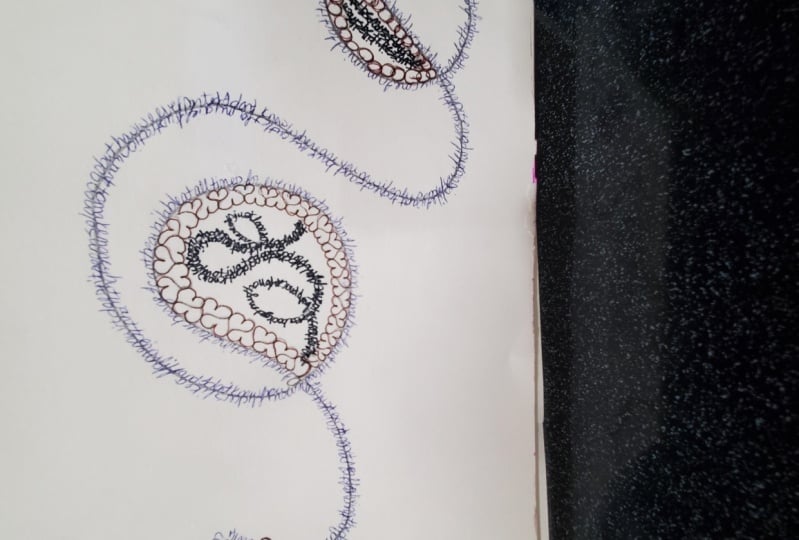
here in this middle loop. So for this first doodle, It's a half circle
followed by a series of tiny little circles
around the edge. The demonstration ones
I did or in circles, my loops are not
perfect circles, so I just make it work. Again. This is not
about being perfect, it's just about getting
the doodles in there. So I'm going to start
with my half circle and then I'm going to add my little circles
around the edges. Next I'm going to
add the petals. And I start by adding
one in the middle. And there it's more
tapered at the end, widens out and then
loops in curves is up at the top and
each loop is different. So it's going to make
these flower shapes look a little bit
different than I do. Another one next to it and
a smaller one on the side. So I just am following the curve of the loop and
filling in the space. It's okay if I'm bumping into my text, that's totally fine. That's what I want it to do. There's my flower. So now
I've gone through this step. Let's move into step three. Step three, I'm going to add
the colors in the middle. I'm going to grab a slightly
thicker pen for that. But if you wanna do
with your thin micron, you can do that too. And then just color them
in either way works. So I typically put in this one, I'm putting in about four, and they progressively get a little bit larger than three, then two, then I take my microphone again
and I'm going to draw a line connecting all those dots down to the base of that pedal. The last step is to color it in. And I can do that with any of the pens that I like that
have a thicker tip on them. So I color in this base half
circle we started with. And then I'm going to
color in around my petals. This tip is a
little bit pointed, more of that brush tip. And that way I can get into these fine little areas versus this one's a
little bit fatter, no beer and then that one has more of a slight chisel on it. Okay. And that's the first one. Let's try this one down here. I'm going to start by drawing this little shape in the
center and that will color in. And then I'm going to add
a few petals out here. They don't have to be exact, just draw them however. So then the next step is I'm
going to add a couple of larger petals out here. And then over here
I'm going to continue to add more petals. I'm going to change the
shape a little bit. So then the last step is to add a lot of these
little crease marks. And I can do that with a thin line or if I
want or thicker line, I'm gonna go with this
thicker Tombow and just start adding some
little crease marks, little flicks in the petals. And then the last step is I'm actually going to
fill in all the way around that flower
with little circles. They don't have to
be all the same. They can be different sizes. Just start filling in
the area with circles. Now that that's done, the other thing that
you can do is you can always go back in if you want and make some of those lines a little
bit more prominent. I didn't on this one. But you could come back and thicken out that
edge line and it will just stand a little
bit more prominent against all those
little circles. And then the last one, Let's do this one. It's going to be small. So all I need to
do is start with this center circle and then
I'm going to add my petals. And I'm just trying to fill up the space of the loop
that I have here. And then this one, I do have
the background filled in. So I'm gonna come back in with the king art minor
just because there's some tight spaces in
this little area and color in that background
just like this, and I'll color in that center. Then the last part of this
is I add lines all the way from the end of the
pedal to the edge. So from the center
out here to the edge and you can have them spread
out, are tight together. There's no real method to it. It's just lines all the way out. And then I just
add an edge line. And I'll use that Tombow just so it's a slightly thicker line. And now that expressive
doodle is done.
 Heidi Cogdill, Writer and Artist