Transcripts
1. Introduction: Art journaling is a wonderfully accessible and versatile
medium for art. There is no limit to how you can express herself through
art journaling. I love that you can use any creative materials
that you have on hand, such as paint, photos, you've taken stencils, the
possibilities are endless. Hi, my name is Ashton Womack. I'm an artist and surface
pattern designer. In this class we're
going to explore self-expression through
art journaling. I'm lucky enough to
have my dream job as the artists behind
Virgo and paper, where I create artwork for stationary and
lifestyle products. But long before I decided
to make art my career, it was always the
way I felt I could best express myself
are journaling is the perfect medium for exploring our thoughts and
feelings through creativity. It's something you can
do with small pockets of time and limited supplies. Or you can really
dive in and make your journal a work of art. It's up to you. In
this class we'll talk about what
art journaling is. I'll show you some examples from my own journals
and we'll explore three of my favorite techniques to create three pages together. By the end of this class, you'll have completed a few
journal pages and you'll have learned techniques
that you can use to keep journaling on your own. I love to express myself through art journaling and I can't
wait to show you how I do it. Let's get started.
2. Class Project: Let's talk about
your class project. In this class we'll
learn some of my favorite techniques to create three art journal
pages together. When you complete the class, I'd love to see
your finished work. You can post pictures of your journal pages in
the project gallery. You can also share your pages
in progress as you complete each lesson and edit
your project to add more photos as you
continue journaling, Head to the next lesson to see all the materials you'll
need to get started.
3. Tools and Materials: Let's talk about the materials you can use for this class. First, you'll need a
journal and I've pulled several options to show
you the different kinds of journals that you could
use. If you'd like to use a large sketchbook, this is one that I really like. It is a Strathmore recycled
drawing paper sketchbook, and it holds up pretty well
to a variety of materials. Another favorite is a small
pocket size notebook. So this is a sketchbook from
the crescent render line, and it has very thick paper that won't allow any of your art materials to
bleed through the pages. So that's a nice feature and
I love the pocket size. You can also use a basic
sketch book like this. This is just one that I
picked up at a local store. It's just a large spiral bound sketchbook, but I like that you could use this
horizontally or vertically. I also love the Moleskine
brand sketchbooks. So they have 165 GSM paper, which I think is really great
for a variety of materials. In this class, I'll be using my trusty Art
Alternatives sketchbook. Now, I love this sketchbook
because it is inexpensive. It is a student
grade sketchbook. It has 75 lb paper. I feel like because this sketch book was
affordable and accessible, it is not at all precious. And so I feel very
free to create. And here, of course it's not the most heavyweight paper and some of my pages do buckle, but I feel like it's worth
the trade-off of having a little bit of buckling
because this book makes me feel like I don't
have to worry about having a precious or expensive
sketchbook and I can really just dive in and use up
all the pages. So, there's no barrier to creating. I also like the book size. It's fairly portable and not
too small and not too large. Beyond the journal,
I'll be using some acrylic craft paint. I love these because again,
they're not precious. They're very inexpensive
and they come in just about every
color of the rainbow. I even have a
metallic paint here. I like to apply my acrylic
paint with a card. So this is actually
an old hotel key. You could also apply your
paint with a paintbrush. I'll be using my
watercolor palette and a watercolor paintbrush. These paints are the Windsor and Newton Cotman watercolors. They come in lots of different
colors as you can see. And you can use these
out of the tube. But I prefer to squeeze all
of my paint into my palette, let it dry overnight, and then I just use it as if
it was a dry paint palette. But use any watercolor
paints that you have, student grade is perfectly fine. This is my favorite supply, which is the collage elements. Now you can use old photographs and I love film photography, but not every photo
that you take with a film camera
comes out very good. So I like to repurpose those photos that are just
too interesting to throw out, but I don't really want to
keep them in my photo albums. So my art journal is a
great place for those. I also like different
types of paper. This is a little
lace paper place mat. Some paint samples. I use different pattern papers. These are just some
that I've designed, but you can absolutely
use any sort of scrapbooking paper or colorful
paper that you may have. And sometimes I have these little pieces of art that I'm not sure
what to do with. So for this, this
was something I used in my work and I
painted some leaves. I scanned them into
the computer and I just didn't need this
piece of paper anymore. This is a great way
to repurpose that. I even have a little
Polaroid photo. You can use all kinds of
things that you collect, such as tickets or
receipts or brochures, anything that has an
interesting photo on it or an interesting design
can be used as a collage element in
your journal . You will also need a glue stick for
our collage elements. I'm also using some
colorful markers. These are Tombow brush markers. You can use any colorful
markers that you have on hand. And finally, I like
to use brush pens. There are two different
brush pens that I use a lot. This one is a Pentel pocket brush pen, and it creates a very loose
brushstroke, very painterly. Then this one is a little
bit more streamlined. It's a calligraphy pen, the Tombow brush pen. I like to use both of these. They have a very dark
black ink and so that's a nice contrast to all the
other elements I've shown. These are the materials
I will be using, but art journaling is
incredibly flexible. You can add any other
materials that you like and may have on
hand such as stamps, stickers, stencils,
decorative tape. It's completely up to you. Take some time to
gather your materials and let's get started.
4. What is Art Journaling?: You might be wondering
what exactly is an art journal and how does it differ from other
kinds of journals? Here's how I see it. A written journal is a
place you can express yourself with
long-form handwriting. A sketch book is a
book where you can practice drawing and painting. And a scrapbook is a place where you can keep your photos, as well as other memorabilia and decorative elements
like stickers and stamps to meet an
art journal can combine all of these
things in one place. You can pick and choose
the elements that you like to create a
journal that suits you. One of my favorite things about art journaling is
that unlike fine art, which can sometimes require
expensive supplies, art journaling doesn't require any particular tools
or materials you can collect found ephemera and use the craft supplies
that you already have. In fact, I like to use
inexpensive materials because it eliminates any fear about wasting or ruining
your supplies. You also don't have
to know how to draw or paint in
order to art journal, It's about expressing yourself. There's no advanced
skills required. I like to use techniques that
are simple and intuitive. Art journaling is a meditative
and creative hobby. It's a low pressure
way to explore art. It's a place where you can
try new techniques and it's pretty easy to actually
cover up your mistakes. So I think it's a great way to develop your
own style as an artist. I, my favorite thing about my art journals is that
over time they become a record of the events in my life as well as my thoughts
and feelings at the time. And they're all expressed
in a beautiful visual way. So it's almost like a scrapbook, but with that added element of being able to express
myself through colors and shapes that covers
what an art journal is and some of the reasons why you may want to create your own journal. I don't know about
you, but I'm ready to create a page together. See you in the next lesson.
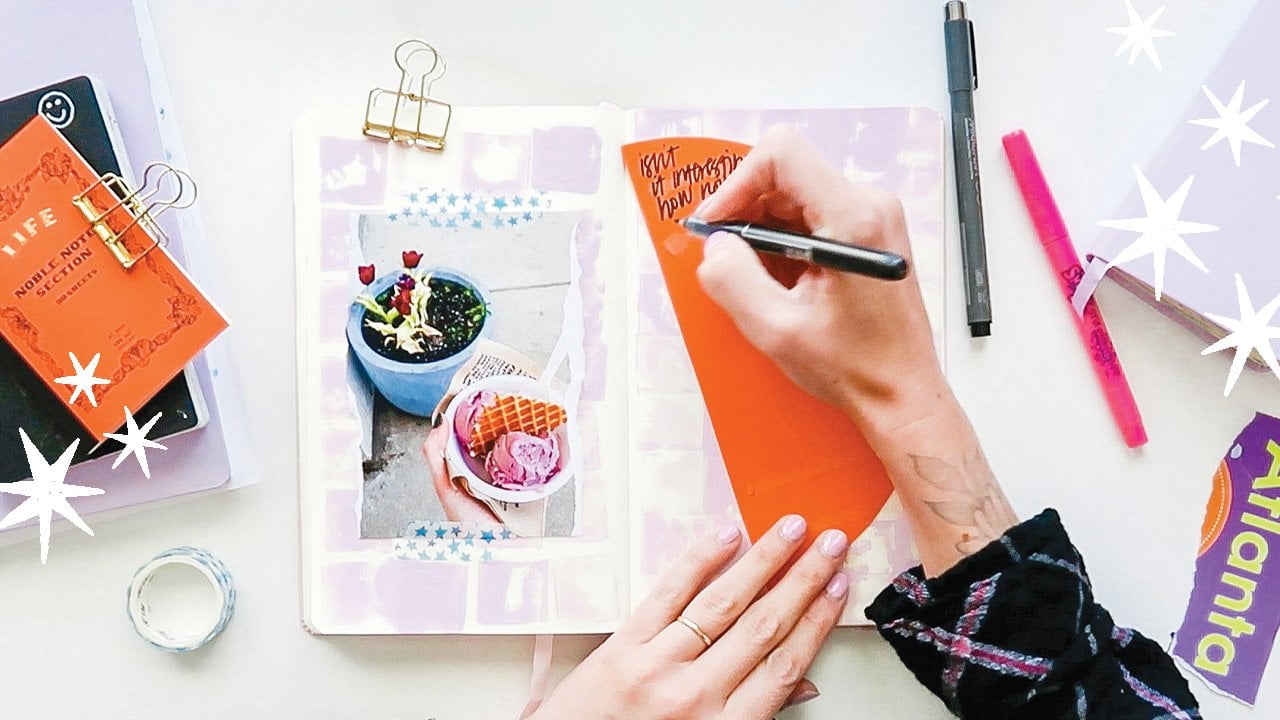
5. Journal Technique: Recipe: We talked about
how art journaling can combine elements of a written journal, a scrapbook and a sketchbook all-in-one. For this page, we're going
to combine some elements of each with one of my go-to
techniques for art journaling. I call this my simple
three ingredient recipe. And the three ingredients, are paint, a picture, and pen. The blank page can
be intimidating, so I like to get
over that fear right away by creating a
painted background. I'm going to select
one of my paints. I was planning on using a pink, but then as I was looking
through my paints, I found this purple and I think I might actually
do a little bit of both. I'm going to use a plastic
card to apply this. I love the plastic card method because it doesn't
require any cleanup, so I can just get my
paint on the page really quickly. As I am
starting off this page, I like to set my focus. So usually I think,
start with today. It's just an easy place to
start by asking yourself, what's going on today? What have you experienced today? And those can kind of guide all of our creative decisions
on this page, including the colors
that we choose to use. So as I'm working, I'm
thinking about the concept of change and particularly
different changes that I'd like to
make in my life, but I don't know how they're
going to unfold yet. So there's a little
bit of mystery there, a little bit of the unknown. But I like to just put the
paint right on the edge of the card and then I
kind of just smear it. That creates a really
cool application that you don't get
with a paintbrush. And while that
paint is still wet, I'm going to add just a
little bit of my purple. I feel like the purple lends itself to that
mysterious element I talked about. This paint
looks like it needs to be shaken up a little
bit, but that's okay. We're just going
to roll with it. That's a little better. The good thing is,
it's definitely easy to clean up mistakes
with art journaling, which is what I love. And one of my favorite ways
to cover up a mistake is just simply to cover it with acrylic
paint exactly like this. Okay. I feel like I have a
lot of paint on this page. I'm going to use a
paper towel just to wipe some of this
paint off of my card. We're a little heavy on purple. So I'm gonna go back and add
just a little bit more pink. You could do this
with just one color. I love how they kind of mixed
together. I like that. It's almost mixing
the paint right here and creating new colors. I think I'm happy with this
amount of paint on the page, so I'm going to let this page
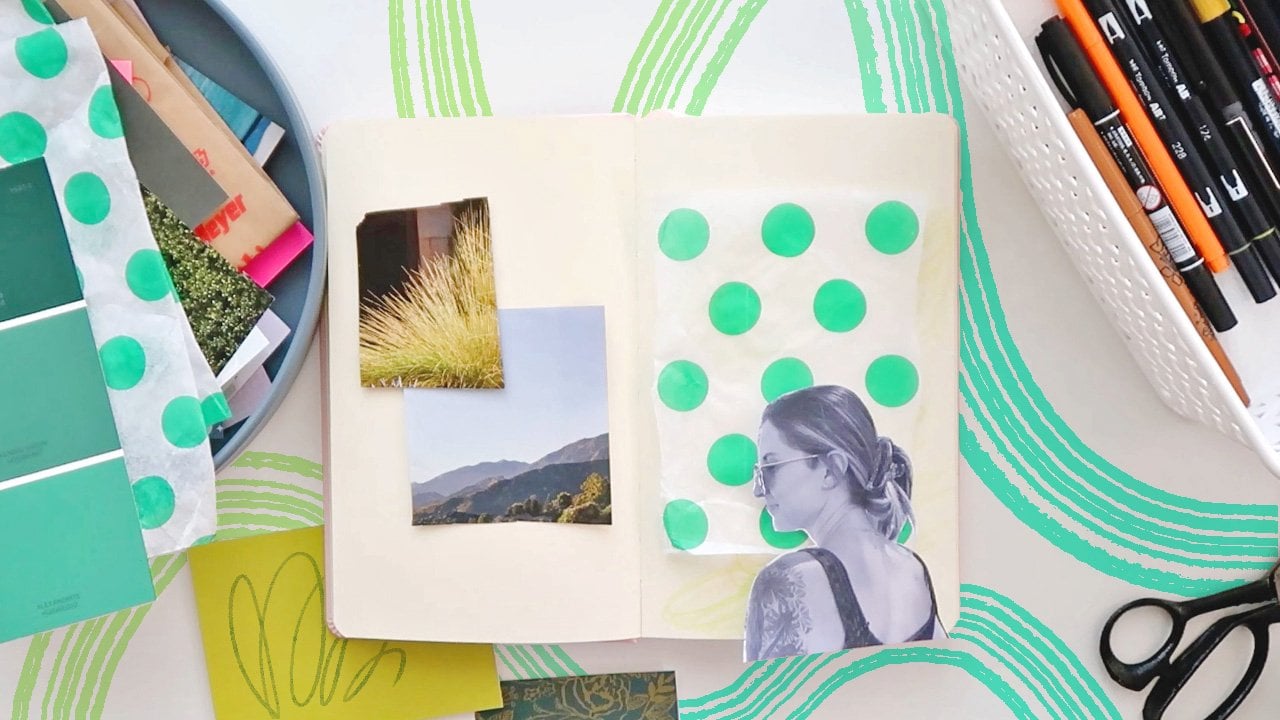
and dry before I continue. My paint is almost dry, so I'm going to select
my second element, which is a picture. It could be an actual
photograph like this one, or it could be one of
your collage elements. Again, in selecting
one of these, I'm gonna be thinking about my focus for the page which is change with an
element of mystery. So as far as mysterious, I think that purple definitely calls out to
me as a mysterious color. These photographs definitely
grabbed my attention. This is a piece of
a photograph that I actually took from
an airplane window. And I think that that very much represents change
going to a new place. That would possibly
be a nice contender. I think that this
photograph also lends itself to the mystery element. This one does too, but just not quite as
much. I like that. In this photo, it's
pretty obscured. You can not really see
anything on this side. And then you just see a little
bit of a city area here. I like this paper. This was just a scrap
from a sketchbook where I had drawn
these loopy shapes. And this just has a very
playful vibe to it. So I don't know if it
really goes with my theme, but this is an
intuitive process and I just like this and I
want this on my page. So I think I'm going to
include this piece too. I'm going to figure out where on my page I'd like
to place these. There are no rules. So just do what
feels right to you. Okay, I think I figured out
on the left side of the page, I want this image over here. And then on the right
side of the page, I'd like to use this image. I could turn it this way, but I want my background
to show as well. So I think I'm going to
again use half of my photo. You can see this is a
theme with my journaling. So this piece I'll use later. But for now I want
this on this side, or should we switch them? Let's see. I like them switched. That's very fun. I'm really liking these
three elements together, the two different colors of paint and then the photo on this side. It feels like something
is a little bit off. If I place this photo here, I'm not sure that I love that. Yeah. That's just not screaming out to me as the right move. You know what, I think I do
want this photo to stand out, so I'm just going to
use the one photo. Now you can absolutely use
scissors if you want to, but I honestly love
the torn paper look so I like to just
tear each element. And I know that my third step of this process is going to be pen, so I'm going to reserve
this area for that. But for now, I want this just as a almost like a little
piece of decorative tape. Let's go ahead and
glue down the photo. I'm also gonna be
thinking about what I'd like to write with my pen. And I think it's
definitely going to have to be
something to do with change because we have
the mystery element with this photo and
the purple color. The shape just reminds me
of an old telephone cord. So I did have this
element already, which was a piece
of sticker paper. But if not, I could
absolutely just glue it down. I like that. Now I'm going to grab my pen. A lot of times what I like
to write in my journal, are quotes and things that
I've heard. Song lyrics that just kind of
resonated with me or something that someone, a relative or a friend has
said that has stuck with me. In this case, it's
something a relative said along the lines of -
when you make a change, just move forward
and don't look back. I think with the playful
element over here, my Pentel pocket brush pen
is going to be perfect. This pen really takes away the perfection element
because it's so inky, it has a very
painterly style to it. I feel like I want to repeat
this shape here because it's just very fun and seems
fitting. Keep going. So that is my completed page. We've really created a full, very busy page with just those
three elements of paint, a picture, and a pen. This is a recipe that you
can use over and over by just changing the
ingredients if you'd like. So you can change the color
of paint that you use. You can change the type
of pen that you use. And you can change
the type of photos or collage elements that you use to create infinite new pages. I personally use this
technique all the time. We're all done here. So let's move on to
the next technique.
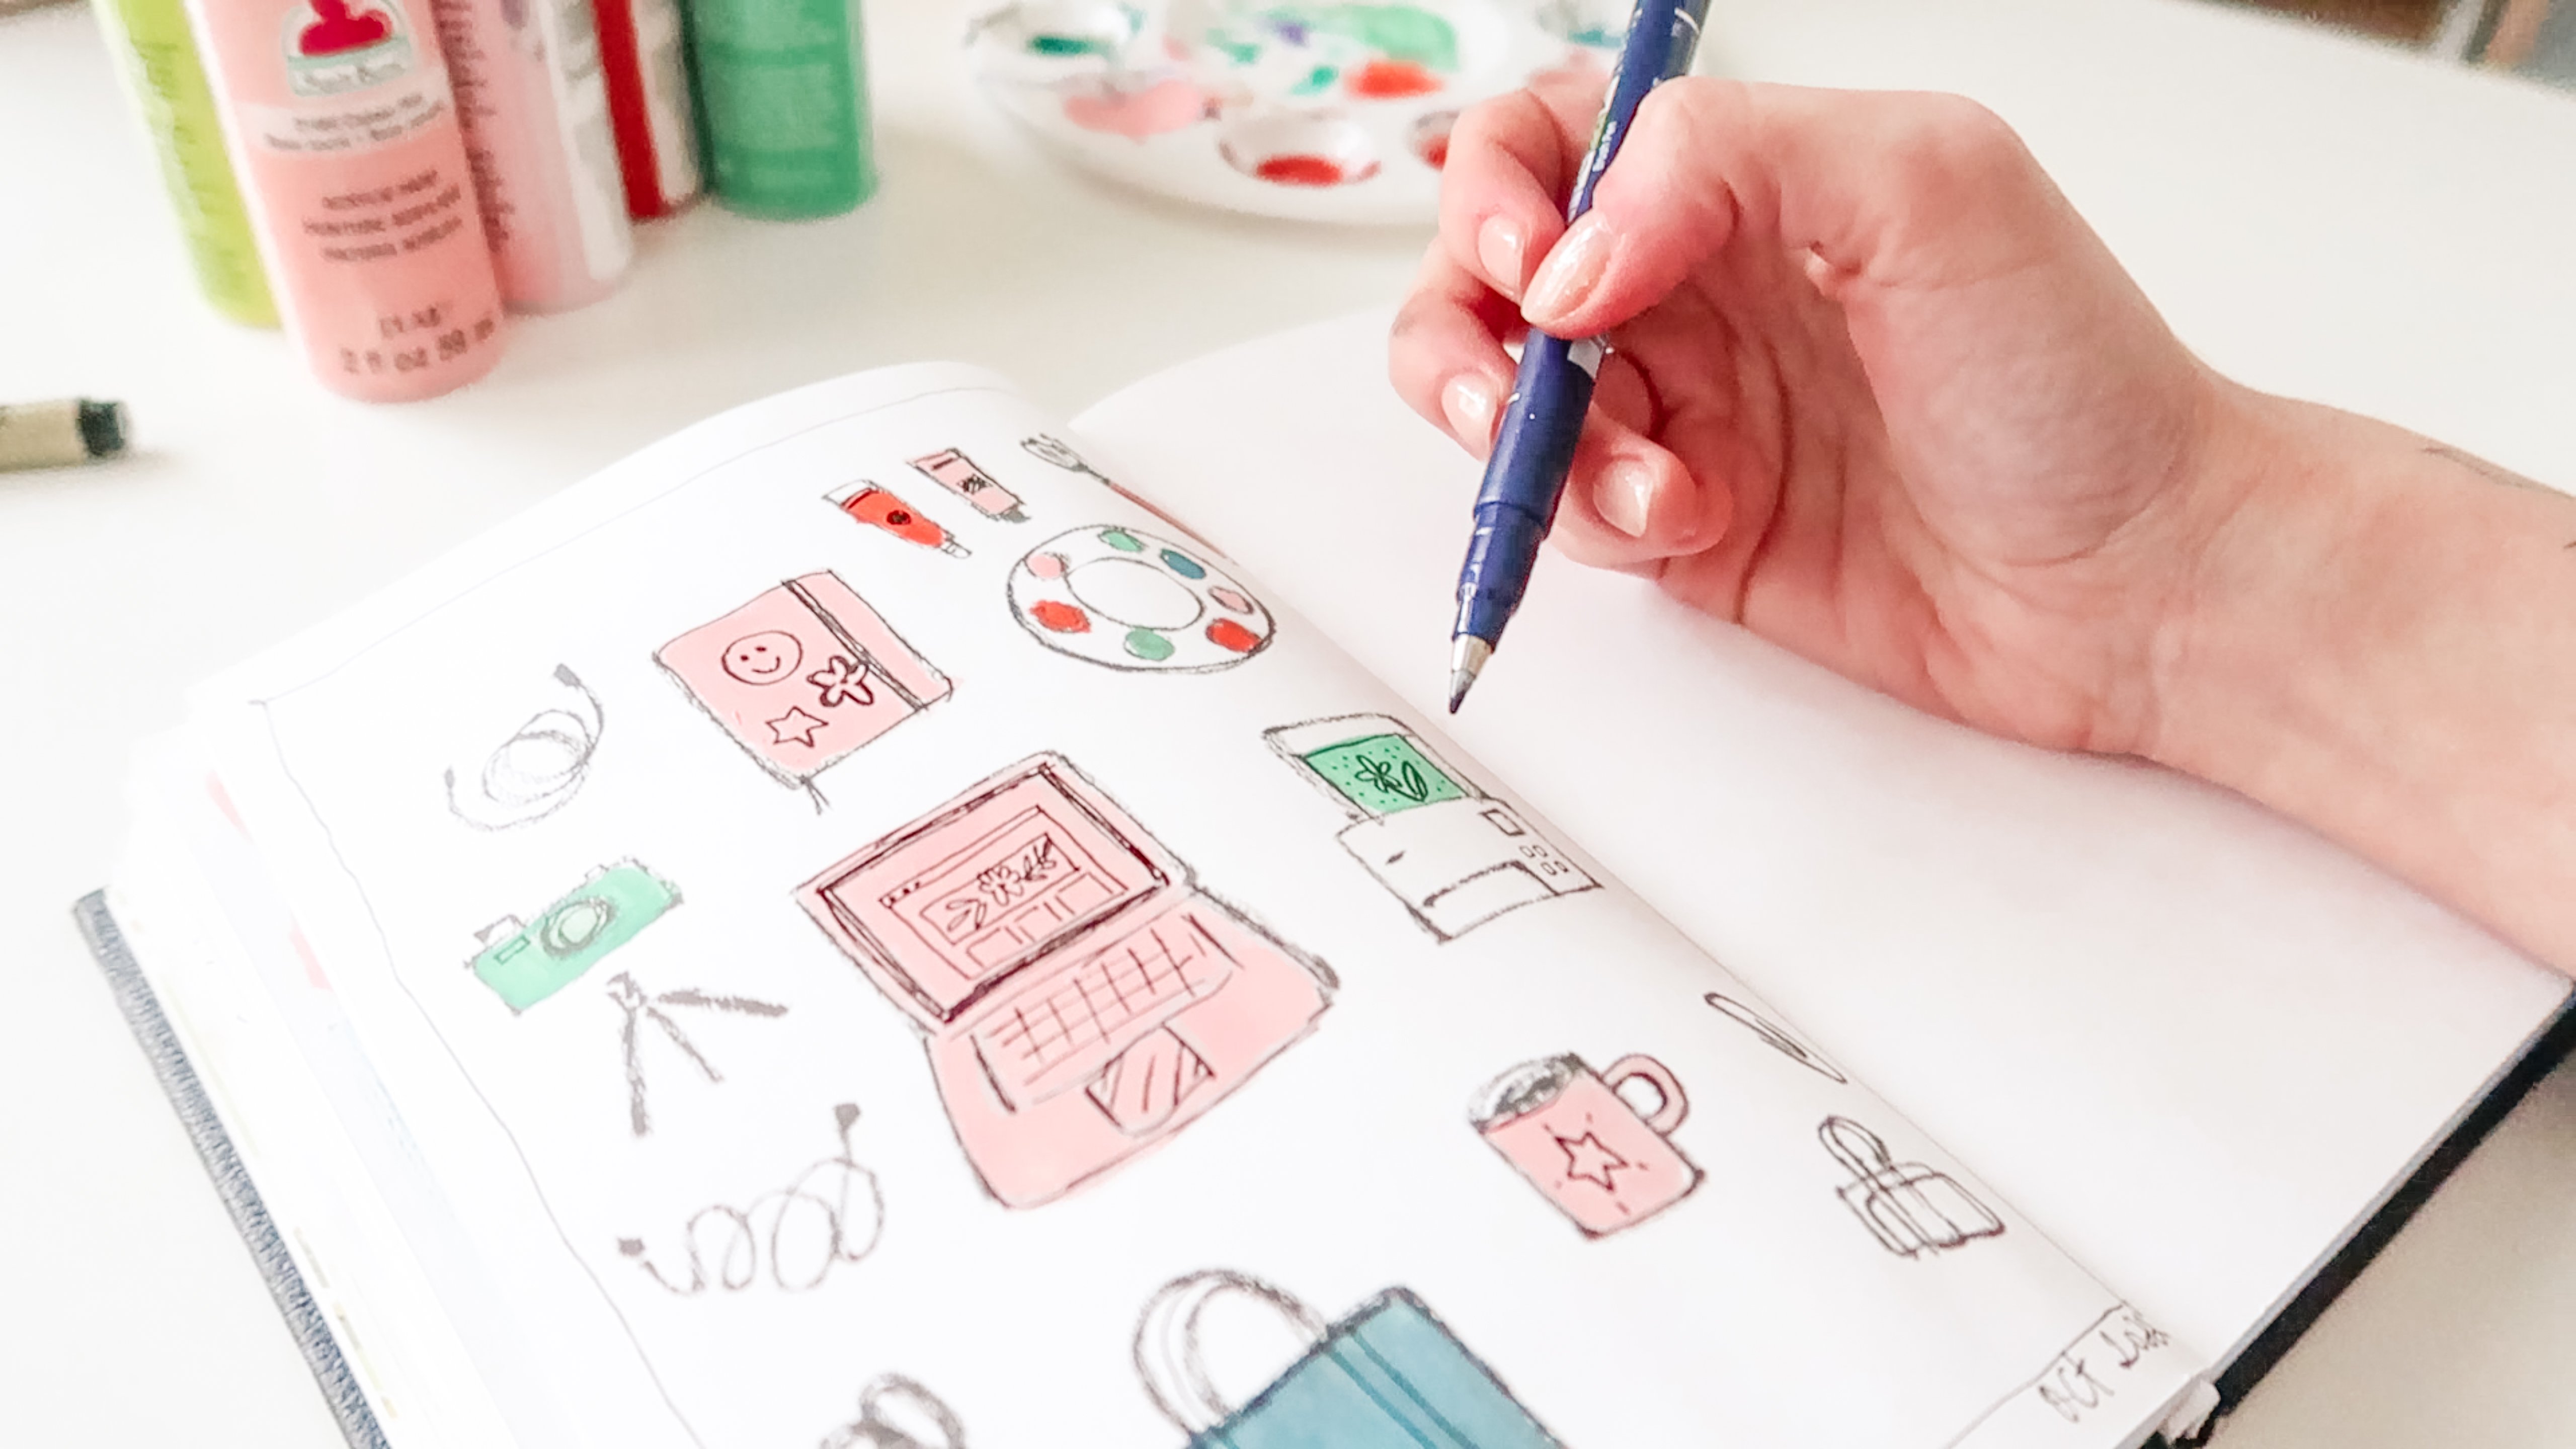
6. Journal Technique: Collection: For our next
technique, we're going to create a collection. Again, as I'm starting
on this page, I'm choosing something to focus on and I will start with today. So I'm going to choose
something that I see a lot in the world around
me to create a collection. I'm going to draw various
kinds of bags to do this. I'm going to use my
Tombow calligraphy pen. Now, don't worry if you
feel like you can't draw. I recommend creating your
items with very simple shapes. You can start anywhere on
the page that you'd like. I think I'm going to start
with a simple gift bag. Your drawings definitely
don't have to be perfect. This is more about self-expression and the way that you see different objects, so it does not have
to be perfect. I'm going to draw a
little shopping bag. Sometimes they have
the little smiley face symbol on them. I also have in my
possession right now a little paper bag with
little crinkly edges. So I'm just going to draw
it folded over like that. Now as far as how
many items to draw, a good rule of thumb is to
draw an odd number of things. So you could stick to
3, 5, 7 or nine items. I think that odd
numbers always make for a really dynamic work of art. I'm going to draw a
handbag that I have a very basic square shape with maybe a little bit
of a rounded corner. I think I'm going to
draw a little detail of the the long carrying strap. Let's do a big
beach bag over here. I'm going to draw
the handles first. Just kinda helps me figure out what size
the bag needs to be. We will draw a little
bit of an opening there. This one almost looks
like a duffel bag, maybe. Oh, that's another good idea. Let's do like a suitcase. I actually just got
a new suitcase, and I'm very excited about it. I like that. It's very easy to draw. Then of course we
have the wheels. There are four wheels, but
I think I'm just going to stick with two wheels. And then it has sort of these horizontal stripe
indentations across there. I think I'm going to leave
the suitcase sort of flat and two-dimensional. And how about I do another
plastic shopping bag. I just think those are
really fun to draw. And this one I'm going to draw from a sort of a side angle. Let's make it seem
really baggy and maybe you can see the
other straps there, the other handles
on the other side. And this one, I think is just a classic design
which is a rose. Let's write, "Thank You" on it. I just think that would be
fun. And obviously I'm taking lots of artistic
liberties with it. By no means am I trying
to do realistic drawings, but just have fun with it. So at this point I have
seven items on my page, so I think I can draw two more. And at this point,
I'm feeling a little bit stuck for ideas. But that's okay. This
is where it gets fun to challenge myself to
just keep going. I think I'm gonna do a little zippered pouch because
that's a type of a bag. And I'm going to draw the
zipper across the top. And then let's give it a
nice big zipper pull there. So I'll have my final
item right down here. I think I'm going to a
third type of shopping bag, but this time I'll do a
re-usable shopping bag, like one of the
ones that I have is just a simple square. And it has those reinforced handles and then a small
loop at the top. And maybe like the gift bag, let's give this one
a little bit of a three-dimensional
aspect to it. So I'm going to choose
a few colors of my colorful markers here
to color in my drawings. And again, I think
an odd number of colors makes for an
interesting artwork. So I'm going to choose
three colors. Pink. How about a nice yellow. Shall we do purple or green? Let's do a little bit
of a darker green. Now, I know I want my
rose to be pink, so I'm going to color that in. And then I'll try
to use each color a couple of times on the page. So maybe we can make
this gift bag pink. And I actually, instead of
coloring in each item exactly, I kind of like a little bit
of a loose style where my coloring just slightly
overlaps my drawing. Perhaps we can give our
suitcase a pink handle as well. Then for yellow, I'd love for my smiley face to be yellow. It's kind of a dark
mustard yellow. And then this paper bag
is sort of a brown color, but let's stick with the color palette and we'll
just make it yellow as well. And again, I'm going to overlap
my coloring a little bit. This is my darkest color, so I'm going to
color in my suitcase wheels and handle with that color and then
maybe the little pouch. Then I'd like to make
these beach bag handles green on the leaves
of my rose here. I feel like this gift bag could use a little
bit of a pattern. So I'm going to add
some sort of confetti looking sprinkles to my bag. I think we need more pink, so I'm gonna make
my suitcase pink. And finally, I would like
to make this bag yellow. I'm just going to color the
bag and not the handles. It's okay if I have
a little overlap. This is a very
intuitive art style. And for me I like to
just do it pretty quickly because the faster
I have to make decisions, the less I think about them. And to me, the imperfections in the page is what makes
it really interesting. I'm going to leave one of
my bags without color. I feel like this bag could use a
little bit of a pattern. I'm gonna do a polka dot
pattern on this bag. So as you can see, some of these bags are bags
that I actually have seen. Like this one
I saw today, and this one. And this one is a
suitcase I actually own. But the others are sort of
made up from imagination. And some of them are combining
elements of bags that I have actually seen with a
little bit of creative liberty. And finally, I like to, when I do these
collection pages, I like to date them. I think it's always
a great idea to date your art if you can, because it makes it a lot
of fun to look back on. I'm done with my collection. Some other ideas of things that you could draw for
collections are the items that you
keep in your bag or the different houses that
are in your neighborhood. You could do different
clothing items like maybe a collection of t-shirts
or a collection of shoes. So that's our second technique
of creating a collection. Let's go ahead and create our next page in the next lesson.
7. Journal Technique: Repetition: Our third technique
is repetition. I love to explore pattern by playing with repeating
elements in my journal. I like it because
this process is very meditative, very relaxing, and it's a great way to get started when you're just
not sure what to create, but you want to make something. So I'm going to do this
with watercolor paints, and I'll just use a
round watercolor brush. If you're curious,
this is a size ten. I think I'm going to fill
both of my pages here. And again, starting with today, I want to represent a sunrise because to me that sort of represents
a fresh start. I'm just going to wet my
brush in my water cup here. And I like to have a cloth
with me when I paint with watercolor just to dry
off any excess water. So for a sunrise, I think I'm going to start with sort of an orange color
and mix up a nice color. Now you may be able
to tell that I don't really clean my
watercolor palette. I like to use all
the colors that I've used before and just kind
of let them mix together. So it looks quite messy, but it's for a purpose. So I've got sort of a mustard yellow, or orange color
here on my palette. And I'm not going to
draw a literal sunset. What I'm gonna do is just choose a simple shape to represent it. So I'm gonna do a semicircle, kind of like a sun that's
coming up over the horizon. And just create a little
simple shape there. And I'm just going to keep
creating these shapes and maybe varying that shade of yellow just a
little bit as I go. And what's fun is when you
do this with watercolor, and I like to explore repetition with a lot
of different materials, but watercolor is fun
because the shapes will start to just
bleed together. This is one of my most commonly
used journaling methods because I love to
do this after work. It's kinda relaxing and it's
just something I can do when I'm not really sure
what to create. But I just want to make
something and I'll just choose a shape and keep going. And it's fun how as you do this, you'll see your shape will
change a little bit as you go, because some shapes might
get a little bit rushed. Some shapes are a
little more perfect and your elements don't
have to be touching at all. So I can actually come over here and just
create a new one. They don't have to be
next to each other. You could scatter them over
the page however you like. I think we need a
little bit more bright yellow on my brush and
a little more water. You can see there's like
a consistent drip in the bottom corner of my shapes. So I'm going to try making
my shapes the other way. That one was a little heavier on water and a little
lighter on paint. So this is a fun way to
get to know your supplies, whether it's watercolor or markers or another
type of paint. I like gouache paint and I
also like acrylic paint. And this is just a fun way
to practice and try out your colors that you have and
get to know the material. Another reason that
watercolor is fun is because it's a little
bit unpredictable. It can dry differently than it looks when it's wet on the page. And sometimes that
can be a good thing. Sometimes it can be a
little bit frustrating, but it's such a
meditative process. Now I haven't varied the size of my shapes very much
just a little bit, but that wasn't so much intentional as just
kind of habit. And then as I'm getting
over here on the page because I'm right-handed and I started on the right
side of the page. I'm using a different part of my wrist so that I don't
touch my wet paint. And that's creating some shapes that look a little
bit different. At this point, I think I want to start introducing a
little bit more of a darker orange and maybe
almost fading into a red color. So we talked about
how you can modify this technique by using
different materials. You can also change
up the colors. You could use just one or two
colors like I'm doing here. But you could also use
a rainbow and test out all the different colors
that you may have and see how they combine
and how they work together. I think I'm almost
done and I just want one more shape over here. So with my intent to just
use one or two colors, just yellow and orange, we actually ended
up with lots of different shades of that color
as they blended together. And I'm sure as the piece dries, I'll see even more
colors coming out. This would make a
great background to do some written
journaling on top of or paste a photo on
top of where you can absolutely just
leave it as is. So I'm just going
to let this dry. That is it for
technique number three. In the next lesson,
I'm going to share some of my journal
pages with you and show you how I've used all three of the techniques
that we've covered today in different ways.
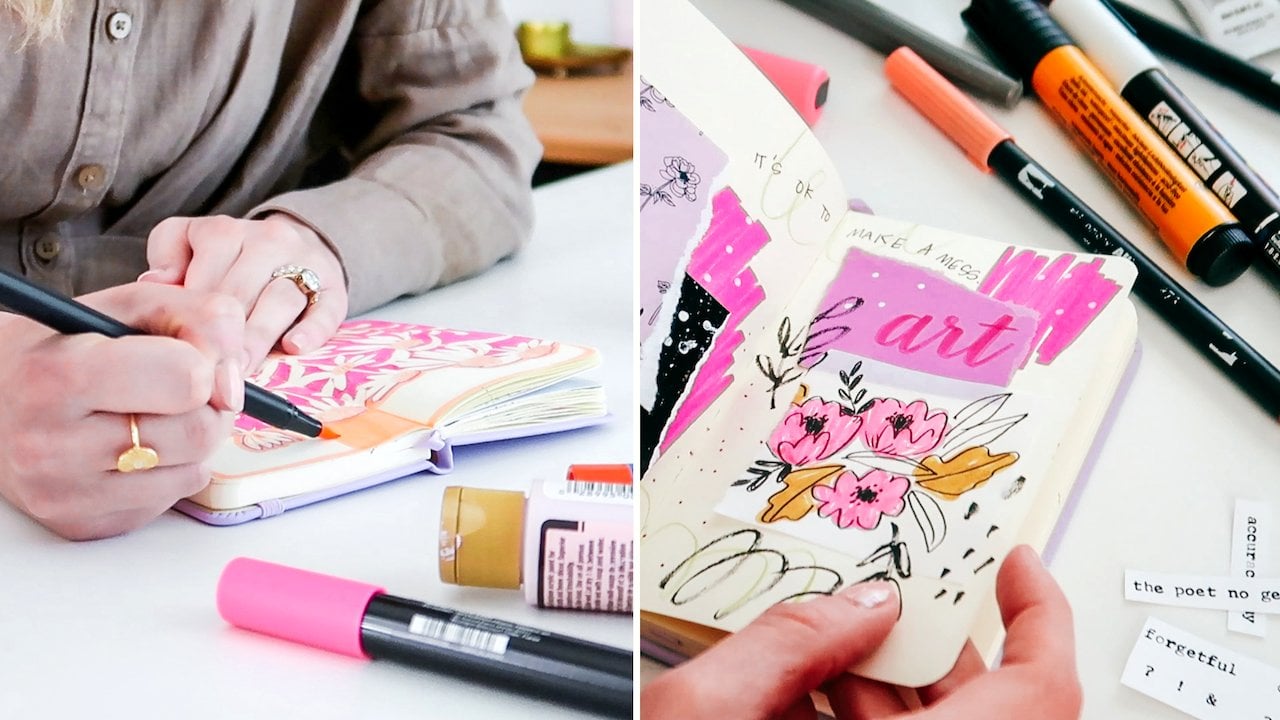
8. Art Journaling Techniques in Action: Before we wrap up the class, I'd like to flip
through my own journal with you and show you some examples of how I've used the different techniques that we've covered in this class. And I'll also talk about how
they've helped me develop my art style and how it's carried over to my
professional work as well. In this pocket
size journal here, starting out with a example of a recipe for the background instead of paint, I used marker. And then instead of a
picture, I did a drawing, very messy drawing in
ink of a coffee mug. And then for Penn, I created some
repeating marks here, and I also wrote
that in with pen. This is a great example
of the recipe as well. So lots of different colors of paint in the background here. And then I chose a photo. This is actually a
photo of my dog here. The photo didn't
turn out very well, so it's hard to see her, but I know if she's there, so I always have a smile
when I look at this page. And then I just wrote
forever on top of the photo. I also created a
little collection of some different flower types here with different
line drawings. So you can absolutely combine the different techniques into one page to create a
really interesting page. This is an example
of some repetition. I loved to draw flowers. And one of the ways I've
found my style as an artist is by asking myself
what I like to draw in drawing those
things over and over. And for me, it's
a lot of flowers, a lot of leaves. You'll see a lot
of that in my art. I also found that I tend to choose the same
colors over and over. So you'll see lots of green, lots of pink and
lavender and orange. And my work in this journal, I started out with a collection, just challenging myself
to start drawing some coffee mugs and then I moved on to other types of drinks and containers
for beverages. And just trying to come up with as many as I could think of. Here's an example of some
repetition with a marker. I just chose these
Tetris like shapes, but with rounded
edges and I wanted to see how they would all
fit together on the page. So I just kept drawing
these interlocking shapes. A swatch page of the different supplies
that you have is always a great collection to do. And it can be a good reference for you because you
can look back and see how the different materials look on your particular paper. These flowers started out
as a collection where I was just drawing as many different flower
shapes as I could. And then I began
repeating some of the same shapes and
different colors. And this is a piece that
was just something I was drawing for fun just
to relax one day. And I actually ended
up scanning this page and using it in my professional
surface design work. So it's now in a pattern that I've used on a couple
of different products are journaling just
helps me to relax and really get creative
with no rules. And sometimes that
actually results in some really interesting
creative work. I used repetition here
to paint these leaves. I had at the time just
gotten my first set of gouache paint and I wanted to see how they would
interact together. So I started with
some red paint and some green paint and just drew these repeating leaves
over and over to see how they would
blend together. And I did make a note
of which colors I used. This pattern is just a
collection of repeating lines. So I started at the top
and work my way down just drawing as many different
lines and marker as I could. This is a great example of my recipe technique
and also shows how you can journal with
just a limited amount of time and whichever
supplies you have on hand. So in one sitting, I created the
background just with a few different
colors of marker. I drew these repeating lines. And then on another occasion
I collaged the photo and added in this
written message here. So we have a marker background, a picture, and a pen. Each of these steps just
takes a few minutes. So I love that about
art journaling. You don't have to spend
a lot of time at in one sitting to have an
interesting result. Another of my recipe here now this one
doesn't include paint, but I actually started
with my photo and then added in some pattern
paper and then finally some lettering
with this page, I started out by drawing repeating rectangles
all over the page. Then I felt like it was
still a little bit empty. So I decided to draw in
a collection of flowers and leaves and trying
to draw them in as many different ways
as I could think of. This is, without a doubt, one of my favorite
journal pages. I started out with paint. On this side I used
watercolor paint and on this side I used
some acrylic paint, and then I layered in
a Polaroid photo here. I also explored some
repetition with a pen here. And then the lettering, this quote here was something
that my grandmother said to me and she's
no longer with us. So I love looking at
this page to be able to see something that she
said just in passing. But it's nice to just
be able to remember those words and think
about that conversation. Another great way to
test out your supplies. I started by drawing
these little coffee mugs in as many of my different
pens as I could. And then I layered different colors of
watercolor over top. I wanted to see how the
different colors would turn out, but also see how my pens would react to the watercolor
and see which ones would blend together and which ones would withstand the
water. So it's great. And I actually refer to this
page all the time to see which of my pens will play
well with my watercolors. One final example, this combines the element of
repetition in the background. So I used some repeating lines here and watercolor to
create a background. And then I added my photo
and collage elements. And finally did some
lettering here with a permanent marker just
right on top of my photo. One more collection I
wanted to show you. I started by water coloring
some rectangles here, and once those were dry, I challenged myself to draw
all of the different types of light fixtures in my house and I didn't think I had
enough to fill this page, but it turned out I did. So always a creative
exercise to challenge yourself to draw as many of
something as you'd think of. So I hope you enjoyed
seeing how I've used these techniques
and my own journal. And hopefully that gave
you some ideas for how you can continue your
practice on your own.
9. Final Thoughts: Congratulations on
finishing the class. I hope you enjoyed
exploring art journaling. Together we talked about what art journaling is an export. A few different techniques
to make pages together. If there's one thing I hope
you take from this class, it's that art journaling
is a fun outlet to express yourself and
explore your creativity. I hope you will continue
using the techniques that we covered to make your
own journal pages. I've created a QuickStart
journaling guide to help you keep journaling. And you can download that under the projects and resources
section of the class. If you have any questions, you can post them in
the discussion area. If you enjoyed the class, I would appreciate it if you
hit the Follow button next to my name and leave a
review of the class. Finally, I'd love to
see your finished work. So don't forget to
take a photo of your journal pages
and upload them to the project gallery so that myself and fellow
students can see them. I can't wait to
see what you make.
 Ashton Womack, Artist & Surface Pattern Designer