Transcripts
1. Introduction: [MUSIC] Acrylic paint
and brush pens are some of my favorite materials
to use in my journal. These materials just invite playfulness and allow
you to work loosely so you can focus on the journaling process of
documenting your everyday life. Quirks and
imperfections are okay. That's what captures the
way you see the world and it makes for a journal
that is unique to you. Hi, my name is Ashton Womack. I'm an artist and surface
pattern designer. In this class, we're
going to explore acrylic paint and brush
pen techniques for art journaling to document
our everyday lives. I'm lucky enough to
have my dream job as the artist behind
Virgo and Paper, where I create artwork for stationary and
lifestyle products. But even as a working artist, it can be really hard
to find the time to just play with my art
supplies and be creative. For many years, I've used
an art journal as the place where I can explore my thoughts and ideas in a
low-pressure setting. My journal also serves as a really unique
scrapbook of my life. In this class, we'll explore journaling with two of
my favorite supplies, acrylic paint and brush pens. We'll try different methods of layering paint and
pens together, and we'll follow three
journaling prompts to create pages together that will
document our everyday life. By the end of the
class, you'll have created a few journal pages and learned some
techniques that you can use to continue
journaling on your own. I really enjoy capturing inspiration from my everyday
life in my journal. I can't wait to show
you how I do it. Let's get started. [MUSIC]
2. Class Project: In this class, we'll start with some warm-up exercises to
get to know our supplies. Then we'll explore three
different journaling prompts to create three
journal pages together. When you're finished
with the class, I'd love to see your work. You can post pictures of your completed journal pages
in the project gallery. Head to the next lesson to see all the supplies you'll
need to get started.
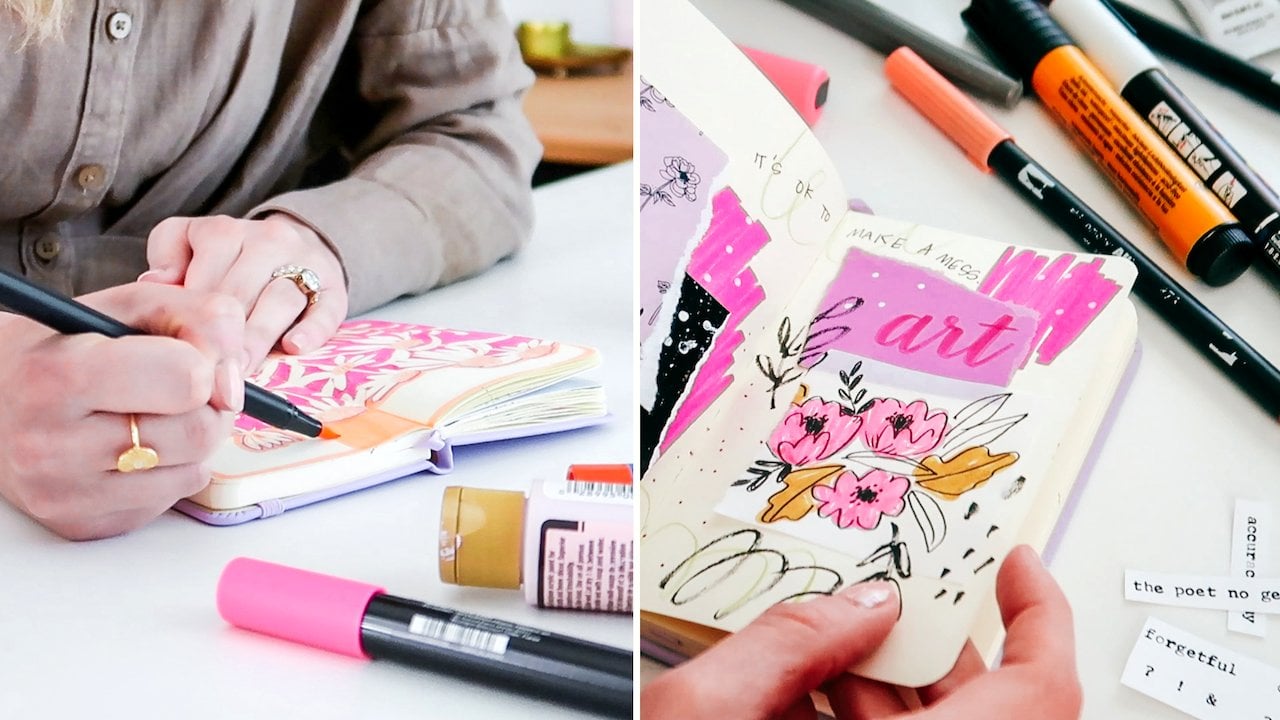
3. Tools and Materials: Let's talk about the tools and materials that you'll
need for this class. First, you'll need a journal. My journal is from the
brand Art Alternatives. It has 70-pound paper
and lots of pages. I feel like sometimes using
an expensive sketchbook can put a little more
pressure on my artwork. For journaling, I like to use an inexpensive student
grade sketchbook, but feel free to use any sketch book that you
like and have on hand. The first supply we'll
use our brush pens. You'll want to use a pen with a dark black ink
and the brush tip. My favorite pens are a
Tombow calligraphy pen, the Pentel pocket brush pen, and a micron pen in size 05. Then we'll also be using
some acrylic paint. Some of my favorite
acrylic paint brands are Liquitex basics. I really like their
basic acrylic and I also enjoy their
heavy body acrylics. But for journaling, I
love to use craft paint. Craft paint is
great because it's inexpensive and it comes in just about every
color of the rainbow. You don't have to think
about mixing colors, you can just choose your
favorites right off the shelf. Along with my acrylic paint, I'll be using a small
plastic paint palette and some paint brushes. These are just the
materials that I suggest, but art journaling
is very flexible. I like to say that there
are no rules in journaling. Feel free to follow along with the prompts using any
materials that you like. Take some time to gather your supplies and
let's get started.
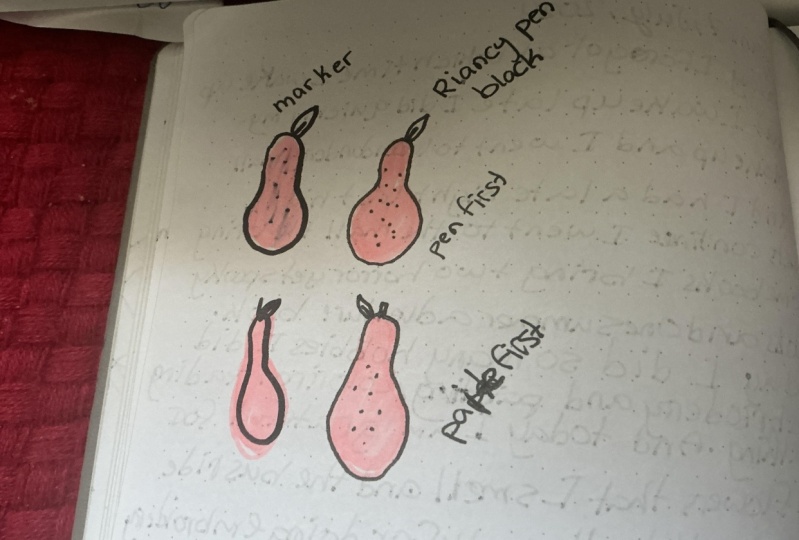
4. Warm Up with Acrylic Paint and Brush Pens: We're going to start out with a warm-up exercise to just get the creative juices
flowing and test out our materials and see
how they work together. We're going to do
this by drawing the same piece of
fruit six times. I'm going to use my three different pens
and draw each one twice. I'm going to start out with
my Pentel pocket brush pen. I think the piece of fruit that I would like
to draw is a pear. You could choose
anything you like, a pear, an apple, a banana. I'm just going to draw a
really simple small pear. It doesn't have to be perfect. You could really do any
shape that you want. This is just to test out
our materials with each other and see what
combination we like. I'm going to start with
the Pentel and then I'm going to go to my
Tombow brush pen next. I like to give my
pears some spots. The next I will go
in with my micron. If you're trying this out with
some different brush pens, you might want to label. You know what? Let's
give our pears a stem. You might want to label
which pen is which. If you're like me,
you might forget. [LAUGHTER]. I'm going to go
back and give them a stem. I've chosen these
three pens because the line weights are a little
bit different for each one. Then the second step is going to be to start by drawing
again three pears, but this time I'm going to
start with my acrylic paint. I'm just going to choose
one color of acrylic paint. I think I'm going
to go with a pink. I'm going to choose a small
paint brush for this. I'm just going to loosely
create a pear shape, it doesn't have to be perfect. I'm going to just
create two circles like a little snowman and then
just blend them together. Just making the bottom
circle a little bit larger. That is the first
step of our warm up. We're going to just
let this completely dry for a few minutes and then we'll go on
to the next step. So our paint is just about dry. The great thing
about working with acrylic paint is that
it does dry so quickly, brush pens as well, and that's what makes these
materials really fun to use. I'm going to label my
illustrations as well. I'm going to label this
top row as pen first, and then I'm going to label
my bottom row as paint first. You may have guessed, we're going to actually
draw over the top of our paint here to
create some more pears. Again, starting with my
Pentel pocket brush pen, then my Tombow marker, then finally my micron pen. This is why it's
really important to make sure that your paint is dry before you draw over
top of it with pen. You don't want to
ruin your brush pens. Definitely make sure that
your paint is completely dry. Now for the final step, we're actually going to
take our acrylic paint again and we're going to layer that over top of
our first illustrations. Yes, it may cover up some of your pen work, and that's okay. You can color in and stay within the lines or you can
overlap a little bit. Personally, I like that
because it gives it a little bit of an
illustrative style. Again, I'm going to
let my paint dry. Now with layering the paint
over those top illustrations, we did lose some
of the pen detail. At this point, I'm going to use my
pens to bring back just a little bit of that detail once your paint is
dry, of course. So there we have our
six different pears. The purpose of this exercise
is to help you see what your preferences are
when it comes to combining brush pens
and acrylic paint. Do you prefer to
put your paint down first and then work with pen? Do you prefer to put
down pen and then paint? Do you like when the paint obscures the details
or do you want to use your pens to bring
back some of that detail? I like to try this
anytime I want to use a new art supply. It's a great way to find out which art supplies
work well together and to figure out what your
preferences are as an artist. The combinations you like will
help to inform your style. Lastly, I recommend
dating your page. Just as a nice reference, you can come back to
it in the future. I always like to date
my journal pages. That's it for our paint
and pen warm-up exercise. Let's go ahead and get into
the journaling prompts.
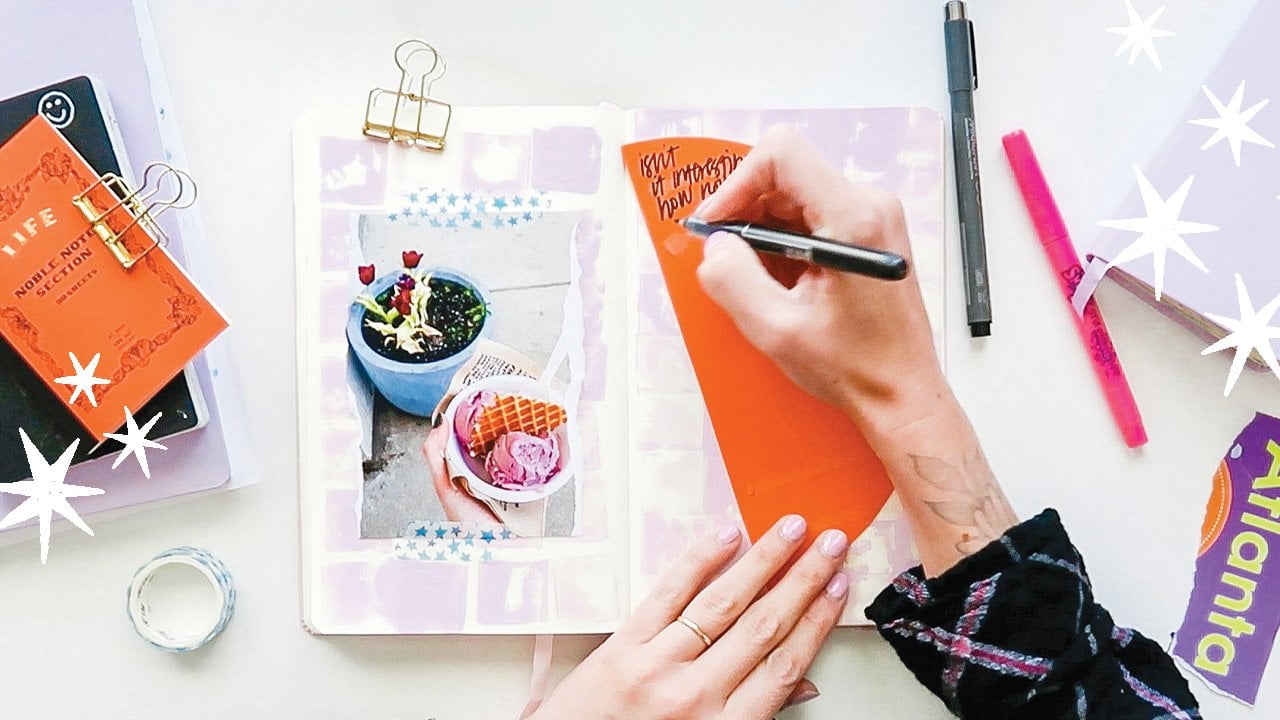
5. Journal Prompt: Where is Home?: For each of our journal pages, we're going to focus on a
single prompt or topic. For this page, the
prompt is where is home? Home could refer to your
house or the place that you live or a notable
building in your town, or any scenery from
your local area. It could be anything
about the place that you live or the
place that you call home. I'm going to work
a bit from memory and a little bit from
a reference photo. This is the photo
I'm working with, this is a photo that I took
myself and it is included in the PDF that is available under the projects and resources
section of the class. If you'd like to
download this photo and work from it as
well, you can do that, but feel free to work
from a photo you've taken or you can also work from your own memory or imagination. I wanted to tell you
a little bit about the photo because I
think that will help illustrate how I
take inspiration from my own life to my journal. This was a photo that I
took with my film camera while walking around in
Atlanta where I live. What I remember
most about that day and the moment that
I took the photo was this helicopter here. It was very, very loud and [LAUGHTER]
in the photo, it turned out to be a neat
photo of some buildings. To me it represents the ongoing
construction in my city. There's always
something going on. There's always new
buildings being developed. I want to capture that
memory in my journal, focusing not only
on the scenery but the sound of the
helicopter as well. I'm going to translate that
memory into a journal page. In deciding [NOISE] exactly
how to capture that, I'm going to refer back to
our warm-up exercise and see what combination of materials I really liked and
what I want to work with. I think my plan for this page is to start by acrylic painting first and then layer some brush pen on top
of the dried paint. Now I'm not going to
worry about trying to capture the photo
exactly by any means. I'm really just focusing on capturing my own
memories and thoughts. [NOISE] I'm just using a orange, pink, and a blue paint. I think [NOISE] I want
to go in and start with a large paintbrush just to
get some paint onto the page. I'm going to use the
blue to represent the various buildings
and I'm just going to block out some
really large shapes. [NOISE] If your paint is not flowing very easily, you can just dip your paintbrush into a
little bit of water. Now for the background
of the sky, I'm actually going
to use a light pink. Just think it would be a
nice contrast to the blue. I'm just going to
quickly block that in. I really like to work fast
in my journal and not worry about trying to make a
perfect work of art, but really just capture
whatever is on my mind. Now, taking a look at my photo, there are just two orange
or red color details. One is the helicopter
at the top and the other are three
red lights down here, very small at the
bottom of the picture. Those just stand out
to me as [NOISE] being the red elements. [NOISE] I wanted to use a
really small paintbrush with this red orange paint and I'm going to add in those
traffic lights. Rather than trying to
capture the photo exactly, I'm just picking and
choosing the elements that stand out to me or
are meaningful to me. Something about my
memories that I noticed and then rather than
draw an actual helicopter, I'm going to draw a star shape to represent
the helicopter blades. Like fanning out. I'm not done with the
page but I'm done with the acrylic
painting portion. I'm going to go ahead
and let my acrylic paint dry before we move
on to the next step, which will be adding
the brush pen. Now that my acrylic
paint has dried, I'm going to move on to using
brush pens on this page. I want to capture the way
that this scene felt to me. The large helicopter on top of this building was so loud and the sound
was really deafening. I want to capture the sound, and I'm going to do that with an abstract shape with my pen. I think imagining these
helicopter blades circling and having
a really loud sound, I'm just going to let
my pen do the talking. [LAUGHTER] Another
thing that really stands out to me
in the photo was just the sheer number of windows in all of
these buildings. I think I'm going
to try to capture some of that and I'm going
to use my micron pen for a little bit of a more thin line and
I'm just going to start drawing some windows by
drawing little rectangles, and by no means do these
have to be perfect. I'm just really
focused on trying to capture the feeling
of the scene. I often find that in my
journaling I end up drawing repeated shapes over and over and focusing in on the patterns
that I see in the world. Patterns are just such a nice
repetitive thing to paint or draw and it can actually
be really meditative. At this point in the process, maybe you realize
you made a mistake. Maybe your acrylic shapes
weren't quite right, or you drew too many windows, or you feel that you
made some mistake. But I encourage you to
keep going and finish the page because
these quirks are what capture the way you see
the world and the things that you notice about the
scene and about your memories. The imperfections are what
make it a piece of art. I would say keep going and finish out the page and
see where you end up. With your brush pens you
can also incorporate writing or lettering
into your page. Maybe you could write down
what the scene means to you or capture the significance
of what home means to you. I'm going to do
some lettering over here on this side of the page. I journaled a little bit
about what I love about my home and why I enjoy
calling this city home. I'm going to call the page
complete but before I do, I'm going to date the page. We have our completed
page and we are ready to move
on to the next one.
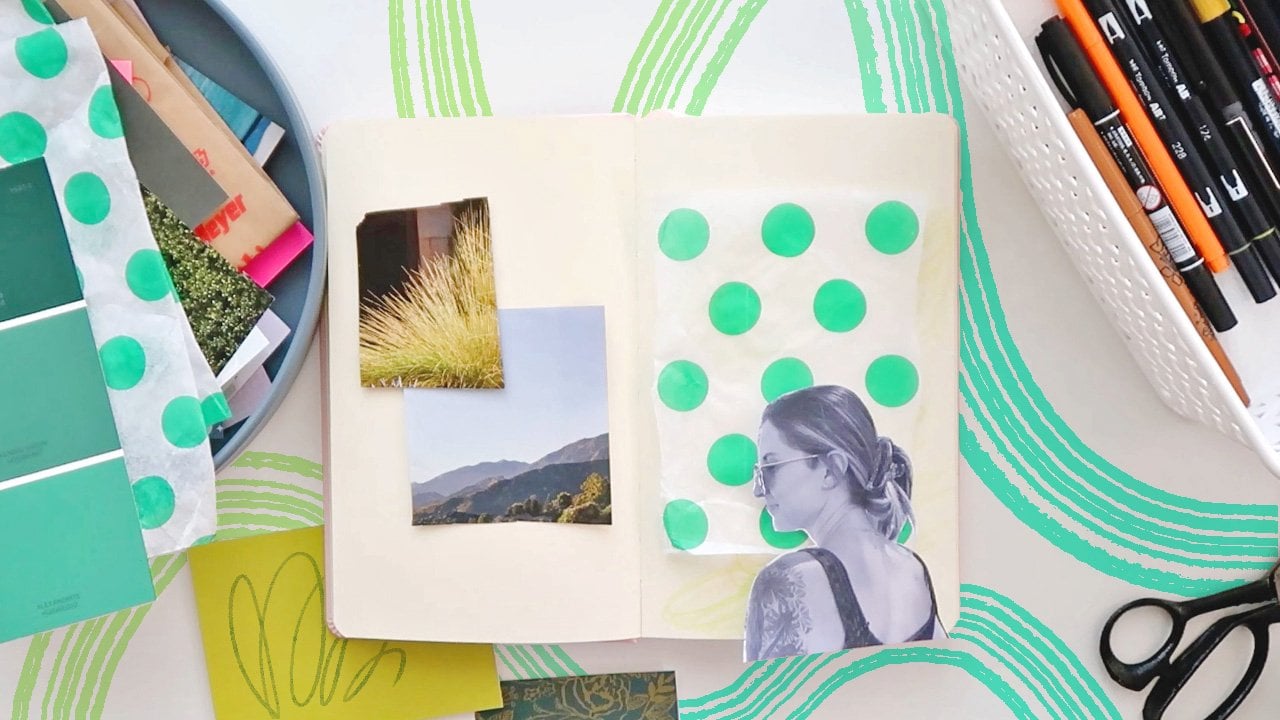
6. Journal Prompt: Go Outside: For this next page, we're going to work with
the prompt go outside. We're going to look outdoors for inspiration for this page. There's so much to
be inspired by from plants to animals to the sunset. I'm going to work using
this photo that I took in a local garden
as my inspiration. This photo is also in the
downloadable resources PDF, so you can follow along with
this photo as well or use your own photo or your own
memory as your inspiration. Referring back to our
warm-up exercise, I'm going to make
a decision about how I'd like to
combine my materials. I think for this page, I would like to try
working first with a brush pen outline and then going in with acrylic
paint second. This was a photo that I took
in a local rose garden. Of course, the flowers
are really beautiful, but I love the colors that I was able to capture in
this photo as well. I'm going to start with my Pentel pocket brush pen and try to capture the
beauty of this flower. What I love about this pen is just the loose style it's difficult to be too controlled
with this sort of pen. But for this subject matter, I think it's just perfect for capturing this beautiful flower. I'd like to use my Tombow pen here as well for a
little more detail. Something that I notice and love about these roses is
just the shape of the leaves and how they have
that slightly jagged edge. I'm not following
the photo exactly as far as exactly where
the leaves are placed. But I'm just taking
inspiration from the shapes and making up my
own design as I go. Another thing that grabs
my attention is all of the grasses in the
background here. I'm going to capture
those very loosely. I need to warm up my
pen a little bit. [LAUGHTER] There we go. This pen is so interesting because it's almost like
using a paintbrush with ink. At times it flows really well, but then the faster
you work with it, the ink can slow down and you get so much
texture and variety with this. Again, on this page, I want to do a little bit of lettering. I'm just going to write
In the Rose Garden. Now, I'm going to go in with a little bit of acrylic paint. I still have some pink paint left over from my other page. I'm going to use that
to fill in my flower. Again, adding just
a drop of water to help my paint flow a
little bit more easily. Again, at this point
I'm going to lose some of the details
of my pen drawing, will get covered up by the
paint and that's okay. I might go back and
add some detail with my pens at the end if I feel like I need to save
some of those details. This flower is definitely
the focal point of my photo and of my
journaling page, but there are some
other pink flowers floating around in
the background. I think I want to
capture that with just some small circles just to represent
those little flowers. While we're at the
acrylic painting stage, I think I'd like to add some green to my palette because, in my inspiration photo, of course, there is
lots of green and blue. I'm going to grab a
little bit of water on my brush and a little
bit of that green paint. I want to water it down just
a little bit so it flows. I think I'm going to cover up my grasses that
I drew with pen. This also will serve to create a nice green background
for the pink flower. You'll notice I'm using what is a pretty large brush
for this paper size. But I like that. I like using an oversized brush. It's fun, it makes you feel
a little bit clumsy and I think it pushes me to just capture the scenery
really quickly. Even though leaves are green, I'm actually going
to intentionally paint around my leaves. I'm working mostly
without a plan. I just know that I want the majority of my page
to be green because that's definitely what I took inspiration
from in my photo. It's really great
when you work from a photo or your own
memories because you can capture the things that stand out to you and you can
also edit out the details that maybe aren't as interesting to you or don't
really stand out in your memory and capture the
way that you see the world. I think what's
interesting is that if everyone worked from the
same photo inspiration, I think we'd all have a
different journal page because we would all notice different things
as being important and choose different
details to include. I'm going to go back in
with my light pink paint. Some of my paint got a little
bit covered up with green. I'm just going to grab some
more pink paint and save those little flowers
[LAUGHTER] and also save some details here in my flower
that got covered up. At this point, I
feel like it gets really fun because
you can work back and forth between the pen that you have on the
page and the paint that you're adding and decide what pen details
are going to stand out, and which paint
details are going to stand out and
work back and forth. I think I am finished with my acrylic paint
stage of this page. I'm going to go ahead and
let my paint completely dry before we move on
to some more pen work. My paint is now completely
dry and I'm going to use my brush pens to
add a few final details. I'm going to go in with
my Tombow pen now. I'm going to pull out
some of the detail from my flower that got lost
in the painting process. I'm just going to go
over those details. I'm not tracing the
original drawing exactly, but just pulling
out what I think are the details that
I want to stand out. I'm using a different
pen than what I originally did
this drawing with. I like the variation
in that line work, this adds a little bit
more interest in detail. Then I'm also going
to add some detail that wasn't there originally. I'm going to add a
little bit of detail to my smaller flowers, just creating little
abstract flowers. Then I think I'm going
to just play around with the type of
flowers that these are. Make some fun, abstract, almost
daisy-looking flowers. Finally, I'm going
to date my page. There we have a completed page and we are ready to go
on to the next one.
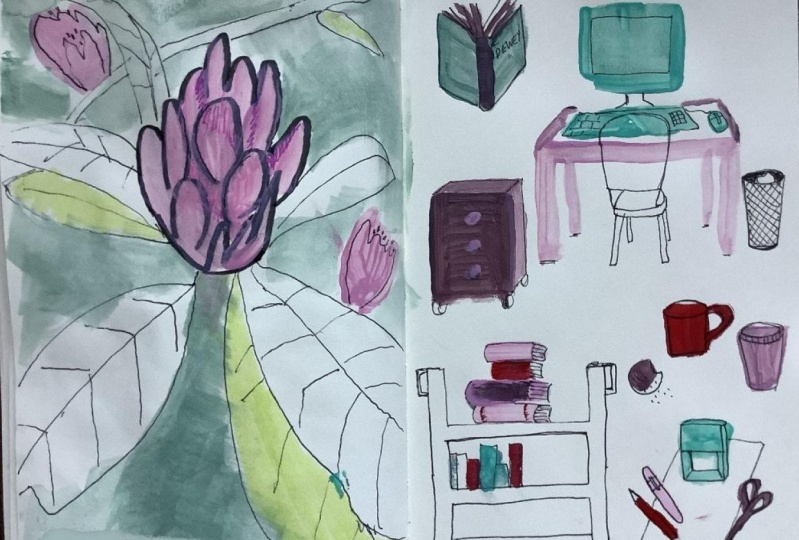
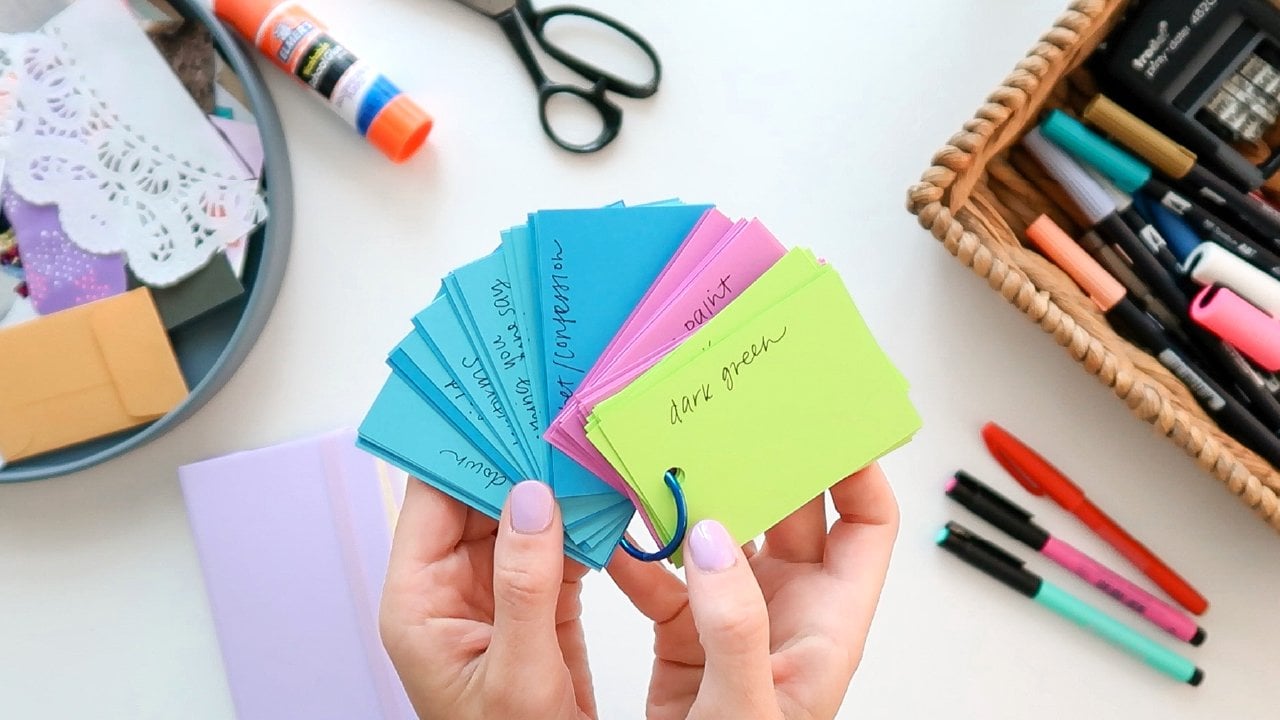
7. Journal Prompt: Tools of Your Trade: For this page, our
journaling prompt is Tools of Your Trade. We're going to document the
tools you use for your work, whatever those may be. It could be the items that you have on your
desk or in your bag. Feel free to use the
term work loosely. You can document the items that you use for
a creative hobby, maybe photography or sewing or even the items that you have in your kitchen that
you use for cooking. It's completely up to you. I'm going to document the items that I
have in my studio, that I use for my artwork. I'm currently in my studio, so for my reference, I'm going to be looking
around and pulling inspiration from the many
items that I see around me. I'm going to start with my
Pentel pocket brush pen. I really enjoy this pen for
its loose quality and so I'm going to start by documenting
some of my art supplies. We'll start by documenting
my paint palette. I'm going to document that as a simple circle with
some other circles, and this will be really
fun to color in. We have a paint palette
and then of course with that we have paint brushes. Again, I love that this brush
is so loose and you really can't capture too
many small details, so it forces me to be really loose with my
work which I enjoy. Then maybe we have some
little tubes of paint, and then also for my work, I use a laptop quite often, as well as a printer. My shapes are really
quite abstract here. Then I'm also frequently
using my sketchbook. I also have my camera. At this point I'm starting
to run out of ideas. I'm looking around my office for some inspiration and I can
see I have some scissors. I've got a little tote bag
because I'm frequently carrying around my art
supplies from place to place. Then something that's
not quite a tool, but you will frequently
find in my office, is a cup of coffee. I also have some of
these little paperclips. I'm definitely
exaggerating the scale. Of course, paperclip is
not the same size as a cup of coffee,
but that's okay. Definitely take
creative liberties and draw whatever you
feel like drawing. I think with my camera, I'm also going to
draw a little tripod. Then of course with camera
and computer equipment, there's often some
electronic cords and cables, or more than one in my case. Many cords and cables. [LAUGHTER] Let's draw
a couple of them. Okay, so I think
that's a nice spread. I'm going to cap my pen. This pen is very
fast drying so I can go ahead and go in
with some paint now. I've got some leftover
paint from my other pages. I'm going to choose, again, a small paintbrush
and I'm going to start with some
of my pink paint. Now I'm not going to worry about coloring these items exactly
as they are in real life, but I'm just going to use
the colors that I like. Of course, my laptop
is not really pink, but I just can't resist making my laptop pink in my illustration so that's
what we're going to do. Then I think it
would be fun to make my sketchbook pink as well. It's not really, I think it would just be
fun to do it that way. I'm going to add some green
to my printer as if there's a green sheet of
paper coming out. Okay, I think that is it
for the acrylic paint. Again, I'm going to wait
for my acrylic paint to completely dry before I
add some more pen details. Now that my acrylic
paint is dry, I'm going to go in with some
more brush pen details. I'm going to use my Tombow
pen to pull out some of the details that were lost with my paint on some
of these objects. You can also add new
details at this stage; maybe some details that were not in the
original illustration. For example, on this
printer here I'm going to, I think, draw a little flower, maybe as if there's an art print being printed and
coming out of the printer. I'm finding as I
go, that I like to work with my largest brush pen first and then gradually work on smaller and
smaller details. Now I'm going in with
my most detailed pen. Again, I think I'm going to add some more details
to this laptop, to the keyboard, maybe even draw something
on the computer screen. We have a little web browser open with some
artwork shown on it. I'm definitely
just straying from what's actually in my
office and my tools and what the details
really are and just having fun at this stage,
being imaginative. That's what I love
about journaling; is it's really somewhere
in between what's really there and the
way you see the world. You could even at this stage, add some new objects
if you like. Something that I feel
might be nice for this page is to do a border. I'm just going to do a
really thin pen border. Just because my
objects are floating, I feel like this
will ground it more. Again, I bet you can guess what the last step of
this process is. But I always suggest
to date your page, date your artwork so that
you can look back on it. I'm going to give
it a little title, Tools of The Trade, and give it a date as well. There we have our
completed page.
8. Final Thoughts: Congratulations on
finishing the class. I hope you enjoyed art
journaling together. We experimented with combining
acrylic paint and brush pens and explored a
few journal prompts to create three pages together. If there's one thing I hope
you take from the class, it's that art journaling
is a great outlet to explore your creativity
and document your life. I hope you will continue using the techniques we covered in
class to keep journaling. You can download the
journaling reference document under the Projects and Resources section of the class for more ideas you can
use in your journal. If you have any questions
about this class, you can post them in
the discussion section. If you enjoyed the class, I would appreciate it if you hit the Follow button next to my name and left a
review of the class. I also have another
class here on Skillshare called Express Yourself Through Art Journaling, so head over to my teacher page for more journaling techniques. Finally, I'd love to see
your finished class project to share your work with
myself and fellow students, you can upload photos
to the project gallery. I can't wait to see
what you create [MUSIC]
 Ashton Womack, Artist & Surface Pattern Designer