Transcripts
1. Introduction: Hi. My name is [inaudible] , and I'm an artist from Italy. My work focuses on the natural world, and I'm sure you'll always be able to find botanical elements incorporated in my art, whether it's an illustration or a graphic design. This is because I can see that the relationship between us and nature really important, and I believe it is a way for us to dive deep within ourselves. This is what we'll be focusing on today's class. Today, we're going to learn how to depict our own inner depths. Each one of us has a garden hidden deep within our being, a place made of feelings, sensations, emotions, a place we can express through a real botanical vision or an imaginative one. To do that, we're going to create a window on our inner garden portraying these hidden depths. We'll depict our secret garden with patterns and botanical elements that can be real or imagined. What matters is that they speak to you. We'll do this through gathering inspiration in nature and exploring patterns and botanical details. Then we can create a vision of our inner worlds step-by-step. Even if this sounds a bit new to you, we'll also be learning lots of tips and techniques to draw botanical elements and patterns from the natural world. There's something for everyone. This class will help you look within yourself in a creative way. Don't worry about the technical aspects of drawing or using fine liners because this class is totally beginner-friendly, and even if you're an advanced artist, I'm sure you will get to know many ways nurturing your creativity and illustrating nature. Open the door to your secret garden and join me in this class.
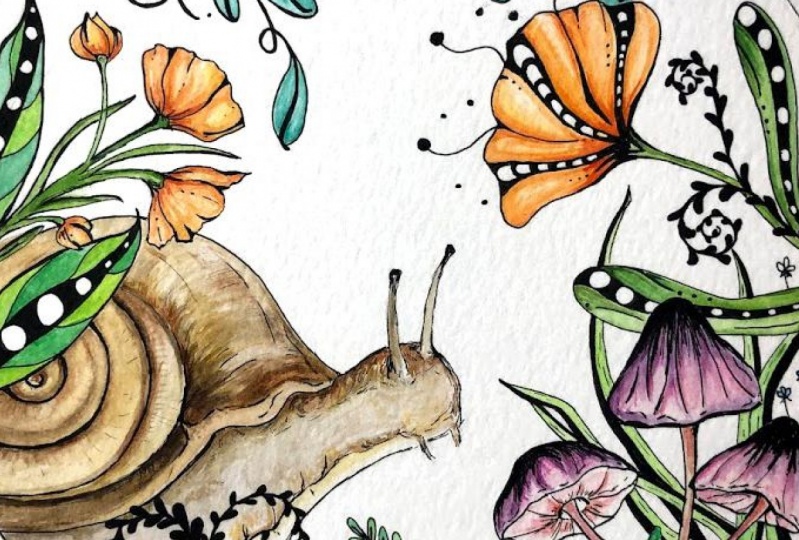
2. Class Project: Welcome to the class and thank you for joining me. I am very excited to take you in this journey where we'll be exploring patterns, drawing plants, flowers, and creating our secret garden. The idea for the class project came from a mural I did a couple of years ago. I had to draw on three-pointers. I had complete freedom, which was amazing. So I went for something wild and really botanical, a mix of patterns and elements from the natural world. I really like the result and always thought they represented some surreal and magical worlds. For this class project, think about what inspires you, what fascinates you the most about the natural world. Maybe you like insects, or tropical flowers, or jungles. You can incorporate all those elements in your secret garden. If you venture outside, the inspiration is endless. We'll start off by gathering inspiration in nature. As mentioned before, I will show you what resources I use, from books to websites, to how I research my references. Next, I'll provide you three worksheets that will help you get started sketching patterns, flowers, leaves, everything you need to create your final project. All the elements that will be included in our illustration can be either real or imagined. So I'm not only going to show you how you can start noticing patterns around you, but I'll also teach you how to draw them and how to come up with your own ones, which can be the result of combining more than one reference or the result of your own imagination. Same goes for plants and flowers. You'll be able to apply my tips and techniques to anything else you want to include in your own garden. Lastly, we'll create our secret garden by combining the patterns we'll draw with flowers, plants, and anything else that speaks to you. My recommendation is to find 20 minutes or half an hour to follow the first four lessons. Then take your time to work at your own piece on what you've just watched. This is going to allow you to absorb all the information, loosen up a little, and get to experimenting with drawing patterns and botanical elements. Next, you can watch the remaining lessons and start creating your secret garden. All the class resources can be found by clicking on the Projects & Resources tab down below. On the right sidebar, you can download the worksheets, and on the left side you can find my books recommendation and a Paxos Board where I've collected a few images you can use as reference. At the end of this class, you can upload your class project by clicking on the Create Project tab. Now let's see the materials you're going to need. I'll see you in the next class.
3. Materials: These are the supplies you're going to need for this class. Let's talk a little bit about paper. For this class, I am using a mix media paper by Canson in A4 size. I personally love to work on this paper because it's thick, smooth enough, and I really appreciate the warm wide surface. I'll be using this paper for our final class project and the size is really up to you. But I would recommend you use smooth paper because we'll be using fineliners and drawing on a smoother surface will prevent you from getting shaky lines while you're drawing. Another thing I look for is the width of the paper, even though fineliners usually don't lead through, I want my paper to be thick and I just want to be sure that when I ink out my sketch, I won't be poking holes into the paper or scraping it. Before drawing our final illustration we'll be sketching flowers, plants, patterns. This will be like a playground for you to explore different ideas. I will provide you three different worksheets. But if you are not able to print them out, any sketchbook or a sheet of paper will work for this step. Next, you'll need a pencil and an eraser. You can use any pencil just make sure you're not pressing too hard when sketching so you can easily erase the pencil lines at the end. Then you'll need fineliners. When it comes to fineliners, there is a lot to choose from. Over the years I've been trying a couple of different brands, but the ones that I'm showing you today are all great brands. It definitely comes down to personal preference. I would say that I'm not loyal to any particular brand, so I would recommend them all. Let's quickly see how they work. Let's start with the first one I've ever used, which is Staedtler. I made most of my mandalas with this fine liner. But since trying other brands, I've noticed that the ink is a little faded in comparison to the others, which doesn't mean it's bad. But it's just a preference and I prefer to work with a rich ink fine liner such as Uni PIN or Sakura Micron. These two brands became my favorite ones lately for two reasons. First, you can really feel the smoothness when you're drawing, and this really helps to achieve clear and neat lines. The second reason is they've got a rich black ink and the illustrations look amazing. If you're just getting started and you're not sure which fineliners to choose, I would definitely recommend you the STA fineliners because they are super cheap and you can get a 12 pack, which allows you to experiment with different tips and sizes. I have to admit that these fineliners work amazing. All these fineliners are waterproof and you can use them together with water colors. They do not fade over time and as I mentioned before, they do not bleed through. This was my personal experience with these brands and you should always experiment with our supplies cause, it's the only way to understand and figure out what feels better to you. Again, all these fineliners work amazing. Lastly, you'll also need some technical tools that we'll be using to divide our paper and to create the shape that will contain our garden so protractor and a ruler will come in handy. Now that you've prepared all the materials, it's time to get some inspiration.
4. Finding Inspiration: When we talk about patterns, we usually refer to something that is repeated over and over again. We can think of lines, colors, and shapes repeated regularly. For example, in art and even in architecture, we can see patterns. We can think of a motif combined and repeated to design a pattern visually appealing to the viewer's eye. They're also widespread in nature, but the patterns you see in nature have some variation or irregularity within their structure. They have a controlled randomness, and they often involve structures. Just to give you few example, we can see these phenomena expressed in spirals, waves, dunes, stripes and spots, and cracking patterns in rocks and mud. Why am I talking about patterns? In our final illustration, these patterns can embellish our shapes and make the garden feel more intricate and alive. They also add a little bit of mystery because only the person who draws them knows the origin of that motif. It can come from anything. It can come from the skin of a giraffe or the plumage of a bird. In the end, this class project is going to reflect your personality. But how do we come up with ideas for my patterns? The first thing I do is to gather inspiration. At this step, I need a reference I can look at or something I can observe. It can be a real flower, plant, or simply a picture. Here are three ways for you to gather inspiration. Let's start with the easiest and most accessible way to give some references, which is online research. If you've joined my previous classes, you know I'm a huge fan of Pexels, and this is what I use most of the times to do my research. I just love nurturing my imagination by simply stumbling across a picture that inspires me. I can visualize something in my head, research, and get a nice image of it. We can also gather inspiration through books. Whether you need a reference for a sketch or you're just looking for inspiration, there are many great books out there. Here are a few titles of books about nature that I can suggest. To conclude, head outside, nature is beautiful. Even if you are in the city, I'm sure you can spot a plant, or a flower or a pattern nearby. Take pictures during your walks and any time you find something interesting. Observing nature in real life and not through a screen can be a way to find a moment for yourself to recharge and to take a break when life gets busy. Once I have my reference, whether I downloaded it or took it during a walk, what I do is I import it on my iPad, and with my pen, I start to go over the details I find more interesting. This way, by tracing just a tiny portion of my photo, I make the detail or the pattern stand out and this gives me a better understanding of what I just found. If you don't have an iPad to do this, you can simply grab a sheet of paper and sketch the element you want to keep, or you can print the image and do the same thing with your pencil. This was my creative process, how I come up with ideas for my patterns, and I really hope you will enjoy this as much as I do. What to expect from the next lesson? We're going to start drawing some patterns that we can find on our first worksheet. I'm also going to be showing you the reference photos I used to come up with all of these motifs. During the next lesson, we're going to use some worksheets that will serve you for various purposes. First one is all about drawing patterns that I already prepared. With the second one, you can come up with your own patterns and feel free to research new images or take your own photos. Our third worksheet is designed for sketching botanical elements. This is going to be useful to brainstorm various elements that might make it to your secret garden. You can find them all in the Project & Resources section on the right-hand side. As a little reminder, if you're not able to print them out, you can follow along with the next lessons by using your sketch book, a sheet of paper, or your iPad.
5. Drawing Patterns (part 1): This lesson is designed so that you can see my process and so that you can start becoming more familiar with drawing patterns. Feel free to just observe how I extract patterns from images first because in the next lesson you'll have the opportunity to do yourself. Without further ado, let's jump right into the lesson. Here is a Paxos board that I use to find inspiration for these line patterns. It has images ranging from giraffes to close-up photos of plants. If you want to check out this board, you can do it by clicking on the Projects and Resources tab, and here's a link to the images. As you can see, nature is full of diverse patterns that we can draw from to create our own natural wonderland. For this pattern, I was inspired by this vibrant red flower with black freckles. Once I downloaded the picture from Paxos, I just open it on my iPad with Procreate, then I zoomed into the area of the image where the pattern I was interested in is located, and I started tracing the polka dots. I'm using this fine liner to fill in this worksheet, but feel free to draw in pencil first and then ink over your patterns. In the first circle, I'm drawing slightly curved parallel lines and filling in the space between the lines with the circles. Make sure that the diameter of the circle spends the distance between the two lines. After you've added the circles into the lines, you can fill in the empty spaces with ink. This was my interpretation of the polka dots we just saw on the flower but each one of you can translate this motif in a different way. For some of you, the dots might be best drawn as irregular circles. For others, might be better to fill them in ink. Possibilities are endless. To design this next pattern, I look at an image of an almost translucent leaf. When I zoom into this image, I think you can see how intricate the building blocks of this leaf are. I first trace the thicker vertical lines of the leaf. I drew two parallel lines a few millimeters apart to capture the thinness of the borders. Next, I drew the horizontal lines connecting the very cool ones. To recreate this pattern, you can draw several curved lines that represent the walls of the leaf. Next, fill the space between the vertical lines with horizontal lines that are either concave up or concave down. This will add volume to your pattern. As you can see, I'm filling in the pattern alternating between the concave up and down lines in order to keep the design interesting. For the next pattern, I found this beautiful baby fern almost resembling a snail. I traced the shape of the stem and also outlined the lines of the little circle leaves and decorated the stem. When translating this design onto the pattern worksheet, I again drew some curved vertical lines. Along the edges of the curved lines, I drew little circles. You can also draw straight lines each time we begin a new pattern. I tend to make them curved just because I find the final result really pleasant and I really like to add movement to the motif. Another really interesting photo I found was one of a snake. Snakes have scales that can form beautiful patterns in the natural world. When zooming into the photo, I noticed that the scales were shapes like triangles with rounded sides and they had small lines in between. The scales of snakes can take different shapes, however. I zoom into another area of the photo and notice that here the scales were more oblong and oval-shaped. I traced those as well just to have more option. An important tip I want to share in this is, be curious. Observe in depth your reference because you will probably spot more than one motif or detail that can simply be transformed and repeated into a pattern. Keep in mind that one reference can give you not just one idea, but many. Returning to our pattern washing, draw the scales as small triangles with rounded sides pointing up. Arrange them really close together, and of course, you can vary the angle at which you want to draw the scales. They don't all have to point upwards, you can also feel free to add small lines in-between or any other detail. It's really fun and creative mixing elements from your reference with the ones you make up and I encourage you to try that. Just to give you an example, you can think of adding some tiny dots at the bottom of each scale or interrupted lines laying on the entire shape. For this pattern, I don't have a specific reference, but it is a result of observing many plants and coming up with my own idea. I'm just laying down spiral shapes of different sizes and I'm adding this tiny motif on top of each one. You can also experiment with different types of patterns and not everything we design has to be based off of an image. It can simply be something that we can think of or that comes into our imagination. The real world can be a good starting point for sparking some ideas, but I always encourage you to use your own imagination and listen to your own intuition. My favorite part is freeing my mind from outside influences and just let my imagination flow. Another image that left an impression of me was this butterfly. There are two different patterns I detected. The first pattern is the way the lines of the wings are arranged. This take the shape of two parallel lines that are connected with lines resembling arrows. Next, I also noticed the eyes on the wings of the butterfly, and I traced the outer circle and then the inner pupil on the image. I then transformed this pattern into small circles on the pattern worksheet and filled with the smaller circles on the inside. I layered each on top of each other, and I fill in the spaces in between them to create a dense feeling. Good job on completing the pattern so far. We can take a little break here and then we can finish our remaining designs in the next lesson.
6. Drawing Patterns (part 2): Welcome back for the final part of our patterns practice. I really hope you're getting many takeaways and I hope you're feeling relaxed and inspired. This pattern is another good example of intuitive drawing. Again, I had no reference for it and I just drew what naturally came to me. I actually use a lot to summative and I like to use it to draw on petals and leaves. For the next pattern, I look at another image of a leaf that had very interwoven lines. When modeling this pattern on the worksheet, I just try to make the line sweep together similar to what I had observed in the image. Finally, we approach the last pattern while going through one of my botanical books, I came across this wild grass, and really like the motif, you can achieve this scale effect by scaffolding lines on top of each other, and you can start drawing either from the top or from the bottom. Through this class, I'll be showing you the complete process so that you could have an in-depth look at how I create patterns and overall how we nourish my inspiration. Now, I encourage you to use the second worksheet to draw the patterns that feels right and enjoyable to you and just let yourself go in this freeing and relaxing practice, go out in nature, spend some time out in the sunshine or lose yourself contemplating stunning pictures from our world online. If you don't feel like doing your own research, and you want to save some time, you can use my Pexels image gallery that I created as a reference, but if you want to create your own inspiration board, here are some keywords to get you started. If you will be using Pexels for your research, I'm just going to show you how you can create your own board. Once you have an image you like just click on the plus icon and you can add a title here for your personal board. Just by clicking on this icon, each time you want to save an image, you will have all the pictures in one place, the board that you just created. Then once you feel like having the right references you can download the images onto your iPad. There you can start tracing the patterns. Alternatively, you can also print the images or just keep them displayed on your computer screen and sketch the patterns directly on the worksheet. These two worksheets will store the patterns extracted from images in a neat and accessible way so that you can have a neat repertoire of patterns ready to access. When we'll start working on our final illustration, you will see how much of this work we just did is going to be helpful. In the next class, we are going to spark ideas on flowers and plants.
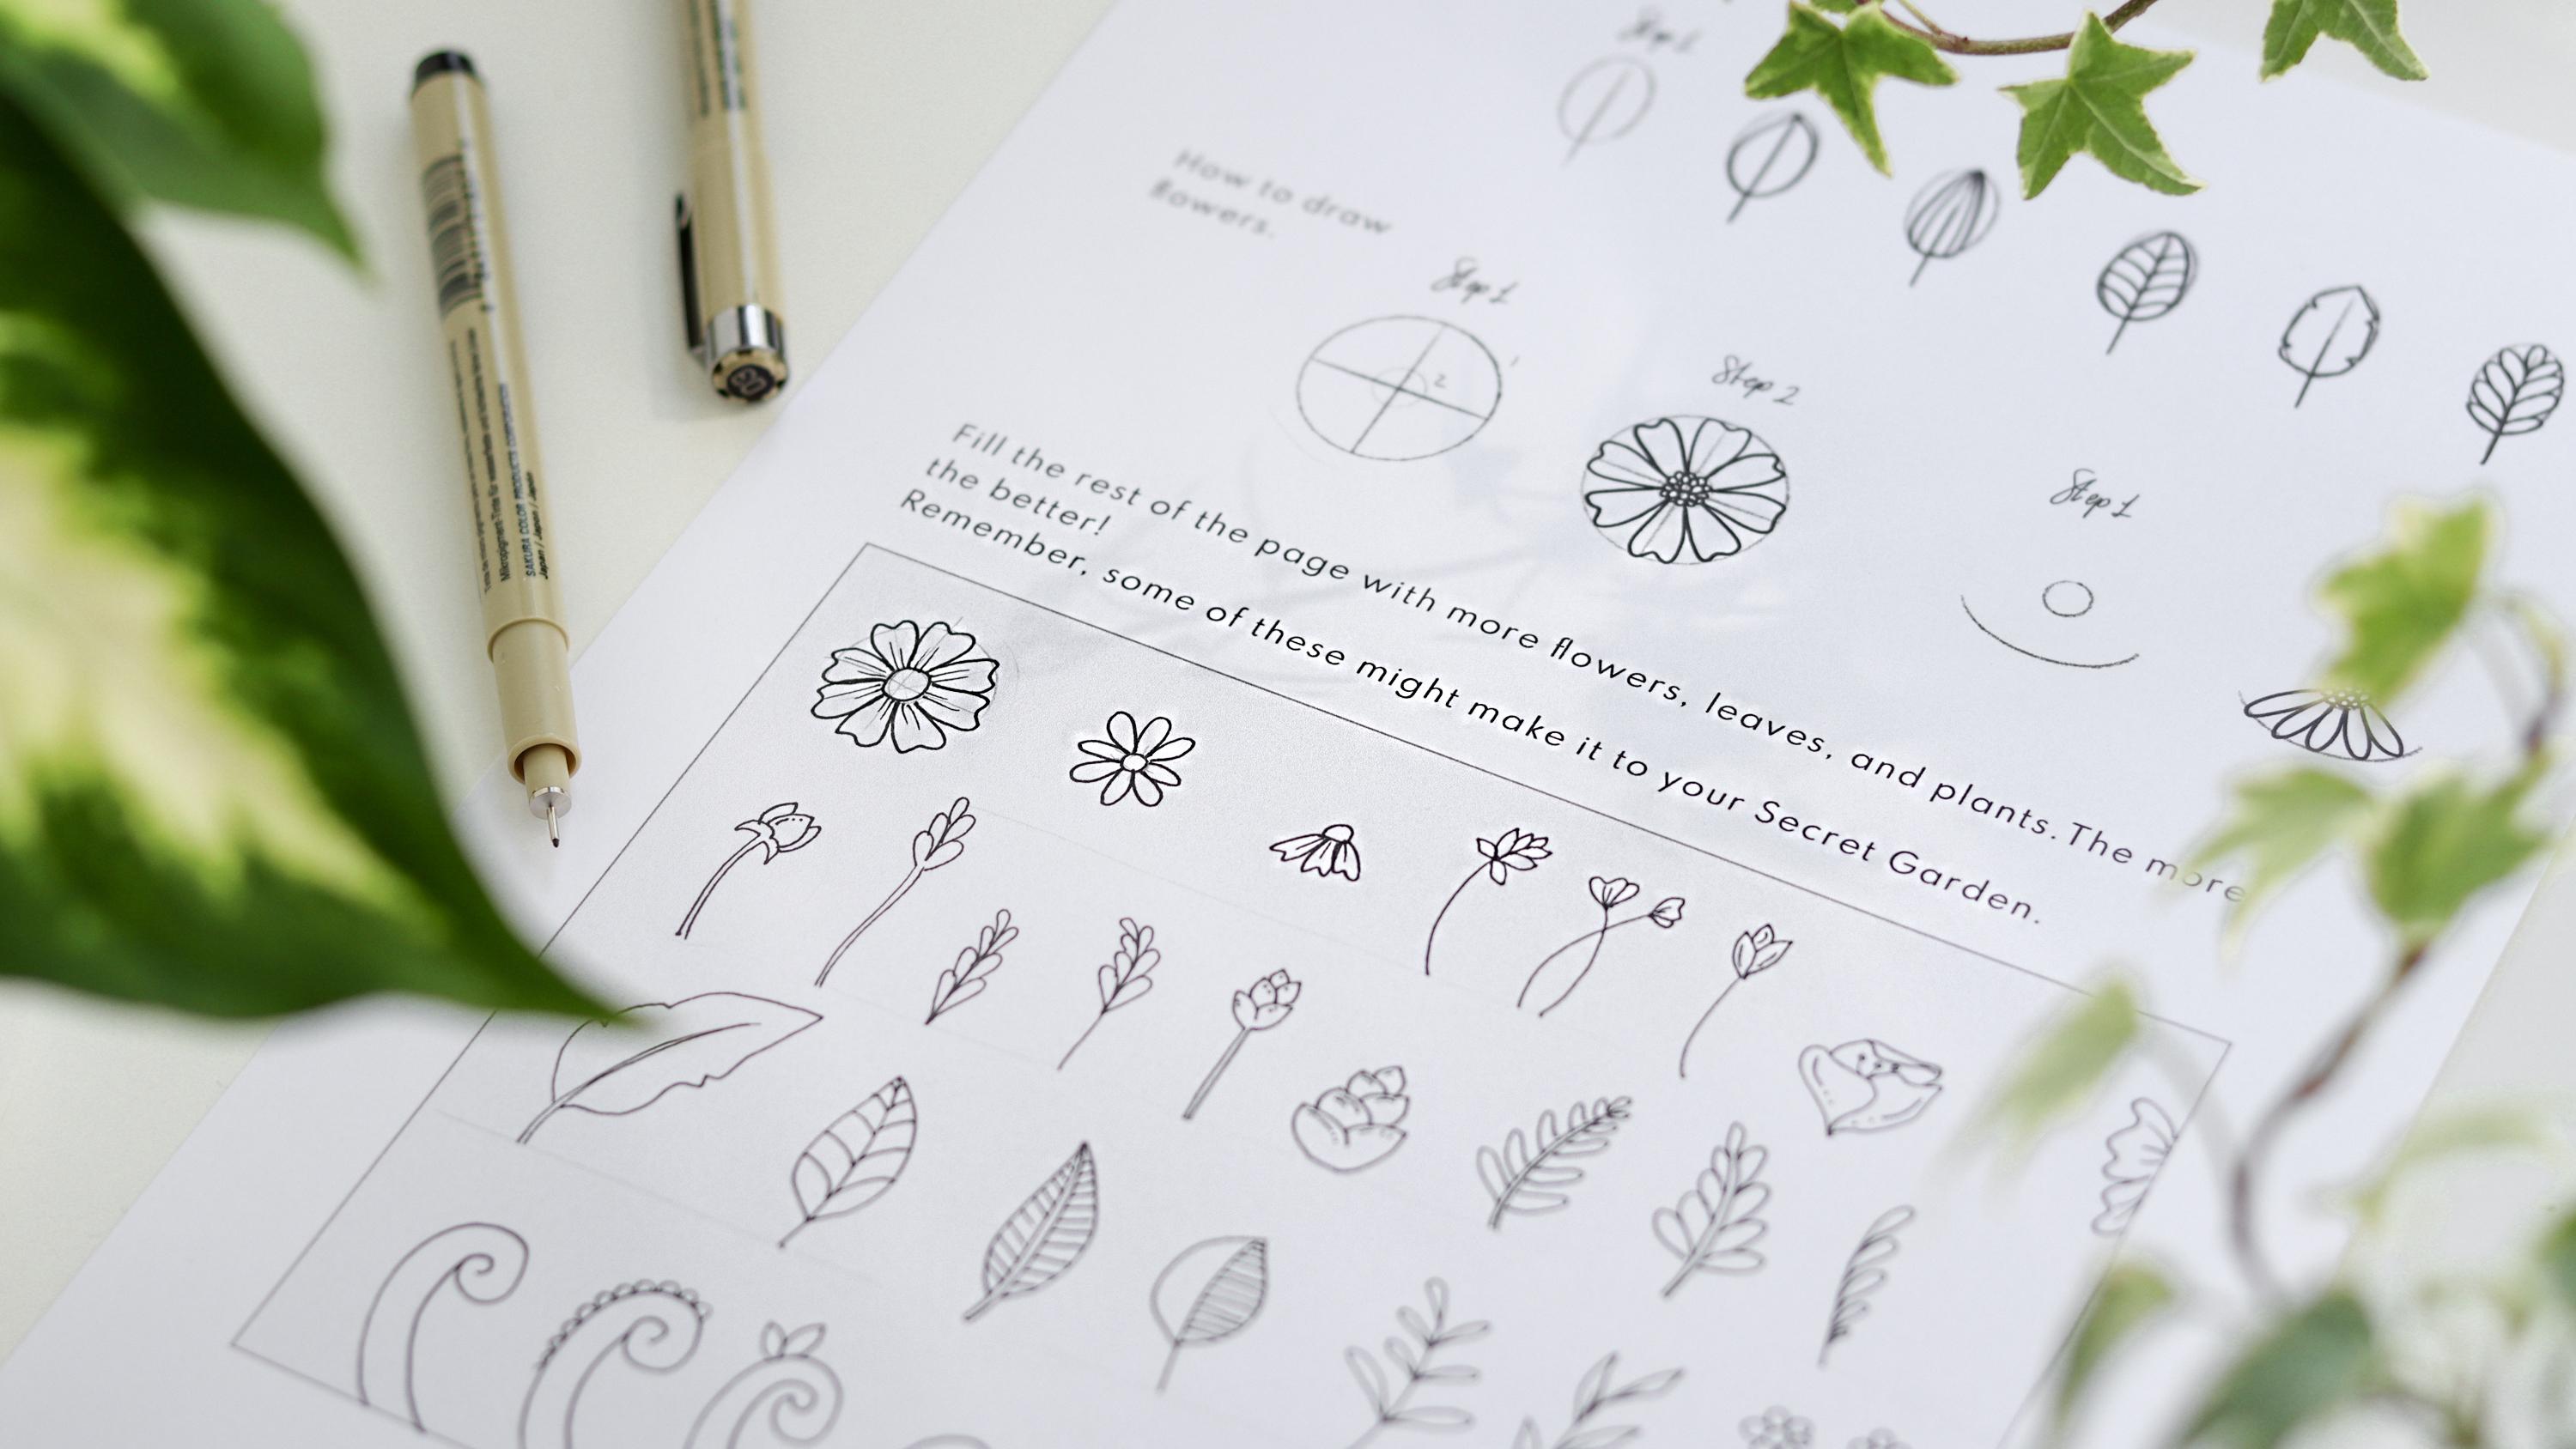
7. Botanical Elements: As you all know, our secret garden is made up not just patterns, but flowers and plants play an important role as well. For my botanical illustrations, I usually keep my drawing style really simple, and as you can notice, almost all the shapes are flat and without texture or shadows. Instead, I overlap them to transmit to the viewer a more realistic feeling and I embellish them with patterns and motifs. This is the time to do a brainstorm on everything we can possibly draw in our final project. Feel free to express your unique style or follow along with what I'll be drawing. I'll be drawing flowers and mostly plants and leaves. But keep in mind that this is going to be your secret garden, so think about if there's something about the natural world that fascinates you, maybe you like wildflowers or insects or mushrooms. There are a ton of subject that you might want to include in your garden. Just take the time to think about it, research and sketch. If you have never drawn a plant or a flower, or if you'd like to have a method for drawing them, up here I made a little scheme to follow so that you can be more accurate, emphasize when drawing. Regarding leaves, a good outline to use is to simply draw a line and then an oval shape around it. You can use this basic shape as a contour for many other type of leaves that you can draw within the outline. Flowers can be drawn by tracing two circles, one inside the other one, and my suggested order is to sketch the bigger one and then the tiny one in it. But I always encourage you to try what comes more naturally to yourself. I'm starting to trace some lines with my pencil so that I can properly line my plants. As mentioned in the previous lessons, just feel free to use this worksheet or drop your sketchbook to brainstorm some plants. I'm going to start off by drawing some flowers, so you can see the actionable steps I take. I'll be leaving this lesson at its natural speed, so you can take all your time to draw with me, observe how I draw these plants, and simply enjoy this step. Throughout this lesson, you'll see what I use more often in my abstract garden illustrations, and as I alluded to before, I like to draw simple plants or flowers and add little details to it. These details can be dots, lines, spirals, circles, and any other patterns we drew. This is not only going to add a modern twist to my botanical shapes, but it's also going to add a touch of surrealism and magic. Another thing I like to point out is how much variation you can find in nature. Each bloom and leaf, I think it's truly unique and it's really hard to mess up when something is imperfect, so just get rid of expectation, insecurity, or fears over the final result. Instead, enjoy this journey into the 3D nature and just let go because it's the process of learning and discovery that is truly unique. The same creative process I went through for creating patterns can be applied to coming up with ideas for flowers and plants. For example, this specific leaf comes from a photo of a fern that I trace on my iPad. From this leaf, I could create other similar to it. By slightly modifying the shapes of a subject and by playing around with it, you can come up with many ideas. Now I'm going to show you how to draw spirals. This is a pretty important shape when I create my garden illustration because you'll see that is going to serve as a foundational structure for the rest of the drawing. Again, ferns are a good example and a great reference for learning how to draw this shape. First, start from the bottom and draw a curved line upwards, and continue drawing the lines so that it curls into itself. Once you have finished drawing that part, start at the base of the inner curl and draw along with a downward motion that is parallel to the first line you made. It can be very easy not to get the right proportion or to mess up with this shape, but don't lose faith. With some practice, you'll get better at the end. As I explained in one of my previous classes, we can develop muscle memory through repetition. This means that by drawing the same subject more than once, you can get your wrist used to a specific motion, and your precision will improve as well. To finish up this worksheet, I'm drawing tiny elements such as spark close stars, and falling leaves. These elements will spark magic and I love using them. It's finally time to begin creating our secret garden, and congrats if you stick around during this practicing lessons, the previous lessons gave you the tools and the knowledge to start drawing with a clear vision. Without feeling confused or anxious over something like our class project. From my personal experience, I find it important to take some time to sketch and plan before an intricate illustration. It makes me feel more comfortable when I finally put pen to paper, and it makes my ideas much more clear. Now, let's get ready to sketch our secret garden.
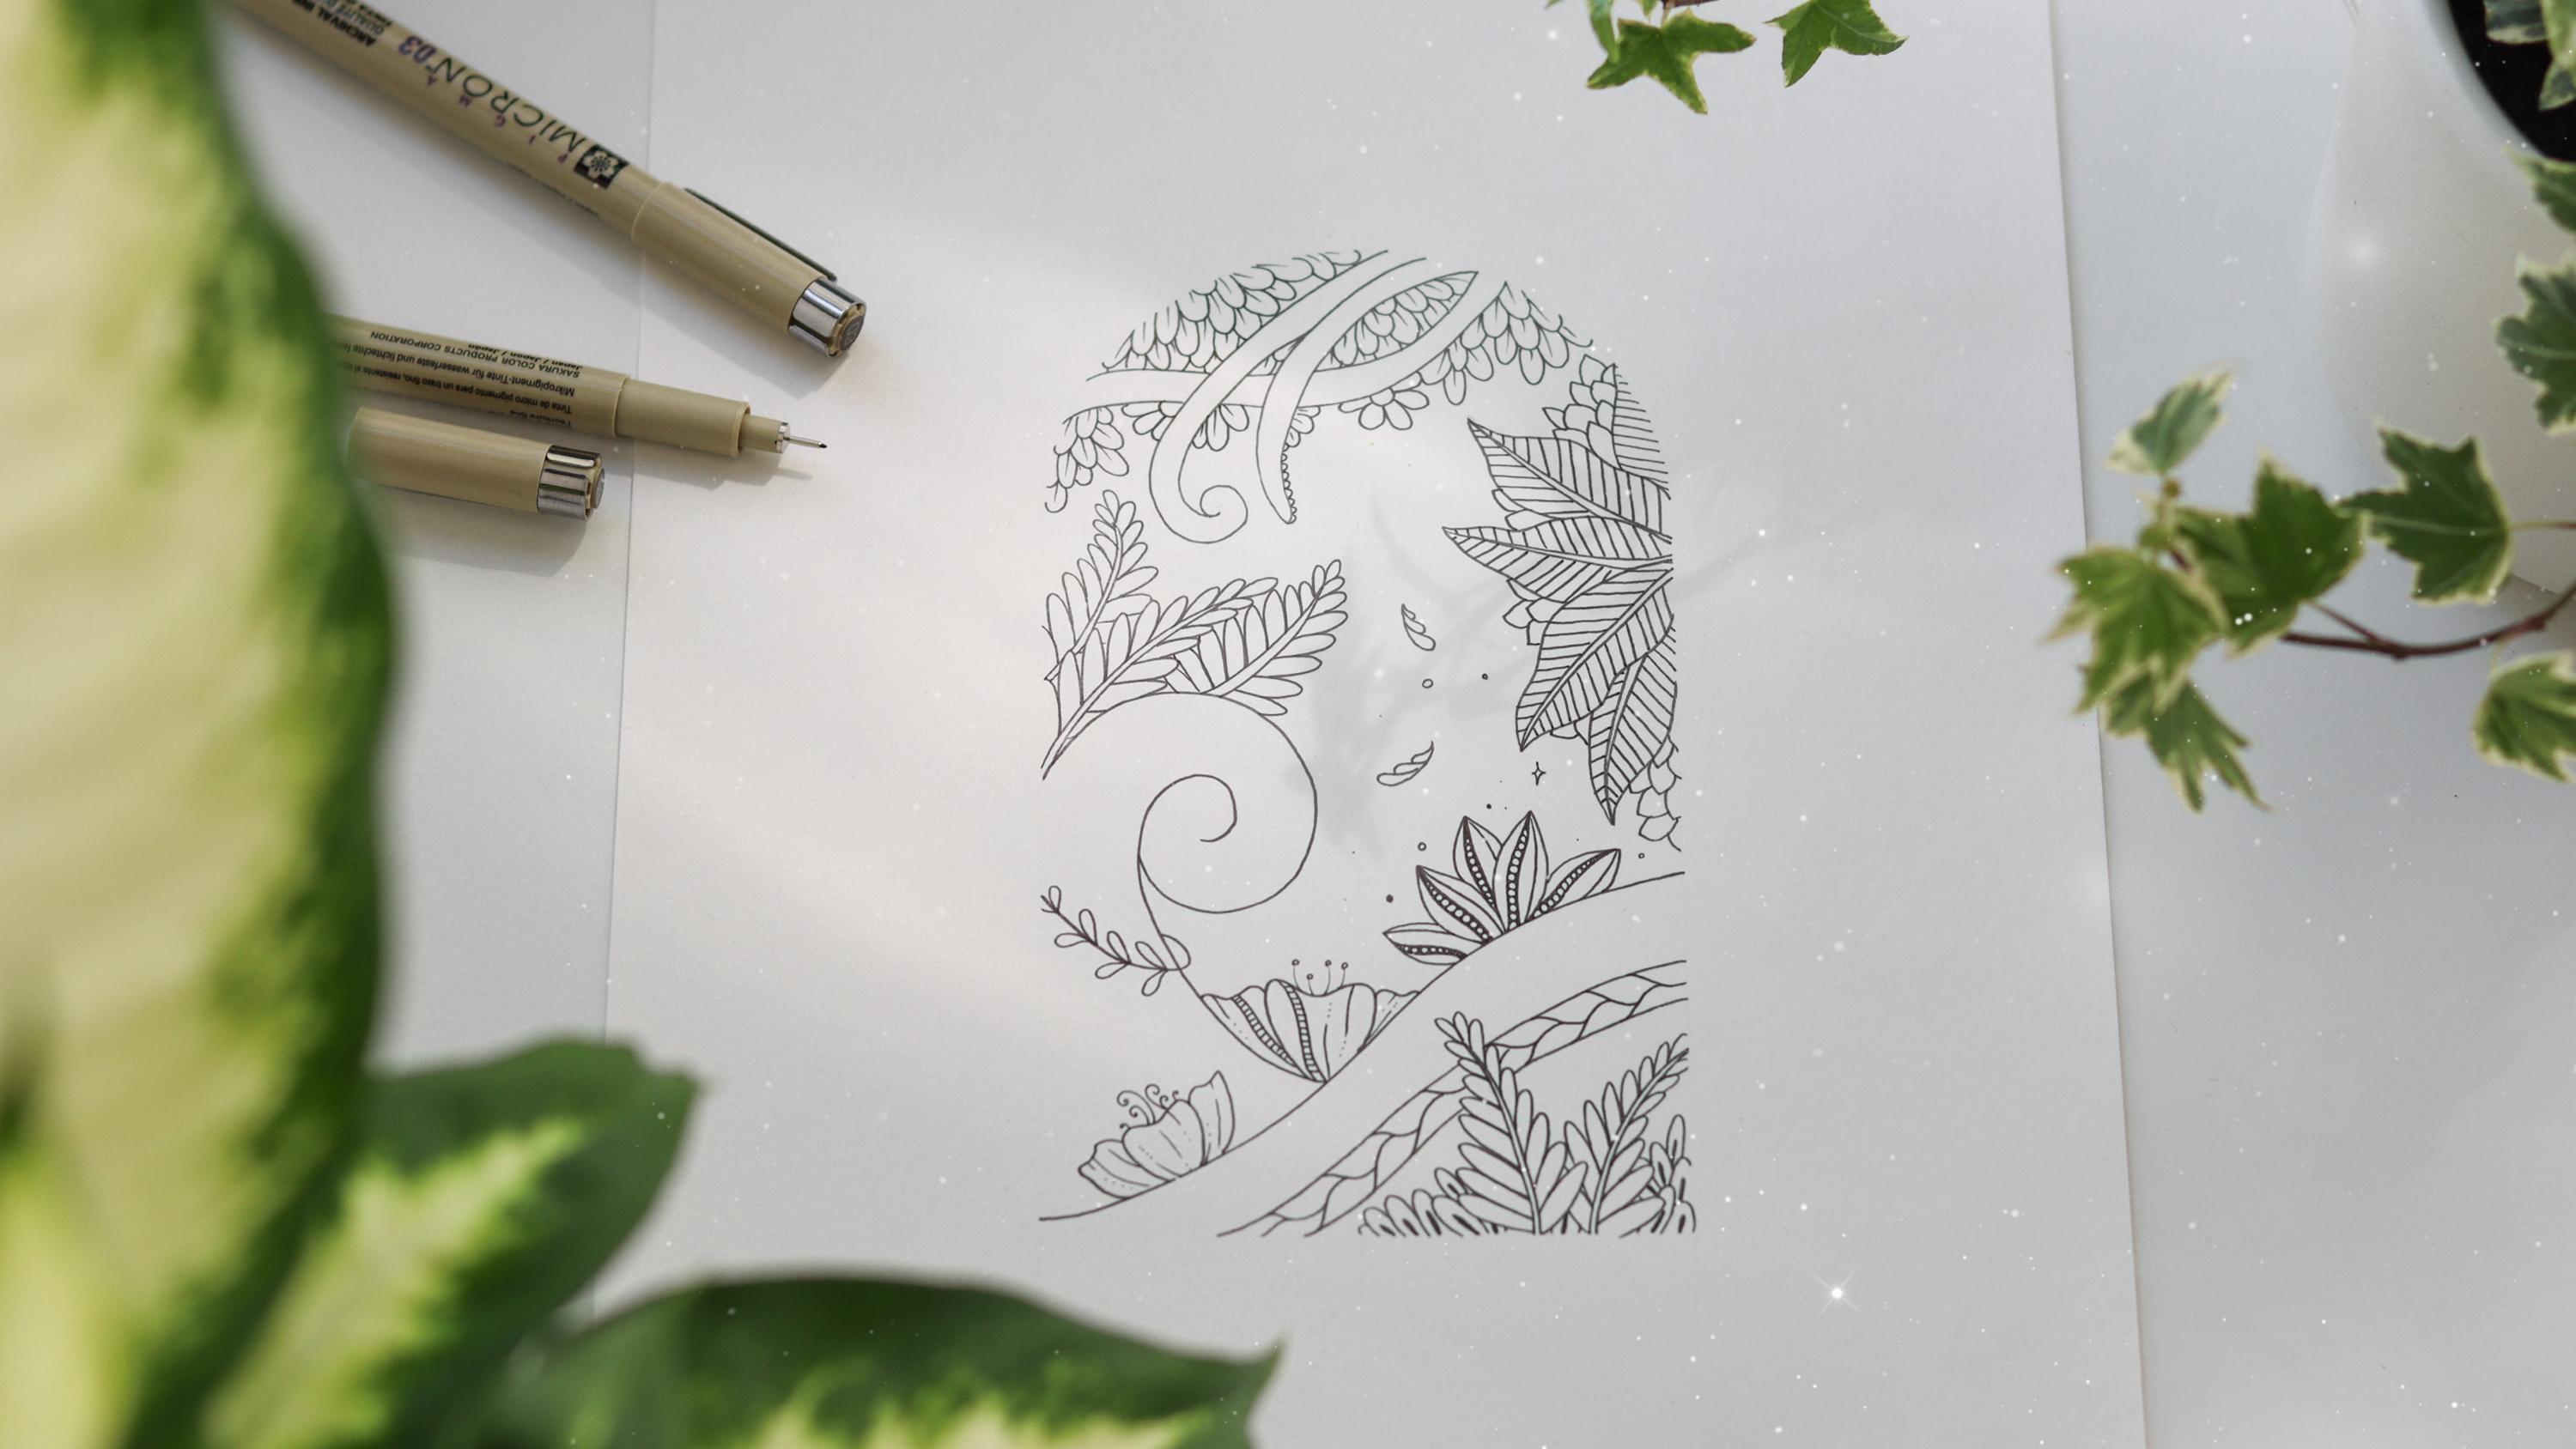
8. Framing: To start off, we're going to sketch the shape that will contain our secret garden. For this class project, I choose the door shape because, besides the fact that I love this shape and it's super trending at the moment, I just find it perfect for this class topic. It can resemble a door, a window, a magical portal, and each one of you will see this shape through your own eyes, and I think this makes it even more unique. Before we start, I'm just going to show you other illustrations I did because I've used different shapes to contain my garden. If you find this arch door shape that we're about to sketch too difficult, just feel free to choose any other shape. For example, here I've used a spherical shape, and what I did is simply trace a circle with my protractor, and then drawing it. Here I've used a rectangular shape, so as you can see, you can really create your garden anywhere you'd like to. In this lesson, I'm going to show you a technical way that you can draw an arch door shape, but as always, if you know a another way you feel more comfortable with, you can use your own methods to achieve the same design. The tools we're going to need for this lesson are a pencil, an eraser, a ruler, and a protractor. To begin with, I line up the zero of my ruler with a corner and measure the length of the side, then I mark where the center of the side is. Once I have marked the middle point for each side, I draw a line between the middle point of the short sides to create a vertical line through the center of the page. The place where these two lines intersect is the center point of the whole paper. Measure 4.5 centimeters to the left and to the right and make a benchmark. Next, draw a vertical line on your paper that passes through these two benchmarks. We're almost done. Now start at the middle point of the bottom side of the page and measure seven centimeters going up and make another benchmark, draw a horizontal line on your page that passes through this benchmark. Last but not least, place your protractor anywhere on the central vertical line of the page, between the middle point and the top benchmark, turn the pencil tip of the protractor so that it touches the top benchmark and draw the rest of your arch. Now you can gently erase all the pencil marks inside and outside your shape. We're all set to start sketching our secret garden.
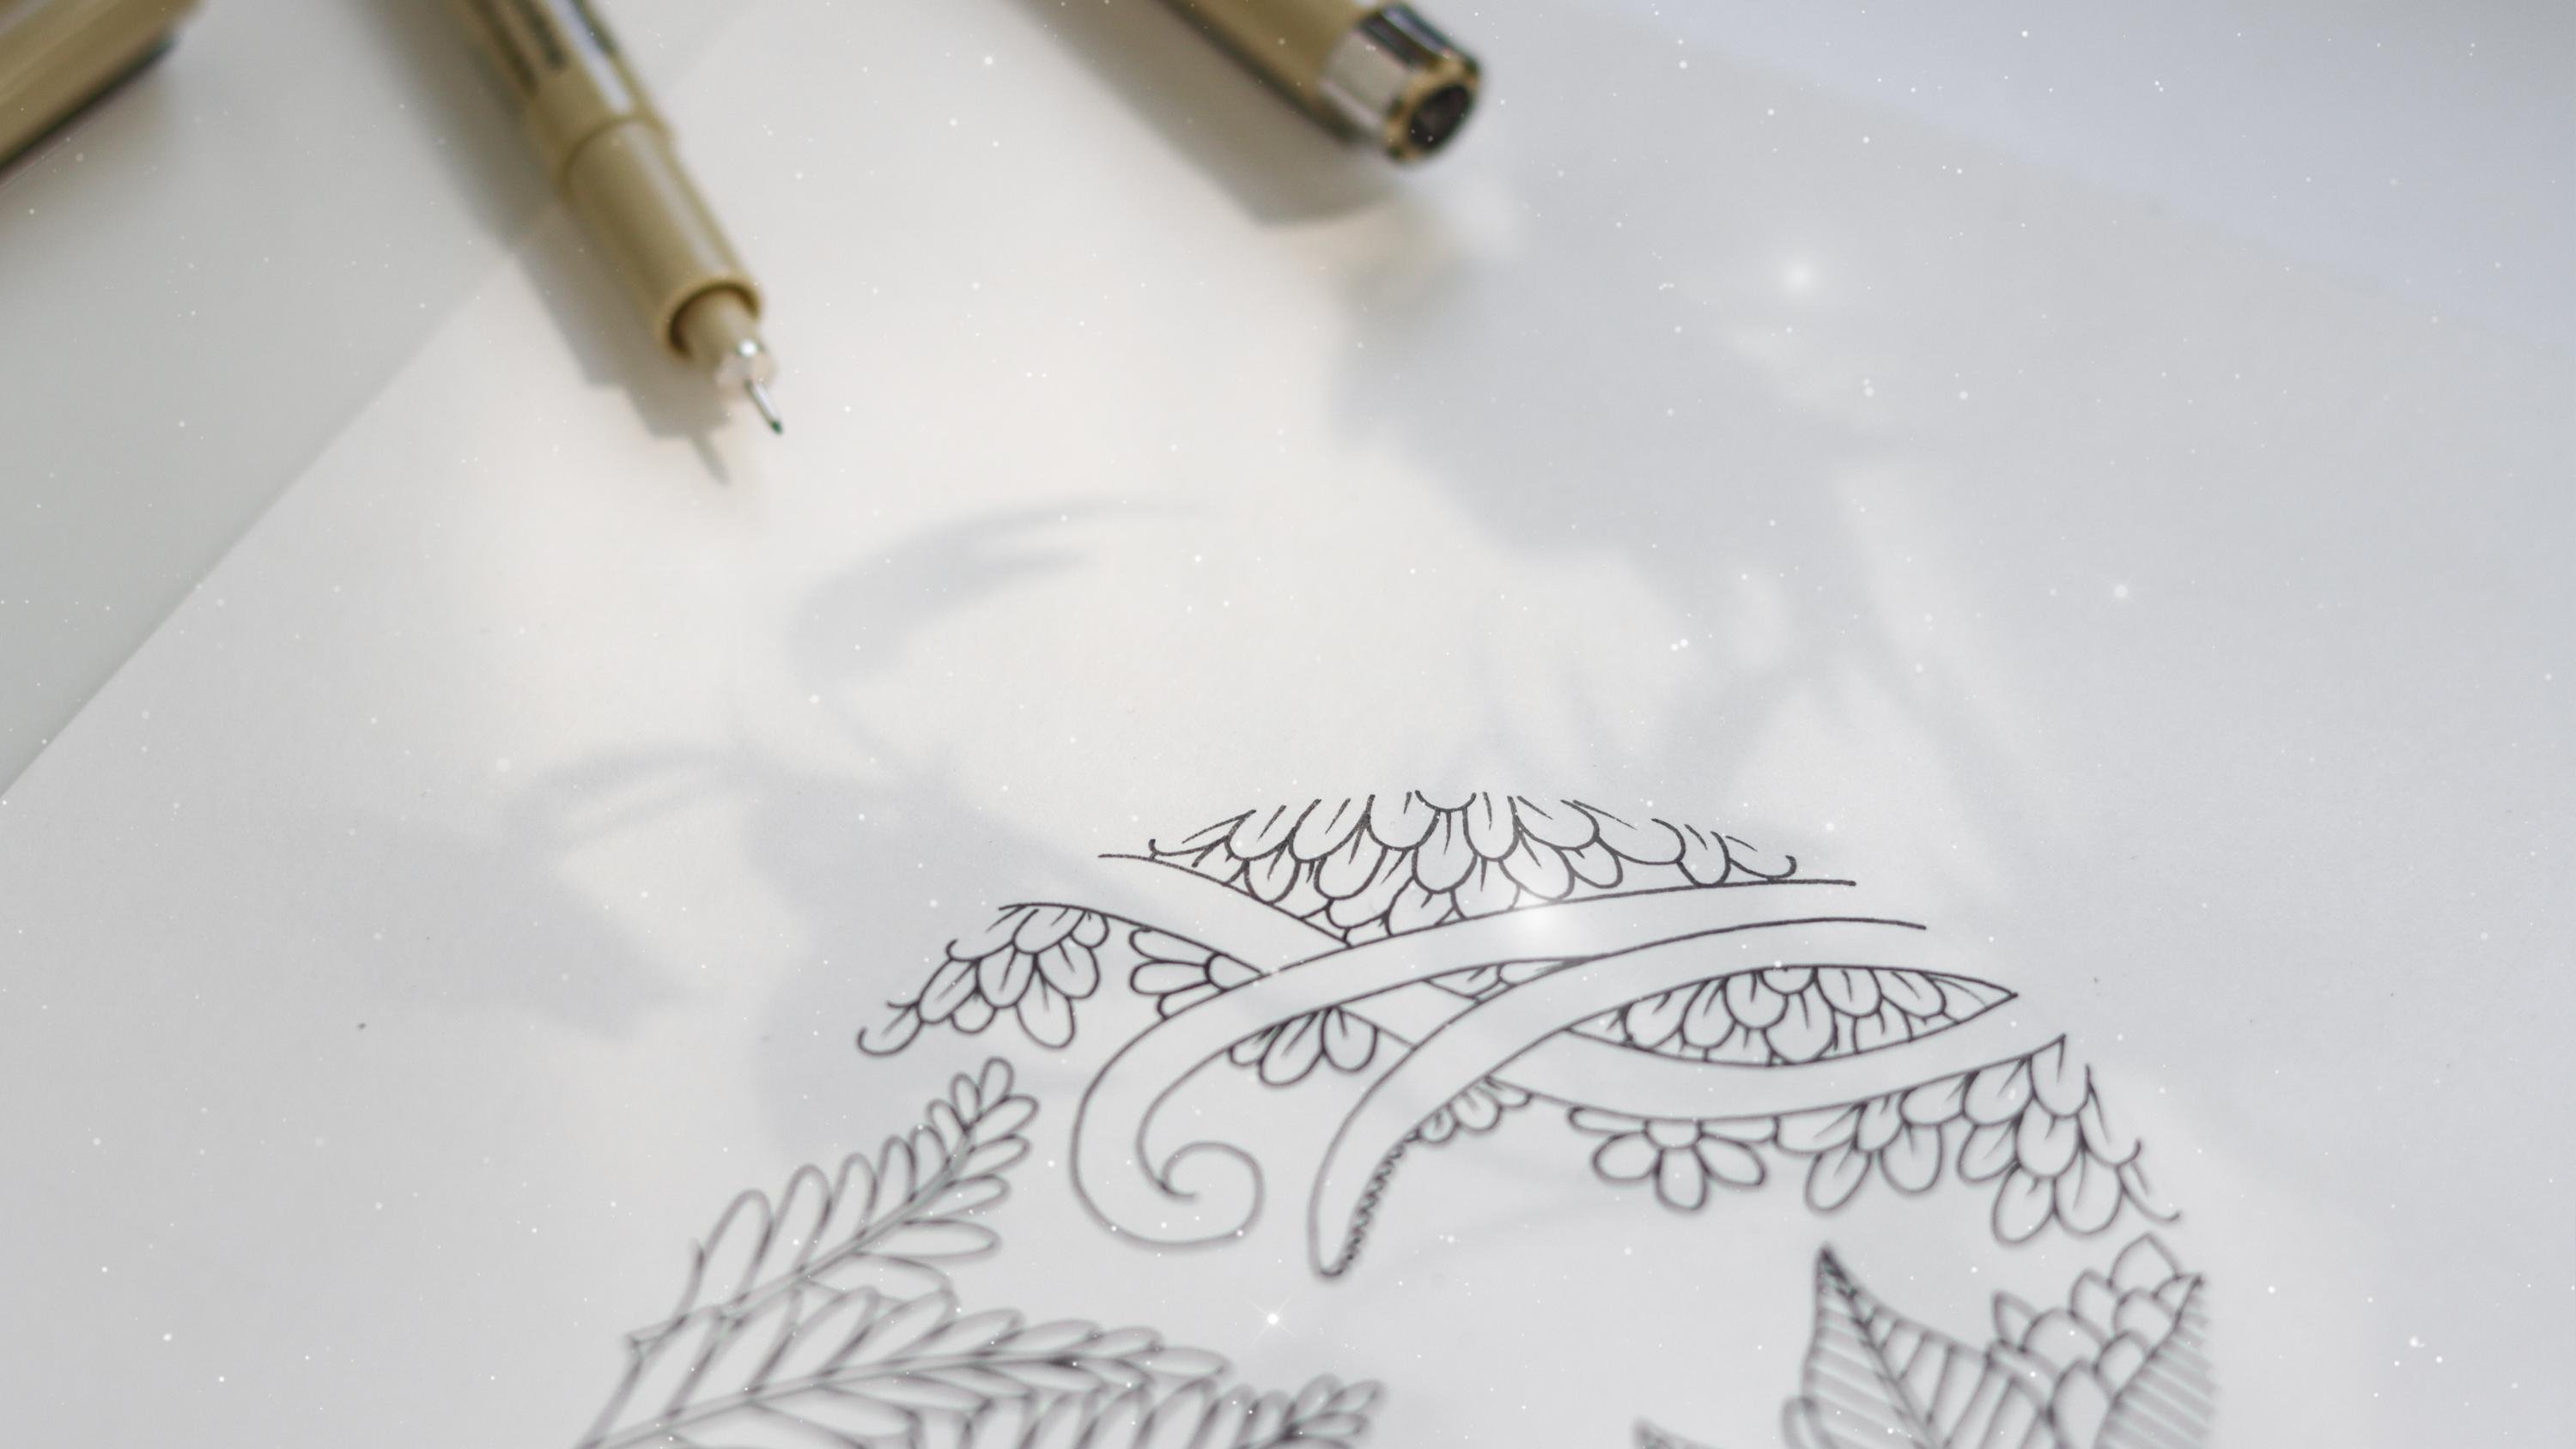
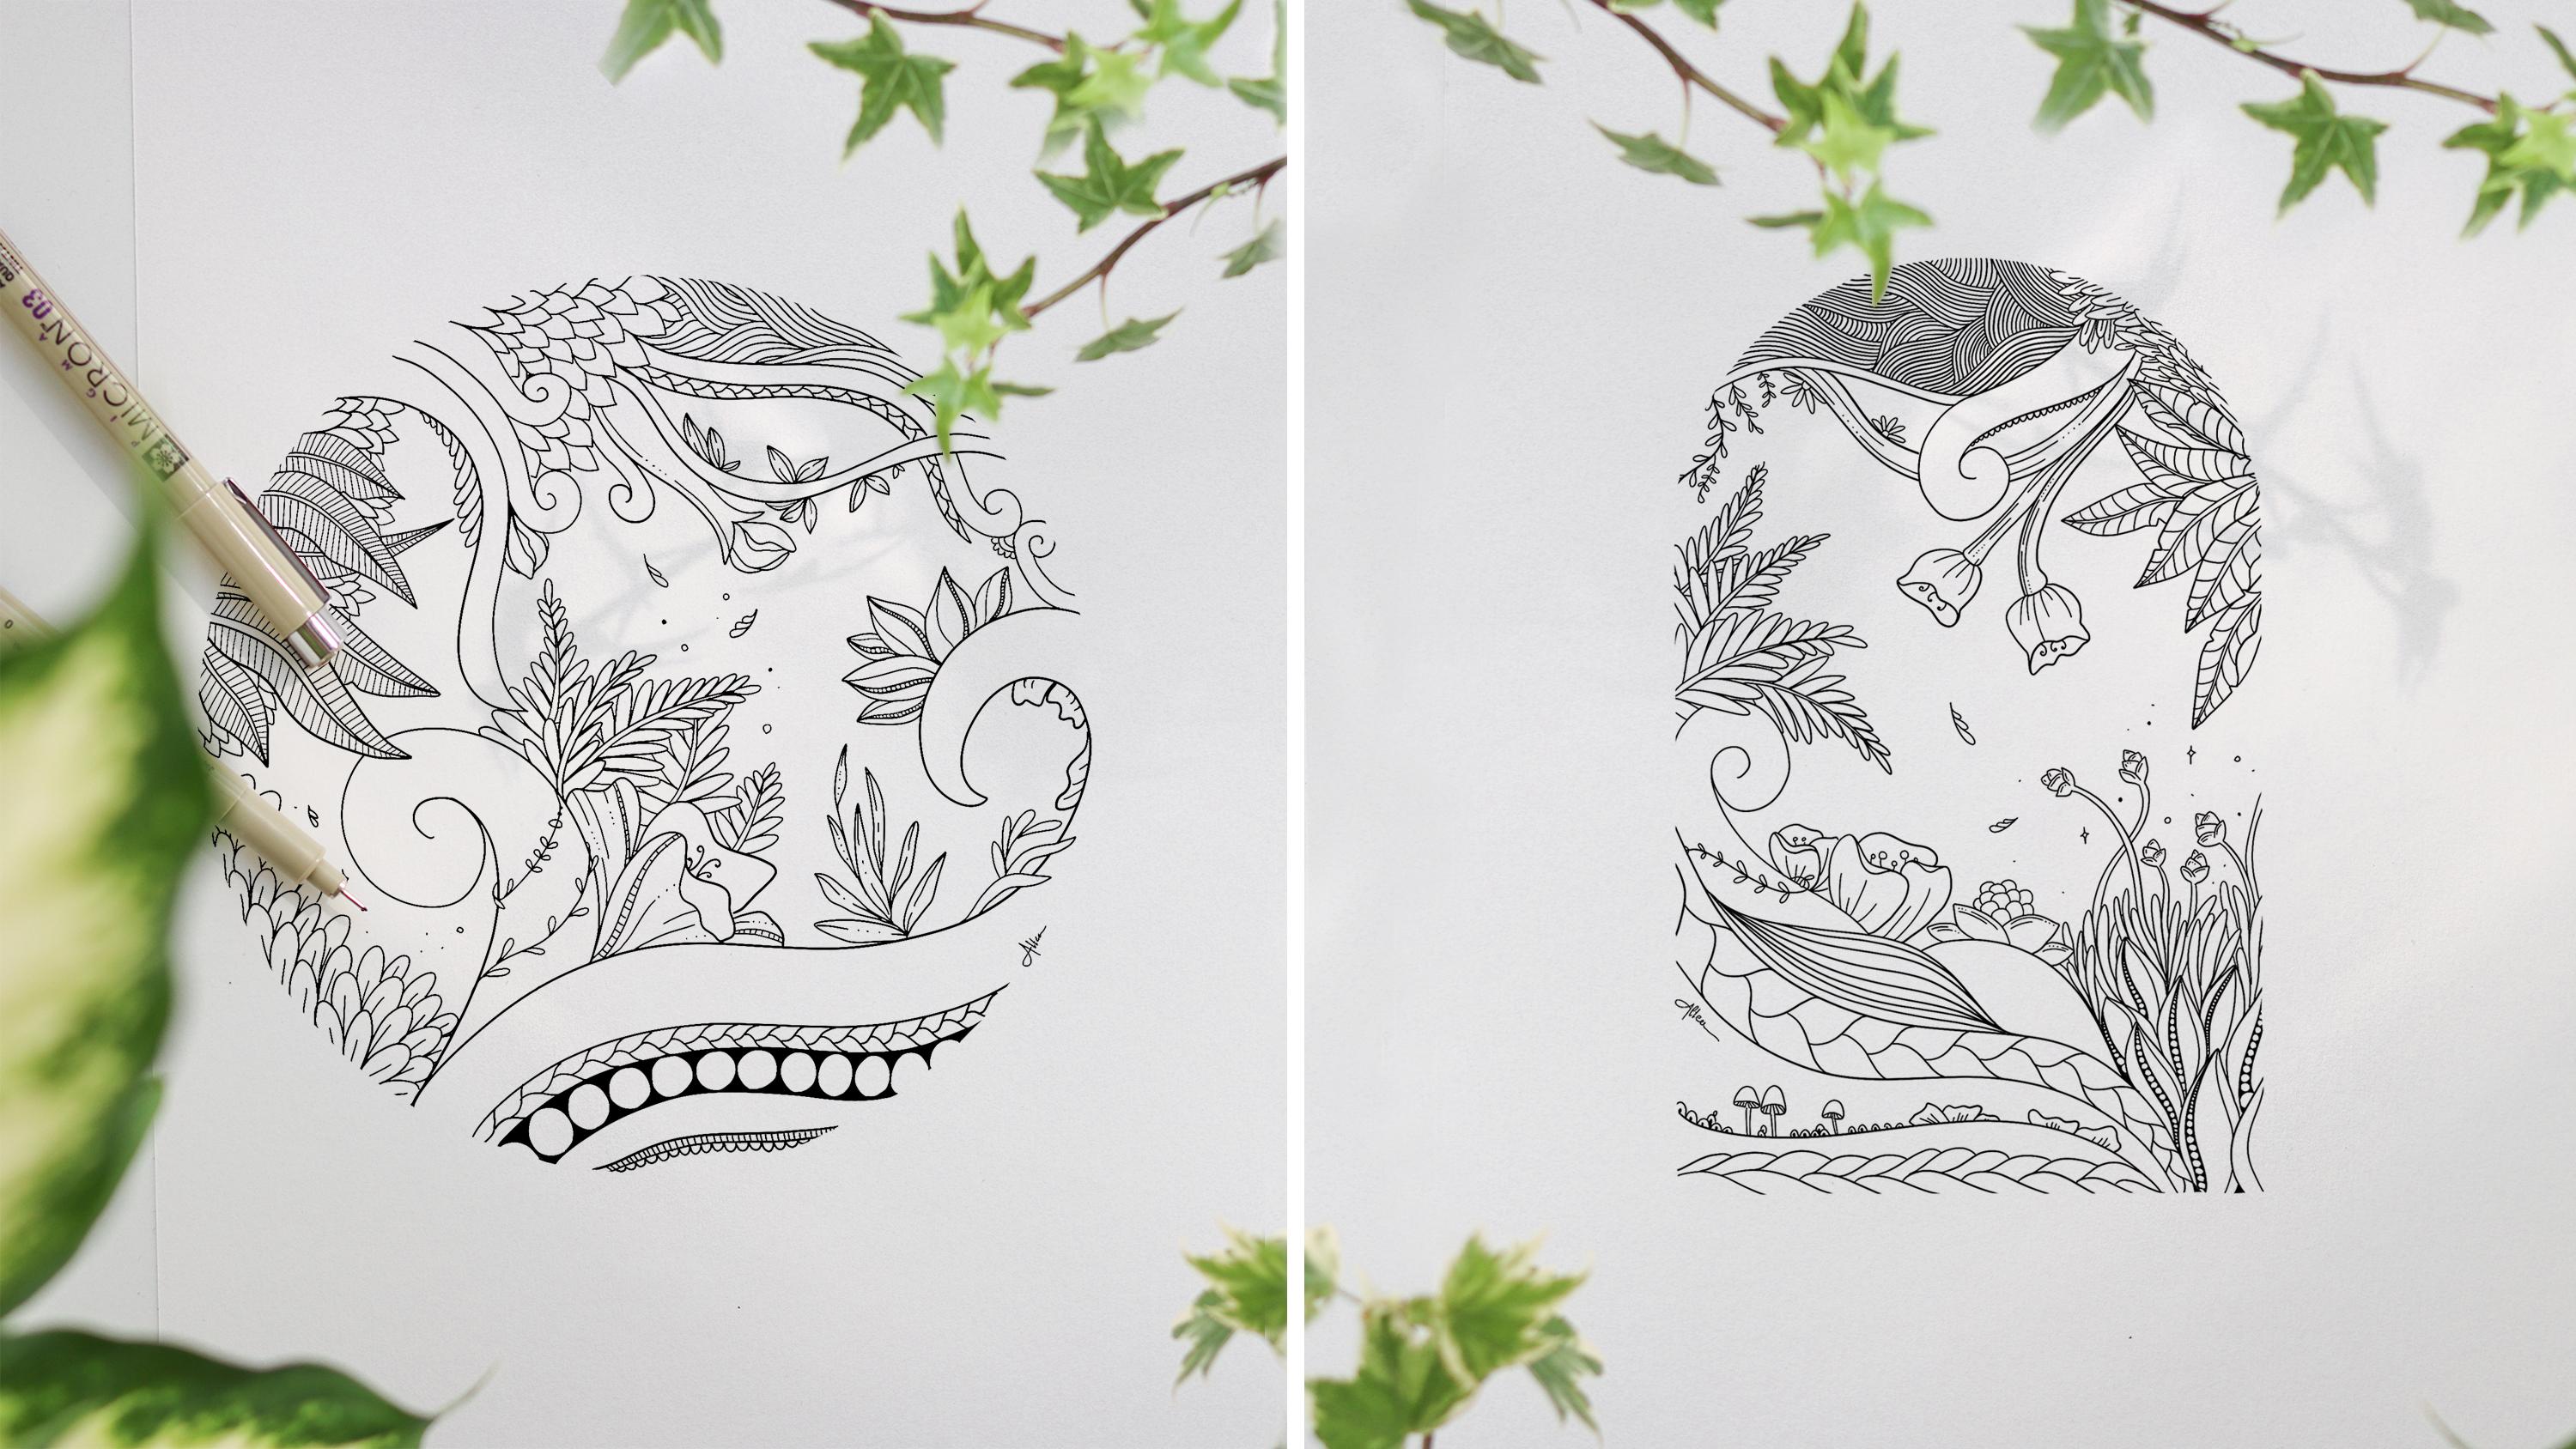
9. Composing and Sketching: Before we begin, I'd like to remind you that you can entirely follow along with the lesson and draw everything I'll be drawing, or you can partly draw what I draw and then at any point, you can start adding different shapes or botanical details. Feel free to keep the worksheets close by so you can add your own shapes and details if you'd like to. When it comes to sketching, I like to start of by marking some areas within the shape, to highlight where I'll be drawing. In this first step, I can understand how I want to balance my illustration and how I want to partition my space. The shapes that I roughly sketch to divide out my drawing area can be lines which are usually replaced with dunes and spirals, which are my bigger shapes. I also use ovals or circles where I usually sketch leaves and smaller elements. This acts just as a guide to understand where I want to draw and where I don't want to draw. Again, it helps me to balance my illustration. I highly recommend you to use this technique and of course, you can use different shapes to mark your drawing areas. Just keep in mind him leave some space around the center of your drawing area and a little bit above the center, so that your illustration doesn't look too busy in the end. Once the areas where we'll be drawing are marked, we can start replacing these shapes. Here I'm going to draw a dune and I'm adding one more line for now as a small detail that we can use to fill with patterns later. Then I thought this part right here would fit a big spiral shape perfectly. I just use the area where I sketch this semicircle to add a spiral, and then I remove the extra pencil lines to clear up the space. On the right side, I'm going to fill in this space with some leaves. Drawing leaves on the side of your garden adds a sense of dimension. It adds frame into your drawing so that the viewer feels like they are truly entering a new space. I made sure not to draw all my leaves starting from the same point. But I always try to overlap them and make them point in slightly different directions. As I keep drawing, one thing that I want to suggest is to consider following this order. While you start sketching your garden, try to start from the biggest shapes such as dunes, spirals, mountains, anything you have in mind, these shapes will serve you as a starting point and as a place where you can lead on other elements, or they can even be the shapes to fill in with patterns. Then move on to the secondary shapes like sketching leaves, flowers, plants, and even animals. Lastly, try to observe how your overall sketch looks and add details. For example, you can add some falling leaves, some stars, a pattern, or any other tiny elements. Personally, I don't always I stick to this order because sometimes I just feel like adding a small shape first and then going back with one that is bigger. It really depends on how my sketch is evolving, but I would say that I follow this order probably 90 percent of the time when sketching. On top, I imagine some wild nature like binds and spirals stripping downwards. After drawing the bigger lines, I added a pattern of smaller leaves just to reach the nature that was already there. Moving on to the left side, I am filling in this space with more leaves. This time I picked a different shape for my leaves and I choose to have them come out from behind the spiral as if they are growing. Looking back at the framing leaves, I thought that the V-shape between the petals would make a good spot for placing a tiny flower and usually intersecting lines create an interesting space that is a good place for sketching details. Here there are two more lines intersecting each other and as you can see, they create this nice spot that I'm going to use to draw a bigger flower. There's still plenty of space on this dune as well. I'm drawing a bunch of leaves that later I will fill in with a pattern. Our sketch is almost completed. You can take a look to it and see if you want to add something else. I'm going to draw a branch around the spiral almost resembling a jewel, and I'm also going to be adding some tiny leaves to it. I'm also adding some more lines here and this remaining area, I think it's perfect for some leaves. I wasn't decided about whether I should sketch some tiny mushrooms or different tiny shapes, but then I just went for something that would overlap my existing lines. The sketching part is over and it was definitely the part that required the biggest effort. If you made it, well done. Now we're going to go to step number three, which is inking all our pencil sketches. Before moving on to the next lesson, I'm quickly going to show you which pen size I'll be using. If you know me, I like to keep my lines pretty thin and delicate. I'll be using size 0.2 for my main lines and 0.1 for the details. I might use size 0.05 as well. I'll definitely keep that fine liner close by.
10. Inking: Now, that our sketch is completed, it's time to start using our fine liners. We'll simply start to go over every single pencil mark except for the shape that contains our garden. I find that the inking part is pretty relaxing and what I like to do when I go over my sketches is simply play some music that makes me feel at ease and I just let myself relax and enjoy the moment. I'm starting the inking of my sketch with a fine liner size saber tool, and I'm starting from the bottom by tracing these leaves, but you can start anywhere you like. There's only one rule that I follow during the inking step, which is to leave all the tiny details and pattern as the last thing that I ink into the drawing. I think this works great for my workflow and this way after I have all my main outlines ready, I can go in with a finer pen to add subtle details. As you notice, I'm drawing really slow and this is key if you want to learn how to draw smooth lines, or if you want to improve your line drawings. From my experience, nothing good is going to come from rushing this step, try to relax while you're inking your secret garden. Sometimes I find that I even hold my breath when drawing longer lines to make sure my hands are steady. I go really slow so that the line I draw jaw is smooth, straight, and continuous. As know you can erase it once you ink it, it's better to draw things with care. I'll skip the listen up a little bit otherwise it's going to be super long, but I want to remind you to take your time and pause the video when you need it. I hope you're enjoying the process so far. While inking, I realized that there still is a nice spot for a flower here. I took my pencil bags, sketched it, and went over with the fine liner. As you can tell, it's never too late to add something to your illustration. If you're wondering why my paper is upside down, it's just because I find it very helpful to rotate my paper as I'm inking and this way I can avoid drawing, adding comfortable angles, and I can achieve a better result by listening to what my hands and my body need. It's something that I encourage you to try out if you haven't done so yet. Once you've inked pretty much all of your sketches, you can look over your sketch again and notice if there are any other areas you'd like to fill in with a pattern. For example, I'm going to add a pattern to these grouped leaves, and I'm going to change my fine liner. I'm picking a smaller size and I'm using a fine liner 01 to draw the lines, and a 005 to add the tiny circles within the lines. Another area where I'm going to add a pattern is the petals of this flower. I was keeping my worksheet patterns close by and I decided to use the pattern that combine the dots with the interrupted lines. Next, I'm filling in the space within this line with this pattern and I will save that, the one with circles and this one are definitely the patterns that I use the most. I just love them, they're like fun to draw and also relaxing. When you're ready, you can start erasing your pencil sketches. Just give you a sketch a few seconds to dry if you just finished. Otherwise, you might find that some of the ink smudges which might disrupt the beautiful smooth lines you've worked hard to create. I was just taking a final look to my garden and decided to add one more pattern at the bottom right behind the leaves. Lastly, I'm sketching two falling leaves to add in mystic vibes and I'm also adding some dots and stars to add a last touch of magic. I usually like to draw dots and stars close to the plants as if they are the ones parking magic. Our secret garden is now complete and I really hope you are happy with it and I hope you enjoyed this journey. In the next lesson, we are going to wrap things up and I'll see you there.
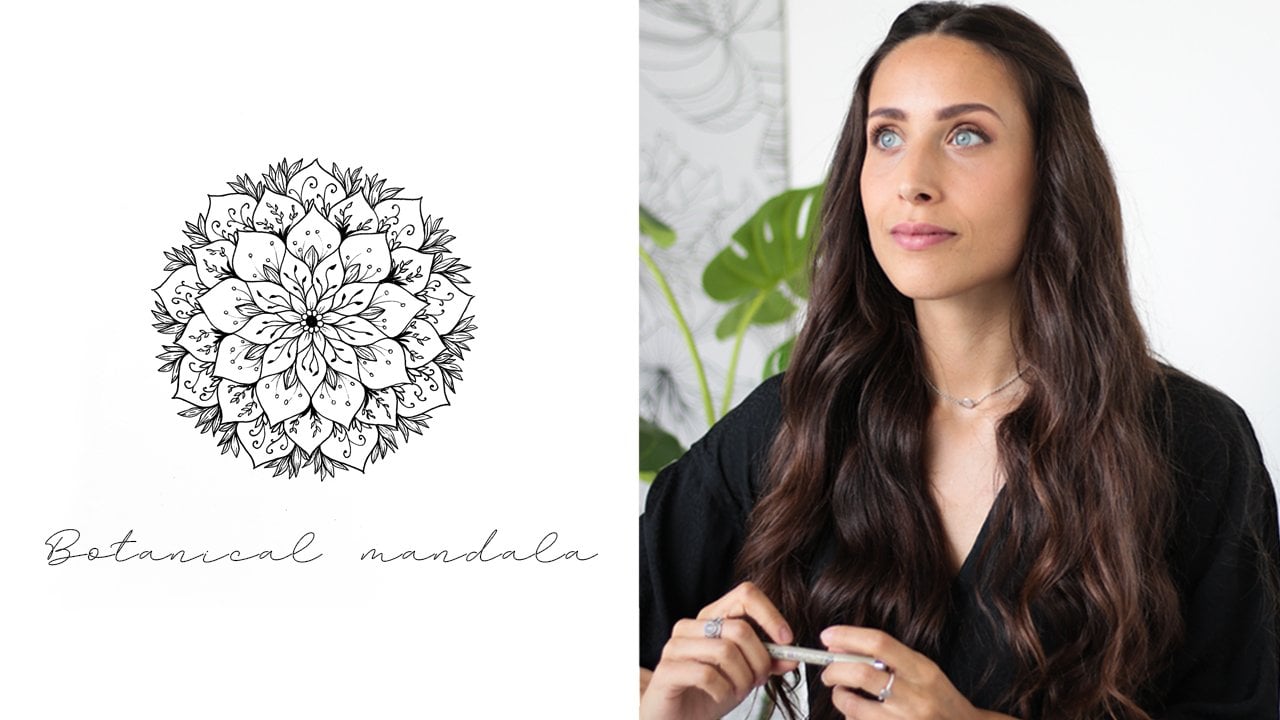
11. Final Thoughts: Congrats, you made it to the end of the class and it's been such an amazing journey into nature. And I want to thank you for going on this journey with me, we have seen how to gather inspiration from spending time in nature to reading a book, to understanding how to notice a pattern and nature and how to translate them into drawings. We let our ideas flow through a brainstorm of plants, flowers, and anything that came into our minds. And lastly, we put everything together to create our secret garden. I can wait to see all of your secret garden illustrations and to give you feedback on your work. So make sure to go to the Project and Resources section and upload your work. Also feel free to share your draft, your patterns along with their finished garden. And you don't have to do it all at once. Take your time and feel free to share any part of your project. Lastly, you can use the discussion section to ask me anything related to this class. So for example, if you need some extra octaves, I'll be really happy to help you out. If you're ready for a new adventure, you can use your newly learned button drawing skills to make a bundle with me in my botanical Mandela class. Or if you want to have some fun exploring different line art techniques, you can check out my one line showing costs. So again, thank you so much for joining me today and I'll see you next time.
 Altea Alessandroni, Artist and Designer