Transcripts
1. Introduction: [MUSIC] Have you ever wanted
to learn how to make a bow? Whether you're looking to add
a little extra flourish to your gift wrapping or a nice textile accent
to your home decor, learning how to hand-make a bow is an awesome skill to learn. Hand-making bows gives you an opportunity to create a
bow with your unique style. Plus a great way to get to know the different
ribbon materials is by practicing making a bow. When we make a bow, we have to twist, bend, and fold our ribbon so we
can see how it reacts, how it works, how easy it is to work
with and whether it's something we want to add
to our creative toolbox. If you've ever wanted
to learn how to work with ribbon and how
the hand-make a bow, then this class
is right for you. Hi, I'm Lauren Weber. I'm a fiber artist, quilter, and horticulturalist
from New York. I love experimenting and
playing with fibers, threads and you
guessed it, ribbon. But in order to get creative
with our materials, first we need to
learn how they work. In this class, I will guide you step-by-step through
the bow-making process. We will cover which factors to consider before making your bow, like size and durability so that we can make sure we
set up your bow for success. By the end of this
class, you'll be able to strategize which
bow-making tools, techniques, and materials you want to use for making your bow. This class is for all
skill levels and while hand-making bows can sometimes
be a little bit tricky, there are some good
techniques we can use to make the process easier. Creatives, fiber
artists DIY'ers, this is your chance to learn a little bit
more about ribbon and see if you want to add
it to your creative toolbox. By the end of this
class, you'll not only have new bow-making skills, but you'll also have a
growing knowledge of ribbon techniques
that you can use for your other
creative projects. Whether you're
making party bows, wedding bows, home decor bows, or simply broadening
your ribbon knowledge, learning how to make your
own bows can add a unique, creative twist and your own
style to your projects. If you're ready to get started, if you're ready to learn how
to hand-make your own bows, join me for this class. I'll see you in the
first lesson. [MUSIC]
2. Class Project: [MUSIC] For your class project, you are going to design
and create a bow. You get to pick
whichever type of project you want to
add your bow to. You can decide where
and how you're going to use your bow. Maybe you want to add
it to a birthday gift, or maybe you want to add
it to a seasonal wreath in your home or some home decor. Whichever project you choose, you're going to design a bow
to work with that project. To make your bow,
you're going to choose your ribbon and material, you are going to
choose which technique you'd like to use
to make your bow, and you're also going
to choose which size would be appropriate
for your project. Once you're all done
making your bow, you're going to take a
picture and upload it to your class project,
it's that simple. In the next lesson
we're going to talk about some of the different
materials you may encounter and some of the
different fabrics you may see as you're looking
for which ribbon to use for your project. So if you're ready
to get started, I'll see you in the
next lesson. [MUSIC]
3. Supplies: Ribbon & Tool Selection: In this lesson, we're going
to talk about some of the materials you may
encounter for your project. Keep in mind that the material that ribbon is made
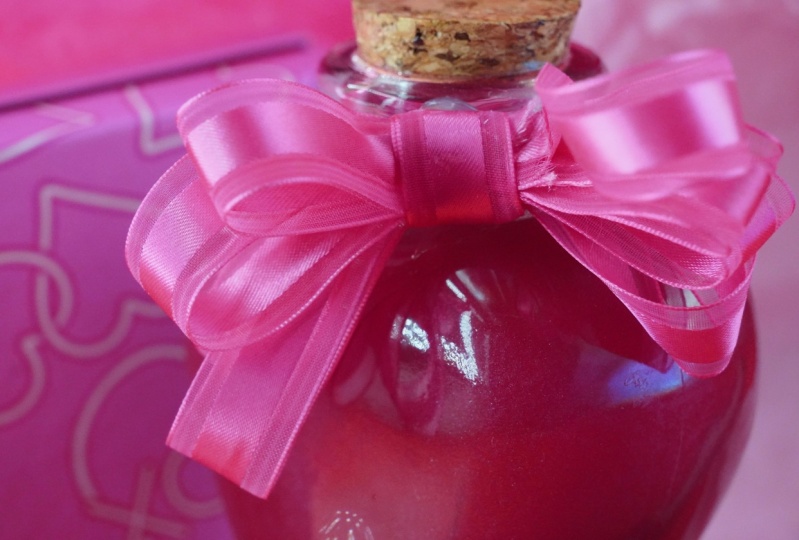
out of varies. The first category
we're going to talk about are the classics, these are the grow
grain poly ribbon or curling ribbon bows,
they are classics. They tend to be
easier to work with, and they can sometimes even be a more affordable
option than some of the more luxurious materials
you may encounter. You'll often find these ribbons used for flower arrangements, parties, or even gift wrapping. These materials are
a good place to start when you're first
learning how to make a bow. Now let's talk about the more luxurious and delicate ribbons, we're talking satin, silk, lace, or ganza tool, the more delicate
materials you may encounter when you're
looking for your ribbon, and while these materials
tend to be gorgeous, they can sometimes be a little bit more challenging
to work with. They tend to be thin, sometimes shear or see-through, or perhaps they are
woven in a way that's very delicate where the
fibers are all exposed. They can be easier to rip or tear when you're
working with them. They can't be held
up to quite so much bending and twisting without starting to break down a bit. Some of these materials
are shiny and sleek, which can make them harder
to hold onto when you're twisting and turning
and creating your bow. Now, these ribbons exude just an elegant,
beautiful style, so if that's the style
you're looking for, these are the ribbons
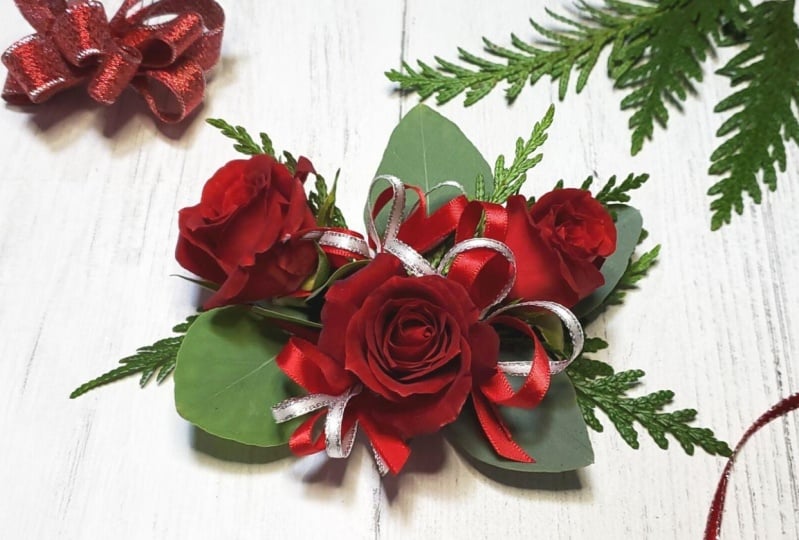
you're probably going to want to check out. They great for
weddings, parties, luxurious home decor, hair bows, wrist corsages, and
elegant bouquets. They're often made from just
simply beautiful materials and they can be
pretty exciting to work with once he
gets some practice. The last category we're
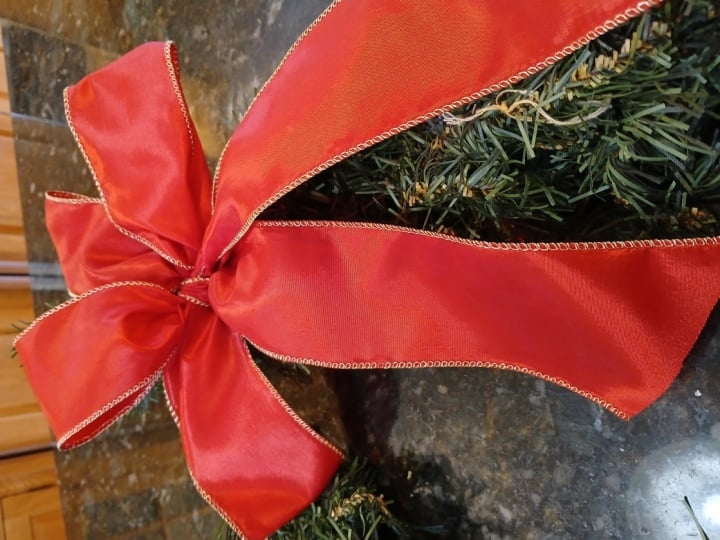
going to talk about, are our heavier materials, we're talking burlap,
poly mesh, velvet. These ribbons tend
to be thicker, heavier, and a little
bit more durable. You'll often see these materials
used for outdoor reeds, or decor, or holiday materials. The thickness of these materials can be a little bit challenging at first because
they're a little bit harder to twist and bend. They aren't as malleable as some of the softer materials, but these materials
are a great option when you need something
that will really hold up to the elements. Now keep in mind
that technology has come a long way with ribbon. Most of these ribbons can be
printed in different colors, sizes, and even unique patterns, meaning you can choose
your own unique style, color palette in size for the project that
you're working on. This is going to give
you a wide range of design and style options
for your project. Ribbon can also be produced
as wired or not wired. If a ribbon is wired, wires are actually encased along the edges of the
length of the ribbon, which makes the ribbon material a little bit more malleable, a little bit easier
to twist and bend, and if you've never
made a ribbon before or this is your first
time trying making a bow, I highly recommend starting
out with a wired ribbon. It'll just make the process
so much easier to have a wired ribbon when you're
learning the twisting and folding techniques
to making a bow, later on you can
always advance to a non-wired ribbon or try
out some other materials. There are a few other materials
you're going to need, you're going to need a way
to bind or hold your bow. Most often, I use floral wire, but you can also
use chenille stems, you can use twist
ties or string. If your wires are going to be exposed at all or if they're going to be used to anchor your bow to another object say, a handrail, I don't want to use exposed floral layer because
it might scratch the wood. Instead I'll use a chenille
stem or twist tie, which is going to protect
the wood and it's going to protect the surface
just a little bit more. Think about which item you want to use to bind
your bow together. The other material
you're going to want to think about is hot glue, depending on how
you make your bow, you may want to wrap the center of your
bow and if you do, hot glue is going
to come in handy. Now is a great time to explore which materials
you like best, which ones don't quite
work well for you. There is no right
or wrong answer, whichever materials you use, it's just a matter of
if they're going to work well for your projects. If you're ready to get
started and talking about the size of your bow, how you're both
going to be used, then go on ahead and move on to the next lesson.
I'll see you there.
4. Designing a Bow: Style, Form & Function: [MUSIC] Welcome back. In
this lesson we're going to talk about designing the
right bow for your project. First, let's talk about
the structure of bow. bow has three main parts. It has the loops, which are the main
body of the bow. A lot of times you'll
see either single loops. You can think of a
classic hair bow or multiple loops on each side
of the center of the bow, you have the bow loops and
you have the bow Center. Sometimes the center is
just where your wire or your anchor is going to be to
hold those loops in place. Sometimes you're going to
have a wrapped center. The third and final part of your bow are
going to be Tails. Now, some bows have tails
and some bows do not. The tails are generally
going to hang down from the
center of your bow. Traditionally there
are two tails, but of course you
can always add more. Sometimes they're
trimmed to be stylized. You might see the
tails at the bottoms cut at a diagonal
or cut with a V, the styling is up to you, so now that you know
the structure of a bow, Let's talk about some key design factors that
are going to impact how you choose the
ribbon for your project. The first thing you're going
to want to consider is the scale or size of your bow. How big of a bow do
you want to make? Imagine placing a really big bow on top of this small gift box. It doesn't quite feel right? Does it know? Makes sure that you're choosing
a bow that's going to be a good size that's
appropriate for your project. If the bows main statement
piece then okay, you can flourish it up
a bit but otherwise, I personally like using bows to just
accentuate my project. Now ribbons come in
different size, width. You're going to
find ribbons that come and thinner widths. And you're going to find ribbons are becoming thicker widths. The width of the ribbon matters. If you choose a wider ribbon, you're going to need fewer
loops to cover more space. Whereas if you choose a thinner ribbon
you're going to need a lot more loops to cover
the same amount of space. Generally, wider
ribbon is good for bigger bows because you'll use less ribbon to cover the area. Wider ribbons tend to make
older, bigger impact. Thinner ribbons are really good if you want a
little bit more of a delicate style and
speaking of ribbon size, you can generally check the
side of your ribbon role to see what length is on
that spool or that role, and that's going to be
important if you're making more than one bow or if you
have multiple bows to make, you know how much ribbon
you're going to need for your project and how
many rolls that you're going to need to
complete your project. Another thing to keep in
mind is material strength. Some materials are going to
be more durable than others. Something like burlap
is going to be a lot stronger than something
like silk or satin. Keep in mind how your
project's going to be used and whether it needs
to be able to weather. The weather, it's
going to be exposed to snow or rain or wind, harsh light than keep in
mind that you may need to either swap out your bow
regularly or freshen it up. You're also going to want
to consider how much stress the bows is
going to be underwrite. If you have a wrist
got tie and someone who's going to say a dance, you're going to want to
make sure [LAUGHTER] that bow is made nice and tight. It's not going to
just fall apart even with a lot of moving
and dancing and action and all the
meeting greeting that comes with
having a celebration. The same is going to be true for your wrap materials, right? If you're going to be wrapping
your bow with a wire, sometimes that wire can cause
a little bit of damage. It can rough up paint or
it can scratch things. You may want to
use something like a Chanel stem that's going to
be a little bit fluffier or twist tie that's going
to be a little bit less exposed than just a
wire for your project. You're also going to want
to think about whether or not your ribbon can
support itself, is it wired or is it not wired? Is it a thicker
material that can hold itself up your loops
can stay nice and full. Something like star and doesn't
support itself very well. It can create delicate,
smaller looped bows. But if you need a larger
bow with longer loops, they tend to flop. They won't hold their
place quite so well, consider how your
ribbon size, color, texture, pattern plays into
the theme of your project. Are you making a wedding bow? Maybe you want to use
a beautiful, sunny, silky texture bow or
a delicate tool bow. Are you looking to
make kids hair bows? Maybe you want a fun pattern
theme or more rustic bow. Maybe burlap is going
to be your friend, choose your ribbon
print, color, texture, and size to coordinate
with your project. Think about the bigger
picture as you're starting to put together your tools
and your supplies. Before we dive into a few
for making Techniques, we want to talk about
how we can estimate the size of our bow
before we make it. This will give you
a good indication of how much ribbon
you're going to need for your project and how many rolls of ribbon you're going
to need for your project, and if you're making
more than one bow, this will give you a good
idea of how much driven total you're going to need
for your project. If you're ready to get
started on how to estimate the size of your bow
before you make it. Meet me in the next lesson,
I'll see you there. [MUSIC]
5. Project Planning: Ribbon Prep & Measurements: [MUSIC] Before we dive into
a few bow making techniques, we want to talk about
how we can estimate the size of our bow
before we make it. This will give you a good indication of how much
ribbon you're going to need for your project and if you're
making more than one bow, this will give you a good
idea of how much ribbon in total you're going to
need for your project. What we're going
to want to do to estimate what bow size
we're going to make, is we're going want
to mock up a bow. We're going to use a very light
folding technique to just mock up our bow to see if it's going to be
about the right size. After we mock up our bow,
we're going to be able to measure out that length
of ribbon to see how much ribbon total we're
going to need for that bow. If you have extra bows
that you need to make, you'll be able to
use that length of ribbon as a template to cut out the rest of your
ribbons before we go on to making and twisting
all of our bows. The key to making a
good mockup bow is to have as little
waste as possible, aka, we don't want to do a
ton of damage to our bow. We don't want to crease
it or dent it in case we decide that we want to change how our is
coming together. To do this, you're
going to gently hold the ribbon
between your thumb and your forefinger and
you're going to make the first leap of your bow. This is going to be half of the width of your overall bow. The next thing you're
going to do is make a loop of equal size, but going in the exact
opposite direction. Continuing to hold the ribbon with your thumb and
your forefinger, go on ahead and make another loop in the
opposite direction. Careful not to bend or
crease your ribbon as you're creating these
first few loops. You're going to just
gently continue to lay the ribbon on top
of the other loops. But each time you
add a new loop, you're going to slowly
make the loops just slightly smaller
than the previous. This way, your
loops are going to have a little bit
more dimension. Not all your loops are going
to be all the same size. It's going to give your bow just a little bit
more character. Don't worry if your
ribbon is printed and you can only see
half of the print. We're not worried
about that right now. We don't want to twist or
crease our bow right now. We just want to make sure
that the size is right, that our loop sizes are right, and that we're happy with the overall fullness of our bow. Once you have your
ribbon loops stacked, you're going to take
a look at your bow. You can move the outer
loops just a little bit to get a feel for how
your bow will fill in. If you're happy with
your bow, awesome. This is going to be the
length of the ribbon that you need for the loops
on your project. If you think that your loop
is going to be a little bit bigger or smaller, now is the time to adjust. Now, don't cut your ribbon, just keep it all one
continuous length. That way, you can use
this length of ribbon as a template for when you
go to cut your project. Next, you're going want
to consider your tails. Do you want your
bow to have tails? If you do, you're
going to want to measure out the
length of one tail. Once you have that
length measured out, you're going to go ahead and double it to give you
your second tail. Of course, if you
want multiple tails, keep measuring out tail
lengths, until you're happy. For a larger bow like this, I tend not to wrap the center, but if you do want
your center wrapped, you're going to want to
add a few extra inches to your bow to make
sure that it can cover from the back of your bow, across the front and around
to the backside again. Now you're going to add up the measurement for your loops, your tails, and your center, if you've chosen to
wrap your center, and the sum of those three
measurements is going to be the total length you
need to make one bow. If you need to make
multiple bows, then you're going to multiply that length out by the number of bows
you're going to need. Now, remember earlier
when I mentioned that the side of the ribbon roll
generally provides a length, so how much ribbon
is on that roll? You're going to check
the side of the roll to see how many rolls
you're going to need to make your bow
or multiple bows. Now, if you need to cut
multiple bows in order to keep them all
consistent length and save yourself some time, you can bulk batch,
cutting your ribbon. You can use that
initial length as a template to cut the rest
of your ribbon lengths, so that you know they're
all the same size. Then you can go ahead and
just keep twisting and making your bows without having to stop and cut more ribbon in-between. Keep in mind that if you're
making multiple bows that have different ribbon widths or being used with
different ribbons, you may need to mock
up each ribbon type, because the width of the
ribbon is actually going to change how much ribbon you're
going to need per bow. If you're going to use your
ribbon-like templates, use them for ribbons
that are the same width. If you want to include a ribbon
that's a different width, then go on ahead and mock up a new bow template for you to use to cut at
that new ribbon width. Creating a mockup
bow will give you a good idea of how big
your bow is going to be. That way, you can make
sure it's appropriately size for your project. It will also give
you a good idea for how much ribbon
you're going to need in order to make
your bow or bows. Now, don't worry if
the first one you make isn't quite the
size you hope for, we can always add
a few extra loops or we can take some away. I'll step you through
the bow making process in the next
couple of lessons so that you can see how we put all of this
information together. If you're ready to get
started making your bows, I'll see you in the
next lesson [MUSIC]
6. Making a Bow: The Twist Method: [MUSIC] The first ribbon
technique we're going to cover is the twist method. Now, this method is a very similar to how we made
our mock-up though. But instead of laying
our loops flat, we're actually going
to twist between changing sides of the
center of our loops. This method is easiest
with wired ribbon. If you've never
made a handmade bow before or if you just want
an easy way to get started, I'm going to
recommend practicing this technique
with wired ribbon. This technique
requires a little bit of hand grip and some
conflict gripping. If you're using a
thicker ribbon it may be tougher to hold
the ribbons in place. If you're using a
teeny tiny ribbon, there will be some dexterity. You need to make sure
that those twists are going to be just
in the right place. If you're using a wired ribbon and you accidentally let go, if your fingers start
moving while you're getting used to the process
those wires will generally hold your loops
so that they'll be easier to put back together and pick right up where
you left off. This technique may
take a few tries to really get into
a good rhythm, but with a little bit of
practice, it becomes easier. If you're ready to try it
out, here's how it works. If you marked up your bow, start with your measured
piece of ribbon. If you're not worried about
pretty measuring your bow, unwind some of the
ribbon from the spool. If you're using a wired ribbon, trim the edge of your ribbon so the wires are not exposed. At this point, you should know whether or not your ribbon has a front side or backside
or a printed side, or an unprinted side. Now keep in mind as you're
using this technique, this technique is
great for one-sided. Those are bows that
are printed on one side or have a front face. You're going to want to
make sure that that face stays on the outside
of your loops. The non-printed side is going to be hidden on the
inside of your loops. Now to make your bow, place the end of your ribbon between your thumb
and your forefinger. If your bow is
printed on one side, start with the non-printed
side facing up. Leave enough space for
your largest loop, and then bend the ribbon back down so that the printed
side is facing up. While continuing
to hold your loop, twist and pinch the ribbon at the center so that the printed side
of your ribbon is facing down for
your second loop. Create your second
loop making sure it's just as long as the first. Bend the ribbon back
to the center so the printed side is facing up. Again, twist and pinch at the center before
making another loop. Continue making
loops into your bow as the size and fullness
of your liking. Generally, four to five
loops on each side of the center will produce
a nice size bow. Remember to make
the loop slightly smaller with each
round of loops that you create so that your loops
are not all the same size. This will help with the fullness in the center of your bow. I'm going to go on ahead and continue making
loops for this bow. I may speed things up
just a little bit. I'll meet you once I'm
done making loops [MUSIC] Keep in mind, the more
loops you add to your bow, the more difficult it will be to hold onto those twists as
you're making your bow. With some practice, this
technique gets easier. Once you have all of your loops, continue pinching the bow in the center and take
a piece of wire or chenille stem or a twist tie and wrap it around the
center of your bow. I usually thread
the wire between my forefinger and my middle
finger to help me wrap it around the bow without pinching my fingers and while keeping
everything nice and taut. Once your wire is mostly
around the center of your bow, use it in place of your
pinched fingers to grasp and hold your
loops in place. Release your fingers
and continued to pull that wire taut and twist that wire you're tight
to hold your bows shape. Now gently adjust your loops to create fullness in your bow. Be careful not to
bend or overwork your ribbon or else it
might start to crease. You can place a finger or two gently in the loops to
help work them around or you can anchor and pinch
at the center of your bow in order to adjust those
loops where you've already have a few
creases anyway. [MUSIC] Then once you're
all done adjusting your loops you now have
a beautiful full bow. Now, this is not the only
bow-making technique. The next technique is called
the figure eight method. It's, I would say a
little bit easier. What's nice about the twist
method is that we have a little bit more
control of exactly where our loops are
going to be positioned. With the next technique, I'm going to show you
it's a little bit simpler and we'll have
quite so much character. But I think you're
going to like it. If you're ready to check it out. Let's hop on over to the
figure eight method. [MUSIC]
7. Making a Bow: The Wrap (Figure 8) Method: [MUSIC] Welcome,
back. In this lesson, we're going to talk about
the figure 8 method. The figure 8 method is another
way to create your bows. In this method, your bowlets are all going to
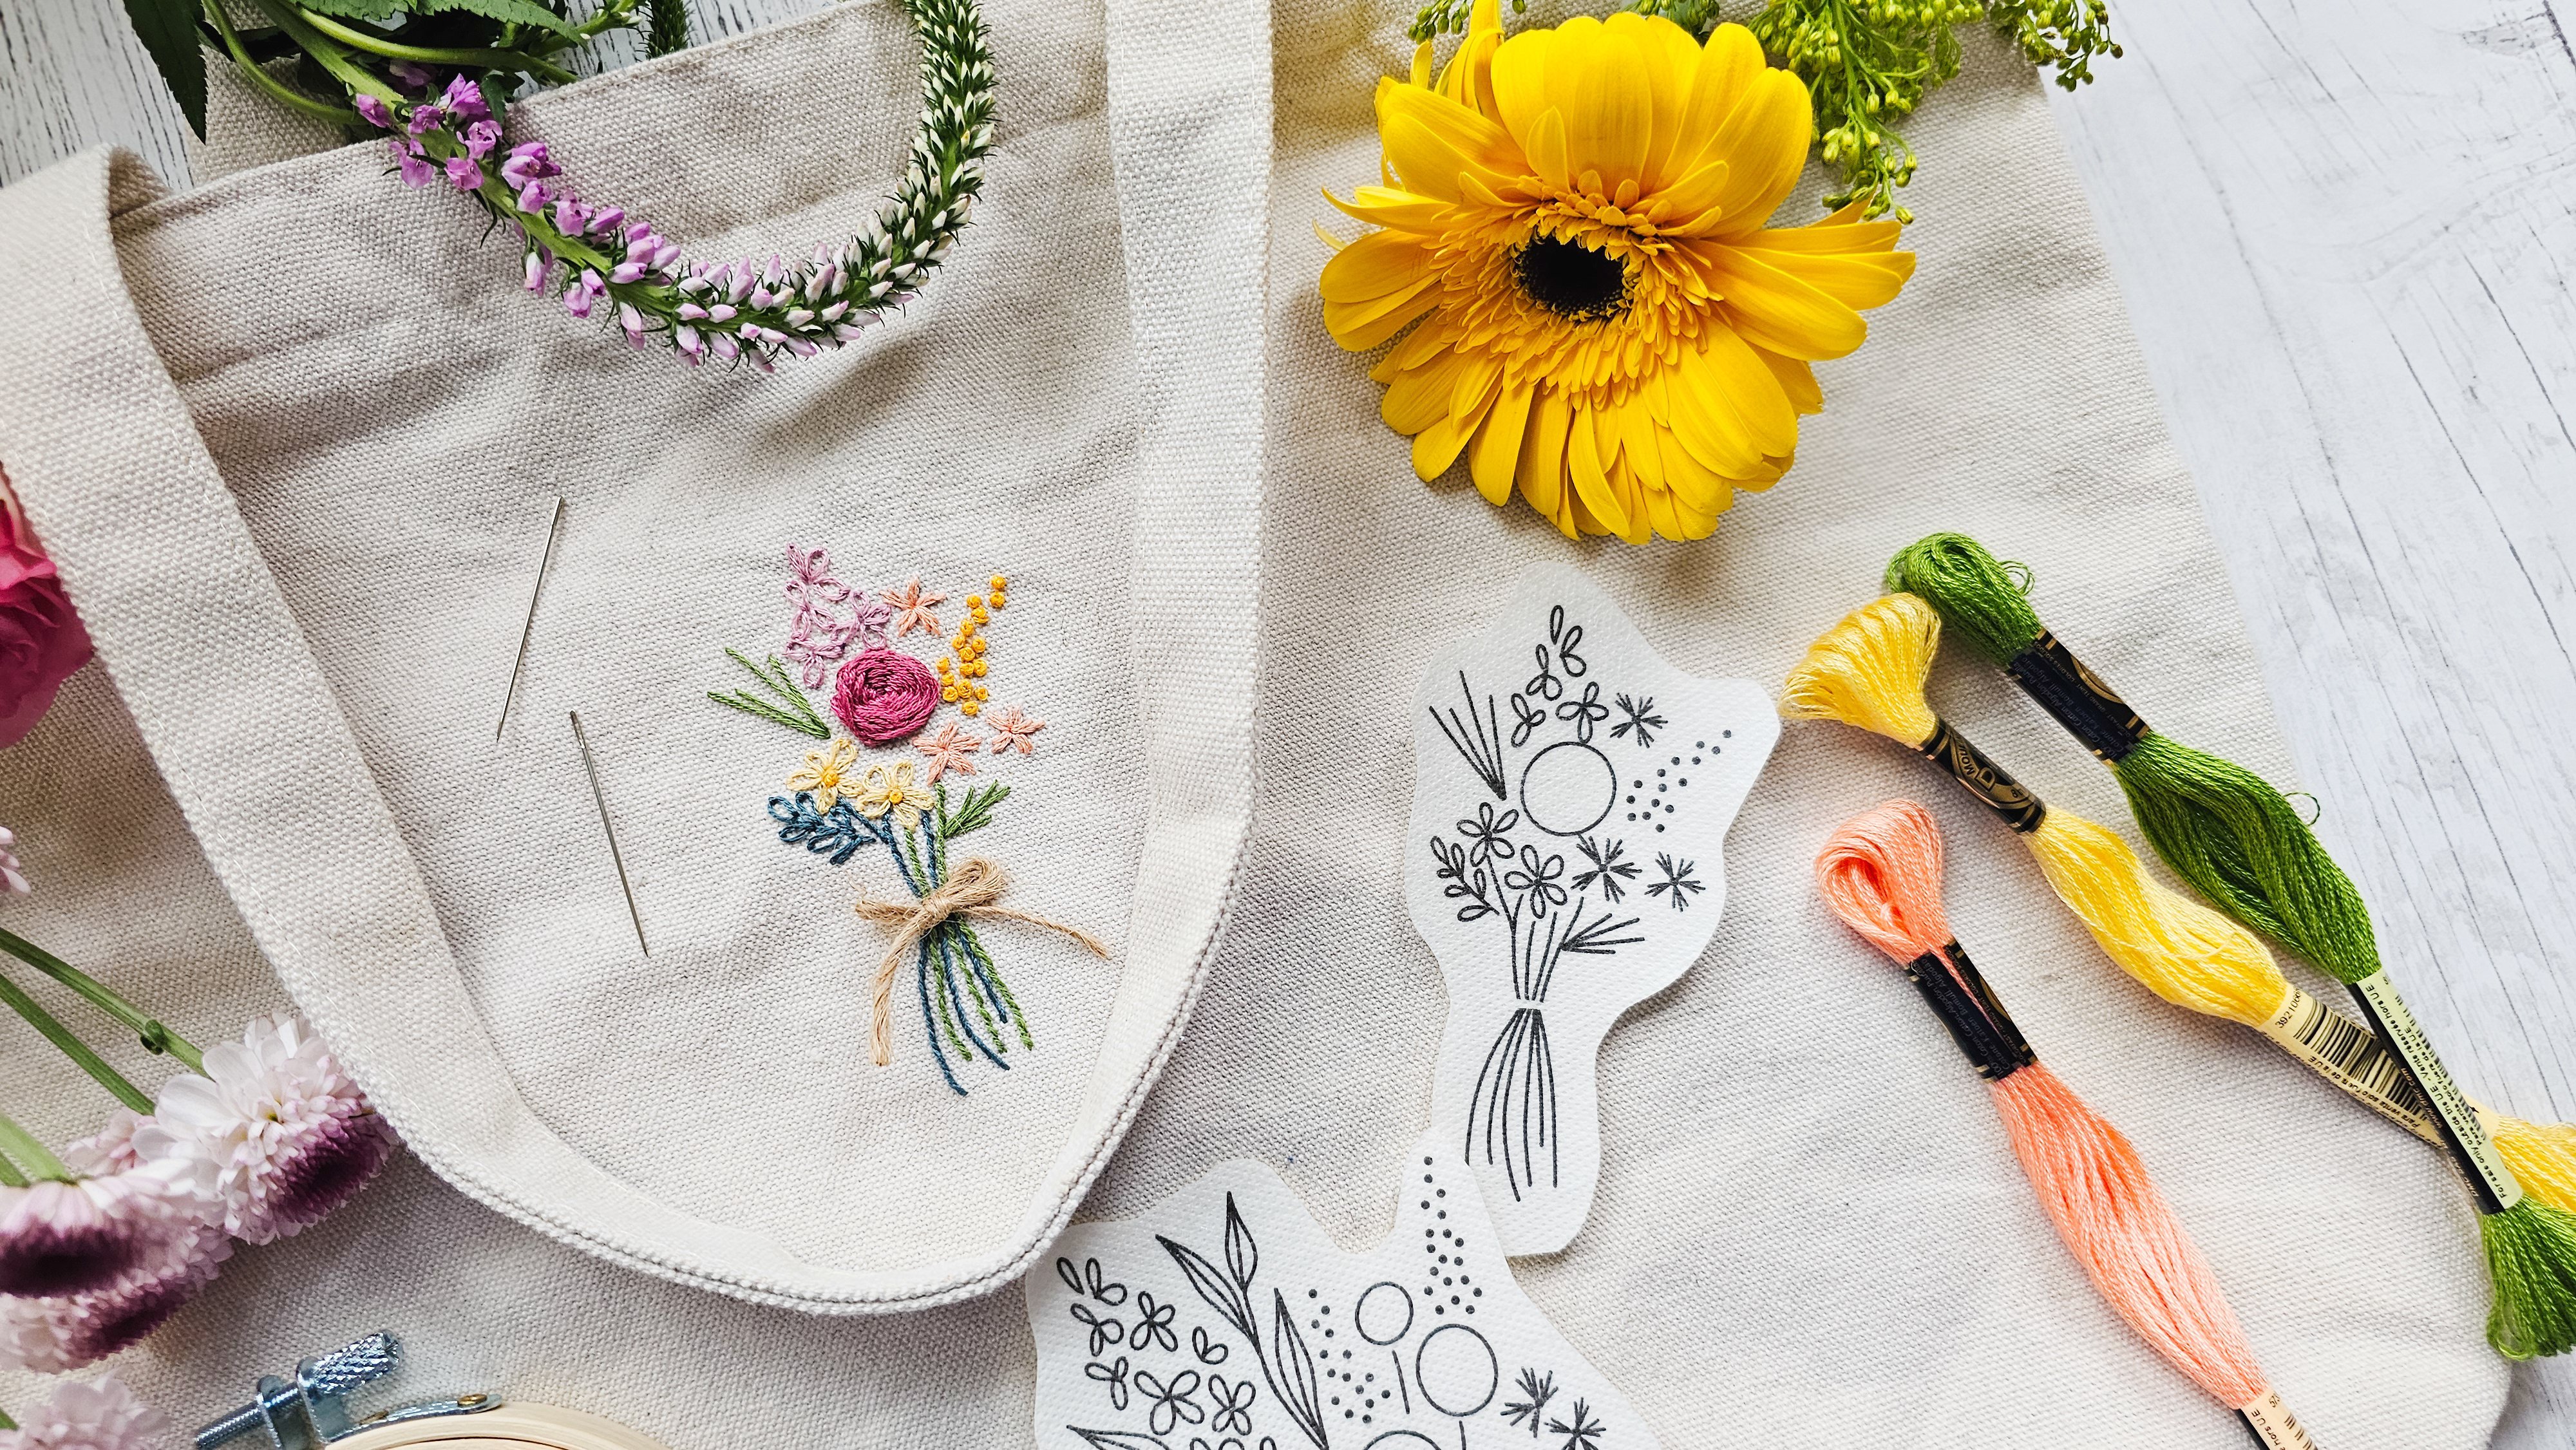
be the same size. I especially like using this technique for
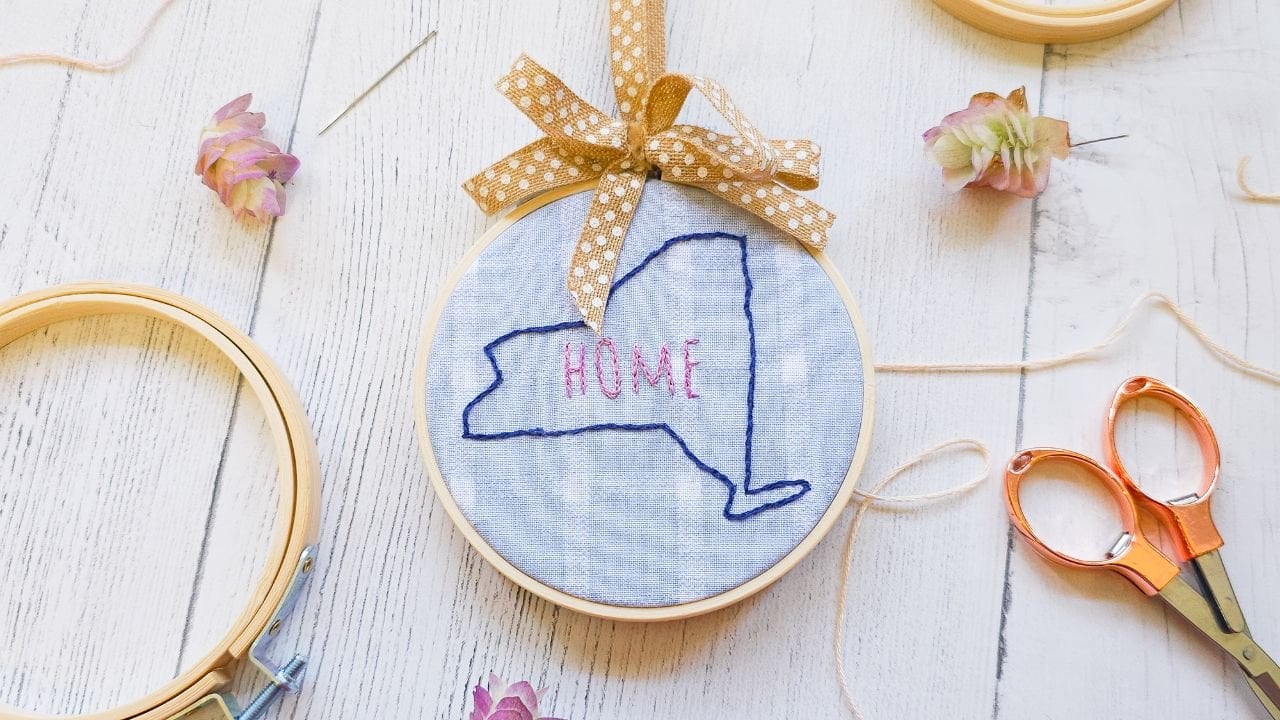
thinner ribbons. It helps to create nice, full, cute little bows, especially for projects like embroidery hoops or [inaudible]. This technique can be used for one-sided ribbon or
two-sided ribbon. This one should be a
little bit easier for you to hold than
the twist method. If you're ready to get
started, let's check it out. In this example, I
am going to be using a larger ribbon that's
printed on one side, so it'll be easier to see
how this process works. If you have a ribbon that's
printed on one side, be sure to keep the
printed edge facing away from your fingers for the duration of this technique, and the non printed edge to be hidden against your fingers. To get started, you're
going to be wrapping the ribbon around your
fingers to form a figure 8. I like to use two
fingers for one side of my loops and two fingers
for the opposite loops. But you can use one finger
on each side if you like. Start by anchoring
the ribbon between your middle finger, and
your fourth finger. With a printed side of
your ribbon facing out, guide the ribbon around
your middle finger, and index finger, and
back to the center again. Once you reach the center between your middle finger
and your fourth finger, gently turn the ribbon so the
printed edges facing out as you continue to guide the ribbon around your fourth finger, and your fifth finger, and
then back to the center again. Then you're going to
twist the ribbon gently in the center between
the loops so the pattern is facing out and
continue to wrap this figure 8 motion
around your fingers. Once you're happy with the
number of loops in your bow, guide a wire between
your middle and your fourth fingers to
anchor your loops in place. Once the wire is wrapped around the ribbon, twist to secure. Use your fingers to adjust the bow loops until your
bow is nice and full. [MUSIC] If your bow feels uneven or could use an extra loop or
two, don't hesitate. It's okay to add an extra loop. Simply make an extra loop
with your ribbon and tuck it into the wire
and twist to secure. Then go on ahead and
rearrange your loops to make sure that your bow
is nice and full. [MUSIC] When you're all done, trim your ribbon and make
any final adjustments. You can also use this technique
with a thinner ribbon. Here's a quick look at what
a thinner ribbon would look like with the
figure 8 method. [MUSIC] I often use this technique for my
embroidery hoop bows, because I'd like to give
them a little extra blank at the top of my projects. It's a nice way to hide the little hook in
the loop and to just make them look
a little bit more refined in a little
bit more finished. With this technique, your loops are all going to
be the same size. In the twist method, we decrease the size of our loopses as we headed
toward the center, which gives a little bit more coverage
to the center of the bow. But in the figure 8 method, the method that we
just talked about, all of the loops
are the same size. A lot of times the center of your loops are
going to be exposed. This may be a good time to
wrap the center of your bow, and don't worry,
we're going to talk about that in a
couple of lessons. If you want to learn
how to wrap the centers of your bow, never fear we're
going to cover it. You can also, if you don't want to wrap the
center of your bow, sometimes you can wedge in the center of your bow slightly, so pull it just a
little bit deeper so that the loops fan
out a little bit more, and the center of the bow
recedes into the project, just giving you just that
little bit of extra coverage. Once you've had some time to practice the figure 8 method, we're going to talk
a little bit about adding tails to your project. If you're looking to add some
extra tails to your bows, go on ahead and meet me in
the next lesson. [MUSIC]
8. Adding Tails: Extra Flourish: [MUSIC] Awesome.
So you've gotten some practice making some bows. Now it's time to talk about adding some tails to your bows. Now I'm going to show you
two ways that you can add details to your bows. The first one is to
just build them in. Instead of starting and
just making your loops, what you're going to do is
you're going to measure out one tail length before you get
started making your loops. Then once you have one
tail length from there, you're going to start
twisting or figure aiding your loops until
you're happy with your bow. Once you have enough loops, you're going to go
ahead and leave the second tail length before anchoring your
ribbon with wire. This will leave you
with one long piece of ribbon that includes both your tails and
your loops and is anchored with one piece
of wire in the center. Your second option is to add tails after you
create your bows. So if you've made your loops and now you want to add tails, you can do this by measuring out piece of ribbon that is
double your tail length. Because you're going
to need two tails. [MUSIC] You're going to
take that ribbon length and you're going to fold
it in half and you're going to take a piece of
wire and you are going to wrap it around that length
of ribbon in the center. You're going to give
it a little twist to pinch and anchor it in place, then you are going to
wrap that second piece of wire around the wire that is around the center of your
bow and you're going to twist it together with the wire that is
anchoring your loops. [MUSIC] If you're wondering how long you should
make your tails, consider what you're going
to be using your tails for. For example if the tails on your wrist corsage are too long, they might tickle or irritate the rest of the person who's
wearing wrist corsage. So you want to make
sure that those tails are a little bit shorter. Your other option is your tails don't just have to
hang straight down. A lot of times I
like twisting them and looping them and bending
them into my project, especially for reads, garlands. I like bending and twisting my tails for my
fiber art projects. If you need a little bit of extra length to cover the
bending and the twisting, you're going to want to
make your tails just a little bit longer
so that you can account for folding your
ribbon back into your project. You can also add
additional tails. So if you want more
than two tails, you can go ahead and keep adding more until you're happy
with your project. Just keep in mind that if
you use a separate piece of wire for every single
set of tails that you add, that wire can start
to get really bulky. So you may want to
try to consolidate and add details to the
single piece of wire. Now if you realize that
you've made your tails too long, never fear. It's not going to be a problem. What you're going to do
is you're just going to take the extra length
on each tail and you're going to loop it back up
toward the body of your bow. You're going to
anchor those loops to the center of your project with the main way
or that wrapped your original loops so
that they look like two loops that you've
added to your bow. That way, you're not wasting any ribbon and your
bow just going to be a little bit fuller. If you found out that you cut your tails telling
just a little bit too short, just add more. Now that we've talked
about adding tails, we're going to talk about
how you can wrap the center of your bow so that if you want to make your bow look
a little bit more traditional or classic
and have that nice, neat center not look. We'll make sure that we
cover it in the next lesson. Once you're ready, go ahead
and meet me there. [MUSIC]
9. Knotted Style: How to Wrap the Center: [MUSIC] In this lesson, we're going to talk
about how to wrap the center of your bow to cover the wire that we use to
hold your loops in place. Now, let me start by
saying that you don't have to wrap the center of your bow. A lot of times especially if
I'm using the twist method, I don't cover the center. But if you're looking for a
more traditional bow look, or if you use the figure eight method and you've got a big gap in the center of your bow, this wrapping technique
can come in handy just to make your project look a little bit more finished. Now, if you think
about a classic bow, maybe a hair tie bow, or a shoe bow, a lot of times you're
going to think of a knotted center of that bow. Sometimes those knots
can come up a little bit warped or twisted. And so in order to make
a nice clean cut look, we're going to go ahead
and we're going to wrap ribbon around the
center of our loops. So if you'd like an easy way to wrap the center
of your ribbon, what you're going
to do is cut just a little bit extra ribbon. You're going to need enough to make sure that you can wrap it from the back to the front and back around
to the back again, and that it will cover all of
the wires that are exposed. Your ribbon is really thin, you may need to wrap your
ribbon around more than once. So when you're ready
to get started, you're going to move
your anchor wires just out of the
way horizontally. You're going to just
bring them away. So we're going to
want to keep those exposed so that we can use them to tie our bow to whatever we're going to
be doing for our project. And then what you're
going to want to do is, put a dot of glue
right in the center of that wire where they are crossing, where
they are twisted. Then you're going
to take one end of your ribbon and you're going to attach it
where that glue is. Be careful if it's hot glue
that you don't burn yourself. Make sure if it's really
hot that you're using a tool or something that is safe to use
around the high heat. You're then going to
give it a second to set. You're going to wrap
the ribbon all the way around until you reach the
back of your project again. If you have thin ribbon you might have to go
around more than once. Once your wire is fully covered, go ahead and add one extra dot the back of your
project so that you can finish your ribbon wrap on the backside of your bow
so it's not exposed, no one's going to see
what you've worked on. If you have any extra ribbon, if you cut too long of length, just trim it up a
little bit so that the glue and the edge is all
on the backside of your bow. So once ribbon is wrapped, we're going to talk
about how you can make multi-ribbon bows. We're going to take it
up to the next level. So if you're ready to
learn how you can use more than one ribbon
for your project, go on ahead and meet me in
the next lesson. [MUSIC]
10. Multi-Ribbon Bows: [MUSIC] Now that we've
wrapped our bows, we've learned how to
do that technique, the next technique that
we're going to talk about is how to make
multi ribbon bows. If you're anything like
me, you like textures, you like fibers, so why stop at one ribbon? If you want to make a larger
bow or more complex bow, you can actually
add more than one ribbon to your project. I'm going to show
you a couple of different techniques
that you can use to make multi-ribbon bows. This is particularly
fun for larger, more showy bows, but it can also be used for
small, delicate bow, say, for risk score
Sij where you want to get more
than one texture, glitter shimmer into your
project in a small space. I'm going to show
you a couple of different techniques
that you can use to add multiple
ribbons to your project. The first method you can use
is again the twist method. When you're using
the twist method to do a multi-part bow, I'm going to recommend to create your outer loops
with one ribbon type, and then you're going to
make your inner loops with a second ribbon type. Let's take a peek at how
this is going to look. You're going to start by making your larger loops with one
type of ribbon [MUSIC]. When you're ready to switch
to your next ribbon type, you're simply going to cut off
that first type of ribbon. Keep holding in place with your fingers or if
it's too much to hold, go ahead and tie
off with your wire. Then you're going to start
adding the second ribbon type. Continue adding loops and your ribbons until you're happy with the fullness
of your project. Keep in mind that the
more loops you stack up, the harder it's
going to be to hold. It's okay to twist off some wire [LAUGHTER] between loops if it's starting
to get hard to hold. In this technique, your ribbons
are basically going to be stacked on top of each other
to create one overall look. When you're ready, go ahead and twist that wire
around the center to lock them all into
one big bow unit. The second method I'm
going to show you is the figure 8 method
or the pinch method, depending on the
size of your bow. If your bow is a
little bit larger, you can use the figure 8
method with multiple fingers. You're going to be looping
these ribbons simultaneously. You're going to stack them
up and you're going to weave them through your figure
eight at the same time. Or if you're making a tiny
ribbons safer risk score Sij, you're just going
to pinch in loop really small figure
8's using the ribbons. Now, these don't need
to be super huge. Especially depending
on your project, they can be a nice
again delicate accent, or if it's a bigger project, you can go ahead and
you're going to have a multi ribbon, beautiful bow. The loops are all going to be the same sizes but
it's going to have a little bit more character
than your general figure 8 ribbons because it's going to have more than one material or more than one texture
color in the same unit. Now that we've talked
about how to make multi-part bows using
multiple ribbons, we're going to go
ahead and cover how to use curly ribbon to make a fun party ready bow
for your next project. If you're ready to
learn how to use curly ribbon to make a bow, meet me in the next
lesson. [MUSIC]
11. Making a Bow: Curly Ribbon: [MUSIC] Welcome back. If you're ready to use curly
ribbon to make a bow, you're in the right place. In this lesson, we're
going to cover how you can use curly ribbon, also known as balloon ribbon, to make an easy bow. Basically you're going
to cut a whole bunch of lengths of your curly ribbon. Decide how you want
to use your bow. Are you going to
tape it onto a gift? Are you going to tie it
to gift bag handles? However you decide
to use this bow, it will have a similar
structure to a traditional bow, loops and a center. In this example,
I'm going to tie my ribbons to the
handle of a gift bag. I'm tying these
ribbons to the handle using the knot as the
center of my bow. Now we have a group
of a flat ribbons on each side of the knot that are
going to become our loops. It's time to curl them. You're going to take a
pair of scissors and using the back of the scissors
you're going to run the back of the
scissors right along the length of each of
the curly ribbons. You're going to do
that on both sides of the center of your ribbon. The more curly they are, the more full your
loops are going to be, and the longer your
balloon ribbon is, the longer your swirly
loops are going to be. Some people like to
open the scissors to cut the ribbon, I
don't recommend this. It's much easier to
get cut doing this. Just use the back
of your scissors, it'll curl your
ribbon just fine. Now you've got this
beautiful twisty celebratory loopy
balloon ribbon bow to jazz up your packages. Now that we've talked about
how to use balloon ribbon, we're going to go
ahead and talk about some modern looping
techniques and other ways that you can use
ribbon in your projects. If you're ready to talk about some other
ways to use ribbon, meet me in the next
lesson. [MUSIC]
12. A Twist on the Classics: Creative Loops: [MUSIC] Now that we've
talked about all the different ways that
we can make bows and all of the
different materials we can use to make bows, I want to talk about
other ways that we can use ribbon
for our projects. Traditional classic
bows are pretty cool, but let's talk about how we can take this to the next level. If you're like me then you like to bend the rules a little bit. One of my favorite sayings
is by Picasso, and it's, learn the rules like a pro, so you can break
them like an artist. In this class, we've
talked about a lot of good staples and
standards that you can use to make bows, ways to hold them
together nicely, neatly, and we've also gotten to know a lot of
different materials. Now that we've gotten to
know all of the materials and all of the
standard procedures that you can use to make a bow, we can mix it up a
little and get creative. You can also twist a ribbon and just make a couple of
loops or a couple of tails and add these throughout your project to make it a
little bit more exciting. It's going to look
like your ribbon is looping through your
project and it's going to be a little bit
more dynamic than a bow that just sits still in one place. If your project calls for a little bit of
extra creativity, don't be afraid to practice making different
types of loops, folding, and twisting
your bows in other ways and in
other configurations. Remember, the materials
that you're using here can also be used for
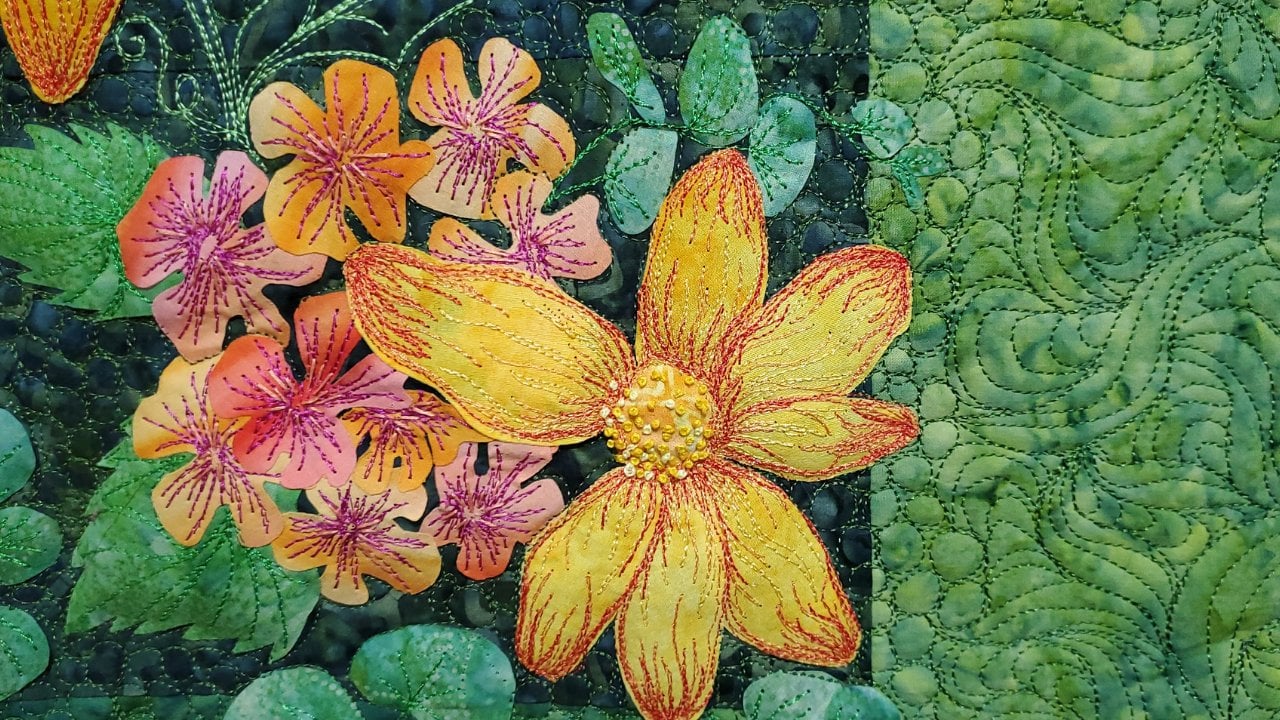
fiber art projects. I love using silk
ribbon in my projects. I like twisting and turning and tacking those
ribbons into place. Instead of using wire, I use a needle and a
little bit of thread. Once you get to know which materials you like to use best, think of other ways that you
can use these materials, how can you loop them,
twist them, tuck them, fold them to create an even better, more
creative project? If you're feeling up
to it, definitely add whatever you create
to your class project. I would love to see how you're thinking outside
the ribbon box. Now that we've covered
all of the ribbon fun, we only have one lesson left. You can go on ahead and
jump into the next lesson where we'll wrap things up.
I'll see you there. [MUSIC]
13. Beyond the Bow: [MUSIC] You did
it. You've learned some great bow
making techniques. Whether these techniques
were breeze or a challenge, I'm going to recommend
keep practicing. Try some other ribbon materials, try some other
projects just to see which techniques
and which materials you like best for
making your bows. Plus it's a great way
to explore and try out some other new
materials that you can add to your
creative toolbox. If you enjoyed this class, let the community know. You can leave a
review by clicking the "Review" tab
under this video. Let me know what your favorite
part of the class was or which topics you'd
like to learn about next. I truly value your
feedback and your feedback can help me make even better
content for you next time. Thank you so much
for following along, I cannot wait to see
what you create. [MUSIC]
 Lauren Weber, Artist + Quilter + Gardener