Transcripts
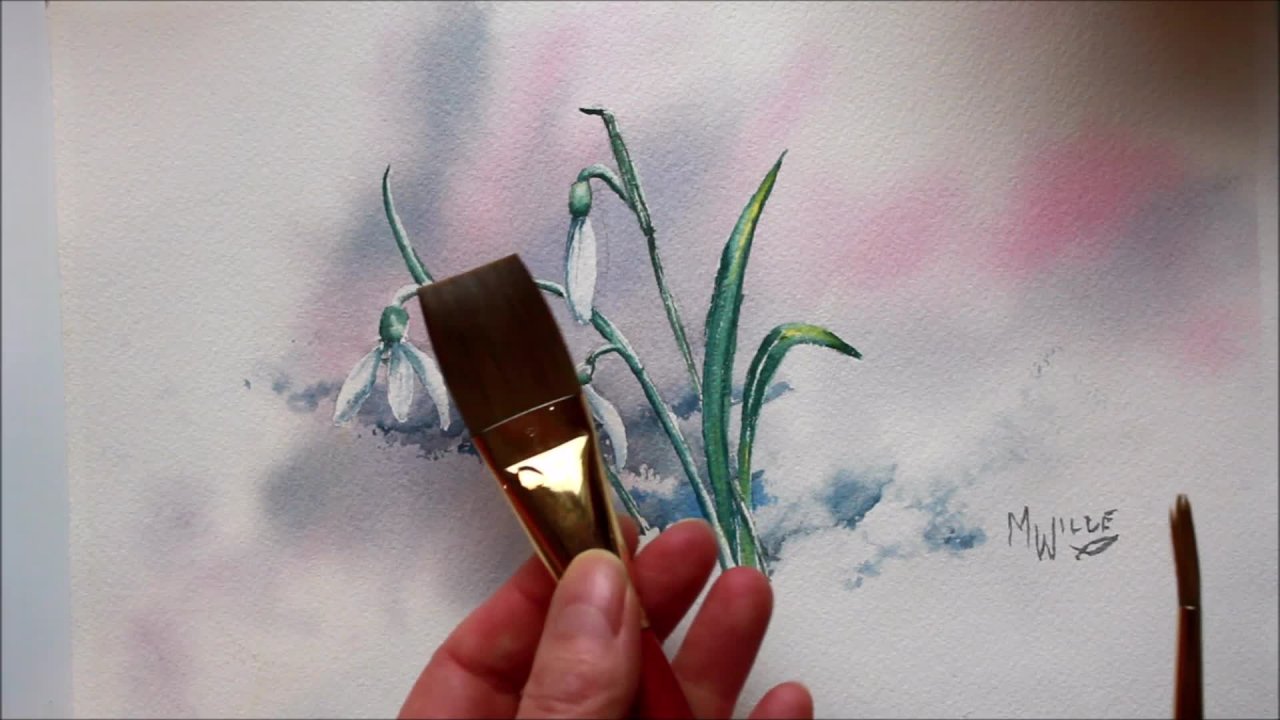
1. Intro : Hi, I'm Melinda Wild. Welcome to experience watercolors Today. We're going to learn a few basic techniques to get you on your wage, producing a watercolor landscapes if you think you're not creative, if you haven't done much art in your life, even if you're not sure which end of the brush to use. This is the seminar for you. So let's get started. So to begin this class, I just like to show you I have a very simple palette with only six colors. You know, for someone who's painted a long time, I have lots of colors at home, but I want to keep this a simple it's possible for you. So three blues a red, a yellow on an earth tone. I've got two small sheets of watercolor paper taped all around the edges with masking tape , and they're taped onto a board. Can be a plywood door, skin. Whatever you've got kicking around a one inch flat watercolor brush on absorbing rag and on my right here have got a water bucket. Everything is placed on my right because I'm right handed. If you're left handed, you want to place everything on your left
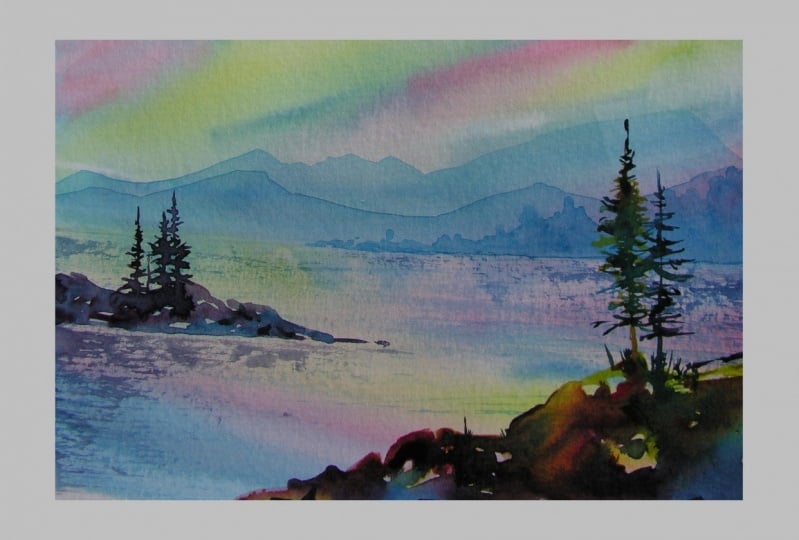
2. sky wash and mountains: So let's get to painting. You'll notice I have two pieces of paper tape down on my board. This is because I'd like you to try all these beginning exercises. Well, at least twice. But I find working back and forth is a good solution when you're beginning, because it gives you a chance to try a technique immediately, Twice without feeling. You have to go from beginning to end of a painting. Now, first thing I do is wet the paper so back and forth both ways because it does have a bit of a nap paper and it's actually not paper at all. It's 100% cotton, and the brand I like is arches £140 cold press. Now, the first thing I'd like you to do is pick up a little bit of yellow on your brush, and I just work it into the hairs of your brush a little bit. And then you're gonna close your eyes. I know that sounds crazy, but I want you to close your eyes, hold the brush over your watercolor paper and with your eyes closed, make three smooshy movements on your paper. 123 very simple. Then you're gonna clean out your brush. And again, I like to pound my brush a little bit. It's not very nice to my brush, but it's a tool meant to be used so you don't have to be super nice to it. Then I'll pick up a little bit of red and red is very strong, so just a little bit and again work it into the brush so it's evenly distributed in the hairs, and this time you keep your eyes open. But I'd like you to do three more strokes. So one to on three and what you'll notice when I do those strokes is I'm not painting. It is if I were painting a house, I'm using the brush by pushing it down and twisting and turning and okay, cleaning out the brush, going for my next color and I'm gonna pick up turquoise because it's one of my favorites and again working it into the hairs on the brush and three more strokes, one to on another little bit. Three. And we'll just leave that one there to dry, and then I'm gonna do the next one. So let's moisten it again. Actually, it's more than moist. It's quite wet. And any time I feel I just out of control with too much water, that's what your absorbing ragas for. Just give it a block. You can go back onto your page, and it will actually pick up some of the water that you originally laid down. All right, a little bit of yellow this time you don't have to close your eyes, but three strokes only, please. One twisting and turning the brush. A little more pigment there, I think to. And three cleaning out the brush. Pick up a little bit of red very, very little again cause the red is quite strong and one to and three and cleaning out the brush again. Gonna grab a little bit of turquoise one to notice how that brush is really working for me twisting and turning. Okay, that's the first step. Believe it or not, this is going to turn into a landscape. We're gonna drive them right now, so I've used the blow dryer to dry these two sheets. You'll know they're completely dry when they go flat. The nature of watercolor paper is that it gets a bit of a wow in it when you wet it. But once it's dry, it will go completely flat another way. You know that it's dries to touch it. If it's a little cool to touch, it's not entirely dry. So you want to make sure you use your blow dryer, get it good and dry before you proceed to the next step, which we're going to do right now, I'm gonna pick a little bit of one of the blues that I've used in here were one of the colors and I'm gonna pick the blue and I'm gonna mix a little tiny bit of it in my palette . And so it's there, ready for me and then I'm going to clean up my brush and somewhere in the middle third of my page, going to do a strip of just clear water, Then pick up that little bit of color and I'm gonna place my brush so that the top of it is on to the dry and the bottom of it is into the Clearwater that I just laid down. And I'm gonna make a shape that I think mountains should look like all the way along here and right off the page. You want to go right off the page to suggest that your landscape goes on forever and ever just gonna feel in that little bit of dryness there, and I'm blotting my brush and running it back along the bottom so that it picks up any excess moisture. Now, what this gives me is a sharp line on the top, a diffused line on the bottom, which gives me lots of options as I continue the paint, I'd like you to do that on both of your pieces. I'm just going to show you one, but you go back and forth and try each of this these techniques on each piece that you've got going. So this is blown dry, and now I'm going to lay in another layer of hills slightly below this first slayer. And so the process is the same would pick up a little bit of the blue that we used Mix it into the palate here, just creating a little puddle for us to come back to that. I'm cleaning out my brush. Going to put a strip of Clearwater pretty much in the same place is my last one pick up some of that paint again. The top of the brushes onto the dry area. The bottom is into the water, so I doesn't leave me with a sharp edge. And then I'm gonna run along here and make another layer of hills. But this time I have to make sure I make them not exactly the same as the last set and not exactly opposite. And then going right off the page, making my brush a little thirsty and running back over there to pick up any excess moisture . And the beauty of this is all those lovely colors that we laid in on our first sky washer shining through these hills. And it just gives it a really nice watercolor. Look, now this one's ready to be Dr.
3. Glimmering still water: So now we're going to do a little bit of water in the foreground. And this is a technique that is what we call dry brush, much drier brush. So far, we've been using very, very moist, wet techniques. This one is so dry that your brush will be like this. It will just separate and not want to join back together again. And that's what we're after for this technique. So I'm gonna grab some of that same blue good idea to stick with the same colors that you originally put in your sky wash because it gives your painting color harmony. I'm gonna work that paint right up into the feral of the brush right up into that metal part. Then I'm gonna blot the other side. So I'm putting the paint on this side that I'm gonna blot it on my blotter on the other side, which will take some of the moisture out. And then I'm gonna use my brush rather than perpendicular to the paper almost parallel to the paper. And I'm using it sideways. You'll notice Not the way you might think you'd use it, but sideways. And I'm going to what's called scum bling. You can hear that sound it makes. And you know, if you hear that sound that you've got the right amount of moisture on your paper. And I'm sorry on your brush. And we're working from off the board on the tape, right into the center and off the board on the other side and right into the center. And what's happening here is it's so dry that it's hitting the little bumps on the paper. But it's not going into the divots on the paper. So what we get is we get that lovely, shiny, glowing look as if you were staring out of the water with the sun on. Now, if you find you're challenged to make the background straight, you need to have the water level straight, and sometimes it's just really a challenge to do that. So if you find that's a challenge for you, which it seems to be for me today, I have a little trick for you. We'll take a piece of masking tape on here we go get that off there, both the width of our paper, and I'm going to make the masking tape a little less sticky by just putting it on some fabric and peeling it back up that I'm gonna lay it in right about where I think I want my water to go to and very softly push it down. You don't want a press too hard in case it sticks and rips your paper. Then I'm going to add my color to my brush again right up into the Farrells, and I can see that my brush is nice and dry, so I don't even need to blot it. And then I can do that same technique. But I have the safety net of the masking tape so that I know I'm not going to get a crooked line at the top. I'm just gonna fill this in a little bit more all the way down here from it a little bit more, and I go right up onto that tape and then I can peel off that tape and there we've got a really nice straight horizon line and we're ready for our next step
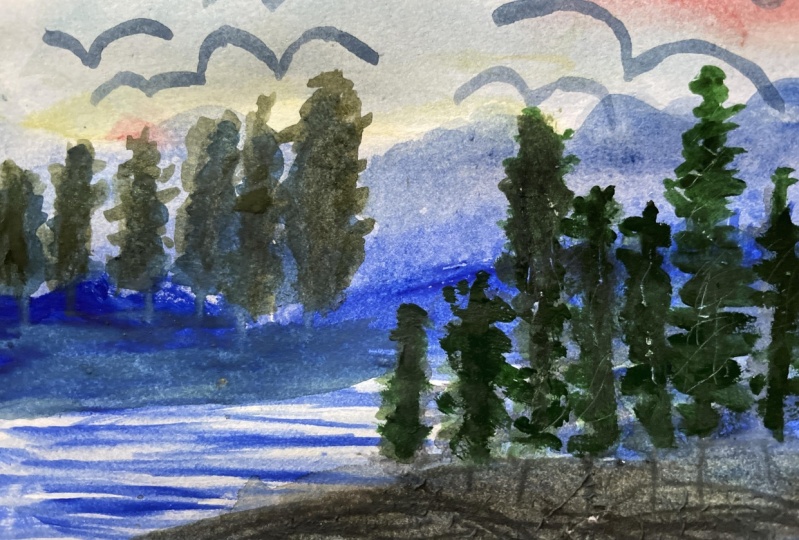
4. Distant land mass: Let's lay in a layer of hills in the distance here a little bit closer than the mountains, and I'm going again. Pick up some of the blue that I've been using little more moisture in the brush this time. And let's just put the first strip across the back here again. It has to be level, and then I'm gonna make the shape I want that little air of pills to be, and here's kind of a fun thing for you to do. If you brush has a lot of moisture in it, just give it a block before you do this and then you use your brush on its side. And while this hill is damp, you're just gonna flick up all the way along, and that's going to give you your trees in the distance. We go, except I want to keep those trees growing straight up. There we go, and maybe I'll just bring that down so that it's level as I can possibly make it, and then we have a nice layer of hills for an island or something happening in the background there. Now, as we come forward in the landscape, we're gonna do the same technique again. But we're gonna add something. Um, I'm gonna show you how to make some trees, and we'll do that on a different sheet of paper, which I'm gonna go and get, and we'll be right back to show you how to make some closer up trees.
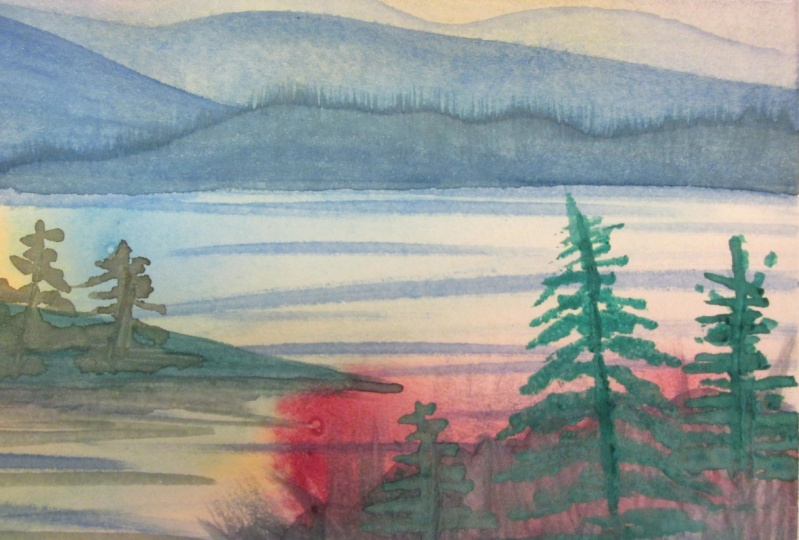
5. Closer land mass and trees: now to make some trees on your painting, I'd like to show you a fairly simple technique. I'm going to pick up some pigment on my brush. Then I like to rest my wrist in my fist because it gives me some stability. And I'd like you to practice this just on any old sheet of paper. You'll notice I'm not on the watercolor painting. And you see, your brush makes a lovely, chiseled edge. So we're gonna use that chisel edge to create tree trunks. And the idea is to keep those tree trunks difference heights and different distances apart . Now, that's a little bit thick for me, so I'm gonna take a little moisture off my brush. You'll find that if you begin to do a technique and it's just too much blooms and it gets too big for you, all you need to do is blocked your brush a little bit and you'll find that you can go back to a much finer look. Okay, so I'm making some tree trunks different distances apart, different heights that I'm using the very corner of this brush to blob back and forth on each one of those trunks and I don't even take it off the paper. I just started the top with fairly skinny back and forth, and then they get wider and wider as we get down to the bottom and the old blend together once you get to a certain point and what this give you is very nice West Coast looking trees. And I just switched corners if you notice there because one corner gets a little bent if you use it too many times. So I need to switch back and forth. Okay. You see, they all blend together nicely as you get to the bottom. And I like you to try this technique several times before you go on to the painting that you're working on because it'll just give you a little more confidence when you do get onto your watercolor paper. If your brush begins to get a little bent as you're working, just straighten it out. Just don't hesitate to stop, straighten it out. And then it's nice and chiseled again, and you're ready to start again and again. Just a strip to make your trunks and then back and forth. Don't think about a tree. Branches don't think about tree needles. Just think about shapes and get the shapes all on there. You find that will be your best baton and constraint that you brush and carry on. Okay? No. So let's take that technique. Now that we've been working on with the trees and put it on our watercolor painting, I'm gonna take a little bit of the turquoise again, mix it into the hairs evenly on my brush, and then I'm going to place another layer of land. Let's see, how about right about here? So put the bottom line in again. It has to be level because water's level. Then I'm gonna fill in the shape that I want it to be and then take a little more paint and I'm gonna do something really messy here. I'm gonna grab a little bit of the yellow just so that I get a slightly different color because it's nice to have different colors mixing together on the paper. There's my trees that I'm making. We talked about and then I'm going to do you decide to side thing with just that little corner on the tip of the brush and we'll have those. All that is what I mean, when I said they all mixed together the bottom. Now I'm gonna grab a little more turquoise because I want some of the trees to be a little bit darker than others. And I'm gonna just drop it in here and there and let it mix on the page. I can see where these air just gonna have little color variations there. And that's a good thing. It gets kind of boring. If the whole thing is very homogenous. Make that a little taller. Okay, Now, while this is damp something that's kind of fun to do, especially if you have a brush that has one of these chiseled edges on it. You can use it to push the pigment around a little bit. You can scratch in some rocks a little bit of beach. Maybe now, if you don't have one of those chisel brushes Hey, your fingernail works just as well your thumb or your pinky or cut up credit card. Whatever you can find that has a bit of an edge on it. Work just fine. Well, scratching a few snags here, beach escape. Now, this technique isn't entirely finished yet because what I want to do is go back to the scum bling technique. Remember the one we use when we put the water in. I'm gonna put pigment again right in the Farrells of the brush, giving it a block here over to the side to make sure it's dry enough. And then I'm going to do a little stumbling underneath this island because I want to settle it into the landscape a little bit better. Then it waas gives it a maybe a look of a shadow are a little bit of reflection, but it just settles it all in a little bit better.
6. Foreground : Okay, now we're gonna put some foreground on. So let's put a piece of foreground land in here, and I'd like to do it with a lot of different colors that we've already used in the picture . So I'm gonna start with the yellow, which is new Gambo. It's laying on top of the blue, so it looks a bit greeny. But anyway, I'm gonna put it on there and then let's pick up a little bit of red and I'm just gonna charge it into the yellow there and let the mix together on the page. Then I'm gonna pick up a little bit of our blue, which is the turquoise again. You're gonna charge a bit of that in there? All right, then I'm gonna take this turquoise and again go back into my yellow so that I get a nice, earthy green and let's put in some of those big trees we talked about now. Meanwhile, these rocks that they're going to be down on the bottom here are drawing, and that's OK, because I need them to get to a certain dryness before I can do the last thing. So while they're drawing, we work on the trees up here, adding a little more turquoise to the mix on. Then I'm gonna add a little more yellow to the mix, and you notice I don't clean my brush between colors. It's really hard for some people to do this, but I think it gives you a better product if you run from color to color without cleaning your brush, sometimes not all the time. But it allows you to keep the same amount of moisture on your brush without picking up a whole ton of moisture and then having it run all over the place for you. Okay, now it looks like we got a little bit of eeny, meeny miny. There, you notice the's trees or the same distance apart. So let's just make it a little more uneven by sticking another tree in there. Maybe on a bit of an angle. Yeah, I think that's a bit better. Now I'm gonna resort to my nice chisel brush here again. This has got to a point of dryness now that I think I can push the pigment around and it will stay where I push it more or less so here we go. When you do this technique you don't want press too hard or you'll rip your paper cause your paper is a little more impressionable when it's wet, so it's a bit softer, so you have to be a little careful. But you'll get the feel of how hard you can push and what this does is it merges the colors together, but it doesn't make them muddy. It'll that you can still see the lovely reds and blues shining through. I'm gonna do a snag or two here, too, and maybe pull up a little bit of, you know, grasses or bushes or something along the front. There doesn't really matter what they are. Here we go now. One thing I'd like to show you is as we get toward the end of a piece. It's very nice to feel the edges at the very end of your painting because it gives you a lovely, lovely white matt around the corner. There is one more thing I want to show you, though, before we take all of that paint off
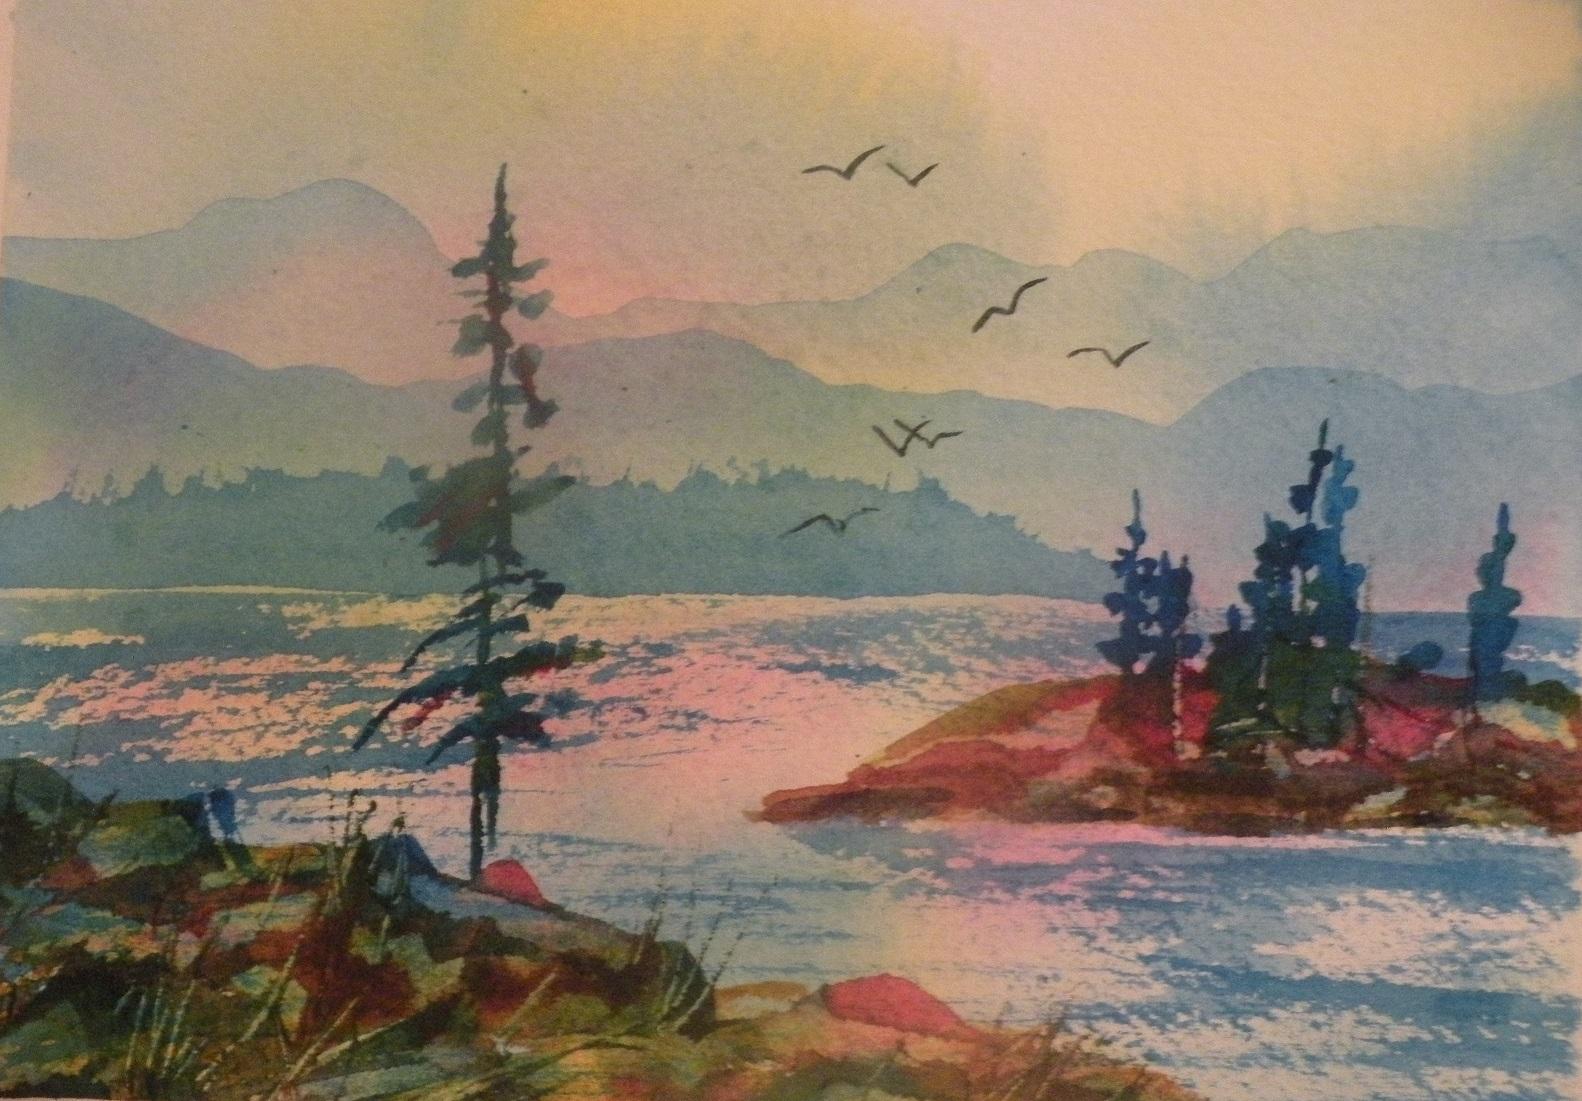
7. Finish With Birds : that is we're gonna put a few birds up in the distance. Now, I have a small brush, usually for my beginners. I recommend that they only get themselves the one inch flat watercolor brush. But it's very handy for just the odd technique. If you do have a fine little round or a big around that comes to a nice fine point and I'm gonna pick up a little turquoise again, work it into the hairs on the brush. And this is the same as we did the trees where I want to rest my wrist in my fist and then I'm gonna practice a little bit off to the side. Okay? I'm resting my wrist in my fist, and I'm going to do a few of them, not on the picture right away. Just for practice and what they are is very shallow ems and very shallow. These and you can make as many or as few as you like, and you can overlap. Um, and you can put them in different angles, and you should definitely have odd numbers. I just think odd numbers look better for things like this. Okay, let's try some on the watercolor painting. Here we go. We'll put a little birdie right there. And how about another little guy right in here and leading? Used to kind of flowing in front of each other? A couple more That looks a bit even to me. I'm gonna put another one here sometimes. Get going, and you want to put a whole flock in. But maybe I'll resist the urge and just stop there. Let's take the tape off those last two pieces. Now that's gonna give us a lovely wait, Matt around the whole thing. And there we go. So you can congratulate yourselves for having done your very first watercolor landscape.
 Melinda Wilde, master teacher of watercolours