Transcripts
1. Introduction: Journaling is a powerful
way to document your days and reflect on
your personal journey. It's a canvas for capturing
your thoughts, musings, and moments all woven into the ongoing
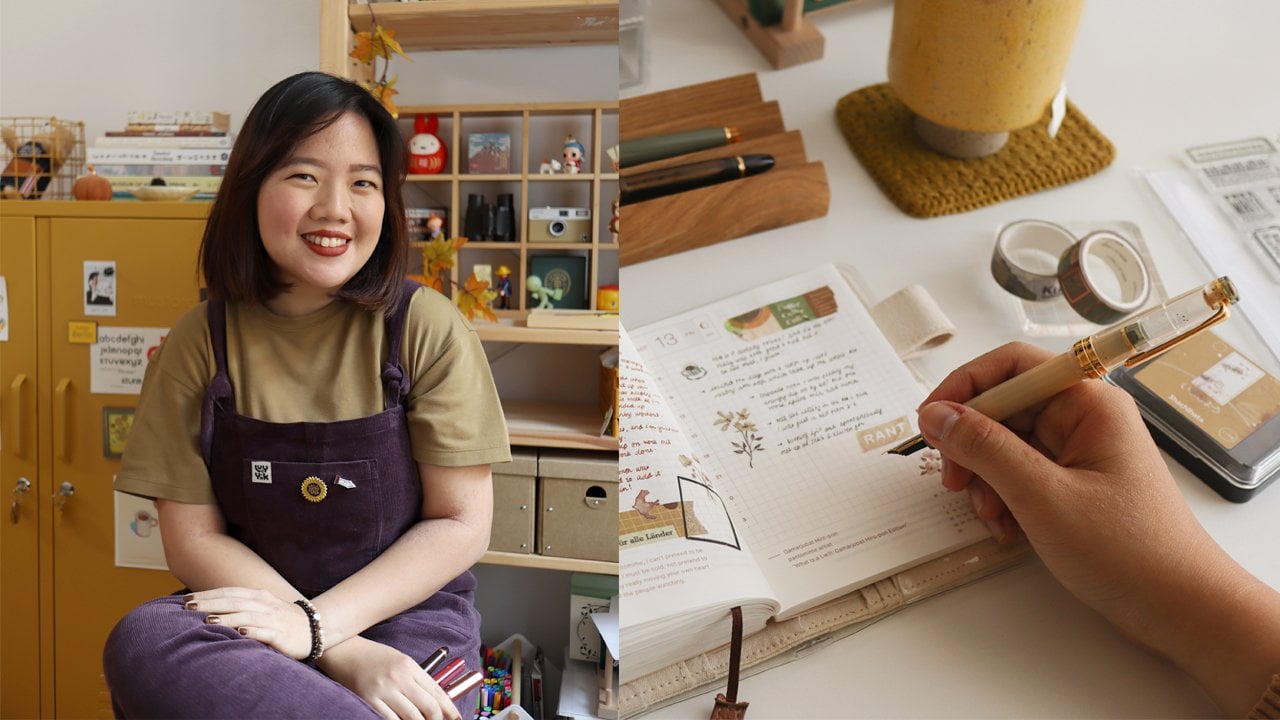
story of your life. Hi, I'm Abby C. I'm an
artist, author, and creator. I've been documenting
my life and travels for over 15
years and counting, having filled numerous
journals with my experiences. I've also authored several books on hand lettering
and journaling, including the Art of
the travel journal. Over the years, I've pursued various creative passions from writing bestselling books
to designing for brands, running an online
stationary shop, and hosting workshops on hand
lettering and journaling. Welcome to my first
skill share class, everyday journaling,
five creative ways to document your life. In this class, I'll guide
you through creating a meaningful journaling
practice that fits seamlessly into
your daily life, helping you capture experiences, and foster personal growth. Journaling allows us to pause, pay attention, and practice mindfulness and self discovery. I'm excited to share
this gift with you, helping you document
your days and the experiences that
make each day a new one. This class is perfect
if you're struggling to start journaling or building
a journaling habit. I'll share easy to follow
practical tips and advice, helping you record
life as it happens, ensuring you remember your days. You don't need to be
a pro at journaling. All you need is a pen
and notebook to start. By the end of this class, you'll have finished five days worth of journal entries as your class
project. Let's get started.
2. Your Project: For our class project, I've chosen five of my
favorite prompts to help you build a consistent and
creative journaling habit. These prompts are
designed to be flexible, allowing you to
tailor fit them to your personal style
and preferences. To make the most
out of this class, I recommend setting
aside 30 minutes for daily journaling at the start
or at the end of your day. Complete five prompts within five consecutive days to
establish a journaling routine. And lastly, to use the prompts creatively
in your own way. Remember, these
prompts are meant to inspire and not
limit your creativity. I understand that journaling
is a personal practice, and I encourage you to explore that creativity in
your own way without having to feel pressure from social media or having your
pages look a certain way. I'd love to see your work so I can provide feedback and offer more guidance on how you can be better at your
journaling practice. When you're ready to
upload your class project, head to Projects and Resources and click on the
Submit Project button. First, upload a cover image for your project to
make it stand out. Maybe choose a favorite spread
that you'd like to share. Then add a title along with additional photos and
videos to your submission. Finally, click Publish. In the Projects
and Resources tab, I've also added a PDF featuring journaling layouts as
well as bonus prompts. I'm looking forward to
seeing your journal spread.
3. Things You'll Need: With journals, it's very
important to pick a size that really is suitable for your
needs or your lifestyle. For this specific class, we're going to be using
the ASIC size journal. This size is very compact, as you can see, and it's
very easy to fill up. There are a variety of
notebook brands that have different types of paper and
different paper layouts, for example, this is a
blank one that we'll be using for this particular class. However, there are
also grid line dotted depending on
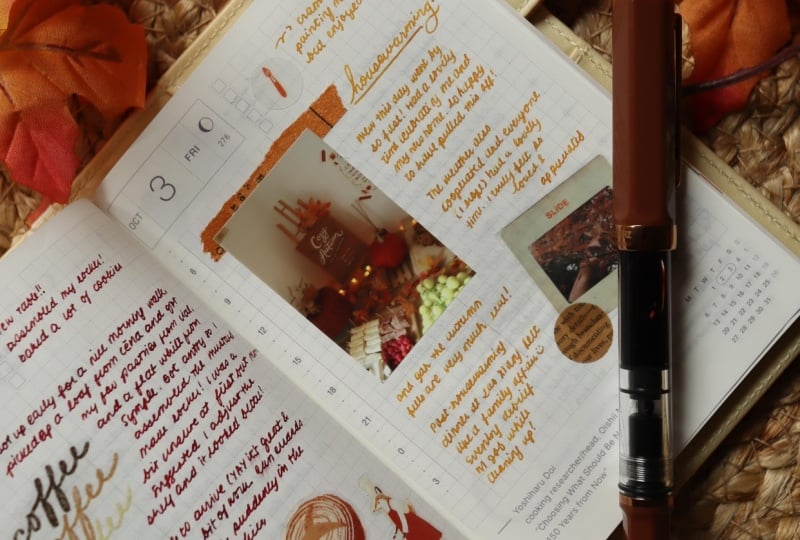
your preference. So this is another ASIx journal. This one is obviously very used. So it's dated, which means that you have to write something
every single day, and it has more
detailed information. Like there's a calendar
view over here, and then we also have the
moon phase as a checklist. So if you like having a bit more constraints
with your layouts, then this is a good idea to have this kind of journal
or notebook. If you tend to we long form, another size that I
recommend is the A five. I used to use A
five a lot because there's just a lot of things that I wanted
to write about, for example,
something like this. But eventually, for me, I felt like this was too much
because I don't have that much to write about
every day and didn't want to force
myself to do that. So A five is great and spacious. If you have a lot to write,
you have a lot to print. You want to really
explore and experiment on the different ways
you want to journal. Like, I like to do recaps
here from time to time. So this is a great
size, and yes, it's twice the
size of the A six. But not least if
you like to have a more pocket friendly setup
or you're always on the go, you like to journal while
you're at a cafe or you're outside running errands
or you just travel a lot. I highly recommend getting
something like this. This is a passport size
insert, and as you can see, it is relatively smaller
than the A six compare. And it's very portable. So you can just bring
it whenever you're traveling or you just
want to write on the go. For this class, we'll
also be using this size. So if you'd like
to follow along, I highly recommend getting
this size as well. Next, let's talk about
writing instruments. So for this particular
skill share class, you'll see me using
mostly fountain pens. So fountain pens are a great way to enhance
your writing experience. It's not required that
you use fountain pens. I personally love them because
I have my own collection, and I switch out inks
from time to time. And it really makes me feel like a writer
for some reason. When I use it on my
journal spreads. I love mostly green, brown, orange tone ink. So those are the inks that I
tend to gravitate towards. They're very
versatile and they're very easy to use once
you get the hang of it. But apart from that, you
can also use whatever you have in your stach such
as a regular ballpoint pen. I super love the convenience and ease of use with
a ballpoint pen. You just grab and go,
you click it and go. I would say this
is in contrast to a gel pen where it does
come off a bit smoother. I think it depends
on the preference. But nowadays, there are a lot of varieties of both gel pens and ball pens that
you can try out. Another thing that I
like to use a lot in my journal spreads
is a brush pen. So a brush pen
really adds a lot of definition and thereafter
to certain words, or else you want to do a
little bit of doodles. I also have been using
this for hand lettering. So if you do brush lettering or are familiar with
doing calligraphy, you'd probably have
encountered this type of pen. It does have a nice
soft or hard tip, depending on your preference, and it's an easy way to start journaling and
writing headers with. So for stationery, here are some of the recommended items. I want to say that you don't
have to have all of these, but I want to show you some of the ones that have been really useful for me when it comes to journaling that I use regularly. First let's start
with washi tapes. They're very easy to use, and they come in roles like these in different
sizes designs, depending on your preference. So I usually just roll it out, tear it off like
this, and you're ready to use these for
your journal pages. Another type of tape
that you might want to consider or you probably have encountered is the PET tape. So this is an example
of a PET tape, and it looks kind of complicated,
but actually, it's not. It's basically an
entire roll like this, but it has a peelable backing. So what that means is, this is not sticky at all. I like to cut it like
this close to the design. And what that does is you
have this kind of sticker. And then now you can use
this for journaling. These are PVC cards. I find that they're
super useful, especially if I need to have
a certain type of design. I categorize it for design, so it's easier for me
to, like, spot like, Oh, I want to use something
pink and yellow and green, and they're all in
the same sample, so I just grab and go. Next, I'll talk about stickers. I have this particular
sticker clear book. And my general rule
is I try to only buy ones that will fit in this
particular sticker album. Other way that I file
my stickers is I have this sticker release
inserts Sticker album, so it has a sticker backing. And sometimes when I
go to meet ups or I need to use particular prompts, I try to put them in these
little compact notebooks. I love these mood ones. They're so cute, so it's easy
for me to just find them. Lastly, I really love using prompt stickers
and day stickers. For example, these ones like days of the week or you
have something like this, where it's like life
lately, happy Mail. I think these add a lot of
context to the journal spread, especially if you don't
know what to write. Sometimes I just pick
out a random prompt. I'm like, Oh, maybe I could
get some inspiration writing about my midweek or
for the week ahead. So they're great ways to really think about what
you want to journal about. Next, we have stamps. So there are two types of
stamps I want to show you. The first one being the conventional rubber
stamp that you see here. I love these alphabet ones
because you can form words, and then you simply just tap it on the ink pad and then
you're good to go. Another type of stamp that
you can use are clear stamps. These are my favorite because
they store really well. They're very compact,
and as you can tell, I love anything that is compact. So for these stamps, you simply need a
clear block like this. Take out the desired
stamp that you want. These clear blocks have a
bunch of different sizes. I like the ones
that have a grid. So then it's easier
for you to kind of place the stamp
wherever you want it. And then you simply
choose your ink. So these are great inks
because they capture a lot of detail for the colors and the
type of ink that they have. Pack it like this, like so, and then you simply stamp it on your desired journal
page or paper. So this is what it looks like. Now, these are
completely optional, but I really love having them around because they
come in book form. So these are sticker
books and paper books, and these are all peelable that you can use for journaling. You also have these
bits where it's like, collages and different
pattern papers. So I like to tear
some out and then use them also for
decorating my pages. And there are also fun
ones that are themed. For example, this one,
label stickers and tapes. Where you can also use it for the same purpose, it's
just nice to have, and it's really versatile
for your journaling needs, and you can never have too many paper or
stickers, to be honest. Here are some of the
tools you'll need. It's good to have a
trusty pair of scissors. I have two different
sized scissors here. Obviously, the bigger
one is more heavy duty and it's a workhorse
pair of scissors. It's very used, as
you can see here. But if I'm traveling and I
need something portable, I like to bring this cute pair. Next, I think this
is very underrated, but I really love these clips. They come in either plastic
clips or metal clips. Next up in the
binding department. The first one is just
a generic white glue, and this is simple,
straightforward. It's a tube, and
then you can just press it out with
the white glue. So if you're
sticking ephemera or paper that's a bit more
tough to stick on paper, is a great way to bind them so that it
sticks well on paper. So glue stick is literally
a stick that's glue. So usually twist it open, then you have this tube. Usually, for photos, I use this because it's
just more heavy duty. Last but not the least,
another one that I like to use is a glue tape. I think this is a
bit more subjective. I think it doesn't bind as well as the white glue
or the glue stick. So I use it asparingly, but I love how portable it is. So this is actually on
my desk all the time, because it's just easy to pull out and use for that purpose. Last but not least, this is a photo printer. It's optional. If you have access to an office printer or you print
photos at the drugstore. That's also a great way to get your photos in your
journal spreads. I want to say photo printers
are a great addition, especially if you love
taking photos and if you prefer having photo
heavy journal entries.
4. Why Journal?: Journaling is more than
just writing in a diary. It's a book that you
create for yourself, filled with thoughts,
ideas, and experiences. You might be wondering, Abby, why should I journal?
What's in it for me? Well, let me share with you
five reasons why I journal. Journaling allows
self discovery. I personally got to know myself better through the
pages of my journals, as I showed up consistently every single day to
write about my thoughts, my feelings, and my experiences. Journaling encourages
personal growth. I find that I have evolved consistently and thoroughly
through journaling, through developing a
richer inner dialogue, and also seeing the testament of my growth through the
pages of my journals, as I documented
about my travels. I wrote about my feelings, and I reflected about
my experiences. Journaling fosters creativity. There are so many ways you can get creative
with journaling, such as keeping ephemera,
doing scrapbooking, doing collage, also illustrating,
writing, photography, and there's so many creative
avenues that you can explore as you develop your journaling habit
and journaling style. Journaling celebrates
the everyday. It is one of my
favorite reasons why a journal because it
forces you to really pay attention to the little
things that make life great and the mundane moments that make every day meaningful. Lastly, journaling
promotes flexibility. There's no one size fits all routine that I
recommend you to try because I've also
had several trial and errors over the past years. But one thing that I picked
up is that I like to pick journals and decide what to document based on the
lifestyle that I have. I love to travel. I also
love to write daily. So those are the two things
that I've been having on my journaling system and has kept me going for the
past several years. Whatever your reason
for journaling is, I invite you to
grab your supplies. Don't forget your
journal, and let's begin.
5. Day 1: Vision Board: For our first prompt, we're going to be starting
with a vision board. So a vision board is basically a page or a spread that focuses
on more of the visuals, and it usually is a compilation of photos, graphics, stickers, and stationery that you
kind of put together in a collage format
in order for you to have a mood board of sorts, a visual identity of what you'd like your
journaling to look like. I wanted to start
with this prom so we can ease into the
writing process and to be able to set an intention for your
journaling practice, especially if this is your
first time journaling. I like to do vision boards at the start of the
year or every month or every three months,
every quarter. It really depends
on how you want to organize your
themes or if you have something specific
that you want to talk about or focus on for a specific
month, for example. Me, this one I really wanted to hone in on the idea of
writing your own story, which for me, is what
journaling means to me. And I'm picking out elements
that resemble growth, nature, and all that, like, metaphors that are sort of within the realm of writing
your story because for me, there's nothing like
writing your own story, telling your own point of view, and through that, we're able
to get to know ourselves better and also to inspire
our own creative journeys. So I'm just cutting
these up in a way that kind of makes sense
in terms of shape. You'll see that the
larger elements are the ones that
I place in first. And right now I'm
in the process of just putting everything
accordingly, but not sticking
anything yet until I see that a
composition is forming. I'm working on spread,
which is two pages. So it's important to note in these situations that
you kind of want the left page and the right page to connect or make sense, whether that's through
color pattern. As you can see, there are some torn paper edges
on the left page. I also added similar
elements on the right page, and that really helps inform the continuity of
the journal spread. And since this one is a
bit more on the side of, I have a lot of random spaces, I thought it would be a good
way to write up a couple of thoughts about how I want my journaling to be or how
I want to approach it. I figured this was also
a great way for you to really tell yourself
and ask yourself, you know, what are the reasons why I would like to
document my days? Is there a specific thing
that motivates me to do that? Do I want to remember
certain memories? I'm sticking in the smaller
elements this time, so you'll see that
it has more of an additional depth
to the pages, and it has a variety
of sizes from larger stickers to smaller
elements that you see here. I want to share with
you what I wrote. So I wrote that I would
like to write my own story, and that for me is in
whatever way that's possible, I hope to be able to know more about myself through
each day and each moment that is written
on the pages of my journal. For me, growth is essential, and it is through this
growth I will evolve into versions of myself
I will get to meet. And realize where life
has taken me and allow me to further discover parts of
myself as time passes by. You obviously don't have to write everything that you want. Maybe if you have a
small space in the page, you can also have a quote. You can also use it
as like a mantra, or some people also
have, like, a focus. One specific word that kind of encompasses what the
vision word is about. So there are many ways
to approach this. And for me, it feels more like
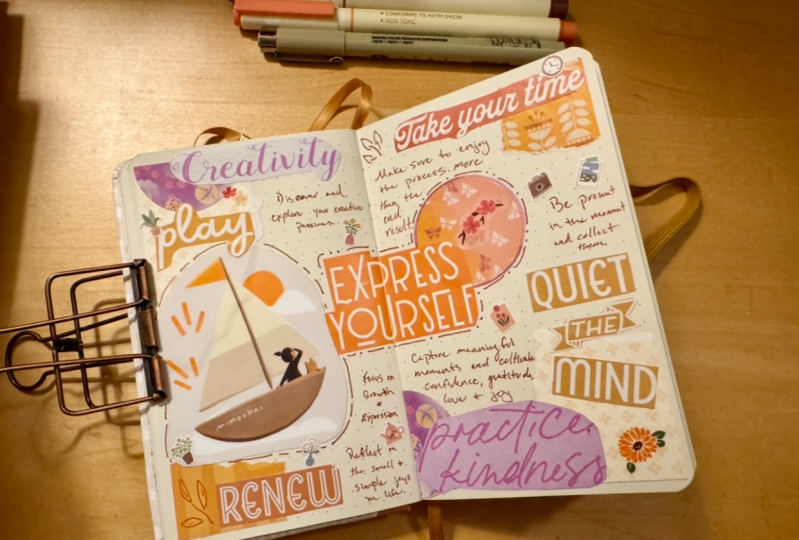
a manifesto at some point. And that's what I'm trying to do for this particular spread. And I'm just adding in a little bit more details
here and there. And if you notice, as the
spread came together, I sort of centered
on, like, blues, yellows, and browns,
and those became the primary color scheme of how my journal
spread looked like. And you'll see that the
elements are very prominent because you have a yellow
fountain pen sticker. You have a Sunser sticker. You know, you have
these, like, black and white illustrations and photos, and they kind of compliment
each other subtly, but without having to compromise on style and making sure that it looks cohesive in a way that balances out the left
side and the right side. So this is the final spread. You don't have to do a spread. If you'd like to do a page
that is more than fine, and I hope you enjoy working
on your vision boards.
6. Day 2: Today's Top 3: For our second prompt, we're doing today's
top three page, and what it essentially is is three things that
you would like to write about for a specific day. The top three format is very versatile because
then it allows you to think of three things that either happened that
day or you are planning to do or something
along the lines of three highlights or
three moments that you would like to remember
from a designated day. For now, I'm just
putting together some elements such as the
today's top three stamp. I also put in some
PET tapes and kind of create a border for all the
visuals to come together. As you can see, I'm
avoiding the center part, and I'm focusing more on adding decorative
elements to the sides. So because I know that the
sides will be sort of like a frame to put together the
text in the middle part, and I try to be a bit loose with this kind
of theme because top three doesn't
necessarily mean it has to be really big things
that happened, you know? It could also just
be simple things that made your day better
or improved your mood. I always like to think
about top three as, like, Oh, this happened
in the morning. This happened in the afternoon or this happened in the evening. That's also a good way to organize your thoughts
about the topic. I also have this particular day focused on being able to rest, so I stuck in a rest sticker
to really emphasize on that. So as you can see, also, that the rest sticker is
over on the left side, and it kind of complements the fountain pen sticker over
on the upper right side. So then it has this, like, good balance of visuals
here and there. So the first top
three, I would say, I wrote that I had a
full 8 hours of sleep. It's something that
I really value. Good sleep means
having a good day. So it was important for
me to write it down. And these can really
vary, you know, I think it's something about
being able to take stock or notice the small things that make the day really
valuable and really great. The second one was that I had a very productive
morning workday, and that's always nice to remember because every
day looks different and whether or not you do a today's top three every
day or every other day, you'll also see that you will slowly build up the habit
of paying attention to seeing more on what
you can talk about or what you can write about
and where the dialogue goes. You know, at the end
of the day, you are developing an inner
dialogue with yourself. And so figuring that out is also something you
will hone as you keep journaling about a similar
topic or a similar prom. So it's also a great way to develop how your
inner dialogue works, especially if you're going to be talking about similar topics and being able to use the same prompts for a
designated number of days. For example, you don't have to do today Stop
Through every day, but if it's something that
you really want to try, that's also a good way to start, but you can also do, like, a today Stop three every
Monday or something, you know, to kind of
kickstart the week. For the third one, I just wrote
that I ran a few errands, and for me, this is something that makes me feel very
accomplished in a day. So it belongs to the
today's top three list. But it can also vary depending
on how the days unfold. You know, sometimes it would be hanging out with a friend. And these are just examples. Obviously, there are a lot of top three options
that you can do, and I suggest you think about how your day went
and really reflect on the things that have happened to you and you'll be able
to draw out a lot of ideas and
inspiration on how you can hone in on the top three
things that made your day. So this is the
final journal page, and I hope you enjoy
journaling with this prompt.
7. Day 3: Weekly Recap: For our third prompt, we are doing a weekly recap. So a weekly recap is a great
way to close out the week, especially if you'd
like to write small updates and highlights for every single day
that have passed. So what I'm doing
here is I'm dividing each page into quadrants. So there's four
boxes in each page. And since they're seven days
of the week, the last box, I'm just kind of doing a short summary of the
entirety of the week. So I'm using label stickers
to label every single day, so that it's easier for
me to kind of look at it. It actually feels like a planner at this point where
it seems like, Oh, you can write out tasks. But also, this is
a great way to use up if you have a
planner or if you have something that has
templates where you can start to write and decorate
alongside the area. So right now I'm just adding a little bit of stickers
here and there. As you can see, I'm
trying to break the stiffness of the lines. So I've been sticking
up these kind of green themed elements to connect both pages and also to be able to develop a more
cohesive composition. And through this, I'm also able to see how much text I
can write on each box. As you can see,
also, I'm trying not to fill up the box
too much because I know that every day I have something that I
want to write about. And since this is a
relatively small journal, it's not that difficult
to write on the box, and you have, like, maybe, like, a phrase or a sentence, and that really
helps, like, kind of weave the story together. I also add some clear
stamps because it's a great way to add more
dimensions and create a better layout between every day and have like
these bold statements. So I have your chill
mode now showing. So it means, like, that day I probably rested or I
probably watched a movie. So I'm just adding it a
couple more elements, taking a weekly report sticker, and then let's get to writing. So I encourage you to
think about this as, like, if you could encapsulate
what happened for that day or like one specific thing that
happened that day, you know, previously, we
did the Today's top three. And for this one,
it's a bit more of what happened that
day that you remember. And I wanted to be quick in
your head because that way, it's easier for you
to also think about, Oh, yeah, I did this. I did that. I went
on a coffee run. I met up with a friend.
I watched a movie. And it's a good way for you to also think about how you can summarize the day through one specific thing that happened uniquely through that day. For example, the sun is out
was such a big thing for me, so I decided to write
that for Thursday, and it's a great way
for you to really be able to draw ideas from every single day that has
passed without feeling like you have to specifically write every single thing that
happened that day. So another thing that you
can also think about is, you know, weekends are more heavy on plans and
things that you did. So in that case, you can also vary the layout
and have a bigger space, for example, for
Saturday and Sunday, or if you prefer having a bigger space to write about your weekend
or your routines, that's also a great way
to change up the layouts. This is one way of
doing the layout, but there are also different ways where you can approach it. I figured this was
the easiest way because then you'll be able
to see a week at a glance, and by the end of the
year, for example, you'll have 52 of these spreads, and I think it'll be so
nice to flip back and see how the year progressed through every
week that have passed. I also like to use brush pens to kind of
emphasize key points, as you can see here
with the Coffee Run, Sun is Out National Gallery. So it was nice to really
add another layer of color to the journal spread
that we're seeing right here. So for the final box, I
just wanted to kind of explain a bit about a
certain thing that I did. Like, you know, I
inked a new pen, and this is the pen that
I'm using right now. And also, it could be
a short summary, like, a one sentence recap
of how the week went, you know, how you felt
how things happened. Was there anything that
really stood out to you? Did you feel did
you feel excited? Did you have certain things that you have experienced
for the first time? It's nice to have a
short reflection of that so that you'll be able to carry that forward
for the coming week. And with that, then you've
done a weekly recap. It's a great way to really
close out the week and also start to think about
how the next weeks will go. So this is what the final
journal spread looks like, and as you can see, I still used a bit more of the green
but also to complement it, I added some yellows
and oranges, and it came out pretty cohesive and it
came out pretty neat, but also with the
nice element of the stickers on every
single part of the spread. And so now we are finished
for the weekly recap.
8. Day 4: Checking In: For our fourth prompt, we are doing a check in. So what a check
in essentially is is a little reflection
on how you're feeling. And this can go about in
a lot of different ways, and it can be as free form as you want or as
structured as you want. I written down for
this particular one. Make sure to check
the description. I wrote that I have three things that I
wanted to check in with, and I think that's a
good way to start, especially if you're working on a smaller format
journal like this one. So now I'm just sticking in
these transfer stickers. They're very fun to
use because they feel like they've been
printed on the page. You simply rub it off, like so, and then the design transfers
onto the journal page. So what I wanted to focus on for this is I actually
thought of having, like, a nice red color
scheme going on. When I work on the journal pages and the composition of my pages, I don't really think about
what exact color I want. I usually like to flip through my stationary and what I have,
you know, some stickers, kind of see if things would
flow well in the page, and, like, visually if
they would make sense. So that's kind of where I start, and then you see,
like, Oh, yeah, I have these bits of reds, and then there's, like, browns and then there's like greens. And then from there,
it kind of forms its own or color story, and I start to
stick on elements, see how they work
out with layering. And one thing that I want you to remember
when it comes to, you know, deciding
on stickers and things is don't overthink it. It's usually just like, oh, it feels right kind of
in a gut feel thing. I don't know how to explain
it more than just like, Oh, if you see something that's
like coffee themed over here, I'll also stick another
coffee sticker, something like that to
kind of really combine the elements and see how they draw out and how they
play out on the page. I love using these
alphabet stamps because they are great
as, like, headers, and so I'm using it to stamp checking in over at the
middle part for this spread. You can also just
start with a page, but I figured that
the checking in portion would require
a lot of reflection. So the first one is I
ask, how do I feel? It's a great way to
do a check in around maybe in the middle of
the week or like Fridays, because then you're
thinking about, okay, how is the week going? How do I feel about it? Is there anything
else that I can improve on based on what
I'm currently feeling? So I wrote that I've been
feeling overwhelmed. You know, there's just a lot of things that I've
been working on. And from that, it's a good way to proceed
to the next question, which is what's out today? You know, maybe you did
something that have helped you feel a bit more in
tune with yourself. And this is also great for you to regulate how
you've been feeling. And for me, like what I wrote for What's it all Today
is like I meditated. I was able to, like, sit a
bit with myself and, like, look at tasks one
thing at a time and, like, really take time to
hold space for myself. And what you can do
is the next question, which leads to what can
I do better tomorrow, then you're giving yourself
this space, you know, this moment where
you're think Okay, based on what I've
written down so far on how I felt and
what stood out today, what can I do better
tomorrow that allows you to change up how
you've been feeling now and lead to some
sort of improvement? And I think for this, it's a
great way to rethink about how you're trying to solve your own problems through
by writing it down. I think that's something
that's very overlooked when it comes to journaling,
but it is a great tool. It's a very powerful tool
to be able to write about these things and
then put them on paper and then read
through it and realize, like, Oh, you know,
I can fix this. I can get myself in a
head space that will work for me and therefore
you feel a sense of hope, and I think that's what we all need when it comes
to journaling and, like, trying to check in and getting to know how
you've been feeling. So, this is the final
journal spread, and I hope you get to reflect on how you've been
checking in with yourself.
9. Day 5: Gratitude: For our last and final prompt, save the best for last, we are doing a gratitude
list journal spread. So this is my favorite prompt for the reason that it's very simple and it's a great way to be more mindful of
everyday things. I'm printing out a photo
of California poppies. They're my favorite flowers,
aside from sunflowers. And what I'm doing is
on the left hand side, I am just pasting
together a couple of visual elements to sort of inform what my gratitude
list will look like. You can obviously
just skip the photos, but I like having a
visual reference, and I figured that this
would be a great way to put together both pages and have a nice visual break from all the texts that
I've been writing. So I just printed
out an instant print of a photo of me and
California poppies. And with this clear stamp,
where it says gratitude, I figured it's a perfect way to encapsulate what the spread is about without having
to say gratitude list. But you can also write things
such as I'm grateful for or other things that really could encapsulate what the idea of gratitude list is about. Now, I tried rubbing this
transfer sticker onto the page, and I left it out
so you can see that sometimes they just
don't peel really well. So I actually had
to cover a sticker. So now let's pretend
it didn't happen. It's always a good way to remedy these situations instead of
having to tear off a page. I prefer to just find ways to remedy them in an easier format, so then I can think about something else and then
continue journaling. So I'm stamping on the left
hand side this gratitude, kind of, like,
dictionary definition. I think it's a really nice touch in comparison to the visuals. And I also had an
ink stain there, so I also covered
it with a sticker. You can never go wrong with
covering with stickers, especially if you have
larger sized stickers. So I would suggest it's a
good idea to have, like, a mix of small stickers, tiny stickers that you
can add as borders is what I'm doing
here, little elements, but also have larger
stickers that can really cover up mistakes, add more visual context to
what you're journaling about, which I've been doing and
kind of establishing here. You'll notice that
I always start with decorating because once
I decorate everything, now I know that
there's enough space for me to write whatever
it is I want to write. And so I also like to add
captions to my photo. So I just wrote here
on the left hand side, like why I pasted a photo of
this and added some doodles. And on the right hand side, I wrote down a list of things
that I am grateful for. This is a very generic list, but you can also do
something where it's like, five things I'm grateful
for for the day, or if you do it every weekend, then five things I'm
grateful for from the week or if you
prefer doing it, like every month, it's also a great way to kind
of recap the month. And instead of
thinking of, like, 30 or 31 things
you're grateful for, maybe think of ten things that you're grateful
for or five things. And gratitude is such a
precious and special thing. It's thinking about how you can be grateful for
very small things, mundane things that
are often overlooked. But when you pay attention, you think about it
and you're like, Wow, this makes me so
grateful, you know? Having conversations, the
changing of the seasons, people that leave a great
impact in your life, or even just as simple as
the leaves turning brown or the fresh air that you get once you open the door
and take a quick walk. And these are often overlooked moments that are really great to write down because it helps
you once again be mindful, but also at the same time, observe what's around you, and that observation
allows you to be more present in the moment and with being present
in the moment, it also benefits you
when you journal because you're
slowly documenting life as it happens, you know? And every day that you do
this or the more that you do gratitude journaling
or any of these prompts, then you kind of
develop this habit and it becomes a better way of understanding you and
the world around you. So here is the final spread completed spread of
the gratitude list. And I look forward
to seeing what you'll be writing on
your gratitude lists.
10. Maintaining a Journaling Habit: So Let's talk about maintaining
a journaling habit. I know it can be hard to keep up with journaling regularly. So here are three tips to
make it easier for you. The first tip is the 310 rule. My golden rule is
I never go over three days of not
updating my journal. In that way, I don't
feel like I'm losing the details of my daily life and I'm able to
write from memory. I also journal within 10 minutes for every
entry that I do. For me, this is the optimal time of not having to
think too much about what I want to
write and also not spending too long on
the journal pages, feeling stuck, and not knowing what to write
or document about. The second tip is the
R and R framework. There are two ways you can
journal about your days. The first one is to reflect whether that's through
thoughts, emotions, and how you're feeling
throughout the day or to recap an overall experience
that you want to document. And the second is to report. Report is more like reporting
events and experiences, doing a rundown
of things you did that day or different ways on how you can do a recap or to summarize a
specific time period. Third one is to always
use more prompts and ideas that would feed
your imagination and allow you to get creative. As I mentioned,
make sure to check out the projects and
resources tab or a PDF of layouts and bonus prompts that you can use for your journaling practice. Remember, it's okay to miss a day if you weren't able to
catch up on your journal. No one's going to
come after you. I won't be coming
after you to tell you that you did a bad job. As long as you show
up every day or whenever you can on your journal pages,
you're doing great. Also, a reminder if you're completely new to
journaling, it can really a learning curve to start developing the habit and
start to do it day by day. So find a pace that works for
you and start from there. For me, something
that I've developed over the years is
my evening routine, which includes the 10 minutes of journaling that
I do every night. But obviously, I had to
learn this the hard way, and also I had to start
with different routines, whether I like doing
it in the morning the midday or, like, catching up five days
worth of journal entries, which obviously I did not enjoy. So nowadays, I do love my evening routine with
a nice cup of tea, ten minute timer, take out
my stickers and supplies, start decorating,
start journaling, and it's such a relaxing
way to end my day.
11. Final Thoughts: Mm. You've made it to
the end of the class. As a teacher, it has been such a pleasure to guide
you through journaling, and I hope you were
able to develop a deeper understanding of
what journaling means to you. Thank you for sharing your
time and energy with me, and I hope you enjoyed
journaling together. I hope you've discovered
journaling as a tool for capturing experiences and
fostering personal growth. Continue this practice
beyond our class, and I'd love to see all
the lovely journal pages and spreads that
you'll come up with. Don't forget to share your with the community over at
our project gallery so I can provide feedback
and more suggestions for you on your
journaling journey. And if you enjoy this class, please consider
leaving a review. Thank you, once again, keep documenting and always
be creating. Bye.
 Abbey Sy, Artist, Author & Educator