Transcripts
1. Encaustic Basics Introduction: Hi, Welcome to the
encaustic basic studio. In this course, we're going
to take you step-by-step through creating your
own encaustic painting. There are some materials that
you need to get started. There are some safety precautions
that you need to take. But all in all, this is
gonna be a really basic dive into what it takes to make
an encaustic painting. Encaustic is a centuries
even millenia, old medium, and it is using wax beeswax
as a binder for pigment. This course is going to
be a really deep dive into what it takes to
set up your studio, to prepare a panel, even to do final
finishing touches like framing your artwork. So there's lots of different materials that
you can use within caustic. It's very versatile. It's beautiful. It creates these
wonderful surfaces. It just has a beautiful
luminosity and transparency that you can't get from a lot of other mediums. It's one of my
favorites that I like to work with and I can't wait to get started showing you how to make your own
encaustic painting.
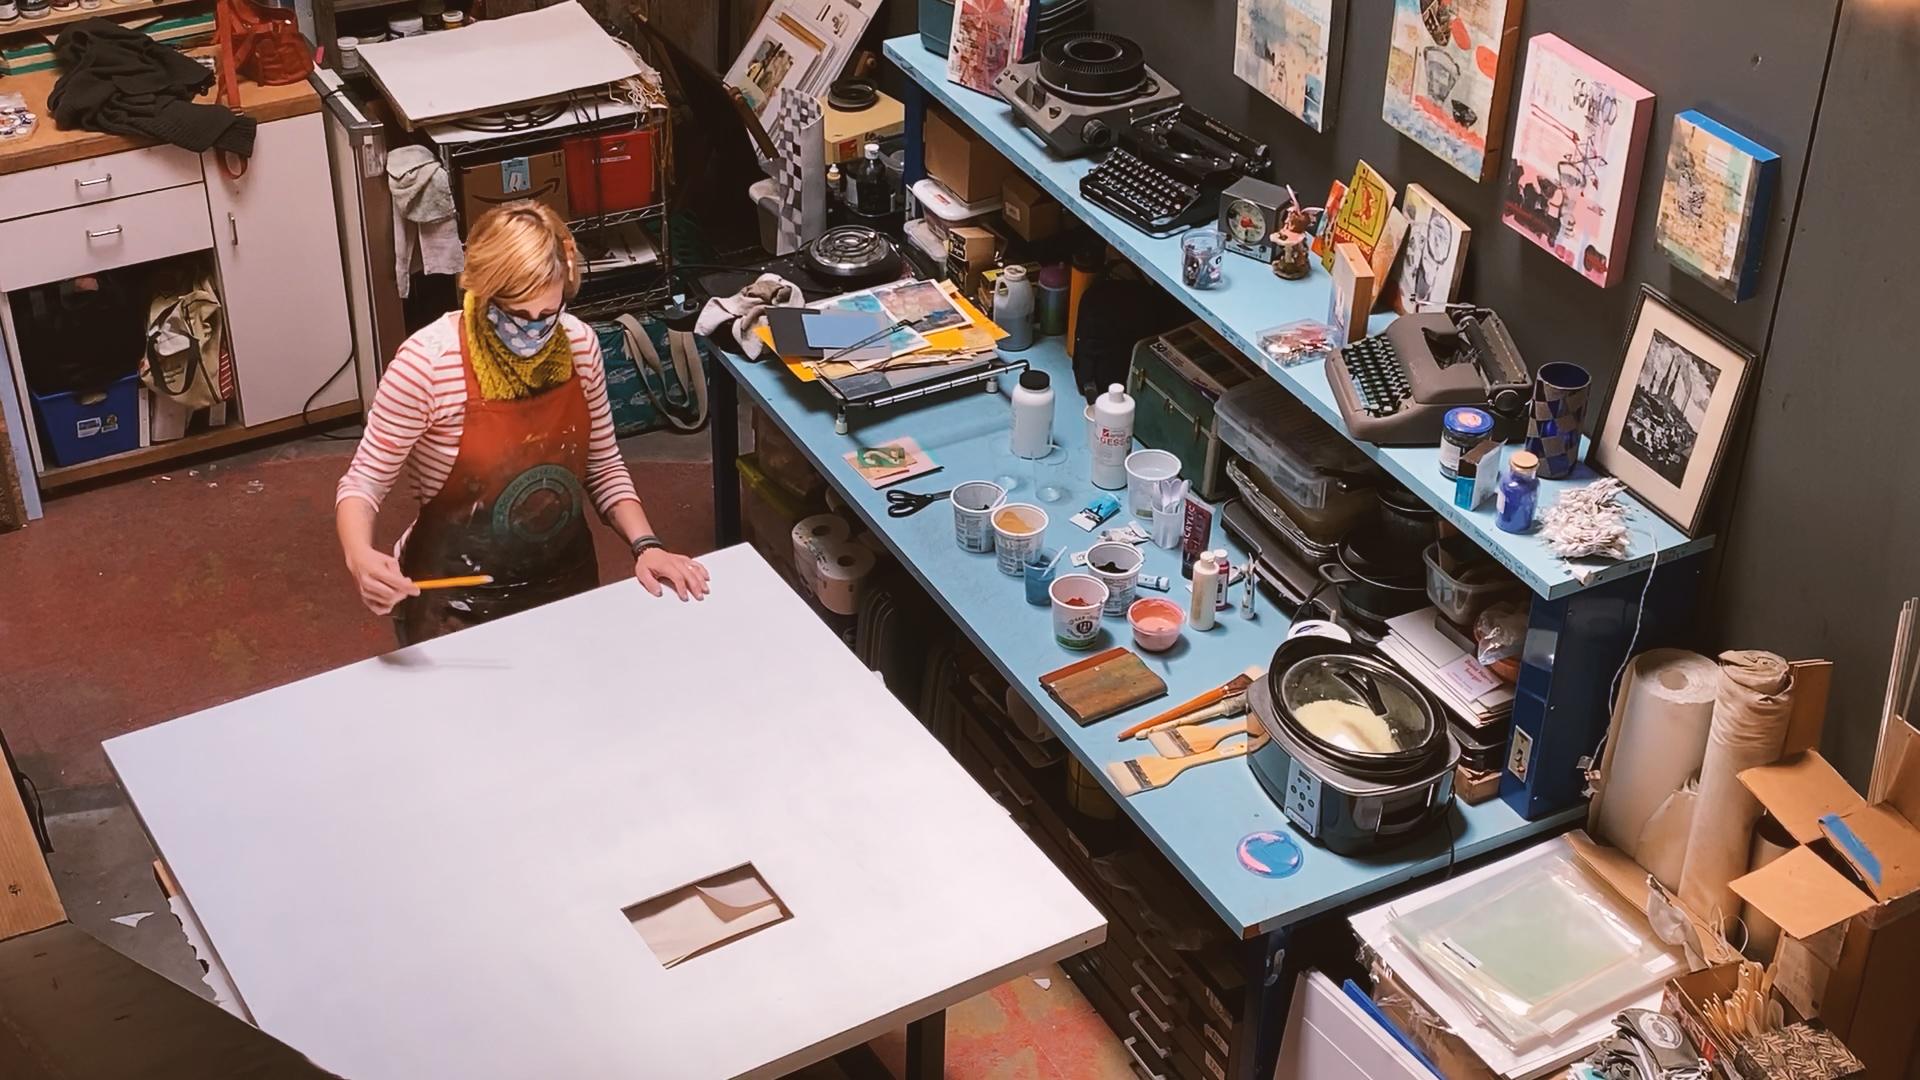
2. Essential Materials: Hi everybody. Welcome to the materials
portion of encaustic course. So here in front of me, I have a variety of the basic and caustic materials that you need to get
started and painting. And first, we'll talk about
what all these materials are. And then we're going to dive into how to use them
and when to use them. And we'll really get deep into
the basics of all of that. So first and foremost, you need something to paint on with encaustic because the wax isn't flexible
when it cools, you need to have
a rigid surface. The surface has to be stiff. You can't use like
floppy Canvas, even stretched canvas
because as the humidity changes and as the
canvas is flexible, the wax could crack and then your painting
would be ruined. So take it from somebody
who's made that mistake. You really want to have
a surface like a panel. This is a psycho Mesa night
panel that's been attached, glued onto a frame. I've made my own lots of times. It's really pretty simple. But you just want
something that's solid. And then we'll talk
about how to prep the surface in order to get
it ready for your painting. But this is already
been Jess owed. The surface has been prepared
using encaustic jets, so which is basically like
normal acrylic gesso, it's acrylic and marble dust, but it is a little
bit more porous, so it has less acrylic and
more powder substance, more of the calcium carbonate. That way the encaustic can actually absorb into
the surface better. And this is important
because the wax, you don't want the
wax to chip off. You don't want the
surface to just flake off to really get
absorbed into the, into the surface of whatever
you're painting on. The encaustic Jessica was specially made and
formulated for using on panels for
encaustic painting. You could make your own. If you had just sell big tubs, You could just add some
more calcium carbonate and that would make it simulate the encaustic just so you could paint directly
onto a wood surface. You would just need more
initial layers because they will soak in quite a lot. So the next thing that we needed that is vital to the encaustic. Once you've prepped your surface is the actual medium itself. And that is made using
beeswax and tomorrow resin. And we'll talk about
all about how to make that yourself
or you can purchase it certainly from places like
RNF or in cost to Coase. You can get those suppliers online usually or
places like **** Blick. But essentially it's just a
mixture of tomorrow resin, which is a hard type of SAP. And that's been melted
into the bee's wax. And there's more bees wax and resin and we'll
get to that ratio. But that enables, the camera isn't enables the beeswax to melt at
a higher temperature. And it also helps harden
it so it's not so soft and gives it its smooth, shiny texture when you're done. So it's an important step. If you've just wanted
to use bee's wax, the surface wouldn't
be the same. And you might run into problems. But nevertheless,
we'll talk about that. Your medium is something
that's essential, whether you're going
to be just coning a photograph with encaustic
medium or whether you're actually going to be
adding pigment to what your medium and coloring it
in for different colors. It's important to start with the basic binder of encaustic
paint, which is the median. We have different
ways to do that. You can buy these
sticks or cakes. The pigment is already
in the medium, so it's easy to just melt it into a pan or
onto a hot plate. And you can add medium if you wanted to
make it more transparent. But color is key. If you wanted to do a
painting with color. You can also use oil
paint and we'll talk more about the compatible
materials within caustic. But oil paint is one of the materials that is
compatible and you can actually add that to
medium to create color. Having some sort of paint or coloring medium is a good
idea for your painting. Next, we need to have something that we're
going to heat it because the encaustic
melts and then cool, it will warm up to
about 200 degrees. If it goes higher than that, then you could risk
and burning it. And that's not good. So it's important to
have a thermometer. If you have something
like a pancake griddle, get a surface
thermometer so that you know exactly
what the surface is. You can get a meat
thermometer and actually stick it in to the paint, to the pigment when it's warm. Obviously, I can touch this cool and it's sitting
on my surface. Nice and cool. So it will harden
when it's cool, which is what you want it
to do on your surface. But in order to
actually paint with it, you need to warm it up. So a pancake griddle
like this one is a really good option. You can also use an anodized aluminum hot plate that you put something like a burner underneath. Like this. Electric burner is a
good all-around kind of heat source for mixing up large batches of or melting large batches and
costume mediums. That clear because I use that
a lot for coating and we'll use that more than
a pigmented paint. I use either enlarge pot
that I can melt on a, on a hot plate, or I use a crock-pot. And you can find crock-pot
so you can buy them new or you can find
them from Goodwill. And they're pretty
readily available. And that's nice because you can set them for how
high you want to go up though Melfi medium and then keep it all
kinda contain that. I liked that for the clear medium because I usually mix up large
batches of that. Then the last thing you
really need is something to apply the paint to the panel. And in that case, I use brushes. And the brushes that you
wanted to use, our natural, not synthetic because
synthetic brushes like nylon or polyester will actually melt or
burn on the hot plate. So because we're putting the brush on the hot plate
and it's 200 degrees. You don't want the
bristles to score. These hockey brushes,
which are natural fibers, are really good for that. So they can get coated in wax. It's not going to be a problem. And they also come in a
wide variety of sizes. You can get a really
wide one for putting on your encaustic medium,
it clear medium. You can get smaller versions for doing smaller bits of paint. You can even get a really,
really tiny brushes. Brushes are really good idea. And we'll talk a little
bit more about this. But within caustic because it's, you're getting it warm
and then it's cooling. It's not like you
could just clean your brush that easily. There are ways and I'll
show you how to do that. But if I use a color a
lot, like for instance, this greenish color
that I use a lot. I'll just leave a dedicate
one brush to a color. And I'll just leave that as my green brush for my
clear, a medium brush. Whatever I want to
use that color, I'll just reach for
that brush, eat it up, even heated up in the
pan with the paint. And then it just reward terms. And it will go from hard
to soft and you'll be able to brush it onto your panel. Again, we'll talk about
how to take care of your brushes and clean them
and all that good stuff. But these hockey brushes, HA KE, hotkey brushes are
really good option for or your encaustic painting. The last thing that
you're going to need. One other thing that
you will need for your encaustic
painting is a torque. And there are different
types of torches. You can use this propane torch, which I really like. It will let you change
the heat temperature, either a really full
blast or really solved. That way, you can
fuse the colors, you can move the
color on the surface. What it does is
that the heat will localize painting and
you'll be able to reheat, remelt the wax in
a directed way. And that way when you
put on the color, you can blend it in, you can fuse it to
the layer beneath. And that's really good. Like I said, because
you don't want the color to just flake off. We want to bind the colors
together on a vinyl. Layers of wax are going
to add a lot of layers. So even if you're adding just a little bit or you
want to fuse really lightly. Having a torch to fuse is gonna be essential
to encaustic painting. You don't have to
use the propane. You can use butane
if you wanted. Like. It's less easy to manipulate the heat
with a butane porch, but some people really like it. You can also use a heat gun, which doesn't have a flame. It's just electric. And you can get some
that will dial in the temperature and
also the airflow. The heat guns I've found are
good from more like spot smaller areas because
they'll take a little bit longer
to heat up an area. But we'll talk about our tour, our friend, the torch here. And I'm sure you will really come to love it as you explore your encaustic painting.
3. Encaustic Safety: I just wanted to talk for a second about a couple
of safety tips. If you're gonna be
using your brushes or like a stir
stick for instance, and you get them right out of the wax or off the hotplate, they're going to be right. They're not going to probably give you
third-degree burns. But the warm wax will cut your finger like a candle
dripping on your finger. So it's about like that. The hot plate and the pan
or probably a little bit warmer and they might give you a little first-degree burn. But more importantly, what you really don't
want to do is leave things plugged in because it's a necessity to have
some sort of warming device, whether that's a gas torch or a gas burner or an electric burner or
an electric hot plate, you really want to
make sure that you leave your space safe. And in this case, I'm unplugging, even though
my hot plate is off, I'm unplugging it in addition
to turning it off because I just want to be absolutely
sure that nothing is going to catch on fire. It's not going to start
at electrical fire. It's not going to
warm something up, a surface next to it or
adjacent or underneath. I don't leave my brushes on a surface because
they will stick to it. So when I'm done pulling
them off the hotplate, if I'm not going to clean them, that I'll just set them off the surface off a
table, for instance, so that the wax part doesn't
come in contact with the surface and that you
can also put it upright. But that will allow the
brush or the tool to cool without sticking
to a surface. So again, unplug everything, turn off the gas. Don't put the wax
into contact with anything that you don't
want it to stick to. And just be aware of
your surroundings, aware of what you're doing. Keep surfaces clean and clear of anything
that can catch fire. I do have a fire extinguisher in my studio at all times
that I can easily access. Because that is the number
one thing is safety. So even though I've never had a fire and I've never
had anything happen. I am extra safe and extra cautious so that
it doesn't happen. So taking those extra
safety steps will really ensure that you have
good experience and not a scary experience.
4. Substrate Introduction: All right, we are back to talk about prepping our surfaces. So we talked about touched on in materials about
the rigid surface that you want to
paint encaustic on. So this is an example of just
a piece of thin plywood. It gets birch plywood that
would work really well. It doesn't have to
be super thick, but it does have to be stiff. So a piece this small, thin you could just
use on its own, doesn't have to be
mounted onto a frame. But you could attach
it to a wooden frame, either store-bought frame
or just create a frame using like what pieces one by twos or what I commonly use. And then just gluing it and or brand nailing it to the frame. That way. This is store-bought by the way, but that way when you go to
frame it or go to hang it, it's already ready
to go as easy to attach a wire or some
sort of hanging device. And it has a little bit of
dimension for that purpose. So to buy a pre just
sewed pre-prep panel, they're called cradled panels. Oftentimes, it's
kinda expensive. So if you start getting
larger in size, It's really a good idea
to learn how to make your home because the materials
are pretty inexpensive. But if you're going to
buy it already made, then it can get pretty pricey. So the reason why they're
called cradled panels is because the wood that's been attached to the frame is usually cradled into the frame and
you can't see the edge. This one, you can. So it's technically
not cradled panel, it's just a panel. But that's why they call
them cradled panel. And there's a couple of
different ways that I like to prep my surfaces
for encaustic paint. This is wood, so it's
absorbent, it's porous, so it will accept the wax
pretty readily and it will soak in nicely on the first
couple of layers and then you'll get a
really good attachment. What we want is for the wax to really adhere to the surface. We don't want it to
flake off and pop off. Another really good surface that the wax like to
attach to as paper. So you could either dip paper in wax or what I usually like
to do is take matte medium, which is like acrylic medium. That's basically
acrylic paint without a color and use it like a glue. Elmer's glue also works
and attach a piece of paper for print or something
that I've created. And attach that to the board. You can either wrap it
or you can trim it. Once it's attached. You can exacto blade off the edges so that
it's nice and even, but having a paper, whether that's a whole sheet or just partially on the board, is also a really good
option for prepping your surface initially because the wax will adhere to that. Now one thing about
paper is that the wax will darken paper, so it tends to, as it absorbs, it will also darken
it a little bit. So if you didn't want the piece of paper that
you've never really nice fancy paper and you
didn't want it to be changed. And what I would
recommend is covering it with like an Elmer's
glue and water mixture. That way it's a
little bit protected, so it's got a sealant on it. But by adding a little water to the PVA glue, Elmer's glue, you're actually creating a
slightly more porous surface for the wax to adhere to. And when you hear
people say you can't put wax over acrylic, It's basically because
a lot of times acrylic is very plasticky. It comes, ends up with the shear check shiny
plastic surface. And when you tried to
put in caustic on that, sometimes it'll flake
off for peel off. So to avoid that adding
a little bit of water or even a little bit of marble dust will help make it more absorbed. So that's one way
you'll see a lot of my paintings have collage
on the bottom layer, and that's how I do it. Another way is to use, this is already been primed, but you can prime your panel
using encaustic Jessup. And we talked about
encaustic Desso in our materials section. But Jessica, so it's acrylic,
white acrylic paint, but it has more of the
calcium carbonate, the marble dust in it, so that it makes
it more absorbed, makes it absorbed better. And that's important
because like I said, you want a slightly porous
surface for the wax to adhere onto and
really grip in. I've never had a problem. I do acrylic
paintings underneath my caustic IV been adhered
like shiny papers. I've never had a problem
with the wax coming off, but other people have. So it's a good rule of thumb to kinda do some experiments first and see what the
best way is for you. So now we're going to
use our encaustic just so two prime one of
our camp or panels, sorry, not canvas panels. Since I said that
you can actually, another way to do a prep is to stretch a canvas
over a panel. Just because you can't use a flexible stretched
canvas on a frame, doesn't mean that you
can't glue or stretch a canvas onto hard rigid panel. So that's another option too. If you had a painting or if
you wanted to start with a really rough canvas
texture, you could do that. You just want to adhere it to a panel so it
wouldn't be flexible. You're going to private the
same way when a Canvas, you're going to take your Justo and we're just gonna
do a couple of coats onto our board and we're
going to let the coats dry between each layer. And depending on
how smooth and how opaque you want the
final panel to be, that's how many coats will do. And we might sand in-between if you want a
really smooth surface, but the wax will make it
smooth anyway as we go. So that's not as important as when you're working on
like sand oil painting.
5. Panel Prep: Gesso: Open this guy up. And this is our encaustic. Just like I said, you could use regular Joe. So I found that the
encaustic just so actually takes longer to dry. So it's not always a good
option if you are in a hurry. I'm going to mix it up because
it does tend to settle. Should probably be
using a stir stick. But here's what you've got. I'm really trying to
mix around and at the bottom so that it
gets all that settled. Paint down. I have lots of paper
towels around my studio. Or if you use rack
into recycling, also lay down a piece of newsprint on my surface
so that it would protect it from getting
any Gesso on the surface. So some people like to
cover their whole edge. You can do that at this point to or you could just
paint the front. I'm just going to
paint the front end. You'll notice that
it might be a little bit thicker than regular gesso, which is probably why
it takes longer to dry. But that is because of the
added amount of marble does to make it more absorbance. So if you had a few panels that you wanted to do this too, I like to do it sort of
assembly line style that way. I get them all out of the way. And when I'm ready to start a painting, there
already prepped. I'm just going in one direction. And then when this dries, I will do another layer in
the opposite direction. You can lay it on
nice and thick. If you didn't. If you wanted to avoid what's
happening here with drips, then you can put some
tape and we'll do that. Anyway. When we, before we start painting our
encaustic medium on, but I'll put some blue
painters tape around the edge. And that will ensure that the
the sides don't get grips. Encaustic paint drips. But as you can see, it
also would prevent BY had done it prior to
painting the gesso. It also would have prevented
that from happening. Again, it doesn't have
to be super smooth. If you're going to
do a whole bunch, then you don't have
to wash your brush. But if you're going to like, I'm going to do just one
and then let it dry. I'll either put my
brush in a cup of water so that it doesn't harden. The acrylic will harden
pretty quickly or I'll just go ahead and wash it and then wait for
my panel to dry. Acrylic dries really quickly
with a fan blowing on it. So if you had either a
hairdryer or if you had a fan and you wanted
to put on there, that makes it dry faster. So if you were in a hurry
or just how many patients, then you could do that and
speed up the drying process. Like I said, when this is dry, I'll put another codon and then ensure that it's
fully dry before we start adding in caustic on the surface because
we don't want to trap any moisture underneath. Washington, my brush.
6. Prepping the Edges: So here we have our
jets out panel. It has its second codon
which hasn't quite dried. And we'll talk about
how to tape the edges. Whether you've just sewed
it or you want to leave it, bear a bear wood panel or
whatever you're using. So I'm going to set this
piece aside to dry. And I'm going to use this, which is just the same
type of cradle panel. But it hasn't been just so
it's just the raw wood. And I'm going to
show you how to tape the edges because as the wax, as you can see here, the wax, when it gets put
on the painting, it's liquid, so
it will drip off. And if you didn't want to
have kinda drippy, Marx, or have to scrape that off at the end of your
work than taping. Just Painter's tape is a really good option for keeping those
edges nice and clean. That way if you didn't frame it, you could just hang it on
a wall and the edges would be either painted if you wanted to just show them or
they would just be bear. Or you could choose later. Again, I'm just using
blue painters tape and to tear off a little piece. And it's easy with
a small painting. But if this doesn't really work, if it's awkward for
a larger painting, then you can find a surface
to prop it up on or something that you can prop it to make it easier
for doing this. But basically we're
just going to put the tape over the edge. And I'm going to
leave a tiny little like eighth inch edge between the tape up to
the top of the panel. And that's because
as the wax drips, it will kind of curve
over that edge. And it gives a nice kind
of soft rounded edge. When you pull the tape off, you don't want to chip painting. You don't want a chip that top
part off of your painting. So having a little bit of a
distance between the tape and the top surface will
allow that not to happen. And then you'll see before
we remove the tape, if there's a lot of wax that's
covering over the tape, will take our loop scraper, which is a really, really, really good tool to
invest in for encaustic. Because not only can you
clean up your edges, but it scrapes wax
off weather hot, or cool really easily. So you can scrape off the
surface or you can add texture. This tool is really,
really awesome. So once we've got one side, we're just going to
do all four sides. And of course this
isn't a necessity. But I do it just because I like the way that the
finished product looks. And when I frame it, it really helps
to keep the frame from bumping up against
like a bubble of wax. Because you'll see when
we talk about framing, I like to frame these
in a float frame, which means that it looks like
the painting is floating. And the edges are a
little bit separate from the edge of the
painting, the panel. And if there's any
kind of bumps, it doesn't sit
correctly in the frame. So cleaning up the edge
and making sure that it's really smooth and nice ahead of time just saves you
a lot of trouble. If you're really good at this, you can actually take your tape and just go around
the whole thing. But if you haven't
done this before, It's a lot easier just to pre tear pieces that down and then I kinda tuck
the bottom part. You don't have to get
taped that same width. It's not necessary. Almost done. So that's taping your panel. And you can do this
before you just Oh, your panel to if
you wanted to get that little edge nice and white or you didn't want to see, you know, I didn't
want to risk getting any paint on the edges. You could just do this
and then just so so that is the final finishing touch
to prepping your panel. And now we can go when
our paint is nice and warmed up and liquid, we can start to put
paint on our panel.
7. Making Encaustic Medium: Hi, I'm Dana Harris Sager. Today we are going to
make encaustic media. What encaustic is at its essence is beeswax
mixed with DMR resin. And I'm going to show
you how to actually make the encaustic medium that is the basis for this
type of painting. And then we'll talk
about how to add color, how to make the color more
transparent or more opaque. So I hope you're ready because we're getting
and diamond right now. We are going to be
making our bees wax tomorrow resin mixture
into encaustic media. And this is purified
bee's wax from RNF, which is really great
and caustic company, paint company, pigment company. And the purified means
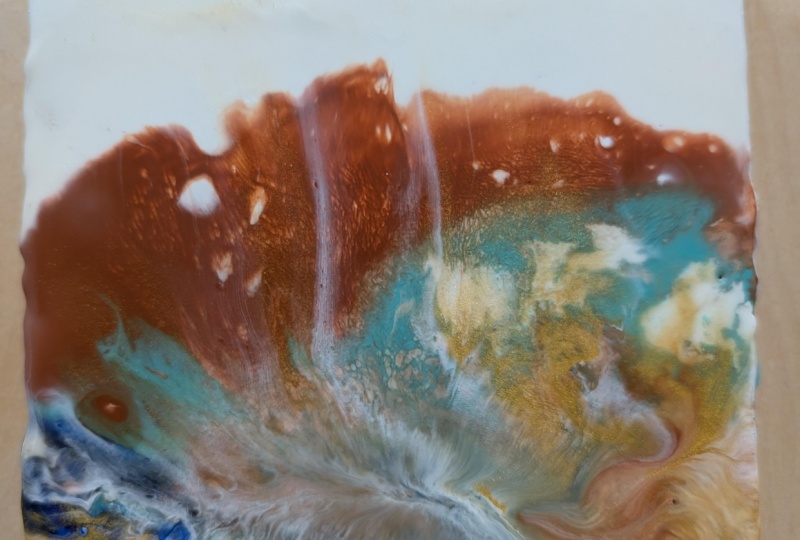
that it's been bleached. So you can see that it's white. Normally in caustic or beeswax
is like a yellowish tint. So they purify it, strain it, bleach it, and that gives
it its whitish appearance. So when it's melted and
then spread thinly, it turns clear ish, the more layers down
the milky or it gets. And this is an example of what it looks like
when it's cooled. If it gets too hot, if you burn it, it'll turn a little bit browner are a little bit yellower. So you want to be careful
that you don't do that. And having a good thermometers
really helpful tool. But you mix the beeswax
with DMR resin in a ratio. And the DMR resin, like we talked about, is basically like a sap
from a type of tree. And it's not a pine
tree like Rozin, but it's a deciduous tree. You can see it's like these little resonate
chunks and we mix it in. I like to do nine part these
wax to one part resin. So I've got this
little measuring cup. You could use any kind of
measuring tool as long as it's your use one per night. Then I've got my hotplate, then I'm going to plug in so
I can heat up my large pot. And then you can either
keep it in the pot and just remelt it each
time you're going to paint. But that takes a long time. So often what I'll
do is I'll have these smaller tins
that I'll pour the pre-made wax and
caustic medium into. Or you could even put it
into these ready-made tins. These ones are metal, which is really good for encaustic because when you
put them on the hot plate, you don't want them to burn. Like if it was wood or melt,
like if it was plastic. Metal is really good. This is actually
just a tuna fish can that I cleaned
out obviously. And it works just great. If you're into recycling and
you don't want to buy it, can, this works perfectly fine. But that's another option. Again, the dog, like
the Dollar Store or goodwill will
have pans like this. This is a nice
thick, durable one. I would avoid the
sort of throwaway, temporary ones just because
they don't last obviously. So what we're gonna do first
is we're going to melt our resin because that's
going to take a little bit longer and it's
really sticky. So we don't want it to
mix with the beeswax yet until it's already melted. So I'm going to
measure out one part. Get my pot cooking here, plug it in, turn it on. First of all, turn it on
high and starts to melt. And let's see, where are you
going to make a huge batch? So maybe take 2 oz, 2 oz of eggs and then I'll measure 9/18 ounces
of these wax. I'm going I can already smell
the fans start to heat up. They put it on this surface
so that as it heats up, it doesn't hurt my
table surface tip top. And I like to use a
spatula as I'm mixing, as it's melting to liquefy, help it move around and liquefy. And then we'll open up the
beeswax once this is melted and pour that in and
mix it all together. And then we'll either
let it cool or put it into our tints. You can see that it's
starting to get kinda sticky as it's melting on there. These bigger chunks
might take a lot longer. It's going to melt it down. So it's nice and sappy. And then that way. So I'm going to measure to smell of bees wax. If you don't already love it, you become engrossed
in encaustic. You will love it. Rest assured. Bigger chunks can be kinda broken up by 1010 parts suburbia and doesn't take super long. Now one thing with encaustic
is that it's not toxic, but it could be an irritant. So what I like to
do is have a fan going or B by an open window, because especially the bee's wax can have an irritating effect on your eyes and your lungs, especially the fumes
as it's melting. Right now, even though
it's in a powder form, it's not going to
affect you too much. It's not like pigment and dust that you have to be careful of because pigments have different chemicals and
different metals even. But the bee's wax
is really inert. But when it gets warm and
warmed over the cooking pot, then it can be an irritant. So what you wanna
do is either be by an open window or
have a fan blowing. I turn the fan on after I'm filming
because I don't want to hear the fan blowing, but I have a nice
large studio space and it's very well ventilated. So that's one thing to
be aware of with this. Media. It down just a little bit. It's nice that melty. So when the resin gets
all nice and liquidy, that's when we can
add the beeswax. And again, we don't want
to scorch the bee's wax, so we want to make sure that we're going to cook
the beeswax when it's time at a temperature
that's or about 200 degrees. You can see that the
demarc has a little bit of can have a little bit of impurities in it
because it's a SAP. So if you don't
want that to end up in your paint after you cook it. Well, it's still hot. You can strain it
before you put it into your containers because
drain it through. Obviously a dedicated strainer, like a metal mesh strainer, and that way it will capture
all those kinda impurities. Hello, Almost there,
down below now. And then we can
add our liquidity and it's sticking
a lot less, right? Liquified. It's not quite so sticky. I can start to pour in. Maybe, you know, let it kinda mix together
as the wax melts. This wax is really nice because it's already
in these little, like, I don't know, peas, grains, I
guess you'd call it. Sometimes they come in
these little past deals that are slightly larger. If you get it in a chunk, sometimes will come like a big hunk like this
that's hard to melt, it just takes longer. So if you're, if you wanna
go the less expensive route, oftentimes that's a
good way to do it. But if you, if you want
to save time and money, go with the past. So this is not a necessity
making your own medium. It, it's nice because you can control
sometimes people want more resin or more wax and
you can control that ratio. Whereas if you've just
by the medium itself, it also tends to be more expensive if you
buy it as a medium. So now that our
wax is on belted, we can strain it through just this strainer
metal strainer mesh. You can label it or
you could pour it. I preferred a ladle because
of this BIG is kinda awkward. So I'm going to leave it on low just because I don't
want it to harden yet, but I don't want
it to be too long. And I'm going to do
this over my hot plate, even though my hot plate
is not gonna be on. But basically what you do is you want to be careful because
this is still 200 degrees, so you don't want
it to touch you, but you can label it. The strainer should catch
all of the nasty bits. And then also remember that
wax cools pretty quickly. We'll learn about that in
the rest of our lesson, but you can't keep it
in the ladle too long before it starts to cool,
to warm to hot plate. And you can see
that the, you know, wax melting strainer is probably too big, but the only one that I had right now because
I want to make sure that it's landing
in the little pan. And the reason I put
them in the littler, the smaller hands is because
it's easier to remelt. Then. When I go to use the medium, rather than trying to
melt down this huge pot. Just let that cool. This. I might need to clean either a torch or
if it's still warm, you can take a bunched
up paper towel and wipe the wax off. That's how I clean my plate to. But you can see that it's
got a whole space now, but everything else
is kinda solidified, but that's okay because it's
just a thin layer and you could probably either cools, It'll be flexible and
this will just pop off. Or when I do it again and
it'll remelt it right away. So I don't really have
to worry about that. But these are just
going to cool down. And I'm going to turn my
hotplate middle burner off. And then we'll be ready to move into talking
about adding color and getting the wax down
on the boards and prepping are born
so exciting stuff.
8. Setting up Your Palette: Hi everybody. Welcome back to
encaustic basic studio. So today we're
going to talk about setting up your
encaustic palette, setting up your space, and just getting
started with putting your first layer of encaustic
medium on your panel. So here I have our palette. This is our hot plate. I'm calling this
our palette because we've got all our
colors on here. We've got our medium that we
made, mixed up ourselves. We've got a large pot of white
because we use that a lot. I use that a lot. And then several
other colors here. And then I've also got a, an anodized aluminum palette. This is a hot plate
with a brush rack, and this is really
handy for keeping your brushes upright
because we'll talk about how you
want to warm them. In addition to the
encaustic medium and paint, then I've got a hot
plate under here. It's not on obviously. But this is going to heat up the anodized aluminum surface. The nice thing about
the aluminum versus the pancake griddle is that you can see that the wax on the
griddle starts to beat up. That's because the surface
has been coated with Teflon for making pancakes. Non-stick surface, and it doesn't hurt the
wax or anything like that. It just makes it beat up. So it's harder to kind of
get a big pool of color. So the difference is that the anodized aluminum
doesn't have that texture. It warms up evenly. So you can mix colors on here just like
you would a palette. You can even transfer paint to paper and
a monotype method, but that's a whole other class. But the nice thing about this is that it's made specifically for mixing encaustic
paint and medium. And you'll see the difference when we lay down some color on the aluminum versus
the pancake griddle. And I'm only touching
this because it's cool and I haven't
turned it on yet. But once it starts to cool
or it starts to heat up, remember, it'll heat up
to about 200 degrees. We've got a little
thermometer to determine how hot the
surface, this surface is. This one has a
temperature gauge, but it's always a good idea
to have a surface temperature to surface thermometer to
measure that temperature. So I'm going to plug these in, plug this guy in, plug this guy in. They're still not on
until I turn them on to see there's my measure. I'm going to turn
it up to 200-250 just so that it heats up
quicker and then we can dial it in and turn it
back down when it's time to actually transfer the
paint to the surface. Same with this guy. It's on but until I turn it, this one's on high right now. And again, I'm going to
leave that there right in the middle so that it starts to heat up
the surface evenly. And then I'll use my surface thermometer to
measure that temperature. I've also got a board here, and you can see that the wax
has dripped onto the board. So whenever I'm
working on a surface, I like to be able to
clean it up easier. And if I'm working directly
on my large table here, it's hard to scrape the wax on. Wax likes to stick. If it sticks to your
surface and your surface, you want to use that
surface for other things, then it's hard to get that wax off in order to put
something else onto it. I just use a dedicated surface. Most of the tools
that you use for acrostic are dedicated
to encaustic. So let's talk a little
bit about brushes. This is my large hockey brush
for my encaustic medium. And that is so that I
can put a lot down. Because when you're going to be putting the first few
layers of medium on, in order to get a nice
smooth working surface, you want to lay down a couple of layers and this just really
helps it to go quicker. I'm going to put that I can
either put it directly into my wax pot or I can put it
on the hot plate like this. And I like this mostly because
it has this brush rack, but you can use pretty much
anything as a brush rack. Anything that will prop up
your brushes so they don't, the handles don't fall onto
the palette and get warm. So you really just want the
brushes to get warm because you can see that when
they're cool, they're hard. The wax will embed in there. So we want to warm that up. Then all the colors
that I'm going to use, you can clean your brushes. We'll talk about that after
we paint to a certain extent, but the wax will really stay
in those brushes even if you clean them and wipe off
the majority of the wax. So I like to dedicate all my brush colors,
two particular colors. So for instance, this
is the orangeish brush. Then I've got rid of a bluish
brush that'll go over here. I've got a greenish
yellow brush. You don't have to to do each particular
color but a range. So if I was gonna do
like a slightly darker, reddish, I could use
this brush tool. And of course we've
got our white. See, That's our white. Not totally white. So I'm going to choose a
different one. There we go. Alright. Some people, instead of
using these low tins, they like to use like 12 ounce little TIM tins or canned
corn type of tins. That way they're brush
can just sit in there. That's nice, except I find it hard to actually see the color, but they work just fine. So if you wanted something tall so that your brushes
could actually have something to lean on in the can itself and
you can do that too. I'm just going to
take a little while, but you can see that this is
already starting to melt. So want to make sure that
that gets up to temperature. And then we will, once these are all nice
and warm and melty, then we will measure
the temperature, make sure that we're not
scorching are often caustic. And then we will move
on to coding our panel.
9. Adding Color to Medium: So when you're setting
up your palate, There's a couple of
different ways to add color to your media. You can purchase the pigment in a little cake form
or in a stick form. This is in Costco's
brands is RNF, which is a really great
company that makes the wax. And you can cut off a chunk
with a knife or ink knife and put that in a tin of
either a little bit of encaustic medium or
you can just melt it down into its own TIM, like often if I really
liked this color, I'll just take the
steak, unwrap it, plop it into a tin, melts, and then I have a nice
little tin that I can put my brush in and work on. And the nice thing about
the sticks is that you can put them on the hot plate
and mixed small amounts. But really if you wanted to
make a whole painting that used a lot of one color or
100 to get a wider brush. Having a small
amount of pigment, having to melt it each time on the hot plate is
really not economical. So you can buy these little pure pigment sticks and then put them in there. If you wanted them to
be more transparent, then you can add some more, add more encaustic
medium than pigment. And some of them do come
transparent or semi-transparent. I'll tell you on the label whether it's more
transparent or more opaque. Another way that you can
actually make pigment, pigments, encaustic paint is to
add powdered pigment. So powdered pigment is compatible
with encaustic medium. You can, this is from Zach key, which is Italian store
in Florence, Italy. But Gamblin as a paint company and they also make dry pigments. And you can experiment with how much pigment to add to
get the color that you want. Because if you're adding two
already transparent medium, then you want to make sure that if you want it
to be more opaque, that you add more pigment. So this is another
option for making your own and cost to paint. The last thing that
you can add to encaustic medium is
actually oil paint. Oil paint is, uses
linseed oil as a binder. So there's gonna be
some oil in here. So if you mix oil paint into
a tin of encaustic medium, then what's going to
happen is it will tend to separate
when you reheat it. It will all join together
and being homogenous again. And if you brush, if you use your brush
and stir it up, then it will blend
together, congeal. But if, if, when it
cools, it will separate, the color won't
really look like it is when it's cooled than
it is when it's heated. Oil paint is certainly
an option for coloring your your
encaustic paint. And just like with
the dry pigment, you can add small amount first, test it out and see if that's the transparency and the
color that you like. And then keep adding
for more opacity. Because usually the tubes, the sticks tend to be
the most pure pigment. They tried to make
it so that there's more pigment and binder in
those like a concentrate. So that's another way that you
can create your own colors or how he would get a color from a stick per se
into a little tin. Then you can apply it
to your paintings.
10. Applying Medium to a Raw Panel: What I'm going to
show you is how to put on the first layer
of the encaustic medium. This is the medium right here. It's the beeswax
with the DMR resin, the one part DMR
to nine parts wax. And that's gonna go on. I'll show you first what it
looks like when it goes on the bare wood and then what it looks like
on our Jess owed panel. And that way you can
get a sense of what happens when the
encaustic medium goes on because it's, it's clear, but you can see that
it's a little bit tinted because the wax has that
sort of whitish matte look. It will make what's
underneath a little bit more opaque so it's
not going to be completely clear
like resin would be. Then we'll talk a little
bit about setting up your colors and we'll move on to actually adding
pigment and things. But I like to start
with a fresh surface, if you will, and then add my first layer of
encaustic medium. Now, you don't have to do that. And once you kinda
learn and understand how the wax interacts
with the surface, you can actually go from
pigment and paint directly onto the surface first and then do a layer of encaustic medium. But just be aware that between each layer you're
going to be fusing, fusing using your torch. And that means that you're gonna be heating
up the surface. So if there's bare wood, if you try to fuse pigment that doesn't have the whole
surface coated with wax, you're going to essentially
burn part of your painting. So it's a good idea
to either start with some encaustic medium as a layer initially or
paint and then layer on. And because the encaustic
paint isn't wet or dry, we actually will talk
about it in terms of warm or cold or melted and cooled. Then there's different things that
you have to think about. For instance, the
temperature in the room, and how that's going to
affect the different layers. And it's kind of the process
that you're going to take. Some of the things that
you need to think about when you're starting your
painting and whether you put pigment down
first or you put in caustic medium down
is how long does it take for the wax to cool if it's a really hot day
than it might take longer for that
initial layer to cool. And if you put warm wax
on top of warm wax, then it's going to blend. You're gonna get
different effects, whether intentional
or unintentional. So it's important to understand the way
that the wax works and how it reacts to the temperature outside
in your studio. My studio right now is about, I'd say 70 degrees, so it's a pretty
good temperature. The wax is going to stay warm when I go from
paint to panel. But it would probably cool
at a good rate on the panel. And that way between the
layers after fusing, it's not going to take a
really long time to cool down. If it does, then there's
things you can do, like put a fan on it
to help it cool down. But if you were
to put, like say, a clear wax coating on top of white or any other color that
hasn't cooled all the way, you're gonna get smearing. So these are things that I've
learned through experience, but also things
that you can try. And if you understand that, then you can either use that to your advantage if you wanted that sort of blending
and streaking. Or you can avoid that by doing things like letting it cool all the way down first. So let's put some
wax on our panel. Here. You can see that my
hotplate is nice and warm. I've got the brush that's been resting on
it is nice and melt. The wax is staying
where it's supposed to talk about putting
color on later. These are nice and liquidity. They said drippy brushes are
nice and warm and flexible. Same with this one. And I've got a little
temperature thermometer here. This is a meat thermometer, so it's designed to
get stuck into meat, which makes it really
good for measuring the temperature of our wax because we can just
stick it in there. Sometimes the surface doesn't. Always. If you get up
temperature thermometer that you can stick
on the surface, it doesn't always give you the accurate temperature
that your wax it. So I'll just stick
it into one of these wax pans and watch
the temperature go up. So it's at 168. Going up, up, up. It seems to be hanging
out at around 204, which is just about right. So that's perfect. I can clean up to about
200 degrees is perfect. That's what we want
our wax to be. So I'm going to take
my large hockey brush. And this might seem obvious. These are still a
little bit not melted, but the rest of it is, but cool or the, sorry, the coolest part of the wax
is at the surface and the warmest is down
by the hot plate. Notice I'm not touching
it now because there's melted wax on here, two degrees. So if you get your brush down
at the bottom of the pan, then it's going to be warmer and it will stay warmer longer. You'll notice how fast the wax cools when
we go to take it from the pan to the panel. Again, this is sort
of also dependent on the temperature
where you are. But understanding this and what kind of textures
you want to achieve, whether a smoother texture
or more bumpy texture, depending on how much
the brushes cooled. I'm not going to just
hang out and think about things and plan things while the brushes out of the
wax because it's kinda cool, It's cooling right now. And if I were to go and put this halfway cooled
onto my panel, I'm not gonna get a lot
of wax on the surface. So I want to keep it in
the wax pan as long as I can until I'm ready to go and apply it to my panel.
So I put it on. And you can see that there's
more obviously more wax, the initial placement,
and then it sort of fades back that way and
it cooled rather quickly. As soon as I started putting
it down, it was cooling. It's also absorbing
into the bare wood. So you can see all
these little bubbles. The little pockmarks
are caused by the wax absorbing
into that wood panel. I don't want to let
it drip too much, just enough that it's not
gonna be dripping too much on my palette or
on my plate here. I'm kinda overlapping a little bit because I just
want to make sure that everything is getting
coded and we will go the opposite direction
before we fuse. This is why having a
really big brush is a good idea because it
covers more ground, but it also lets you
work a little faster. Now it's pretty cool
to the touch already. And I can pick it up
and you can see how the wax drips around the edge. That would all be on your panel if you didn't have the tape. But that's good because
that means that the wax is getting all
the way to the edge. And now what I'm gonna
do is turn it so that my panel is horizontal. And then I'm gonna do one more
layer just to ensure that the whole thing is
covered before a fuse it. By holding your
brush horizontally, you're keeping the
wax in the bristles. If I were to hold it like this, then more of it drips out. Whereas if I hold it like this, then it's all sitting
on the surface. Which means that when I go
to put it down on my panel, it's going to hold a lot
more and I can kinda tilt my brush and it will
drip out onto my panel. So more layers of encaustic medium initially will give you a smoother surface. Because the more you can
build up your layers, then the more when you fuse it, the more even it
will be and it will kind of all sort of self level. So now what I'm gonna do is
it's going to take my torch. I'm going to make
sure there's not little scraps of paper
nearby that could ignite. Going to move everything
non-essential out of the way. It's another reason why I
work on a board like this. This is just like
a masonite board that's got some texture on it. When I'm using my torch, I'm going to be holding
the cylinder and then holding the cylinder with my left hand because
I'm right-handed. And holding the trigger
with my right hand. Left hand holds the cylinder with propane and right
hand holds the trigger. There are lots of
different propane torches. And if you're using
like a butane torch, you'd probably just
hold it fit small enough with one hand and
same with the heat gun. So for these initial layers, warmer or hotter is better. So I'm going to make
my flame pretty hot. That way it fuses it quickly
and it fuses it really well. The way that the propane torches work is no matter if you have a trigger switch or you have
a striker to ignite it, you turn on the gas. I turn it until I
can hear that sound. If you can't hear that
sound or it's really quiet, not enough gas is
coming out to light it. And then for this one, I'm just going to pump
the trigger ones. Then either I can turn
it down for a really, really light flame, or I could turn it up really hot flame. You could see how it's
re-melting the encaustic. It's pulling a
little bit unevenly, but that's okay because
we're going to put one more set of layers on the painting and then
it will get way more EBIT. So this is a pretty thin
layer, especially over here. You can see that it's
really, really thin. And if I were to scrape
any of that back, it would be pretty easy to just scrape
it back to the wood. So what we're trying
to do is build up a nice smooth layer
so that we can add paint and other things
and even scrape away. And it's not going to go
right back down to our panel. This is the first
two initial layers. You can see that there's still
some pockmarks because it has absorbed into the
surface and that's okay. Those will disappear
when we add some more. If you spent too
much time trying to get rid of those with the flame, then sometimes it can actually
do more harm than good. You'll end up either burning
your wax or you will make it so warm that
it won't cool enough. And when you go to add more wax, it will just make a little hole. So it's better if
that's happening, you know, wax isn't
sticking in certain parts. Better to just let it totally cool before you come back
and start adding more wax. Because the more
you try to fix it, sometimes the worst off it gets. So if I touch this,
it's pretty warm. I wonder if our surface
thermometer will tell us what the surface is. Going up. 78 degrees, 80 degrees. You need to not super hot 90 degrees. Obviously you could touch it. But if I were to put
another layer of, say, color, right now, that layer would be really
smooth because this is warm and the wax and I'm applying as warm and we'll
talk about that too, and different textures
that you can get. But just know that
if you wanted, that the surface of the wax plays a role in
how it gets applied. So going to turn it because it looks like
this is the thin part. This part is the part that I
didn't start at last time. So that's where I'm going
to start this time. It take my brush and do exactly the same
thing I did before. Worry about those little drips. Now kinda smooth write in this way. I can turn it like this. So notice that it's going
on a little smoother now. It's not quite as bubbly
and it's not quite as brushy that got a little bit brushing because this is
warm and this is warm. It's also got a layer of wax, so that also helps to get the WACC the subsequent layers
on a little bit smoother. I don't have to wait for
this to fully cool before I fuse because fusing is
just reheating it again. I can just go right into fusing. And again, we turn it on
so we can hear the gas. It's enough. When I go a little bit
farther, pull the trigger. And I'm really just
lingering a little bit all the way off, all the way tightened
before you put it down. Sometimes if the older
with an older torch head, the flame will still be going
even after you turn it off. That's okay. Just stand it
up and let it cool down. Let it stop. It looks like
it's drooping a little bit. It looks like my table's going
a little bit of an angle. So what might be a
good idea to have something, prop it up? Otherwise I'll get uneven
texture as it cools. I might have to refuse that. So having us a level
surface is really important to get a
really smooth surface. You can also see
that there's still, you can still see some of
the texture of the wood. But as it cools, it gets a little bit milky. That's because the wax has that characteristic milky,
translucent texture. And you'll see
things through it. The deeper the layers go, the more wax we put on or the more encaustic
meeting we put on, then the more
opaque it will get. Meaning that if
you put something underneath it and
layer this over the first one or two coats
with encaustic medium. You'll be able to see it. It'll be a little
bit sort of hazy. But the more layers we put
on even of the medium, the more opaque
it's going to get, which is cool if
you want to have that deep space and
the illusion of depth. You're trying to
see things clearer than either less coats
of encaustic medium, do it right at the end, or try a different embedding
technique, perhaps resin. So that is our encaustic medium over our plant clean panel. Now we'll do a white one
and see how that looks.
11. Applying Medium to a Gessoed Panel: We've got our white panel
or just sewed panel. And we're going to see the
difference between what that looks like with the
encaustic medium initially and our
plain wood panel. I'm going to do the
same thing that we did with our wood panel. We're going to go
the same direction. And I just wanted to show you a slightly
different angle here too. You can see how the wax goes
on and how my brush tilts. If you're working
large and you can't make it all the way to the edge. Then just doing as much as you can in the time that the
brush and the wax allows. Working in smaller sections, basically like coordinating off foot by foot section and
just working on that, getting that wax down. I would advise coating the whole thing prior
to fusing though. So if you were working large, you wouldn't want to
coat just one area and then fuse that same area. You would want to coat the whole thing in sections and then fuse the
whole thing at once. That would ensure that nothing different areas didn't get burned or didn't
get left out. Notice that my brush
is starting off the panel and going all the
way to off the other edge. I'm not trying to start
right on the panel that so that I want the
whole thing to get coded. And you'll see those telltale
drips. One doesn't have it. But you'll see some of the
drips that happened from that. And that's that's okay. That's what we want. We don't want to
skip little areas, we want the whole
panel to be covered. So then we're going
to use our torch again and we're
going to light it. Makes sure it's nice and high. We turn it all the way off. And notice when I'm using the torch that I am
slowly kind of hovering. I'm not I'm not staying in a certain area and
leaving it there. I'm constantly moving it. And I'm going in
a systematic way. I'm starting at the top
and I'm moving it down. And the torch will
localize certain areas, but it also has this cone
of heat that extends out. And so it will cover
about 3 " of area. And you can just like
we did with the wax, you can kinda overlap
that heat as you go down so that it all
kinda pools evenly. And already we can see
that it's a little bit milky or a little bit whiter than it was in the
previous painting. Now let's see a slightly
different angle. Turn it this way. We do that before. Alright. Well, our horizontal way now, I'm kinda overlapping that. Then we fuse, know. And then we turn. Won't do that. Confused. So one thing that you can see that I can see
right off the bat is that my, there's
less bubbles. My surface is smoother initially even with the
initial layers and fusing. It's much smoother than the panel with just
the plain wood. And that's because the gesso
has primed the surface. So you can see the
difference when the gesso is on just in the absorption. Because the gesso has prime the surface there's
already less absorption, the more the gas bubbles out of the porous
surface of the wood, the bear would more, it creates those bubbles. So if you prime it, you're going to
get less of that. But also the more
wax you put on, the less that happens too. So our first surface will
compare side-by-side. So here is a
side-by-side comparison. Side-by-side comparison of
what our pieces look like. This is still pretty warm, smeared it just a little bit, and this one has cooled, so it's a little bit smoother. You can still see the wood
grain, which is nice. It's cool to a sort of a milky, clear ish texture color. And this one has that
white obviously, but it's a little bit yellowy. It's not quite a white, white even with
the purified wax. So that's just something to be aware of as you're
starting your paintings, thinking about what kind
of imagery you want to use and how you want the
wood to either play a part, the panel that
you're working on, or if you start with
something like a collage, how that's going to affect
and get layered over the wax has been I think
that those different layers.
12. Transparent vs. Opaque Paint: So here I have the
palate, the hot plate. And we saw that our, our, There's a little bit of clear medium on there already. Let's leave this here. And I want to talk a little bit about the
difference between the opaque paints and the transparent paints and
how to get to achieve both. Then also how you can actually
make the encaustic paint. So for instance,
this is the medium, and that's what you
always start with. Everything that that is encaustic paint has
the medium in it, whether that's a stick form, a little cake form, or this is even a
blending stick. This is medium just
in a static form, so it's the same thing. And when I put it on the
hot plate, it melts down. The nice thing about the
anodized aluminum is that it's going to just stay pooled
and puddle where I put it. Versus Let's just use a color. If I put this down,
this pinkish color, I just have to rub it
on the hot plate and it melts melts into a
nice little puddle. If I put it over here, it does the same thing, but you can see how it beads up. So the difference between
the Teflon coating and the anodized aluminum
coating is huge. So there's a little bit of that. Now. The pigment forms,
the stick form, and those store-bought cakes, those are as broad as opaque often as you can get
and they'll tell you whether they are. So is this a semi-transparent, tiny little letters
semi-transparent on the sticks. They have these hot sticks, so they have labels too. I just took this
label off and it will tell you this
one says transparent. So it says transparent on there. If you wanted something
that was opaque, meaning that it covered over
what's the layer underneath, then you would want to look
for something that said opaque or not transparent, not transparent or
semi-transparent. Those are going to be allow the colors and the layers underneath to show through more. And that means that
they're mixed with some more of the encaustic media. If you had an opaque color, say this one and we put it down. If we put it on our, say we took a paint brush, this is our blue brush. Put it on there, and we painted it
on our surface. Let's use our white surface. So we put this on there. It's totally opaque. So wherever the paint goes, it's covering over
everything underneath. Now, if I wanted that to be a little bit
more transparent, but I only had
this opaque paint. What I can do is I can
take a little bit of my medium either in the stick form and put it
down on top next to it. Or often what I'll do
is I'll take some of my already mixed up liquid and just drip it on
drip it on the surface. You just got to be careful with this method that whatever
you're going over, if you didn't want this
to be dripped into and just be careful how
you're trans, porting it. So now I can take and mix in
a little bit of my medium. And you can see already on the palette it looks different. So it has more medium which
makes it more transparent. So that's the difference. In transparency and opacity. You can see that I have
to keep my brush warm, or I'll see these brushstrokes. Right? If I'm working on
a cooler surface, then you'll see the brush
strokes even more because the, the paintbrush will cool. The wax on the paintbrush
will cool faster. So this is the difference
between opaque and transparent. But you can make it take something
that's more opaque and make it transparent. You can also mix colors
on your palette. So say I wanted
it to be a little bit browner, purpley brown. I could mix these colors
just like oil paint. And having this nice
anodized aluminum palette really helps you do that. I could do. You could see that
this doesn't go very far. So if I wanted more, but I wanted a
heavier application, I would have to definitely
mix up some more paint. But just by adding
one extra color, I'm getting a totally
different look, totally different color. So this is like a dress similar to a dry brush
technique where you've got not a lot of paint on your brush and it's cooling on the surface. So you have a lot of
those brush textures. If I wanted it to
be more smooth, I would hit my brush up and
I would use more pigment. Then that would give
me a smoother mark. And heating up your
surface with a torch. Just lightly fusing also really helps to get a
smoother brushstroke. Now, if I left this, this is what the
texture would be. A lot of people like
this type of texture. But if we wanted to move on and keep layering and we
didn't want that, all that texture,
we would fuse it. So fusing can be very hard
for using very heavy fusing, very hot fusing like we did
to make this super smooth. Or we can make it very light fusing and try to retain
as much texture as we can, but still fuse it to
the layer underneath. And that's what we're gonna do. And I'll show you
what happens when you fuse the color at a
high temperature. You could actually move it around because it all liquefies. And then you can kind of guide that the liquid wax
where you want it to go.
13. Fusing with a Torch: So first let's see what
a light fuse will do. And then we'll talk about what happens when you do a heavy
kinda fuse on this color. I'm still going to open up the propane pretty
high and strike it. But then I'm going
to turn it down so that it's just barely kind of like very light flame. Then I'm going to sort of
do this like wispy motion. I'm not holding it
like I did before. I'm just going where I painted. And that just long enough for it to remount and
you can see it change. The more you do this, the more you'll kinda get accustomed to the way that you can
tell when it's fusing. And all those little bubbles
have sort of popped out. So that's a light views and it essentially looks the same. I still have all those textures, that same kind of brush stroke. It's not a physical
texture as much. I don't see the the very
rough brushstrokes, but I can still visually see it. And again, if that was my final layer and I didn't really liked that,
I could leave it. It's just not fused
to the surface. Now let's do one more and
see what it looks like when we force the force it to move. So for that, I'm going to use
slightly different color. Let's try this. Put that in here. You can see that the
color was sitting and so it's because I mix it up,
it's kinda combining. Now, as this brush
is heating up, I'll talk a little bit
more about your palette. If I wanted to clean
this palette up, what I would do is ball up a paper towel like this with
my hands, don't touch it. And I could just sweep it across the surface and
it absorbs the wax. That's as easy as it gets. The surface has to be warm. Can't do this one, it's cool or it'll form that solid surface. But you could do that with
all of the hot surfaces. Colors look like on
here. That's kinda nice. It's like a greenish amber. If I know I'm going to
use a lot of a color, then what I'll do is mix up a little tin and these colors
that I've got in the pans, the tins, I use quite a bit. Say I wanted, I knew I wanted
this umber color and I wanted it a little bit
more transparent than I would probably cut a
chunk of this off. And then put it in a tin with maybe like 50% encaustic medium. Then you can test it
out and have like a testing palette to see what it looks like
on an actual panel. Because oftentimes, if you
want a specific color, it's hard to tell what
it's gonna look like on the palette when you get it on and fuse it onto
the panel here. So that's a pretty color. So that's just a good, good tip. I really like these colors. With encaustic. I tend to work
pretty limited in terms of the colors that I'm
using encaustic paint. Just because, again, if
you're mixing up an amount, it's not like you can just take this brush and go dump it into the orange or melt down a
whole tin of another color. There's limited space. So maximizing what you've got by using a limited palette
is really helpful. And by that I mean, if
you use limited colors, you can mix them
together and create a cohesive palette of a
wide range of colors. Let's use this one. Get this guy out of the way. If you didn't want to drip or risk dripping
your color over your your colored or sorry if you didn't want to risk dripping your colored paint. Over your encaustic medium. Often what I'll do is
get a little clothes pin or a metal like binder clip, pinch it onto the tin, and then take the
whole tin off of the palette over my painting. And that helps to
keep it from cooling because if you set it
down on a wet surface, the tin is going to cool. But it also helps
you not have to grab the whole ten
to bring it over. Just a tip. Alright, so
let's do line of color here. Again, this is to show
you what it looks like when when we confuse a high
fusing with the pigment. So actually let's use one more. I'm gonna do one
more layer white. This is kind of an open,
transparent white. So I'm going to
fuse, turn it on. I'm going to use pretty hot. So as I've used, you can see that the colors
starting to loosen up. And you can actually to certain extent guide
where it's going to go. On the surface. The closer you are to it, the more directed the
heat's going to be. So the more or the less control
you will have, I guess. But I'm heating a little bit of that surface up there so
that it kinda drips into it. As long as it's still liquid, you can tilt it and make it
move in different directions. But that is one way to fuse
and get the color around by actually liquefying
all the layers and blending them and
moving them together. So less control, more
control, more brushstroke, more soft background texture. Then when this is cool, we will put another layer of our encaustic medium over it. And that way, for instance, this will get sealed in and we'll just keep
building our layers. We don't have to, we could
leave it just like this. We could continue to build
with different materials. But this is think of the
encaustic has a lot of layers. You can always scraped back, you can always add more. You don't have to be satisfied
just with one layer. You can keep going. So don't be afraid as you're, especially as you're
beginning to really try and experiment and do different textures
and see what happens. Well, what if I layered
this color over this, or what if I put a layer
over the whole thing and moved it around
and saw things come, come up and out. This is pretty cool. What I'm gonna do
is show you how. Now that this is cool. What it looks like
when another layer of medium goes on top. If this hadn't been cooled, when I stroked it
across, it would smear. This is still pretty warm. We'll see what that looks like. Well, I didn't do too bad. But often what I'll
have happened, especially if it's sort of
a deep color like that. If you sweep across
with your medium, it will actually pick up some
of that pigment if it's not cooled and smear it
across the surface. Again, that might be
something that you like and you want to exploit. Otherwise, just know that
that's what happens. One more fuse even
out the surface. Because even though
we've got a lot of, we've got a lot of different
textures happening and we've got a lot of different
types of marks. If you can end with a
very smooth surface, I think some people
really like that. And the way that you do
that is by layering over one more caustic medium layer and then fusing that to
a very smooth surface.
14. Painting and Scraping: So if I pits this
is the warm just recently fused and
I add some paint, it goes on, really
push that off. It goes on really smoothly because it's already
got a warmed surface. So that's one thing
to think about. See. If you didn't want
that they wanted the more textural look you would want to wait
until this was cool, which is one reason why I have multiple pieces going
at the same time. Transparency. It's just one of the most
beautiful parts about caustic. Say I didn't like the way that, that covered over it. I could take my loop
tool, which is mostly, it's made for ceramics, but you can certainly use
it for anything like wax. If it's warm, I just barely
have to to scrape away. And the wax, the top
layer comes off. If I scraped too hard
and it's super warm, then more will come off and I'll go straight
through to the bottom. But it gets a
really nice texture that you can't get
just by applying. So often, having this sort
of back-and-forth put on takeoff sort of approach
can be very interesting. If you're into sort of texture. I'm layering. I can keep working or I could lightly fuse and add on top. I think what I wanna
do for this one is actually going to heat this up as brush and do
some smaller mark-making. This brush is nice and warm. Let's see. I'm going
to add a little bit of the medium to make
it more transparent. And out a little bit
of my blue drip, some of that in there. I like the greenish, but I liked the greenish blue. Yeah. Not totally in love
with this part. But that's why I
have my scraper. I can either cover over
with another layer of paint or I could scrape
some parts back. Scrape some way, can
actually shape it. You know, like I'm drawing. It's better. So if I take too much away and I want some
more white there, I can add some more, either lightly or it could
cover over it if I wanted to. I think I like I like how that sort
of transparent to, which will get even more
transparent if we fuse that. Alright, let's views lightly. Because I love all
that. Texture. Don't love that one.
15. Cleaning Up: Well, when you are done with your setup and it's
time to clean up. The first thing
that you wanna do is clean off your palette. And I've done that by balling up some a paper towel and wiping off all
the excess wax while the palate is still warm. If you try to do
this one, It's cool, It's not going to work. So you can do that on
here if you want to. If you have a place to put
these tins while they cool, That's not going to
melt or have them stick to the surface, then you can certainly
remove them using the little like a binder
clip or a clothes pin. If they're small enough. If they're larger than a
spring clip would work too. Move them off the pallet
and then clean it. Somewhere like another palette or some surface would surface that's surface that you're dedicated just to that would
be a really good idea. And then after that, if your brushes need
further cleaning, if they're still warm, then you can either wipe them off with the same paper towel. And that gets a lot
of the paint off. Like I said, the way that the wax works and
embeds into the brushes, they're not going to get 100% clean no
matter what you do. But if you can keep them warm and keep wiping off
onto paper towel providing you're not overheating your hands and getting
that, burning yourself. And then you can use
this brush cleaner, which is just the soy wax, to also clean your
palette too, if you want, if there's any kind
of residual tint, what I do is take a little
bit of the soy wax, sprinkle it on the warm pallet and you'll see that
it'll start to melt. And then as it's melting, paper towel, get your
brush in the wax. The soy wax is different
than encaustic medium. It's not beeswax. And then he just
further wipe it off. And you can continue to do this. Especially if you dedicate, say, a white brush and you
accidentally get color on it, this is a good way to clean that and save your white brush. But it's not gonna get 100% like you're not gonna be able to
use this for oil paint again. But then once that's cleaned, you can see how
there's still a lot of pigment on the palate. The soy wax will help pick
up and clean the brushes and the surface is not going to hurt if there's sort
of a layer of soy wax, it's not going to
hurt your brushes, not going to hurt palette. It's not going to
make it compatible with your encaustic paintings. So that's how you clean up. You let everything cool. I try not to turn everything
off and then leave. I tried to make sure that after everything is
unplugged and cooling that stick around so that if anything because it is still warm and if
anything does happen, I want to make sure
that I'm present. So one final step after
everything is turned off again is to unplug all of the plugs, the hot plates, the
pancake griddle, turn that off and let
everything cool down. I put my brushes
kinda hanging off the table just so that the wax bit doesn't
stick to my surface. This one, I never heat it up, so it never got really warm. That's basically
the end of cleanup. These will cool and
solidify again. If they're still warm, you can remove them again
and a clean your palette. But it's not necessary or just liquefy when you
turn it on again.
16. Finishing Edges: When you have a finished
painting and it's time to remove the tape and move on to the
final finishing and framing. One option to do that, because you can see that
often there's a lot of bumps and overlap where the wax has come over the
edge of the surface. If you were to peel
the tape off now, some of that might
pull the wax surface actually and tear some of the painting front
of the painting. So simple way to mitigate that is to use
your loop scraper tool again and scrape a
little bit of that edge. Remember you don't
have to go all the way to the edge if
you do, that's okay. But what we're really
trying to do is just separate that drippy
part from the surface. So just carefully scrape. And as it starts
to get the excess, you can just peel that
off and keep going. Whatever way is easiest for
you to get a good grip on. Obviously that's
not working for me. You can use either side too, but just be aware that this side is a little bit more rounded, at least on this loop tool. So it's not quite as It's
not going to get you quite far enough into that part if you do accidentally go into your painting, that's okay. You can just kinda
smoosh it down and, or re apply wax or reheat it and kinda
remelt it on there. I really like to drag it
across the surface like this. Because I find I have
more control that way. We go little by little, turn and do the next bit. If you don't like
the feeling of wax, probably won't like and cost it. But people wear gloves. I don't like wearing gloves because I'm
always afraid they're going to melt my hands. I don't really need
to get all of that. I just need to get the part that kinda up
against the painting. All right. I think that's enough. I
can take the tape off. And to do that I find one of the edges and then try to peel angled away from the painting
as much as you can. That way, if any parts
do get overlapping, they can just pull underneath instead of
ripping it off the top. And you'll also notice
that I'm touching the surface that
should be fused. Everything that you've done to the surface should
allow you to touch it. And in fact, we'll talk
a little bit about the finishing of the painting, but the surface should be stiffen up and cool enough
that you can touch it. You're doing this part. Sometimes a little wax bits will break off as
you're doing this. So I tried to do it over an area that I don't
care if that happens. There. It is. Nice. Finished and ready to print.
17. Framing: Today we're going to talk
about framing our artwork. Once our pieces are finished, it's important to make sure that they're presented
and protect it. And we're going to talk more about that in this next lesson. Okay, so now that
we have finished our painting, the last step, and in my opinion, important step is
to frame the piece. And framing not
only helps to make the pieces look really
nice and valuable, but also to protect these edges. So you can see that we've
taken the tape off of the edges on these
piece, on this piece. And so we don't have any kind of unwanted drips,
but if you did, you could just take
your scraper and scrape them off so that
the edges nice and smooth and that will allow it
to fit in the frame better. There are a few different
ways that you can make frames or frame your
encaustic paintings. And the way that I like best
is to use a float frame. And a float frame is
called this because it allows the piece
to look like it's floating away from the frame. So a lot of pieces, if you go to the store and you buy like a
regular Canvas frame, they look like they
actually cover up part of the image and the PCE sits
behind the frame like this, which is totally an
okay way to do it. The drawback to that is that
you will put pressure on your soft and caustic surface. But if you were going to
leave it in the framing and, and care about that
or didn't care about losing some of the edge, then you could
certainly do that. But if you're like me
and you do want to have the the nice edges kind of protected but also
showing and not covered up. Then you can use what's
called a float frame, which makes the piece float or seem like
it's floating. This one has an actual
painted edge and you can get some that are just
raw wood or black, or white or gold. I mean, there's lots of
different choices if you look up float frame. And what I like about
different frames is some of them will actually
raise the painting up. So it looks like it's
above the frame. And some of them will
make them look like they are more recessed. And the more recessed they are, the more protected they are. This one is meant for
either a thin panel. So this is only three-quarters of an inch to an inch wide. So this painting fits
nicely into this frame, but it also doesn't
stick up too high. But if you had a wider
painting where the edge, the panel was actually
an inch and a half, then it would still fit
into a frame like this. And the frame would be just about flush with the
surface of the painting. And it would still keep those
little edges protected. So I'm going to show
you how to put it into two different
types of frames. And these are
store-bought frames. But you could pretty
easily make your own. Float frames have particular
store-bought frames have a little groove
in them, so they're, they've been routed out a couple of times
so that they have this lip here that allows the painting to look
like it has space. And then it also has this
part where the painting sits so that you can
actually screw it in. And each of the
store-bought frames come with their own hardware. Some of them require a like a little sort of s hook that connects the
painting back to the piece. Some of them like this one. You just, they have grooves
in them already and you just screw directly into the
wood of your panel. And that keeps the peace
connected to the frame. So it's important when
you're doing either of these that you make sure that
the painting is even. Because if it's
tilted like this, if there's enough space, it'll get caught guide or
if one of the areas is too high and that will not make
it look nice and even. And so it's important
that you measure that and make sure that that's
even ahead of time. If you need to raise
up your painting because there's too
much space in-between. Where the frame is and
where the panel ends, then you can get something that won't damage the
surface of the painting. But that won't damage the
surface of the painting, but we'll raise it up flush
with the back of the frame. Like this so you
can screw it in. So I'm just going to use another name for a blank
panel to raise my piece up. Put it like this. Put my pieces face down. And then I'm going to put my
frame on there like that. And now it's flush, press nicely against there. I'm going to make sure
that it's nice and even really just by feel. But you can also use a
measuring tape if you wish. And then we're gonna get
some screws and just screw it into the frame. Okay, So if you, if you make your own and
they don't come with screws, then you can by just
regular wood screws. I like the Phillips head. These are counter
sunk so that you can see the the little lip of the angle of the screw head will actually go down
and it will be flushing, don't pop up over the top. So that's a good a good thing. And I always save home my old ones regardless of
whether they're good or not, so I can use them again. So you just placed the
screw into the slot. It's already cut
out and I'm using a battery operated
screwdriver drill combo. But you could certainly do
this with just a handheld too. It's all the way
in and go around all four sides
until it's secured. Then just pretended
to the other ones. When you turn it
over, it should be even all the way around with the same amount of
space for each side. If it's not, you can
make slight adjustments. Then you have it framed. And then we'll talk
about how to wire it. So we're going to
set this in there. You can see there's a
little bit of wiggle room. So if you did have any
drips and your piece was just fitting
snugly, that's okay. If you make your own panels and there are different size
and you probably won't be able to buy a ready-made frame because they come in
pretty standard sizes. This is 11 by 14 panel that was store-bought and
an 11 by 14 frames. So that's one of the
nice things about, or I guess the simple
things about making using store-bought materials is
that they are standard. So what I'm gonna do next, this one actually you
can see how the frame, the panel sticks in
rather than the frame. So it might be hard to
actually screw it in. So what I'm going
to use for that are these museum or mirror hangers. And one side goes
into the frame and one side goes into the panel. Same thing I'll do
all four sides. These required two screws For each is that it just
screwing right into there. So I'm going to do for this is first I'm going to
screw it into the panel just to make sure
that it's in there before I actually put
it down onto the frame. You can buy these little clips, these little mirror clips
at a hardware store. Their angle, it just a
little bit to get it down. Alright, now I'm gonna get
another one and secure that. Of course, I would do
all four of these. If you are having a hard time getting the screw to
go into the woods, someone's are pretty hard. Then you can take a drill
and actually pre drill your holes to match
the size of the screw. Just want to drill
bit that slightly skinnier than your screw. There we go. So it should fit snugly, it shouldn't wobble
around like that. But you get the idea. Then. When you are ready
to attach your wire, I'll show you how
to do that too. They sometimes will
include these, but also you can buy these
at the hardware store. These D rings,
which I use a lot. I really like this
because you can position them wherever
you want and they are kind of adjusting depending on where
you put the wire. When you hang, it, just
makes it really easy. So my rule of thumb
for wire is to put the little D rings about
a third of the way down. So if you divide the
frame into three parts, the top third should be
where you put the D rings. And just like before,
we're just going to use the same screws screwed
directly into the frame. They don't have to be very long. But you want to make
sure that the head is wide enough that
it's not going to go through the little hole. And you may have
also noticed that I didn't I didn't measure. You can measure and mark. But the way that the wire
works is it's going to adjust as you place
it on the wall, so it's not super critical. Then one thing about
wiring is that you want to make sure that the wire, first of all, is on the
correct part of the painting. If you're wiring the bottom, then you wanna make
sure that you're putting it on the top third, which it looks like I did. But for the sake of our demonstration, I'm
just going to leave. What I'll probably end
up doing is taking these out and flipping
the painting rather than moving these because it looks like it's
splitting a little bit. And if it's doing that and see that the
wood is kinda splitting, what I'm gonna do is
actually predrawn my hole so that the screws fit better and
they don't split the wood. The screws are too
wide or too fat. For instance, like this one. Then it really pushes and put
strains the wood if there's not a whole already there
to kinda help it in. So I've pre-cut this wire, but what I want to do is
make sure that number one, that's gonna be a
strong enough gauge. It's going to hold the painting. I'm costings aren't too heavy, but when you start
getting large panels, then they can start
getting kinda heavy. And I've cut it so
that the there's about 4 " on either
side of the frame. And that way I can secure it. I'm going to pull
up kinda evenly. Then I'm going to pull it
tight through those loops. And then I'm going to
make another sort of not, I'm going to loop it through
and loop it through. Kinda make a knot in the wire. And then I'm going to take
the remainder and wrap it. Just going to wrap
it around the wire. And all that excess will help to secure it so that
it won't slip out. Just like extra insurance. Just wrap, wrap,
wrap, wrap, wrap. Doesn't really matter which
direction you wrap it. You just want to wrap it. In working in a frame shop, I learned this technique. I could pretty fast at it. And then one more thing
that I really like to do with frames to avoid getting scuff
marks on your wall, but also to protect the wall
from getting scratched by the raised up elements is to put little rubber bumpers on the bottom and sometimes
the top of the frame. Then you're ready to
hang it and you can see that it will stretch
a little bit. But if it's at the third, the top third and not
the top quarter than the wire will be what's
supporting it and not the frame. Pieces primed and ready to go.
18. Thank You: Thank you for watching and
caustic Studio basics. I hope this course gave you a really good idea of how to create your first
encaustic painting. And I can't wait to see
all of your projects and paintings uploaded
in the project area. If you'd like to see
more of my own work, you can visit my website
at Dana Harris seeger.com.
 Dana Seeger, Artist, printmaker, educator