Transcripts
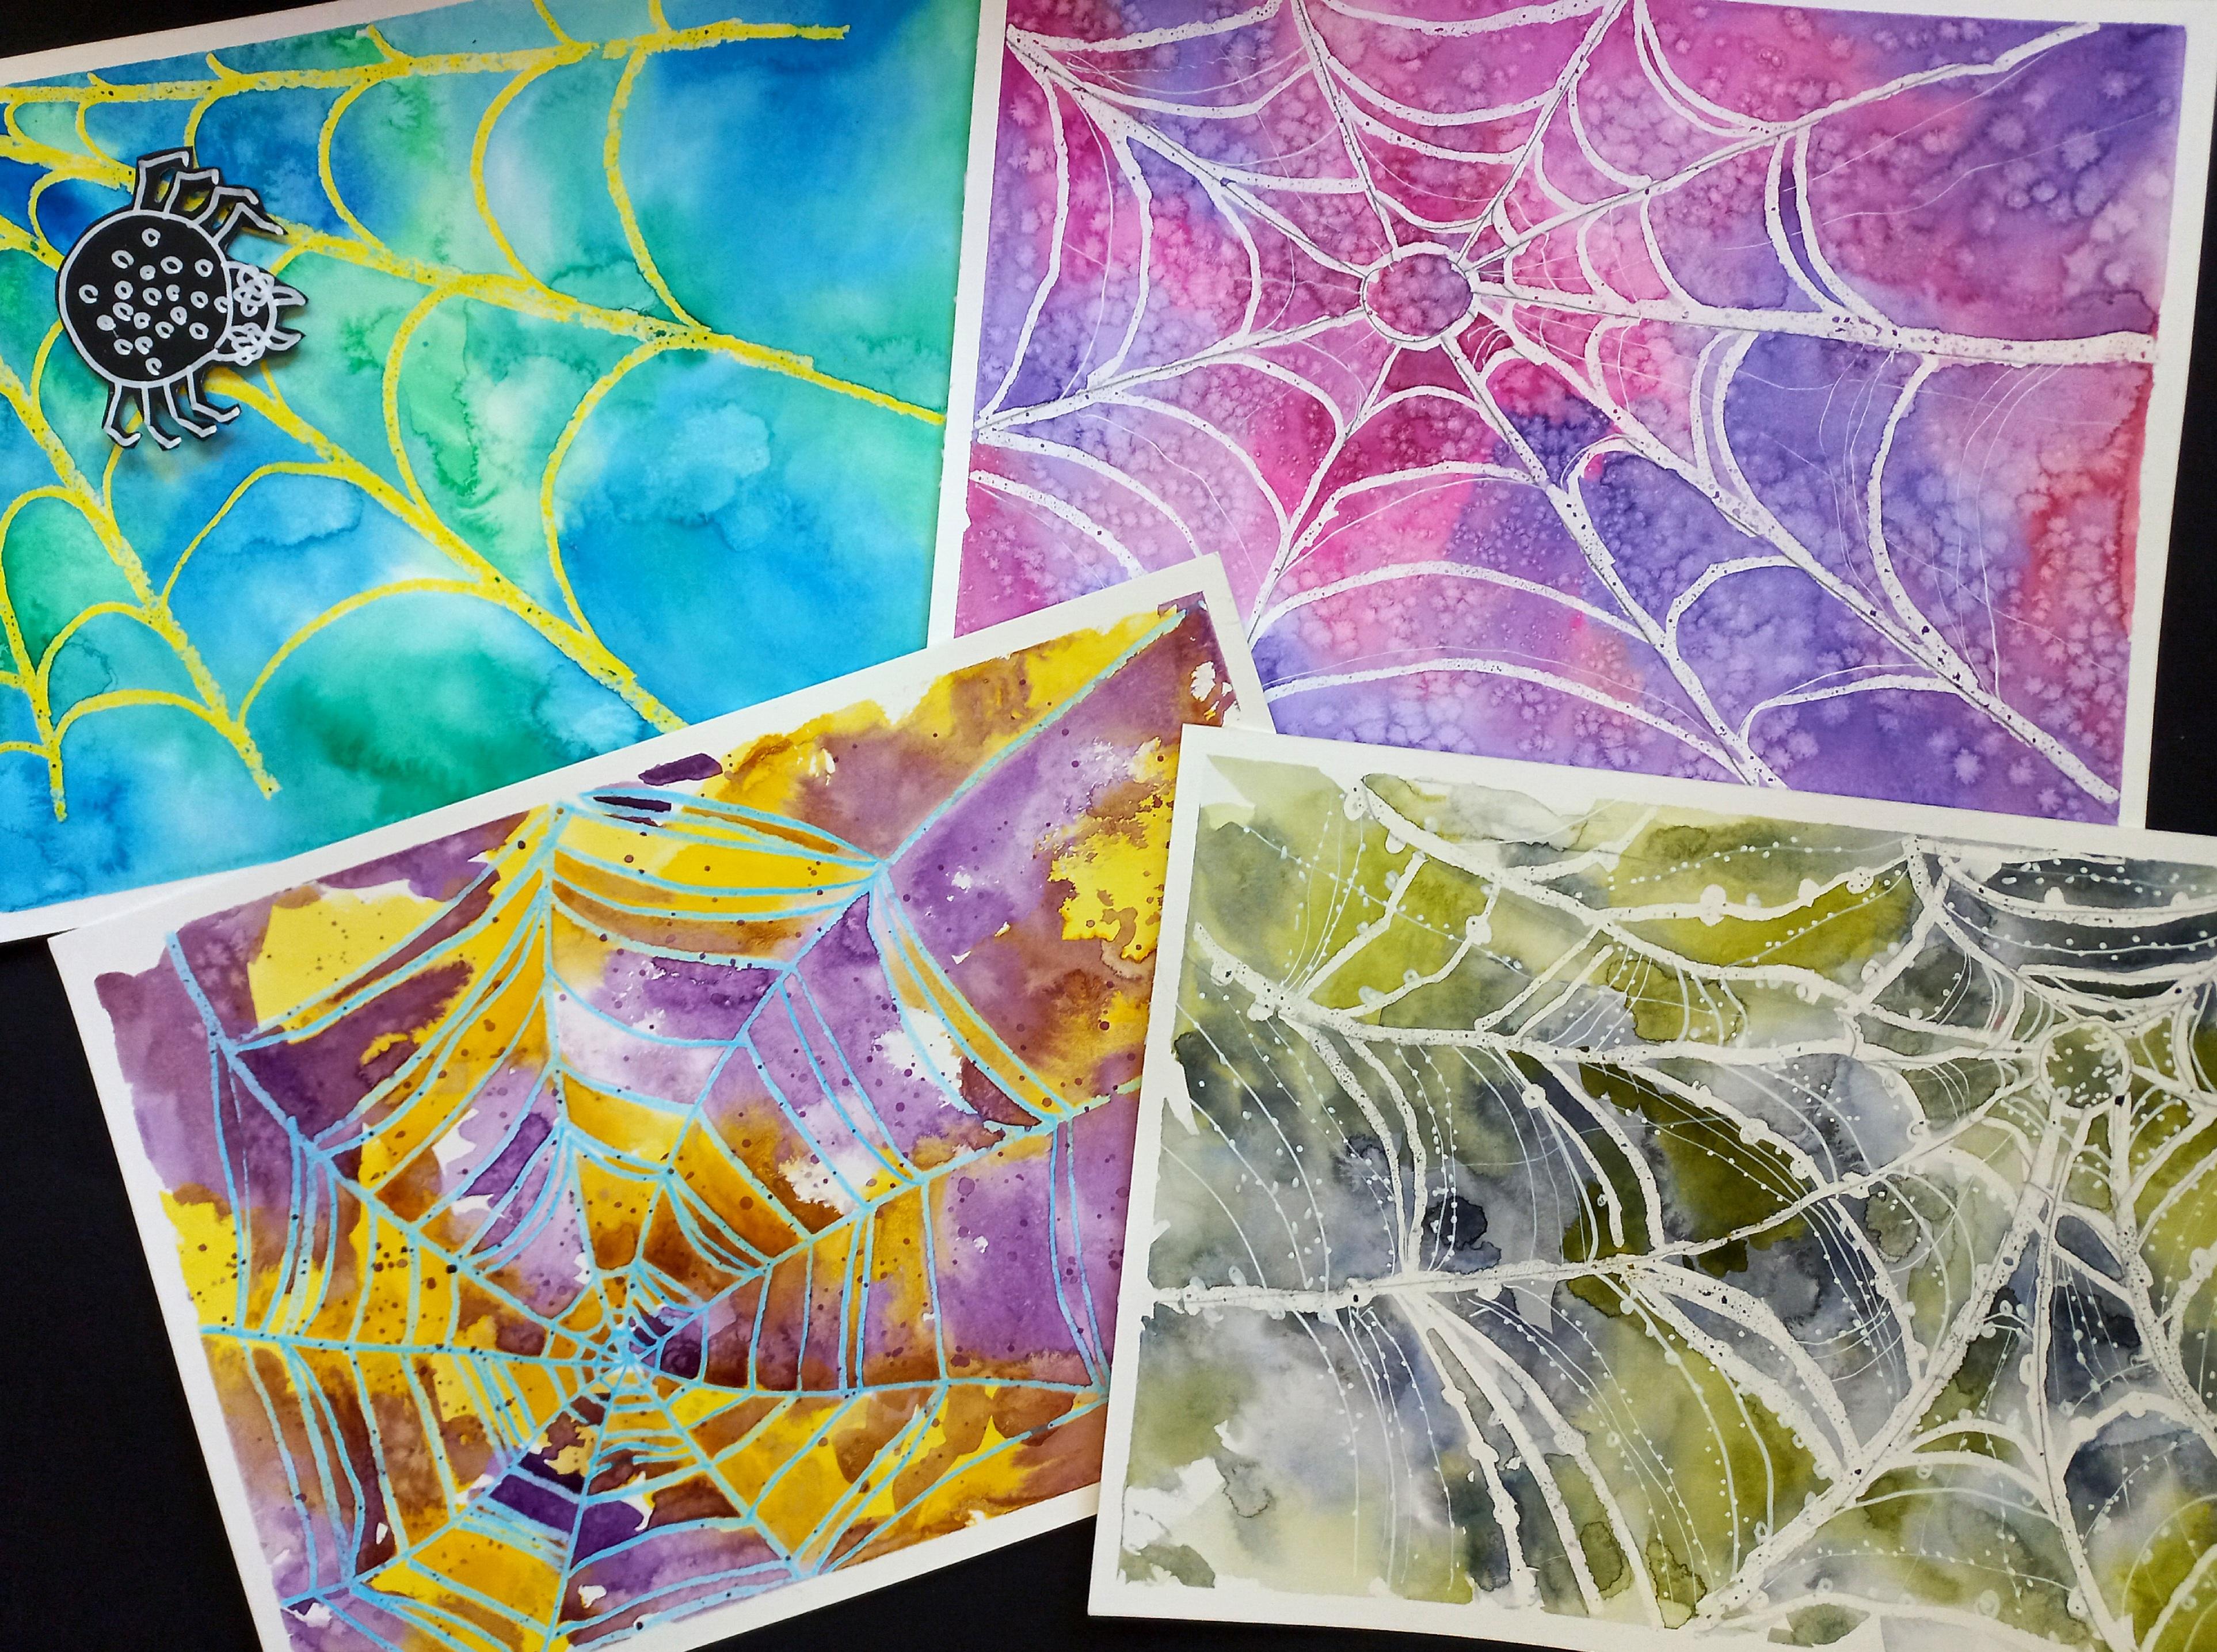
1. Introduction: Say hi to my little friend. He's also an artist. He makes beautiful webs. Today, we are going to be making webs out of watercolor and ink. Join me as we make
these webs together. Hi, I'm Wendy Lee, an artist and educator
from South Africa. In this class, we will
be learning how to make four watercolor and
pastel spider webs. Each one of the spider webs have got different watercolor
techniques in them. For our class project, you can either make
one spider web or you can make all four. I'd love to see what
you can come up with. So come along and join me
on this exciting adventure.
2. Materials: To do this class project, we will need the
following materials, watercolor paint brushes, any size will do,
watercolor paper or hard card stock that can hold wet on wet techniques
and a lot of water. A spray bottle with water. This is optional. Some salt. Any salt table salt or
himalayan salt will do. Some watercolor paints,
wax crowns or pastils, a jar with clean water, and some black paper that we can later use
to make some spiders. The black paper is also
optional for this project. Let's get started.
3. Draw and paint corner spider web: Welcome to my class
on spider webs. I'm so glad you've
joined me today. We're going to use our
pastel or wax crayon and going to draw our
first web from the corner, radiating out to the
rest of our page. Draw your main spider web
strands from the corner, ending just before the
edges of your page. You can draw a few or
as many as you like. I'm just adding a
couple extra here. Then I will join them, starting at the top and
joining each one separately. There we go. I'm happy with
the amount of strands. And now I'm going to join them. I'm going to make
upside down use, so actually like an end shape
to join each main strand. As I draw these as they
radiate towards the edges, they will be getting wider. The spaces between them
will be getting wider. There we go, press nice and hard so that when
we paint over this, it will create a
beautiful effect. I'm going to wet my page now, and then I'm going to start
dropping in my colors. I can also use a
spray bottle to just activate my colors in
my watercolor pan. I'm going to be choosing two to three main
colors for each. Make sure your page is very wet so that you can drop the
colors onto your page. Make sure your colors
are nice and bright? Choose two, and then we can
just put them anywhere, drop them anywhere on the
page that you would like. The colors will
eventually flow into one another and create new colors. Because we are making four webs, you can either submit or
four as your class project or choose your favorite
one to draw and paint and share that
with us at the end. Look at the colors
already blending. Isn't that beautiful? Just keep dropping the
colors in randomly, making sure that
your paint is wet. It doesn't matter if
the paint is darker in some areas or
lighter in other areas. Keep wetting your page and
dropping your color in, and the colors will eventually
flow into one another. If it looks a
little bit strange, don't worry about it, they
will flow into one another. As you can see, there's already
some blending happening, and I'm just dropping
the colors in randomly. Also, don't worry if some of the colors are
darker than other colors. It creates an overall
aesthetically beautiful effect. Once I have filled up my page
and my page is still wet. I'm going to make sure that
I have clean water so that I can drop some water
droplets onto my page. This technique is called
making Cliflowers. It creates a different effect once the painting has dried. You can add them in by just
lightly touching your page or by dripping some
water onto the page. I'm now going to leave
this painting to dry and I'll show you what it
looks like once it has dried. Now that our web is dry, we can see the
beautiful effects that the water droplets have
created on the page. We can also see the
beautiful effects that the watercolors have
created on the wax. Are you ready for the next? See you in the next video?
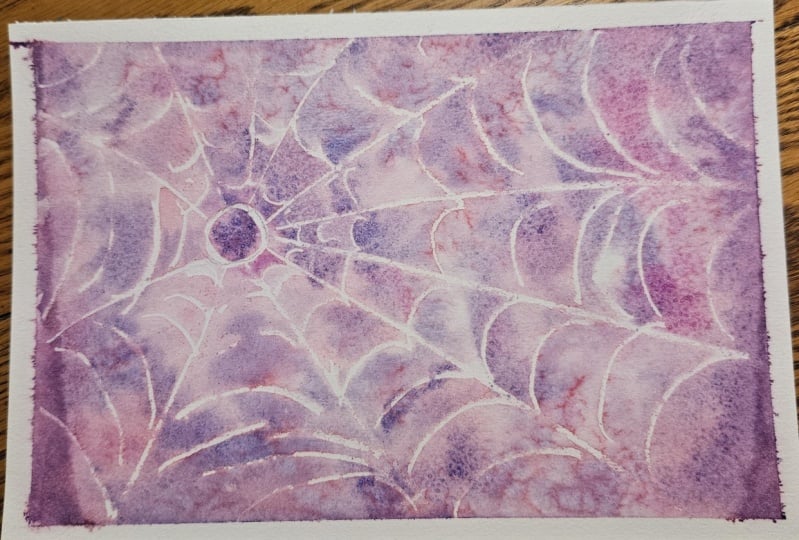
4. Draw and paint circular spider web : For my second web, I'm going to start
with the circle. You can decide wherever you
want to put your circle, and you start from the
circle and you draw your lines going outwards
to the edges of your page. For the purpose of this
video, so that you can see, I'm going to start off
with a lead pencil and then go over it
with a white crayon. You can draw directly
in your white crayon, if you like, or choose any
color that you would like. I'm going to start
my circle here. Just a little circle. F here, I will have my web radiating out to
the edges of my page. You can draw as many
maintrands as you would like. You can always add some
end later if you are not happy with the amount of
strands that you have. I think I'm going
to add one going to that corner and another
one going to that corner. Same as the first web, we are going to
make little threads from one main strand
to the other. Can you see that? You're going to
carry on with this, as it gets to the outside, you're going to leave
bigger gaps between them. I'm going to do this
in my crayon now. You can start with
yours and I'll do mine. I'm just tracing over this line so that
it's nice and solid, and I'm making my main
lines over my pencil lines. It's okay if your crayon hooks a bit or goes a
little bit crooked. It still adds effect to your spider web and
makes it beautiful. Some spider webs look like they have been ripped a
little bit in the wind. Some spider webs look like
Someone ran through them. Have you ever run
through a spider web? So if your lines don't always
connect, that's also fine. So I'm just carrying
on with my white, and I'm adding more layers, more webs, as I go outwards, I leave bigger gaps. Each time I connect it to the web to the main
strands of the web. I just keep going outwards,
outwards, outwards. This is quite a fun web to do. Actually, all the webs
are quite fun to do because you can add a different
technique on each one. On some places, you can even add a double strand if you like. If your strands are a little
bit wonky, that's okay. I'm going to just add a
couple of extra strands. Right. Now I'm going
to wet my page. I can wet it with my sprayer, or once again, just wet
my page with my water. And I think this time around, I'm going to add some purples
and some pinks to my web. You're welcome to
use any colors. I would suggest using two
colors, two main colors. But if you want your whole web different colors,
that's fine too. And I'm just going to put my
colors wherever I want to, so they can blend
into one another. Make sure your water
colors are nice and wet, so they can spread and so that the colors are nice and bright. Add some of these purples. Got a nice deep purple here. Blends naturally with the pinks. Look at that white
webs standing out. And you can put put your
colors at random places, you can overlap
some of the colors. If you want to, you can put
a bright color with a lot of paint on a section and you can even take your little
spray and you can wet it. So I'm just mixing my pink
and purple here a little bit. When the colors mix like this, they actually create some new
colors as well in between. I love using bright colors because it makes
my paintings pop. As I said, you can choose
whatever colors you want. Bring some of these colors
into play a little bit. Look up beautiful
that's looking. Now, the following
step is optional. But it creates
beautiful texture, especially because
spider webs are found in nature and sometimes you've
got, dew drops on them. Sometimes you have
light shining through them a little bit of table
salt on my painting. And when this dries, the salt absorbs
some of the color, so we will have a
beautiful texture in between these
strands of spider web. We'll wait a little while. When it dries, I'll
show you what it looks like before we move
on to our third web. Our second web is dry, and look how beautiful it is. Look at the different
textures the salt has created. I heated up. I used, you can use
a heating tool or a hair dryer to
pull the tape off. But if you didn't put it
on, don't worry about it. It just helps to melt the glue underneath so you
don't rip your paper. My salt is dry, My
painting is dry, and I'm going to just lightly
rub the salt off my page. Web number two is complete. Are you ready for
Web number three? See you in the next video.
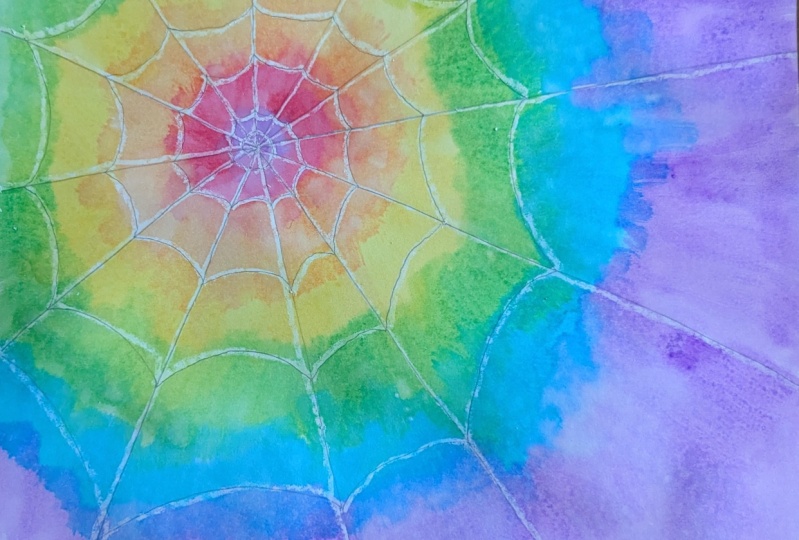
5. Draw and paint simple orb spider web : Are you ready for
Web number three? This one is similar
to web number two, but we're going to add a
couple of extra strands to it. This one, we're
going to start with a dot anywhere on your page. The last one, we started
with a circle, this one, we will start with the dot, and we're going to
make straighter lines. So I'm going to put my dot down. And once again, you can choose whatever color you feel like. I'm going to put my
dot down and then draw some strands
leading from my dot. This time, I'm also
going to curve my strands just a little bit so that they are not
perfectly straight. Draw your main
strands of your web radiating from your dot outwards to the edges of your page. You can draw as many
strands as you want to. This one looks a
little bit wind blown. I've done my main strands, and now I'm just going
to start at my dot, and I'm going to draw
straighter lines than the previous webs. On some places, I might even
add a couple of extra lines. See how I stop it at
every main strand, and I'm just going
to keep curving it. You can use any crayon
again or wax crayon, these fat wax
crayons or pastels, or these thinner ones if you
are doing a delicate line. So for this one, I'm making my lines a little
bit closer together. And I stop at every main strand. Can you see that? I just
keep going out out. Remember, as you go out, you draw your lines
further and further apart. It almost feels
like a dot to dot. Do you know that spiders have
different types of webs? The webs that we've drawn
today are called orb webs. But there are actually a
couple of different webs. You can get cob webs, sheet webs, and funnel webs. Depending on what
type of spider it is and where you
find it in nature, or if you find it in your house. This one's coming along nicely. When you get to the top and you haven't got any more space, you can just leave it or just join some
extras on the side. Now I'm going to add a couple
of extra web pieces because this spider was doing a bit of a crazy dance here last night when he
made his spider web. And you can add them
anywhere you want to. They can be a little
bit more curved, or they can be straight. They don't have to
be exactly parallel. They can be a little
bit crooked as well. It just adds a little bit of extra effect and
texture to your. I'm happy with that, and now
I'm going to start painting. This time I'm also going to try a different technique
with my paints. I'm going to make sure I spray my paints and make sure they're completely
wet on the palette. This time, I'm going
to keep my paper. I'm going to add some
yellows this time. Once again, you are welcome to as many colors as you want
or any colors as you want. Now I'm going to spray this with my sprayer and see
where it goes. Sometimes the color will spread in weird and
wonderful ways. The better way to do
this actually is to wet your paint completely
and just drop it in. I'm going to drop it in here, and then I'll show you that
spray technique again. I'm just going to drop it in, and I'm going to spray it
quite close to my paper and look how it runs creating an extra
little texture there. And there it's flowing
into that yellow. It looks beautiful. Yellow and purple love each
other on the color wheel. They compliment each other. Just going to drop
this in again. You need to make sure you drop
in quite a bit of pigment, so your color must
be nice and bright. And then I'm going to spray it again and see where it goes. Just keep dropping color in
and see where it takes you. Put some more yellow in. The yellow and the
purple are mixing a bit, making it look at b
dirty, but that's okay. We find these colors in nature. Also, if you've been making
all three of your webs, make sure to change
your water so that it's nice and
clean for each web. It almost looks like a ti die
shirt. See how it blends. I'm making sure that my yellow
paint is very, very wet. Actually, the pigment is quite beautiful,
nice and bright. I think we need some
more purple in here. I'm just going to drop
some more purple. Look how it flows.
If my yellow paint is still wet, it flows nicely. It's nice dark pigment. Not mixed with too much water, but wet enough to
create an effect. Also when I touch the wet
paper and the wet yellow, it spreads by itself. Of course, I'm going to
help it spread a bit more. By spraying it. Spray,
so that it runs. It's okay if it does that. For this one, there
will be some areas that don't have any paint on
it at all, and that's fine. It just makes it more beautiful. I'm going to drop a little
bit more color in here, so that it can run a bit. If you think your
colors are too light, just drop a touch more color. And that's okay
for this painting because we're creating texture. Because we're creating texture. I'm going to just drop
a couple of spots of purple on top of this yellow so that it
can spread by itself. You can even just tap your
paint brush like this. In each spider web, we've done a different
painting technique. I'm going to leave that white over there. Isn't
that beautiful? I'm going to leave
this to now and then I'll show you what it
looks like when we are done. Beautiful. My painting
is mostly dry. But some of the spots because the yellow and
the purple were wet, some of the spots blended
and ran into one another, and you can't really see them. You can see them nicely here. I think what I'm going to
do is I'm going to add a little more now that
it's mostly dry, these little spots
will sit on top. I'm just going to tap my brush, dip it in quite
wet and pigmented purple. Close to my page. And again. Beautiful. I'm happy
with this one. I hope you are too, and I'm
ready for my fourth web. See you in the next video.
6. Draw and paint frosty orb spider web : For our fourth and final web, I will be making a circle again, choose anywhere on your page. This time we're going to make
our strands nice and loose. Be it's difficult to
see with a white. I'm going to use my lead pencil again and then add some color. I'm going to make
my circle here, and then join some
loose strands. This also looks like
a wind blown one. And you can make them
going in any direction. Looks like a little bit
of a raggedy one this. Now you are going
to do Los webs. You can add a little curve or you can add a
straighter piece. This is a little
bit of a higgledy Pigley one compared
to the others. You just keep on
doing that until you get to the outside edges. Of, once you get to
the outside edges, you can stop just where
you want to stop. You can also make these a
little bit in some places. Right? I'm going to continue
mine with my white crayon. I'm going to just go over
my lines once again. If it doesn't go completely
over your lines? That's okay. I'm adding a couple
of extra strands coming off the main strands, just to add a little bit
of something interesting. This web, we're going to do a little bit differently
again as well. We're going to decorate it
a little bit differently by putting some dew drops on it. Have you ever seen a frozen web or a web with dew
or frost on it? D little icicles. As I said, this one is a
little bit Higgle piggledy. Maybe somebody
walked through it. I'm going to draw a
couple of extra lines. Again, little web lines. It doesn't have to be
exactly neat and tidy, and some can be looped, and some can just
be straight lines. I'm going to join that one
up there. And again here. Now I'm going to draw a
couple of dots on my web. You won't be able to see it now as I work with my white crayon, so I'll do it in
my pencil again. Every now again, I'm going to
just make a little circle. Big ones, smaller ones, just to create a dewy effect. If your crayon is wide
for the detailed work, you can use this type of crayon, or you can add it in with a white pen after you've done your web and after
your painting is dry. I'm going to just
do it with this. Wide crayon. Going to add random little dew
drops everywhere. You can make them big,
you can make them small, you can make them on the
main on the main strands, or on the secondary strands. These ones that link
the main strands. Because I can't see this, it's hard for me to tell how big these dots are these
dew drops are. So I might actually
add a few in with my white pen right at the
end once my painting is dry. But I think this
will look beautiful. So what are the four webs have you enjoyed making
or enjoyed watching? And which web will you try
for your class project? There you go. I'm now
going to add some color. Hm. I think I'm going to add some darker greens and darker blues this time
to create a frosty, frosty, colorful,
cold, frosty day. So maybe some olive greens
and some dark dark blues. See that? Wow. You could even just do one color
if you wanted to. I'm going to put
a lot of pigment on here to make
it nice and dark. Look at that. This is lovely. This is a paints grade,
one of my favorite colors. It creates a lovely snow effect. So I'm using a lot of pigment
to make it nice and dark. I might drop in some more
pigment in some areas. Just going to wet my page
a little bit more so that my paint will move around
the page a little bit more. You can wet your page
with your little spray or just with your brush. And once again, you
don't have to paint your whole page because and you can just drop your
color into it like that. Look, it looks all snowy here. Just drop some color in
and let it flow by itself. I'm going to add some
of my olive green now. I'm going to drop some
of this olive green into random places so
that it can spread. As we've said, you can
use any color you want. For some of your spider webs, you can even make them Micol
full of lots of colors. Can you see these little drops are standing out a little bit? It's looking so beautiful. T When the two colors, the paints gray and
the olive green mix, it creates another
beautiful shade of green. This could be a spider
web in the forest, in the snow, just with a little
bit of forest background. I'm putting a couple of
extra dark pieces in here. You can just motel it. You can even just
tap your brush like this to add extra interest
to your painting. Or you could just lightly tap it and touch it in like that. You're going to add a little bit of olive green here
in the middle. And a little bit more here. I think I'm going to leave
it to dry a little bit now. You can see the
double strands here. You can see it's a
little bit wonkier than the previous ones. When I'm finished,
I might come in with my white pen and add a couple more of these little
dew drops sitting on my web. So I'm going to
leave it to dry now, and I'll show you
when it's done. My fourth spider web is dry, and it is looking beautiful with these frosty
morning colors. I've decided, I'm going to
add some more dew drops. I've got two different pens. This is this step is optional. If you don't want to
add more, that's fine. I'm going to use I've
got a posca pen with a thin and my thicker pilot
pinto pen with a thicker nib. So I'm going to add a
couple of extra dew drops. Some of them are
obviously going to be smaller than the ones
that I did in wax, and I'm going to put them on
different places on my web. You can even add a couple of extra thinner
strands in between. S the pen fades as well. That also creates
lovely soft look. Just a soft, dainty
little spider web. And I'm also just
loosely putting them where I feel like
no specific place, no pressure of where to put it. If you hold your pen a
little bit further back, it will create a wonkier line
and a softer line as well. You know, there's a soft silk that they use to
make their webs. I just to add a bit of
something else to it. It doesn't matter if it fades away while you are drawing it. This is looking so good. I'm sure yours is
looking beautiful, and I'd love to see
what you create. Look at that. You can
even make a couple of lines coming this way,
like many strands. If they're thinner like this, just these thin gossamer
strands of web. You don't even see them all. Just a couple of thin strands. Not quite the main strands. All right. Some can be
bigger, some can be smaller. Once again, you don't
have to put these in. This is just optional. They don't have to even
be in a straight line. Just all along your web
anywhere you want it. It doesn't even have
to be on every strand. I'm doing it on these thin
gossamer ones as well. I'm going to make some
fatter ones here. So bigger blobs, so that you
can see them a bit better. It almost looks like
a fairy tale web. Once again, you can see I'm
holding my pen near the back, so that the dot is not
too hard and that there's no pressure of having it in the perfect place or having a perfect little
spot on my page. So bigger spots. You can even add these in with some white gouache if
you have white gah. This is starting to
look very realistic with all these drops. I think we need a
couple here at the top. I'm just adding in
an extra few lines. Remember this is your artwork, so you can do it
just like you want. If you feel like you need to
add a couple more webs in. If you feel like it's
looking a bit empty, go ahead and add your things. If you want to draw a spider, draw your spider in one of
my other videos after this, I'm going to show you
how to add a spider. So you just keep going until you are happy
with your final result. And I'm just going
to keep going. Look at that. Gorgeous. Now, in the next video, I'm going to show you
how you could make your painting a bit by
adding some spiders.
7. Draw a spider: Going to design my own spider. I'm going to make a nice
round body and a little head. And I'm going to
draw eight legs. Fall on the side and
fall on the side. Very creepy, indeed. And I'm going to draw a
little design on its back. Now, depending on
where you live, or if it's a make
believe spider, you can choose what design
you want in the back. I think I'm just going to draw a of big circles on
the spider's back. Maybe a few more in the
middle to make it a little bit more full. Right. And then if you want to, you can add to your spider. And you can add eyes Creepy, indeed, I'd love to see what kind of spiders
you come up with. I'm going to cut this one out. And then you can decide
if you want to stick your spider on your web or just place it
gently on your web. I'm going to leave a
little black outline just outside my white outline. Of course, you don't
have to use black paper. You can use any color and make your spiders multicolred,
if you like. Just be careful when
you cut out the legs. It's very dt. I can rip easily. So I'm not going to
cut out all the gaps. I'm going to just cut
out little spaces, not completely
around the outline. I love this guy's eyes. Looks like he's got funky
sunglasses on. All right. So when I go here, I'm just going to make
a tiny little cut because I don't want to
break these little legs. I want to be able to
see them on the web. So just looking very carefully. If you need an adult
to help you with this, now is the time to ask an adult, a parent, or a guardian
to help you cut this out. Look at that. I'm going
to do the site too. And then we have a spider. I'm going to fetch your web, and I'm going to put
my spider on it. Stick your spider on any one
of the webs you have made. You can stick it
in at any angle. If you want to, you can
even draw a little fly or a little other bug
that is stuck in the web, and your spider is walking towards it and he's going
to eat his lunch soon. You can stick your spider straight onto your
painting with glue, if you like, or if you
wanted to make it stand out, you can stick a thicker piece of card or a small plastic lid, or a foam piece, and then add it onto your painting to make it look
a little bit more three D. You can also use if you used tape or artist tape to tape your picture down
earlier on to make the frame. You could use that tape now and you could
just roll it up. I'm just quickly ripping
it so that I can fit it. This is a bit big. So you could roll it
up. Just measure it. That should be fine and stick
it underneath your spider. And then I'm going
to stick my spider here waiting for his prey. And that makes your spider look a little bit
more three D as well. And there you have it. A
spider happy in its web.
8. Class project and closing words: These are the four webs we made together in this class today. I hope you had lots of
fun doing this with me, and I would love
to see your webs. Please post your class project, either all four webs
or the web that you. If you only one, to put it into the class project section so
that I can see your work. If you enjoyed this lesson, please consider
leaving a review. You might also like
to try some of my other watercolor classes.
 Wendy-Lee Strydom, Teacher, Artist, Art teacher