Transcripts
1. Introduction to Watercolor Flow: Welcome to watercolor flow. We will be painting a step by step watercolor painting of a beautiful flowering
succulent together. And that's what makes this class perfect for beginners as well
as intermediate painters. We'll be bringing
this painting to life by applying what we've
learned in the lesson. In this class, we
will learn how to blend and layer watercolors. Mix our own custom
colors and painting simple botanical shapes to create a beautiful
overall painting. Hi, I'm Wendy Lee, an art teacher and teacher. I give online and in
person art classes. Welcome to Watercolor Flow. And I'm so glad
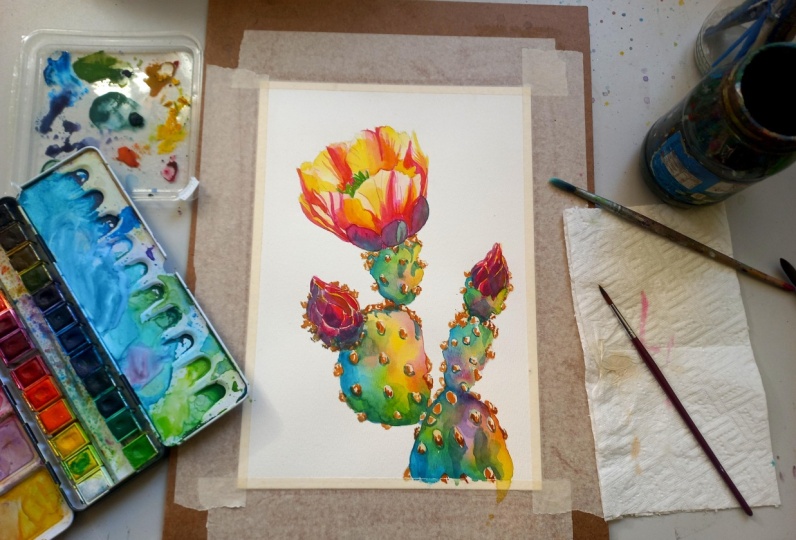
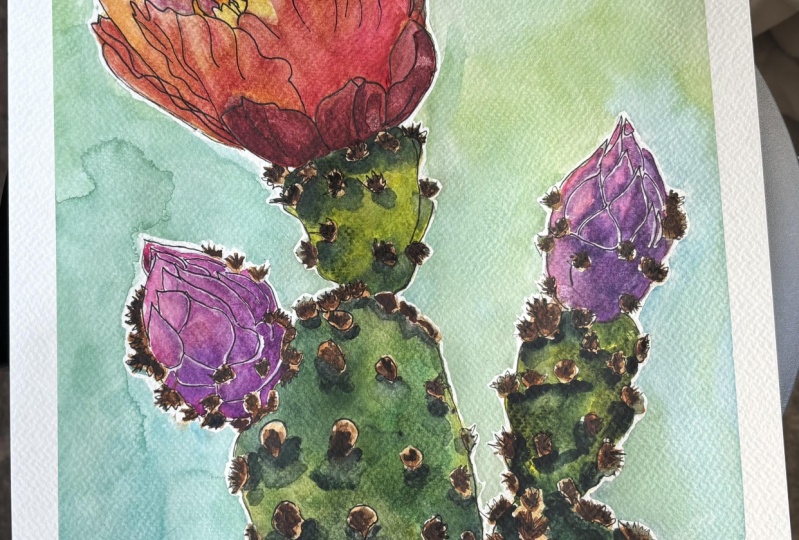
you're here today. This is my succulent garden. And this is the prickly pear that we will be
painting together. As you can see,
this prickly pear has got its fruits on it, but we will be
painting it in flower. Are you ready to have
some fun with me? Well, let's get ready for the
next video where we'll be looking at what we need to paint this step by
step painting together.
2. Class project and Materials: For our class project, you'll create your own
watercolor painting of a flowering succulent using the techniques we explore
together in the lessons. You can trace my template, choose your own picture, or draw and paint a
succulent from life. Don't worry if you're
new to watercolor. This project is
all about enjoying the process and letting
your creativity grow. Watch the class, follow
along and upload a photo of your finished
work to the project gallery. For this watercolor project, I've used watercolor paper. It doesn't matter if you use cold press or hot press paper. I've used cold press paper. Then I've used two
different size brushes. You can see I've got three
different size this year. You can use whatever
size suits you. These are I've used a size four, a size eight and a size 12. You can use whatever
brushes you prefer. Then I've got some
watercolor paint. You can use watercolor
paint that comes from a tube or a paint pan. Masking tape, also known
as artist's tape to help tape your page to your tabletop or to a board
to prevent it from buckling. A jar of water, and I've also got a little bottle of water spray to keep
my paint pans wet. This is optional, of course. I just find that this helps
me a lot when I'm painting. I've also got some white quash, which I sometimes use to add
highlights to my artwork, but that is also optional. Right. Are you ready? Go gather your things so that we can start painting together, and I'll see you
in the next video.
3. Painting Succulent Leaves: So to begin, I've already
taped my watercolor paper to a board and drawn my succulent so that
I can start painting. I've pre wet this
big succulent leaf so that my paint
will flow easily. You can use any
colors on this leaf. It doesn't only
have to be green. I've used a few of
my favorite colors to brighten it up and give
it that whimsical look. As you can see, my
paint consistency is not too watery as I want
my colors to stay bright. Because I pre wet this leaf, the colors are flowing and
blending into one another, creating a bit of an unpredictable yet
beautiful mix of colors. By randomly dotting
some new color into areas that I've
already painted, new shades of my original
colors are formed. Later, when I paint my flowers, I'll be adding a little bit
of red into their petals. So adding this little
touch of red into this leaf will give the painting an overall balanced feeling. If you have chosen
different colors to me, remember to later add splashes of them into your
flower petals as well. Working on the second leaf, I'm still keeping
my colors crisp and taking care to move my paint around these
little thorny bits. As you can see, I
forgot to pre wet this leaf so the colors
aren't flowing as easily. If you prefer a more controlled
and a less natural flow, you can use this method instead. As you can see, some
of these colours are flowing into that
first leaf that makes it look more natural and a little bit more
whimsical, and that's okay. That just adds to the
authenticity of this piece. In this third leaf, it's
important to repeat the colors you used in the
first two leaves. Believe me. I was so tempted
to change colors at this point because
I love experimenting. But if I did that, it would look like a totally
separate plant. I've given this class in person, and many people have changed
colors at this point. So be careful not to
make the same mistake. I found painting
this piece more than once a totally lovely experience because I've used different
colors for each one. So you could try that
too, if you would like. Here I'm using a
bit of red again. And as you can see,
it's blending and making a totally new
color, and that's okay. That's what makes it unique. So just go with the flow. Just remember, if you
want your colors to stay crisp and not turn
into a muddy puddle, you need to clean
your paintbrush each time you change colors. You've probably wondered why I've used no brown
in these leaves. Well, that's because
I'll be painting the thorns in browns later. If you're painting along
without having pre watched this lesson and you've
used brown, that's okay. You can make your thorns
a dark, purple or blue. After all, this is all about
experimenting, letting go, and watching the colors flow, and, of course, having fun. I'm just going to finish
off this little piece, and then I'll see you
in the next video. Come join me as I paint the succulent flowers
in the next video.
4. Painting the Main Flower: For the main flour, we'll paint a base of yellow or a mixture of yellow and
a slight mustard color. Make it very watery
so that we can build this as the bottom
layer and build it layer by layer as it dries
to make it more vibrant. Did you know, prickly pear flowers actually come
in a variety of colors. So you can paint yours
in any shades of pink, red, yellow, orange,
or even purple. I've chosen yellow for mine, as the one in my
garden is this color. While it's still
wet, I'm dropping in bits of the same red that
I used in the leaves. Wow. Look how beautifully it spreads and flows
with the water. Painting wet and
wet like this is a lovely technique to use
when painting flowers, as it captures that soft
delicate feeling of the petals. I'm quickly going to paint
that same base yellow on my smaller buds so that
we can work on them later by using a wet
on dry technique. For now, I'll drop some of
the red on random places on these buds and add an olive
green just under the bud. Did you know that prickly pear fruits are
actually very healthy. They are high in antioxidants
and various vitamins. And many people eat
them as a dessert. Actually, my husband permeating he prefers eating
them with ice cream. I'm going to use
my smaller brush to help me add the details. I'm going to paint these
thorns a light brown color, remembering to keep my
paint quite watery. Later on, I'll add a little
bit of a darker brown just to create a bit of a shadow and a three D
effect on each thorn. On some places in this video, I'll be fast forwarding a bit, as I'm sure you don't
want to watch me paint each individual thorn. Now, back to my main flower. My bottom layer has dried, and now I can go in and do a layer of detailed work in red. As you can see, I'm just softly adding some color around
my pencil outlines. You can use these
lines to guide you, but feel free to leave soft patches of red
wherever you want. I'm just painting
a few soft veins in the petals and making the back petals a little
bit more red for contrast. As you do this layer, your red can be a little bit darker, or shall we say, a little less watery than the previous
red that you used. See how I'm doing
these back petals. It creates a little
bit more depth if I do the red petals at the back. If the lines look too
harsh for your liking, soften them with a bit
of water to blend them, so you're just dipping
your brush into the clean water and touching
it lightly to soften them. We'll be painting the flower
buds in the next video.
5. Painting the Flower Buds: To paint the flower buds, I've mixed a touch of blue into my original red to
create a maroon color. As you can see, I'm not
painting to the lines, but rather leaving a tiny
gap on either side of my pencil line so that my original lighter
color shines through. In this way, the
petals look loose and separate instead of just having one big blob of
color on my page. I'm also using my
smaller paintbrush, as the spaces are quite
delicate to paint. I'm touching my page very softly so that big
drops of paint and water don't accidentally drip and possibly smudge my lines. I'm now adding the
same color but with less water to make these
petals a little bit darker. When you are happy with the
shade of your flower bud, you can drip a darker color like purple or blue into
your still wet petals. This will create a bit
of depth in the flower. As you can see, I'm dripping it close to the bottom
of each petal, which allows the colour
to flow by itself. I'm just going to paint the
bottom part of this flower. You can paint it as part of the succulent or as
part of the flower bud. Now, for the succulents thorns, I'm using a dark brown for my thorns and dabbing
it on parts of the thorn so that when I stand back at the end and look
at my completed painting, the thorns will look
more realistic. I'm going to do the
whole succulent thorns now all in one go. While that dries a bit, I'll work on the
next flower bud. So you might be wondering why my main flower hasn't
been painted yet. I'll let you in on
a little secret. This is the second time that I'm painting
these flower buds. I was so excited to
paint them that I forgot to press
record on my camera. I can't believe that I did that. I guess that's life sometimes. At least it's a good thing to be excited and enthusiastic
about one's painting. It always relaxes me, and that's why I get so excited. I'm taking some of that maroon and watering it
down a little bit, and then I use it under each thorn to create
a small shadow. Once again, I'm dabbing
in I'll be dabbing in some darker brown into my thorns and some more purple
into my buds petals. And look at that. It's
starting to look a little bit more realistic
now. I love it. I love seeing how it all
comes together at the end. Follow the same
pattern as you did on the first bud to
complete the rest of your thorns and the
second bud, as well. I'll see you in the next video.
6. Final Thoughts: You so much for
joining me today. I hope you feel
more confident in blending colors and
working with watercolors. I would really like to
see your class project, your completed class project. Please share it by submitting it to the
My project section. And if you have Instagram, find me an Instagram and tag me on your
completed project. I'd love to feature
it in my stories. If you enjoy this class, please leave a review and try some of my other
Skillshare classes. Well, that's all
from me for today. I hope to see you soon. Bye.
 Wendy-Lee Strydom, Teacher, Artist, Art teacher