Transcripts
1. Introduction: Hi, I'm Wendy Lee. I live in a small town in
the Kuru, South Africa. I'm a mom teacher, and
creative encourager. I teach art lessons to
children on a weekly basis. I also run holiday art
workshops and teach art lessons like
acrylic painting, watercolor, and drawing
to adults and beginners. Welcome to beginners,
Watercolor and ink. Sunrise on ocean waves. In this class, we'll
be learning how to use warm and cool colors and how they affect our mood,
as well as the moon. In our painting, we'll be
using decorative drawing to create a beautiful
calming effect as well as salt to
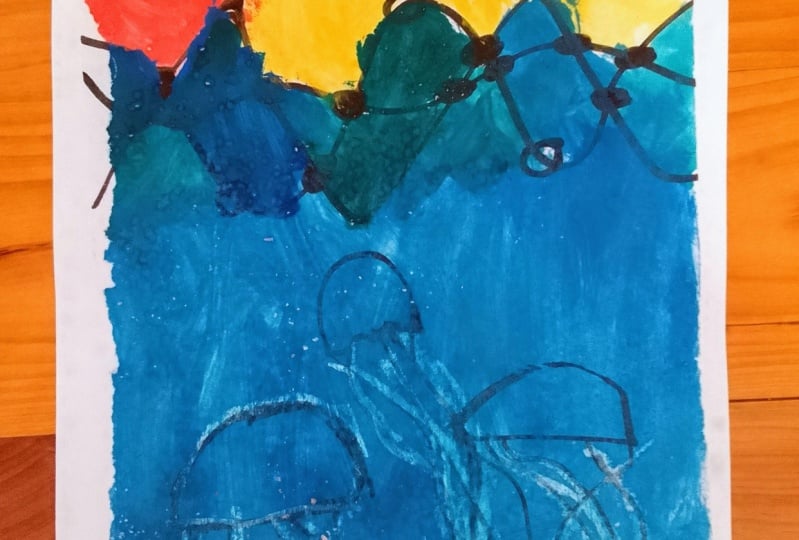
create texture. For our class project, we'll be working on this
painting together. This makes it accessible
to beginners, to children, and to anyone that
is just wanting to do some painting to
relax after a crazy day. Come on, what are
you waiting for? Come and join me and
let's get painting.
2. Lesson 1 Materials: For this class, we will
need watercolor paper. I've used hot press, four size acid free 300
GSM watercolor paper, but you can use any watercolor
paper or thick card. We also need water colors. For this class, I've
used watercolor pans. But if you do not
have access to pans, watercolor tubes work very well. You need an eraser, a pencil, and a marker. This marker that I've used is a medium sized black marker. It has to be a permanent
marker so that the ink doesn't run
when you paint over it. You need a ruler. You can either use oil
pastels or wax crayons. Either one of these are fine. It depends on your choice. For this one, you also need as a jar of
water, clean water. Two brushes, a large size brush that can spread water
across the page nicely. It doesn't matter
what size it is, As long as it is big enough to spread water and to spread
color over large areas. Then a medium size brush, this one that I'm
using is a size five. You need masking tape
or artist tape to tape your page to your table or to tape it to a board to
prevent it from buckling. You need salt to create texture. I've just used
common table salt, but you could use Himalayan
salt if you would like to. Then I just a circle a lid
of a coffee container, but you can use a lid of
anything. This is optional. You could also just draw a
free hand or you could use a compass to create the
round shape of the sun. Right. Let's get painting.
3. Lesson 2 Drawing the waves and sun: I've stuck my page
down with masking tape or artist tape to prevent the paper from
buckling once it is wet, it also creates a
beautiful little frame for when your
painting is finished. To start off, we're
going to take about the third of the page. From the third of the page, we're going to draw
a couple of lines. We're going to draw
straight into our marker. And we're just going to
draw some wavy lines. And we're going to draw a
few more back, two or three, and they can overlap, right? Wherever these lines
cross or intersect, we will be rounding
those corners. And this is called
neurographic inspired art. This is just to also create, help us create a soft,
harmonious line. This is quite a
relaxing drawing. We're just going to
fill all of these in. Just make these lines a
little bit more rounded. These will be the
waves in our painting. As you can see, I'm rounding all these corners and this looks like the foam
of the ocean waves. It's okay. Some of your lines
are thicker or thinner. That also creates part of the texture I'm going
around this side. If you want to, you
can draw a couple of circles just to create some
extra bubbles for effect. For instance, of here where it was looking a little bit empty. Of course this is completely optional to add these
extra little circles. Once again, where the line intersects you are
going to round those little corners on the outside as well as on the inside of the little bubble, so there will be no
sharp pointed corners. Everything will just be rounded. Right. Now we're going
to draw the sun. You can decide where
you want the sun. Do you want it on the side in the middle or on the
right hand side? For this, I'm going to take just a simple coffee lid and I'm going to
trace the coffee lid, make sure that part of your sun is behind your waves
because your sun is rising. I've decided I'm going to
make it a little bit low, it's still early in the morning. I'm going to draw
it with my pencil, just so that I have
a perfect line. If you would like to
use a protractor, you can use a protractor or you could draw it
free hand as well. Then I'm going to take my ruler and I'm going to
draw the sun's rays. I'm going to start at
the edge of the sun and move across to the
edges of my page. You can make them straight. Let's have a look here and just start at your son. Each time, draw them going from your son towards the
edges of your page. You can draw as many of
these lines as you want to. There we go. Now I'm going to do
these with my marker. Just go over them with my marker so that you can
see them clearly. Of course, you can
use your coffee again to trace it if
you want it perfect. But it doesn't have
to be perfect. If you want the sun ray
lines to be squiggly, you can do that freehand too. I'm just going to once
again use my ruler here and go over my lines, son, neat. And then we have our sun's rays. And we are ready to
paint with water color.
4. Lesson 3 Painting the waves and sun: I'm ready to paint,
so I'm going to be spraying my watercolors. To just give them a
chance to activate, I've got a little bit
of leftover paint that I've previously
used on my palette, so I'm going to
spray that as well. This is the wonderful
thing about watercolors. You can keep using the paint
even after it's dried. If you like a color that you've previously made and you
still have some of it left, it doesn't get wasted. Right? I'm going to
start with my son. I'm going to use
warm colors now. Our warm colors are our
yellows and our oranges, and our reds and our pinks. They help us create. They create a warm feeling. These are usually the colors
that make us feel good because they natural colors. You can decide what color
you want to make your sun. You can make it any
of the warm colors. It doesn't have to be yellow. It can be orange. It can be red. And we're just going to
give it a nice paint. Feel free to mix any of your warm colors to
create a new warm color. Feel free to explore with the mixing of colors because
this is your own painting and you can do it like you want to try out
your own creativity. Every single one
of these sections, I'm going to do a different
color just so that it creates an overall harmonious
effect in my painting. Water color always looks very bright when you
paint it at first, but it dries on your page. If you aren't happy
with the color, you don't have to mix
so much water with it. You can have a stronger pigment. Just realize if you
have made it too dark for your liking, it fades. This is the lovely thing
about watercolors. It's nice to have
a little play with them and mix as many
different shades as you want. As you can see, this red bled into the orange
a little bit. And that's fine. It just creates another
beautiful effect. I'm going to add a little
bit of think in here. You see it might
bleed into that red. That's okay. Because that's actually the
beauty of water colors. They're a little
bit unpredictable. That's what makes them such
a lovely medium to use. I'm going to put some of that red on this side. I try not to use the exact
same colors next to each other so that we create
a bigger contrast. Yet it's still
harmonious because the colors are all warm colors. I'm going to just move
my water out of the way. This is starting
to look beautiful. I'm starting to think of warm islands, warm
island holidays. Wouldn't that be great? There we go. Now I'm going to start
to my cool colors. Each of these little
bubbles will be a different, cool color. Once again, I'm going
to try and not put the same color next
to each other. If your palette is
starting to dry, you can just spray it
again to activate it. All right, I'm going
to start to this color that I've previously
made. I quite enjoy it. You can repeat the colors in different areas but not
next to each other. This just creates a more
harmonious picture as well. These different blues and
greens are beautiful. Cool colors create
a peaceful feeling the darker you go
with the blues, as we'll see later on when we do the bottom here where
the deep water is, the darker you go, it
creates a feeling of depth. Also the feeling of
getting colder and cooler. You can see I've
mixed a little bit, I've mixed a little bit
of this purple into my blue just to create
a deeper blue color. Of course, you can
add some greens in here to those will
look beautiful because our ocean is full
of various colors, greens and grays
and aqua colors. Feel free to mix up any of those colors
that you would like. I'm going to add a little
bit more blue to this one. Once again, if you see any of your colors bleeding into
each other, that's fine. Because that's the
wonder of water colors. Green, these greens, it looks like the sun
shining on the water. You know, when it
sparkles like that. I hope I'm putting
you in a holiday mood here because I definitely
just talking about this, I'm feeling like I'm on a tropical island,
having a holiday. Watching the sun
rise over the ocean and working with blues. It's lovely and peaceful. These colors, actually,
it calms you down. If you've had a crazy day, I don't think we often realize the effect that colors
have on us during our day. And doing water colors and
using bright colors just help us to calm down
peaceful painting, these waves as well. There's no pressure in
making perfect art. This is your painting. So you can do it just like you want it. If you want the
colors to bleed into one another, that's fine. Right. I'm going to
leave it there for now. Next we will start
on the bottom.
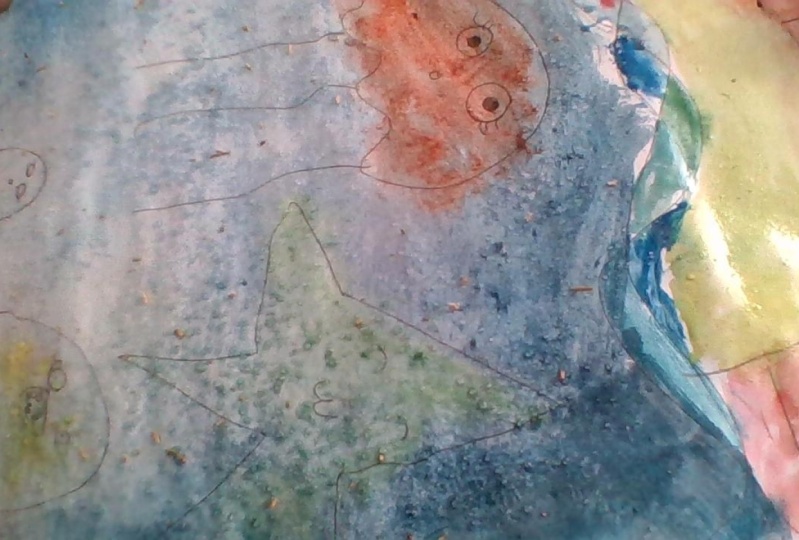
5. Lesson 4 Drawing the jellyfish: Right, we are ready for
our ocean creatures. Now you can decide
if you want to draw jellyfish or if you want to draw an octopus or any sea life. That's up to you. I've chosen
to draw some jellyfish, I'm going to make a big
one, it's just an oval. Then I'm going to just round the bottom and I'm going to
draw some long tentacles. Some of them can
overlap quick and easy. I'm just using my mark for this. In art, we always
use odd numbers. I'm going to be doing
two more jellyfish, also three different sizes. This just makes it a little
bit more pleasing to the eye. I'm going to make
a medium one here. Once again, you can have some of the tentacles
overlapping. And then I'm going to draw a
little mini one over here. Right? I'm going to use my crayon to
add a couple of highlights. You can add your highlights wherever you want to
on your jellyfish. You might not see it immediately
if you are using white, but you're welcome
to use any color. So I'm just going to go around the edges of my black outline, press nice and hard. And I'm going to
do it here where my tentacles are as well. You don't have to do it on every tentacle if you don't want to. It just creates a nice effect.
6. Lesson 5 Painting the ocean and adding special effects: We're going to, we're going to use a medium to
large brush, any size. The reason we use a
bigger brush is because it spreads the paint better, especially for larger areas. And we're going to mix
up quite a bit of blue, try and make it nice and dark. My little paint palette
hasn't got a paints gray. I bought a separate one. These tubes work
beautifully as well. So I'm going to mix some of
my blues together to create a lovely effect and add some of the pains to create
a dark effect. Then what we're going
to do is we're just going to spread it over
this whole bottom. Then you'll see the beautiful, beautiful whites or whatever
color you chose to use. Because it's wax or pastel, it will resist the paint. This is deep under the waves. Look how that resists.
Isn't that beautiful? Once again, to create some
different colors here, you can mix some of
your darker blues together and add them
in on random places. Look how beautiful that is. Your water doesn't look
the same everywhere. It makes a little bit of
greeny blue in here too. See how this paint
resists over the wax. We've created a
beautiful effect here. Now this is my favorite
part that's coming up while your painting
is still wet, we're going to put
a touch of salt on. Just going to add a bit
more color at the bottom. Add a bit more color
here at the top. All right, now I'm going
to use some table salt. You might have a
different type of table salt in your country or you might want to
use Himalayan salt. That's also fine. Common
table salt is also fine. So what I'm going to do is I'm, I'm just going to spread
some of this color. Yeah. Quickly. I'm just going to spread
a little bit of the salt. And this is going to create
an underwater bubbly effect. As you can see already,
where the salt lands, it absorbs the water color. It will leave all
beautiful texture and marks on our page. Once it's dried, I'm going to leave it like this
for a little while to dry. Later on, when my salt is dry, I'm going to just slightly
scratch it off with my fingernail or
with a soft cloth. I've rubbed off the salt. And just a quick
tip, if you want to remove this tape nicely
without ripping your paper, it's a good idea to
take a heating tool or a hair dryer and to just blow
the heat over the edges. And then hold your page and
take your tape and pull it away from your painting that prevents it from
ripping your picture. Your painting, I'm going to
look how beautiful that is.
7. Lesson 6 Key learnings and Class project: Thank you for joining
me in this class. I hope you've had as
much fun as I have. I hope you feel
more confident in using colors to create
mood in your paintings, as well as using
textures like salt and decorative drawing to create beautiful textures
in your paintings. I'd love to see your final
project, your class project. Please share it with me in the class project section so that I can
celebrate it with you. I'd love to hear what you
thought of this lesson. Please leave me a review
in the review section. And don't forget to follow me on Skill Shape by clicking
the Follow button at the top. You can also follow me on
Instagram at Wednes Strad on Have a great day and
see you in the next class.
 Wendy-Lee Strydom, Teacher, Artist, Art teacher