Transcripts
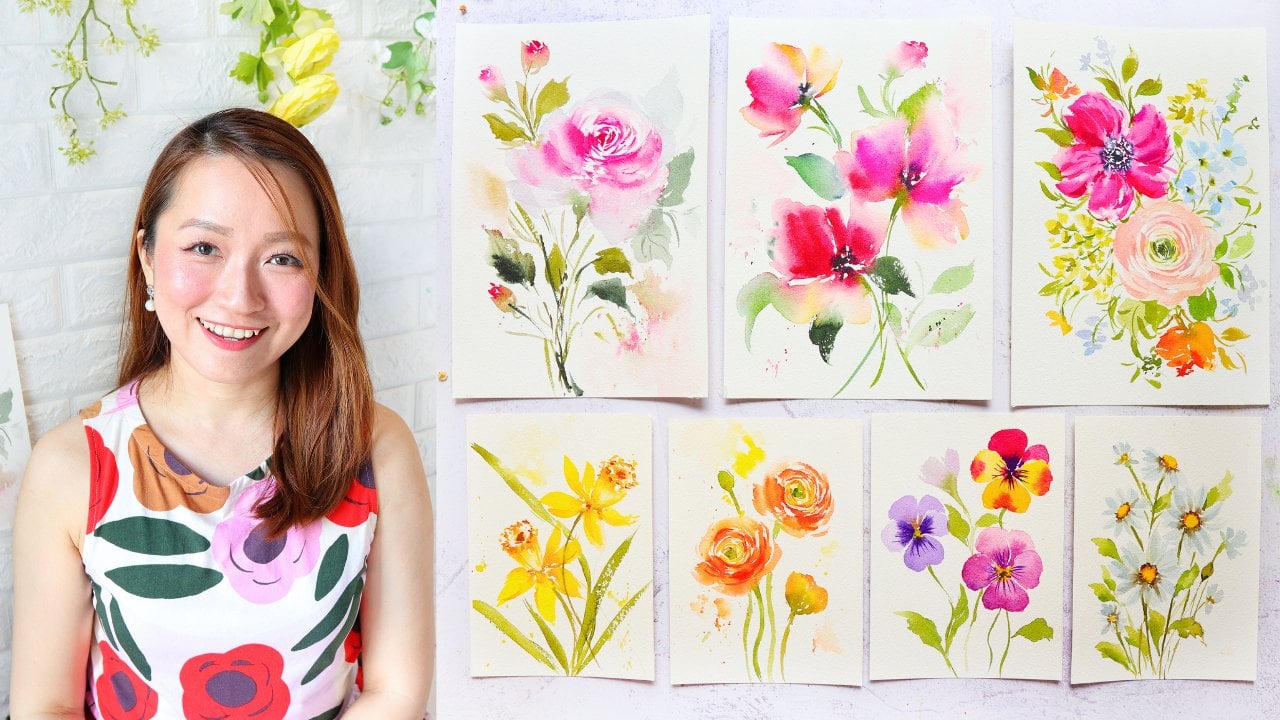
1. About the Class: C. Let's turn 15 minutes into a handmade card that you will surely
be proud to give. Hi, your name is Shale and
I'm a watercolor artist, a Skillshare top teacher, and the author of the book called 15 Minute
watercolor florals. I've been painting for
about a decade now, and my work focuses on loose expressive
watercolor florals. My goal is to break down
techniques into simple step by step processes so anyone
can create beautiful art. In this class, I'll guide
you through painting loose beginner friendly florals and turn them into
heartfelt cards. This class is designed to
be simple and relaxing, so even if you're
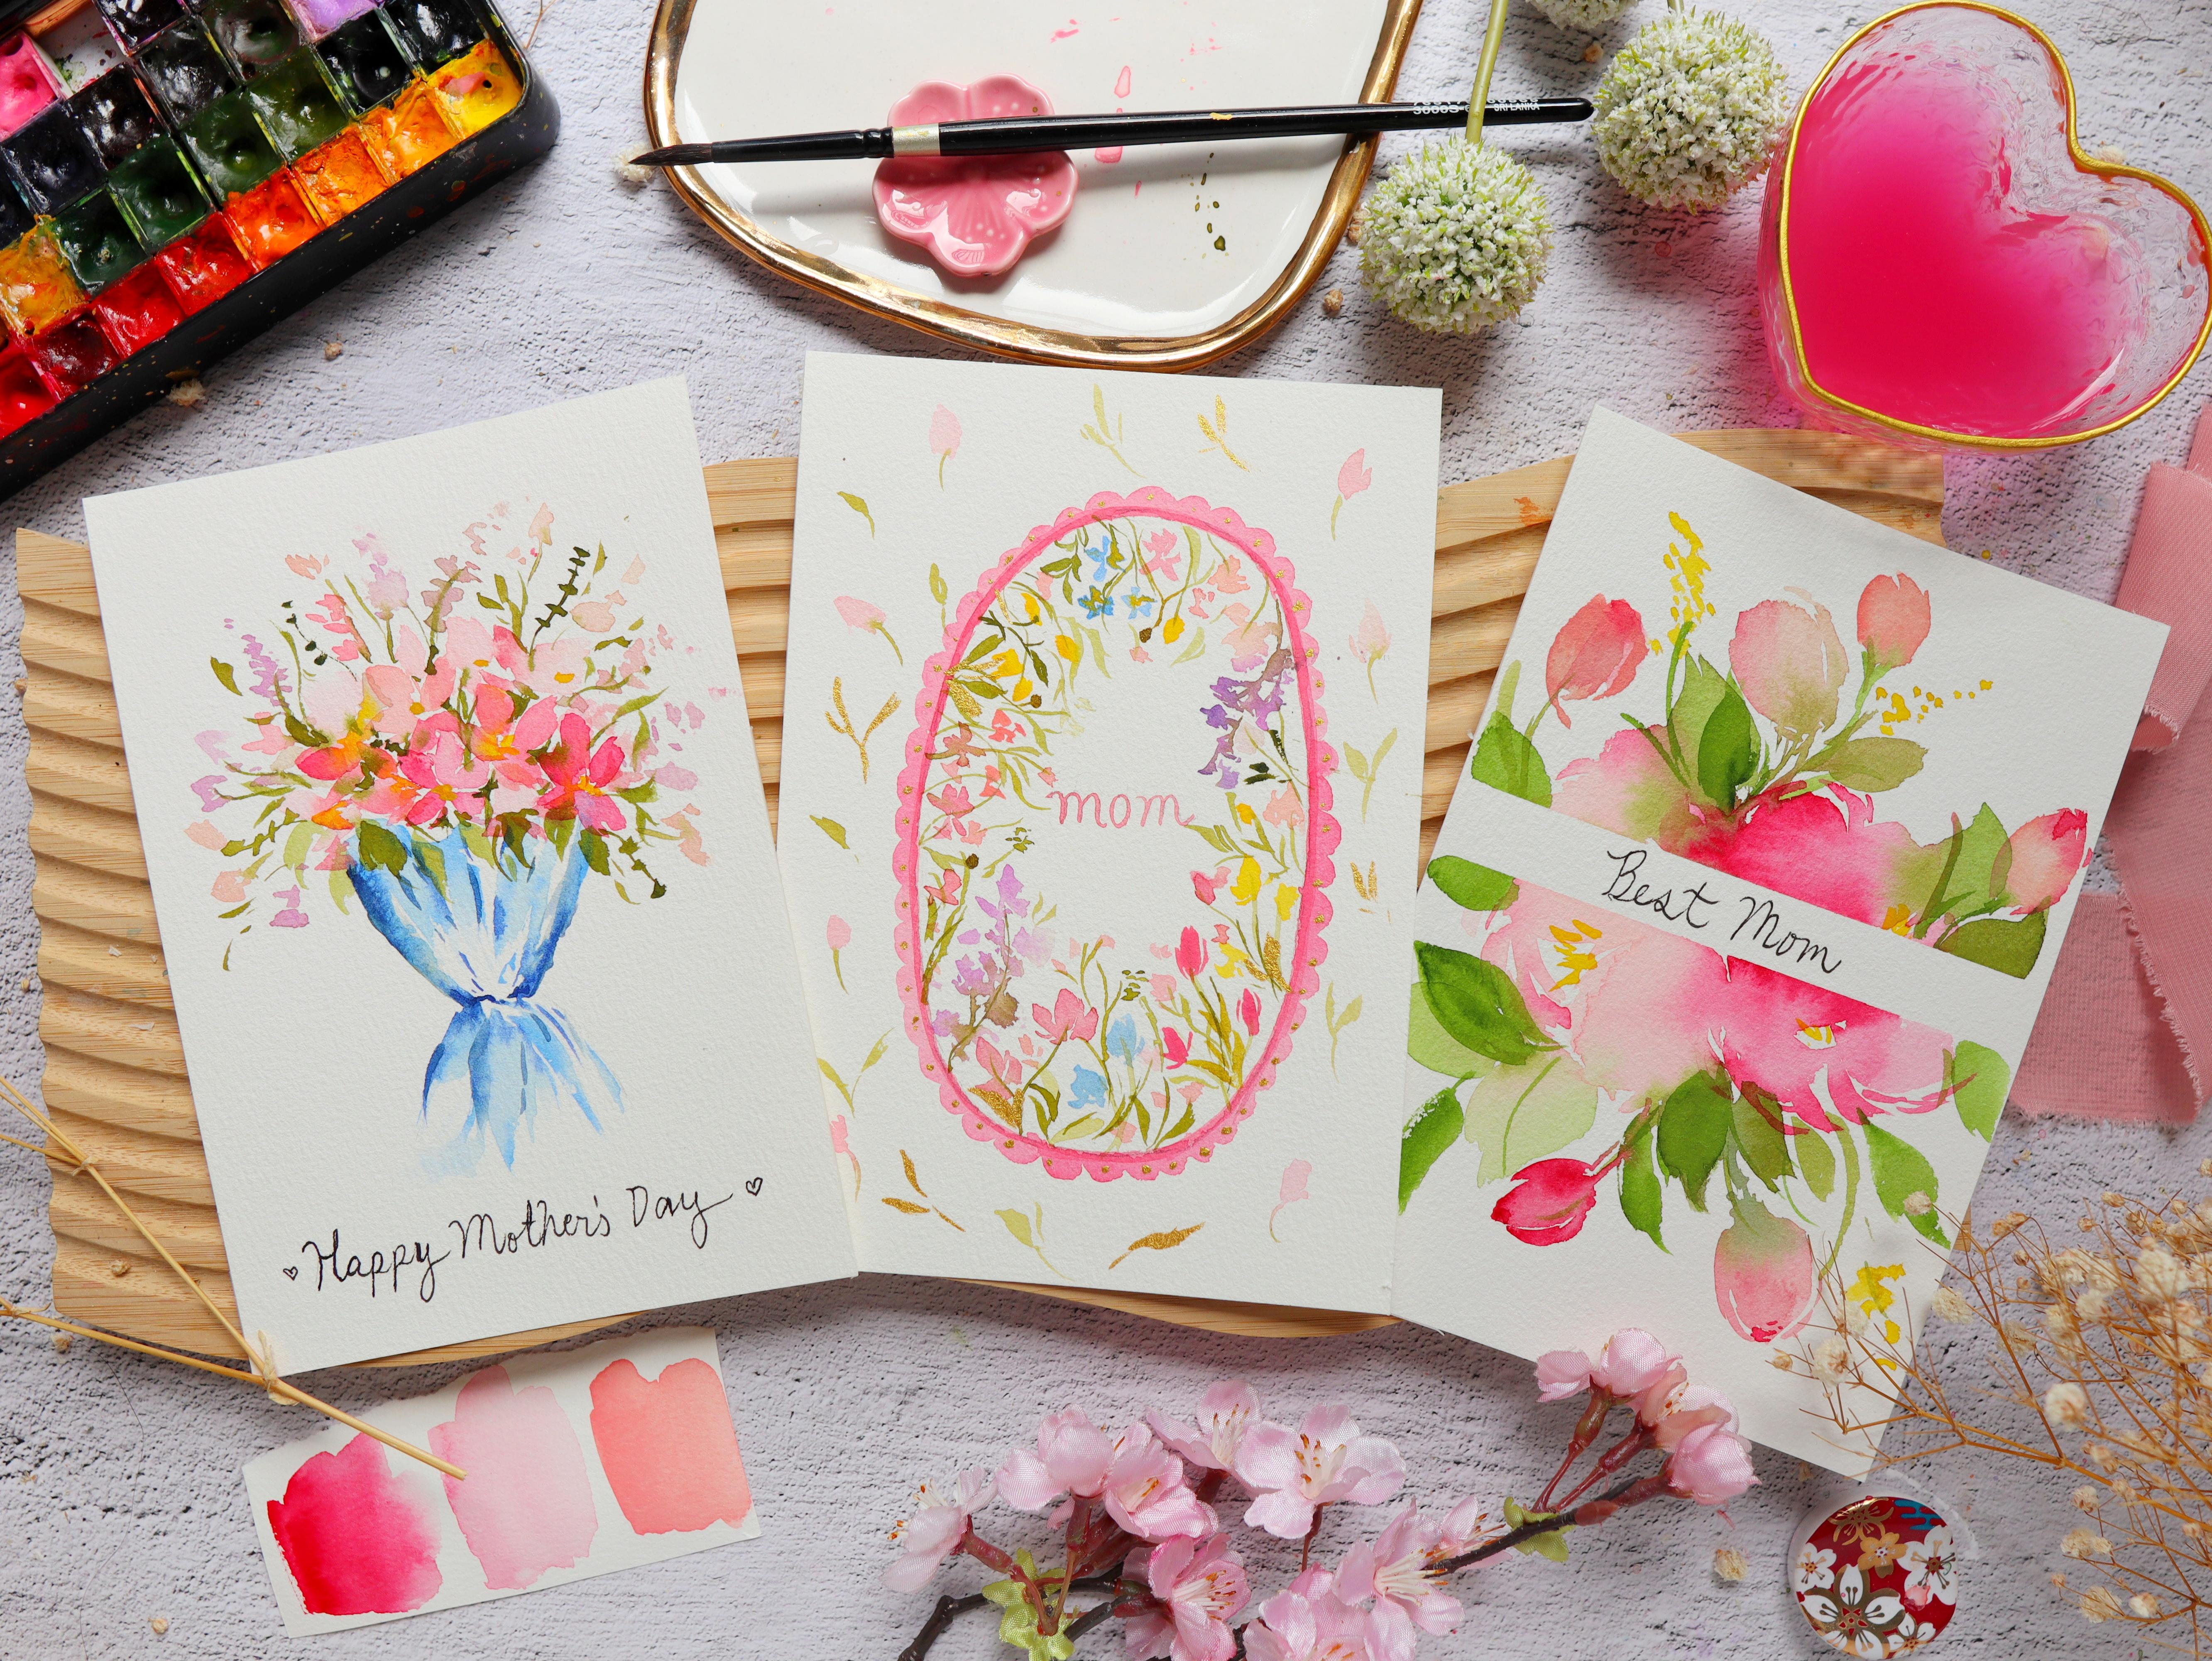
new to watercolor, you can easily follow along. So we'll create three
projects together, a pony floral frame, a sweet, mini bouquet, and a
delicate wildflower frame. These are designs that you can easily recreate and personalize. Along the way, you'll
practice techniques like using tape to
create clean spaces, painting loose floral shapes and combining elements into
a beautiful composition. While these projects are
perfect for Mother's Day, you can also use
them for birthdays, thank you cards, and even
for other special occasions. If you're ready to enjoy painting and create
from the heart, I would love to have you in
my class. Let's get started.
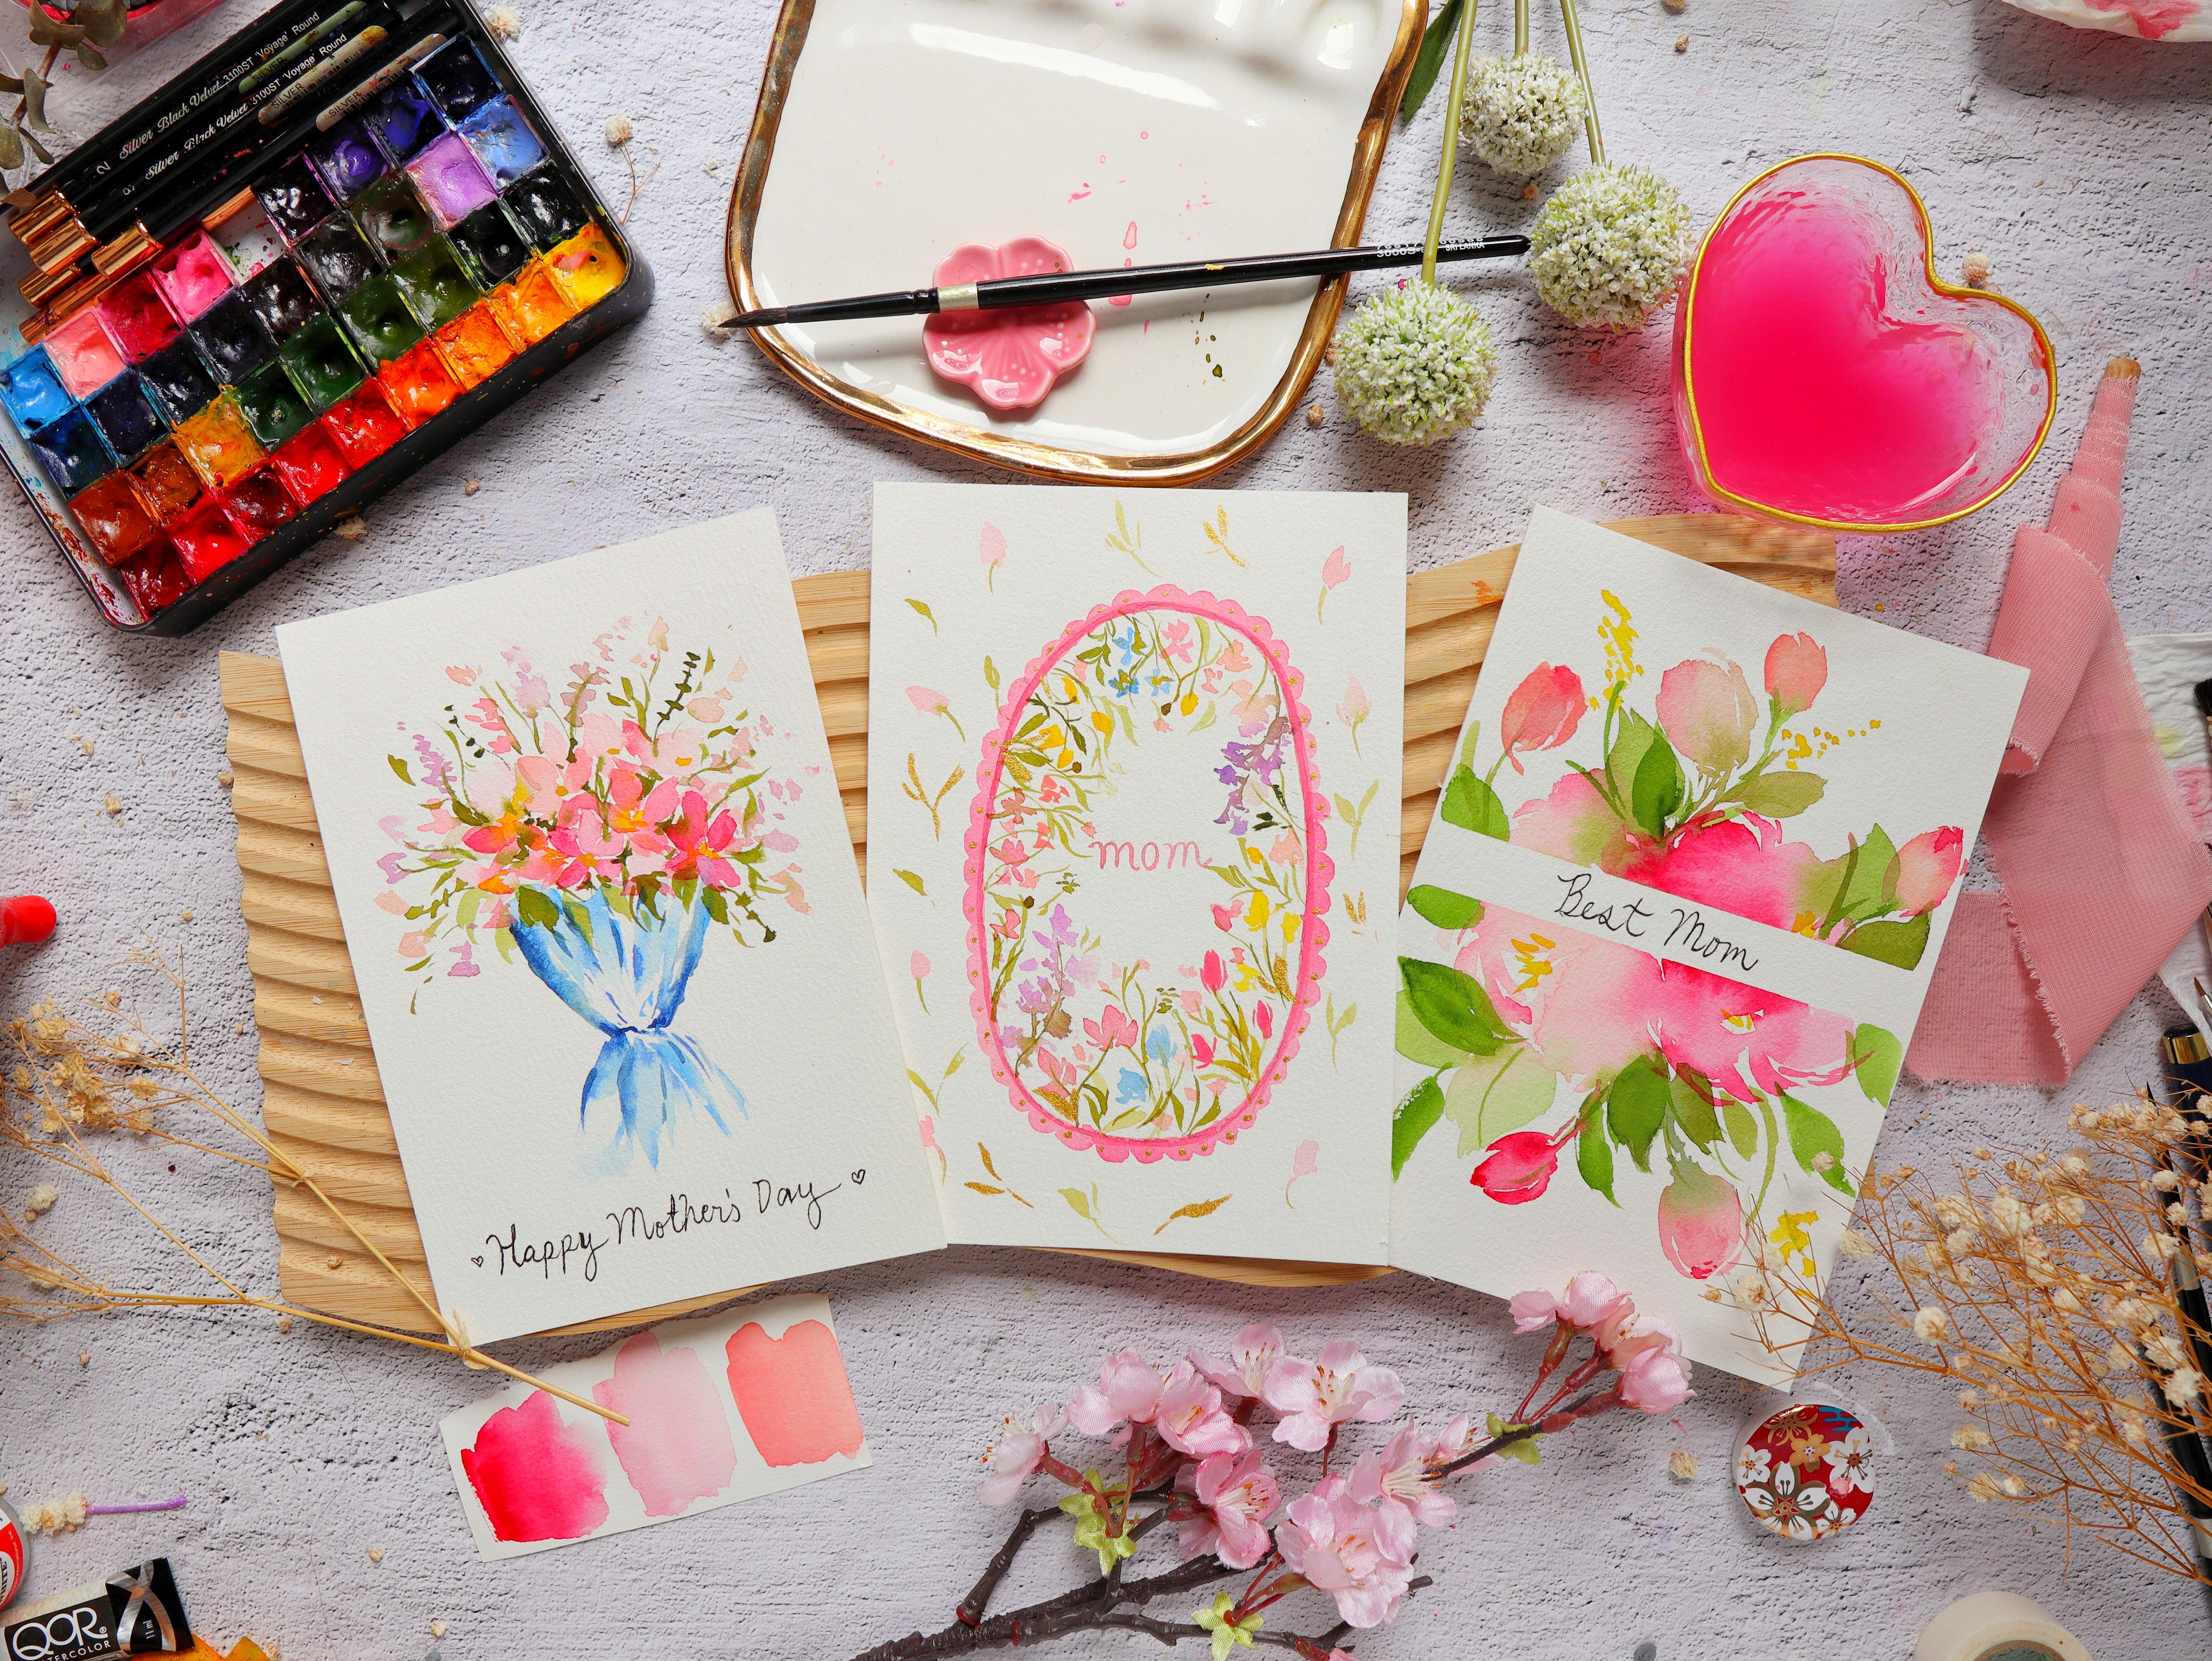
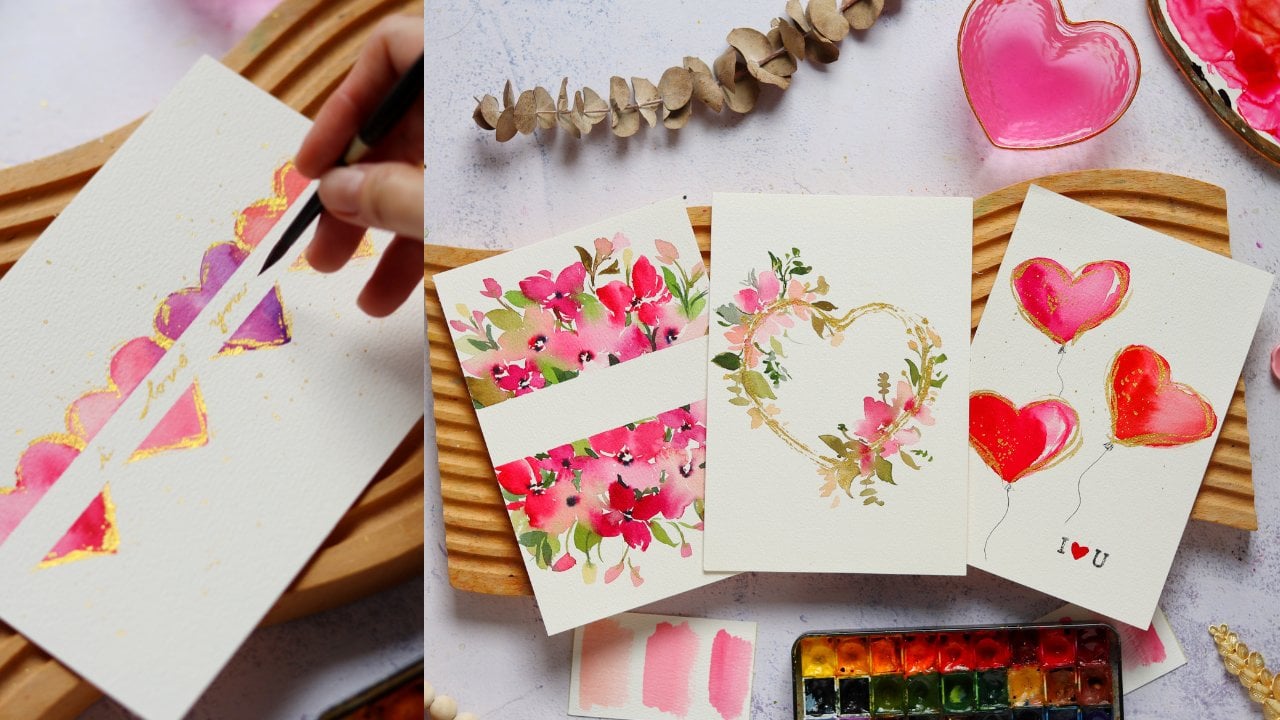
2. Class Overview: Welcome to the class overview. Let me show you all the projects that we
will be painting. The first one is a
pony floral frame and we have this
white space here. We were able to create
that using a tape. So I'm going to show
you that later on, and we're going to paint
some loose, fluffy peonies. Next, we are going to paint this beautiful and
simple bouquet. I really love the
handle of this bouquet because we left some white
spaces for the negative space. And then we painted some simple five petal flowers
with some fillers. And again, you can
write a message below. So next is this beautiful
delicate wildflower frame. So you can actually change
the shape of the frame. I made it oval because
it looks very cute, but you can make it hard shape or square or even a round shape, and also added a little bit of cold for that sparkly effect. So I chose projects that you
can do in under 15 minutes. So I want this to be very doable and very approachable
for beginners. So all you need
is a round brush, and you can start painting simple florals and turn
it into a beautiful card. All right, now, let's
move on to the next video as I talk about the
materials that you need.
3. Materials: Let's talk about the material. So for the paper, I'm going
to use this Bau home Academy. It's five by 7 ", and it's called press paper, perfect for loose
watercolor painting. And this one comes
in a block form. You can see all the sides
are glued except for one part where we can slide off the sheet of paper
when we are done. So I really love the
texture of this paper, and it's also very affordable, but you can definitely
use other papers as well. So for the paints, I am
using the brand Shinhan PWC. This is a Korean
artist grade paint. They come in tubes, but I just pour them into little
half pans like this. And this metal tin is actually from another brand
called core watercolor. I just took out the items inside and replace
it with Shinhan. So we also need this
mixing palette, but you can also use a regular plate or
other plastic palettes. For the brushes, I'm going to use the silver
brush black velvet, and the sizes are
two, four, and eight. So when you're painting,
you want a brush that can hold a lot of water
and still keep its point. So this is what I love
about this brush. But again, you can use other brands as long as it's
comfortable for you to use. We also need a
glass of water and also some tissue
paper to blot out the excess water in our brushes. Now, this one is optional. So if you are going to use
some gold paint in your cards, I highly recommend this
Kura take gold mica. It's in a liquid form. So you just shake this
bottle and you can use the gold paint right
away. It's actually ink. So once you paint it on paper, it stays there, even if you
paint on top of the strokes. So for the tape, we're going to use
this washi tape. And going to use it
for the first project. So we have a nice clean edge. You can definitely use other printed Whitapes
that you can find in, like, dollar stores or
other stationary stores. Alright, so that's it for
our materials. Very simple. We just want this to be a
quick watercolor cards glass. So now I think you're ready. Let's now move on to the
first project of this class.
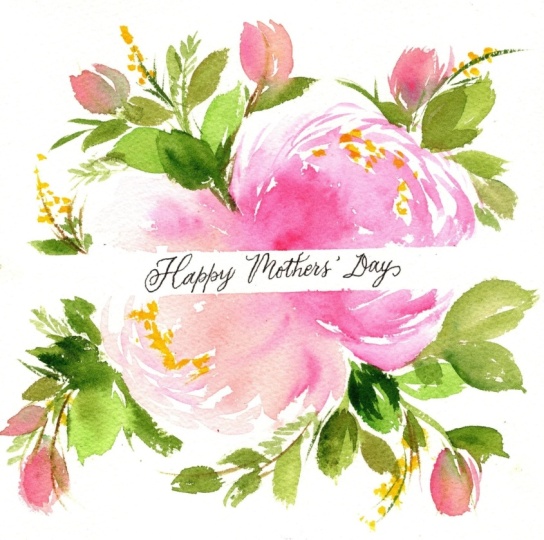
4. Peony Floral Frame: I before we start here, the colors that we
are going to use. So for our first project, we're going to paint
this beautiful card with some soft peonies and also a frame or a space in the middle where
you can write a message. Before we start
painting, let's do a quick recap so that you'll be more
familiar with the process. So I'm going to
start with putting the tape in the middle. This is washi tape, and
then we're going to paint two big fluffy peonies. So I chose a darker pink and also a blush pink
because they look good together when they
sit beside each other. So now we're going
to add some leaves, and we're going to add this while the flowers are still wet, so we do have to work
a little bit fast. And then we're going to
add some small buds, and we're not going to layer this painting that much because we want this to be a quick
painting for a card. And even with just one layer, this floral piece
looks very, very nice. So now when everything is dry, we just peel off the tape, and then we can write any
message in the middle. Alright, so let's
start painting. Okay, so for demo purposes, I am using a five by
seven inch paper, and then here I
have my washi tape. So you can definitely use
any printed washi tape. I just got this from Japan. It's a plain washi tape. And then I'm going to
put just one layer. But if you want more space for your writing in the middle, then you can add another layer
of tape to make it wider. Let's just prepare
a pink colored. I am using the color
permanent rose, but you can definitely use
other pinks in your palette. And the brush that I'm
using is size eight because we want to paint some
fluffy peonies right here. We want the petals
to be quite big. So I opted for a
bigger size brush. Just grab some juicy paint. We want to load our
brush with some paint, and I'm going to use the side of my brush to create
the first petal. So you want it to look
a little bit rounded. Just press your
brush up and down, and you can use the tip of the brush to create
some thin strokes. You can see I'm painting over
the tape, and that's okay. We're not going to
ruin that part. The tape is going to protect a portion of this painting
to keep it white. Okay, I'm just going
to rinse my brush and just add some
lighter pink petals. Just press the side of the
brush and move up and down. Now, let's use the tip of the brush to create some
thin curve strokes. So I'm just going to attach those thin curves
to the big petals. So it's going to give us
an illusion that there are many layers of petals
in this peony. So the general shape
of this peony is that the bottom part should
be like a cup shape. Next, let's use the
color called Slping. It's a nice pastel pink. So now I'm going
to just paint one petal beside this pink peony. And we want it to be
like an oval shape. And then if it's difficult
for you to paint in this way, you can just rotate your paper so that you get a better angle. So the tape actually helps break up the shape
in the middle. So you don't have to
overthink your strokes, even if they're
loose and imperfect, it will still look like a pony. So next, let's paint
another petal beside it. So it looks like a
letter V. Again, we want the petals to touch each other so that they will
bleed beautifully. So at the top, I'm painting some thin curvy strokes
just to close up the pony. Then you can just grab
some more permanent rose and add it right there
where the two flowers meet. And you'll notice
I'm working quickly because I want the two flowers to blend in with each other. So you can also grab
some permanent rose and add it at the top of that
blush colored peony. I think it looks very pretty. It looks to toned. Okay, so we're done with
the two main flowers, and while they are still wet, we're going to grab
some sap green and add it in
between the flowers. So you want the green and the pink petals to sort of
blend in with each other, so they look very soft. Let's continue
adding the leaves in different parts
of this painting. Now, if you want an
earthy green color, you can add some burnt umber or any brown in your
palette to your green. I'm just going to add
it right here where the petals and the leaves meet
just to add some contrast. Then you can add
more leaves that are smaller and also add some stems using the
tip of the brush. Usually like adding
these very long and thin stems because later on, I can put some buds, some fillers at the tip. Let's rinse our brush
and grab some pink. Just grab any pink
in your palette. I'm using this shell pink, and I added a little
bit of permanent rose. So let's paint some small buds, press your brush to create
this nice oval shape, and you can add some tiny
strokes on the sides. And towards the bottom part, you can add some green just to connect the bud and
the stem together. Okay, let's go to
the bottom part. We can grab some permanent rose and also add some buds here. So you can vary the
color of the buds. Some can be a darker pink, some can be a lighter pink. It's just best to use the colors that you use for
the main flowers. Alright. Here I'm just
getting some green and adding it towards the base of the bud. Right. So I decided to
grab a darker green. This is called shadow green, but you can see the green
is spreading too much. I'm going to grab my
clean brush and let it absorb the excess green and tap my brush in
the tissue paper. So we can try to clean this again and absorb
the excess green. Because if we leave it that way, it will look a
little bit patchy. Another tip is that when
you're adding small buds, you want it to face in, like, different directions,
or you want it to be a little bit curve just to add some movement
to your painting. So again, just
press and then lift your brush to
create a small bud. All right? Let me
just grab some green. And even if my pink and green color mixes on the
palette, that's fine. So looking at this from afar, we need some more contrast. So I'm grabbing a more
pigmented sap green, just adding some more leaves. So some of the first layer leaves that we painted
are already dry. So we can now start to layer
or paint on top of them. Okay, so I'm going to
grab some more shell pink and add some small buds. So you can vary the
size of the buds. Some can be smaller,
some are bigger, and you can add some contrast by adding a darker pink
towards the top, and you can see they're
blending in with each other because the base color
of the bud is still wet. Every time you're painting with a frame like this using a tape, make sure that you paint near the tape so that when
you peel it off, you get a nice clean edge and not a lot of white
space near the tape. So here I'm just
painting some thin, short strokes for the
stamen of this peony. I'm using permanent
yellow light. So you can also use this
color to add some fillers. You can tap your brush. Use the tip of the brush to
create these dotted strokes, and these are going to
look like tiny flowers. Okay, so I think
we're done painting. I kept this really
simple because we want it to be quick and easy. I think the trick to painting
these loose peonies is to paint as little strokes as possible so that you
don't overdo it. And again, the tape also helps with creating the
shape of this peony, so you don't need to
worry or overthink. So now I'm just
peeling off the tape, and we have a very
nice clean edge. So using a pencil, I'm
just going to write the message that I want
to put in the middle. I'm just going to put best Mom, but you can put, of
course, any other words. I just like using a
pencil because it just guides me on where to
write the letters. For the pen, I am using
the sakura, micron pen. You can use other
pen, that's fine. So when you are done
writing the message, you can just erase the pencil outline so
that it looks cleaner. All right, so we are done
with the first project. I hope you enjoyed painting
this floral card with me. So feel free to add
your own twist. You can change the colors, maybe add some more fillers or other smaller
flowers. All right. I'll see you in
the next project.
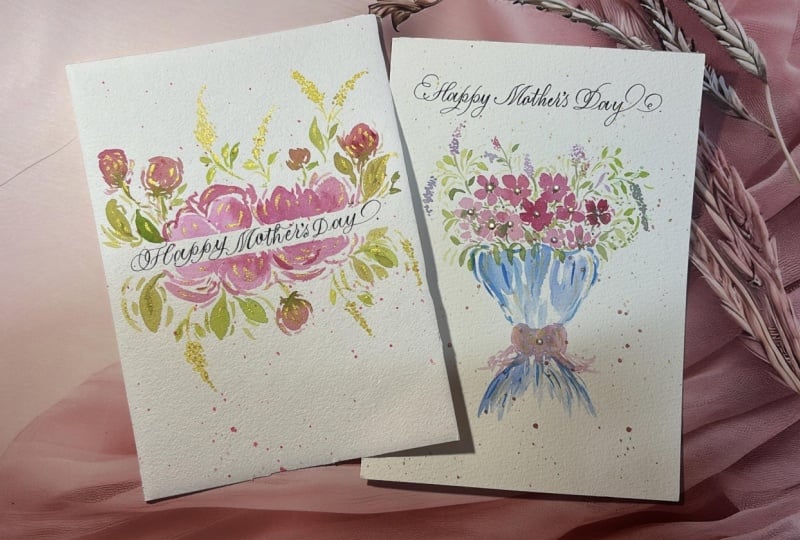
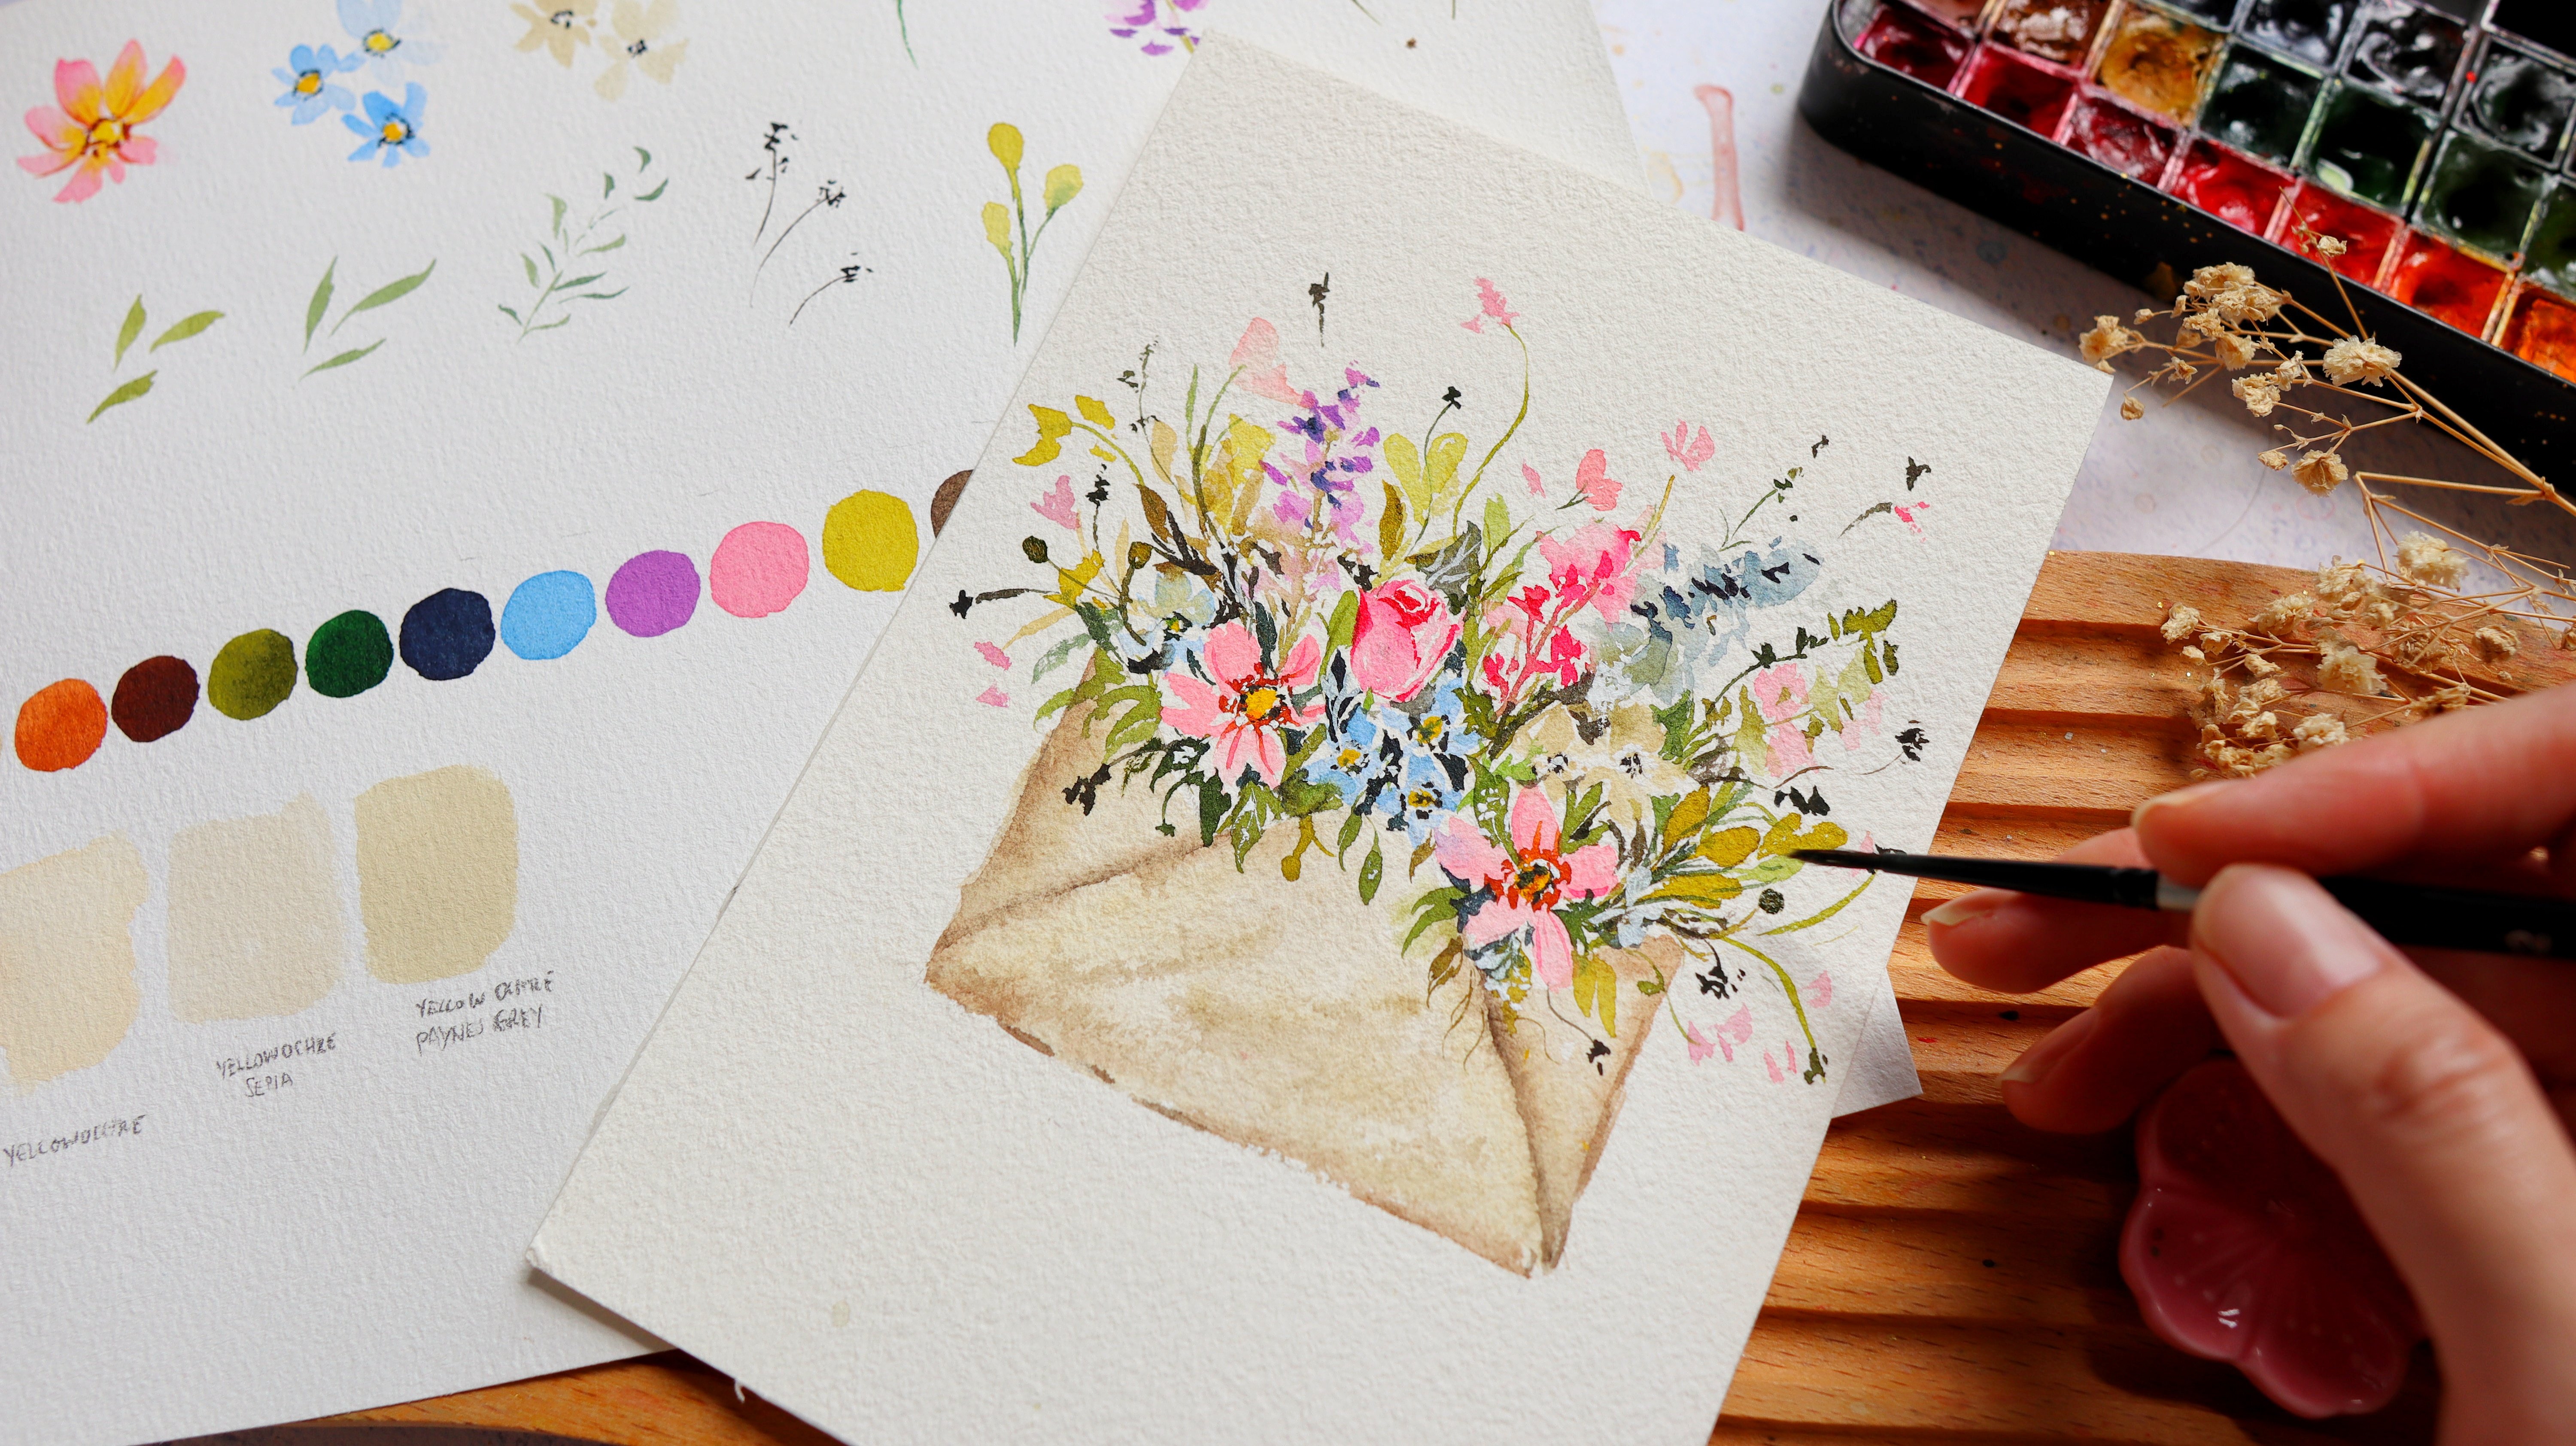
5. Sweet Mini Bouquet: Here are the colors that
we need for the project. For our second project, we're going to paint this
beautiful and simple bouquet. So we are going to paint smaller and simple
five petal flowers and just add some fillers. So before we start,
I'm going to show you a quick overview
of this project. So first, let's do the outline of the handle of the bouquet, so you can just draw a
letter X or a letter. So this is just a guide for us. Next, we're going to
fill this in with some color and just lightly
paint some strokes, leaving some white spaces
for that negative space. And I think it looks very nice and loose this way
instead of just filling the entire
handle with solid paint. Next, we're going to
add some contrast, add some darker blues, and then we're going to paint these simple five or
four petal flowers and just make clusters of them to fill in this bouquet
using pink colors. Next we're going to
add some leaves, some fillers, just to make this very fluffy
and just very lush. Next, let's add some
finishing touches, paint some strokes in between the flowers just
to fill in the white gaps. And after that, we can just
write down our message. I put here Happy Mother's Day. But of course, this can be a card for a different occasion. Alright, so let's
start painting. I'm using my five by seven
inch paper for this demo. Then I'm going to use my pencil to just draw the
shape of the bouquet. So if you want to change this and maybe turn
it into a vase, you can also change the shape. So here I'm just
drawing like a letter for the top part and an inverted letter
for the bottom part. Or you can simply draw an X, that would be easier. For the bouquet wrap, you can use different colors. I just prefer using
vertical blue. I like this pastel blue color
that looks a little muted. So we want to add
a lot of water, make this color very light, and I'm using a size
four round brush. Using the tip of my brush, I'm going to just draw or paint the outline of the
handle of this bouquet. And then we're going
to start with the top. I'm going to paint
some ruffled edges. And then we're going to paint some straight lines going down, and you can see I'm leaving
white spaces intentionally. So those white
spaces are going to be the highlights
of this bouquet. It's going to make this handle of the bouquet look
very light and flowy. I'm going to do the same
towards the bottom. I'm just going to press my
brush and drag it down. And you can see I have
some nice pointy tips. So let's try to work quickly while everything is still wet, let's grab a darker blue. This is still verttal
blue, just more pigmented, and we want to paint some
darker strokes that will look like shadows or the
folds of the wrap. Now we can move on
to the bottom part. I'm doing just a few strokes. Again, don't overdo it. We want to leave still a
lot of white spaces or negative spaces and just let your eyes fill in the blanks. Now we want to define
this even more, so I think we need to add
a few more darker strokes. I'm using the color
ultramarine blue, but you can also use indigo. Now while everything
is still wet, I'm dropping in some pigment towards where the folds meet. And that's where the darkest
part of the handle is. All right. You'll just
use the tip of the brush and paint some tiny strokes. And again, don't worry, we don't need to paint all
the details for this part. Alright, this looks good. Let's move on to
painting the flowers. So you can definitely
change the colors. I prefer pink because
it looks very dainty. Let's grab permanent rose and
also the color shell pink. Let's prepare all the colors that we need so that it's just easier to grab the paint and
paint the small flowers. Let me start with
permanent rose, and here I'm going to paint
just a five peta flour, lightly press your brush
and then live towards the end and leave some white spaces in between
some of your strokes. You can also rinse your
brush to get a lighter pink. So we want to make a cluster of small flowers in
different shades of pink. I'm going to grab some
brilliant pink now. And some of the flowers
can be just three petals. So it will look like some of the petals are behind
some of the flowers. Okay, so the key to painting a beautiful small bouquet
is to vary the colors. So we want darker pinks
and lighter pinks. And we also want
to vary the shape. So what I'm doing here is I am just changing the
number of petals. So let's just grab
some shell pink and just paint a few
more petals here. So let's just continue adding more petals and small flowers. So you can see we started from the bottom and
we're now going up. And as you add some flowers
at the top of this bouquet, you want it to be smaller
or just a few petals. That way, it won't be
too heavy looking. So we want the bigger flowers
towards the bottom part. And of course, you can play
around with your strokes. You can dab your
brush like this to create an illustration
of a small flower. It can be like a filler
for this bouquet. Alright, so we're done
with the flowers. Now, let's add some stems. I'm using the color olive green, but you can also use sap green. Let's just paint
some short strokes in between some of the flowers to create an illusion
that there are stems in between
some of the flowers. I like using the tip
of my brush to create thin stems sticking out just
like this so that later on, I can add some fillers
or maybe some leaves. Now we can add some more leaves and just try to vary the
shape of the leaves. So can be bigger,
some are smaller. Alright, so now we
have the stems as a guide on where to put
some of the fillers. I'm going to grab
the color lilac. We want to dilute this
in a lot of water. We want it to be
very soft and light. So I'm just going
to dab my brush to create an illusion
of small flowers. This can be lilac or maybe some other
light purple flower. And this is a good way
to extend your bouquet so that it doesn't look too
concentrated in the center. We want to add some
lightness to it. So usually add some
fillers just like this. Just tab the tip of
my brush to create small strokes that look
like small flowers. And some of them can be
a little further away. They look like they are
detached from the bouquet. That's going to look very nice. Okay, now I'm going to paint
some eucalyptus leaves. So let's just paint a thin
stem, just like this. And then we're going to paint little oval shapes or just simply press your
brush on its side. And now you have some really
cute eucalyptus leaves. Right, to make the center
of the flowers pop, we can add a little
bit of yellow. I'm just using
permanent yellow light, and we're just going to put small dots in the
center of the flowers. So this part is optional. If you're already happy with how this look like,
you can stop here. But if you want to add
some more contrast, you can paint over your flowers. I'm going to grab a deeper
permanent rose color, and just going to paint on top of some of the petals
that we painted earlier. This is just to
add some contrast. But we also have to be careful because we don't
want to overdo this. You can see I'm just
painting on some of the petals and not
all of the petals. So I still want to
see some petals to be a light pink color, some were a deeper pink color. And you'll notice
that there are still some white gaps in
between the flowers. We want to add some depth to it, so we can just grab
a darker green and just paint over
those white gaps. And that's also going to
help define the flowers, make it pop up even more. Alright, so we're almost done. I'm just going to add
some finishing touches. Let's grab a very,
very light pink color, add lots of water, and we are going to use this to dab or brush onto the paper. You can see I'm painting really tiny strokes towards the outer part of the bouquet, and it will look like there's a spray of little
flowers all around. I really like the
effect of this. It looks even looser
and very flowy. So for some of the
petals that we painted, you can attach a very thin stem. A. So we're using ultramarine blue, we can go over some of the folds in the handle
of this bouquet, just to add some contrast
using the tip of the brush, go over the darker areas
and paint tiny strokes. This is just to define
what we painted earlier. These are very small
finishing touches that can make a huge difference
on your painting. Es. Now I'm just going to
write Happy Mother's Day, but you can, of course, put different dedications
depending on the occasion that
you're celebrating. Or you can also opt
not to write anything and just give this flower
bouquet as a gift. So here I'm using my
sakura micron pen. The size is 05, so I want this to
be a little thick. Alright, so that's done. I hope that you enjoyed painting
this beautiful bouquet. I'm excited to see you paint it in different colors as well. Alright, now let's move on to the next video as we
paint our last project.
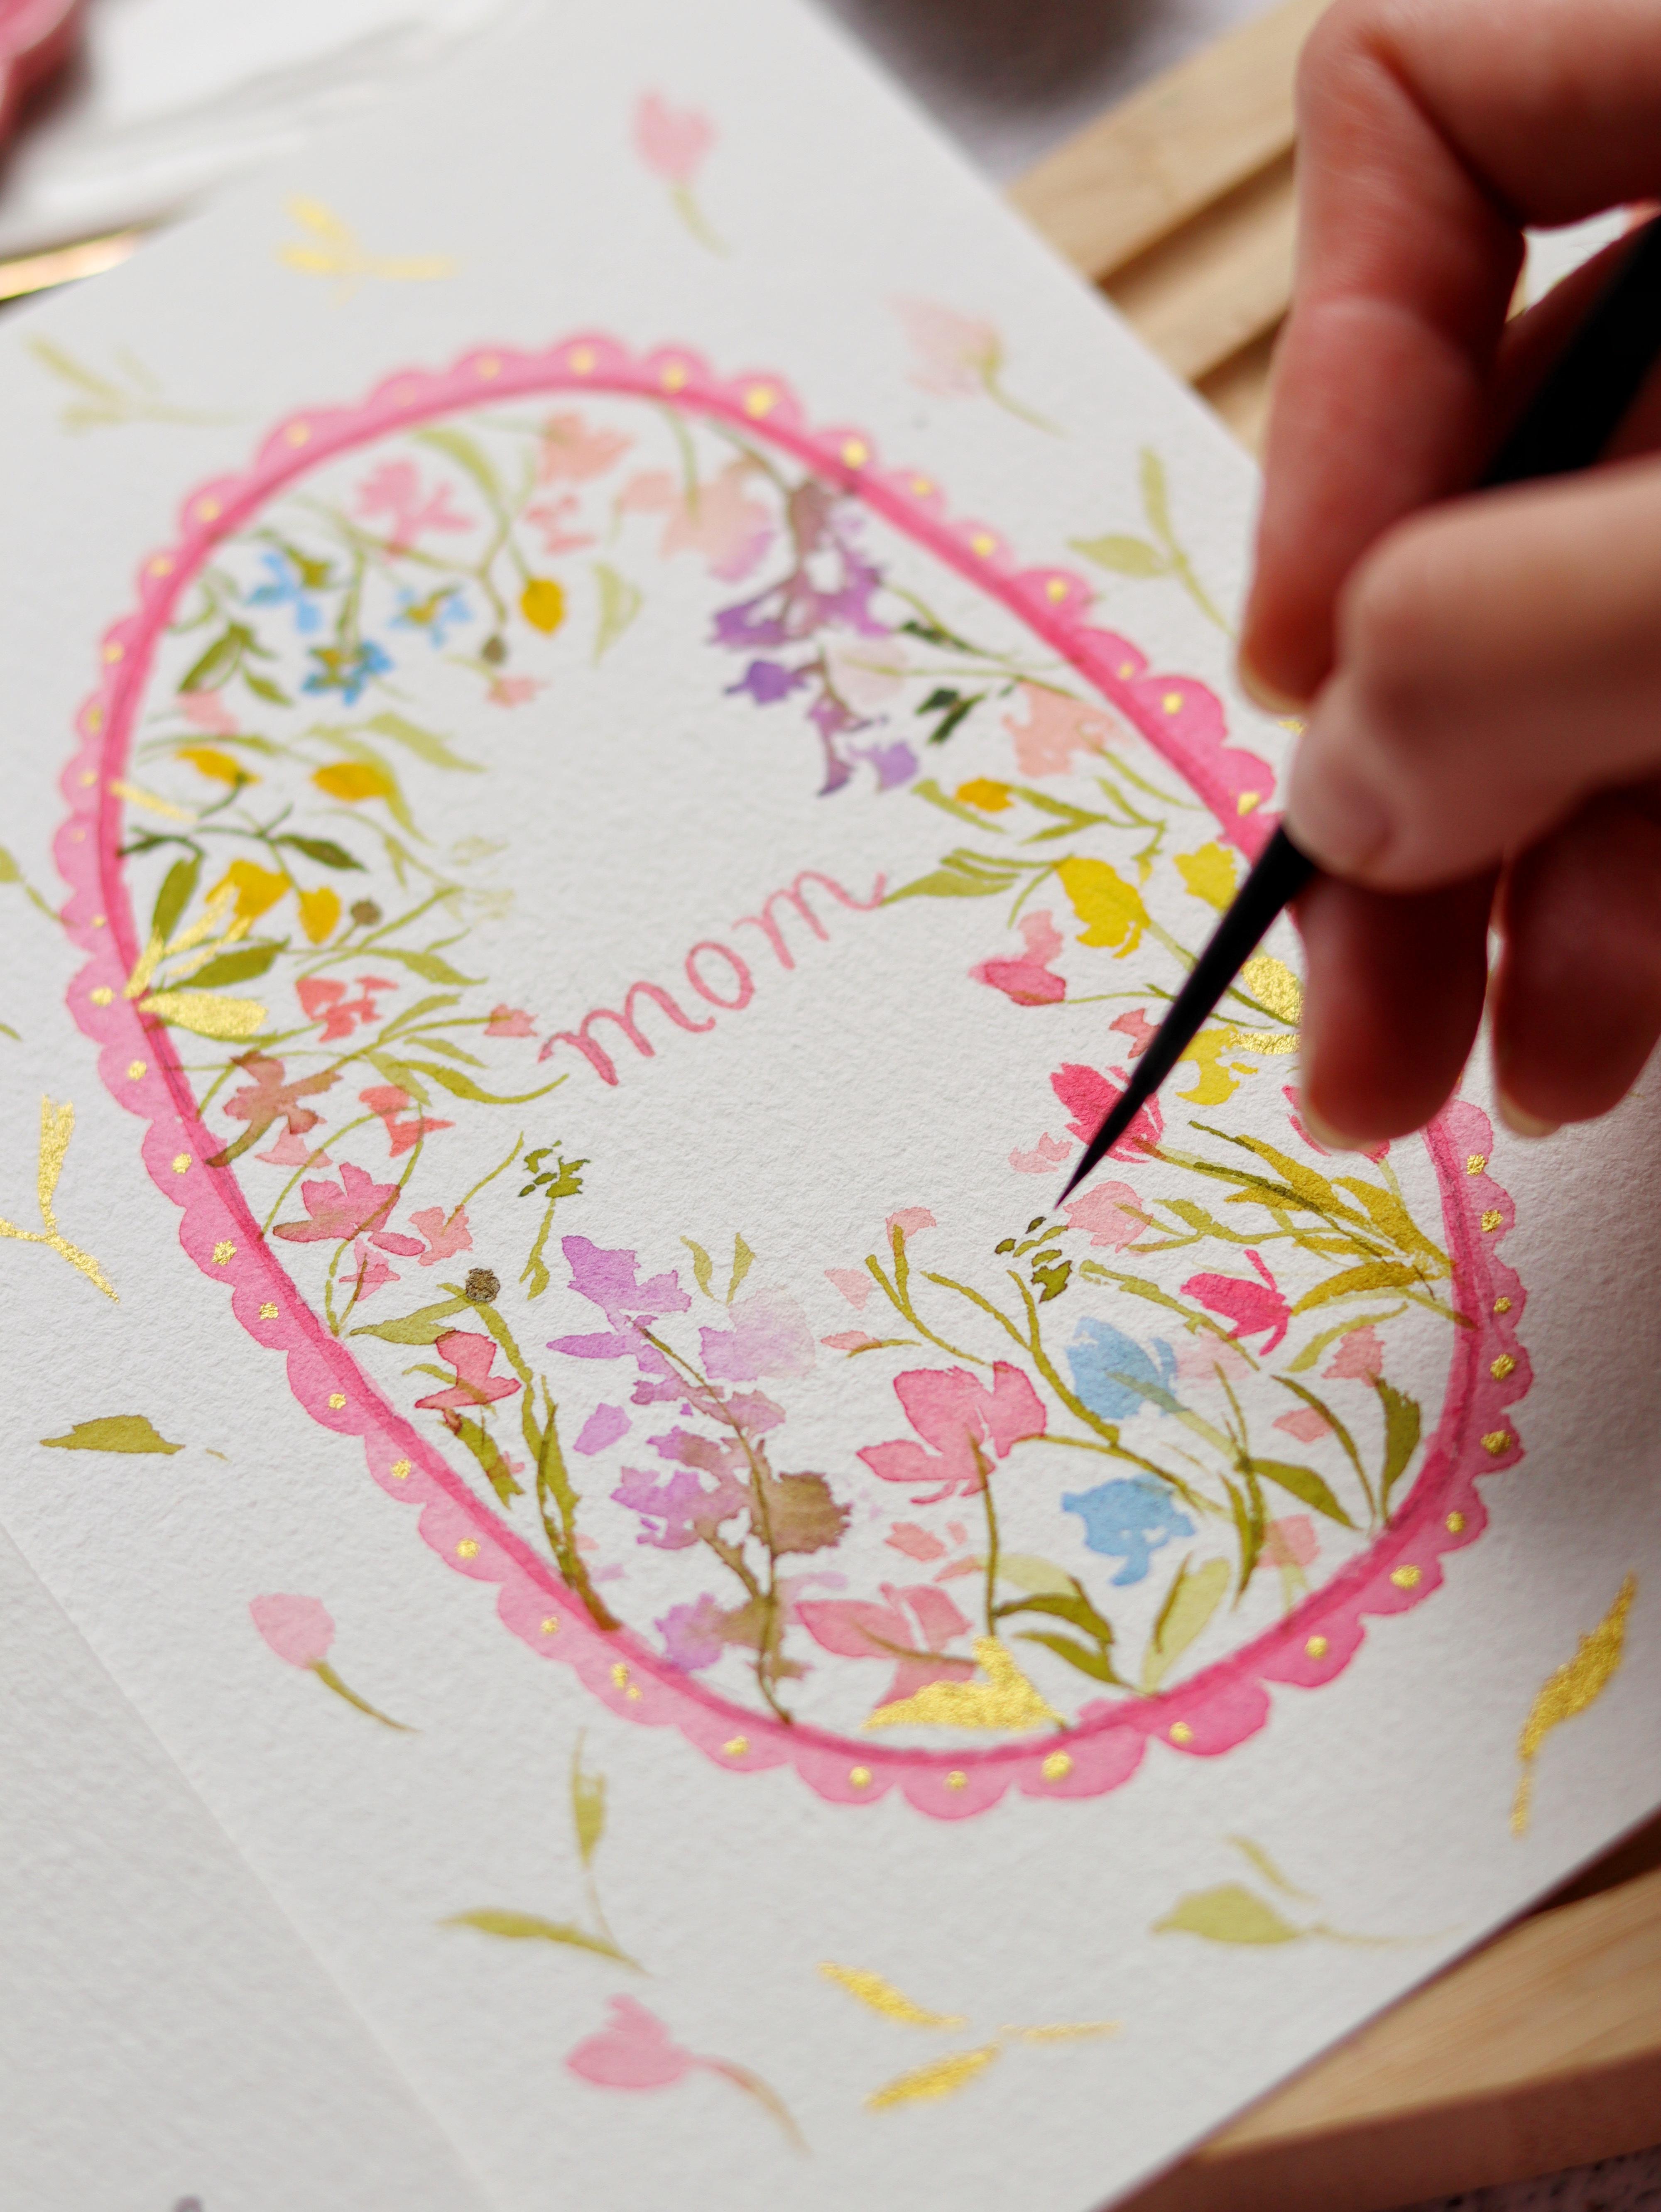
6. Delicate Wildflower Frame: Here are the colors that
we need for this project. Welcome to the last project, and we're going to paint this beautiful floral frame
with mini wild flowers. This is going to be very easy, but we're going to
need a small brush to paint these tiny flowers. So before we start painting, let me show you an
overview of this project. So first, we need to
draw an oval frame, but if you want a different shape, that's completely fine. I'm just going to erase
the extra pencil markings, and then we're going to use
a small brush and just draw an outline of this floral frame. It doesn't have to be perfect. It's a little irregular in
shape, that's completely fine. And then next we're
going to paint the scallops all around it. I actually find this part very relaxing because you're doing the same thing over and over. So once we are done, we can start painting
the flowers. So for this project,
I started with the bottom part and painted
some tiny wildflowers. And then next we're
going to fill in the top part of this frame. So this part is optional, but I also like adding some tiny flowers
outside this frame. And of course, you
want to add something sparkly for this
Mother's Day card. I'm going to add
some gold paint, just a little bit
of gold accent, such as adding small
dots and leaves. Alright, I think we are ready. Let's start painting
this project. So the first thing we need to do is to draw an oval frame. I'm using a pencil. And if you don't
want an oval frame, you can change it
to a heart shape, a circle, or a square. I'm doing this free hand, so I am expecting
that it's going to be symmetrical and that's
completely fine. I think it adds a little bit
of charm to a handmade card. But if you have a bowl, then you can use
that as a guide and trace the shape of the
bowl onto the paper. So now I'm just erasing some of the darker lines because
once we paint on top of it, we cannot erase that anymore. Now let's start
preparing our frame. I'm going to use permanent
rose and also brilliant pink. I'm going to mix
these two colors. But if you only have one pink, that's fine. You just use that. Or if you want to change the
color, that's also okay. And just remember that this is your watercolor card
that you're painting, so feel free to change
some of the colors. Now, I'm using a
size two round brush for this part because I want to paint just the
outline of this oval shape. So the trick is to
press your brush and then lightly drag the
side of the brush, so you get a nice clean line. But again, even if
it's imperfect, that's completely fine because this is a handmade
card after all. So you can see I'm
also trying to rotate my paper so that I get a
better angle when painting. So using the same mixture, I'm going to add some scallops. I'll just paint a curve line, so it looks like a letter C, and then you just
fill in the inside. So I'm finding it
difficult to paint the scallops using
a very small brush, so we are going to switch
to a size four round brush. Let me just grab
some more paint. So I'm using the same
color as the outline. And some colors can be a
darker pink, and that's fine. So can be lighter in color. Now, this part can
be boring to watch, so I'm going to speed
it up in a while. But as I'm painting this, it actually felt very
relaxing because you're doing the same design or
pattern again and again. So I hope that you
will also have a relaxing time painting
the outline of this frame. Alright, so we are
almost done painting the ruffles or the
scallops of the outline. So I like painting
them small because it looks more dainty and
more delicate this way. So now that we have
our frame ready, let's start painting
these many wild flowers. So I'm using my size
two round brush. We want a small brush for this project to create
these tiny flowers. I'm going to grab the
color olive green. So we want a medium
tone for this. Going to use the tip
of my brush and paint some nice thin curvy strokes. So you can see that there
is a movement in my stems. So we want to vary this. Some can be like a letter Y. So can be just one curvy line. So we are going to
start at the bottom half first so that it's
more manageable for us. So now let's grab some pink. I'm using permanent rose, and this is just
a light mixture. So we just dab our
brush and then live so that we can create
a cluster of petals. Here I'm going to paint maybe just three or four petals and going to attach it to the stems that we
painted earlier. Now let's grab
some verdial blue. I'm just going to
wiggle my brush onto the paper to create
a different shape. So it doesn't have to
be any specific flower, so you can try to play around with the shapes of the petals. Okay, let's continue
adding some more flowers. I'm using the color,
brilliant pink. Going to paint some
small buds right here. I'm just going to press
and drag my brush, so they are going to
look like tiny tulips. Next, let's grab this
color called lilac. This is also one of
my favorite colors. So we can paint a
tall flower here. Going to dab my brush and just create this
elongated shape. So you can try to vary the pressure in
your stroke so that you can combine bigger
strokes and smaller strokes. You can simply add some
more green stems to connect the petals
to the main stem. So here I'm just adding
some more color. You can definitely change the color of this
flower as well. Now let's grab some yellow. We want to pop of color. So again, I'm going
to just press my brush and try to
wiggle to create a different petal
shape and just add some more leaves and stems using this color
called olive green. So there are some
white caps right here. I'm going to paint
some tiny leaves, just press and drag your brush to create
these pointed leaves. I love how this turned out, and you can actually just paint the lower half if you're
already happy with this. But I think I want to add some more flowers
towards the top. Just fill this in with
some more wild flowers. So let's paint with
some thin stems again, doing the same procedure. So use the tip of your brush and add some movement to your stems. Alright, let's grab
some shell pink. If you don't have shell pink, you can add some white paint or, like, white gouache to your
pink paint and just mix them. And now I'm just going to dab
the tip of my brush and add some small flowers to attach
to the stems that we did. Now, we want another
lilac flower, diagonally across the first one. So I'm just going to do the
same thing and dab my brush, create this elongated flower. And as I'm dabbing my brush, I'm making sure that there are still white spaces in between my strokes so that it looks
very light and flowy. So we can also add
forget me nuts. So these are small wild
flowers that are color blue. I'm just going to paint a
cluster of five petals. Using my size two round brush. I'm using just the tip of my
brush and lightly pressing it onto the paper to
create these petals. And then we're going to add some more stems and some leaves. And next, I'm going
to just paint some small yellow dots in
the center of the flowers. And because I already
have yellow in my brush, I'm going to use this color to paint some more
cluster of flowers, just dabbing my brush, creating some small buds. And now, if you notice there are still a lot of white gaps. So we're going to fill that
in with some smaller flowers. Going to use a pink paint, but you can definitely
use other colors as well. So just continue adding some small buds and
five petal flowers. You can wiggle your brush, extend some of the
petals or just dab the tip of your brush
to create small fillers. Using the color olive green, we're going to start adding some more leaves to
fill in the white caps. You can change the value, so some can be lighter leaves, some can be darker leaves. Let's add some texture by
tapping the tip of our brush to create these dotted strokes that will look like
small fillers. So one of my favorite
green colors is called greenish yellow. So this is a beautiful color that makes your
paintings pop up, and it just brightens
up a bouquet. You can paint some small leaves. You can also paint
small berries. And as we're adding
these small details, we have to remember that
we have to keep the center open or with enough space
to write some words. Let's add some
finishing touches. I'm using a very,
very light pink color and just tabbing my brush onto some of the white caps so that it will look like there
are smaller flowers there. Okay, so we're done
with the frame. I'm just going to
add another detail. Let's use a medium
tone Bermant rose. I'm going to do another
outline for this frame. I just feel like
it's going to add more depth to our floral card. So feel free to rotate
your paper if it makes it easier for you
to paint this outline. All right, so now it's
looking really good. Now, if you want some
more tiny flowers all around this frame, you can also do this style. But if you want it to be clean, then just leave it as it is. So right here, I'm going to
demonstrate how to paint these smaller flowers all
around this floral frame. So I'm using a very,
very light peak and just dabbing my brush to
create a single stroke. Some can be double
strokes or double petals. With a green paint, this
is just olive green. I'm going to paint
a very tiny stem, and I want the stem to have some movement so you can see that it's a
little bit curved. And next, you can paint some tiny leaves just to fill
in some of the white caps. Now we can paint the
word in the center. I'm just using my brush
with some pink paint. I also did the outline of the word or the letters
using a pencil. So we can also add a
little bit of sparkle. This is the queer
tack gold mica. Going to add some small
dots all around the frame. So this is also
optional if you don't have this gold paint
that's completely fine. I just personally like
adding some gold to my cards because it makes it more special and I like
the sparkle of it. Now you can also paint some
tiny gold leaves all around the frame and even on the
inside of this floral frame. So I really want you to have
that artistic freedom to add some more color or add some sparkle
to your paintings. Alright, that's it
for our project. I hope you enjoyed painting
this beautiful floral frame, and you can definitely change the colors and the shape
of this floral frame. So take a moment to appreciate
what you have created. I would love to see your work, so don't forget to upload your project in the project
gallery section of the class. All right. Now let's move on to the next video as I
share my final thoughts.
7. Final Thoughts: Congratulations on
finishing this class. I hope you enjoyed painting
these three projects. Through these projects,
you've practiced simple techniques like using
tape to create clean spaces, painting loose floral shapes, and combining elements into
a beautiful composition. These are small skills
that can really grow into your own
unique style over time. I would love to see
what you have created, so don't forget to
upload your project in the project gallery
section of the class. You can also share your work on Instagram and Tag me there. If you have enjoyed the class, don't forget to leave a
review as this will help other students know how this class help you in
your watercolor journey. Follow me here on Skillshare
so that you'll be notified every time I have a
new class or a new giveaway. Thank you again for
painting with me. I will see you in my next class. Bye.
 Joly Poa, Watercolor Artist