Transcripts
1. Introduction and Supplies You Will Need: Hi friends. How are you? I hope you're having
a great day today. I'm excited about sharing
this project with you. This is a drawing and
watercolor painting project that I designed,
especially for Kids. Students do not need to have any drawing or painting
experience at all. To be successful
with this project. I will guide students
step-by-step through all the steps
that they need to take. Today, we're going to
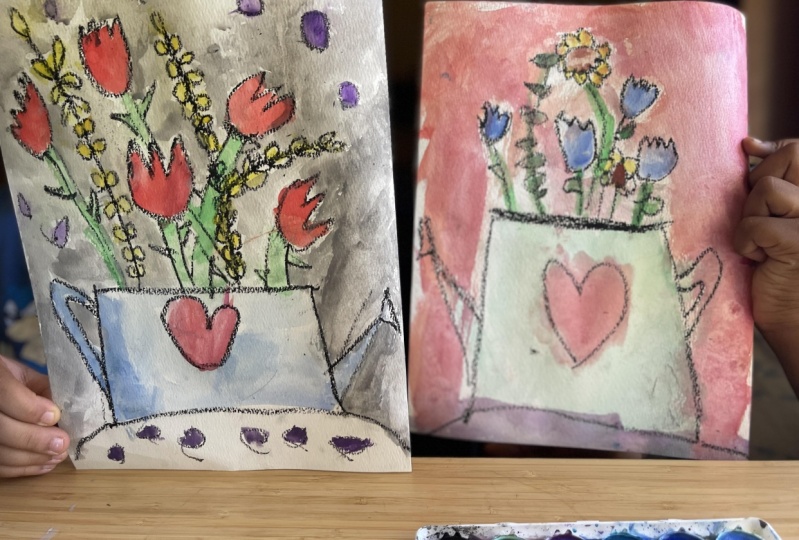
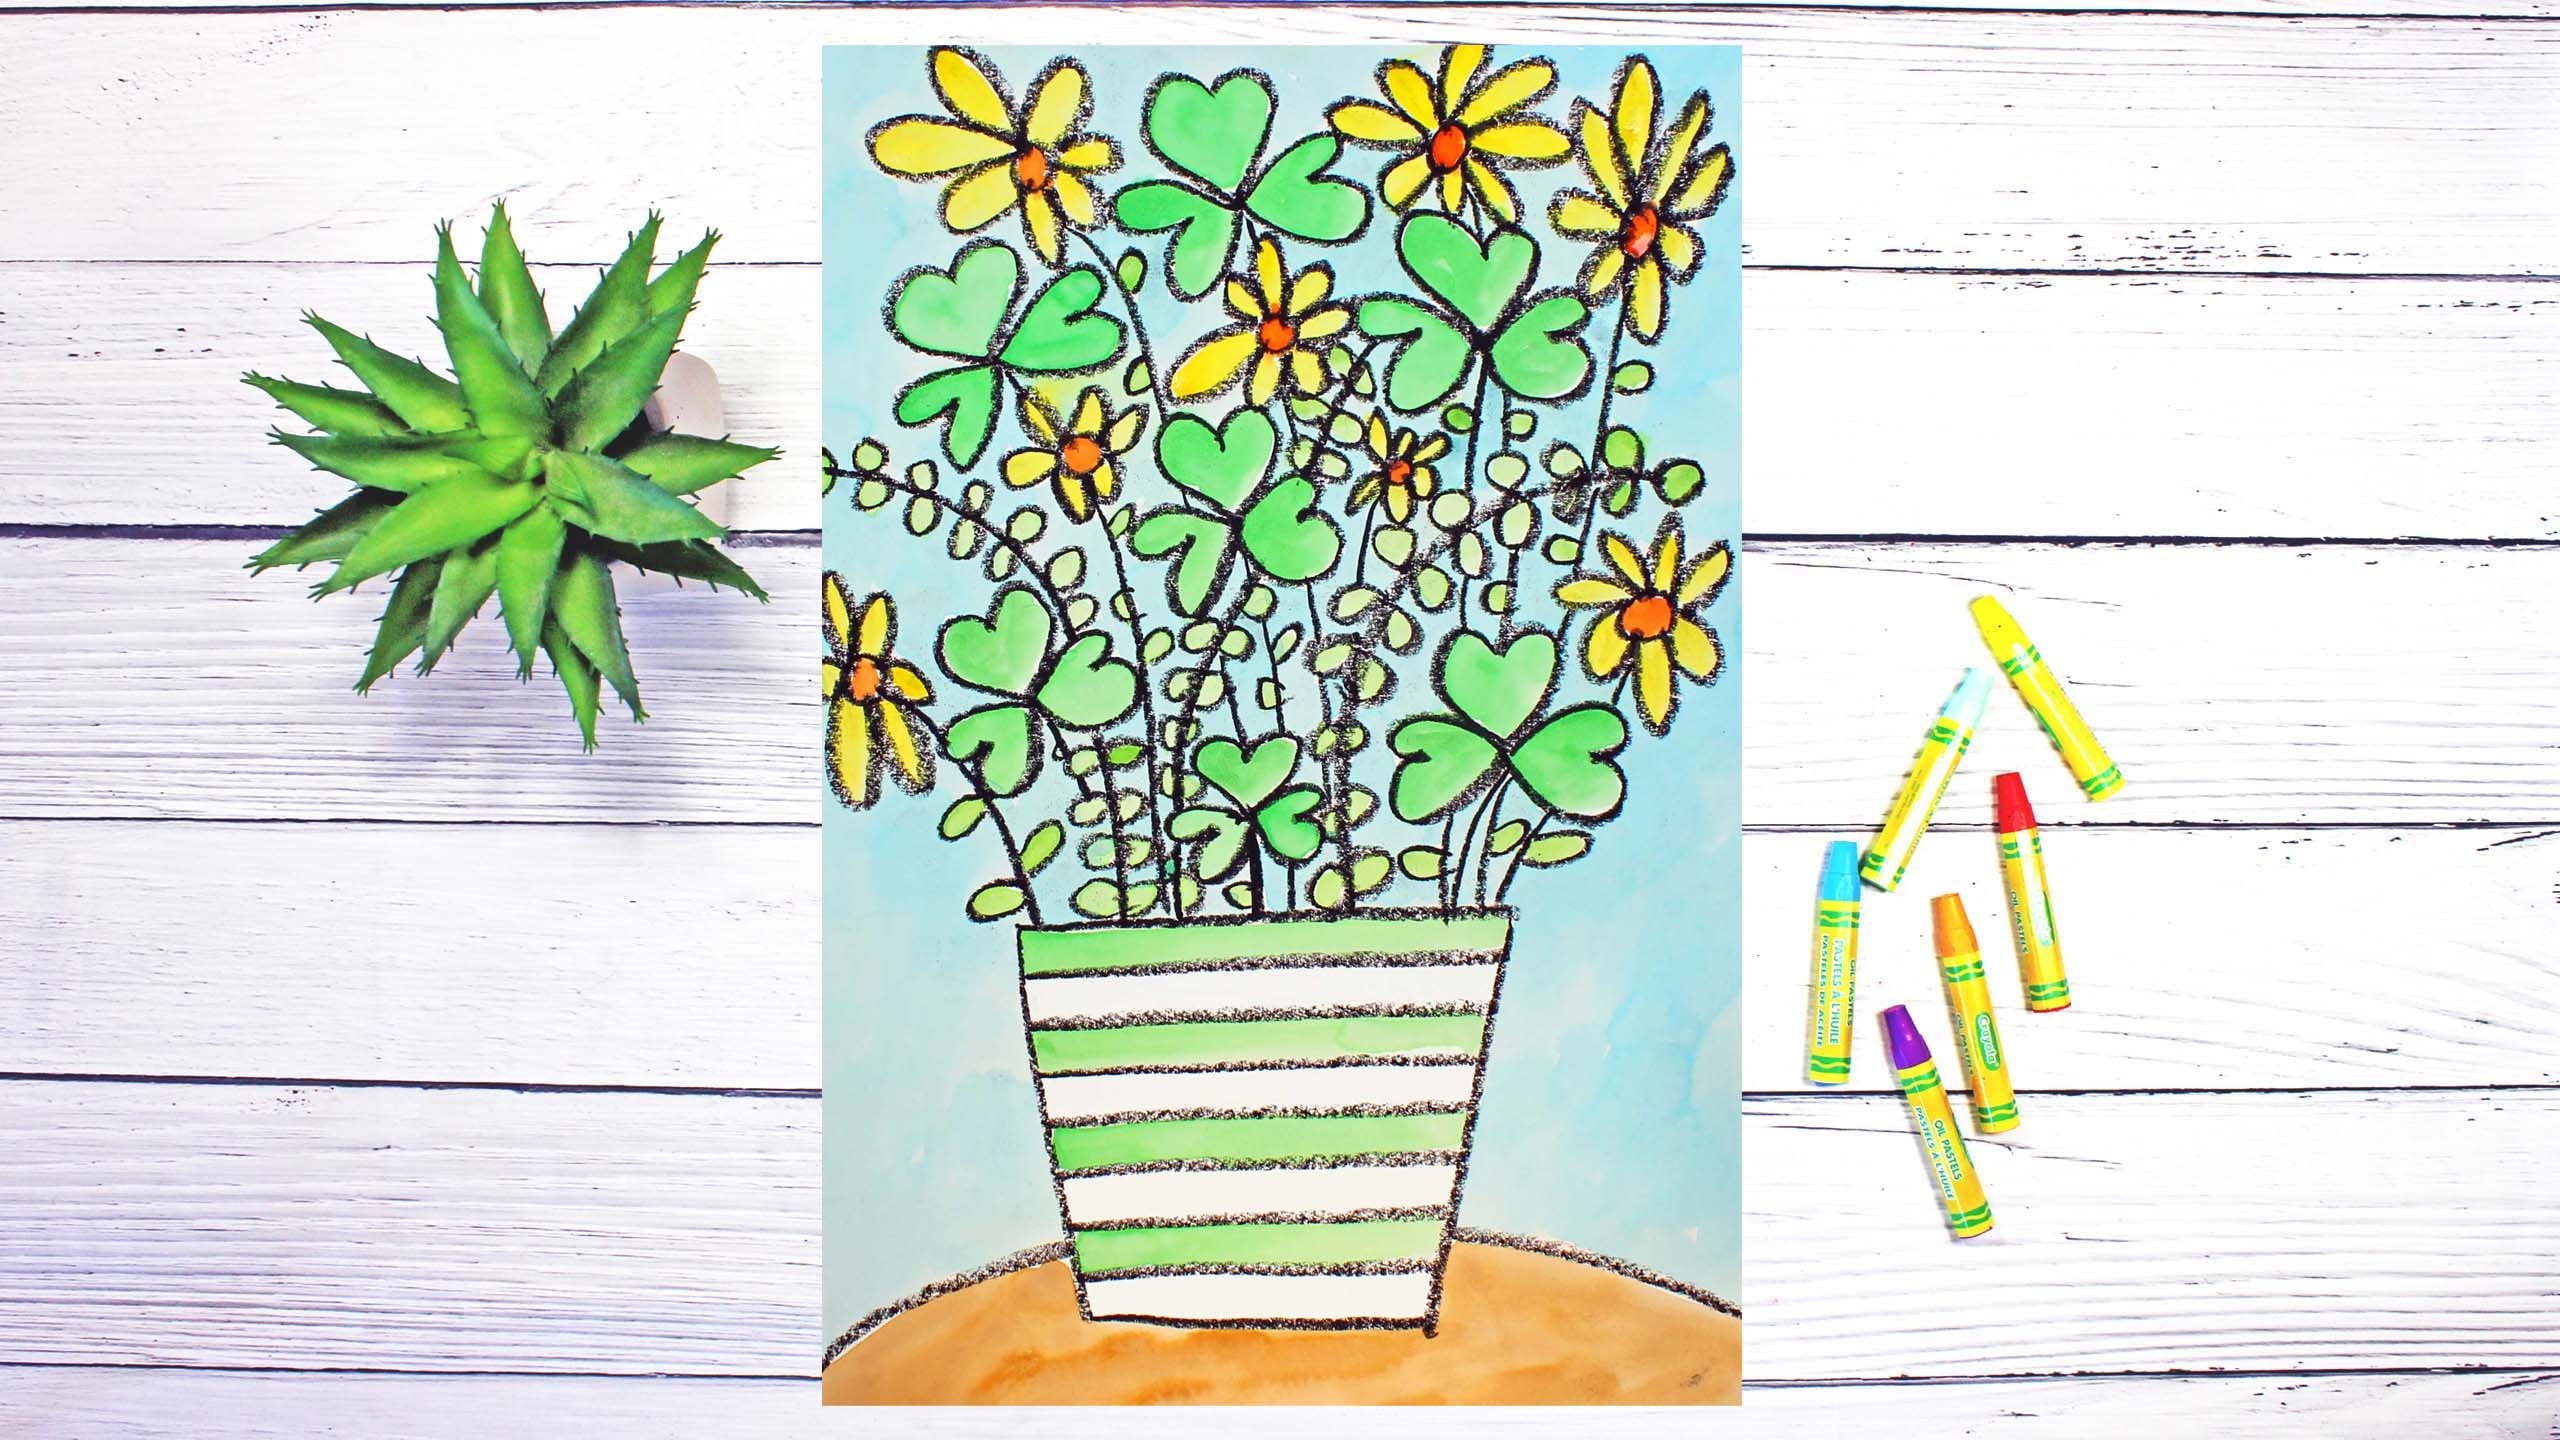
create this Watering Can with flowers inside. Let's talk about
the supplies and materials that you will
need for this project. The first thing
that you'll need is a sheet of watercolor paper. You will need a set
of watercolor paints. You will also need a paintbrush and a cop or
a bowl with clean water. You will need either
a black Oil Pastel or a black crayon. Either one will work, great, and you will
need a paper towel. So go ahead and gather all of those supplies and materials, and I'll see you back
here in the next video.
2. Step 1: Draw a Tulip Design: In this step we're going
to draw our design. So let's get started. The first thing
that we're going to do is we're going to pick up our black Oil
Pastel or black Cram. I'm going to use an Oil Pastel. We're going to find the
middle of our piece of paper. And we're going to make a short line right in the
middle of our piece of paper. Let me show you how long, about this long just
a straight line. So below this line we're
going to have a Watering Can, which is a special Can that
waters flowers and plants. And then above this
line we're going to create a bouquet of flowers. Okay? So the first thing that we're
going to do is start at the top and we're going to
create our bouquet of flowers. Now you might think of some flowers that
you'd like to include, but we're going to start
out with some Tulips, okay? And then we'll fill in
with other types of flowers if you'd like,
if you have room. So let me show you
how to make a Tulip. We're going to
make the letter U. You can put this
you anywhere that you'd like above this line. Now, we're going to connect
this part of our line, this part of our line with
a zigzag line like that. So that's the Tulip. And then we're going
to make another Tulip. I think I'm going
to move over here, make the letter U,
and then zigzag line. I'm connecting this part of the line to this
part of the line. I think another Tulip about
right here would look nice. So I'm going to
make another Tulip. That's the letter U. And then a zigzag line
on the top of that you, maybe I'll make another one
right here facing this way. Then I'll make that zigzag line. And maybe about right here, I think I'll make another you. And then I'll make
a zigzag line. Alright, so there we
have some Tulips. Now we're going to fill in with some other flowers before
we make our stems. So think of some other flowers
that you'd like to make, or even some leaves. I think that's what
I'm going to do. I'm just going to
create some leaves. I'm going to make a really
tall stem like this. Then I am going to
add some leaves. Just a teardrop shape. But you can make
whatever you'd like. Going to make this all
the way down this line. I think I will make
another one of these. And it will come up this way. Maybe I'll even make one
going this way like this. I'm just trying to
fill in the space. Alright. So go ahead and create some leaves or some flowers
to fill in your space. Now what I've done is I
filled in a lot of my space with these leaves and
I have my flowers now, I feel like it's time
for me to make my stems. So Tulip stems are a little bit thicker
than some flowers. So I'm going to make two lines. And I'm going to touch
this line right here, this, this top line
of my Watering Can. So I'm going to come down
from my Tulip to this line. And then for my next line, it looks like I'm
going to have to jump over this leaf right here. I'm not going to go through it. I'm going to jump
over it like that. Then I'm going to go ahead
and add some more stems. Jump over. Alrighty. So I have my Tulips, I have my leaves and
I have my stems. I still have a
little bit more room that I might put something into. For example, right here and
right here maybe over here. So what I'm going
to do is just going to think about what
I'd like to add. Do I want to add
some more leaves? Do I want to add
some more flowers? I think I'm just going to add
some leaves to the stems. I'm going to add a leaf
that looks like that. I'll leave that looks like that. Maybe a leaf here like that. See how it filled in this space. A little bit. Tiny
one right there? I feel like I'm really
happy with that. I think what I'm
also going to do is I'm going to add some circles. Sometimes when I want
to fill in some space, I just add circles or hearts or something that will
fill in the space. You do not have to do this part, but I'm going to do it
because I like to do it. Remember you get to do
what you'd like to do on your artwork because
it, your artwork. There. Add one more
here, small one. Alright, so remember
when you're doing this, we add everything
above the line. This leaf came down a little
bit, but that's okay. Alright, what I'm going to
do next is I'm going to create a Watering Can
down here at the bottom. So I'm going to create two lines that are diagonal
slanted a little bit. Going almost all the way to the bottom of my piece of paper but not touching the bottom. Let me show you what I mean. I'm going to make a
slanted line like this diagonal line and another
diagonal line like this. Then I'm going to close
that up at the bottom. Now that we have the main
part of our Watering Can, Let's add a spout. The spout is the place
where the water comes out. So this is the part of the Can that holds
the water and then the spout will allow the water to come out
of the Watering Can. We are going to have a Spout. I'm going to make my
spout on this side and a handle so you can hold
on to the Watering Can. It doesn't fall down. So a spout in a handle to make
the spout I'm going to go pretty close to the bottom of my Watering Can,
but not quite. And I'm going to
make a diagonal line coming up like this. But I don't want it to touch the edge of my piece of paper. Now I'm going to
move up a little bit and I'm going to make a line from the Watering Can to the
end of this line like that. Then at the end, I'm going to make a
line that comes out, a line that comes out and align, that closes up those two lines. Now on this side, I'm going to make the handle
part of my Watering Can. You could choose any type
of handle that you'd like. I'm going to make a handle
that looks like this. It's going to look
like half of a heart. So I'm going to come up with a curved line and
then come down. Then I'm going to make
another curve line right next to this one
on the outer edge, on the outer side. So it's going to come
up and follow along. And then it's going to
come down like this. If you want to get fancy and
make a little bit of a loop, the loop like a swirl down here, you can do that as well. I'll show you how you come out. You swirl around like this. And you come out and you
swirl around like this. That's optional if
you'd like to do that. Now let's go to this part
of our Watering Can. You can make something, anything that you'd like. I think I'm going to
make maybe a heart. I think that would
look great in there. So I'm going to just make a heart's going to be pretty big. Awesome. Alright, now I'm want something that my
Watering Can, can sit on. So I'm going to make a table
down here at the bottom. So I'm going to come out from about here close
to the bottom and make a curve line and then do the same
thing on this side. Then I think what
I'll do is I will add some more circles
down here at the bottom. Bring those circles down from the top Area, bring this down. But you don't have to do
this part if you don't want to or you can do
it. It's up to you. If you would like to
extend your circles down into to fill in
this space down here, you can do that as well. I'm going to choose
not to do that, but of course, you can
do that if you'd like. So take a look at your drawing and if you're happy
with your drawing, then you can stop right there. Like I'm going to do. If you'd like to continue to add more details
to your drawing, you can do that as well. Now, if you're using
black Oil Pastel, you'll notice that you'll
have a little bit of Oil Pastel on your
fingers, your thumb. That's why we have this
handy-dandy Paper Towel available so that you
can clean your fingers. Will all of the black Oil Pastel come off of your fingers? Probably not. But that's okay. That's part of the
fund of creating. You can get a little bit messy. Alrighty friends.
When we come back, we will start
painting our Design
3. Step 2: Paint the Design: In this step we are going
to paint our design. So let's get started. The first thing that we're
going to do is we're going to add a drop or two of water into each
of our pans of paint. And what that will do is it will soften up our pay a little bit. So it will make it
easier for us to use. So I always encourage my students to take that step because it
really does help. Now that our paints
or softening up, Let's turn our attention
to our design. So in this step we're
going to be painting our tulips and leaves
and our watering can. And then in the next
step we're going to focus on painting
the background. So be thinking about the colors that you
would like to use for your flowers and leaves
and you're watering can. I think I'm going to use
pink for the tulips, green for the leaves, may be blue for this watering can and maybe pink
for this heart. That's what I'm
thinking right now. I might change my mind though sometimes as I'm
going along painting, I changed my mind. And when that happens, I just go with it. I just changed my mind and I'm just happy with
whatever happens. Remember you can choose the
colors that you'd like. And what we're going to do
after we think about it for a moment is we're going
to start painting. I know that I'm going to
paint my two lips pink. And then I am going to move to my heart and paint
that pink as well. If I'd like a lighter
color of paint, I'm going to use
quite a bit of water. If I had like a stronger, darker shade of the color, then I'm going to
use more paint. Ok. So I'm going to go ahead and I'm going to
speed up this video. And you can watch
what I'm doing. And then when I'm finished, I will come back
and chat with you. Alrighty friends. I'm back and I'm
finished painting my tulip flowers and the leaves and the stems
and the watering can. So in the next step, what we're going to
do is we're going to paint the background
4. Step 3: Paint the Background: In this step we are going
to paint our background. So let's get started. You can use any colors
that you'd like. I'm going to choose the color
purple for my background. I am not sure yet
what colors I'm going to color my table
and all of my dots. I just haven't decided yet. I'm going to start with
the purple because I know that I would
like to use purple. And like I said, you get to choose the
colors that you would like to make a my purple paint. What I'm going to do
is I'm going to add a few drops of water
into one of my wells. And the reason why I'm
doing this is because I want my purple paint
to be pretty light. So I'm going to be
using quite a bit of water and a little
bit of purple paint. So that's why I'm putting
some water in one of those wells because I want it to be a little bit
lighter rather than darker. So I'm making sure that I stir that paint and
mix it up really well. Then I'm going to test it
out on my piece of paper. See how it looks, like, how that looks. Might even need to be
a little bit darker. So what I'm going to do
is I am going to paint my background and I will speed up the video
so you can watch me. It will look like in painting
really, really fast. But in real life, I'm not painting that fast. So you might think
I'm speed painting, but I really not. Also, if my Paints
start to run around together and mix on the
piece of paper, That's okay. That's just what
Watercolor Paints do. They mix around on
the piece of paper. Alrighty friends. So I'm finished
painting my design. I'm really happy with it. I don't know if you
noticed on the video, but I added a little bit of orange and yellow together
on my dots up here. I thought that that
would look cool. So I'm happy with the
weighted that turned out. I hope that you had a lot
of Fun with this project. I will see you next time.
 Em Winn, Teacher, Art Instructor, Artist