Transcripts
1. Trailer: Hello! Animating
on video is pretty amazing and opens up many
creative possibilities. Because we can
interact with footage while bringing our fantasy
into the real world. In this class, we will learn
how to animate over video. And in particular,
how to animate your portrait using
procreate dreams. My name is Giulia and I'm
a professional animator, film director and storyteller. In this class, we will
be adding a touch of animation to a
short video portrait. We will explore
three creative ways to bring your persona to life. And we'll do all the while
exploring procreate dreams. Anyway, keep in mind that
the skills I'm teaching you can be applied to other
animation tools as well. At the end of this class, you will have an amazing clip to share on social media and maybe even to use in an introduction video
or on your About page. If you are a creative
who wants to dive into the new
procreate dreams up with me and at the same time add some animation
to live footage. Then this class is
definitely for you. Some resources come with the class and they
include a recap, PDF reference sequences for animation effects, and a
secret Pinterest mood board. I'm looking forward to
seeing you in class.
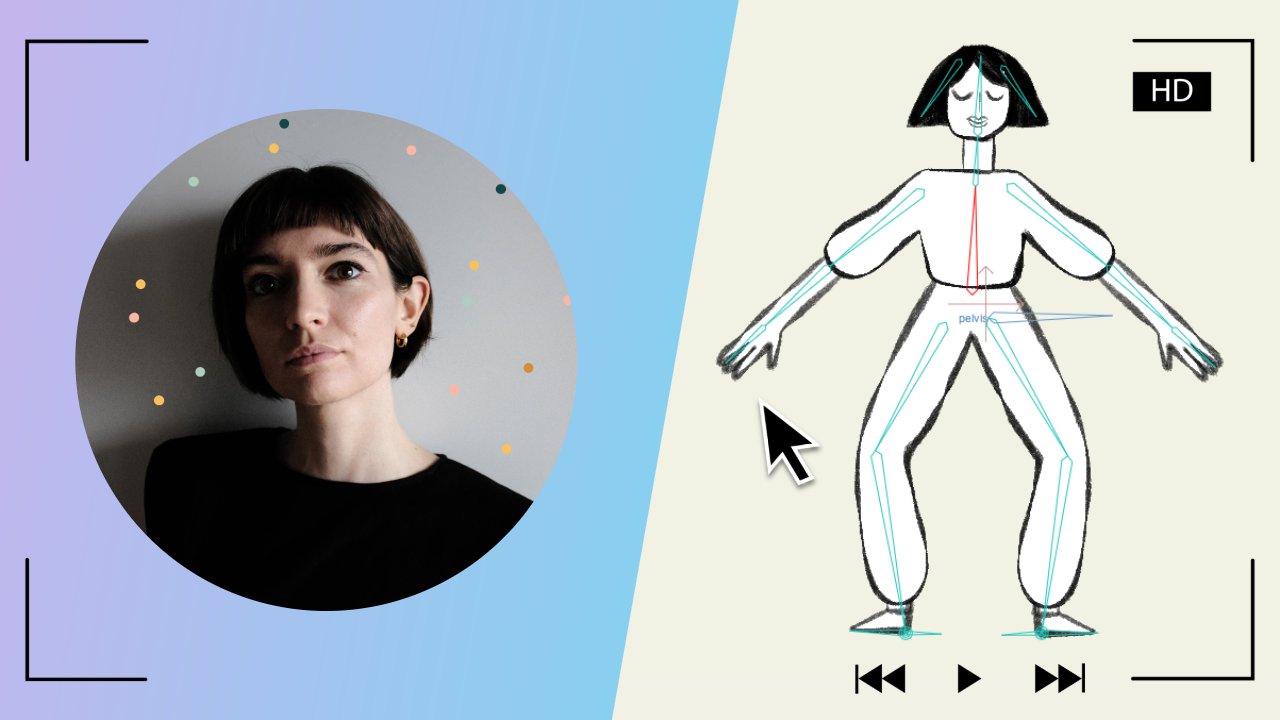
2. Introduction: Welcome to this class. Today we will animate a short portrait video infusing our personality
and style into it. And we'll take this opportunity to dive into Procreate Dreams, exploring this new app
and its amazing features. Please note that
although I will be using Procreate Dreams
for my demonstrations, the skills you learn can be applied to other
animation tools as well. Our project for this class is
to create a short video of yourself adding
hand drawn elements and animations on
top of the footage. This animated portrait can be used as an intro for
your reels or Tiktoks, Youtube videos, or simply as a fun Instagram story to share
with friends and family. To kick things off, let's dive into the concept of animating portraits and
gather some inspiration. I've created a Pinter
s board filled with captivating examples
and inspiration. You can find the link
in the resources, let's have a look
at it together. Here you can find a selection of beautiful inspirations on how to combine animation
over a portrait. As you can see, there
are many cool ideas that can inspire us to create our own unique and
personalized animation and elevate the portraits
into a work of art. The en, drawn elements
definitely add a touch of quirkiness
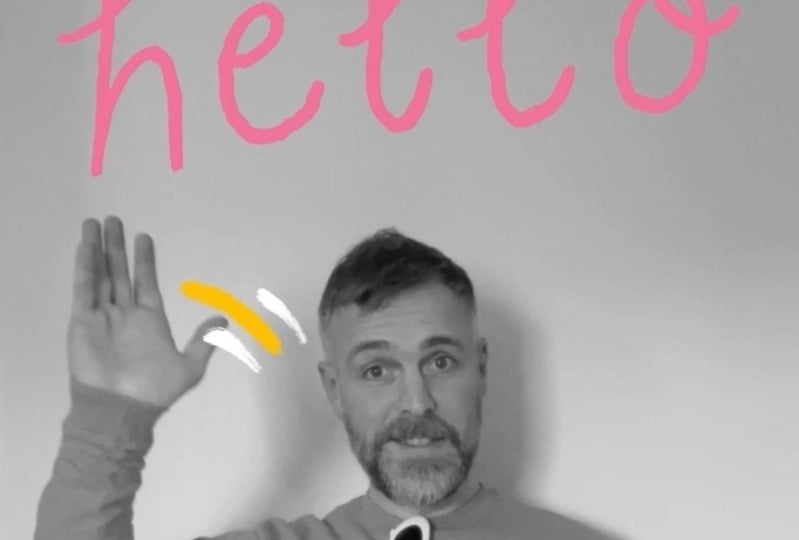
and personality to it. The first thing that I
noticed is that the photo or video can be in color,
or black and white. This is a matter
of personal taste, But consider the
black and white, especially if you want the
colors and your animation to pop, and if our video and its
background are distracting. In this example, we can
notice how the graphics and bold colors elevate the photo and make it look
part of an artwork. Notice also how
the color palettes chosen are usually
minimal and bold. Also, the color white is used a lot to make the
drawing lines pop. Another important detail I notice is that the
background is often neutral in order to let the subject be the most
important part of the picture, not to be distracted
by too many elements, and above all, to have a nice
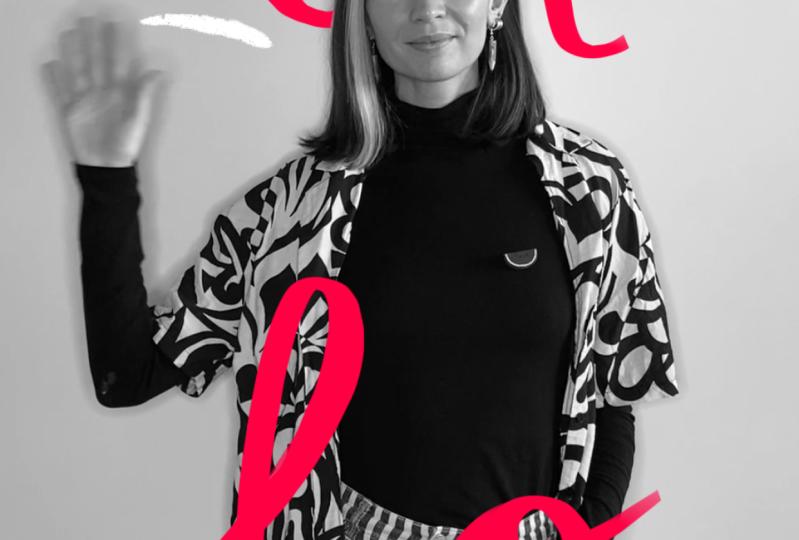
blank canvas to draw onto. I like how here the graphics
are enhancing some elements, redrawing in bright
color some parts, like for instance, a sweater, some earrings, or
other accessories. The cool part about this
technique is that we can add some fantasy and dreamy
elements to the footage. Colorful graphics can add a vibrancy in personality
to the portrait, while a neutral
background ensures that the subject remains
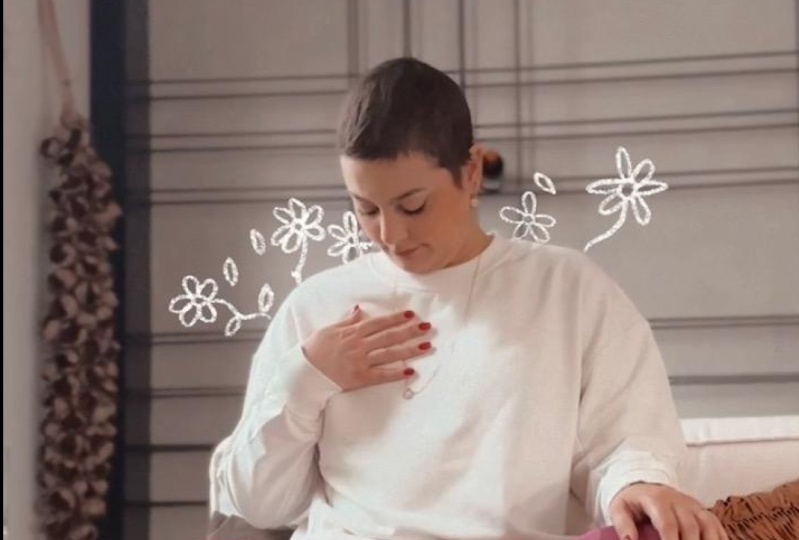
the focal point. Notice how hand-drawn elements
enhance certain features, adding whimsy and
fantasy to the footage. Last but not least, notice
how cool it is to interact with the footage and add some
three-dimensionality to it. If the graphics go in front
and behind the subject, they are more blend into this
world and more compelling. It's also possible to
add some texts and some action lines. On this note. Let's keep in mind
that for our project, we want to animate on top
of a video, not a photo. Our subject will be moving. This adds a layer of
fun to our project. You can imagine how
interacting with it becomes much
more interesting. The interaction
between the animations and the moving subject
is indeed fascinating. By incorporating animations that interact with the
movements in the video, we can create dynamic
and engaging portraits that captivated the
viewer's attention. Now that we filled our
eyes and minds with beautiful inspiration
and possibilities, let's brainstorm and plan
our own animated portrait. We will explore different ideas, experiment with color palettes, and sketch out our concepts before diving into the
animation process. Together, we will transform a regular video into a dynamic
work of art that tell a personal story and leave a lasting impression.
Let's dive into it.
3. Brief & Brainstorm: In this second lesson, we will start brainstorming
and planning our project. For my demonstration,
I will create a short, fun video of a couple of
seconds that I could use at the beginning of
my Instagram reels or even for the
introduction of this class. When you decide what you want to create and
for which platform, you also decide the format. For instance, if it's a
video for social media, it will most likely be vertical. When opening Procreate Dreams, you can select the
preset that works best for you and then
tweak it if needed. I would like to create a few seconds clip where
I show myself, maybe I wave and I show something about
the work that I do. This little introduction
video or portrait video is our opportunity to let our
personality shine through. Think about actions it would
be fun to interact with. For my clip, I'm
considering using a clapper board since
I'm a filmmaker, it adds a playful
touch and I think it could be a fun way
to introduce myself. You could also consider
using props like a camera, a pencil, sunglasses, or
a musical instrument. Maybe you can hold
your pet or introduce some other elements that can showcase your interests
and personality. Alternatively, a simple wave to the camera can
also be effective. The animation, color, choice, and overall style that will
incorporate later will contribute to the uniqueness and personalization
of your clip. During this initial
brainstorming, let's jot down or sketch a few ideas to get our
creative juices flowing. If you're up for it, you can
also take some quick photos to envision the framing and star flashing out your concept. When you're ready, go ahead
and record your quick video. I suggest you to
keep things simple. Use a neutral background, natural light, if possible. And take a couple of
extra videos to be sure. I recommend to keep
the video short, just a couple of seconds, because the longer it is, the more animation you
will have to draw. But don't worry too much. At this stage, we will be
able to cut the video later. Finally, I suggest stabilizing your phone to minimize
camera movement, unless you specifically
want that effect. You can use a tripod or simply
lean your phone somewhere. Now that we have
our short clip and hopefully a couple
more as a backup, let's have a look at them and see what we can
animate on them. We will quickly
brainstorm some ideas, and later I'm going to dive into each single technique and tell you how to
achieve these effects. In this phase, you
can also start thinking of the style
you want to achieve. And maybe pick a procreate
brush and a color palette. Choosing colors
that represent you, your brand, and convey
the desired mood. It's important, but we also
need to consider this time, the color of our background so that the animation
will be visible. In my case, I feel like the
color white could work well. But I also feel I could
use a pop of color, maybe one of my
branding colors so that it's more consistent and
cohesive with my website, Youtube channel, etc. At this stage, you
could also explore the impact of using black
and white versus color. And see what you like the most. To try this out, after importing the clip
in procreate dreams, go to the video
track > filter > HSB, and pull down the saturation for a black and white effect. I think I will go
for the black and white and a bright red
color plus some white. Today I will work
on three different. I think it will be fun to
play with some action lines, some highlights,
and visual effects. Maybe it will be fun to use
some hand lettering as well, which is also a
personal signature because everyone has his
or her own handwriting. Let's see now how to make
each one of those effects.
4. Action Lines Animation: In this lesson, we are
animating the waving scene. Here we are. I'm launching
Procreate Dreams up. As you open it and start a new project with
the plus icon, you can choose a preset. I'm going to choose Social
for today's project. Keep in mind that you can
then tweak the settings later by clicking here on
the name of the project. You can see the properties of the project itself,
frames per second. We have now 12, which is perfect duration. We will adjust later. Let's import the video
we want to work with. You can simply pull up the icon bar and drag
it to the side like so. Then drag the video you
want into the stage. This is something pretty cool. In Procreate Dreams,
note that you can do the same also to import
procreate projects. For instance, ready
illustrations you made previously and
even single layers. Here I have the video in which
I'm waving at the bottom. We have the timeline and we can trim and adjust the video. My clip is quite long. I'm going to keep only
this movement right here in order to cut. Simply tap on this red
symbol on the truck. Then edit split. Now I can delete the
part I'm not using. Let's drag our clip back to the beginning
of the timeline. I'm going to cut again
at around 7 seconds. Edit, split. And let's delete the part
we don't need. Here we go. At this point, we can adjust
the shot to frame our video better if it's needed by
clicking on this red icon. Again, those four points
will appear there. We can adjust the shot. For example, zoomin,
rotating, et cetera. I make sure that the
hand waving it is always on frame. Here it is. This works for me. Next thing
I want to do is to make the video black and
white to follow the references I
saw on Pinterest. To do that, press here again, filter HSB and pull
down the saturation. In my case, this created
automatically two key frames. I don't need the first
key frame because I don't want the opacity
to be animated. I can simply delete the first key frame is this also happens to you
and you don't want it. It's a simple setting to change. Go on timeline, add keyframe
at start, and disable it. Quick, procreate
shortcuts, four fingers, show you the full screen. And four fingers
again to go back. Two fingers is undo, three fingers is red. Another pretty cool trick from procreate dreams is the
possibility to zoom in and out very nicely on the timeline and
also on the stage. This makes the timeline
very easy to navigate. The coolest feature,
which is going to be very useful later
when we animate, is that when you press Play, Procreate Dreams
is going to loop only the portion of the
timeline which is visible. For example, now I'm
zooming to 2 seconds. And it's going to
play them in loop. When the bar reaches
the end of the screen, it's going to jump
back and play again. In loop I can zoom even more. And now it's going to play. Only 1 second. Okay, now I'm
getting started for real. I'm going to add a truck by
pressing on the plus truck. And here you can see
this gray new truck. I want to animate an action line following the
movement of the end. I'm going in the
drawing mode here. I have access to the
usual procreate brushes and I can draw wherever I want. Keep in mind where
your frame is. You can see this gray box, that's the stage, our frame. Everything which is
outside is offstage. Think of it like
a theater stage, and you as the director
can make elements move in and out of the frame
when in drawing mode, to have more space, we can
pull the time line down, the flip book appears, and we can move it
around as well. This gives us more freedom and all the space possible for
drawing, which is awesome. I'm going to pick a white
color and the dry ink brush, I will try to stick to 23 brushes and colors for
the all projects today, so that the collection
looks more cohesive. The flip book tool allows
us to move frame by frame. We can see when the
hand starts to move, I'm going to zoom and start
drawing my action line. Then I move on. The
next frame in purple. Here we can see the previous
frame that I just drew. This is called onion skin. If you tap on the time code, you can see its settings, the side colors for the previous and the
following drawing. And decide how far
we want to see, maybe only one
drawing away or more. Now that I see where the
previous drawing is, I can keep animating
my action line. Following the
movement of the end and progressively
moving my line. I'm going to follow the arch of the movement and create
this cool effect, little tip, wild winds. Of course, the line
can stretch as the movement becomes
faster and wider. In my case, it starts
small and it grows bigger. And you can also break
the line apart like so, ideally you want to
follow the same arch. In fact, turning
on the onion skin, we can see all the
drawings we did so far, and you can see they
follow an arch. In this case, for example, the last drawing I
just made is not working because it's not
aligned with the others. This is what we animated so far, following the
movement of the end. Now I'm going to progress and animate the waving
frame by frame. Notice how the line gets shorter when
approaching one end. Because it slows
down and then it speeds up again in
the other direction. Procreate dreams
makes this animation on footage very light and easy. And that's something really like I never experienced before because on other software
the footage can be very heavy and make
everything slower. That's something I definitely
like about this app. This is a little tedious work
but that's animation folks, if you feel that your movement
is repetitive enough, you could copy and paste
one cycle of waving. But I like the endronn effect and that each frame
is different. I'm doing this all
by hand. Here it is. It looks good. And I think this little effect adds
already some dynamism, even if it's quite
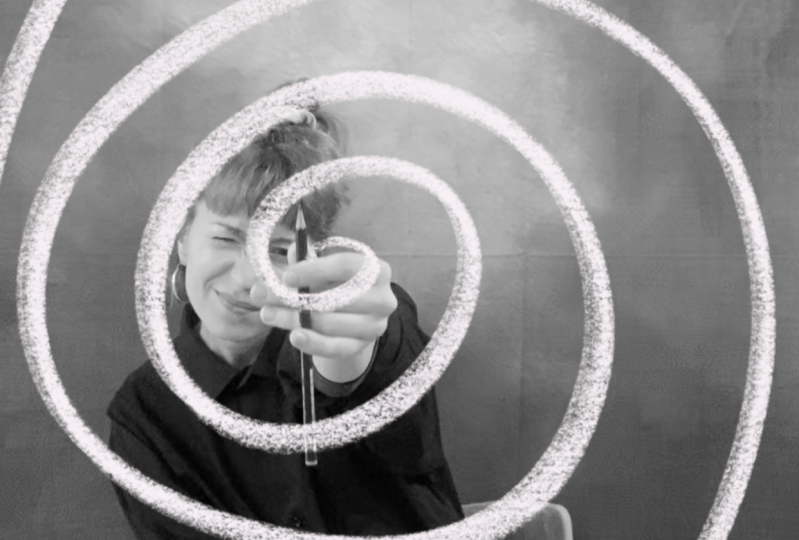
a subtle action. Imagine if you had
a larger movement. Imagine if I was dancing
and not just waving. It could be very nice to draw the action line
around the figure. Imagine, for example,
if I was spinning. That could be very interesting just as an input for
a future animation. But now let's add another track. I'm picking another color
and I'm in drawing mode. Remember that you can move the flip book around so that
it doesn't disturb you, and you can zoom
in on the area you want to draw onto with
a different brush. I'm drawing a line that's
going to interact with my character going in front
and behind the subject. As we saw earlier
with the references, this will give three
dimensionality and the illusion that the drawing
is really there around me. I want to animate the line. Moving across the frame, I'm going to draw
a reference first. This truck will be my guide. I'm setting its opacity with filter opacity
to a lower number. I'm expanding the frame for the whole duration of the clip. I'm creating a new
truck on top of this. Now, using it as a guide, I'm going to animate
frame by frame. Moving this red line
from the bottom to the top, draw a frame. Click on the next one
and go on like this. At this stage, I'm
not worrying about going in front or
behind the character. I'm just going to follow along the reference line
frame by frame. You can notice that when
I draw a new frame, I tend to draw a little bit on top of the old drawing.
And then proceeding. Let's check what we did so far. I turn off the guide to see the animation
we made. So far. It looks good, but we want
this to interact with our character going in front
and behind. Let's do that. I'm going to go frame
by frame and erase the parts where the line
goes behind the subject. For this phase, I'm turning off the onion skin and try to
be as precise as possible. In this case, for instance, it would have been nice to have a little bit of a
tail behind the leg. I'm going to add it in. Let's go through all
the drawings now. Okay, let's see how it looks. Nice. I like it. Now we can add some
effects to our animation. For instance, a blending mode, tap on the track blend mode, and try out what
you like the most. For me, it's going to be
the screen this time. Another trick we could try is to mask the animation
with some color. Simply create another truck and put some blobs of
color here and there. I put them close to the subject. I think the spray effect works
very well for this trick. Enlarger frame
across the timeline. Then tap on the mask
and clipping mask, that looks pretty cool. Awesome, I hope you
have fun exploring these possibilities which are really endless for this example. And in this I know I will
add some texts later, but now I felt like I could have a second red animated
line going through. I did the same
process again with a different path and using the screen blending
mode at the end. Here is the result. Sweet. Let's move to
the next technique.
5. Rotoscoping Details: In this lesson, we are adding some fun animations to
the sunglasses clip. After importing my video, I move on to trim the
section that interests me. I decided to keep
the short clip of around 4 seconds in which I play around with
my sunglasses. I apply the black
and white effect to match my other clip, and I'm ready to
start in this one, we're going to highlight the
detail of the sunglasses by redrawing them in every
frame with a bright color. I proceed in drawing
mode frame by frame. This technique is
called rotoscoping. Rotoscoping is the
process of creating animated sequences by tracing over live action
footage frame by frame. We are doing it only
for one element here, but it can be done
for entire shots. This is a very repetitive task you could put on some
music or a podcast. I got a little bored, and that's when I
decided that I didn't want to simply trace
the glasses over, but I started animating some
flames coming out of them. This action starts
towards the end of the clip when I release my
hands from the glasses. Once I'm done with tracing
over the frame of the glasses, I create a new truck under the previous one to fill in the lenses with
a black color. Now on a new truck on
top of the glasses, using the same mask
technique we saw earlier, I'm adding some yellow at
the edge of the glasses so that the tips of the
flames will catch it mask. And then clipping mask, this is a very lovely effect
and requires a low effort. Next I want to add
an animation of the reflection moving
across the sunglasses. And I'm showing you
three ways to do it. The first ways, frame by frame, on a new track between the black lenses
and the red frame. I'm drawing two
diagonal white lines. I move the frame by
frame towards the right. Once I'm done and
I like the speed, I'm going to group all those
drawings with the timeline. Edit, selected. Use the pen
to select all your drawings. Then top group. I'm going to set this
group as a clipping mask. Note that also the lower
truck of the black lenses needs to be a group for you to be able to use
the clipping mask. This is the first way
to achieve this effect. For the second and third way, we're not redrawing
every single frame, but we are moving those
two diagonal lines across. I hide the previous truck, and I create a new one. Here I draw my two
diagonal lines. Now I enlarge the drawing
across the old time line. Then I will set two key frames, one for the initial
pose and one for the final pose, like this. If you want, you can fix the easing by clicking in
between the key frames. I then set the truck
as a clipping mask. And here we go if you don't want to
manually set key frames. A third way to animate
this effect is to test the amazing performance
mode of procreate dreams. This tool is basically recording your finger movement and
creating key frames for you. Simply start in the
initial position. Click on Performance mode. The moment you touch the screen, Procreate is going to start
recording your movement. You may want to try a couple of times simply with
two fingers to undo. Let's animate a
camera movement now. To do so, you want to group
all the trucks together. In my case, I want
to zoom in When I make this funny move
and rotate a bit, the camera on the group tuck simply put position
and rotation, key frames like so. For the rotation, you can type the number of degrees you
want to rotate your group. Or you can type next to one of the corners and rotate manually. Now on a new truck, I'm going to animate an effect. I'm drawing these
three white lines that accentuate my action. Cool. Last but not least, I'm adding another truck on top of everything. Animate a fire. The flames are
going to start when the camera movement happens and go on until the
end of the clip. The glasses animation
is inside the group. The camera movement will effect all the layers or trucks
inside the group. When I animate on a new
T outside of the group, like for instance the white
eyelets or the flames, they will not be affected
by the camera movement. Lastly, I use the
same mask effect to add some gradient to the flames so that they have the same
style of the glasses. We're done. This piece
turned out pretty fire.
6. Sparkles & Highlights FX: This time we are animating the clapper boards
in as we did before. I'm importing my clip into a
new Procre Dreams project. And I'm framing it
so that the action and the subject are in
the center of the frame. I then cut the clip to keep
the section I like the most. This time it's only
3 seconds long. I apply the HSB effect, pulling down the
saturation as usual. In this exercise,
I want to enhance the action and animate the
clapping of the clapper board. Then I plan to animate some
sparkle effects around. And lastly, something on the
clapper itself. Let's go. I start by analyzing the action. I am in drawing mode and I can move frame by frame
with the flip book. As you can see,
this is the moment in which the clapper
board closes, making the iconic sound. We all know I want to
animate the clapping with these three red lines growing
and moving gradually apart. Four drawings are enough
to animate this effect. After that, I'm going to add the movement line of the
clapper board closing. I go back to the beginning of the movement and I follow along, as we did earlier,
with the waving hand. It's like a speed trail which enhances the movement and brings the viewer
attention to this action. In this demonstration,
I'm drawing in the same track
of the red effect, but you can create a new
track if you prefer. Notice how the two
effects are connected. The moment the white
lines disappear, the red effect starts. This helps to create a
continuity in the animation. It looks like the two
animations are linked, and that the first one guides the viewer's eye
to the second one. Awesome, This one works already. Next we're learning how to
animate a sparkle effect. It's a very common
and useful animation that can make every
shot unique and pretty. Here I'm drawing
the sequence frame by frame on a new truck. I start with the main star and then I animate the
way it appears, moving quickly
from a smaller dot to the full star in
only three drawings. Then I go on and I stretch the star so that it
becomes almost a cross. In the sixth drawing, the cross breaks apart. I maintain a little
star in the middle. Finally, then we make all
the particles disappear. This is how it looks like. I'm going to group all those
drawings so that I can easily move the animation
around and apply some effects. Here I want to show
you the difference between duplicating a group
and duplicating a truck. Duplicating a group is useful, like in this case,
to make a loop. If you want the sparkle
animation to repeat, tap on the group Duplicate. If you want to
duplicate the truck, tap on it, truck
options duplicate. In this case, I want to duplicate the truck
so that I can have multiple sparkle animations and offset them after
duplicating the track. You want to move them in the timeline and
also on the stage, so that they happen in different places,
at different times. For example, like this.
But I want to push this even further and
show you that you can also animate
the group sequence, adding for instance, a rotation. With the group selected, you can flip the animation
and edit the anchor point. That's what we want to do now, find this little cross and drag it to the
middle of the sparkle. In this way, when we
scale it or rotate it, the anchor point will
be in the center. Now that it's done, go
at the beginning of your animation and see that
the rotation here is zero. Then let's move at the end, let's set the rotation
to a higher number. This time, like for instance, 180, you can see how now the sparkle
animation is also rotating. That's a pretty cool effect. In the same way, you
can also animate the size or the
opacity if you want. For instance, I am now adding an opacity animation towards the end of the sparkle effect. That in the end it
starts to fade away. In this way, you can
duplicate and tweak the same animation and
make it look different. Now we have two sparkle effects. I'm going to draw a new one, this time in red with
a little variation. By the way, you can find some useful sequences in
the resources as reference. This time as the star grows, I'm adding this
circle around it. The circle grows and
gradually disappears. This is how the
animation looks for now. Now I'm grouping
the red sparkle. After positioning my anchor
point in the middle, I make the red sparkle smaller. And I animate a rotation. Remember, you can edit the easing by tapping in
between two key frames. A linear easing will be a
constant movement while easing in and out are giving you acceleration and
deceleration effects. Next, I'm animating with a red line contour
of the clapboard. This effect helps me
to put the focus even more on that object and the action that's
about to happen. I simply go frame
by frame and let the red line run across
the edges of the object. I chose a brush that's a little transparent because
I wanted to see through a little bit after I applied the
blending mode screen. This highlight is preparing the viewer for the big
action, the clapping. It's starting at the bottom, running around and
going up to the part of the clapper board that
it's going to close in. This way, we are
building up attention and tension towards
the clapping action. I group the frames and I apply the blending mode
screen to the group. Okay, now it works
better for me. Again, this effect ends when
the next one is starting. In the end, I duplicated the red effect to
balance the red color. This is the final
look of our clip. I like how the effects
are connected to each other and how they
enhance the main action, putting the focus on
the clapper board. In the next lesson, we add some animated text
to the waving scene.
7. Text Integration: In this final animation lesson, we're adding some text
to the waving scene. Do you remember
the waving scene? We're back at it to add
some animated text. I love the references
from Pinterest in which the text interacts
with the subject. I first write some lettering
around my subject. I like this typography, but I soon realize it
would be much better for the animation to break up the lettering and separate
each letter like this. My goal is to animate the text to make it first appear
and then disappear. It's important to start with the final lettering
and lay out this is the most important frame
of the animation because we want our viewer to have
the time to read the text. To make the text interact
with the subject. I will delete some
parts, for instance, here around the head, so that the text
will be behind it. Before animating the appearance and disappearance of the text, I want to create a
loop of the word. Hello. I turn on the
onion skin and I'm going to redraw this frame a couple of times for
a boiling effect. Note that we saw already the boiling effect
on a previous class, the one about creating a
pack of animated stickers. I try to retrace it as
precisely as possible, but also embracing the
imperfections which are inevitable and
which are going to give us this interesting
boiling effect. Copy the first frame, 34 or five times. Something like that might work. You can decide if you want
your boiling effect to be moving a lot or if you
want a subtle animation, depending how precise
you are in your tracing. For instance, you
can see here that the thickness of the L
changes quite a lot. And I don't like it too
much, I'm going to fix it. The video underneath
might distract you and not allowing you to
properly see the onion skin. You can turn the truck
off. Just for now. Here is what we have got so far. Let's do a couple more frames. Also, as I said on
my previous class, always copy from
the first frame, Otherwise it's possible that
the animation will shift. For example, moving
in this direction. Now I'm exaggerating. Of course, to avoid this
copy from the first frame, I click on the first
drawing and I add the frame in between the two so that I keep the
first as a reference. Okay, this is interesting
for my lettering style. I'm cutting the edges
of the letters by erasing the inclination is
in this case quite relevant. Otherwise we would probably
notice this difference in the boiling and this small detail would
disturb the loop. For this reason,
while retracing, I'm going to try to keep
the same inclination. Now we have four frames. Before I look them, I'm going to erase the parts
that go behind the subject. We're going to copy
and paste this. Now I'm trying to be very
precise with the sing, but this only works if I don't move my head
throughout the clip. If you're going to move
a lot in your shot, you might consider
duplicate the loop and delete the parts that go
behind the subject at the end. If this happens to you as well, the fact that you cannot
delete something, check if that frame
has multiple layers. Like in my case, now that
we have this sequence, I'm going to group it and
duplicate it a couple of times for my hello. At least a second would be necessary to let
the viewer read. Now let's animate how
this text is appearing. I'm turning on the onion
skin to see the text. The plan is to animate
the appearance like a liquid that spreads to make later everything disappear with a dissolving effect for
the appearance animation, I am animating backwards, starting from the final text. This brush has a nice
pressure effect, so that if I press on and
off, this is happening. Not all brushes
have this feature, and you don't have to
use this specific brush. You can draw by hand bubbles
all across the surface. This is how we're
going to proceed. I'm going to show
you quickly now. The more we go away from the boiling text direction
left in the timeline, the more those bubbles
are going to be small until they're
just tiny dots, they're going to
slowly disappear. In this case, I want to play around with the
pressure of this brush, but the more I move away
from the boiling text, the more I will have to
draw single bubbles. I'm turning off the
main video again because it's distracting
me while I animate. I proceed backwards to make the bubbles
smaller and smaller. I'm going to change
the onion skin color to let you see better. We are breaking
the pieces apart. If, for instance,
this one big line is connected in the
previous frame, it might be divided into, if it's a long line, I'm breaking it apart. When it's already a small piece, I'm going to draw a smaller dot. At this point, I'm not too
precise or thinking too much. I simply go with the flow
and see what happens. Let's check, we
made four frames, and here's our text
appearing in here. I might add an extra drawing to make the animation smoother. I go back into drawing
mode and I add an extra drawing with the
plus, with the onion skin. I see the previous one and the following is
the boiling group, I make an in between, so I have to be a little
more precise here. I could start
introducing some of the clean edges we have
in the final text. Here we go. Nice Now
I like it much more. Now, we need to make
the text disappear. So we go on the right
side of the boiling text. We could use the same
technique we just used and break the
text apart in bubbles. But this time I want to try a different
type of animation. I want to make the font explode. I'm going to draw the
contour of the text. Again, I need to turn off
the video to see better. Now the goal is to move the outlines away
from the center, and at the same time
to break them apart. For instance, this
line now might be a bit broken and a
little further away. Like this, in this frame we still keep the
shape of the letters, but we break it apart, making it a little larger. The more we proceed
with the frames, the thinner the lines become and they
dissolve in the air. You can animate
straight ahead and later check if the movement
is too fast or too slow. When there are many
little pieces, it might be harder to remember in which direction
they are moving. So you can go back, flip through the frames and realize where to
trace the next line. Finally, they slowly disappear. Okay, let's turn on the video again and check the
animation play. It works. Now we can turn on the
animations we made earlier. At this point, remember, you can readjust the
timing if needed, you can group each
animation and move it around together with
the previous animation. Here is the final result. Great job everyone. It's time to expert
and wrap up the class.
8. Exporting & Sharing: Congratulations for animating
these amazing portraits. The next step is to export them, to bring them out of procreate
dreams and into the world. In this lesson, we will see how to export from
procreate dreams, not only videos but
also still images. Here is our beautiful
animation we just finished. If your animation
is not starting at the beginning of the
timeline, like in this case, you can select all the tracks, group them, and move the
group back at the beginning. In this way, you will not have some blank frames or seconds in the beginning
of your export. Now a final check to
see if everything looks good and we're
ready to export. Click on the name
of the project. In the properties, we can adjust the duration of the clip. Put here the amount of
seconds your animation lasts. Then proceed to share video
and save where you prefer. Note that you can also
export a frame of the video. This is very useful
for instance, if you want to use
a steel image of your animated portrait
for a profile picture, simply choose the frame
you like the most. You can even turn off some elements that you don't
want in the screenshot. For instance, in my case, this red action line. Then click on the
name of the project. Again, share Current Frame. Here you go, easy,
save your animations. Upload them on social media and share them with the class. Join me in the next lesson
for the conclusion of the class and some
suggestions to move forward.
9. Recap & Next Steps: Good job in
completing this class! I cannot wait to see what
you've been creating and all the ways you are interacting
with live footage. Here I'm giving you some
extra ideas to keep experimenting with these
tools I just showed you. I also want to let you know that this class as a sister, in fact, I made two procreate
dreams classes and launched them
at the same time. Because they really
go hand in hand. If you want to continue your
animation on video journey, consider follow my other
class, City Adventures. Animate your local charm
with Procreate Dreams, where we're going on
a mission downtown and make animated postcards. I encourage you to keep
experimenting with animation. And in this case, with
procreate dreams, discovering new tricks. Something I tried and I found quite funny
is for instance, to animate on top of my shadow. Last but not least, please leave a review as this helps greatly me and the algorithm to let other students
discover this class. You can follow me
on social media, subscribe to my newsletter, Creative Crave, or
simply reach out: I'm always glad when you
want to connect with me, good luck with your
creative path and bye!
10. Extra: Hi, have you published
your project yet? If you need extra support, remember that you can write in the discussion section or you can publish a
work in progress And I will leave feedback and
tips if that's not enough. Skillshare introduced
one-on-one sessions which are available to
anyone to find them. Simply go on my
Skillshare profile page where you can read
all about them. The best part is
that you don't need a Skillshare membership
to participate. During the one-on-one session, you can get a portfolio review, career guidance for your
creative practice, or a Project Deep dive to discuss a
Skillshare assignment. Are you attempting
your first steps as a freelancer or are you stuck in thinking about a
pivot in your career? Are you moving to
a new country and a new market and you're
not sure where to begin? Are you unsure about your
portfolio and you would like to polish it and have more
chances on finding jobs? Do you want advice on a specific animated sequence or do you want a deep feedback
on a class project? If any of those questions
are bothering you, then this private session could
be the right fit for you. Happy Creating, and see you soon!
 Giulia Martinelli, Animation Director / Illustrator