Transcripts
1. 1consciousdrawingtechniquesintroductionV3: Hello, everyone, and welcome to conscious during techniques. My name's Chris Sandbox, and I'm really excited that you have decided to join me on these drawing. Janey. I know for a lot of people, it is a big step two. Take that leap into exploring your own creative process, and it's something that we often procrastinate about for a long time. So I'm really glad that you have decided to take the leap and begin that process for yourself. I know I'm here to support you throughout the entire way, so a conscious during techniques is about exploring your inner creativity. It's about learning to connect with yourself through drawing and through the creative process. It's about expressing yourself. It's also about learning to draw with confidence and committing to the process. It's about creating awareness in your creative practice, being conscious as to what and why you are creating. And it's about building your drawing skills while enhancing relax, ation and, most importantly, enjoying yourself. So the Contra Storing Techniques course is designed for beginners. It is designed for those who want to explore their creative side, but they don't have any prior training or knowledge on how to do technical drawing skills, and we're going to learn those skills. It's for those who want to improve their drawing skills and create more mindfulness in the drawing practice. So the cost includes video elections where I will be talking to you vice device, as I am now. It also has a lot of exercises with some comprehensive downloadable instructions for you to follow. Along with Onda, we will be covering different points of information, so the main six topics or they could also be thought to be divided into six different lessons. And the 1st 1 is going to be called drawing with the whole self, using your eyes in every way shadow and light dimensional drawings exploring different mediums and intentional drawings. Now this cost can be completed entirely at your own pace. I encourage you to. I feel into when it is right for you to do this practice so there is some guidelines that I could give, but it's really all about you. So it's about you setting your own intentions, setting clear guidelines for yourself and following through with ours often when we set a clear guideline and then we follow through with that that process in itself helps us to build our own confidence because we're committing to ourselves. The materials that you will need for these course are going to vary depending on what types of mediums you would like to explore throughout your during process. However, to get you started, all you need is paper, pencil sharpener, an eraser and a rula. Now, at a three or a four visual diary is always a fantastic idea. Cartridge paper is the best to work on for drawing because it has a lot of flexibility with the different mediums that we're going to explore. However, if you don't have access to cartridge paper than any Pangle, we'll be fine again. Sometimes we feel like we need to go out and buy all of these expensive materials so that we have the perfect scenario that we can do our drawings in, and that's not always necessary. So, um, whatever you have available to you is exactly what you need to do this process. So I remember stay committed to the process. Most importantly, enjoy yourself. And if you have any questions along the way, please let me know as I am here to support you and your during Jenny
2. Skillshareintro1:
3. 2consciousdrawingtechniqueslesson1part1V2: So first thing I want to talk to you about having confidence in your creations. And this is something that is so important, not just enduring but in life in general. It's about having the confidence to move forward, about believing in yourself and about quieting the stories that we have in our mind so that we can move forward and that we can do what we want to do. We often have a lot of stories, especially around creativity, and I think that often our education system or influences of when we were growing up have a lot to do with this. So I know it as a child and I see it happening. I have a child myself. Um, we start out with so much confidence in our abilities to draw, and we I think every single creation that we do is wonderful than our parents put it on the fridge and they give us lots of compliments about it, and then we go to school that we learn all. It's actually not that gorge on. We start comparing ourselves with other people on. We start to lose confidence in that process and part off the adult coloring in movement. When I made some videos about that, Ah, lot of the baby back that I got was that people were actually afraid to color in. They were afraid to put pen to paper because somewhere along the line they were told that they weren't good enough to do that. So it's about getting back that confidence in our inability. And I think the most important thing to remember is it's only a piece of paper. Yeah, I'm going to say that again. It's only a piece of paper. So if you create something or draw something that you don't like or that maybe is not at a really high standard, first off it doesn't matter. What we're doing here is we're going to be practicing and everything that we do. It is just a practice run, and if it turns out great, great. If it doesn't, that's great, too, because we have learned from that and we often become really critical of ourselves and we think tracks ills. Uh, this part's not good enough, and that part's not good enough. And when you look at all of the things on that page that are not good enough, so that's what we're not going to do. What we're going to do is we're gonna start looking and everything that we create on. We're going to find the parts that are good. We're gonna find the parts that we do well and later we might learn to improve the parts that it may be not so great. But most importantly, we're going to start to build the confidence in the things that we do well. So when we consciously choose to let go of our own expectations and our own self judgment, we then free up the mind and leave a lot more space to be able to create. And that's what's important. Here is letting go of expectations and letting go of our own judgments so that we can move forward with confidence. Earlier, I mentioned that having a visual diary is a great idea. So this is going to contradict myself a little bit because in one sentence I say it's only a piece of paper, and if you don't want to show anybody, you don't have to. If you want to throw it out when you're finished, that's OK to you don't have to hold on to anything that you don't want to. However, in contrast to that, keeping a record off your process and of your drawing Jenny can be a really great way to gain confidence. So if you're inclined to, I encourage you to work in a visual diary. I also encourage you today to your work onto work from the front of the book to the back of the book that way into a three months time into a three days time. You can look back on your creative journey and you can reflect on how far you have actually come, and that alone will give you a lot of confidence. I talked about having something called a 10 year rule in design, and sometimes I look back on things that I had done 10 years ago, and at the time I was really self critical and I really didn't like them, and I thought, Oh, goodness, that's no good. I look back in Cheney's time, and I think, Wow, how amazing a my and how wonderful Indeed I do back then, considering where I waas and look at how far I have come. So if you wish, keep a visual diary. If you never want to show anybody. That's okay. If you want to send me pictures from it and things that you have created so that I can help give you feedback, then that's great to please do so.
4. 3consciousdrawingtechniqueslesson1part2V2: So before we start our first exercise, I just want to address another topic first, and that is called feeling into the process now feeling into the process. This is something that will be gauged by the type of person that you are and how deep you want to go into this as a spiritual practice or if you're wanting to take it into a more practical level. At the end of this video, there will be a meditation available for you to download and two prior to starting your during practice. However, even if you're not going to meditate before age drawing, I want you to feel into the process. I want you to take three deep breaths, and I want you to set your intentions for the drawing. What are you wanting to create? What emotions are you wanting to convey? Why are you choosing to do this drawing? Maybe you could feel into your current feelings in your head space. Are you possibly in lift brain or right brain? Married? We'll talk about that a little bit later. Uh oh. You Somewhere in between. Are you feeling happy, relaxed, angry or frustrated? And then often it's a good idea to reflect after we have done the drawing and see where I hid spaces that in save perhaps we have changed head spaces as well. Sometimes it's a great idea to choose a medium that is going to express our emotions on. We'll talk about this more deeply in Listen 55 for example, Chocolate is a great way to get anger and frustration app if we're feeling soft and light, maybe just to the like graphite pencil is a great way to go, however you're feeling is what you should do. Okay, let's get on to the first exercise, which is cool, drawing without an eraser. My intentions for this drawing to feel into the process and to let go of expectations and the end result. And that is why we're drawing without an eraser. This is not about the end result. This is just about playing with technique and forms and feeling free to express whatever comes ash. Throughout this course, we're going to be drawing a lot of things in nature. Nature has its own freedom and its own imperfections, so therefore, it is a really great way to start withdrawing process and thes mountains have great form and shadow, and we will be able to play with this idea as we go along. Today I'm working on cartridge pipe up and I have a to B pencil. And one thing that I would be doing throughout the video a lot is using a test page. So because I've just shop into these pencil, I'm just going to soften the edge research so that it doesn't create ate a really hard line . So I've just softened off that pencil a little bit and that we'll help with the start of the drawing. My space is a lot bigger than the drawing that I want to create, so I often like to work within a border. And then I have a reference for proportion and scale. But because this is not a perfect drawing, I'm just going to start wherever I want on the page, and I'm going to start creating that edge of the mountain, and I'm looking at my picture reference a lot at the moment to create that mountainous itch . And as I move through the drawing, I will be looking Listen, listen, my picture and Mawr and Mawr at what I'm creating But for the moment, my eyes on my picture a lot, and I, and creating a basic outline that I and then going to come back and shade in later. Sorry. The beauty about these mountains is I can go wherever I want, and I'm gonna go up. I'm gonna create a nice Paige to the mansion shape, and then I'm gonna come back down the mountain, gonna create some cutting in detail there some foreground detail ing here, and my cloud line. We'll be roughly up here and I can create some cloud shading writer. And now that I created that beautiful line, I can go back and with a really great freedom and movement with my pencil, I can create shadow in detail. And again, what I love about drawing nature is it does not need to be perfect. We can really going to town without expression. He up and just text your away. Uh huh. So I'm having a little fun with this drawing. Um, it's a really interesting texture that we get to create with these mountains. And you can see here I've got an area that doesn't really match the picture. It'll I've just decided that I want to add a little valley in here. Andi, I didn't really mean to do that at first. Uh, it just sort of happened. And so now I'm running with it. I'm embracing my mistake, and I am changing it into a positive part of the drawing. So I'm going to really take it down and create some foreground darkness here, take you my drawing a bit of depth and dimension. And that's often what it's all about during without an eraser could really help us to release the idea of trying to create an exact copy off the picture on Rather just embracing what we're doing at the time. Okay, stop. After 10 minutes, I want you to stop drawing, and I want you to walk away from your touring if you can. Before you go close your computer or turn the original image over so that when you come back, you are not comparing to the original image and you are not comparing toe what I have just demonstrated. This is about you, Lord roaring, and it's about looking at what you have done. Well, I want you to congratulate yourself on creating an image of nature that is perfectly in perfect, and that's what this is all about. It's your turn now, so please download the learning materials to rake up yourself if you need on any of the information I have just in of it. There is also exercise instructions where you will find the image of the mountains, so please download these and take 10 minutes of your time to complete this exercise and congratulate yourself for the end.
5. 4exercise instructionsV2:
6. 5consciousdrawingtechniquesmeditation: When you feel ready, close your eyes. Begin to turn your focus inwards. Take three deep breaths in through the noise and out through the mouth, relaxing with H breath into your body. Being present with yourself. Continue to breathe deeply, turning your attention to where your energetic self is situated Right now in our around your body. What I mean by that is when we are turning our focus in words, we can feel that energetic body, our consciousness. It was often sitting up in our heads. You may feel like you're energetic. Selfie is above your head out to the Seidel, perhaps in your stomach. What ever your energy is focused right now, begin to really feel into that space. When you are ready, start slowly moving your energetic 40 and your focus towards your center towards your heart space. Take your time. Remember to breathe. Allow your consciousness to center itself in your heart space into your creative space. This is the space of infinite possibility of infinite creativity that we all had infinite access to. This face of creativity is always open to us. We can return here whenever we want. It is a safe space a space in which we can create from where we can access that part of us that can guide our creative janney. And when we consciously choose to create from that heart space, we're choosing to follow our hearts and this is in itself creativity in its purest form. I continue to slowly move your consciousness down through your body towards your navel area . Geo Center to US Olympic Shocker. Feeling into this space individualized small light like a candle flame that is at the center of your being and now visualize expanding this light instantaneously to feel your whole self. Imagine a large bubble of life surrounding your whole being breathing in this light. Now submerging in this light. This is the light of creativity. Enjoy. Notice how you feel when you're feeling into this space of light and movement of energy that you can generate at any time, journeying down again down throughout body throughout legs. Now fate visualized, reaching down into the earth into mother earth, growing out routes into the spreading out routes far and wide, feeling our fate and our legs supported and grounded into the earth, grounding our artistic practice and a creative confidence feeling the stability and the support of our of mother Nature, knowing that we have her support and knowing that we can move forward with confidence remaining grounded and scented, you know, being bringing awareness to the sensations about body right now, continuing to pre slowly begin to journey up with through our fate throughout legs and stomach through our body. In fact, now becoming aware of our hands in your drawing hand in particular feeling, there is a line of connected energy from our minds and through our hearts, down into your hand. Becoming aware of this connection now becoming conscious off this connection, knowing that this connection is always there and we can feel it at any time we like from the space or connection and wholeness repeat after me, either silently or aloud. I, um creativity. I allow myself to feel confident in my creating and artistic practice. I follow my intuition into my own creativity. I allow myself to explore my creative side with an open mind and an open heart. When you are ready, bring your attention back to the full awareness of your body in the room and where you are right now. Change the movement of breath in your body. Gradually externalize your awareness, listening to sounds in the room the feeling of the air on your skin. When you are ready, gently open your eyes and begin your creative Janney.
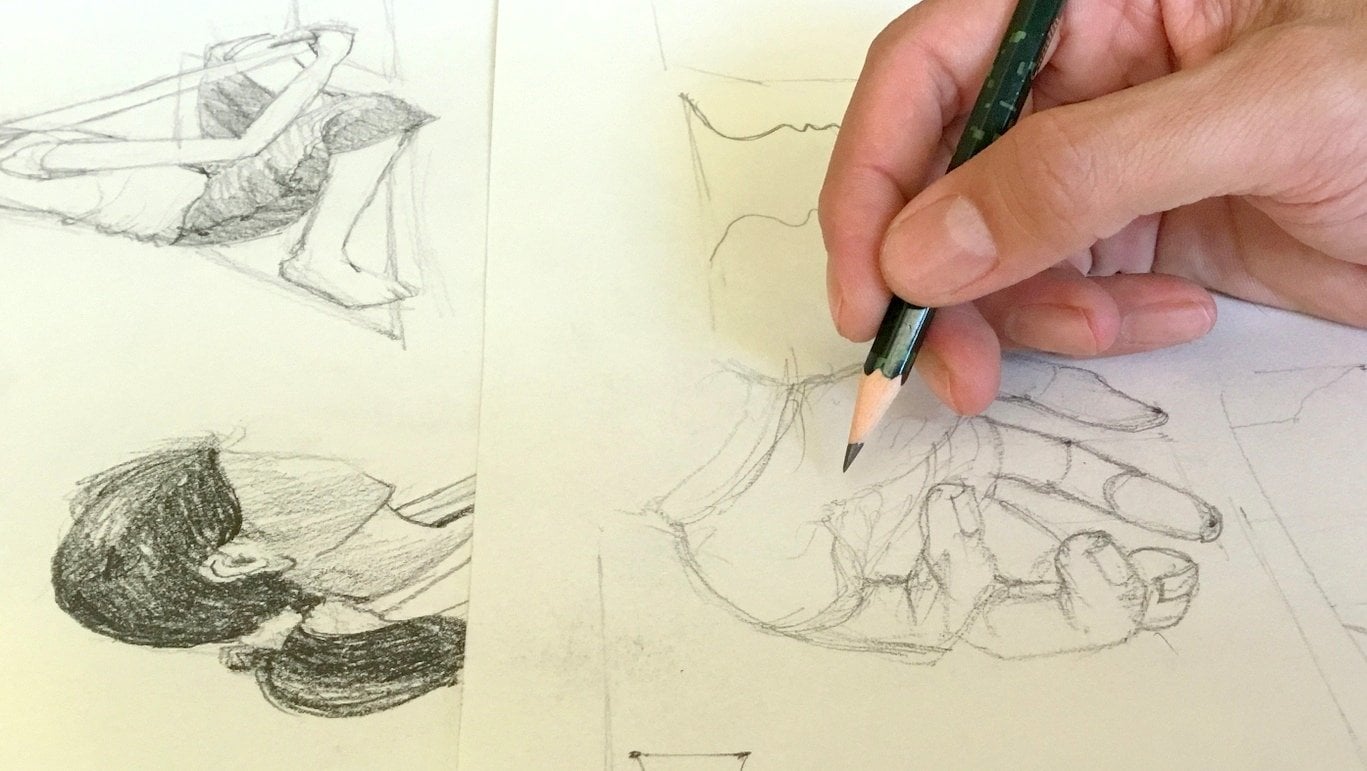
7. 6consciousdrawingtechniqueslesson1part3: we're ready now to start building a relationship with our hand. I find this is one of the key elements that helps me to be a really good drawer on a really good artist. It's something that you will take time to develop and something that well come with a lot of practice. Building a relationship without hand is about allowing our hand and our mind to work together as a team. We are so often cut off from our physical bodies and unaware of our mind and body connection. And rediscovering this through drawing is not only possible but empowering and inspiring as well. It doesn't matter at how you hold your hand or what angle the paper is on, although I do find rotating the page to be quite handy. What matters is that your hand is doing what your mind wants it to do. There are many techniques that you can learn that will help you to become a better artist. However, consciously developing a relationship with your brain and your hand will help you to give yourself this an atomic programming. It will help your hand to do what you're telling it to do as you're going through the process off drawing. I often find that if I haven't picked up a pencil or a pin for a long time, and I have had a holiday or I haven't been drawing for a while, I need to spend a little bit of time reconnecting with my hand and being able to draw again . If I have a series of six or seven drawings to do, I often find that the last few drawings that I do is a lot easier and a better quality than the first few drawings that I had done. And that's because my hand and my brain have a bit of relationship as I'm moving through the day or moving through that set of drawings. The other thing that we're going to be doing in this exercise is learning how our hand likes to behave. Some of you might find that drawing geometric shapes, straight lines, squares, triangles. That kind of thing is a lot easier for you. I find drawing curves to be a lot easier for me. Learn to follow the natural curve off your hand, rotate the page if you need to be able to use your hand, the right way in the direction that it wants to flow in, rather than trying to go against the grain of what your hand wants to do or against the direction that your hand wants to Floyd. On that way, you will be exploring how your hand functions and what comes out of the end result during these Infinity symbols. It's really about exploring how my hands creates a curve. How does it like to travel around the page? Do I want to rotate my page when I'm drawing? Because my hand will make a full of curve if it's working in one particular direction? Uh, how does my hand like to interact with the page when doing a curve? And I like to do them all different sizes, going in different directions, not really worried about where they're going on the page, because this is purely and exercise. Playing with that, this idea of just continually making that pattern as well. And now that I've given my hands that practice, trying again in a different area and seeing how much easier it is now from when I first started trying to go back the other way, forcing my hand to go in a different direction. That's quite difficult for me to curve that way instead. And even though I only want to spend about five or six minutes on this exercise, my hand just wants to keep going. It's quite fun when you start getting into it and just really allowing your hand to go forward, not worrying about whether it's gonna be correct or not, could be very relaxing.
8. 7consciousdrawingtechniqueslesson1part4: I'd like to talk to you now about a brain and how we use both sides in drawing. I'm sure a lot of you have already heard about how we have a left and a right brain, and those brain sides have different functions. So our left brain is all about mathematics logic. It works in straight lines. It is the masculine side of our brain, and it likes to work instruction steps to get to the end result. It looks at separate parts that then creates a whole by going through these separate parts . And a lot of people believe that the right brain is very dominant in drawing. And, yes, the right brain is our creative side. However, the left side has a huge amount of influence when we are doing something that is step by step, and as a designer I often have to create a technical drawings, and I have to create drawings that involved mathematics and that involve technical steps. So therefore, I'm using my left brain at that time, the right brain. On the other hand, it's about creativity. It's the feminine side of our brain. It works in circles and curves. It's about inspiration and exploration off self. When we're in right brain mode, we think about the whole picture, the whole creative end result. We don't work step by step. We're always thinking about the end big picture. You can purposefully train your brain to enter into that left side and that right side off the brain. Sometimes when you're drawing, you want to be a left brain mode. Sometimes when you're creating and drawing, you want to be in right brain mode. Another way to look at it is that the left brain draws what we know and the right brand roles. What we see when we're during a tree, for example, When we're working in left brain mode, we don't what we know. We draw what we learned when we were her child, and it would look very childlike when we're working in right brain mode, which will bring what we see, which were wearing what reality actually is. And that's a huge demonstration off the difference in how a brain functions work. So why does this matter to us? Over the years, I have learned that discovering through my own artistic practices, that you can choose which side of the brain you are consciously using. Another way to see this is you can actually swap between left and right brain Mearns. As an artist, I find this to be quite difficult often when I am painting and I'm in my element at work, and I'm really delving into my creative process. And my builder comes out of nowhere and wants to talk to me about what I have designed and the sizes of things and how it's going to be put together. And I find it really hard to swap back into that left brain mode because it takes me a little bit of time to get out of that creative, whole swirly feminine itself in Back in June, my masculine, I'm back into my left brain logical reasoning. So it's really hard for me to swap between the two. I am definitely a right brain dominant person, and you may find that you are right brain dominant or a left brain dominant. It doesn't really matter. What it matters is that we're aware of what state the way in and how we're applying that to a creative prices when we're relaxing and we are particularly drawing images of nature or images that have free flowing movement and creativity, It's easy to feel ourselves in right brain. I have developed the next two exercises to help you to explore your left brain, explore your right brain. And how does that feel when you're in both of those mines? What you need for this exercise is a pencil, or in this case, I have a pacer, a roula and a rubber. I'd like to work with a ruler that I can see through, and I have already traced after my template and with tracing, you can either trace onto tracing paper. You can also use any window in your house as a light box. It's a very handy trip. Just take up your paper, toothy windows, two layers of paper and trace off the image that is underneath. It doesn't matter what scale you print the image to. You can print it to any size, and it will still work. The most important thing is that you mark the dashes on each off the lines as per the template, and it should all work out. It's important to also keep the template close to you so that you could know which lines are which, for example, this is like a This is lying, Bates. They see this is I D. And I'm going to follow my template and my instructions to know exactly what I'm doing. So following along with the instructions step by step, we're going to start by joining Line A with line B, and we're going to go from a one to be 11. And as we draw our line here, most importantly, we're going to miss the center Diamond Square here. We are not going to put anything in that area. And then we're going to move to point to A to to be, uh, 10. And we're going to draw a line again. Wow, missing that center part. And then we're going to go to the next two points, which will be there. I'm going to continue with the sequence, the hallway down both sides and there we go. We created our first geometric circular greet, and we're going to do the same thing again. But joining lines C and D together No, I often find it a good tree to place my pacer on the dot that I am going to be drawing from and then slide my ruler up to the Pacer. That way I could be a little quicker and I that I am being quite accurate with you. Am I? Roller is going to lend. Okay, we know made out geometric curves on joining both sides A and B and C and D And we're going to move on and join e to hate each. We're gonna create a circular greed In this way. Sometimes you can be a little tripped by the optical illusions off the small areas. Sorry. Keep an eye on exactly what you're doing and make sure that you are matching up the right dots with the right dots. Now, here, when we get to this point on the interline, this in a square touches the midway between two points, so it's going to get a little tricky here. So I recommend you using the penso True. The rule of trip that I mentioned before. It's a little little bit there. That's OK. And now we're gonna be on the other side of that square going to that charge we've just finished going from 80 hates. So now we're gonna go from F to G and now we're gonna go from J to K and then l two I to finishing the center area, and this is a little more exciting. We could do it a little quicker now because we're really great at this process and we don't have to worry about thesis Entra Square anymore. So we can just You're nice and quick now, okay? You We have now created a really nice geometric shape, and if you like, you can stop here and skip to the end process. Now, However, if you would like, I'm going to continue to feel in some of these areas here with more of our geometric greed . So if you would like to continue, then the first thing we're going to do is go back to a one and we're going to join a 12 d 11 and we're going to continue our greed through year. What's important to note is the only place that I am drawing lines is in this area here, which is our sort of a hole in our design at the moment. So I'm gonna very carefully go now to the next two dots, and instead of going all the way to the edge. I'm only drawing in that gap area and I'm going to do the same thing in here, joining sides B to C. And now we're going to repeat that process for E and F to fill in this gap. Andi, Then G and high h Inter feeling this camp and again Now the last step from J to I and L to K When you have completed your drawing, close your eyes. How do you feel? Remember to breathe below your drawing. I want you to read three words that describe how you feel. Some questions you may want to ask yourself could include How does your mind feel right now ? How does your body feel? How do your eyes feel? How does your drawing hand feel? What did you like about during that way? What did you not like about drawing that way? Did you enjoy that? Left brain prices
9. 8consciousdrawingtechniqueslesson1part5: This next exercise is about relaxing into the right brain marred. It's about allowing the drawing to simply flow onto the page without any control or rigidity. So I have chosen this beautiful feather image that has, ah, lot of lines of curves and free flowing forms. It also has some beautiful contrast through the center, and it has some opportunities for some shading and creating texture. This particular drawing is not to be timed. I would love you to spend half an hour, at least on the drawing, but players do not set a timer for this drawing. Just let the time floor and allow as much time as you want or need to create this beautiful feather picture. So right now I'm peaking at some of the details of the feather and just giving myself a basic guide as to where these feathers end. And then I'm going to come back and create a lot more detail later. So I'm looking at my image now roughly, and I'm saying, I want to go up here and I want to go here, and I'm gonna allow my image to go up there with the feathers trailing over once I've got a basic idea is to wear the main line of the feather ease and my hand is making a perfect curve there. Once I creates and basic feathers, I can go back and I can just relax and create lots and lots of feather lines. And the reason I chose this image is because again, it doesn't mash where they go I've got a basic idea is to wear all of the feather strands, sit on the Drori And now I can just Jerry whatever I wanted to And it will still look beautiful and perfectly in perfect Just like nature. Another thing technique that I am using to create the look of a feather is rather than doing one harsh line on the page, I'm feathering my lines and I'm dashing in a way I'm dashing on the page to get that beautiful, feathery look and I create a few and then I go back and I can create more texture and more texture Has that guy One thing you may be tempted to do is start to rush. You may feel like oh, this is taking too long, and I'm just gonna, you know, hurry up and do it quickly and you're going to lose that beautiful light, feathery nous off the image. Plus you also going to slip yourself into left brain mode, which works a lot faster and a lot quicker. So if you find that you're starting to get a little frustrated and you're wanting to do it quicker, then when you first started, I want you to just take a deep breath and slow down again and surrender to the process. And when we I feel like we're rushing, it's a good idea to refer back to the image and just to keep looking at the image and following the lines off the feather that it in the image instead off just trying to create a bunch of dashes to get the drawing finished. That's not what this is about. This is really just about taking your time and absorbing yourself in the feather shape. Perhaps if you find this drawing frustrating, it is an indication that you are more of a lift brain Dora, and that's perfectly fine. Now that I have most of my feather kind of blocked in, I am going to go back and I'm going to add a lot more def and darkness to the roots because of that dock area that is in the feather. Now, I have seen a little bit lazy because I've really been relaxing into the process today. And so I have allowed my hand to smudge affair beauty of the base of the page. And that's OK, because I'm gonna balance that out by simply smudging the rest of it. So here I go. It will create a bit of a smudge effect over the entire page using the palm of my hand and you can see that the edge of the power my hand is quite dirty. I'm using a hey HB pencil, which is a much lighter pencil than what I normally use simply because I felt that it was indicative off the feather form. And so this smudging hasn't been too bad. The way to avoid smudging is to really hold your hand up off the page or to get a separate piece of paper on to shrink here and to have a piece of paper there that you're using why you're drawing. However, as I like to work with my mistakes, I'm just gonna smudge into the page And then that's all fixed. And I'm gonna create more darkness at the roots here by doing some nice Messi shading, still keeping that feather texture. And I can really just take a long as I want during all of this now because it really is a beautiful part of the process. What I am still doing is I am still looking at my image, and I'm looking at some of the details that air there so that I can stay true to it now. There's some definite dark areas up here, and there's also a beautiful gap there that I want to try and maintain to give the randomness of the feather, uh, the day child. So I'm gonna keep to that. I'm going to make sure the center part is nice and duck also, the image itself does trail off at the bottom there, over here, and it cuts off a little bit there. So I'm just using my I'm creative freedom to take off a little beach, and that's fine. - And they re going putting on the finishing touches, just fixing a couple of areas there that I want to keep the same as the original image and it's okay to use an eraser a little bit, although I encourage you not to use one too much, but just for some little things at the end. Just clean up some of my smudges around the outside there. Oh, once I stopped doing that and then ruin it. So I'm gonna go back and smudge all the Rams. Give it some nice shading on the page. There we go. After completing this drawing, I feel so relaxed. I feel really free and really happy with what I've created. I feel like I could spend another hour doing these drawing and I feel really beautiful. So remember to take your time and think holistically while still allowing yourself to get lost in the detail and lose track of time. Remember to build your confidence along the way and have confidence in our creations. We consider our intentions, relax into the process. And when you're finished, I want you to congratulate yourself on a job well done. Look at all of the parts that you have done well and remember to take some time to self reflected the INGE and I'll see you in the next. Listen, when we talk about using our eyes in a new way
10. Skillshareend1:
 Crisanne Fox, Creator of Conscious Drawing Techniques