Transcripts
1. Introduction: When we look at the drawing, many of us ask ourselves, how can this artists
draw like this? I don't have the
patent or I'll never draw it that I know how it is. I've been there myself. So what we're not
seeing property is that before reaching
this stage of the drawing, the artists went
to several phases. For him or her to
reach this point. The artists have to say the word around in a different
way that it's taught. This course is all about. Hi, my name is Bobby Bravo. I'm an illustrator, artist, and art teacher
basic than Brazil. Works prohibition mailing
children's literature, advertisement and the curation. Because of my work as a children's book illustrator
and also as a mother, I always had a lot of
contact with children. And they were always
asking me, bye b, bye b. How did you learn to draw? For sure, I had
wonderful mentors, taught me everything I know and guided me to where I am now. So to keep this knowledge alive, I began to organize all
this learning in my mind. And that is how by
putting together and best-known the pieces of what
I learned over the years that I created the
course that are now present in this class to
observational drawing. I will teach you how to see
and to draw from the start. Learn to practical
exercises to develop the right side of our brain and also to see the
world two shapes. Each class will have a practical
exercise and at the end we'll put everything
together and make a drawing from
beginning to end. Since I was a little kid, I always felt more comfortable expressing myself to draw them. And they still feel
like they're drawing is just another way for us
to communicate ourselves. And you can learn this
new language as well. So come with me and
led the work begins.
2. Overview: Before we start,
let me present you a summary of what are
going to learn here. The first thing we need to pay attention to is where
internal dialogue, sometimes we can be very hard on ourselves and we ended up
being very judgmental. So let's try to decrease the volume of this
internal critic, and let's try to tune
into another frequency. Let's begin to hear a
more compassionate and also more curious voice
inside our heads. I know it seems a
little commonplace. How can we do this
in a practical way? It's very simple. To
draw from observation. We tend to spend a lot of time looking at our own drawing. Instead, let's
take a closer look at the topic we were drawing. From now on. Let's look at our subject
matter as if it were a small child of serving
everything without judgment, as if it were seeing
this for the first time. When we look at the
word around this with curiosity and passion, we get in touch with
your inner child, will automatically turn off this internal critic and connect with another
type of conscious. So this is my first and
most important tip. Focus more on the subject
matter then on our drawing. Now, I have an advice. Drawing, despite
being a learned about activity can be a
little frustrating. It's not every drawing that I
do that I like, not at all. And that's okay. But the secret is
not to give up. So overcome frustration and compete only with
their old self. You can say something like this. I like this problem,
but the next one, I'll try to do a little better. That said, let's go
to the practice. For our final project. You'll be able to
complete a drawing from beginning to end using
an image as reference. You will come out of
this class equipped with all the tools
necessary to do it. But first of all, keep in mind that in order to
make a good drawing, we need to think about 1 million
things at the same time. It's like learning to ride a bicycle or e.g. learning yoga. You need to pay attention to your briefing, your thoughts, your core, the position of our feet is too much
at the same time. So let's go step-by-step slowly. We can look at our final
project is a big marathon. And each lesson
before we get there, we'll prepare you a little
bit to carry it out. Each exercise will focus on
one or more fundamentals of drawing forms like and
share those deaf and so on. Now, onto the materials. Let me explain a little
bit about pencils. That should be HB pencils and the mechanical
pencils are harder and indicated for cleaner lines, outlines, technical
drawings, and also details. In general, we use the tip of the pencil to draw
a line in this way. This six big pencils
and also for B5 be the bigger
the, the softer. They are indicated for a softer drawing for
shading as well. And they use this side of the pains to more
than the point, the lines come out darker and also a little
bit more healthy. So if you have a very
light hand, go with a six. But if our hand has
a heavier grip, you can use it to me. If you prefer to learn
digitally, that's fine too. You can also use a soft eraser, kneaded eraser, and also ruler to make some frames
for our drawing. Now, let's go to our new mantra. Joy is ten per cent prevalent and nine
per cent hard work. So let's go practice.
3. Shapes: Before I start, my
first advice for you is to begin on drawing
as light as possible. Drawing is a
transparent technique. We are creating it layer by
layer on top of the order. So if you make mistakes, it's much easier to erase it for keeping our
lines very light. Sometimes when you're drawing
something very complex, we can be overwhelmed
by so much information. So where to start? The answer is from the biggest shape you can see simplifying it the most you can. For instance, if you're drawing
a village like this one, instead of drawing
house by house, you can draw first
the basic shape. This group of houses for me, always start from the largest
to the smallest shapes. Then later, you can get with
confidence into the details. We can begin asking ourselves, what shape am I seeing here? A triangle, several triangles,
rectangles, and squares. Remember, it's much easier to draw forms then
to draw things. We have two exercises
for this class. Our first exercise, Let's draw as many shapes as
you can think about. Circles, triangles, or squares,
rectangles, et cetera. Then you can pretend
they're made by clay. So let's bend in the
store them as well. No, let's get a picture
of a landscape and translate it into this
simple shapes you can see. Let's start with
the biggest ones first until we get
the smallest ones. Leave it like that. You don't need to add details on this one. Let's focus only on
the basic shapes. As soon as you
finish your drawing. Join me in the next lesson, we're going to talk about
the right side of our brain.
4. Face / Vase: The second place I'm
going to talk a little bit about the right
hemisphere of our brain. There are a lot of
studies on how we can develop our drawing by using
the right five of our brain. The brain is divided between
two parts, left and right. The right side
controls the left side of our body and vice versa. But this can be reversed
if you're left-handed. The left side is responsible
for our logical reasoning, our speech or language,
or logical thinking. The right side is the
sensitive side of our brain, and it is responsible
for our feelings, emotion, creativity,
imagination, and intuition. It's artistic and poetic side. Unfortunately, on a
day-by-day of modern life, use much more the left side than the right
side of our brain. Join is an activity that encourages to use
the right side. The next exercises were developed by an art teacher
name is Betty Edwards. I will leave her books
as referenced for you. Look at this picture.
What do you see? Two faces or a vase? I think it's both. Now, let's make our
own face vase drawing. Let's start on the left
side of the paper. Attention, if you're
a left-handed, start on the right side. First, a person's profile. It doesn't have to be perfect. It may be something like that. The important thing is that we're able to
identify a forehead, and nose, and mouth,
and the chin. As soon as I
finished drawing it, Let's do tracing on top
again, very slowly. But this time
speaking to yourself, everything you'll
drill like this. Forehead, nose, mouth,
chin, and neck. Now let's make an
horizontal line at the top and another at
the bottom of the figure. Now pay attention on the
right side of the figure, you'll start or new profile. But this time you'll
be looking at the drunk profile and inverting
each line of the drawing. Go very slowly. We are mirroring the profile. If it doesn't work,
don't give up. Start again. As you finish it, you can start a new one. This time. Let's try to draw Moses profile and
then the end of it. Or nato or face
vase as you wish. So which side of the
felt more comfortable? Well, in the first profile, you were using our
brains left side. But when you're mirror, your profile is switch
it to the right one. They do notice the difference. Well, I hope you had some
fun, different profiles. Next lesson, we'll have even more fun as we'll try to draw without looking
at the paper.
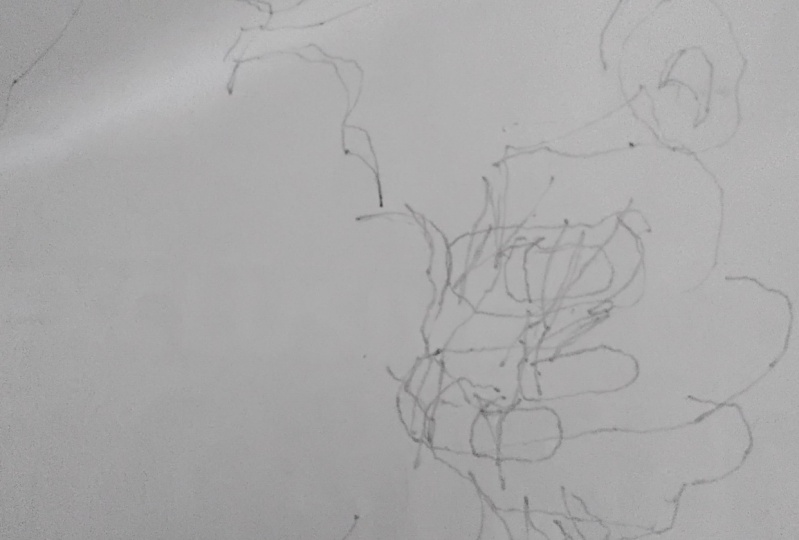
5. Blind Drawing: This is another exercise from the right
hemisphere series. You'll make a drawing this
time without looking at the paper as looking only
at what is in front of you. Want to draw without
looking at the paper, we put aside all of our memories and focus only on
what we're seeing. So we increase our perception. This way, we can
draw exactly what we see and not what we were seeing. So let's go to the assignment. First. You need to hold your paper
or you can put it under the table or turn your head to another direction,
That's up to you. Then let's mark a fixed point in your object and we're going
to begin to draw from there. Let's go very slowly
and carefully here. Our hands always
follow our eyes. If you need to go from one side of the
drawing to the other, keep her pains to against the papers so we don't
lose the reference. This lines will be part
of the drawing as well. Don't worry if your drawing
will look like I abstract. The idea here is to
stop worrying about the result and just focus
on analyzing the object. You can take any object
to have at-home birth. I will leave some
references for you. In the second exercise will
make another blind drawing, this time of her own
hand coming towards you so that you can barely
recognize it as a hand. This time, I'm going
to make it easy. And let's look at our hand
for a maximum of five times. Make as many details
as you can see. Remember, this is a
very powerful exercise to increase our perception. Whenever you're drawing
from observation, remember to draw
without looking at the paper for
infinite few seconds, your drawing will come out
more naturally and organic. It was a little bit hard, right? But don't give up. Next lesson, we'll
talk about negatives.
6. Negative Space: Joy, what is around
the main subject is almost as important
as its subject itself. This is another
powerful exercise to improve our perception. And this is also
another exercise for a right hemisphere brain. You are going to use
a lot this technique. This time we'll look only at
what is around the subject. What shapes does the
empty spaces form? The figure will
come out the same, but you only draw what is
in the background in blue. First, I'll make a frame in the same proportion as
the frame of the image. That's important. You can use a ruler for
this if you'd like. Now, I'm going to focus
on this first form. What am I paying attention
to while I'm drawing? Let's begin with this point
where the shape begins. Where is it located? How far is it from the
edge of the frame? Which shape is this? What's the inclination? Well, I think it's
something like this. Now let's go to the
next shape and ask similar questions until
complete the whole drawing. You can always use this
technique when you're drawing from observation.
It helps a lot. Next lesson, we are going
to learn about 3D shapes.
7. Forms: In lesson one, we
learned that we can translate everything
into basic shapes. In this lesson,
we're going to learn the difference between
shapes and forms. Forms or shapes in
three-dimensions. In other words,
shapes with volume. But how to represent a 3D
shape in a piece of paper? The answer is two, lights, shadows,
and perspective. Let's draw some
basic shapes now. A circle, a square, a triangle, and a rectangle. Notice that they all
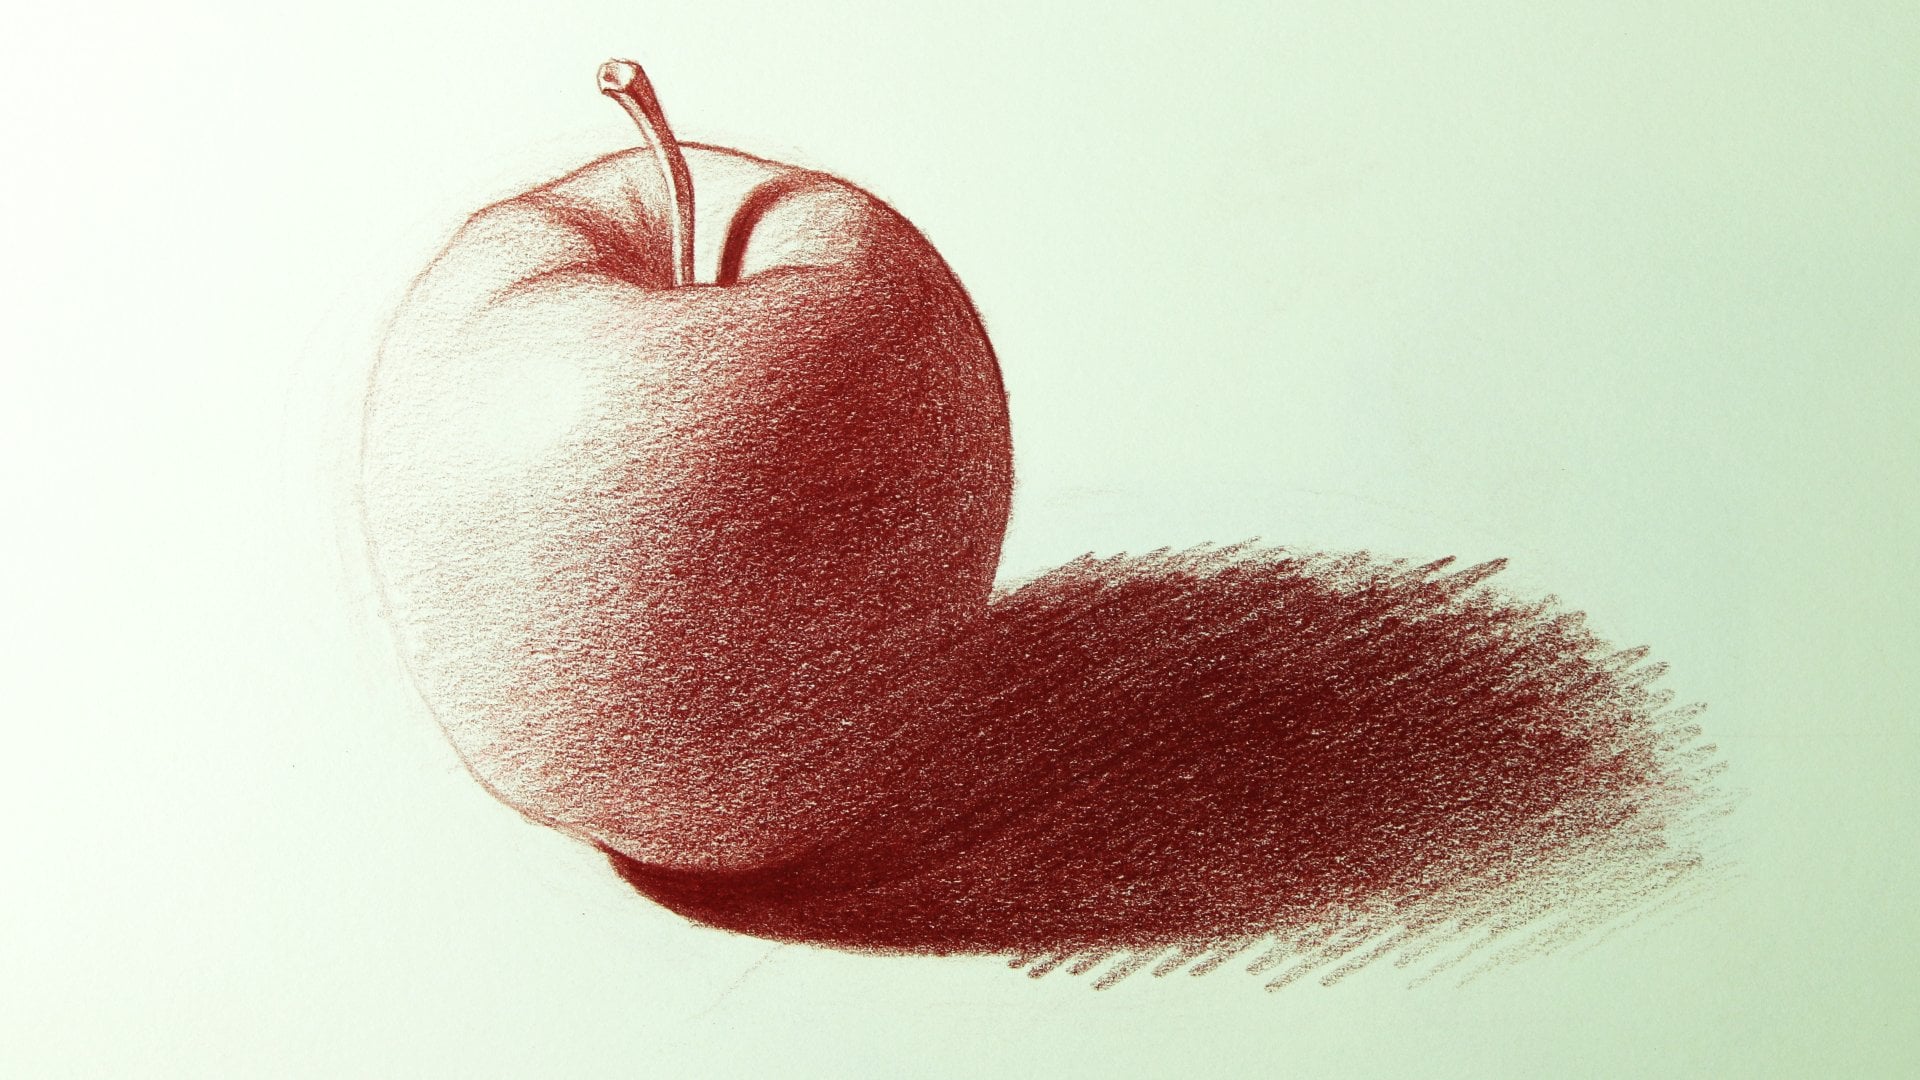
look flat on the paper. Now let's draw some forums. I'll begin of the sphere. This is still a circle, but this time I'll add
some volume to shading. It will look like
completely off. If I made my shading
straight like this. For the height lights, we can always leave the
white of the paper. I'm shading with the
side of my pencil, strokes coming and going. If you want a darker tone, increase the pressure
of the pencil. If you can shave like
that, that's okay. You can use a small
marks like this. Why do you need more darkness? Just add more marks and
increase the pressure. Notice that the light is coming from the
top to the right. The right side of the
sphere is very clear. The left side is not
receiving much light, so it's darker and also where we are going to
place the drop shadow. Now, let's transform
this square into a cube by rotating
it into space. It will look like this. The basic principle
of perspective is everything that moves away
from us gets smaller. When we see a cube
from the front, it simply looks like a square. But notice what happens
when we turn it into space. The edge that is
closest to us now looks bigger than the
others that are far away. Now let's rotate this cube in this direction so we can see
the top of the cube as well. Now, let's apply some shading. The light is coming
from above, right? So the top of the
cube will be very clear and the right side
will be in the middle tone. The left side will be in shadow. And that will place my
drop shadow here as well. Let's go to the triangle now and transform it into a pyramid. This side of the pyramid
is facing the light. The other side is in the dark. Let's put some drop shadow here. Sometimes when I'm shading, I cross the census
of my strokes. It helps to cover all the small holes
of the paper texture. But be careful not to
leave the outline. Always start lighter and
gradually get darker. Wow, that was many
information, right? But don't worry, just
keep drawing so you can get familiarized with
all these new concepts.
8. Measurement and Guidelines: Measurement and guidelines are important tricks to keep our drawing as accurate as possible. Now, I'm going to give
us some tips to make our life easier while
abroad from starvation. You'll be able to use these
tips whenever you're drawing. Let's take this
image as reference. Whenever I'm drawing
from observation and always comparing one shape
with the author, e.g. the upper tip of
this cone is almost in the same level of the
bottom of this field. And if I trace an imaginary
vertical line here, I can see that this
is almost a line, but not totally with the
right side of the cube. I'm always making this
mental comparison. The mind doesn't
stop when the drum. I'm always looking
for references and landmarks between one
object to the other. Have you ever seen an
artist drawing with one eye close it and the handle
stretch at holding a pencil. So the artist is using
the paint so to do some measurements on the
drawing, how does it work? Let's say I want to compare the height and the
width of this bottom. I'm going to close
one eye and hold out my hand holding the pencil. I'll place the tip
of the pencil, align it with the
bottom of the bottle. Then I'm going to put my thumb, align it with the
top of the bottle. I'll do the same with
the width of the bottle. I can see now that the height of this bottle is almost
treat times its width. Which will also pay attention to the inclination and
angles of the lines. They can also use our
fans so to do it right. For this next assignment, you will make a line drawing
of this basic 3D shapes. Remember to use your
imaginary guidelines and to compare the
size of the shapes. This time, you won't
apply any shadows. In the next lesson, we're going to use destroying to shade it more accurately. So let's go to the next class.
9. Greyscale: Now we are going to produce some shadings with foreign pain. So to make a gray scale, I recommend the six B
pencil to do this exercise. Before starting our grayscale, lets practice some gradients. You can hold your pencil
in the bottom like this. Or we start to combine
index finger like this. Let's start with
a very light zone and gradually getting darker. Notice that I'm using
the side of my pencil. Now let's do the opposite. Start with a darker tone
and gradually lighten. Now, let's do our gray scale. You're going to need a ruler. Let's make a
rectangle and divide it into seven equal squares. We're going to number it 1-7. The first square
will be the white of the paper, so leave it blank. And the last one will be the darkest you can do
with your pencil. Be careful not to
tear the paper. Now let's go to
the middle square. Here. We are going to
make a medium gray, halfway between black and white. Let's start with a light board and then increase the pressure. Be careful not to get too dark. Now let's go to square five. It has to be darker
than the four, but much lighter than the seven. Now let's go to square seats, which is right in the
middle of the line 5-7. And now let's go to three, which is closer to the four. And finally, number two is the lightest gray hair we
can reproduce if our pencil. The secret here is
to hold the pencil as a first stroke in our
paper with a feather. Look how many
shades were able to produce with one single pencil. We have one more assignment. Look at the figure below
with our grayscale in hand. Let's take a mental note of
the tones. We can see 1-7. Square number one will be the lightest tone we can
see in this picture, n square number seven
will be the darkest. I can see a gray number
seven in the backroom and also a growing number one at the top of almost every form. Now let's begin to
shader drawing. To better see the
lights and shadows, we can use this following trick. Let's look at the picture
and squeeze her eyes. Let's look at the big trend. Squint our eyes as if
we're looking at the sun. When we do this with
the lights and shadows, they become more obvious. So better see the
lights and shadows. We can use this following trick. Let's look at the picture and squint our eyes as if you
are looking at the sun. When we do this, the lights and shadows become more obvious. I'm glad you're still here. Don't give up. Next lesson. Turned upside down.
10. Upside Down Drawing: This is the last vector size of the right side Brain Series. In this lesson, we'll turn the reference picture upside
down as well as our paper. The act of turning
things upside down helps us see things
in a different way. In another perspective by
Tony are drawing upside down. We can see advances and the tails that we
couldn't see before. It's like we're
telling our brain, this isn't a face in the
morning, this is something new. Let's find out what it is. So I look at all this new information
and simply draw them. Even the shadows and textures can be
approached this shapes. I will leave many pictures as reference for
this assignment. And you can do how many wants. Remember, during our drawing, upside-down should
always be part of our routine even when we're
not drawing from observation.
11. Surprise Puzzle: This lesson is just a
summary of our previous one, is just a preparation
for our grand finale. We're going to jump
into the assignment and make a surprise
puzzle drawing. Remember the negative
space lesson, it's very similar, but we don't know what is
inside the main piece. Will only draw what's around it. And then when I finish, I'll show what's the
main subject in. Let's begin drawing
a frame as similar as possible with the
frame of the puzzle. That's okay to use a ruler
number of the pieces, but you don't need
to follow an order. Remember to make those
mental comparisons and also some imaginary
guidelines will draw. Let's begin drawing
piece-by-piece. Now that I've finished, I'll show you our surprise
so you can complete the drawing with some
shading and details as well. I already, well, it's a cow. Let's approach the shading and textures and shapes as well. I love this exercise and
I hope you love it too. Next lesson, we'll learn how to apply them in our drawings.
12. Depth: In this lesson, I
want to do suggest a little bit about death
and error perspective. When we look at the landscape, we can notice some things. Number one, everything that
is closest to us seem bigger. Number to everything
that is closest to us seems to have more
contrast between tones. Number three, everything
that is closest to us seems to have more
details. On the opposite. Everything that is further
away from us seem smaller, have less contrast
between tones. And now swore a
little bit blurry. We can apply this concept in objects and humans
figures as well. Look at this garlic,
for instance. Although this scene doesn't have so much depth as the landscape, the main garlic have more sharpness and contrast
then the rest of the picture. We don't need to
render everything in the same level of
sharpness and detail. We can, and we should choose a focal point
in our drawing. Now to the assignment. Draw a very simple landscape of principles learned
in this class. Everything close to us, we look bigger and with more
contrast and the tails, everything that is far away will be smaller and a
little bit blurry. Well done, we're almost there. I'm so glad you didn't
give up joining me for our final lesson so we
can make a beautiful toy.
13. Final Project: Welcome back. This
is our final lesson. We'll put together everything we learned and apply it
into a complete drawing. I will use a picture as
reference for this project, but I will leave other pictures as reference if you'd like. Before we begin, let's recap everything you learned
in this course. We learned that when
we begin a drawing, we should translate
it into basic shapes, beginning with the largest ones. We learned about the both side of our brains some second place. And how the mind can
be a little tricky on us interfering
in our perception. On third class, we learned
that we should look more at our reference and do some blind drawings
during our practice. On fourth lesson, we learned the importance
of the shapes. The negative space produces. The fifth and seventh places or all about shaving and
geometrical shapes. Lesson number six was about the imaginary guidelines we use to compare or subjects
in this scene. In number eight lesson, we learned to turn our drawing
upside down and also a reference in order to look at things in a different
perspective. We made a surprise puzzle
in lesson nine and learned a little bit about where our perspective in lesson time. That's so much we need
to make a drawing, but by taking baby
steps and a big breath, it's easier to put
everything together. So let's begin. First of all, we'll
look at this picture and it will begin to
notice the basic shapes. I'll take a few minutes to
look at the whole scene and observe very accurately
what's going on here. I'll notice the sizes and
distance between shapes and also the distance between shapes and the
frame of the paper. One of the biggest mistakes, and I'm saying this
for myself as well, is to jump into the
details very quickly. I'm a detail over, but we really need
to pay attention to the whole picture before
adding any details. I'll be gone now to apply basic shading is
starting very light. While it begins to develop
more of my drawing, it will get darker m, I will add more details. And I will also remember
to choose a focus point. So the most important
area of my drawing. Now, I'll turn my joy and
my reference upside down, look for things
that I can improve. So I think that's it. Congratulations. I know it wasn't easy, but remember our mantra, joy is 10% talent and
nine per cent hard work. So go practice, keep
drawing and drawing. And don't forget to post
your final assignment. I can't wait to see it. I hope you felt in love with this new language of the best.
 Babi Wrobel, Illustrator - Artist - Art Teacher