Transcripts
1. Introduction: Someone who always wanted
to learn portraits, but didn't know where to start? Well, you found a
perfect class to kick start this
journey. Hi, everyone. I'm Anacahodas an
artist from India, and welcome to my
very first skill share class on portraits. I'm a self taught artist, and after two years of
practice and learning, I've decided to share
everything I've discovered about
portraits with you all. Now let me share a little
bit about my art journey, especially my portrait journey. When I started
drawing portraits, I struggled a lot. I spent months feeling
frustrated and giving up because my results were
in matching my expectations. Everything changed when I
stopped chasing perfection and focused more on sting
consistent with my practice. That's why this class is all about learning
through the process and enjoying it rather than
worrying about 100% result. Trust me, as a beginner,
it takes time, but with patience
and realistic goals, you can see yourself improving
with every portrait. So all you need for
this class is a pencil, some paper or a sketchbook, and the willingness to learn. With these tools and
a positive mindset, I'll help you learn
how to sketch free hand portraits with ease. So grab your tools and let's
start sketching together.
2. Class Layout & Materials: As you know, this is a
beginner friendly guide to kick start your
potry journey. Let's keep our goals realistic. That is, as a beginner, aiming for 100% accuracy right away might
be overwhelming. So instead, our aim for
this class is to achieve around 30 to 40% likeness
to the reference. This way, I believe,
you'll see yourself improving with every sketch
without feeling pressured. So let me break down
the class for you all. We'll start off with warm ups, which are essential for getting
comfortable with strokes, and it also helps you to
improve your hand flexibility, especially if you're
someone who's a beginner, these exercises are must to try. After warm ups, we'll
dive into Loomis method, where I'll teach
you how to approach portrait sketching step by step, where I'll also be introducing a helpful tool which
I personally use. Next, we'll have a
quick practice session sketching basic
phase orientations. This is not going to
be a detailed one, but it'll be based on the knowledge we gained
from the Loomis method. Then we'll move on to
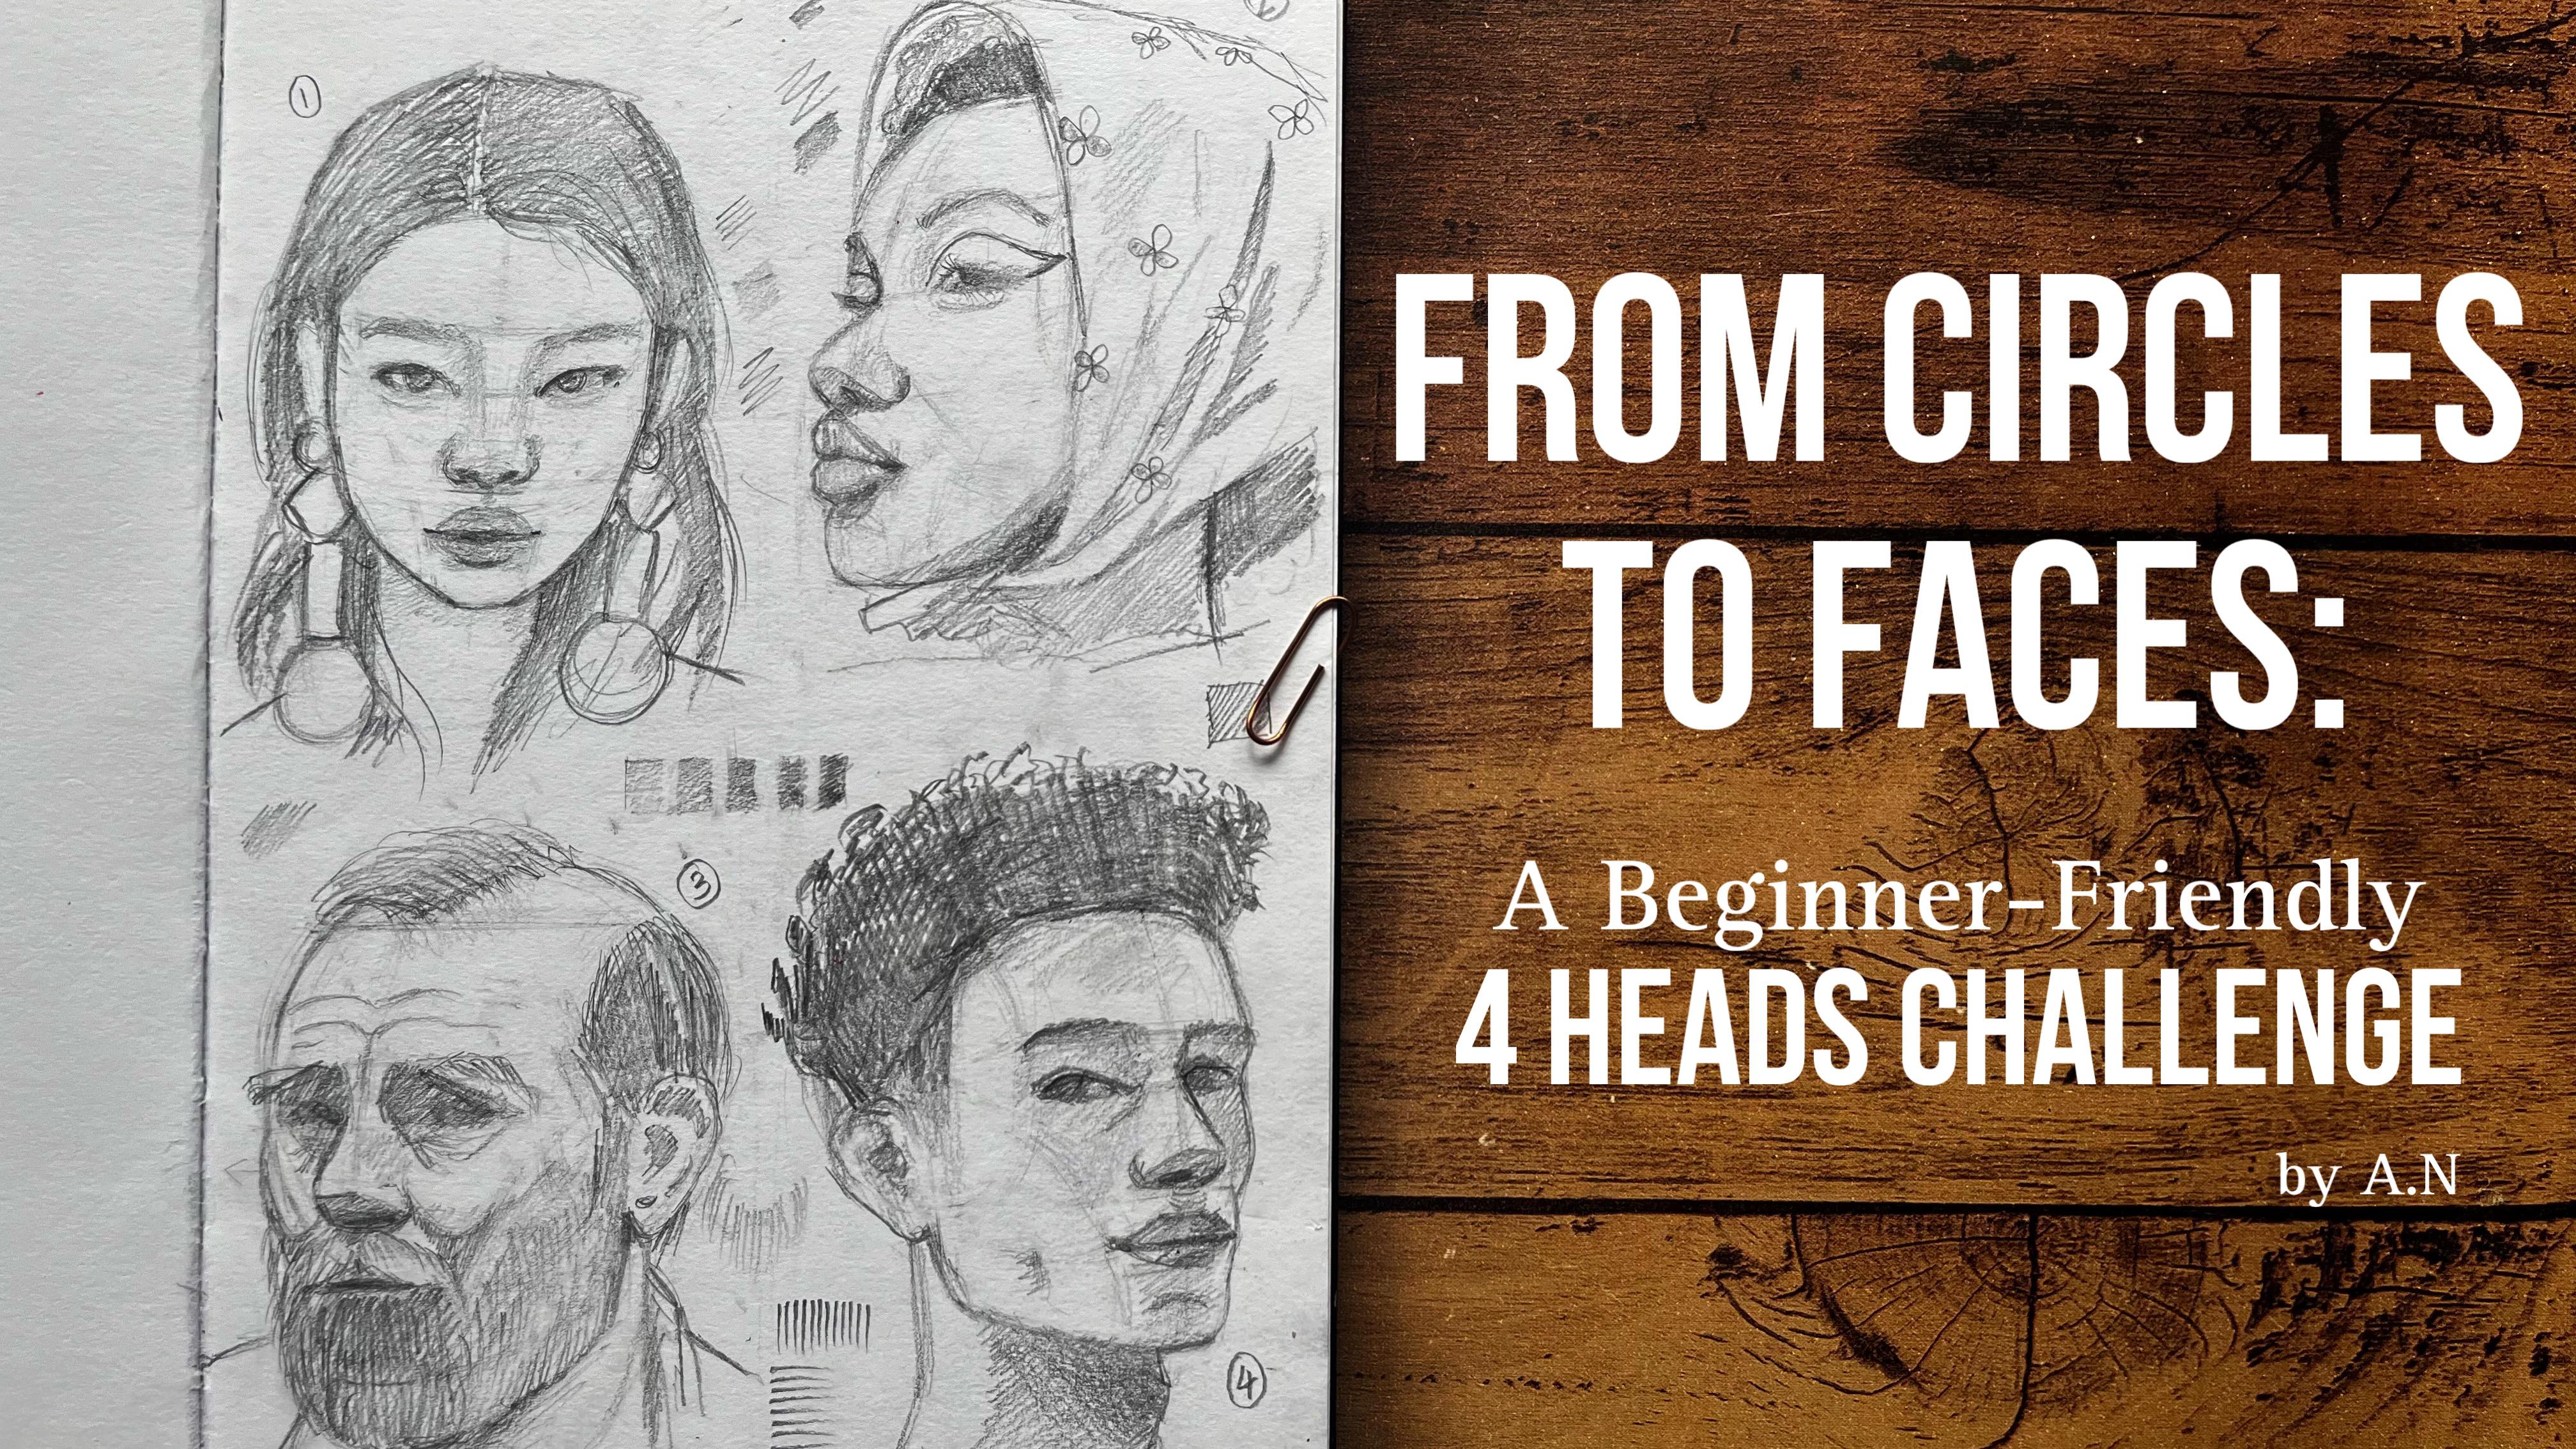
our main challenge that is sketching four heads, followed by which you'll
have a quick recap. Finally, we'll wrap
up with a project to boost your confidence and also to keep you all consistent. Now let's talk about the
materials for this class. I'll be using the mixed media
sketchbook from Zensungam, which is an Indian brand. I've chosen the
sketchbook due to its smooth texture that works beautifully for
sketching portraits. You can also use
Brusto's drawing paper, which is also
another good option. For the pencil, I'll be using
the standard PMM pencil, but you can use any
pencil you have at home. Apart from that, if
you're interested to add a little bit of
color to your portraits, feel free to use any colored
pencils of your choice. When it comes to
paper in general, make sure you use a
good quality paper that can handle pencil pressure
without damaging it. So I would recommend 200 GSM or any paper
that is thick enough. If you have any
sketchbooks at home, you can experiment
with it by doing a few trial strokes and see
what works best for you. These are some of my
portrait sketchbooks that I have been using for
past two to three years. Now let's move on
to some warm ups to get started with
our challenge.
3. Warm up: All right. Let's get
started with bomb ups. Now, before we jump
into the exercises, let's talk about
something super basic, but which is also
very important. That is how you
hold your pencil. Yes, you heard me right. It might seem like
a very small thing, but trust me, it can make a huge difference
in your sketches. The idea here is to hold your pencil lightly.
Let me show you. Try holding your pencil
perpendicular to your sketchbook and
keep your grip loose, not too loose that
it might slip off. Try to keep it loose, but also within your control. Now go ahead and grab a
pencil and give it a try. This way, you can see that you can still move your
pencil freely, even when it's
under your control. Experiment with
your grip until it feels comfortable and
then you're ready to go. Our next exercise is, again, a simple one that
is drawing circles. This exercise helps
you to improve flexibility and also
builds muscle memory, which is a key factor
for sketching portraits. So you can start by drawing
circles from small to large, and please don't stress about getting them perfect in one go. If your circles aren't right the first time, it's
completely okay. You can watch myself struggling
with just one circuit. It's pretty common,
so simply go over it two to three times
to refine its shape. This will give you better
control over your pencil, as well as it helps you
to refine your shape. Another important thing is
don't just move your fingers, use your whole arm, that is from your shoulders
to your wrist. This reduces the strain
on your hand and makes your movement
smoother and more natural. You can try it
both ways and see, and do let me know if you
found any difference. Now, all you have to
do is fill a page with circles and focus on
staying loose and relaxed. Once you are done
with this part, let's move on to some
cubes and cuboids. Our next exercise
is sketching cubes. It might seem tricky at first, but let me break
it down for you. If you have a Rubik's cube or any box at home, use
it as a reference. For now, let's keep it simple. Sketch the cube from five basic angles that is from front, left, right, or top and bottom. If you're new to drawing
cubes, let me help you out. Start by drawing a square. You can place another
square diagonally above it. And then connect the corners. You can erase the extra
lines, and there you go. You can experiment moving the second square to
change the perspectives. You can watch as I
demonstrate this. You can replace the
squares with rectangles. You can try sketching cuboids that are placed horizontally, vertically, as well
as diagonally. This helps you to understand the perspective in
a much better way. For now, let's focus
only on simple angles. Practice a bit and then you're ready to move to
the next exercise. Our next warm up is all about practicing lines and gradients. For lines, you can
start by filling half or a small portion of your
page with simple lines. It can be long continuous
lines across the page, or you can break them
into smaller ones. The goal here is to
loosen up your hand and to have your
pencil move freely. With this in mind, try to create some lines in the speech
to get yourself warmed up. Before we get into
the gradients, try to fill in a few
boxes with these lines. You can fill them with
horizontal lines or maybe vertical lines
or even diagonal ones. Now, choose the one that
you are comfortable with, and let's move on
to the next one. To practice the gradient effect, draw a rectangle and divide it into four
to five sections. You can start off with a
light test in the first box. Gradually increase the
pressure in each section, making the shade
darker as you go. In the last section, apply the heaviest pressure you can
without damaging the paper. This exercise will
help you explore the full range of values
your pencil is capable of. That is going from light
to the darkest one. You can also try shading
whole shapes for fun. For example, draw a square and imagine a light source
near one corner or a side, shade the area closest to
the light source slightly and gradually darken the shade as you move further
away from it. Try this with other
random shapes and place the light source in different positions and give it a try. The key here in all
these exercises was to keep your pencil
flexible and under control, adjusting pressure as
and when necessary.
4. The Tool: Handmade tool has played a major part in my
portrait journey. It's pretty easy to make, so here's a quick tutorial. You can use foam clays
to make a ball out of it by rolling and conditioning it until
you get the shape right. Let it dry for an hour. Once dry, take a thread and wrap it around the clay
through the middle. You can use a pen to
mark along the thread. This thread is actually
a reference line. You can also do a free
hand sketching for this. But for accuracy, let's keep
this thread as a reference. So once this is done, repeat the same way by dividing the
sphere horizontally now. Also, don't put a
lot of pressure on your pen as the clay can
be damaged at some point. Hold the square this
way and repeat the same for the top center
using the thread. Also, mark the front side so that you don't forget which
is the front facing part. Now divide all four lines from the center into
three equal parts. Now, it's a little bit
of imagination here. Imagine you have a line parallel
to this horizontal line passing through this point and also intersecting the sidelines. Mark those points and repeat the same for all the
remaining three. Our next step is to
slice the sides. For that, you can use
these four points and slice them equally
and also carefully. Once you connect these lines, a reference tool is ready. This is one such tool,
if made properly, we'll help you sketch any
facial orientation with ease. Now with this tool,
let's study how to sketch a portrait
using Lumi's method.
5. Loomis Method: Using our tool, let's understand the very famous Loomis method. This method breaks down the
human head into basic shapes, making it simple and effective to study and draw human heads. Let's now understand
this method. The first step is
to draw a circle. In three D, it's basically a sphere which
represents the skull. The size of the
circle can vary on how big or small you
want your drawing to be. So basically, this sphere
forms the base of our head. We'll begin with a
straight facing head because it's the easiest way
to understand the basics. Now, draw a vertical
line through the middle of the sphere to divide it into two equal halves. This line is what we call the central axis or
the central line. So if the head is straight, the axis stays in
the middle dividing both the sides equally. But if tilted or turned, the axis follows
the face direction. Our heads aren't
perfectly round. You can observe that the sides near the ears are slightly flat. To show this, we'll slice off
two sections of the sphere. It is said that the sliced part is two thirds of the sphere, so here's how we do it. Divide the central axis
into six equal parts, three above the center,
and three below. Now, from the center, count two parts up and two parts down, then mark these
points on the circle. These marks define how much
of the sides to slice off. The slices will look a bit oval from the front because
of the perspective. As you can see, from the front, the sides are pretty straight. So you can divide these
side ovals vertically. The next step is to add the horizontal guidelines
using the rule of thirds. These guidelines help to
locate the key features. So if the person isn't
looking up or down, the central horizontal line of the circle marks
the eyebrow line. Next, connect the ends of the
sliced parts of the circle. The top connection
gives you the hairline, and the bottom connection
gives you the nose line. So basically the
rule of third says that the distance
between the hairline, ebrline, nose line, and the chin line is
approximately equal. Using this, we can now
mark the chin line. To locate the chin, measure the distance between
the eyebrows and the noslineO from the hairline to the ebrline as both
of them are same. Now using this measurement, you can mark the chin
just below the nosline. The shape of the chin can
vary from person to person. It can be a sharp V, U or even a broader U. So it depends based upon the
reference that you choose. Now, at this point, our major
guidelines are all done. Next, to give the face a shape, let's connect these lines. You can start by connecting the end of the
chin to the sides. Instead of using
a straight line, you can bend this jaw line
based on the reference. But here let's simply bend
it a little by extending the side line a little more down and then joining
it to the chin. To shape the upper half, draw a curved line
from the end of the eybrline towards the
mid of the hairline, and also it depends upon the
hairstyle the reference has. Now to add the side
planes for the cheeks, draw a curve starting
from the outer edge of the ebrline bending slightly
inward towards the chin. This helps define the
side planes of the face. All these guidelines
and shapes and planes, you can look at yourself
in the mirror and try to study using your own facial
features and planes. Now let's look at all
the facial features. We already know where
the hairline starts, where we need to
place the eyebrows and where the noseline
ends and so the chin. There are a few
more to this list, which are the eyes,
mouth, and ears. Let's start with the eyes. It is actually present in this section between the
ebrline and the nosline. So to locate the eyes, you can divide the space between the eyebrow line and the
nosline into three equal parts. After this, you can see that the top third marks the eyeline. So within the same section that is between the eyebrow
line and the nose line, we also have the ear, which is on the outside
of this portion. Next is the mouth. So divide the space between the nose and the
chin into halves. It's normally said that the mouth lies just
about this half line, talking about its corners, it changes based upon the expression that
they have on the face. And to be precise,
the lips occupy the bottom two thirds
of the upper section. The horizontal
guidelines are done. Now, marking the exact location on this eyeline is
a crucial step, and based on this method, you can divide the
horizontal width of the face into five equal parts. This width is the eyebrow line extending till a base circle. Basically, it's from both the
extreme ends of the circle. You're dividing it
into five equal parts. Once you divide them
into five equal parts, the second and the
fourth parts mark the width of each
eye. Here's a note. The width of one eye is equal to the space between
the two eyes. So basically, you have five eyes throughout the horizontal
length of the entire sketch. Next comes the nose. As the nose is present
between the eyes, this space between the eyes gives us the width of the nose. So basically, an I and the
nose are of same width. Next to add the hair, you can add the hairline
the way you want based upon the reference
and also the hairstyle. As you know, the hair
adds volume to the head, so we can add this hair
slightly above the circles top. Here I'm actually going ahead
with a random hairstyle. Now, using the basics
of Lumi's method, we have created a phase. This method is widely used by
portrait artists to sketch phases from references or even from their
own imaginations. Now using this method, try to create an
imaginary phase, and this would be a
great self practice to understand this
method even better.
6. Follow up Exercise: Lumi's method, let's try to
understand the other angles. You can start by drawing a line horizontally across the page. Now, the first head is a quick recap of what
we had just learned. So start with a free hand
circle in the center. And with the help of the tool, we'll revise the guidelines, starting with a
straight central axis, as this is a straight
looking face. Next, we'll slice the sides, following which we'll divide them vertically
and horizontally. The initial line passing through the center is the eyebrow line. So once we connect the top
and bottom of the sides, we'll get the hairline and
noseline respectively. So this is basically
a square shape. Next with the same height,
you can mark the chin. You can also shape the jaw line. Divide this region
into three equals, and the first part
gives us the eye line. Now you can divide
this eyebrow line into five equal parts to
locate the eyes, which is in the second
and fourth part. Just above the eye,
place the eyebrows. When we drop a line from both
the corners of the eyes, we'll get the width of the nose. You can mark this using a curve. Finally, dividing the
last part into two gives us the mouth which
lies in the upper half. You need not define any of the features as we are just
working on the basics. You can simply shape
them the way I'm doing. You can also darken the
same way for the eyes. Feel free to make any changes as this cage is purely
from your imagination. I had missed the side planes before the features,
so here it is. You can connect it from the eyebrow line towards the chin. You can follow along
SM slightly adding a few details like the bend
in the chin and the nosline. Next, let's mark the
years on the sides. To finally add the hair, shape the hairline
the way you want, or you can simply follow
the way I'm doing. Use simple lines to sketch
the hairstyle first, and then you can proceed
with the details. The straight looking
face is done. Next, we'll slowly
direct the face towards the sides and
learn its proportions. These steps are the same, but
with a few little changes. So as always, let's
start with a circle. Now for a better understanding, let's use our tool
for the proportions. For a front facing head, the central axis was
exactly in the middle. But when they look
towards the side, the axis also moves
along with the head. Now, you can see that
the slice part which was hidden earlier slowly
starts showing up. After slicing the sides, when you compare
these two parts, it's pretty much equal. But when a face is
turning towards a side, that side portion of the
face from the central axis reduces in size and the opposite side
starts getting visible. So I'm slightly reducing this part to correct
the measurements. When you look carefully, you
can see that on the side, the embrline is
slightly taking a bend. Consider this to be the front plane and this
one to be the side plane. So every guideline in the same plane would be
parallel to each other. This is the same here as well. This peer can also be considered
the same way as a cube. Now, connecting the top and bottom tip of the side oval
along the front plane, we'll get the
remaining guidelines. That is the hairline
and the nosline. With the same measurement,
you can mark the chin. Now, from the sides
of the circle, you can drop the jaw line. For the other side,
you can extend this vertical line a little more before connecting
it to the chin. You can use this upper curve of the circle as it is
for your hairline. Next comes features,
starting with the ears. I'll slowly mark
the eyebrows now. You can mark the cheek
plane with this curve, starting from the middle of the sliced part to its the chin. On the other half, this
line won't be much visible as the face is
looking towards the side. In between these, you
can mark the nose. Now, as the face
is turning slowly, the nose also starts projecting
towards the same side. I'm marking it this way, slightly slanting from the
tip of the right eyebrow. Near to this, you can
mark the right eye, and from the edge of the nose, you can start marking
the left eye. Now divide the lower part
of the two halves and make an oval shape
horizontally just above it. Now this is for the mouth. I'm following the
same hairstyle, but with a slight shift, you can follow along or you
can try different hairstyles. The side study is done
for the right side. Now, try to make the same one
for the left one as well. This exercise will actually help you understand
it much better. So give it a try as this is just the mirror
of what we just did. Now let's go for
the extreme sides. Here, also, the steps
would be the same. As always, you can
start with a circle. This was for a previous study, and this one would be the lomisphere for
the extreme side. Here, the central axis, even though not visible here, is a straight line on the sides. You can watch this to
understand the central axis. So it's basically
a straight line on the side of the circle. And now the entire sliced part is placed in the
middle of the sphere. As we know that the sliced part is two thirds of the circle, you can mark it
this way and then divide it both horizontally
and vertically. Extend the horizontal line, till the circle for
the eyebrow line, and draw two parallel
lines at top and bottom of the smaller
circle for the hair line, as well as the nose line. On the same gap, you can mark the chin on the central axis. For the jaw line, you can extend the sideline and
join it to the chin. Mark the years,
and in this angle, the side hair would
be fully visible. So you can mark it this
way around the top circle. As I'm following
the same hairstyle, I'm trying to match it with
our previous versions. You can also try it the same way or go ahead with
your own hairstyle. To mark the features,
mark the ey eline the same way in the first
third of this section. Divide the bottom part
into two for the mouth. Just below the eyebrows, there is a bend from
which the nose starts. So in the first it was straight, then slightly towards the side and now to the extreme side. Now, from the tip of the nose, connect a line to the chin. Now, the mouth and chin
would be within this area. On the line which we had
marked for the mouth, roughly shade the lips
and then mark the chin. Once you mark the I, the side profile is all done. Now using the same concept, you can try it for other side. This is a rough sketch of the same exercise with
many more perspectives. I'll probably take another class soon exclusively on this topic. Now let's move on to
our main challenge.
7. Head 1 - part 1: So I'll be using
this mixed media sketchbook from Zen Sangam. I have already used this for
my other portrait studies. So I'll be using a new
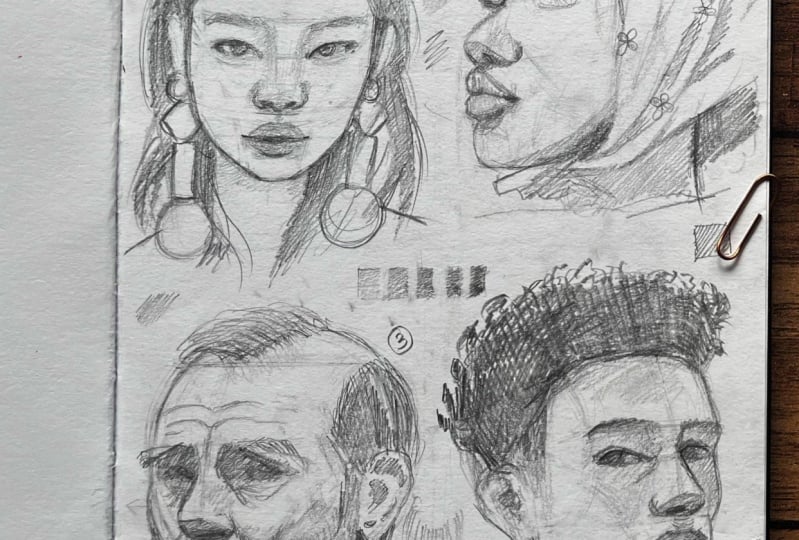
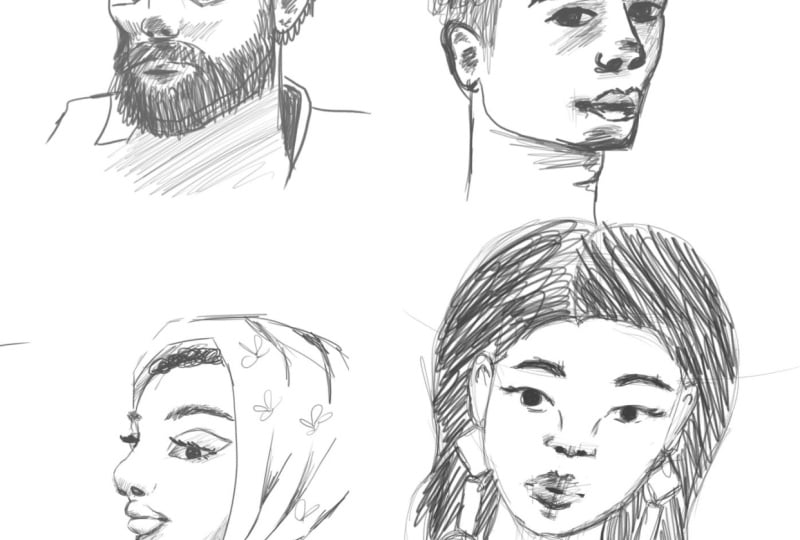
page for this challenge. These are the
references we'll study. First, I'll demonstrate how to approach and then we'll be
sketching them together. Now, let's start with
the first reference. As I'll be filling this whole
page with four sketches, I'm going to divide them
equally into four parts. So in the first
part, we'll approach our references using
Lumis method in 13 steps. The first step is
to mark the circle. For that, you can place the center of the
circle in between the eyebrows and then sketch a circle big enough to
have the nose inside it. As you can see, I have placed a circle just below the nose. Now you might
understand why we had circles in our
warm up exercises. Once this circle is ready, our second step is to
locate the central axis. As we know that this line passes through the
middle of our face, but for a better understanding, you can mark the
midpoint of the nose, lips, and chin, and then
connect them with a line. This line is nothing
but a central axis. Next, our third step
is to slice the sides. When you look at this stool, for a straight looking face, after slicing, the sides are
parallel to the centalaxis. That is, it's simply
a straight line. Even though the slice
part is like a circle, it tends to be more of an oval shape when
viewed from the front. So to mark this part,
I will use the tip of the eyebrows as a reference and proceed with the oval shape. Now you can divide the shape vertically and parallel
to our main axis. Next comes the
horizontal guidelines. Let's start with
the eyebrow line, which is our fourth step. You can simply connect the
eyebrows using a line. And there you have
the eyebrow line. Similarly, draw a line
connecting the end of the nose to the bottom
part of the side ovals. And remember, this line has to be parallel with
the eyebrow line. Now we have the
noseline as well. Same way, you can also
mark the hairline. Remember, all the
horizontal guidelines are normally parallel
to each other. Now it's visually clear that both their
heights are different. So before marking the chin, let's measure the heights
manually with the pen. Now you can see that this part is slightly bigger
than the forehead. Now after marking the chin, I'm once again comparing
the measurements. From this, it's clear that the first and third part
are of same height, while the second part
is slightly bigger. I'm marking these details here itself so that I don't
forget it while sketching. Our next step is to
mark the overall shape. When you look at this
reference carefully, you can see that the
chin isn't sharp, instead is a broad you shape. Once you mark that, you
can connect the jaw line. Make sure you notice how much this line is bending towards
the chin and from where exactly it's bending
because it's these minute details that we
often miss while sketching. Same way, you can outline the shape of the
hairline as well. Next, for marking
the side planes, you can use these two points and connect it with
the end of the chin. You can slightly bend this
line towards the central axis. Moving on to the
remaining features, there is nothing
left in this part, but here we have the line. For that, you can divide this section into
three equal parts. And with this point,
you can mark the line. Our next step is
to mark the years, which is in the same section. In the last part,
you have the mouth. Once you divide this section
into two equal halves, you can locate the
mouth's position. It's clear that the upper
lip is divided just above this line and a major portion of it lies in the upper half. You can simply keep this
in mind while sketching. Now the last step
is to add the hair. Due to its volume, it will be always outside the um circle. You can simply mark the
hair using simple lines. And we are done with
the guidelines.
8. Head 1 - part 2: Let's begin with a sketch. As always, start with a circle, and you can take your own
time to render the sheep. Next is to mark
the central axis. As you can see, the central
axis isn't straight, but is slightly
tilted to the side. You can follow the
same on your sketch. This is the center,
and using this, you can roughly slice the sides. Now, when we compare the sliced
part to the front plane, you can see that it's
smaller in width. Similarly, when you
look at the other side, the sliced part is
smaller than this part. Once this is done,
you can divide it vertically with a line
parallel to the central axis. Next, just to mark
the eyebrow line. Here, this line is passing
through the center, but you can slightly bend this guideline while
you're sketching. Next, mark the hairline above because we already knew
that these two are of same height while the middle
one was slightly bigger. So you can measure this and then mark the noseline slightly
bigger than this. Now mark the chin based on
the foreheads measurement. Now the chin is marked. The lengths are fine,
that is almost equal. Now let's mark the jaw line. As you can see from here, the jaw line starts bending. Consider these two lines
to study that position. You can see that this point is almost in the middle
of this section. You can go follow the
same on your sketch. Now extend this line a bit and then connect
it to the chin. For the other side, simply bend in the line
towards the chin. As the guidelines
are almost done, I have removed the darkest
lines using an eraser. Now let's work on the
required details. So mark the jaw lines properly. For the upper part,
you can mark the same from the eyebrow line to
the middle of the hairline. You can relatively
study any point or line with the help of the nearby
shapes or guidelines. Now you can mark the years. From this point, you'll have
to draw the side planes. Next, let's mark the eyeline. When you draw a line from
the corner of this eyebrow, you'll get an idea where
to place the neck. I'm basically trying to
connect everything on this sketch to precisely mark
the details in my drawing. As you can see, just
below the cheek line, we have this other
side of the neck, so you can mark
that accordingly. Now using this, you can sketch
the outline for the hair. Now, the hair line
partition is not exactly in the middle
but slightly away. We can mark that in
our sketch and also note that it's going
above the circle. Repeat the same that is
comparing every line on the reference and sketching it the same way in our sketch. From here, you can
see that this line is extending till the nose line. As I mentioned, try to connect the nearby
possible coordinates. For the other side,
you can see that the hair is parallel
to the jaw line, so you can mark it
in the same way. You should be focusing on
the minute details as well. That is, here, in this case, the hair is present just over
the ears on both the sides. From the bottom of her ear, few strands are
extending outward. You can mark that as well. Don't miss this gap
that's in between. Now, let's mark the mouth. For this, you can divide
this part into two halves. In order to locate the eyes, use a very basic shape
that resembles the eye. Here it's almost oval in shape. As you can see, her
eyes are not in a straight line. It's
somewhat like this. So you can follow the
pattern and leave in a space that is equal
length for the middle part, which would be for the nose. By doing so, it's clear that if you divide
this line into three, we'll get the exact location of the eyes as well as the nose. Now, let's sketch all
these in the sketchbook. Just above the eyes, you can now add the eyebrows. Moving on to the mouth, we
know that the major part of the lips lies in the upper
half than the lower half. So let's mark that
in small circles. Now connect this into a bigger circle and then divide them horizontally
in the middle. As you can see, she's
having a small smile, so let's curve this a little upward and let the corners
touch the side planes. Don't focus on adding
too much of details, simply show that
this is the mouth. So for that I'm shading this
mouth area very lightly. And also, you can correct
the shape while shading. Whenever you finish any part, always compare it with
the surroundings. As you can see, below the lip, we only have a little
space for the chin, so I'm reducing it a bit. As we are not going
into the details, we can mark the dark portions of the nose by shading it this way. Now shape the eyes and
shade this shape lightly. You can also darken
the eyebrows a little. When I look at this sketch, now this side looks a little
fluffy than the reference, so I'll correct that now. So from time to time, you can check if things
are placed right. If not, you can redo it anytime. A little away from
the central line, you can mark the nostrils
by darkening that part. Also shape the sides this way. Now mark the iris near
the central line. You can darken
this area as well. Shade wherever you find
is a little darker here below the eyes to
corner of the nose, and in the lips
and also under it. Feel free to reshape
any lines or any other. So just above the nose line, you have the circle
part of the earring. Do the same for the other side. The bottom part of this shape, you can see is ending
on the mouth line. So this way you can compare
and sketch the details. I'm also shading the nose
lengthwise to show some depth. Now let's shade the entire hair. Don't mix the direction
of your strokes. Even by continuing it in the
same direction throughout, I'll show you how it'll look. It won't look bad,
but it'll look neat, so there is no need to change the direction
of the strokes. If you remember,
in the warm ups, we practice individual strokes, but here it would take
a really long time to finish the entire hair. I'm replacing it with the same
stroke but without lifting my hand and also by keeping the strokes
closer to each other. Even if you can't extend
it over the entire shape, you can break it down, but
try to blend them together. Remember to leave
a little space for the partition and continue
it with the other side. To add more details, follow the direction
of the hair and add it using similar
single strokes. Now remove the unwanted lines and compare it with
the reference. If any changes has to be done, go ahead and change
it accordingly. So our sketch is complete. If you look at my sketch, it's not 100% match, but I can tell that
she's somewhere related. So with this, I'll
wrap this sketch, and we're done with
the first head.
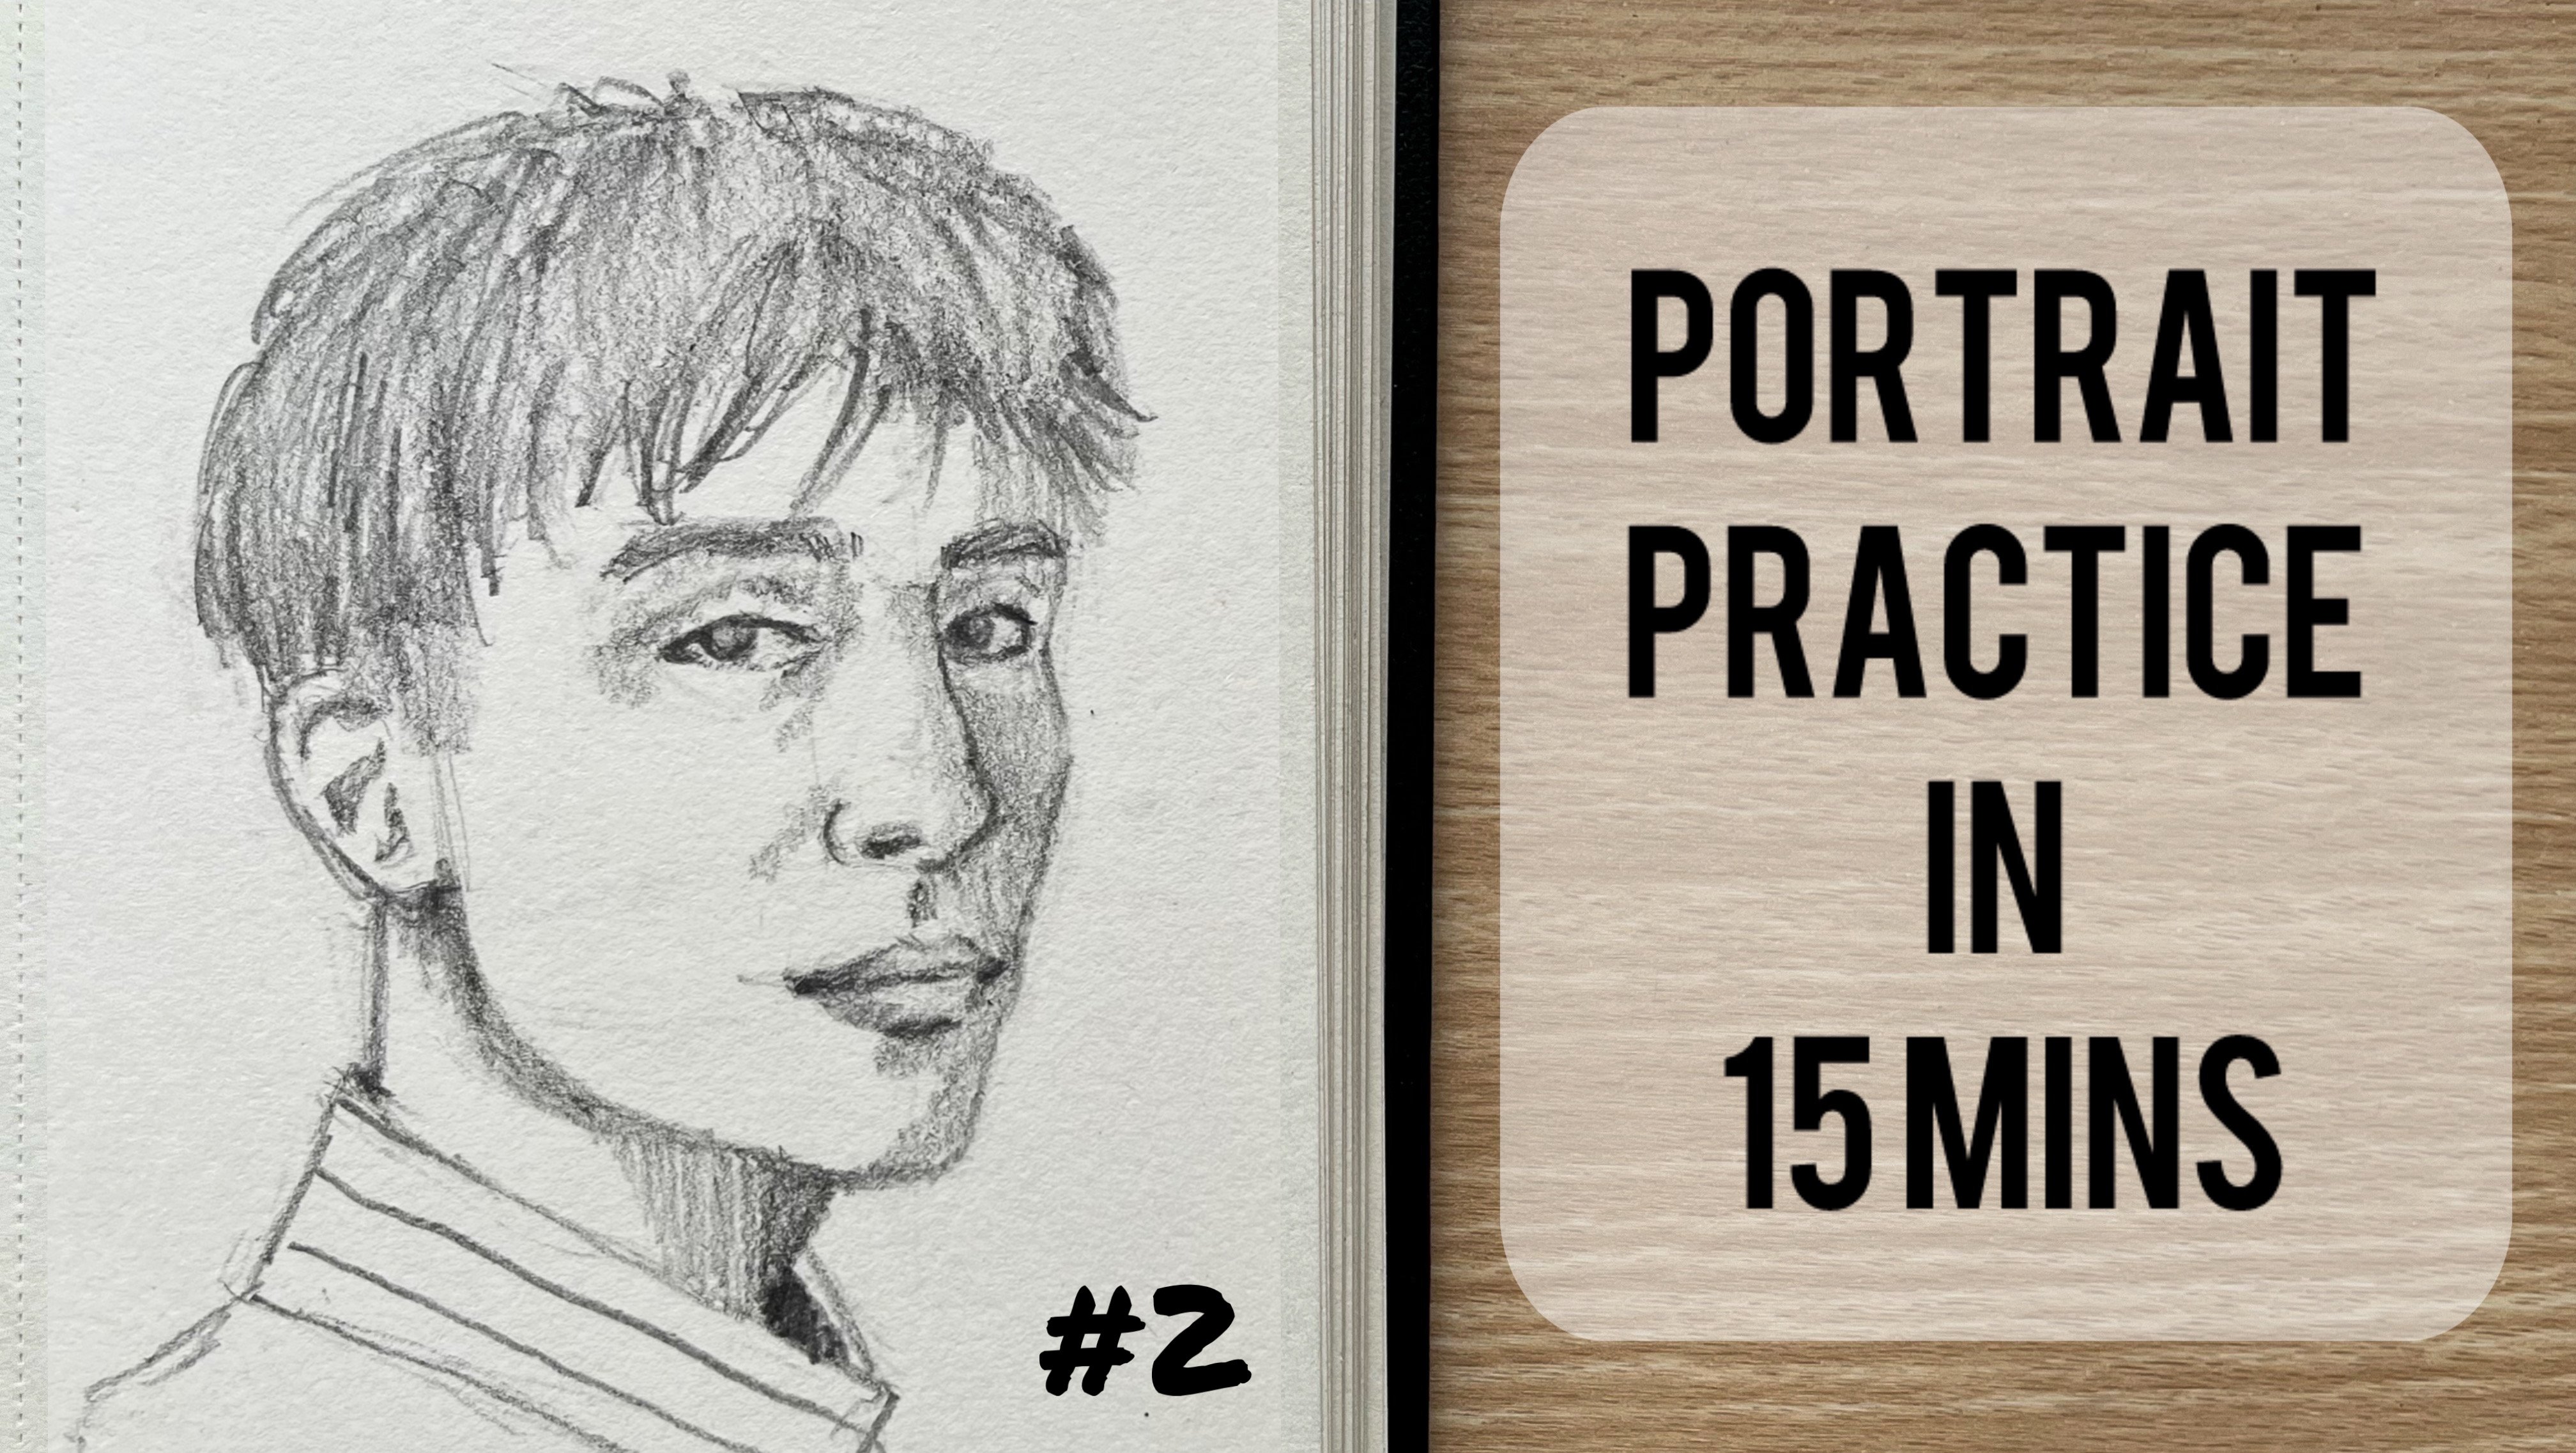
9. Head 2 - part 1: Is going to be our
next reference. The reference is pretty simple, even though it looks
a little tricky. Now let's try to understand
it using our reference tool. As you can see, this part is one plane and the side
is another plane. So basically, these two are
completely different planes. Now with this idea, let's understand the reference. As you can see, this person
isn't looking straight. So if the person was
looking straight, this would have been the case
with the reference tool. But as the person is
looking towards the side, you can adjust the
tool the same way. As you can see,
the more you tilt the face towards the side,
that part diminishes. When a person was
looking straight, both the halves were equal, but as the person started
turning to one side, the part towards which they are turning slowly reduced in size, while the other side
became more exposed. If the person were looking
towards the right, the right side of the
face would diminish. On the other hand, if the person were looking towards the left, the left side of the
face would diminish. Now let's try to
understand the reference. The top part of the space
is simply this portion, so let's draw a circle
using this as a reference. If possible, try to
include the nose as well. For this reference,
the circle is big enough to contain
the nose within it, so you can draw accordingly. Once the circle is complete, the next step is to
add the central axis. To locate the central axis, draw a line passing through
the middle of the eyebrows, or middle of the nose, and the middle of the chin. Since we don't know exactly
the location of chin, we can roughly
place the chin line and then mark the middle. As you can see, when
you connect these dots, it's not going to be a straight
line but slightly curved. So this will be
our central axis. To slice this part, you can start from the corner
of the eyebrow, referencing the central
line and slice the sides. As you can see, this portion is less visible than
the other side. Since this is just a
reference and not a sketch, I'll focus on correcting the shapes rather than
keeping it neat and tidy. Even if it gets
messy, that's fine. Our main focus is to
correct our guidelines. Now, the sites are done, so let's divide the
sides vertically. Basically, this line has to be parallel with a central axis. You can see that the ear falls on the outer
part of the side. Next, let's move on
to the eyebrow line. As you know, this is on one plane and the side
is another plane. In the same way, this is how
it looks on the reference. For the eyebrows, simply connect
them on the front plane. And for the side plane, you can connect it from this
point to the tip of the ear. As we know, every line passing through this plane will be
parallel to each other. Everything passing through
the side plane will also be parallel to the lines
present in the side plane. For the nose, you
can draw the line parallel to the ebrline at
the bottom of the nose. For the side, you can connect the point towards
the end of the year. Similarly, for the hair line, you can simply connect a line parallel to the eyebrow line. Now let's mark the chin. As you can see,
this is the mouth, and this would be the chin. Since he has a beard, the chin would obviously be
somewhere above the beard. Let's roughly mark
the chin here. So this would be our chin line. Now let's understand the
proportions of each section. You can start by measuring
by using your pen. You can see that one section is slightly bigger than
the previous one, but the bottom part is approximately similar
to the first. So the larger section
would be the middle part, followed by the bottom part, and the smallest would
be the forehead area. Let's keep these markings here so we can implement
them while sketching. Next, let's shape the face. The chin would be
approximately here. For the first reference, the chin was equally divided
as it was facing straight. But here, the central axis
shifted towards the side. So this portion of
the chin would be much smaller compared
to the other side. Now let's connect
the sides this way. Next, the jaw line is
clearly visible here. So simply extend it further. As you can see, his
beard follows the shape. This means you can
extend this line a little more and then
connect it to the chin. Next, for the side planes, you can connect the center of this to the corner of the chin. Using these two points, you can mark the cheek plane and the side plane of the face. On the other side, this
won't be clearly visible. Now this part of the
side contains the ear. Next to mark the eyeline, we normally divide this
portion into three parts. Let's do the same and see if
it works for this reference. So I'm dividing this
into three parts. As you can see, the first
part gives you the eyeline. Next for the mouth, let's try dividing it equally and see. With this, we can
understand that the lips are aligned
just about this line. Now, just below the ears, you can connect the neck. And with this, our
guidelines are all done, and let's move on to
the sketching part.
10. Head 2 - part 2: Now let's begin with
these features. Since I have drawn
a small figure, I'll try to keep
the circle small, and also as the features
fall within the circle, I don't mind extending it
slightly towards the sides. Feel free to take your time to adjust your circle as needed. So once the circle is complete, you'll need to mark
the central axis. Note that it's not
perfectly centered, but slightly off to one side. So you can represent this using a curved line instead
of a straight one. Now let's mark the sides. You can see that one
side is smaller, while the opposite
side is larger. You can do the same
in your sketch. Once done, divide
the side vertically, draw a horizontal line in
the middle for the eyebrows. We can slightly bend
it towards the sides. As we know that one section
is larger than the other, so let's begin by marking
the hairline first. Now I need to position the
nose line slightly lower, so I'll increase the gap a
little before marking it. So if you observe closely, the circle forms
a small triangle like shape near the nose. I'll locate that point in my sketch and use it
to mark the nose line. Here I'm slightly adjusting the measurements to correct
the earlier observation. Since the chin section
will be slightly smaller, I'll mark it accordingly. Next, connect the sides by drawing lines from the side
of the circle to the chin. For the other side, you can
extend the vertical line outward slightly and then
connect it to the chin. Since the person's face
is turned to the side, the chin will also be slightly divided in the same perspective. That is, one side of the
chin would be less visible. In the same way,
I'll mark the neck. Now we need to add
the cheek plane. So using the two
points marked earlier, you can outline the
cheek plane similarly. For the eyeline,
divide the face into three equal parts with the top section
representing the eyeline. As you can see, there
is a small gap here, so make sure you reflect
the same in your sketch. Next, let's position the mouth. So if you divide the lower
half into two equal parts, the mouth should sit just
about this midpoint. You can also add the details of the clothing by outlining it. Just below the mouthline, you can add for the other side. Now, remove all the
dark pencil strokes, leaving only the guidelines in place for adding
the next details. At this point, I'll be using these guidelines as a reference to mark the remaining features. You can notice a
small curve like formation between the
eyebrows and the nose. And also the bottom of
the nose appears darker, forming almost a curved
shape in the lower section. So start by adding a
slight bend and note that the nose is slightly bulgy as you move to the bottom. Try to replicate the same
curve in your sketch as well. Since there is a gap, I'm not
extending the nose further. You can also keep it that way. Next, the eyebrows are
not on a straight line, as you can see, so I'm breaking them down
into simpler shapes. On the other side, there is a small curve close
to the central axis. You can sketch the same. For the eyes, observe
that they form a shape extending from the
corner of the side plane. You can mark a similar
shape in a sketch and place the eyebrows
just above it. Now, if you look closely, you'll notice a shadow below the eyes extending
halfway down the nose, so you can do the
same in your sketch. On the other side, there is
a small inverted triangle. So using the shading technique, I lightly shade
these simple shapes. So basically, what
we did was we broke the face into simpler
and manageable parts. So this way, you can make the sketch easily
understandable. Now I'm adding the
details for the eyebrows. So you can follow the same natural strokes
for the eyebrows. And wherever you see dark areas, break them into simple shapes and try to shade
them accordingly. So here, as you can see, I'm shading the nose
on the same idea. You can observe that the side of the face is lightly
bulged outside. You can mark this
on your sketch and notice how the curve
connects to the nose. You can apply the same technique to the opposite side as well. But for the lips, although they aren't
very detailed, you can spot a triangular
shape just below the nose. So you can mark the
lips based on this. It's easier this way, that is to sketch the outline first and then shade inside it. I'm also adding minor
details like below the eyes, under the nose, and also
just above the lips. So above the lips, you can see an
inverted triangle. You can add this detail too. The side of the forehead
is just perfect already. So next mark the details
in the forehead. So near the central line, you can notice the
hair line beginning and extending towards
the back of the head. So you can sketch the
hair similarly and also try to give similar
strokes for the hair. So on the other side, the hair
falls within this section. So before adding the
detailed strokes, mark the ear, which is
located in this area. You'll notice that the parts
of the ear are darker, so you can first
break them down into simple shapes and then
shade them accordingly. Now let's mark the
shape of the hair. So just behind the ear, you'll find the side
edge of the hair. You can shade the hair
in the same direction as in the reference so that you can get a
more realistic look. For the moustache, extend it slightly beyond the front plane, following the same shape
as in your reference. Now for the beard, observe
that it adds an extra volume. So first outline
the gentle shape of the beard and
then start shading. So once you sketch the shape, you can erase off the dark strokes and then
add the finer details. As you can see, I'm not
using uniform strokes here. Instead, I'm following the natural direction
of the beard. So once you shape the beard, then you can gradually fit
in with finer strokes. So this is how I
normally create strokes. You can practice this before on a rough sheet before you start sketching
it on your paper. So as you can see, I'm curving the bottom part of the
beard slightly inward, similar to the reference. Once the initial layer
of shading is done, you can darken it further by
adding additional shading. So basically, focus on darker
areas in the reference, such as below the lips
to enhance the contrast. Now you can add the finer
details such as the collar. Below the chin specifically
under the beard, you can see that the neck
area looks more darker, so you can shade it accordingly. If you look closely, you can see that the eyes
have an oval shape. So here what I'm doing is instead of outlining
the oval shape, I'm slightly shading
it to form the shape. You can slowly notice that
the sketch is coming to life. So even without too
much of detailing, shading alone can capture
the essence of reference. So if you practice a lot based on this
shading technique alone, I hope and I believe
that you can also see the drastic
change in your sketches. The primary goal here
is to understand the positioning of features and to replicate the
same in your sketch. Now for the final touch, you can darken the areas
like the corner of the eyes, beneath the nose, the hair, the neck, and also
below the ears. So once all the finishing
touches are done, your sketch will be ready
for the second reference.
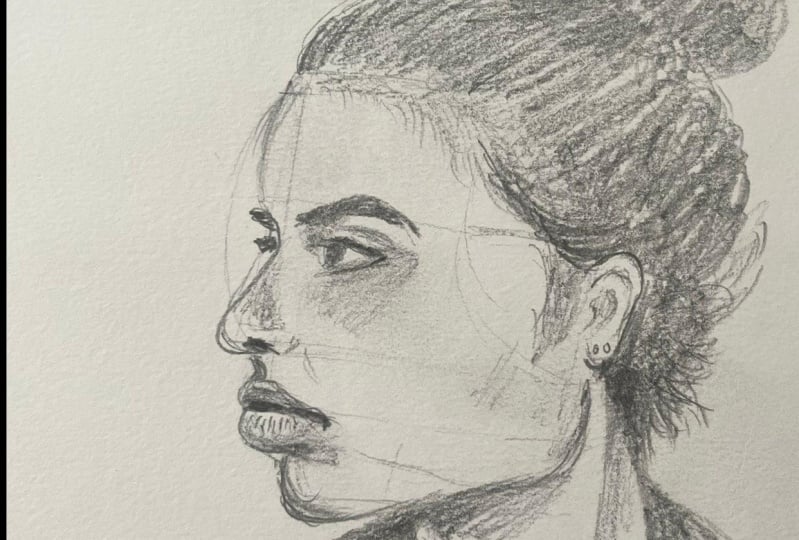
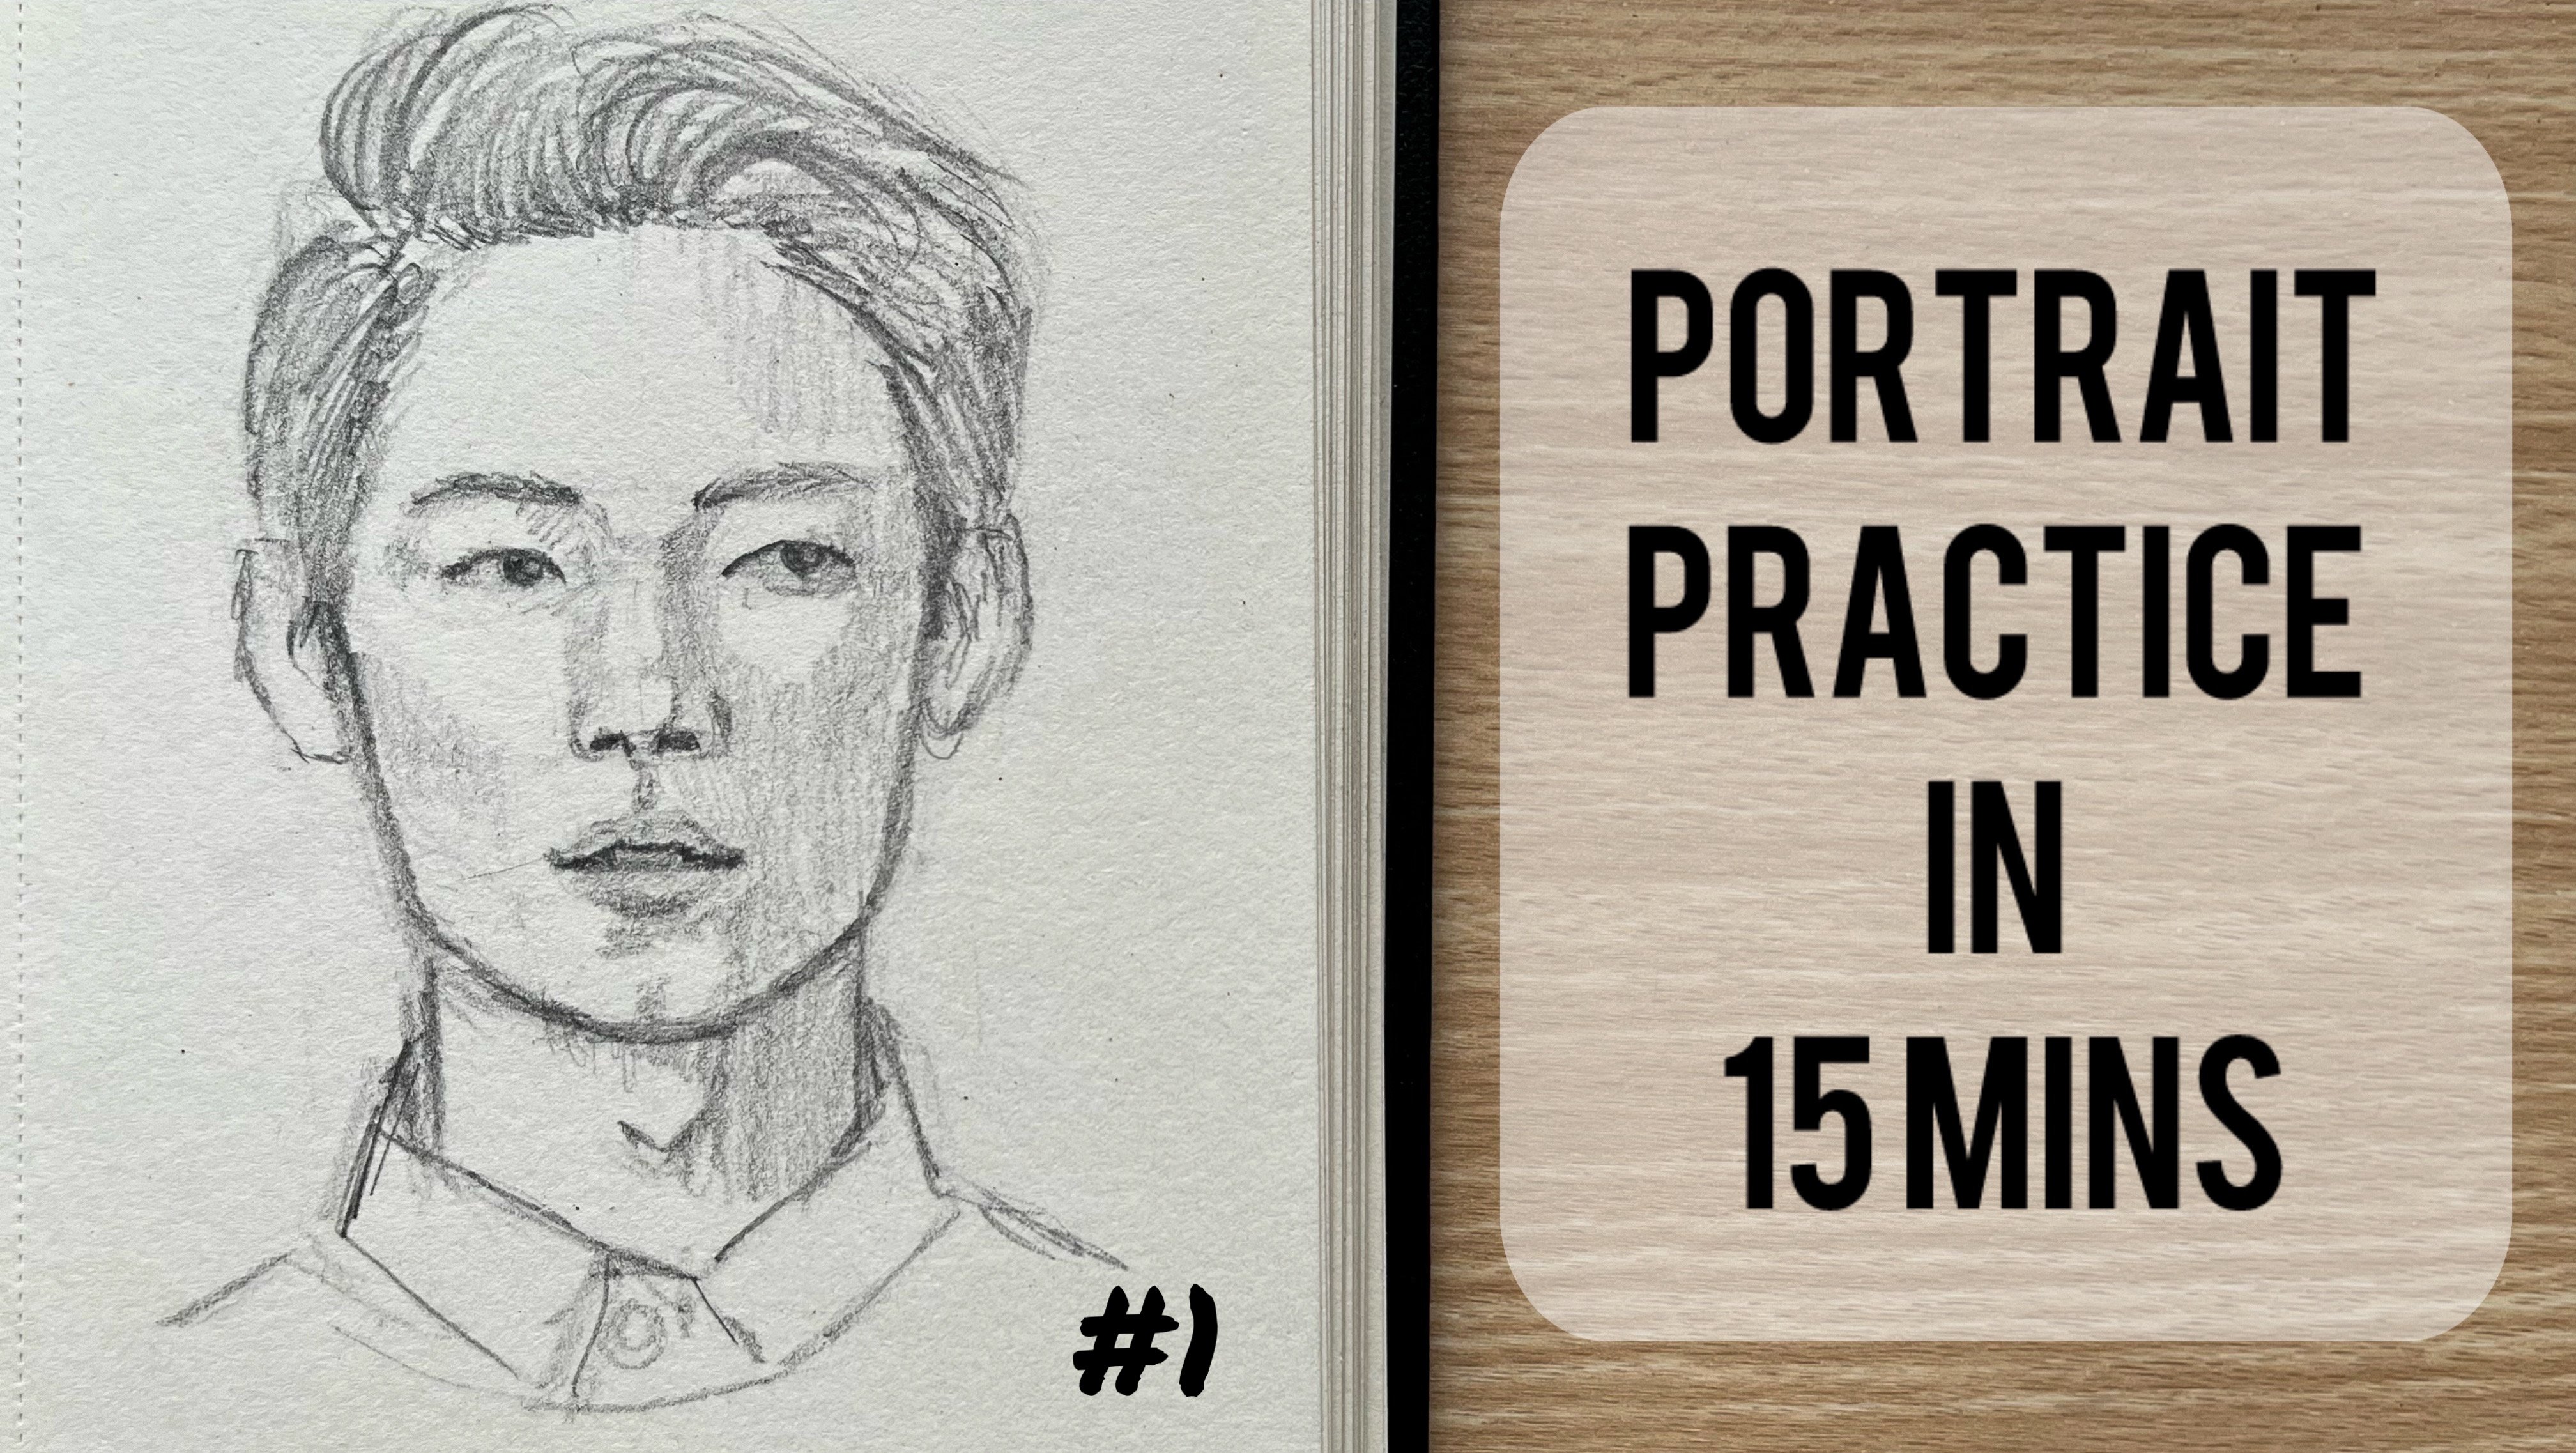
11. Head 3 - part 1: You can see, this
person has tilted or rather turned her face
completely to the side. Moreover, the face
isn't straight. If you observe her eyebrows, you'll notice that her face is slightly tilted at an angle. Therefore, you can hold
your tool this way. In this case, you'll notice
that the sliced planes of the face are not horizontally
aligned at the center, but are also angled. Similarly, if a person
is looking downward, the side guidelines will
rise towards the top. With that concept in
mind, let's begin. As always, the first step
is to start with a circle. If you have a reference point to guide your circle,
go ahead and use it. In this case, the forehead can be taken as a reference point. So using that, you can
start drawing the circle. Since the person has turned
her face to an extreme side, there is no need to
include the nose within the circle
like how we did in the previous cases because as the face turns
away from the center, the nose begins
projecting outward. So here in this case,
you can exclude it. Once the circle is drawn, the next step is to
mark the central line. To do this, identify
the reference point, that is the midpoint
between the eyebrows, the midpoint of the nose. You can skip marking
the lips for now, but find the midpoint
of the chin. After that, connect
all these points. The resulting line may not
be perfectly straight, so you can curve it accordingly. Mm. So this here would
be our central axis. Once this is done, the next
step is to slice the sides. We already know that the bottom
tip of the slice portion represents the nose line while the top indicates the hairline. With this in mind, let's mark this section between the
hairline and the nosline. Using the tips of the
eyebrows as referenced, place the hairline and
noseline accordingly. Now divide this section using a line parallel to
the central axis. You can now mark the eyebrows. Initially, I had made
a small mistake, so you can simply connect the eyebrows to get
the eyebrow line. They don't need to
be overly slanted, so try to keep them simple. Using parallel lines mark both the nose and
hairline positions. Next draw another line parallel
below to mark the chin. Now at this point, we have got all four important
reference lines. Now let's understand
the measurement and proportions between them. Using your pen as the tool,
measure them like this. You'll notice that the second
section that is between the eyebrows and the nose is nearly twice the size
of the first section, that is the forehead part. In this case, the facial
shape is like this. So let's move on
to the next side. Here, as it's clearly visible, not clearly, but
slightly visible, you can extend the
line a little bit and connect it to the chin
line to mark the jaw line. You can see a small
curve beneath the chin with the chin
projecting slightly outward. You can see that about halfway down the nose curves outward, And around the middle
of the bottom section, you can notice a C shape
curve indicating the lips. The bottom of the C shape
marks the bottom of the lips. Now we need to define
the cheek plane. Since the years are not visible and we don't have a
clear reference point. You can simply divide this
section into half from this midpoint to where the
chin ends on the sides, you can draw a connecting line. You'll see a highlight
point in this area. So draw the cheek guideline representing the side
planes through that point. With this, the cheek
plane is complete. You can also mark the hair
slightly above the hairline. To mark the eyes, find
their position by dividing this portion into half. Doing so will give
you the eye line. Similarly, for the lips, divide this section below
the nose into half, and this will help us
obtain the mouthline. Now with these guidelines, we are all set to sketch.
12. Head 3 - part 2: Let's begin with
drawing the circle. The next step is to
mark the central axis. As you can see,
it's not exactly in the middle but positioned
closer to one side. If you observe carefully, the axis projects more
outward at the bottom, so you can follow the
same in your sketch. Next, we'll slice the sides. Now, this is almost in
the center of the circle, and since the side is almost on the opposite
half of the circle, you can slice off a
section accordingly. Do pay attention
to finer details, that is, notice the gap here. Now, divide this
portion vertically. For the embrline as I
had mentioned earlier, I had made a slight mistake, so let's correct it.
You can keep it simple. That is, draw a line that
passes through the eyebrows. If you observe the
entire circle, you'll notice that the ebrline isn't exactly in the center, but slightly above it
with a small angle. Next, mark the hairline. In the same way,
mark the nose line. Always try to compare the nearby reference guidelines
for a better accuracy. As noted earlier, the forehead section is half the size of the other
two sections, right? That is, the other two sections are about double the
size of the forehead. Since these two sections
are roughly equal, we'll use the proportion to mark the horizontal guidelines. Now let's mark the nose line. Then with a similar gap,
mark the chin line. You can now connect the
jaw line on the side. Remember there was a small
mass below the chin, so you can mark accordingly. If you divide this section
into two equal halves, you'll get the
shape for the nose. In between, you can mark a
slight bend for the nose. Again, divide this section
into two for the mouth. You'll notice that the line from the tip of the nose
is almost straight. Instead of directly comparing
with the central axis, we can use the general
Y axis as a reference. For this, what I normally
do is use the edge of the notebook as a guide since it provides a
straight line for us. Using this method, I'll draw a C shape and also extend
the chin slightly outward. From this point, you can
curve upward slightly. Now mark the neck. Now to define the cheek plane, since the ears are invisible, divide the section
equally into halfs, then from the midpoint
to the end of the chin, draw a curve to complete
the cheek plane. Next, to locate the eyes, divide the upper section
into two equal halves. Similarly, for the mouth, divide the section below
the nose into half. You can then add the hair. You can now erase any unnecessary dark
lines in your sketch. So let's start with a scarf. So this was our side
sliced part right. Here, you'll notice
that the scarf falls slightly
inside this section. So sketch accordingly. And as I had mentioned earlier, always try to find and compare the nearby elements to
maintain that accuracy. From the noseline, observe
how the scarf bends downward. Now, from here, you can bring the knot to the
back of the head. So just in front of
the cheek plane, add the texture to the knot and also include minute
details if needed. Now, as for the eyes, notice that they are positioned closer to the sliced portion. If you divide this
guideline in the middle, you can find the
position of the iris. Let's break down the
shape of the eyes into simple lines and curves for
a better understanding. So as you can see,
the eyes should be placed slightly towards the
lower part of the section. You can sketch the
eye accordingly. That is first divide the
section to locate the iris and then shade it lightly without extending it too
far to the sides. You can add the eyeliner or eye shadow as needed
using the same details. Next, you can draw the
eyebrows just above the eyes. Now follow the same shape
as in the reference. The other eyebrow is
only slightly visible, so you can mark it the same way. If you look closely, it almost forms an L shape. So at this point,
you can add the I to your sketch using
simple lines for clarity. So there is a small bend here. You can also add that as well. Now, focus on the darkest
areas of the nose, which is the nosetrils.
You can mark them here. They're almost within
this nose shape. As mentioned earlier,
you can break this into simple shapes for
a better understanding, and you can replicate
the same shape in your sketchbook and
finish it by shading it. Now here, same way, you can position the nostrils correctly and
darken it a little. For the lips, observe that they don't extend to the cheek plane. So let me just show you how to study the surrounding
guidelines. That is, if you drop a perpendicular from
the edge of the nose, it almost falls exactly on
the line where the lips ends. So you can use this as a
reference to mark the lips. I'm actually marking the
corner of the lips first. Now you can roughly
sketch the lips as a slanted line
from this point. Let's try to break it
down using simple lines. That is, it appears
somewhat straight here and it bends afterwards. That is, it bends after it
crosses the central line. Now, let's connect this
with a corner of the lips. You can see that there are
shadows just below the lips, so you can add that in
your sketch as well. So basically fuss out, try to outline the shape and then fill it with light strokes. You'll notice that this
area is also darker. You can see that the iris is positioned near the
center of the eyeline, so darken it slightly, but try to keep the details
minimal for simplicity. Now you can add a few eyelashes I'm also lightly
shading the lips. You can also add minor
details wherever required, such as darkening the hair or
refining the scarf texture. For the details, I'll draw to infinity symbols in
opposite direction, and you can also shade them for adding some
depth in the scarf. When shading, try to focus
on areas with darker tones. Once the shading is complete, erase all the
unnecessary guidelines. You can also lightly
shade areas where you observe subtle
shadows in the reference. For example, if there is a
slight change in the tone, add a soft gradient
for the depth. This part is up to
your creativity. You can either keep it as such or add light shading
for some effects. So once you have
added all these, feel free to apply some more
details if you feel like. You can also revise or redo any section that
needs improvement. And with that, our third
sketch is complete.
13. Head 4 - part 1: You observe this person,
you can see that he's not looking straight but
slightly to the sides. Additionally, the line here is bending from the tip
of the eyebrows. So in this reference,
you can notice that the person is not only
looking sideways, but also tilting his
head slightly upward. Now I'm using their forehead as a reference to
sketch the circle. I'm also trying to include as many features as
possible within the circle. Since the person is not
looking entirely to the side, I'm also trying to include
the nose within this. Next to mark the central line, I'm identifying the midpoints
between the eyebrows, nose, and the chin,
and then connecting them using a slightly
curved line. So the central
axis is now ready. Now to slice the sides, I'm using the tips
of the eyebrow, the hairline, as well as the
nose line as a reference. Next, I'm dividing this
portion vertically with a line that is parallel
to the central axis. Now let's mark the eyebrow line by simply connecting
the eyebrows. Similarly, above it,
I'll mark the hairline, and just below, I'll mark the noseline and the
chin line as well. Now, let's understand
their proportions. As you can see, the two
lower portions are equal, while the first portion
is slightly smaller. So I'm marking the same here so that we don't miss
it while sketching. Now closely look at the
shape of this chin. It's almost a broad U shape. So if the person were
looking straight, this would have
been symmetrical. However, since our reference
is turning to one side, the center line
also shifts along. This causes the chin to
be divided unequally. The same principle applies if the person is turning
to the opposite side. Since our reference
is facing this side, only a small portion of the chin on that side will
be visible to us. Now let's move on to
the facial shape. Here I'm extending this line
to connect it with the chin. On the other side, I simply connect the edge of the
circle to the chin. Now for the upper part, you can shape the hairline
based on the hairstyle. Next moving on to the neck, you can follow the same shape. As you can see, the neck is positioned slightly
near the central line. You can follow the
same in your sketch. After dividing this
portion vertically, we can connect the tip
of the ear to the tip of the eyebrow to create
that horizontal line. Here around the chin, you can see it almost
forms a U shape. Now using these two points, we can mark the cheek plane. So instead of drawing
a straight line, you can slightly bend
it to be precise, you can bring in
the line just below the eyes and then curve
it towards the chin. Now all the
guidelines are ready. For the eyes, we can
divide this section into three equal parts with the first part giving
us the eyeline. Next for the mouth, we can
divide this portion into half. So this will basically mark the place where
the lip would end. Somewhere halfway
through this section, you can see a slight bend that
will be forming the chin. Next, I'll mark the
position for the ears. As you can see,
the person's face is not bulging too much outward. It simply follows the curve that is very close to
a straight line. So it's not entirely straight
but slightly curved. Now I'll be adding the
shape for the hair. As you can see, it
extends just above the circle and ends
around the hair line.
14. Head 4 - part 2: Always start with a circle. Here, the middle of the
circle lies at this point, but the center line does not
exactly pass through this. Instead, it's slightly outward that is almost halfway
towards the other side. So you can follow
the same method and mark the central axis. So this was our center, and the sliced part
falls roughly here. So you can mark it accordingly. Now, divide the circle to mark the eyebrow line
and slightly bend the side horizontal line in the same way and then
drop up perpendicular. Next mark the hairline
and the nose line. Once done, you can measure
to ensure the proportions. So you can mark it accordingly. For the jaw, you can extend this line lightly and
connect it to the chin. On the other side, you can simply connect the edge of the circle to the chin. Since I find this
portion a little small, I'm rubbing it off and
extending it slightly. Next I'm adding the neck
line in the same way. Near the central axis
around this area, you can start marking the
other side of the neck. Next, for the upper half, you can follow the same
hairstyle to mark the hairline. In the next step, you can
mark the cheek plane. Now for the eyes, divide this portion into
three equal parts. For the mouth, you can
simply divide this section, and as you can see, you can add a small bend between
to mark the chin. Now proceed with
marking the ear. You can outline the
hair in the same way, and just above the forehead
and also towards the sides, make it a little larger. With the addition
of that dimple, our guidelines are all set. Finally, remove the dark
strokes and unnecessary lines. So you can add the finer
details of these features. Now, to shape the nose, so this was our eyeline, right. So in between this, you can
see a bend that occurs here. So from this point,
you can curve it outward to mark the nose. As you can see, it does not
extend beyond this line, and in this way, you can create a broad U shape for the
bottom part of the nose. You can continue
this upper line in this direction to
mark the eyebrows. And similarly, on
the other side, you can extend the eyebrows to the tip of the sliced part. So just above the
nose at the corner, you can start marking
the eyebrows. For the eyes, I'm breaking them down into simple shaves so that it
is easy for understanding. Here in this case, it
can be taken as an oval, but it also resembles
a rectangle. To simplify it further, I'm using just lines
to outline the shape. So as we did earlier, I'll shade the shapes, highlighting the
darker portions. So I'll also mark the nostrils
and on the other side, a small portion is visible. You can mark that as well. So above the nose, you can
notice a shadowed area. Typically, the bottom part
of the nose is darker, break it down into simple shapes before adding the finer details. If you divide this
portion in half again, you'll notice that the mouth occupies almost
half of the space. As you can see, the upper lip is larger than the lower one, causing the middle line
to sit a bit lower. You can slightly curve this line and extend it towards
the cheek plane. Additionally, this part
slightly extends outward, so you can include that as well. Try to replicate the same shape from the reference
in your sketch. Near the nose, you'll
notice a portion extending outward
towards the chin. So it's positioned
just above this line, so you can make it accordingly. So just below the eyes that
is around the cheek area, you can mark it in this manner. So as for the lips, you can simplify
them by breaking them into basic lines or shaves, and then you can start
shading inside it. Feel free to erase
or redo any portion that you feel can be improved
or doesn't look right. Now, just below the nose, you can see a shadow
in this area, so I'm shading it slightly to
create that shadow effect. For the ear, you can darken the necessary areas
using the pencil. First, you can outline it and then fill it with the shading. Moving on to the IRS, I'll mark it roughly. This is just to show
that it is the eyes, and most importantly, you don't have to focus too
much on the details. Keep it simple, keep
the shading simple. Even if you don't feel like
going ahead with shading, you can, you know, not
proceed with that. You can stick with
a simple sketch. So whenever you notice a dark tone or shadow
in your reference, go ahead and shade
it accordingly. If it is a deep shadow, you can apply more pressure on your pencil to
create that effect. So here I'm shading
all those regions where I feel shading
is necessary. You can observe where I'm shading and also compare it with the reference on this side
to understand it better. Now for the hair,
as you can see, I'm first marking
the outline alone. Once the basic
outline is complete, what I'm doing is I'm dividing the hair into
smaller sections, and I'm trying to create that effect just
like the reference. So basically, I'm starting with the hairline and moving upward towards the end of
the hair's outline to give that curly effect. So here it may not look
like the exact curls, but instead of making
one continuous stroke or detailing each curl, this is what I prefer
to do so that I'm trying to create my own way
to create the same effect. H so as you can see, at this moment, the hair
looks a little bit messy, but you can improve
it gradually by adding a few more
layers of shading. Once the inner part is done, you can outline the
hair further by adding stray strands as there might be some extra hair
extending outward. As you can see now I'm focusing on few more areas of the face, particularly near
the eyes, nose, lips, chin and neck, where the shadows might
be more prominent. You can try to identify those dark areas and treat them accordingly
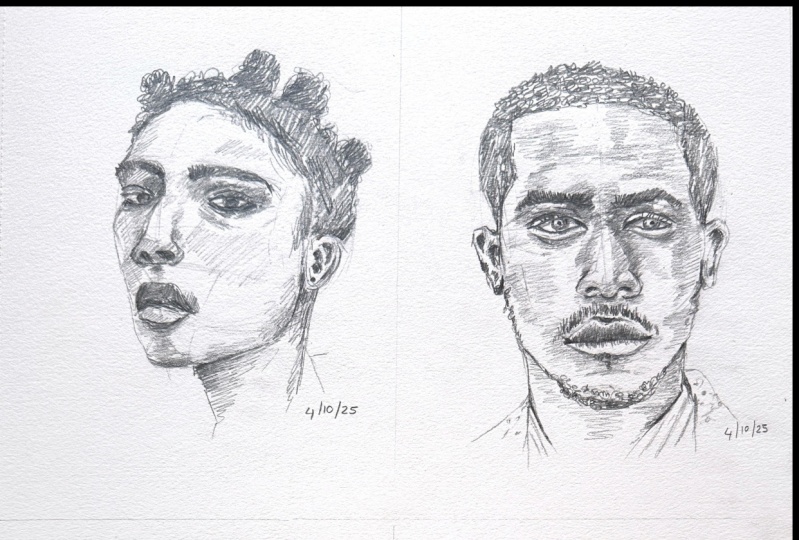
in your sketch. Once everything is complete, our final sketch will be ready. And with that, we have
successfully finished our four heads challenge. It
15. Recap: Now let's quickly recap
how to sketch a face. For this exercise, you don't
need to sketch anything. Simply close your eyes and
visualize it in your mind. So let's begin by imagining a face that's looking
straight ahead. So on a blank sheet, let's start by drawing a circle. Once you have drawn the circle, mark the central axis
passing through the center. Next, slice both the sides of the circle slightly
and then divide them vertically and also ensure that the vertical line is parallel
to our central axis. Next, let's add some
horizontal guidelines. For this, begin by dividing the circle horizontally
through the middle. This will be the eyebrow line. Then mark the hairline
by connecting the top part of
the sliced sides. Next, draw another line parallel to the eyebrline to mark
the nose line below. And same way, you can mark
the chin line as well. I hope you all followed
the rule of thirds. But in case if anyone forgot, let me explain it again. According to this
rule, the distance from the hair line
to the ebrline from the ebrline to the nosline and from the noseline to the
chin line should be equal. This proportion applies to all balanced or let's say
proportional phases. So you can follow the same
steps in your sketch. Now, once you have
marked the chin, you can shape it based
on your reference. It can be either
curved or even sharp. After marking the chin, next is to draw the jawing, which can also take any shape, like it can be sharp, broad, or even rounded. Now, once the jaw line is drawn, you can connect it to the chin to complete the lower
part of the face. Next, let's shape
the upper half. For this, you can adjust the hair line based on the hairstyle that you
have in your mind. Now let's move on
to the cheek plane. For this, you can draw
a line from the end of the eyebrow line to the corner of the chin on both the sides. You can slightly curve this line to define
the side planes. Once this is done, all our major guidelines
are now ready. Now let's move on to making
our facial features. The first feature to
work on is the eyes. To locate the line, divide the space between the eyebrow line and the
nosline into three equal parts. The first division will
give us the eyeline. Now for the mouth,
divide the section between the nosline and
the chin line into half. So just above this
halfway point, you can mark the mouth. To accurately locate the eyes, you can now divide the
horizontal width of the circle into
five equal parts. Once you have finished
marking these five parts, the second and fourth section will indicate the
positions of the eyes. For the nose, you can draw lines from the corner
of the eyes downward. The space between these lines will determine the
width of the nose. So basically the width of an eye and width of the
nose would be the same. Finally, let's add
the hairstyle. Since we already know that the hair adds
volume to the head, you can mark it slightly
above our Loomis circle. Once you complete this step, you will now have a rough sketch of your imaginary reference. I recommend listening
to this audio a few times to get a clear
understanding of the steps. So visualizing this process is also an excellent practice, but in case you're finding it
difficult to visualize it, you can refer to
the image I have uploaded here for
a better clarity. Also, do let me know if you
found this exercise helpful.
16. Project: So with all four hits completed, I hope you have gained some valuable insights
from this class. Now it's time for
you to practice consistently until I
see you next time. Since this is a beginner
friendly class, I've chosen references that are similar to what we have
covered during the class. These include faces
looking straight ahead, slightly tilted
towards the left, right, and at extreme
angles, as well. The idea is to keep things
manageable and familiar, so don't feel overwhelmed or nervous about the references. And most importantly, remember, it's okay if your
sketches aren't perfect. Our focus isn't on achieving
100% accuracy right away. Instead, we'll take
it step by step, keeping things simple and
building your skills gradually. So if there is any area you
feel needs more attention, use each portrait as an
opportunity to improve that part. Let me repeat the
key here is to try. Don't worry about the results. What matters the most is that you practice and learn
from the process. I've attached the
reference images as a PDF below for you to download
and use for sketching. So go ahead and give it a shot.
17. Conclusion: Finally, we have reached
the end of our session. Thank you all for
joining this class. It's been a pleasure
sharing what I have learned about portrait
sketching with you all. The goal of this class wasn't
to achieve 100% result, but to help you get started on your journey with portraits. So it's completely okay if your results aren't
exactly as you wanted. What truly matters here is starting and showing
up consistently, even if it's just for
five to 10 minutes a day. Set realistic goals
for your projects, maybe aiming for a 30 to 40% closeness
to your references. Remember that every
small step you take brings you closer
to improvement, so don't lose your hopes. This is just the beginning of many more exciting challenges
I have planned for 2025, including 100 hits challenge to help you master
portraits with these. So stay tuned for more fun
and informative classes, including ones on acrylic
as well as Gash portraits. And I hope you enjoy the
process as much as I did. Keep practicing. Stay motivated, and I'll see you
in the next class.
 Anagha Sivadas, Artist, India