Transcripts
1. Drawing Flowers with iPhone Photos : Introduction: Hi there and welcome. In this lesson, I want to
talk about how you can use simple iPhone photos to take wonderful and creative sketches of flowers that you might find out anywhere in
your neighborhood at the park, in your backyard. As you can see behind me, I have a ton of Black Eyed
Susan set are in blue. And I'm going to
take a series of still photographs
using my iPhone. And from there we
will draw a couple of really nice and really
fun sketchbook drawings where we really investigate
these fun and beautiful. Like I'd Susan's
that are growing in my garden right now this week. And I do this a lot. I use photographs that I've taken while out in the
garden or walking my dog. And just for the
fun of exploration, I, I draw them. I'll just take a
couple of quick snaps. Sometimes I'll even take
videos of the flowers and just draw them that evening
on my sketchbook when I have a time to sit
down and relax. Or my Black Eyed
Susan said I have, I have two different varieties. So I'm going to actually get some good photos
of both of them. And what I like to do is I, if I wanted to look at the
pattern, the pattern them, or if I want the
specific anatomy, I'll take a photo and I'll actually post the flowers
the way I want them to be. And then I'll take a
quick snapshot of them. And it's really simple,
and it's just fun. And there's my little puppy
who is always with me when I'm out in the
yard or on a walk. So let me take some still photos and then we'll get to draw.
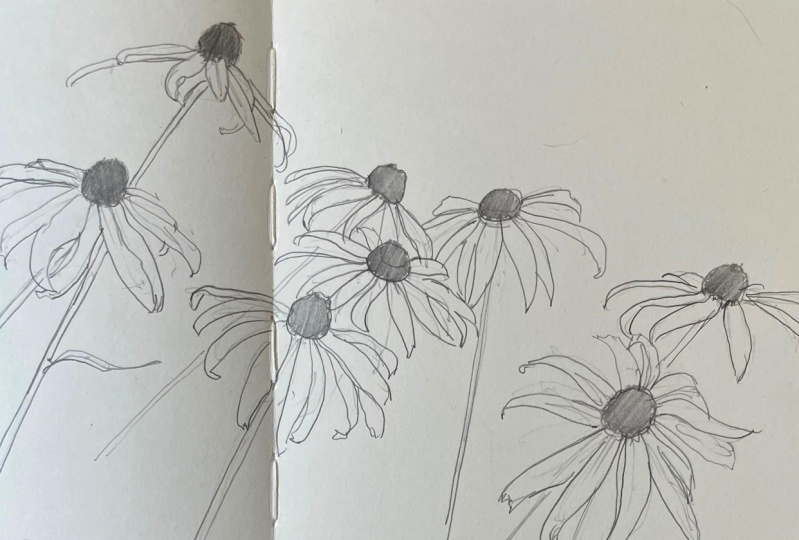
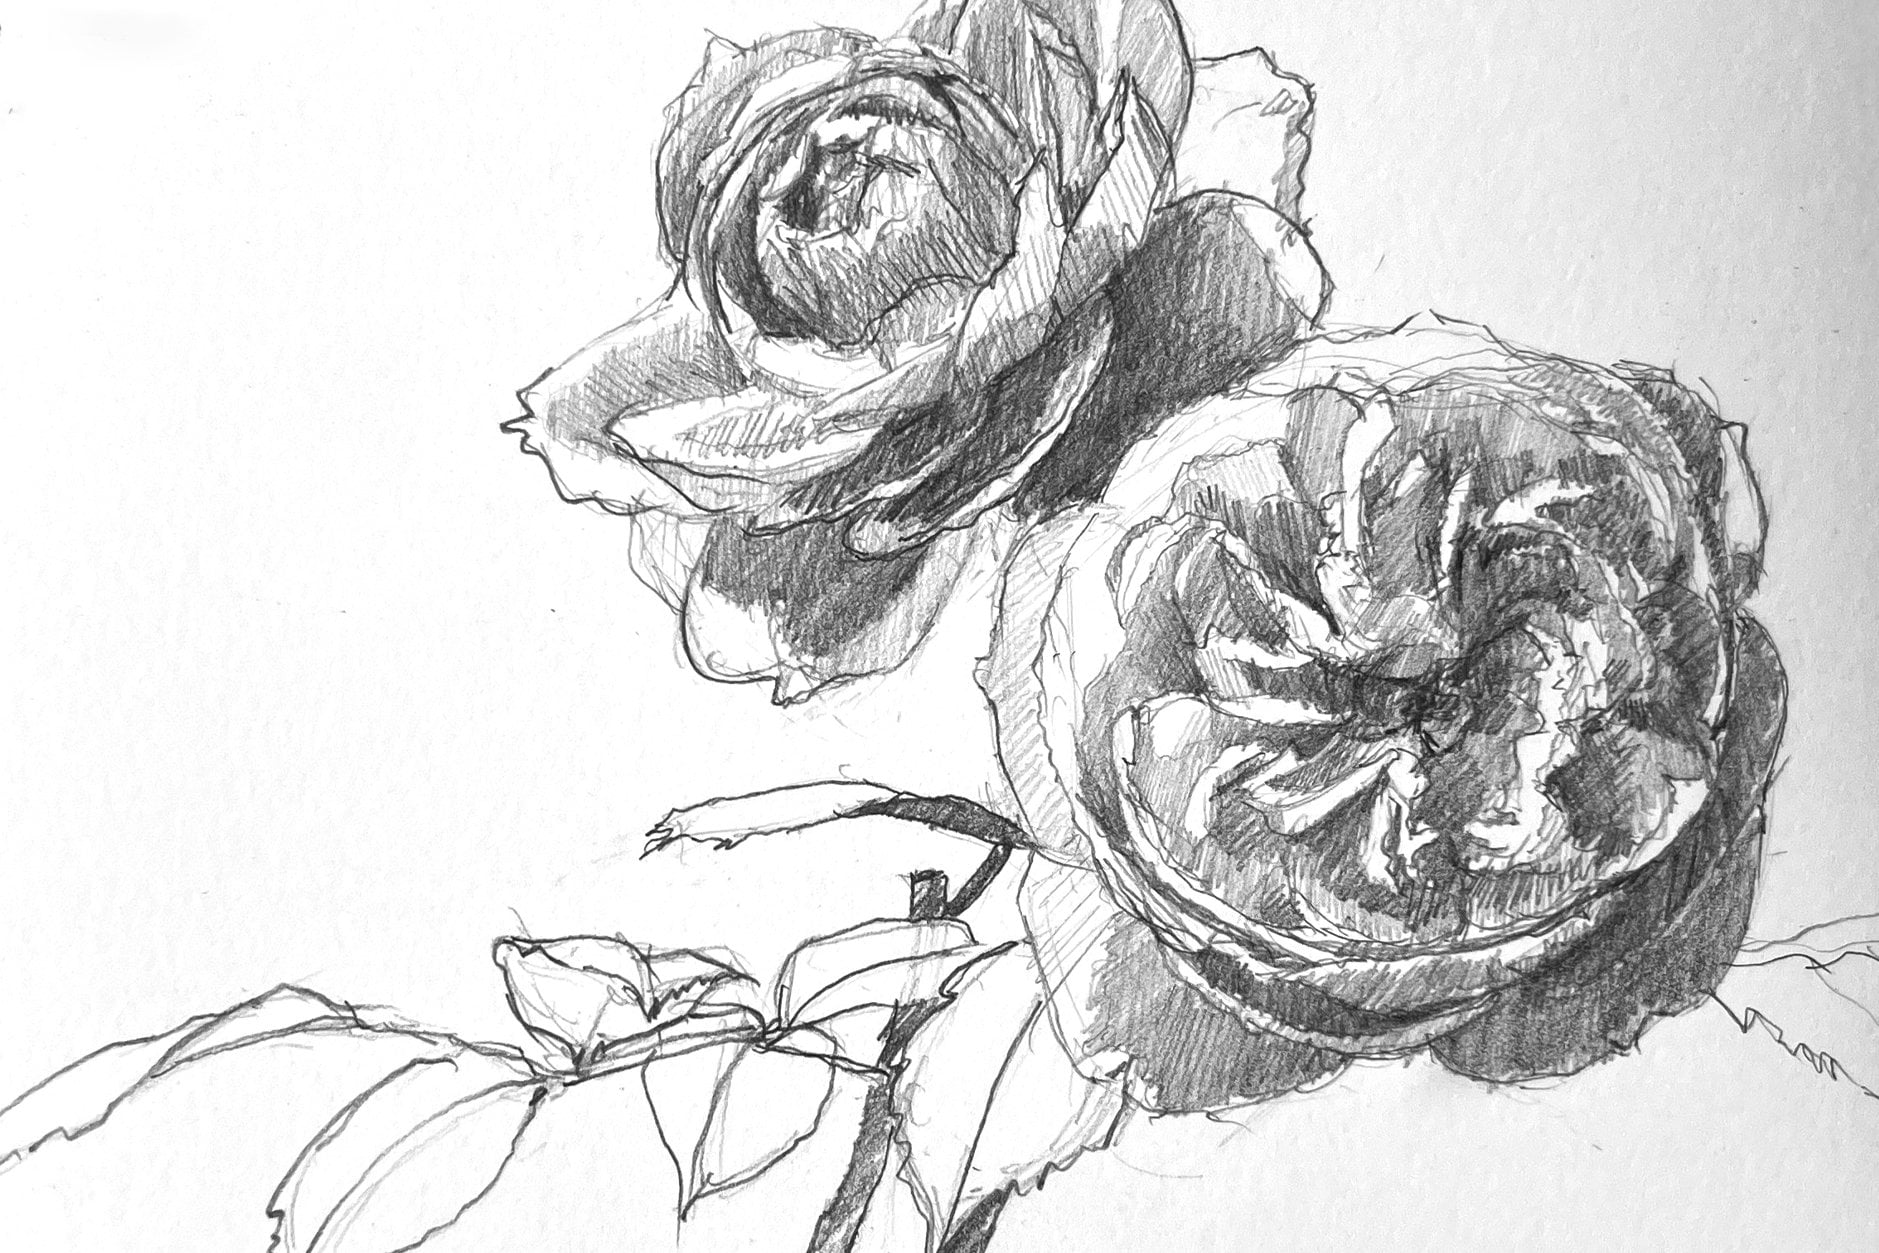
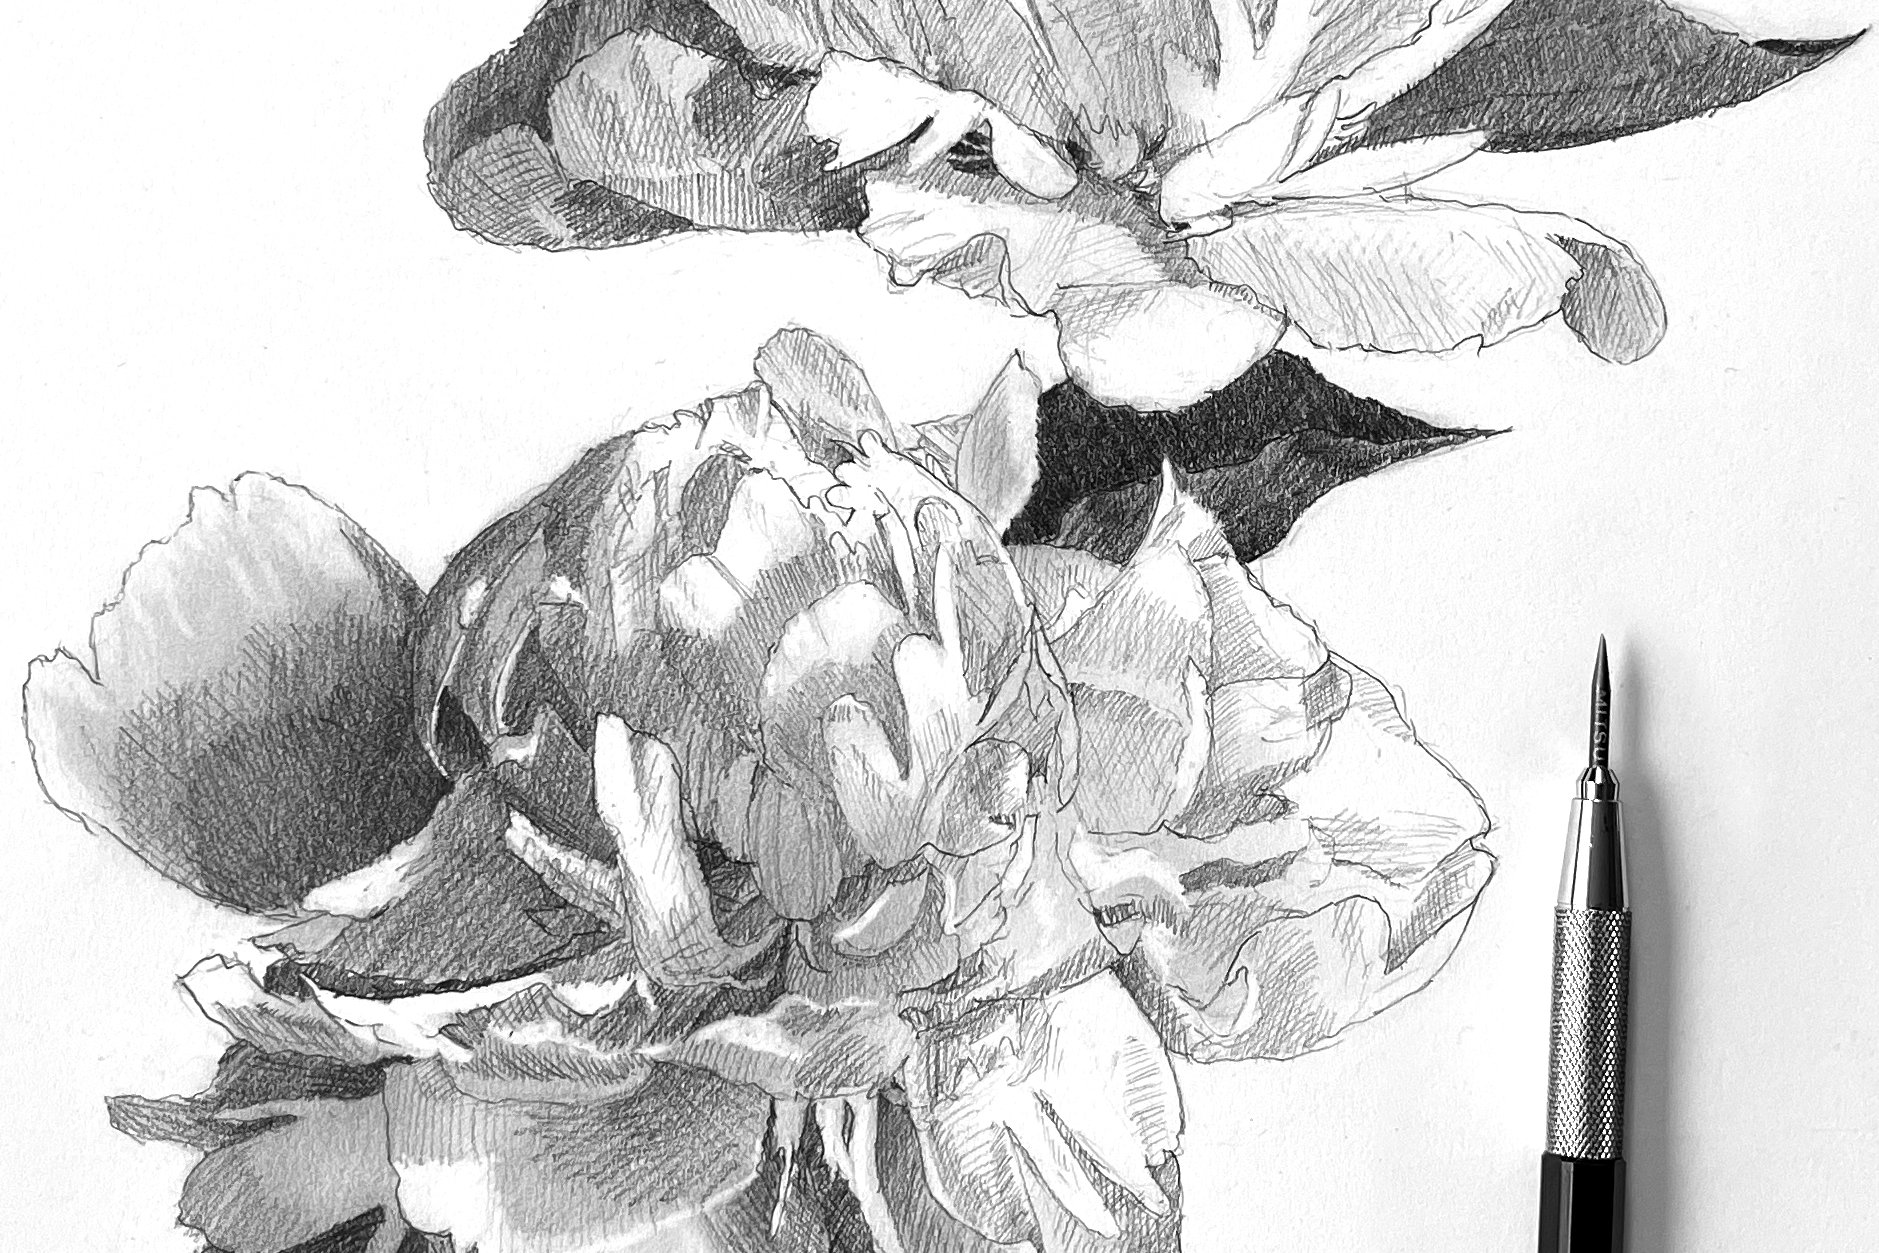
2. Sketchbook Examples : Here is an example of
some pencil drawings completed from photographs
of Japanese enemies. And then here's an
example of a Dalia drawn from photographs that
I picked up in my garden. And so whether you're using
pencil or graphite or pin, all work really, really
well for drawing. In your sketch book.
3. Drawing Black Eyed Susans : Part 1 Analyzing the Photo: Sometimes I'll cover
the entire page, like this whole area
or just one side. I'm thinking. We'll see we'll see
where I where I end up. But I do know I want to cross
over the center seen here. And the, of the image that I like is I love this
flower right here. Zoom in. I love that specific flower. Then I loved the
relationship that one has. And I'm not so crazy
about that one. So that one probably will
get cut off. Cut off. And okay. So I wanted to like markup
and so let's do that. So of the flowers that I like, I really like that one
right there. Like that one. Not so crazy about that. Not too crazy about how these two flowers
are coming together. Get rid of those images. I really like that one. I like those that
shape, that shape. I like that one a lot. I like this one partially. I think when I would
draw this one, I would actually add, provides an add
another petal right there to make it attractive. This, like I said, these don't, I don't like these, but I think I'd get rid of
that and keep this one. So when I'm working
from photographs to I'm actually always kind of composing and making
judgments on what I like, what I wanted, what I don't
like, what I want to keep. And so with that, that that helps me looking at my photographs and then anticipating what pieces
I want to keep it. Also, since I'm not crazy about that one,
I like that one. I can also decide high when a crop I don't
like this one either. So I can choose to crop my I'm going to crop it like that so I can have but
I don't need that. What I also worked from when
I worked from photograph, I almost always photograph bigger than what I
need because I know I can adapt with that in
mind. With that in mind. Let's get started. I have, I'm using 0.5
mechanical pencil. And I want to put this. So I'm also probably going
to mess with the scale a little bit because I
want this one right here. Okay, so lightly
draw it in theirs. I can immediately
get into the lines, but since I'm
working with pencil, that means I can kind of do
a little bit of cheating, so to speak or not be so
specific at the forefront, I can think about my
boundaries of my flowers, which is what I'm
doing right there. And then I have this
other flower right here. Which this lets, you know, I'm always triangulating two. So the, the verdict, a vertical drop, drop line aligns with the edge
of that flower. So with that in mind, I got to make sure
that is that in the right location in relationship to that.
And I think it does. So then I drop that
imaginary plumb line. And I, and so that's, that's where the black guy of this root of Beckett
IS goes to there. So I can even, so I'm just quickly
drawn the outline of the flower going around
it like the clock. Thinking about the way the
different petals interact. Lots of negative,
I'd like to draw sometimes by thinking about
the negative spaces first. And in this drawing, I just really want to focus
on the flower petals. So I'm not going to
put in much of the, I'm not gonna put
much of the leaf. And I went in a way, this is almost going to be
like a graphical exploration of the black and yellow
pattern that this, that these barricades
Susan's make in nature. Yeah, that's it. And then they're sorry, I look at the space between the
petals as much as I look at the positive location
of the petals. Okay, there we go. So now, so those
are my first two and now I need to decide
like, where do I want? I want to work on that, that flower right there
and relationship. So diagonal. Let's look at this diagonal. If I look at the full, this is the angle
of this flower. That one comes down. It has, Let's see, it's not quite a parallel. So that's my trajectory of that, of the flower that I just drew. The way the stem
isn't everything. And then the trajectory
of this one is like that. And I bet, like I continued on, it would intersect right there. Okay. So with that in mind, I know that I want I don't
want to carry it up. And I am going to kind of adapt the scale because I
want it to fit on my paper. Falls right in the
same of my drawing. Do I want that? Not particularly. So I have the choice of either moving it more forward here are more on the
side I'm choosing. I'm going to sway it
more on this side. And so what I'm gonna do is
let's get that started at that drawing in hip, That's about the right scale. And it will cross a little bit. That's not so bad. There we go. Then I've got the stem, stems come from the middle. Then I've got this second. I have this one right there. Actually, let's
rewind the moment. But with that, I'm
going to, like I said, I was going to add a couple of petals to make that fill
a little bit more rounded. With that in mind,
let's get that in. Some flower petals like that. See that flower right there. That's gonna be my inspiration
of how to interpret and create petals for,
for that flower. Okay, and then I got a stem that comes out and
then curves back down. This one comes down through. And I just moved it over. That's where it would be. Kinda get there.
I'm going to erase. Okay. So I'm going to erase erase my construction lines. Sorry. Sound like construction
lines. There we go. I think I probably
exaggerated that a bit. That's okay. I don't mind. That exaggeration
comes in. Let's see. We've got another flower right here and another
one right here. Okay, there's a
leaf on that stem. I do want to put that in. I'm going to move that
flower over just a smudge, make it a little bit easier. Let's move over and continue designing this
page a little bit. I like to design
my page first and then add the detail
if I want to. And what that by
designing my page first, it allows me to actually
to go back and work on sketch but entry over, say for 15 min over
like two or three days. And then I can that
guarantees that I will have the time in my because I would anticipate your
schedule is probably just as busy as my schedule is. There are times when
your children or family or dogs need or
work need your attention. But you might have a
creative idea that you want to see to come to fruition. And it's really wonderful
to be able to break up your creative idea into
small, bite-sized chunks. That is one of the things that I really strive to do
with with my drawing. With my drawing practice, with my drawing practice
and painting, I'm always striving
to make sure that I I can I can fit it into my schedule and fit it in
a way that it actually improves my life instead of becomes just one more thing
that needs to be done. So since this guy got
moved over there, no longer connecting
like they were, I start to stretch
them to do that. That's not working. There we go. I'm really liking how this is
coming together. Okay. Then there's this, like I'd Susan right here. Right there, and then the stem comes down right there. There's I don't quite
see what's going on, but I'm going to just
kind of make that up. I can kind of get an idea of what that top part by
comparing it to like say, that flower right there, and seeing the pattern
of the petals. So I can kind of deduce
what's going to, what it's gonna look like. Okay, there we go. And then I went that
flower right there. And it is underneath. Quite. Then I'm going to, I want
it to fit on my page. So you'll notice
that I'm drawing very lightly with my pencil. One of the reasons why I love drawing with
mechanical pencil. I have two big reasons why
I often travel with the I, I carry my drawing kit with me, my pencils with me. And if you have a sharpened pencil that that lead can get
broken off so easily. Where a mechanical pencil you just you just push
the button down. You just push the button
down and you smash it in. Just for such an
easy way to travel. And I know that my tip will
always be a fine tip, 0.5. And yeah, so I love that. Oftentimes when I'm
working in my sketchbook, I tend to work in like 15 minute chunks
for this demonstration. I'm actually not. But if I was working in this was an evening an evening sketch
book entry for me, you know, I would have laid out my
design for my page like this, knowing that the
next time coming back at it to improve it.
4. Drawing Black Eyed Susans : Part 2 Refining the Sketch: As I said in the previous video, when I improve my drawing
or improve my design, I start from here and I just
kinda refine my drawings. So one of the things I'm gonna do is like for
these two flowers, I did kind of put the
pedals in a little bit more where I got
a little bit more sketchy as I moved along. And now I'm going to
actually fine tune the, fine-tune it just
a little bit more. So one of the flowers that I want to fine tune
is this guy right here. And so I'm going to draw in with a little
bit harder pressure. And I'm going to draw
in the way this petal, the petals come out from a Nike. If there's any, there's these
two overlapping petals. So I want to make
sure I capture that. Comes in, almost hits the stem but doesn't stem. Then this pedal
comes out like that. I'm exaggerating a
bit, but that's okay. I like it. So I have the choice to finish the drawing or
leaves the drawing at, in this as a linear drawing, which I really liked. So I might keep it. I also have the choice
to add a little bit of tone value two. So now I've got, now I'm moving to that flower right there. But I'm using the petals
back there as inspiration. C. And then back pedal comes out and you pee,
it peaks through. And then I have a series of petals that are
actually like to, but they're so overlapped that
they visually read as one. I see like a wrinkle right here. So I'm going to get that wrinkle in overlap so much
that they read, really read as one. And then at about this point, I see that there's another. Here we go. So now
I have to assume what is going on over there. Because I could keep it, but I want to have a little bit more symmetry
in this, in this flower. So I'm going to postulate
what it looks like. I'm going to make it up as I go. Here we go. I really like
how that's turned out. I've got a stem there that
comes down and curves. There is, there is
a leaf right there. So I'm going to, this stem comes through. Con, error is if there was a leaf that
comes off of that stem. I want to put that in. Yes, there we go. I'm moving this flower
over just a smudge. So that way I can, I want the whole black
guy of the flower to be seen. There we go. Of an exaggeration
but no big deal. Okay, now I'm at this
one and I will finalize. I'm using harder
pressure so I'm close. I'm like a little bit more
choked up on the edge of the pencil versus
being a little bit for holding the pencil back
a little bit further. And I'm using the HB
hardness of pencil. So that means that even if I press the heart
is the hardest that I can, it's only gonna get to like
kind of a middle darkness of, of the graphite, that kind
of shiny gray of graphite. And have I wanted to go darker, I'll need to go with a softer
lead that will give me more more of a darker gray. So this guy is the
furthest back. So if I wanted to make sure I'm controlling my
edges the best, I need to draw from
front to back. Or I'm thinking, I want
to think about my, I want to think about
the way my overlap on my edges are comes down. So I'm using like
hard, hard pressure. I love the pattern
that it's repetitive, but it's it's also unique and there's so much
variety in nature. There's, there's repetition, but then there's
so much variety. And that is one of the
things that I love about drawing flowers from nature, is that you've, you know, each, each flower adapts and changes as a response to the environment that
they're growing in. And to me there's nothing
gets better than that. Then drawing that, I'm
going to draw the stem. Let's follow the stem
down and see if there's any leaf would be decorative. Nope. So like if you notice I'm not going
too crazy on the stems. That's because the stems to me, or not adding a ton of a ton to the design of
what I'm fascinated with. What I noticed is my drawing from earlier was
a little bit off. That's okay. I can adapt it. And it actually will make
for a better drawing. That's fun. Okay, so then, then I have one more, I have two more, three more
flower, flowers to draw. And let's, let's do that. I loved drawing off the edge of paper to meet the sketchbook. It to me, it makes the
importance of the boundary of my sketchbook becomes
part of my composition. I think it makes for a more
dynamic sketchbook page when I create in a way that, that interacts with
my boundaries. That one right there. And then make it a
little bit bigger. I think these petals
are just bigger than, little bit bigger
than what I drew. Here we go. Then I've got one more flower I
wanted to incorporate, which is this little
guy right there. What I drew it in. There we go. Okay. So that is my sketch book
page design right now, as in like I drew that. But in fact, it's actually
going more like that. There we go. Excellent fun.
5. Drawing Black Eyed Susans : Part 3 Finishing the Sketch: The two previous videos I just demonstrated
how I like to draw. But it's a drawing,
a Black Eyed Susan. So what I'm
fascinated by is also the repeated theme
of those black dots in the field of
light value yellow. With my drawing here. That means I get to
play around with that. And so what I'm gonna do is I'm going to add
just a little bit of tone to the the Black
Eyed Susan part. And I'm just using my my HB
mechanical pencil to do this. If I wanted to make
it darker, I I can, I have I have some
to be led and I also have some for BT
lead, which I might. But initially I'm just
going to play around with the idea of having these black eyes poke out at me.
 Elizabeth Floyd, Artist | Elevating Everyday Moments