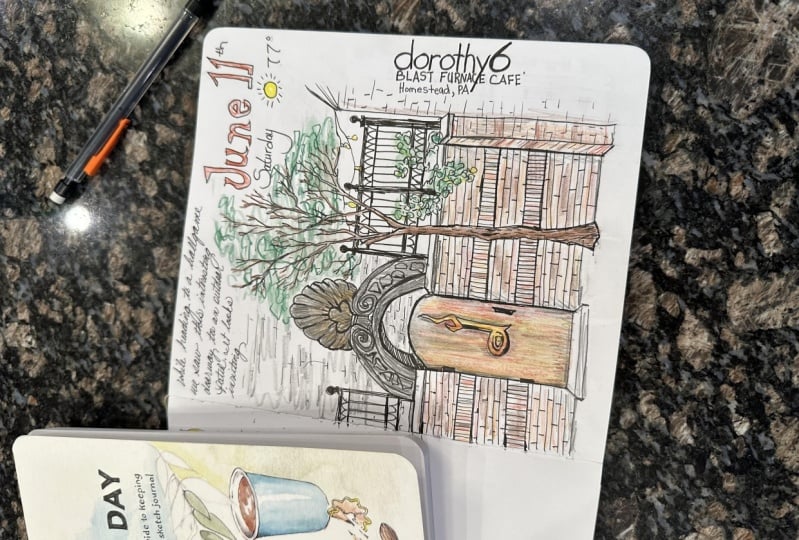
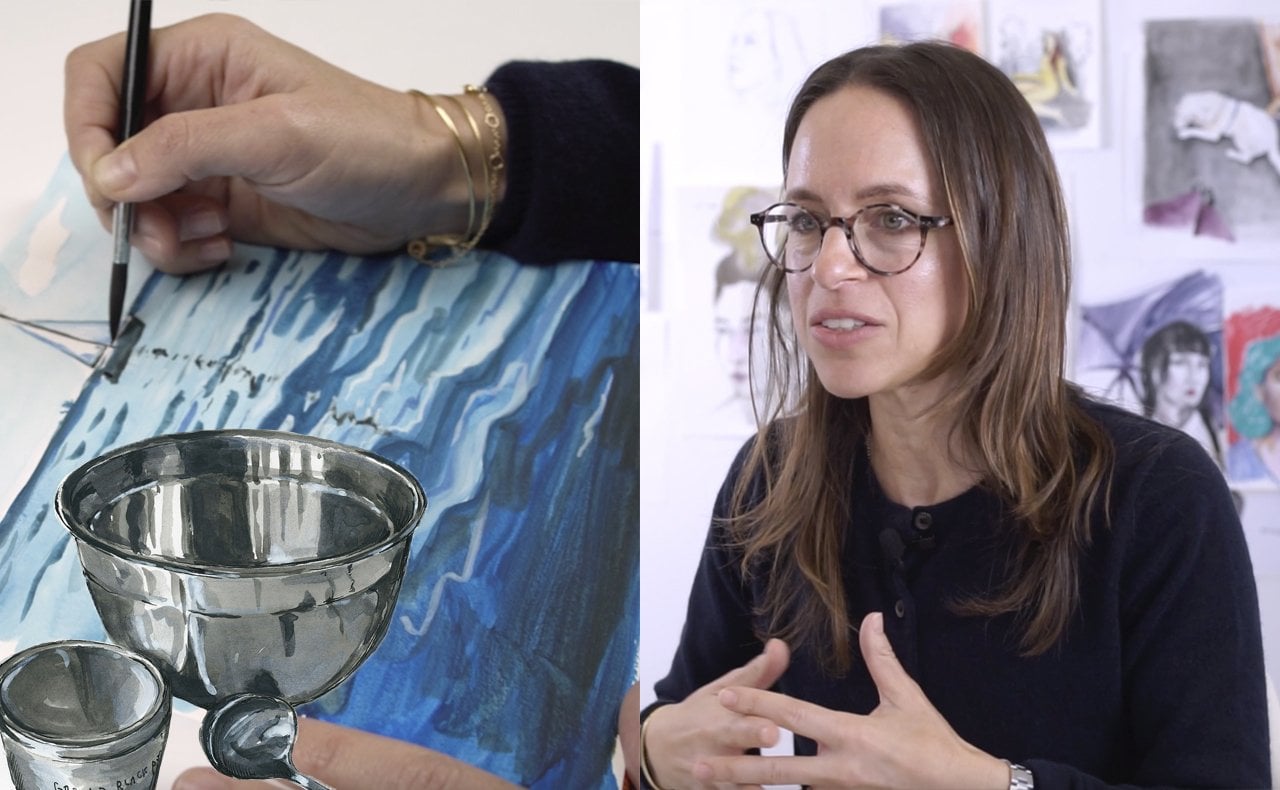
Transcripts
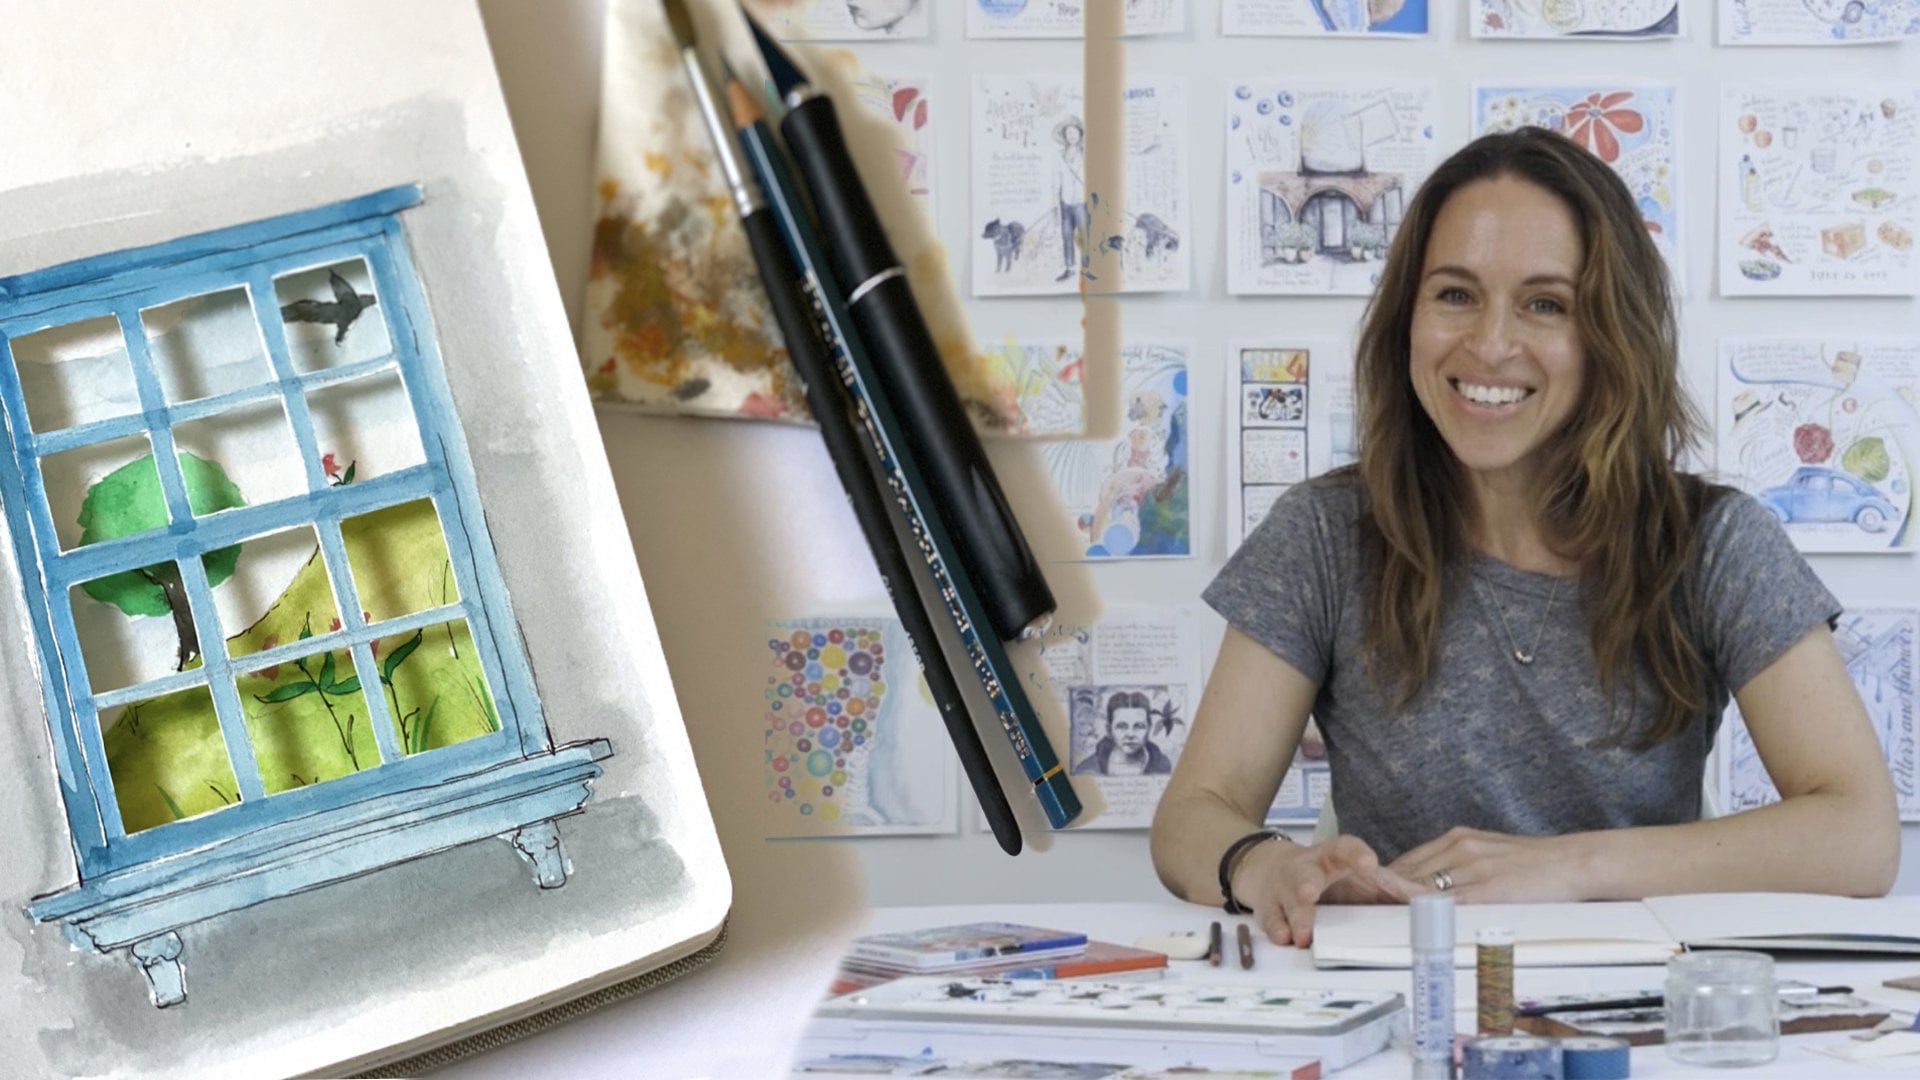
1. Introduction: Hi everyone. I'm
Samantha Dion Baker. I'm so happy you're here. I'm an artist, an
illustrator and author, and I work out of
Brooklyn, New York. You might know my
work from my books, Draw Your Day and
Draw Your World, and most recently, Draw
Your Day For Kids. You also may have seen my
work with Blackwing pencils, and with Atelier
Cologne perfume. A lot of what we're going to
be going over today is just about getting back
to drawing practice, which is something that I
had to do after many years, and embracing the sketchbook and seeing all the joy and ideas and excitement that keeping a
regular sketchbook practice can bring to your everyday life. The class is really meant for everyone at any skill level, whether you're new to drawing
or a seasoned artist. I'm just here to give you
inspiring ideas and keep you motivated to open
your sketchbook every day and have a
regular drawing practice. Drawing can come in so
many different forms. It does not have to be a perfect representation
of what's in front of you. It can be abstract, it can be line work. You can combine the two. What's important
is to incorporate some challenge into
your daily practice as well as free play and fun. Seeing your mistakes as just simply information for your brain is really
freeing and empowering, and it just helps you get to the next place in your
drawing practice. By the end of this class, we're going to complete
3-4 sketchbook pages. You can follow along with
what I'm doing exactly or ideally you just take it as ideas and a rough guide or reference for what you want to create in
your sketch book. In this class, we're going
to be just starting with a few simple drawing exercises and some warm-up exercises including continuous
line and blind contour, and then we're going to
be moving on to filling our pages with everything
from abstract, art work, and free play to filling the entire page with your
drawings that go from edge to edge so that
you don't leave any blank space and you make
a dynamic full composition. I'm so happy you're here, and I'm excited to get started. Let's jump into the class
2. Your Class Project: Hi everyone, I'm so
glad you're here. Thanks for joining me, you've made it
into the class and I'm really excited
to get started. For the class project
you're going to be completing at least three
spreads in your sketch book and there's really
no strict guidelines to how you fill those pages. Hopefully you'll follow
along and be inspired. A rough guideline is for the first one,
filled everything, all the space with color and lines and maybe some drawings like this where you just use every inch of the page
and fill it all up. The next one, you're going to be creating some drawings in
your own unique style, cropping them off the sides so they are not in the
typical way where you just stick something down in the center but
we're really going to be using the whole spread
sort a viewfinder, like a camera, snapshot. And for the last one
you're going to be breaking the whole spread
up into different shapes. I did a workshop
a while back in, I think 2020 called dry
your day and shapes. The idea is to just break down the whole spread into various shapes and we'll
talk all about this, and then you fill those shapes with drawings or
pattern or line. Those are the rough
guidelines but again, as long as you fill
those pages I'm happy, and I hope that you share your projects to the
project gallery so that everyone can see and be inspired by
your work as well. Next we're going to
look at the tools and materials that I'll be
using for the class.
3. Tools and Materials: Hi everyone. I'm now
going to go through the materials that I have in front of me and
that I'll be using. They're just a suggestion. I love them and I
do recommend them. But you really can use
anything that you have. The idea here is not to create any stress or spend a lot of
your money or any of that. It's just paint, color. If you enjoy using markers, use markers, that's great. Or anything that I don't have that you enjoy using,
traditional watercolors. I have gouache, for
example. Anything goes. First is the sketchbook. I love this sketchbook. Some of you might know or
who are familiar with me and my work that I actually hand-make my sketch
books that I use daily. But any other time, this is my go-to and it's the
handbook journal company. The linen, watercolor
sketchbooks. The paper is really great. It's got a little bit
of a texture to it, but I really enjoy
hot press paper, so it's pretty flat and it's thick and you
can paint on both sides. I'm going to be using
today the square. I think it's 8.5 by 8.5
and I highly recommend it. There will be a link in the class notes so
that you can find it. For all my color materials, I'm using Caran d'ache. Caran d'ache is a brand that I've been using
since I was little. If you're familiar
with my books, you'll know that I
have illustrations of Neil colors and they're
colored pencils in my books. I love their products. Even if you're not using
their higher artists grade materials,
everything is great. I don't even really
notice the difference. We're going to be using
neo-color pastels. They're like a chalky
through crayons, waxy pastel that
is water-soluble. You can add water to
it and make really beautiful washes out
of stronger color. Then if for finer detail, I'm going be using the
Museum Aquarelle pencils. They're also water-soluble and the pigments are pretty similar, so I can use them in
combination with each other. I also have a
gouache pan palette. I love these paints. They're gouache, but you
can also use them lightly, a little bit more washy
like watercolors, but also get them really
pigmenty in really strong so that they're
much more fully opaque. The only other tools
that I have are pencils. I like a 2B or 3B. I like a softer
pencil for drawing. That's personal. These are
just regular graphite pencils. Again, I'm using
Caran d'ache pencils. I really loved their
graphite line. They're very well-known for
their graphite and they also make water-soluble
graphite pencils. If you sketch something and
then want to paint over it, the lines of your pencils just blend right
into your drawing. I have eraser for erasing,
which controversial, I don't want you to get
too caught up in erasing, but we do have one on hand. I also have a few brush pens. You just want to
make sure ideally that any pens that you use, if you're going to be mixing your materials together
and layering that they are fully waterproof
so that they don't bleed when you add water. That's it. It's pretty
straightforward. I also have a rag
and some water. It's very simple. Again, anything that works
for you is great. These are just suggestions.
Everything will be linked in the class notes. Also, have some
scrap paper around. I recommend this because
you might not want to have all the quick drawing
exercises and warm-ups right in your nice, fancy sketchbook. It's up to you.
You can also have a separate sketchbook that's a little bit more
like thinner paper, that's more for
just quick sketches and that can be where you
do your warm-up exercises. My hope is that you really love those and that
you do them regularly. Come up with a plan and have
a place for those as well.
4. Your "First Drawing": Hi everyone. Now we're going to start with the first lesson. This is an exercise
that is meant to be really quick and raw and real, and just no expectations. Basically, I want you
to take a subject, it can be anything. I'm going to draw the
camera in front of me. You can draw anything you want, your hand to the
supplies that are in front of you, a person, I mean, wherever you
are in your practice, this is just to mark
where you are right now, and just 5, 10 minutes, not
longer than that. I don't want you to spend
a lot of time on it. Just take one tool, if you'd use a pencil, I would recommend
and ask for you not to really use
an eraser too much, because I don't want you
to get too caught up in making this perfect. It's actually going to be taped , I'm going to fold mine, and I'm going to put it
into the beginning of my sketchbook or actually where I am in my sketchbook right now. What I find really useful with this practice or
incorporating this exercise into your practice is to track where you are
at any given time. It's nice to do this when you're starting a new sketchbook because as we grow and as we
change, our style changes, our skills change, we become more of
our own artists or over time your style
completely changes. It's nice to do this exercise, and track where you are
at every given time. I like to live in the moment, but also it's nice to look back, and see how far you've come. At the beginning of
any drawing class when I'm teaching someone, I ask them to do this. Usually it's like, they're super
uncomfortable with it, they hate what they've done, but there's always
something to see, and something to hold onto
and learn from this exercise. You really have to look at
all the little nuances, and everything about what
you're drawing in order to translate it onto paper. Yeah, it's meant to be quick, don't worry, there's always something to
learn from this. Ideally at the end
of the sketchbook, you can then look back on it, and reflect on where you
were when you started. This is a choice that
I made to fold it up, and tape it into where I
am now in my sketchbook. This is just a suggestion you don't have to
do it this way, but I like to hide it. Also in the beginning
of a drawing practice, sometimes people are
like, I don't like this. I hated doing this,
I'm not where I am. I'm not where I want to be. I need to practice
and so I'm going to practice with my drawing so I've been drawing
since I was little, so on and off, and for me it's just like a little record of
something that I drew to mark this time. I'm just sort it away so that I can come
back to it later. But if you're really learning
and really practicing, another suggestion is to, every time you do this, draw the same thing, so then you can really track the progress or your
style or your confidence. It's all about confidence as an artist so you can just track, let's say, I was continuing to draw the camera in front of me. Every time I draw it, I'm
going to be seeing it, and drawing it a little
bit differently and that's just a really
valuable little bit of information again
that you can have, and use as you move forward. That could have been super fun and easy or extremely humbling, and you want to stop right now. Either way, it's okay the whole point is to
sit with these feelings. Do you want to keep going? Do you want to draw in
a completely new way because that felt icky or maybe you want to
just get better at drawing the thing
that you just drew. Drawing it as we typically
think of drawing, and so you just
want to practice. All of these questions come up, and that's the whole
point of this exercise. If you want to revisit this, there's a digital download
under the resources tab, and it's a PDF from the pages of draw your world
where this exercise appears. Now that the first
drawing is finished, we're going to move on to more traditional
warm-up exercises and I'm excited to
share those with you.
5. Lines and Ellipses: Hi everyone. Now
we're going to be doing some more traditional
warm-up exercises. This is just meant to be
free and loose and really ideally just with
one pencil or pen, you can use any
tool that you want. After you go through this, you'll start to play around and learn what tool
you prefer to use. I'm going to be using
a 3B graphite pencil. What I want you to
do and play with first is I'm going to be using this entire spread
and I'm just going to fill it up with lines and marks. First, we can just
play with pressure, pushing and pulling
and pushing and pulling and use the edge
of your page as a guide, almost like a ruler. But if you use your whole arm when you're
making these marks, then you have more
control over the pencil. That one was a little crooked, but you can just keep playing. What I'm doing is
I'm creating a line by pushing and pulling. Some of the most
beautiful drawings are made from just
creating beautiful, really confident lines
using pressure and pulling. I'll share some of
my drawings as well so you can see what
I'm referring to. Play with your tool, play with what angles you like the best. You can start to curve your lines and play with
pressure almost like you would like a calligraphy pen by adding pressure on
the upstroke or adding pressure on
the downstroke. Just play with lines. This should be
meditative and freeing. As you go, you might discover
that you really like the work that you've
created in these warm ups. It's meant to be meditative, but you might really
enjoy what you create. Therefore, if you
work on scrap paper, you can then use it as collage material or inspiration
for some of your artwork [NOISE] Now if I were
to draw an apple and I just changed the
pressure with my pencil, it's almost like you can create dimension just with
a single line. You can build on it and add to it [NOISE] Now the next thing I'm going to do is I'm
going to practice ellipses, which is a circle
in perspective. These are really good to just practice every day
as much as possible. I always say that making a
good ellipse is like balance. It's like if you're
in a yoga class and your balance is really
good one day, it's the same. If you're drawing
your ellipses can be really on one day or really off. If you play with pressure, you can go really light
and go around a few times. What's also really good idea is to remember to use
your whole arm. Now, if we talk about the
circle in perspective idea, you can start really
thin and then get more and more
round until you end up with a circle. But I want you to not create lines and marks in one
corner of your page. I want you to create
them from edge to edge, going right off the sides. The purpose of this exercise is really nothing more than
just getting used to a tool, making marks, playing around with lines and thicks and thins and getting
confident with those lines. It's just great for freeing yourself up for
what's to come next. It's almost like a
meditation before you begin. I think it's really
valuable sometimes what I do personally is I love
playing with my handwriting. I have an entire book just
filled with random writing. Doesn't even say anything. It's just how I unwind, it's how I relax. Use this as inspiration to find what leads you
into your practice. Another important thing
about ellipses is that they make up so many objects, so many things that you
don't even maybe realize. Everything from a glass to
the pins in front of me, to a jar or a garbage bin
or the legs of a table. Everything can be broken
down into these ellipses to get proper perspective or
orientation of a subject. What I want to show you now is if you were to take
a jar, for example. I'm going to draw
a very small here, everything within that
jar is an ellipse, the lip and it all
pretty much follows the same proportions or
thickness of the ellipse. Maybe if you're an ant looking
at something very small, then it could be distorted more. But do you see how now when I add the thickness
to these strokes, you suddenly see a jar emerge. But really all I did was make
a whole bunch of ellipses. Just realize, it's just
to give you an idea of how much these shapes come into play when
we're drawing. Now that you know what true and happening
in space and how a glass object might be drawn with proper accuracy
or perspective, you can decide whether to
take that or leave it. Plenty of people will
draw a jar like this. Is that accurate? No, but it's perfectly
charming and great. It's completely up to you
to take these rules as a guideline and use
them or leave them. The point of this though, is to really just practice
moving your whole arm, practice using your tool
and play around with lines. What I want you to do after
this lesson or as we're going through this
is to just fill an entire page with these marks. Leave no space blank. Just fill it all up. Hopefully that was freeing and relaxing and now we're
going to move on to some more warm up
drawing exercises using one continuous line. See you in the next lesson.
6. Warm Up With A Continuous Line: Hello. Now, we're moving on to more warm-up exercises
that you might love and continue on with. What happened for
me was that I love drawing continuous
lines so much that now I do it almost all
the time because it just stops me from getting
caught up in mistakes, it stops me from
using any eraser, it just keeps my hand moving
and it really forces me to look and also it just keeps my drawings very
loose, which I really like. The other thing I like about continuous line drawings is that if I have a bunch of marks that are very light and then
some solid marks and lines that are where I've decided I'm happy with where the lines
are and I thicken them, then I love seeing all
the history behind the layers underneath that got me to the place of
making that decision. For me, it's these exercises became
a part of my practice, so that might happen
for you as well. The idea here is one rule only. For both exercises, there's one rule and that is you do not lift up your pencil. The first one we're
going to be doing blind contour which
you may or may not have heard of and that means that you only look
at your subject, you do not look at
your paper at all. The outcome is usually pretty funny and it's meant to
be because everyone, even seasoned artists, their blind contour drawings
are pretty funky looking, it's just freeing
and fun and they're supposed to take like
30 seconds to a minute. So, they're just an
exercise in really looking at your subject only, which is a huge part of
the drawing practice. Then the next one again, you don't lift up your pencil at all but you can
look at your paper, you just don't lift
up your pencil. This is where that pressure, the pushing and
pulling of your tool really comes into play
because you might do like a bunch of marks before you are happy with
where you are, kind of like how I was doing
the ellipses and then I had to go over them
a few times before they actually look
like a proper ellipse, so it's the same idea. Let's get started. For
the blind contour drawing that we're going
to be doing first, I am going to be
actually working on a drawing of this jar of tools and it's a pretty
complex subject, but I'm going to break it down. Maybe I'll leave
some of the pencils and paintbrushes out of it, I'll just make that decision. I'm used to doing this. I can have the paper in front of me and still not
really look at my paper, but it's a good idea to hold it to your side and have
the subject in front of you so you're not tempted
to look or you can't really see it in your
peripheral vision. Maybe for here, I'll move that there. That's my drawing
contour. Now, I'm going to draw the
same thing with a little bit more accuracy
and a little bit more time. This one you can spend
about maybe up to five minutes on but
it's up to you, some people work
quicker than others. Just remember again, don't lift up your pencil, so if you're really not sure just go really lightly
with your pencil at first. This is not meant to be perfect, it's just another
quick drawing exercise that you might enjoy
or you might not. These are really useful for
the whole idea of really looking at your subject and not getting caught
up in any mistakes. Your perspective does
not have to be perfect, nothing has to be perfect here. And what's really nice
about these two is, if you see, I'm a little
off here or there, you just keep building on it. If I want to get from this spot all the way down to the bottom, I just drag my
pencil all the way down there, just really lightly. You can move all around layers or you can even
add some shading. This one is a continuous line. Oftentimes, when I ask
people to draw something, they will spend more time looking at their paper
than the subject, and I think that this exercise really forces you to
look at your subject, whatever it is you're
drawing and you get to know it in
a different way. You really just
see little things that you don't see
when you're not drawing and I think
that's super important. The more that you look, the more you will see and that
just brings you more into the present moment and really appreciating what it is
that you're drawing. Some people draw more from
their imagination and that's fine or from memory and
that's their choice. Again you can take
this or leave it, you can decide that
you love doing this, you can say you know what, I'd like to do
continuous line drawings completely from my imagination. There's so many ways of
doing this exercise. What I want you to do at
the end of this lesson, is to create at least one
but ideally three of each, so just spend a little
time with this. The blind contour
drawings are super quick, they're meant to be super quick, so you can easily do three or four of those
in just a few minutes. The continuous line
drawing just do one, two, or three of
them and hopefully, you'll get somewhere,
make a decision about how you might want to use
this process going forward. As you're working,
just be mindful of what thoughts come up
and what ideas come up, and just really think about how these exercises make you feel and if
they're exciting, maybe you can start to use
your imagination on how they can be incorporated
into your final artwork, into a painting,
really anything. The idea is to have
confidence in those lines and really play with them
and be free about them, and I promise you that, you'll get something
out of the exercises. Now that we're all warmed up, let's move on to filling our first spread
with color and line, and you'll see how some of
these initial exercises come into play as we move
forward. So, let's move on.
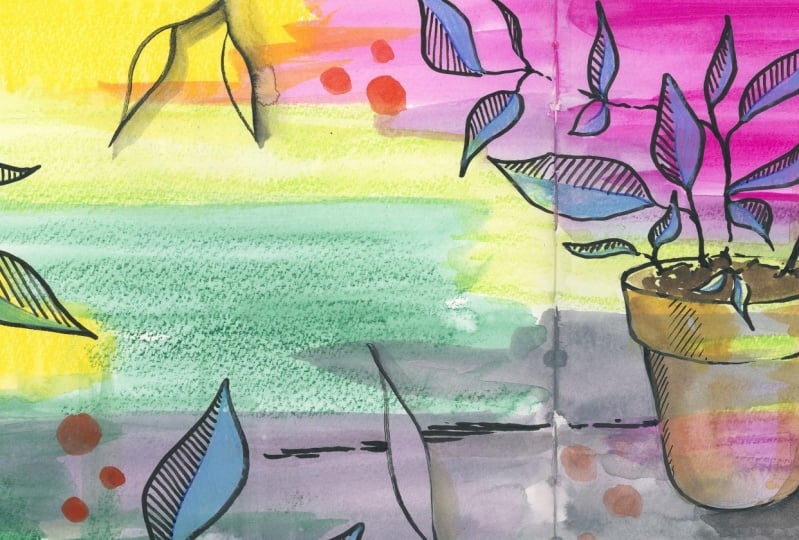
7. First Spread: Abstract and Traditional Drawing: Now we're going to
fill our first spread. I pulled out everything
that I shared in my materials video. I have it all in front of me
and I'm just going to play. Actually, I have a little
bit of a plan in mind, but this is
completely authentic. I am going to fill this
page with you right now without any real
full preparation, and that's how I want you
to fill the page too. I don't want you
to think too much. Just start playing
and we will be incorporating one more
realistic drawing, I'm going to be doing a
plant and some leaves, but you can play around with whatever
it is that you want. Something that does incorporate
more traditional drawing, that's representational of
something real and literal, mixed with just abstract marks and lines and lots of color, and using the entire spread. We're going to be filling
every bit of paper with color. I'm going to start
with a little bit of paint because I'm using Caran D'Ache paints and
pastels and colored pencils, all of the pigments will be
happily blended together. This is the case really with any water-soluble materials
from any brand or line, but it's nice when it's all from the same company
because you know that the pigments will be coordinated and work
really well together. Like I said before,
this is gouache, but I am using it in various
levels of opaqueness. I'm going to use some
gray and pink paint, and then I will start to
add some Neocolor pastels. What I love about these
gouache paints is that they have the paints
bleed on wet, kind of, these beautiful
little clouds of paint appear if you add
up a pool of water, which is similar to watercolor, but then you can also get
really dark and opaque. When you're playing
with these pastels, you can really push and pull, like the same as with your pencil and those
drawing exercises. For balance, it's nice if you add a color to one place on your spread to add it
another place as well. Sometimes you just want
that one pop of color. What I like about
using the pastels in combination with
the paint too, is that you get a little bit of this texture when you
initially put it down, even though you're moving the
pigment around like paint, it does give a little bit
of a texture on the paper. Once you have all your color down and you're
playing with washes, you might have to
wait a little bit in order to add another layer. I'm going to be
going over this with pencil and my fine
line permanent pens right on top of all of
this pigment and paint. You might need to just pause, maybe get a drink of water, go and just take a little bit of a break while you
let that paint dry. You can make your marks filling
the page any way you want in a pattern of boxes
and going up and down. Right now I have not added
any vertical strokes, but maybe I can add few. Any way that you want to play with moving this paint around and filling your page, the rule that I have is
to not leave any white. Now I'm just going to draw a little fake
plant from my memory. Again, this is a great
time to practice these ellipses and the leaves from this are going to flow, and I might not actually
even use my pencil. I just wanted to get a
quick sketch of the pop. Now I'm using a Faber-Castell, Pitt Artist Pen that has
a brush tip and this is a great tool for adding that pressure and weight and
playing around with lines. I love to draw with brush pens because you can
really play with those lines, similar to the pencils. I always think that drawing
things from nature is really a great way of
exploring drawing. One of the first
things that we draw, I think are like flowers
or trees or mountains. I remember my son
always drew mountains. I just think there are no
straight lines in nature, there are no real mistakes, you can just play around. I actually paint on leaves and I have a thing about
the shape of a leaf. I just love it. For me it's really freeing. I'm drawing and I'm practicing drawing
something more literal, but it's more in like an abstract way. I think it's important
to see your page like a viewfinder and really you
don't have to all the time, and it's perfectly valid
and I do it as well, to draw a subject smack in the middle of your
page and that's that. But I think it opens you
up to more possibilities. If you see the whole
page as working space. Once you see the entire page or Canvas or a surface
as usable surface, then it opens you
up and you just can create more dynamic artwork
and more dynamic pages. Experiment with drawing
ordinary, everyday things. I find that if you draw it, it becomes beautiful
and that's one of the biggest messages in my book, Draw Your World and
in Draw Your Day. If you do use your
sketchbook more as a journal or as a diary, even the most boring days, there's something
interesting to be found. Right now I'm just filling part of the leaf
with some lines. I'm just having fun. Again, it's those
straight lines that we were playing with in
the beginning of class. Art making and your sketchbooks
should be really free and fun and it should bring joy
and relaxation to your life. It shouldn't be stressful. This is a way of
just going back to those drawing exercises that we did in the beginning
of the class, just being really
meditative and free. I'm going to do a
few more leaves that will not be filled in. That's my first spread. It's always a good idea
to date your entries. I always have fun
playing with lettering and I'm practicing
different ways of putting the date on
my sketchbook pages or my sketch journal entries, so you should add a little
date so that you know exactly when you
created it somewhere. Now we're going to move on to the next lesson and we're
going to be working again, with the full spread, but in a very different
way, similar and different. I'm excited to move on.
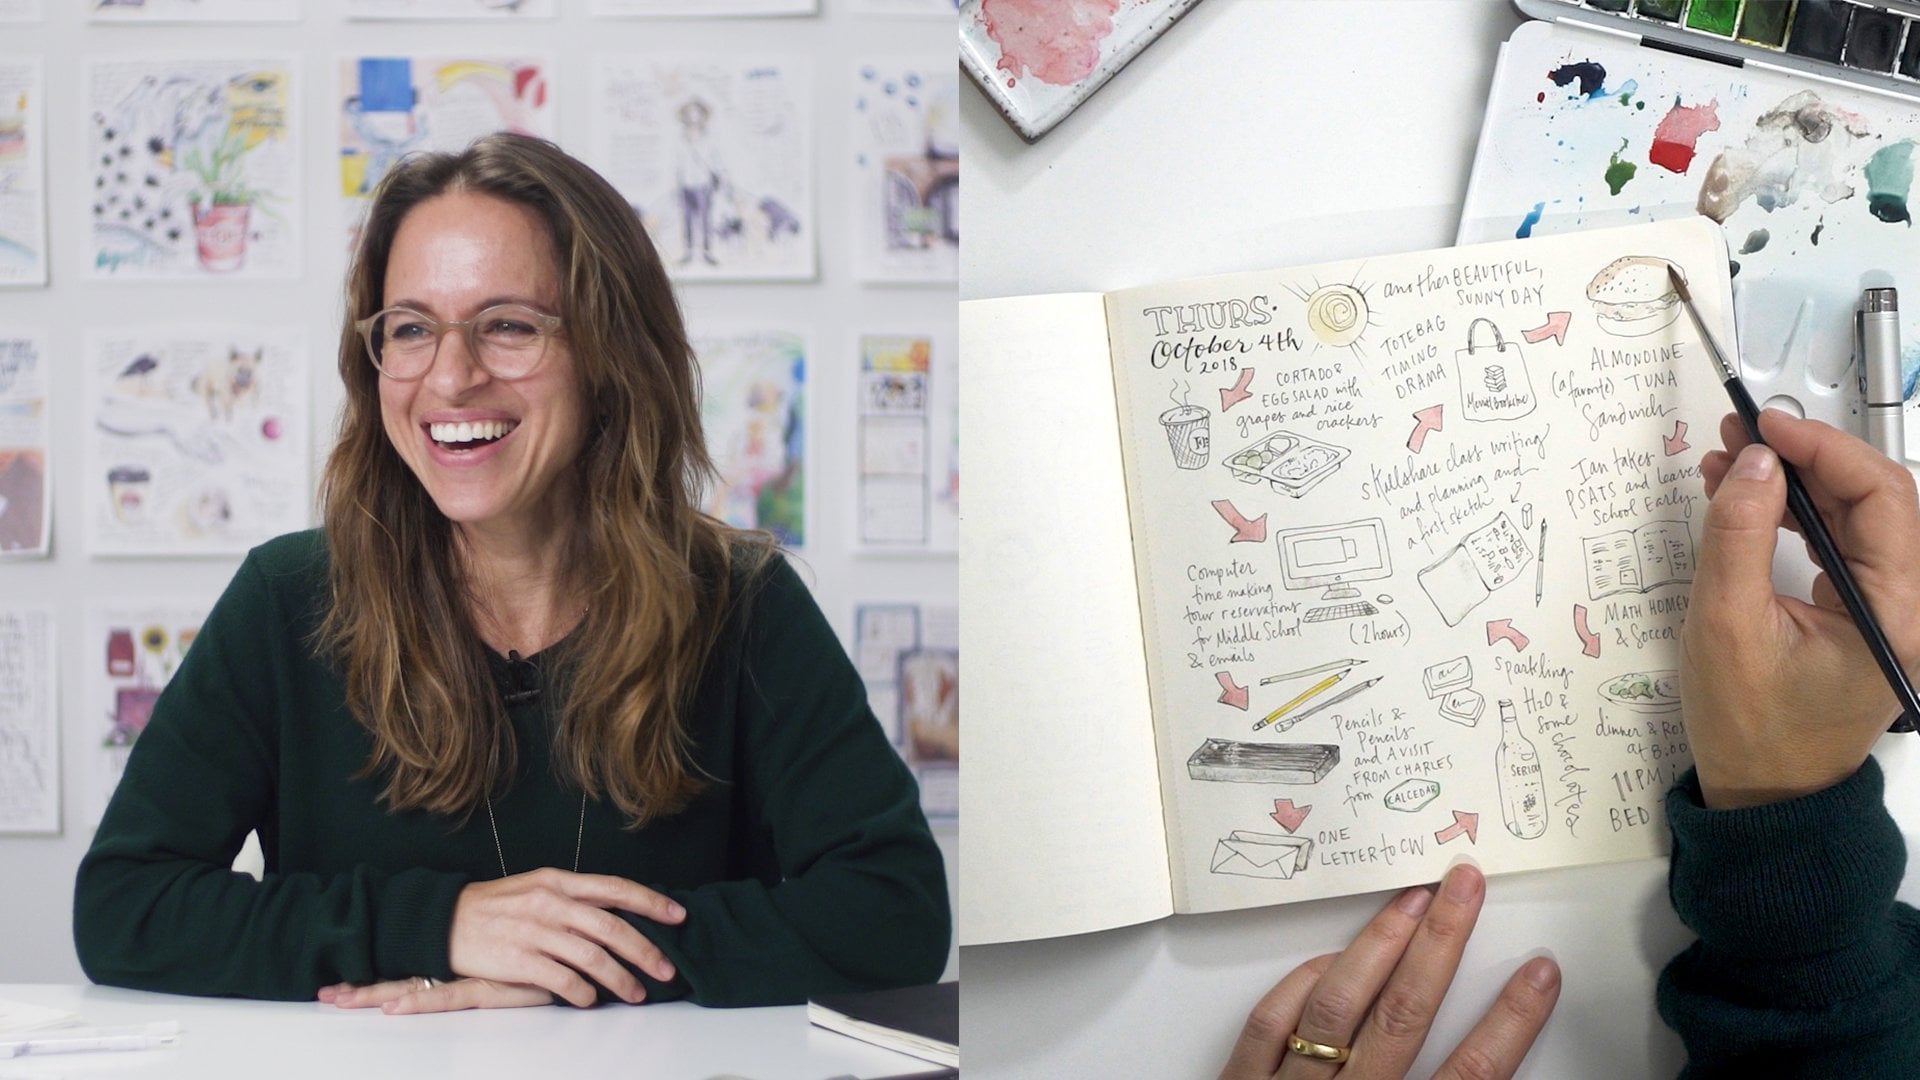
8. Second Spread: Page As Viewfinder: Now we're going to be working
on the entire spread again, but we're going to
be drawing things and that can be in your
own personal style. I'm going to be drawing
things the way I naturally draw them
just from my memory. The concept is
that it's going to be like looking
through a viewfinder, although I'm not drawing
one single scene, like in a photograph, it's just the idea of things falling off the
edges of the page. If I start with a pencil. These things I do draw often or I've been
drawing a long time. I'm only drawing things that
I know I can pretty much represent pretty accurately
without looking at reference. Pencils and pens are
in front of me though, so I am looking at those. My books are about drawing
my world or my days. A lot of the items
that I might draw here are things that might
come up in your daily life. But if you just want
to draw plants and flowers and have them
fall off the page, that's fine. Anything goes. If you're stuck on
what to draw, I mean, I'm just drawing things
that pop into my head, but I'm thinking about
what I did today, and that's always
super helpful for me. If I do want to keep track
of my days and just draw things that have
happened or that I saw, then you can just go through your memory and
think, what happened today? Did I do some laundry? You can draw a little
laundry detergent bottle. What did you eat for breakfast? Did you have some nuts
or some blueberries? Did you buy something new? Draw it. Do you like the shopping bag that
it came in? Draw it. My subject matter here is
just coming from memory, and I'm actually going to
draw this pen right now. The main objective and
the main outcome of this class is just to
get you to think of using your entire page and have things
fall off the edges. Hopefully, that gives you a little bit more excitement and just curiosity
about what you can do to fill those pages up. Another thing to think
about when you're doing this is just
big and small. Some big things,
some little things. I like the idea of these noodles falling
and floating around. The grapes are little. But then I have a few
bigger items like the book and the
pants and the pizza. That also creates an
interesting composition when things are changing scale. Another thing that I
talk about and draw your world is layering subjects, and using your pencil to sketch things out is
really helpful because you can draw subjects right over each other and then decide
what lines to eliminate, if one thing is falling
in front of the other. Now, I enjoy leaving
my pencil lines. Sometimes if I really didn't follow and I have some
really dark marks, I'll erase them a little bit. But for the most part
I leave them there. I just like the way they
look and I use them. You can usually see them
in my finished artwork. I'm just erasing a little bit. Also, keep in mind
you don't have to change your subjects. You can do this by drawing the same thing
over and over again. A flower, your art
supplies, a pencil. You can just draw
your pencil multiple times and make it almost like a pattern
filling your page. There's my final pain spread. Hoping that this
inspires you to use the entire spread and
have things fall off your page and see the
possibilities in that. You can draw the
same thing over and over again from
different angles. You can draw a pattern. You can draw
different things from your day or from your week, or just random things
that inspire you. Whatever you want, just
think of the page as that snapshot or framing
within a camera. Things just fall right
off the edges and it just automatically makes
for dynamic compositions. Also play with scale,
big and small. It's sort of a win, you'll just discover so many
more exciting possibilities. Thanks for joining me
again and now we're going to go into
the last spread, the last lesson, and
that is all about breaking your page up into different shapes. Let's move on.
9. Third Spread: Dividing Your Page Into Shapes: Hi everyone, congrats
on getting this far. Now we're on our last spread. I'm excited to share
this idea with you because I think that it really opens up a whole new
world of possibilities. Again, if you see a
whole blank page, it can be a little bit
like, where to begin. Back in 2021, I created this workshop that
everyone really loved. The concept is just to
break your page up into different shapes and
it works for anyone. It keeps a bullet journal, for example, or a diary. You can create
different shapes and then record different
things within each shape. Or you can just use the idea just to create
abstract patterns. The idea is once you break
it up into different shapes, almost like a storyboard, it makes it more accessible, like, I'm going to take
one shape at a time. It's not so scary to have
this huge blank page because you know exactly
what you're filling in. It is almost like filling in a calendar or coloring a book. Here's the guide that I created. This will be in the Resources tab for you
to grab and look through. There's some of my examples
on the second page. What I have here is just a guide showing you all the different
possibilities, you can create different
squares, circles. You can create shapes with
arrows so that you follow a path, zigzags,
continuous lines, scribble, going back to that continuous line and
then fill in the shapes, which is something I
remember from childhood, and it's really fun. Let's get started. Again, I don't have a plan, I don't know exactly
what I'm doing. I'm going to [inaudible]
it with you right now, which I hope inspires you because you don't
have to have a plan, we can figure it out together. I'm going to be using
a pencil to plan, just for planning and for
maybe a few little sketches. My fine line
permanent pens again, and mostly my gouache paints. My pencil just took
me to create some little curvy like amoeba shapes. Some of them could
bleed off the side, but today I'm going to just
have them contained within the page with this uneven
border all around. Again, yours can
be very geometric, they can be circles, you can make shapes. So that's my start. Sometimes I create
a little dimension within the side of side shape. One is usually for the day, today is February 17th. I think I'll do a 2. I love playing with lettering. Then I think I'm going
to just play around with a pattern within this one. It's raining today, so I'll do a some pattern in this one, maybe with a little umbrella. It's very important to use
the edge of the shapes, almost the edge of your page, so have things fall off
the edges of your shapes. Even though I don't have a plan, I'm just looking around, thinking what might
be fun to draw. I have friends and I've seen a lot of artists
do this thing where they fill their shapes
with different scenes. You can look at your
photographs and draw things that are
on your camera roll. Or again, similar
to the last lesson, you can just do the same subject in a grid from different angles. I think that that's a lovely
way of using this concept. In the end, it's all about
really enjoying the process. Just don't be discouraged
if you make a mistake, just keep moving and playing, and it will all come together. Sometimes it's nice to do
these projects in stages. If you want to fill
one shape a day, however it flows for you. I made this decision as I
was going to come back to the ink to just paint a little
bit and then ink after. That was just a decision
I made on the fly, it's not how I always go, but you just do what works
for you in the moment. I'm also drawing this
umbrella from memory, so it's a little random,
but that's okay. Now because this is so white, I'm going to paint
the negative space. That is also a decision I'm
just making on the fly, but I think it'll really help. One thing I want to remind you is the point of the class is not really how I'm doing my
drawings and the technique, although I understand
if people have questions and I'm
happy to answer them, this is just an
example of how I, on the fly, use this concept on my page. The technique of how I'm
painting or how I'm drawing, going back-and-forth from ink
to paint and paint to ink, it's just a decision
I'm making on the fly. It's normally how I work just to tighten things up and make things a little
bit more complete. I often will go back
with ink over my paint. But again, just try not to get too up in how I'm doing things, but more how the page
has come together, how I problem-solved, how
I work through mistakes. You can take lots of other
classes on process and then you can then
use those processes that speak to you the most
with the materials that you love to use and then bring that to your blank page
and these ideas of using the edges and filling
up different shapes, incorporating a challenge
with abstract play. All the lessons that
we did together, they're just more of ideas for approaching the blank
page rather than technique. Here's my finished spread. It was work in progress until
this came about on the fly. Thank you so much for joining
me in this adventure. I hope that you enjoyed
the last lesson. The whole point is to just look at the blank page and
break it up into shapes. That way it's just more
accessible and less intimidating. You can fill those
shapes however you want. You can even make a hole grid of little tiny squares
and fill them with pattern or create
like a storyboard. Anything where you break it up, I think just makes it just more inviting because
each little shape can be filled on its own. Have fun with it and just
explore and experiment. Always let me know if
you have questions and I'm excited to
see what you do and I hope that you share it to the project gallery
so that everyone can be inspired by how you interpret all of these lessons, but especially this one. Thank you, and I'm so
glad you joined me.
10. Conclusion : Congratulations on getting
to the end of the class. I'm so glad that you joined me. Just to wrap up and bring it all together
because there were a lot of different exercises
starting from that first drawing to breaking
your page up into shapes, really what the whole
purpose of this is just to see where you are, state where you are, and then also play with lines, play with carefree, these fluid warm-up exercises, things that just relax you
and get you in the moment, and get you started drawing. Then just when you open
to that blank new spread, how do you approach it and
how is it less intimidating? How is it going to be friendly and inviting rather than scary? I'm hoping that
through those three spread exercises that we
did, filling those up, you just see different
possibilities and blending your carefree play and
collage or abstract work with some more challenges. Blending those two,
then using the edges of your page, seeing your pages, if you find or not having to put an object or a subject that you're
drawing smack in the middle, but maybe draw part of it. Maybe just draw a pattern
of things and have it look almost like surface design
and have it just repeat. However you want to use
those edges of your page, it just helps to make a really dynamic composition
almost guaranteed. Then lastly, just another idea of just
breaking that page up into shapes so that you only
see one section at a time. You fill each section
however you choose and it hopefully will be really inviting and
just get you excited. That's the whole point. My hope for when you
leave this class going forward is that you feel really inspired and discover
a little bit more about what a daily drawing
practice can be for you and new ways of how
that can look and feel. I hope that you
enjoyed the class. I can't wait to see
what you create. If you're interested
in following my work, you can find me on my
website, sdionbaker.com, and there there'll be links
to my mailing list where I share most of my workshops and classes and any important
announcements and I also share some stories and some
of my personal work. You can also join me on
Instagram, sdionbakerdesign. You can always find me
and feel free to reach out right here on
Skillshare with questions. I'm here to help and encourage. Definitely upload
your projects to the project gallery if
you feel like sharing. I know sometimes
that's a little scary, but I encourage you to share. I'm going to be checking. I always give feedback to
projects for my classes. I will be checking and
looking for all of your beautiful creations
and I will give you some feedback to
each and everyone. If you're curious
about my books, I have two books for adults; Draw Your Day and
Draw Your World and they are work alone, but they also play off of
each other a little bit. My latest book, Draw Your World, just dives more into some
of what we discussed today and it's a little bit more about overall drawing practice, whereas Draw Your
Day is a little more specific to keeping
a sketch journal and drawing your life on more
or less a daily basis. Either one I encourage
you to look for, you can buy them
anywhere books are sold. On Amazon, you'll find
the links on my website. They're there for you as
another resource and also to just explore more of
what I have to share.
 Samantha Dion Baker, Artist | Designer | Author