Transcripts
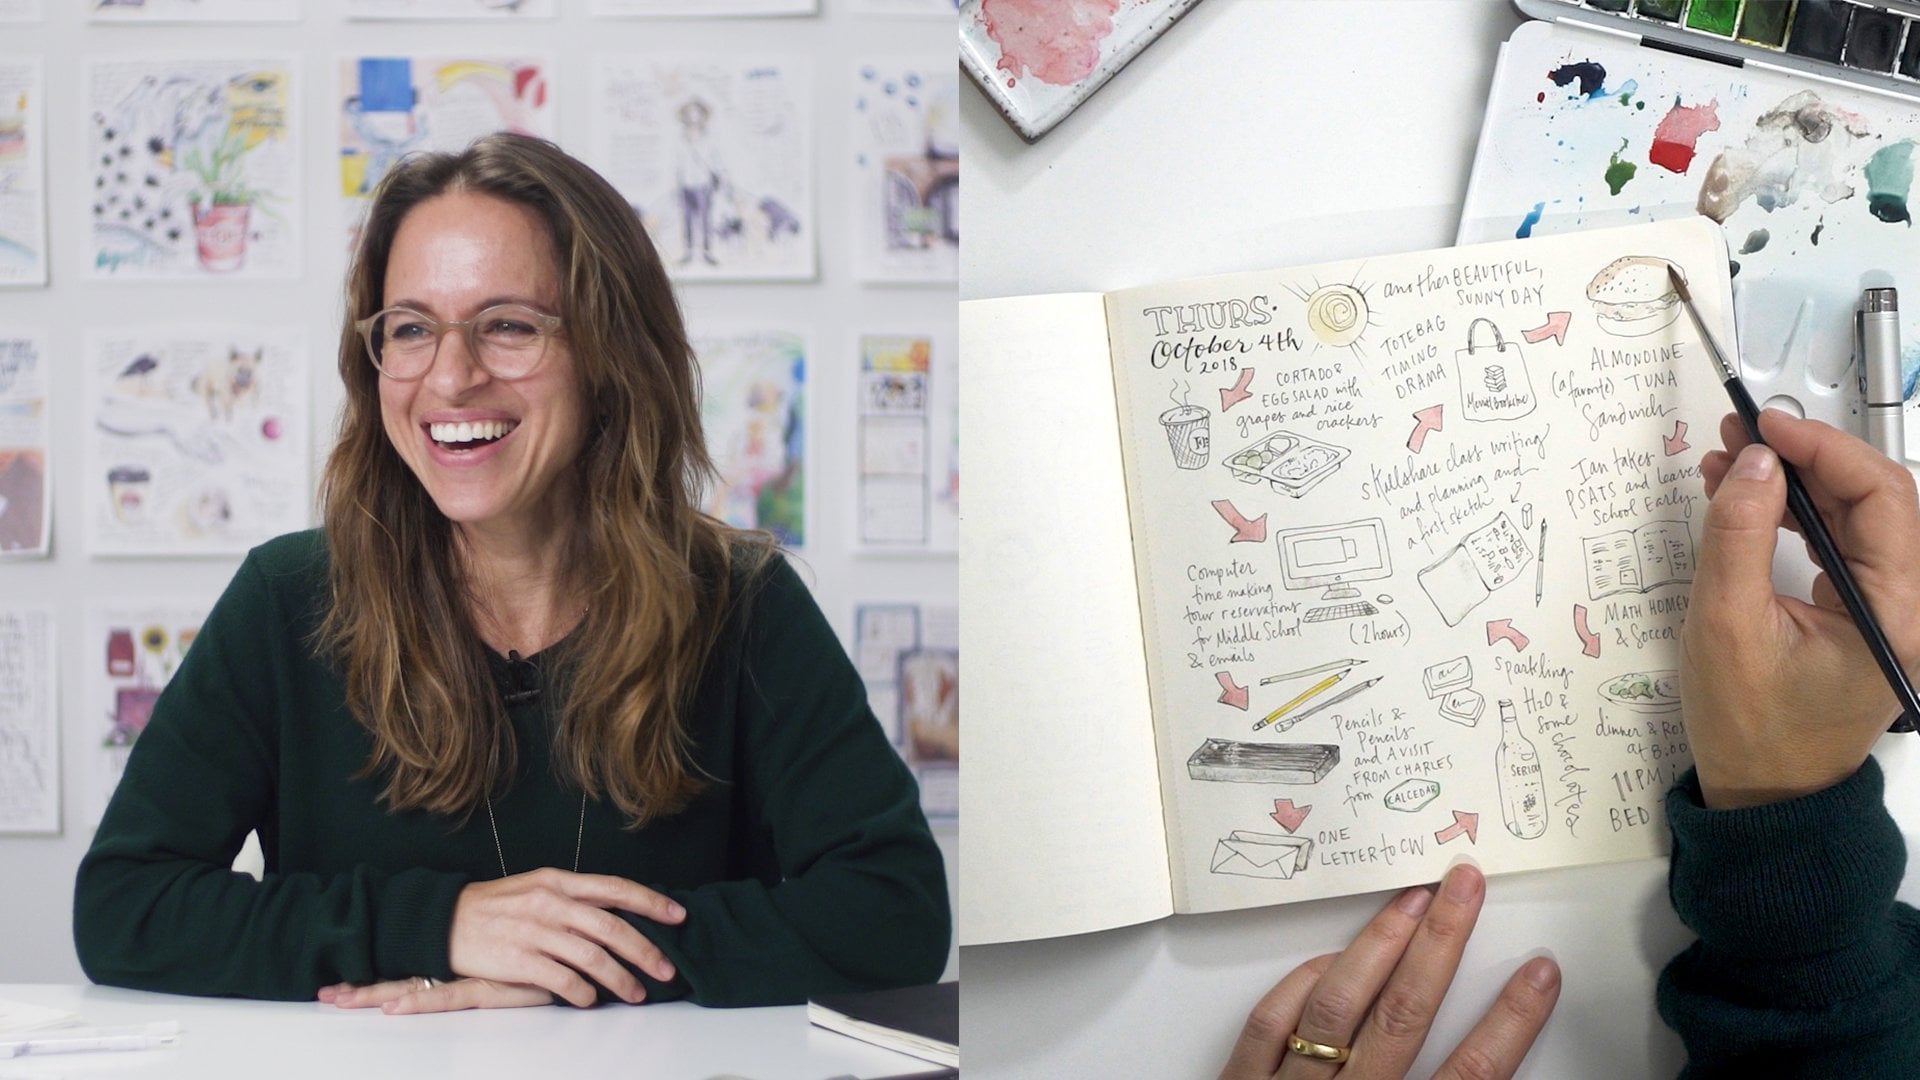
1. Introduction: Hi everyone. I'm Samantha on Baker and I'm so
happy you're here. I'm here in my studio
in Brook Lynn, and I'm really excited about this class because it's a
little different for me. Usually my classes
are about keeping a sketchbook and drawing
the world around you. This is honing in on
four specific subjects that a lot of people
find intimidating. And through these subjects
and through these examples, I'm hopefully going to open
up the possibility of, you know, how we approach these subjects can apply
to anything that you draw. And by breaking down clouds, water, glass, and metal. Today I'm going
to share with you how anything that you draw be broken down
into basic shapes. And you can also simplify, get rid of a lot
of excess noise. Make your paintings much more decisive as far as what
shapes and lines you make. My goal is to enable you
to see even hard subjects or hard subjects in
more of a simple way. And by breaking things
down into basic shapes, these subjects
that seem hard are actually more approachable
and not so intimidating. In this class, we're
going to finish three to four paintings. You can follow along
with me and use the references that
I have provided. And you can find
those references in the resources below the class. Or I encourage you,
definitely to use your own reference and
even work from life. So hopefully the
lessons will just sort of help to break things
down and help you see. It's all about seeing form and
shape a little bit easier. And then you can apply that to your own life and
your own drawings. Throughout all of these lessons, I will provide tips and tricks
to keep you motivated and excited to move on to the
next stage of the class, I'm hoping that this excites
you and inspires you.
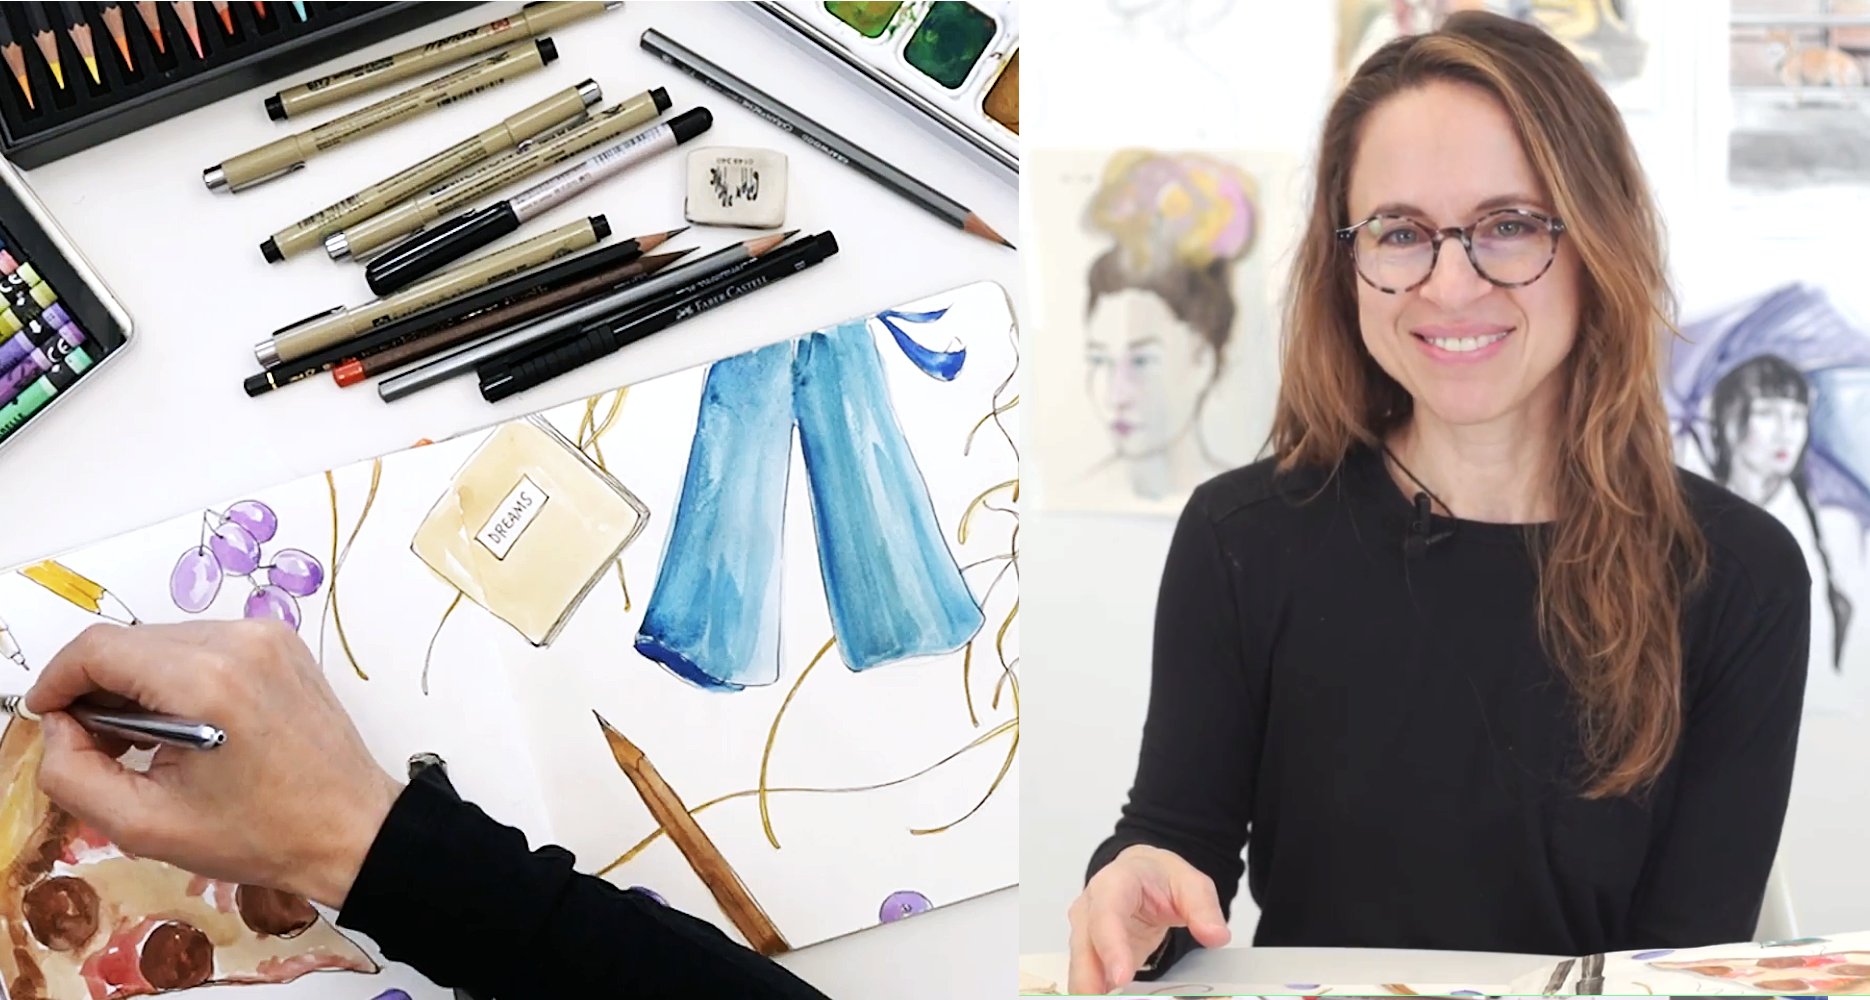
2. Class Materials: So now I'm going to go over the materials that I'm going
to be using for the class, and you do not have to have
exactly what I'm using. But it's just to
give you an idea of what you could use to
create similar projects. So I'm going to share
what I'm using today, all the different
things that I have out here on my table, and feel free to look them up. They'll be listed
in the resources. A lot of what I'm using
is from Karen and they are one of my longtime
favorite arts ply brands. And I'm also using
a few other things. First is the sketchbook
that I really love and I recommend all the time I took the label off
for this class. It's a newer book and
it's Handbook journal. It's got great watercolor
paper, acid free pages. It is just one of my favorite
sketch books to use. And it has a nice little
bookmark and this closure, I highly recommend
these and they are linked in the resources I'm
going to be using that. I'm also going to be using a little bit of vellum
tracing paper just to highlight and share how you can find shapes
in reference images. I'm not encouraging you
to trace your drawings. This is really just
only going to be used as a form of demo, like a way to share how
I break down shapes. As an alternative for
some of the paintings, I also have this Canson
watercolor paper. It's not very expensive. I really, really like it, and when the paper
is cold pressed, but not very grainy and toothy, doesn't have a lot of
texture, I much prefer it. I'm actually a hot
press paper fan, and my sketch books all
use hot press paper. This does say cold
press, but it's not, it doesn't have a lot of
texture. That's paper. I'm using a few
different pencils. I have a five B and
a four B. I like soft graphite for
sketching, personal choice. I also have a three B
technaloindah pencil, and this one is water soluble. Anytime you see a little
paint brush on the packaging, you know that you can add water. Kinda makes a lot of great materials that
are water soluble. I'm going to be, this is my very well
used and loved debt of Carina paints. This is a set of 15 and we'll talk about
just the few colors I'll use for each painting. It comes with a brush that's actually a pretty good brush, I'll be using that
most of the time. It also comes with
a tube of white. These paints are
great. They're not typical because
they're in pan form. But I prefer them for
myself because you can do more light washes as well
as real opaque coverage. I also have two different
alternate brushes. I really like these little short stubby brushes can throw them in my bag and they are Da
Vinci, two different ones. One is a dagger brush and I
liked having that point last. I have a card plastic eraser. Always good to have when
you're doing pencil sketches. I don't want you to be too
attached to an eraser, but it's always
good to have then for just adding some
shine to the Metallics. In the last demo I have this fine tech,
polescent color palette. I'll just be using a
few of these to add some shine and very
less water and a rag. All my rags are very
well used and loved. This one, I'll maybe
use this portion, it's a little bit cleaner. So now that I've shared the materials that I'll
be using for the class, let's move on to
the next lesson, which is an overview and a lesson in seeing
form and shape.
3. Class Project: In this class, we'll finish three to four
finished paintings. I encourage you to
finish all four, but you know for
the class project, three is also fine. Whatever speaks to you the most, please feel free to
follow along and use the references
that I've supplied or you have the freedom to just use the lessons as a rough
guide as you go through the class and use your own objects and
your own reference, excited to see what you create. And I encourage you to please share anything that you work on in the project galleries so that I can give you feedback which will always be positive, especially if you
gave it a good shot. But even if you're not happy
with what you've created and you just want some
advice you can always share. And I will help us in
any way that I can. It helps other people to see projects that you've
worked on as well. So please share. And I can't wait to see
what you've created. So first, let's gather
some materials. In the next video,
I'm going to share what I'll be using for the
class. So let's move on.
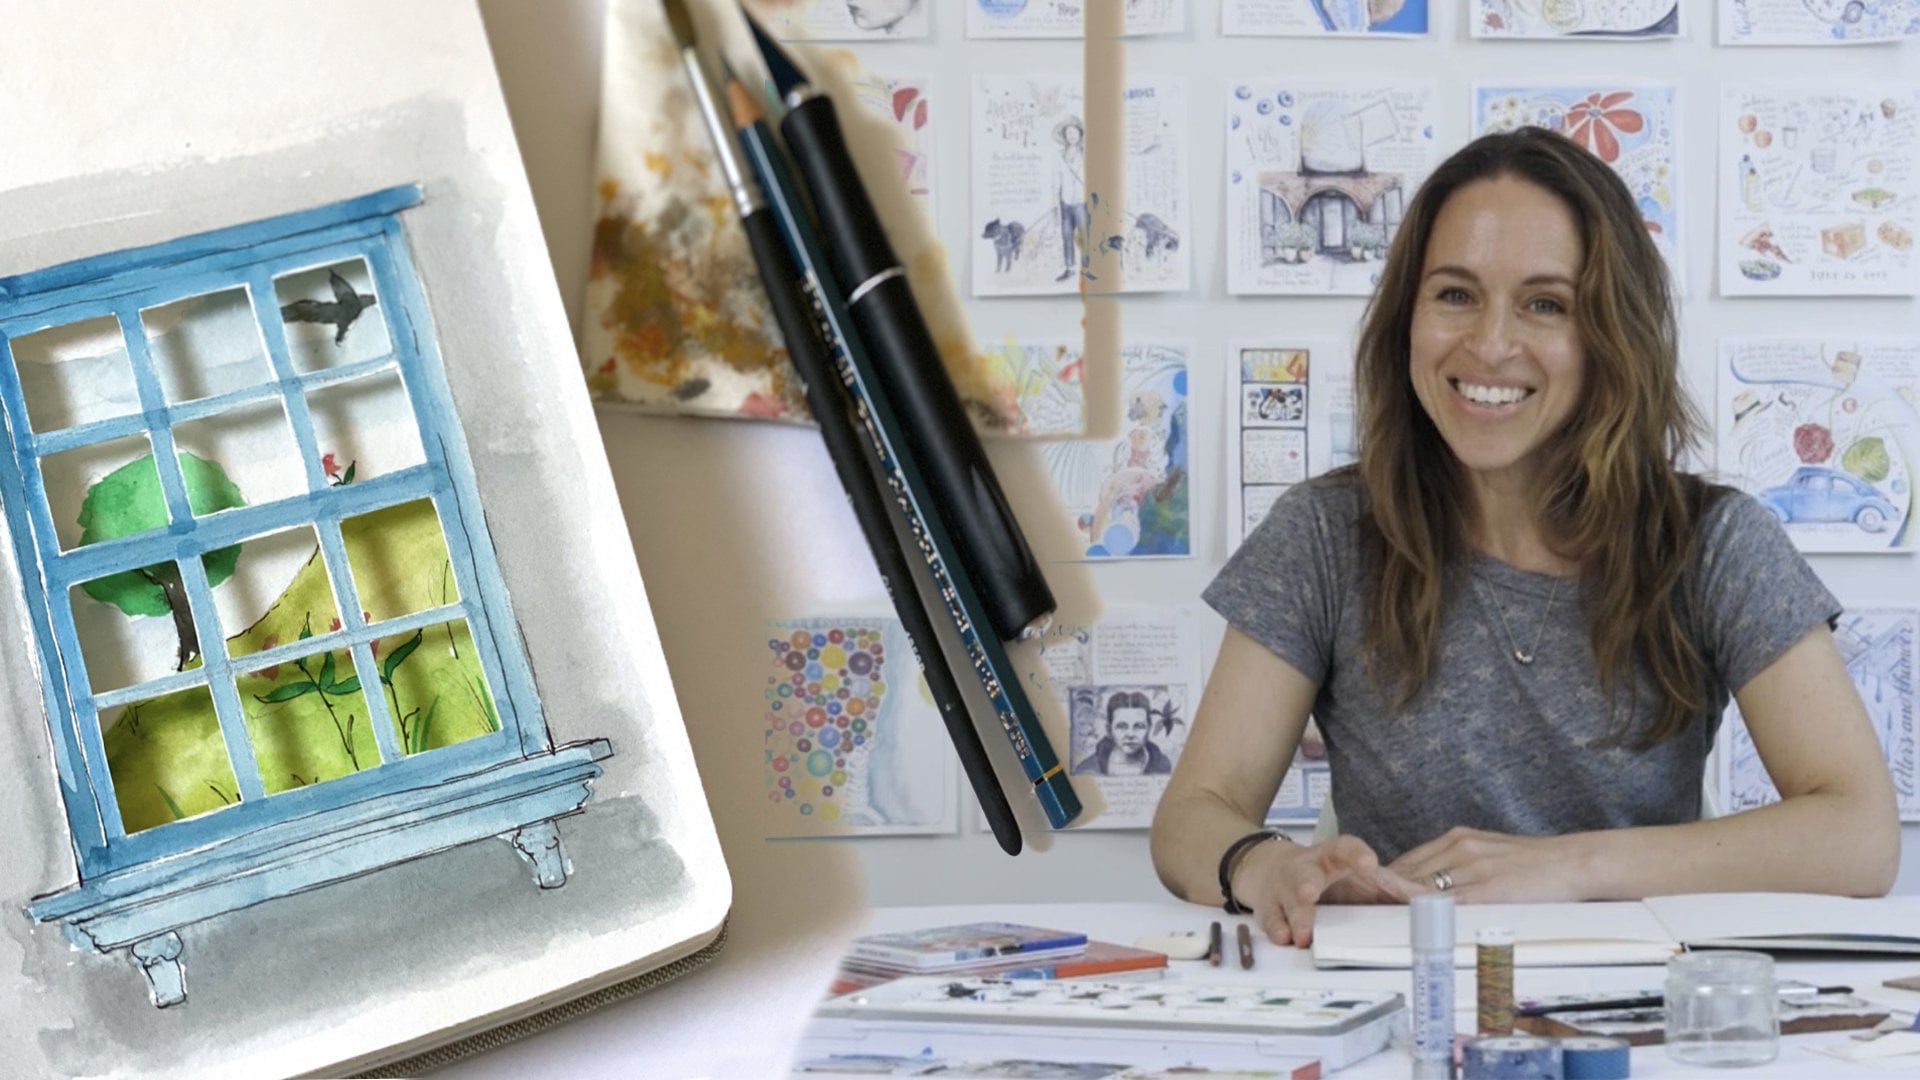
4. Class Overview: Before I go into
the first painting, I'm going to just do a quick
overview of how to sort of see shape and basic form
when you approach a drawing. And so I'm going to share a
few examples from my work and just share with you relative
shapes and proportions. And you know how to
sort of decipher things through line and simple shape before you dive
into more details. So here's an example
of a spread in my sketchbook that I'm just
going to talk through. This one here is a very
good example of how I really broke this down
into very simple shapes. There was so much detail going on in all of these
windows that when you're looking through the underpass of the Manhattan
Bridge in Dumbo, there was so much
detail back here. People, you know, probably cars. This right here behind this
couple is a bookstore. So there's things in the window. Every window here had reflections
and different things. But I just broke it down
into very basic shapes just to give the illusion
of what is happening. And so taking away all
the noise still gives you the idea and you can still see and get the
vibe of what's happening. This as well has so
much more detail in it, but it's just this basic shape. When I was drawing the couple in order to get
the scale correct, when I was looking at
my reference photo, I had to really look
at where their heads lined up with the
letters and Dumbo, how far below their feet came also relative to where
everything that you're drawing has another point
that you can compare relative lines and shape to in order to get
the scale correct. Again, here, this one has a
little bit more detail and I really went into all the decay happening on this steel bridge. But the basic shapes are there. Basic shapes then. What was happening here
in the background? Lots of detail, but I
just put very little bit of form and shape in there just to show that it's like
happening in the background. This drawing, again, so
much detail in the back, but I just got
these basic lines. It's really like just
really breaking things down into first shapes, then adding detail and
really knowing what to leave out and what to add in order to get
the effect across. First, we're going to be
starting with cloud paintings. It's like simple
going into complex. Here are a few examples. One thing that I find
really important as we move on to the next lesson is we're
looking at negative space. We'll be looking at that shape and then
defining the clouds. Let's move on to the first
lesson and we'll talk more about finding basic shapes and then building from there.
5. Clouds – Drawing From Reference: So I'm excited to get going with our first drawing
which is clouds. And we're going to
break down shapes and have fun just like doing
something kind of simple, but sometimes can seem complex and a little
bit intimidating. But I'm going to make it really, hopefully very approachable. I'm going to share
some reference images and we'll be working on some photographs
that I have taken in my world and sort of objects
that are in my life. And you're welcome to
use those references. But I do encourage
you to go out in the world and look at
the sky and water, and glass and metal, and find your own references and even work from
real life, if you can. So here's our reference image and this is just a
detail of a sky. This is one of my photographs. There's a lot going on here. There's a lot of little
puffs in the background. Big puffy clouds. There's a lot of
really bright white. And then there's a little
bit of sort of dark and I see some pink in here
and some purple and grays. But the whitest whites are here. For all the lessons when
we're going through, I really want you to
squint your eyes and find those white whites and also
see the darkest darks. And that's going
to really help you determine what to include
and to eliminate. And also how much
tone you have to add on your whole overall piece in order to capture
those highlights. This is just a way of
showing you how you can really sort of see the
shapes and see the form. I don't encourage
you tracing for your final piece and you don't even have to
do this on your own. This is really just a way of sharing with you how you
might break this down. I'm using my four B pencil and I'm just going
to break down. There's a lot that I'm
going to leave out, not include can if
I want to later on, but I'm just really going and finding like
the major shapes, especially for something like
a cloudy scene in the sky. It doesn't have to match at all what you're really seeing. You just want to get
use the image as a rough guide and then just
play around with shape. I'm leaving a lot out, just adding a few lines to show. If we break it down
easily like that, a sketch that I would start in my sketchbook would actually
just be that super simple. Then for the clouds, what we're actually
going to be painting first is the negative space, which is actually this part, not the white clouds. I just wanted to show
you how it might begin and I can show you this right in my
sketch book as well. Having a piece of tracing
paper and finding shapes will help as we move forward
into more complex subjects. Here's my first blank page, similar to what I just
did on the tracing paper, but in my own version, I'm just going to follow some of those lines that I'm seeing
in my reference photo, but I'm not worried
about it matching. And I'm just creating nice fluid shapes because it's just a cloudy sky and you want to get the
abundance of clouds. Maybe it's really
caught your eye. Really cloudy sky feels
like it will capture the mood of the day or whatever is
happening in your life. Maybe you looked up
and you were like, wow, look at those puffy clouds. Whatever reason that made
you want to draw a subject, If you get the overall vibe, it does not have to
match your reference. I've just did some loose lines. Some of the shapes are being
closed off as a solid shape. A solid cloud. This is actually negative space
right here, this whole area. Is going to be white cloud. There's like freedom in
just making these shapes. It doesn't have to be precise, it doesn't have to
match your reference. You don't even have to actually
do a pencil sketch first. But I'm doing that just to
share how it might look. If you really are
going from the basic, basic line in shape. To begin with, I'm going to start painting the
negative space of the sky, just using more cyan blue just to paint this
bright blue sky. And actually almost like a coloring book just filling
in that negative space. I'm using the pat pretty thick so that I get a
real clear defined sky. And I'm not adding any white just using pure paint. Once you've added and filled the negative space and can
really see those cloud shapes, then you can start to add
the next layer of form and shape which is define
those shadows. We will go into as well, how washes and adding water for this particular subject can
be really nice addition. Did you get those like puffy, puffy cotton ball like shapes? As you can see, I've really just got the beginning of a sky. You can barely tell what is happening at this point
if you didn't know. But once we add the
next layer of form and shape to create some of the dimension and
some of the shadows, it'll start to become more
clear what is happening. Now, I'm going to add a
little bit of gray to this. A little bit of this magenta. If you can see in
the reference photo, there's some highlights
at the bottom. Things have darker and lighter as the light
is shining through. You can just see
bit of highlights. We want to capture
some of that as well. For this, I'm adding a bit
more water in this sense, I'm using the Gare water color. The next layer of shape, which I did not
outline in pencil, are similar cloud
like forms that echo the shapes that
are already there. Do you really want
to add tone and fill those clouds up with tone so that you can
capture the highlights? This is something that
we'll talk about as we move forward into the
other lessons as well. If I add a little bit
more tone to the bottom, similar to how it would
look like a shadow, the clouds get heavier
towards the bottom. For this entire
painting, three colors, I'm going to be using just a
tiny touch of the magenta, the gray, and then this blue. I really like to try and
keep my palette very limited for the
most part always. But especially as we
break down these lessons, I'm not going to be many colors. Having more limited palette can help you to simplify
and feel less overwhelmed when it comes to approaching something
that has got a lot going on. Now I'm mixing and adding some bright white just to
get some of that. Some of those white
highlights back in. The puffiness in
these clouds also add some more dimension clouds. In particular, all these
colors blend together. I'm just adding
some more shapes, blending these shapes into the sky because
that's really what happens when you're looking at this reference and
looking up at the sky. These shapes get a little
bit blurred, puffy. So the guash paint is
meant to be really opaque. And I sometimes don't
use it opaque enough. So I'm trying right now to just really define the
negative space here. Make the sky one solid color, that's a little
bit better there. We have just really basic shapes and the colors blend
together a bit, but they're just really
broad, puffy form. That can really be
anything that you wish in order to
capture just the effect of puffy white
clouds just shape. Then the fun is blending the colors together and
then you want to have the weight of the clouds
similar to the reference photo is the weight and the bottom of the clouds are in
shadow matting. Just a little bit more weight to the bottom of a few
of these clouds. Sometimes it comes together, not until the last layers. Adding some more detail to
this looks like a very cloudy, moody sky, a little bit darker
than my reference photo. But that's okay, you can
keep building and playing. Maybe watercolor or
different material might work better for you. A very simple example, also painted with gash. Then here's an example
of a moody cloudy sky. You can almost not even
tell that it's clouds, but the sun was shining through the clouds and all of
these colors were there. I just played around with again shapes and it almost
looks a little bit water like, which we will get to
in the next lesson.
6. Water – Illusions With Shapes: So now we're going to go
into our second painting, our second drawing,
and it is water, which is kind of a
really fun subject when you think about
shapes and breaking down something
that seems complex into just really
fun, simple shape. And I have a few samples of some different
artists and how they've created the illusion of water in their work
by using shapes. I hope you find that these are inspiring and sort of
give you the freedom to explore because there's so
many different fun ways of achieving the look of water. So here are two examples of work that I find
very successful. And David Hockney is
one artist who really explores shape when he represents
water in his paintings. And as you can see there, these are really just like
loose fun abstract shapes. If you were to zoom in, you might not even know
that it was water. But when you sort of pull away, it's so clear what it is. Here's another example
by my friend Gail Baker, who really paints water
in such a fun way. And you can really
see the lines and shapes that she explores
when she's painting water. When I'm working on my demo, it will be a little
bit more true to life, but I will show how
just really seeing these shapes and having fun
with them can be really, really exciting and freeing. And you can create some really unique and
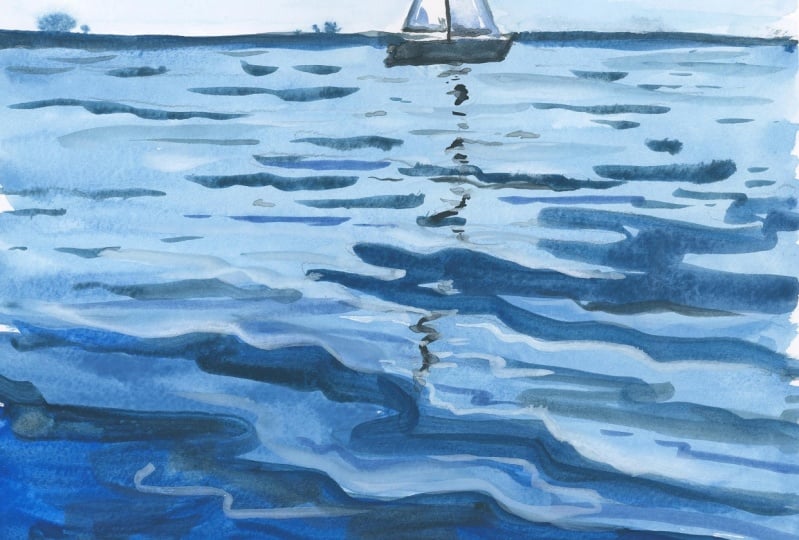
personal paintings of water in your own style. I have two reference
images for water and one is very close up. Where, because I wanted to share all these amazing
forms and shapes. And they in a way are a great place to land now
after looking at the clouds. Because some of these shapes and lines are very similar to what we did in the
previous lesson. And then if you see some of these really cool
abstract circles and reflections of light in
the water and in the waves, they're just so much
fun to play with. This is one example, and this one is a little
bit further back where you still see all these
funky shapes. But they run from back and forth and they fill
the whole scene. And then it gets darker and lighter as it
goes back into space. And then also these shapes here, we can talk through
the horizon line and then the reflection
in the water. It's this reflection of
the mast of the boat that really shows that that
boat is floating on water. Again, it's just nice to
use the tracing paper to separate lines and just really highlight some
of these shapes. I'm going to do that first. I think today we'll
work on this one. Remember, it's really nice to convert your images
to black and white. If the color is
overwhelming here, I'm leaving out there's
a lot going on here. But I'm highlighting and
roughly tracing a few, not following it exactly, just playing around
with just a few lines. As I mentioned before, just form and shape. The shapes are not closed here. When I'm actually going
to draw in my sketchbook, if I get this basic shape, it's just almost like a
slightly tilted long rectangle. And then we have two
triangles, again shape. Just look at basic shape. This piece of land in the background is
like one long shape. Then we have up
here, another cloud. Just be its own shape. Here we have a basic
getch of what's happening in the photograph when you're looking at water and when you're
looking out in space. Really try and just see
the darks and lights are and where those shapes are and how you can really,
simply define them. If we move on to this piece, you can really have fun
defining those shapes. I won't go into all of
them, but if you can see, it almost looks like
it could be clouds, it could be wood grain,
it could be anything. In nature. I love just seeing those
basic lines and shapes. It's a nice exercise to
use the tracing paper, but we're not going
to be tracing on our actual final piece if
I'm using this reference. And I just want to get a little
bit down with my pencil, I'm going to switch
to the four B pencil. I'm just going to quickly get some of these
shapes in there. I'm really using the image
as a very rough guide. All of these little shapes
can be a little bit more abstracted as you can
see the shapes and the waves. As they get back further in
space, they get smaller. These little lines
and little forms. Then as I said when I was
working with the tracing paper, the horizon line is just
this long, skinny shape. Then the boat will just
sketch in the boat, which pretty much an horizon, the top of the boat,
again relative, if I'm looking at
the reference image, I see that the top of the
boat aligns with the horizon. I can just roughly put in there the reflection
of the mast. If I look at the reference, as well as if I was
looking from real life, I see that the mast is taller
than the boat is wide. I'm always looking at
different places to compare and contrast and make up my mind and decide how big something
is going to be. I made the boat a
little bit higher, but there's a cloud
in the sky and I can just decide where that shape is. Here we have just basic shapes. Quick pencil sketch.
Now I'll start to add paint again for this piece, I'm only going to
be using two blues. I'm going to use both the
blues that are available here. The blue at the bottom of the palette has a little
bit too much green in it. I could add that, a
little bit of that. But I'm just going
to be focusing on these two blues and white. That's pretty much
it. Maybe a tiny bit of gray for the boat. Now if we think of
the sky and water, it makes sense to use
similar color palette. I'm going to add a
touch of black just to make the blue even darker. Because here in the foreground, it's much darker and gets a little bit lighter as
it goes back into space. Right now, I'm just
filling in some tone. There's a very few
little highlights, but I'm just filling in a very light wash using the blues and a
little bit of white just to fill in the water quickly. And then we can add. I can
still see my pencil lines. So now I'm just adding small
little shapes as it goes. These are just
divining the waves, showing that the waters, we're looking back
in the distance and the waves are getting smaller as they go
back into space. Anything in the foreground
is going to be bigger. These shapes have
much more defined, big broad strokes as
they come forward. Now I'm adding a little
bit of white just to add some highlights. I'm adding just a little
bit of a different blue. Still working with
the same blues. Okay, now what we can do
is a little bit of detail. My horizon got a little blurred because the
paint wasn't dry. Just totally fine, I'm just
using the tip of the brush as I work on layers similar to what happened
with the clouds. As I was working on that piece, I just define a little bit more, some details come in. As I'm working, what I need to do is this
reflection of the mast. I'm going to use some black, but really use the
tip of my brush and just do like little
tiny back and forth shapes. I need to definitely add dark of the mast itself so that we know really can see
what's being reflected. So you could use a pen, but I'm going to try and use just the very tip of my brush so the paint wasn't
totally dry and we've got some little trees growing in the back
which I might leave. But I did want to cover this up. And the nice thing
about working with gas is that you can
make it pretty opaque and cover things and go
over and add highlights. The big shapes become
really defined and the smaller shapes are just little breast strokes
in the background. I'm pretty happy with that. The paint is a little
different than, again, some of the
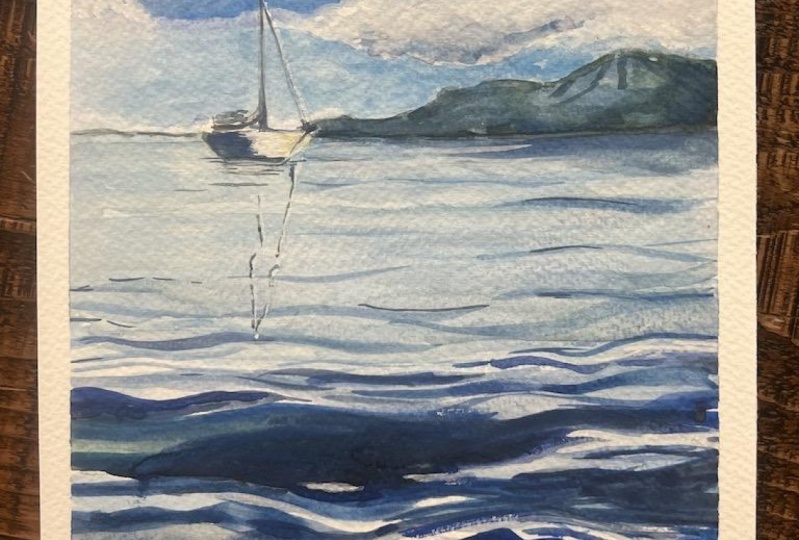
paint that I use. Um, for some of my
personal paintings. This is an example of the same piece and that
was done with watercolor. You can see how the guash
looks very different. I really like the
defined shapes here, it becomes a little
bit more abstract. Have fun playing with
different materials and playing what works well for
you. I really like that. As you can see the shapes here, aside from the bottom, they're really more like breast strokes going
back and forth. Whereas in this new piece, I've really defined
them a little bit more. But again, it's shape here, how far the horizon line is, how big the boat is, how wide the boat is compared to
the height of the mast. Things like that that you're
always going to be looking out for when you
start a drawing. Here's one more example. This is showing a very simple, almost abstracted version of a sunset where there was
more color in the sky. But it's really all I looked for was that
shape of the horizon. Some of the colors in the sky and how they blended together. And then the basic back and forth brushstrokes
becoming smaller. Again, as it came
into the foreground, this shape got a
little bit bigger. Those are just some examples. Now we're going to move on to looking for shapes in
reflections of glass. And some of these wave like
fluid lines and marks, actually it's what's
happening in glass as well. It's all going to be connected. See you in the next lesson.
7. Glass – Highlights : Now we're going to go into our
third demo which is glass, which I know a lot of people
find very intimidating. And in a way I do as well. But once you really
look at the shapes, as I mentioned earlier, and break things down and simplify and take out
a lot of the noise. And just look for
more broad shapes, look for the highlights. Know that everything else aside from those highlights
is going to have tone. The only white is the highlight, which a lot of people miss
when they're painting glass. There's huge, like obvious things that
people don't realize when they look at a really complex like all the
reflections and the light. It just looks like how
am I going to draw that? But it's actually
not that hard if you break it down and simplify. So here are two examples, one that is very, very, very photo realistic. And I think that, yes, this is intimidating and I
don't want to paint like this. And, you know, we
have photographs. If we want to see
glass this realistic, that's how I see it. Total respect for the artist who created this, it's amazing. But on the other hand,
this example shows how you can achieve
an amazingly, you know, gorgeous, stylized kind of painting that
really looks real. Where you can see the highlights and
you know, it's glass. And you can see, you know, the basic reflections
without all of the detail. And so this is
going a little bit closer to how I approach
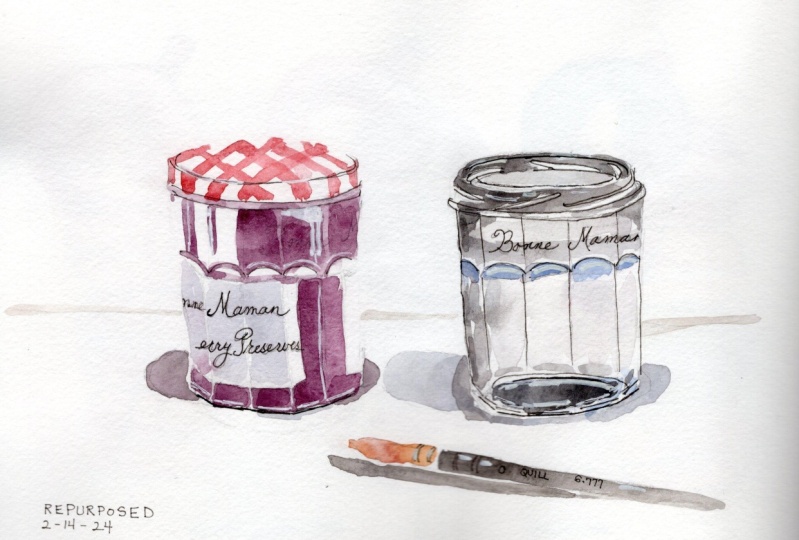
painting glass. So here's my reference
image that's going to be in the resources below the class
that you can use as well. It's just a very simple
photograph that I took at home, but there's really
good reflections in the glass and lots of
little shapes going on. And then also very clear
defined overall shapes. I'm going to put it under
the tracing paper and really look at these
shapes again for this piece will
take four B pencil. If you took my previous class, which was motivational
sketchbook practices, I did talk about creating
ellipses and lines, and pushing and
pulling a pencil and some similar ideas about
creating lines and shape. One shape that is often something that is repeated
in objects such as glass, is the ellipse,
which is a circle. In perspective, there's a lot
of ellipses happening here. There's different widths and
thicknesses to each ellipse. But if we just start
with the basic shapes, this is a shape that
you can practice separately as a
meditative practice, just practicing
over and over again ellipses to get that
form and shape accurate. We've got three right here
that are pretty defined. The bottom ellipse is not showing up as clear because
there's a lot of reflections. They end up looking a little similar to the
waves in the water, but there's our three ellipses. And then we can
just join them all by adding these down strokes. On the side here we have
123.2 down strokes, very simple, basic shapes. The same thing is happening
here for the top of this jar. This shape comes down on the sides in a little
bit of a wave. Then you have this shape. Then there's a little
bit more going on here, but you can just
really add one line. Then the outline, the
reflections at the bottom, amok. Again, similar to the
waves in the water. Here we have basic shapes. Now there's breaking down all the different information
that's happening. If we just highlight the
highlights with our pencil, I think that's actually
enough for a sketch. And to break this down into
the simplest basic shapes, our highlight on this jar is. A shape like that. I don't know what
that looks like. But then we've got
another one here. Then there's three
different stripes here. They repeat and then come down in the front
of the glass as well. Then we've got
some little waves, but we can leave those out. There is another one here
and another one here, but we don't even have to
add that much information once you break it down and
have even just simple marks, we can tell what's happening
just based on those marks, those shapes, we can tell
that this is a glass. All you really need is to
just highlight and outline the highlights in order to see
that there's a reflection. And the reflections on
glass are always like, kind of fluid and wave like, especially if the
glass has curves. Now I can see when I'm
looking at my reference, this top of the glass aligns pretty much with
the bottom of this lid. Again, anything you're drawing, you can always use a
different point in order to determine where
things will lie. There's our second ellipse, there's nuts in this glass jar. But I'm leaving
those out for now. I'm not even worried about that. I'm just getting
the highlights now. I'm getting the
shape of the shadow again, highlights. The shapes here are a
little different than a version that I did
previously in preparation, And we are going to skip to
that one in a little bit because I have let the
paint dry already. But you can see I have
the basic overall shapes. The proportions
are not 100% but I prefer to work from
from my hand and from authenticity to try and create something that is my own unique
version rather than, you know, trying to make
it perfect and match perfectly the shapes are there. I have basic shapes
laid down and I've intentionally marked
where the highlights are, where those whitest whites are. I actually can also indicate
there's some highlight here in the top and also in the
top of this lid of the jar. So this is how I sketch. I just put down shapes. Then from there I either
add ink or begin to paint. I'm starting to
add some dark just to this bottom because
I'm seeing that that's where some of the
darkest darks are. I can correct any mistakes
or fix some shapes. The pencil is just a rough guide for this one. I'm really just
going to be using gray and a tiny bit of brown. That's it, I start to block in some color, there are different
ways of adding the darkest darks
and the highlights. One way that's really
nice if you can, is just leaving the white of the paper for the whitest white. But everywhere else
there's going to be tone. What I'm going to do now
is I'm going to skip to the version where I got
further along in this stage. Then add and build
on that so that we don't have to wait for
all the paint to dry. This is the version that
I had started yesterday. As you can see, the shapes
are a little bit different. I just got a little bit
further with adding tone. The more washes and the more
lighter that the paint is, the longer it takes to dry. This just gives us a
bit of a head start. Now I'm going in, I already
have this dark shape here and I'm just going to make it even a
little bit darker, just adding more darks to
get those darkest darks. I'm not really worried about
this looking exactly like, photographic what it is. I just want to get the idea that it is glass and that
there's something inside. I'm working with just some darks and adding just a little bit of dark to just indicate that
there is something in the jar. That filling doesn't even
have to look like nuts right here in the reference, you can see it gets
darker right at that lip. So I just want to add some the connection between
the waves and the clouds. And leading up to this painting, I think it's pretty significant because we really are creating these wave kind of marks, especially at the bottom of
the jar and at the bottom of the glass that are similar to what we saw in the
waves, in the clouds. The glass, I'm not even going
to add that much more too, but you do want to add some dark just to get the contrast
between darks and lights. As the shapes get smaller, that's where you can
edit more and just really eliminate a lot of
the noise and just simplify. Just add a few marks, a few squiggly lines. This is basically like the
under painting of shapes. Like basic shapes. My white has a little
bit of blue in it from my clouds and water, but there's just
basic highlights. Shapes that are to define where
the darks and lights are. Now I have a pen
to help me define even more fine lines and darks which you are
welcome to try as well. Totally not. Part of the reason why I'm introducing a pen
now is just because of time. Even just adding little touches of dark with the pen to help define the lines really makes the piece pop
a little bit more. Some of these little lines
down here at the bottom, wave like shapes can be
defined and made with a pen. The bottom of this jar, for sure has a very
dark line, dark shape. I'm just looking for the
darkest and just adding tiny, tiny bits of detail
just to further define. I'll leave that at that. I
might work on it a little bit more for the final piece. At the end of the class, I'll share the versions
that I'm most happy with. So you can see my
finished result. Now let's move on
to our last lesson, and that is painting
metal objects.
8. Metal – Reflections and Contrast: Now we're going to go into
our last demo which is metal, which in a way is kind
of similar to glass. There's lots of
reflections and light. What you see sort of
naturally happen with metal objects is there's like this dark contrast of
those darks and lights, which is kind of fun,
can really break it down into very like black
and white kind of shapes. I'm also going to
incorporate a little bit of metallic paint just to sort of capture some of those
that shine in the metal, which is a nice,
like, fun detail that you sometimes can't
see in photographs. But in real life it's, you know, having that
extra little sparkle. Here's a few examples of
metal objects in my own work, In my sketchbook metal container that holds a lot of
tools in my kitchen, the reflection almost
becomes a mirror. And so you really, really see a lot
in the reflection. And I had fun exploring this. And this is more
detailed, this example, but you don't have to add as much detail if
you don't want to. This just sort of
shows how far this can go and how much fun it can
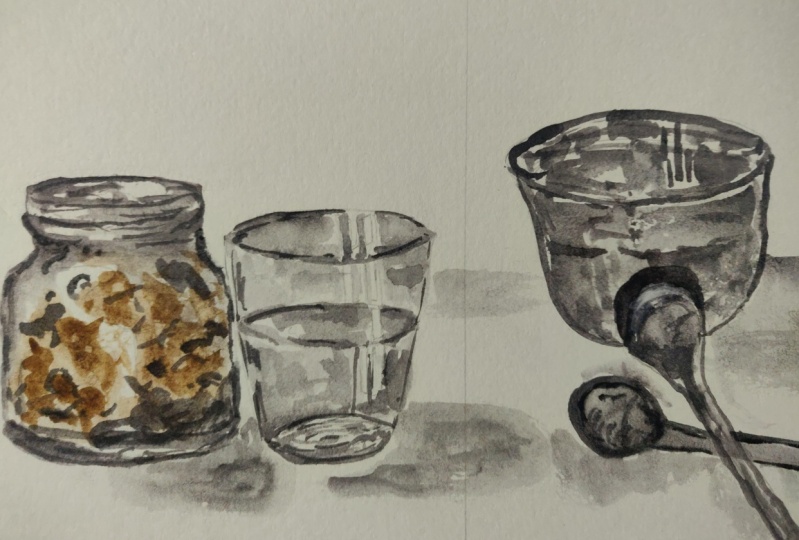
be, more you practice. Now we're moving on
to metal objects and this is our last demo. And as you can see from
the reference which will be provided for you
in the resources, there is really
clear defined shapes and the darks and lights
are much more defined. Just the nature of metal. You don't even really
have to squint your eyes and you don't
have to convert the photo to black and white because there is such a contrast
of dark and light. So I'm not going to actually use the tracing paper this time
because I think you can see and since we've used
it the previous lessons, it's a step that we don't
really, for this lesson, it might take me a little
bit longer to talk through how to size
and make the shapes. Anyway, I'm just
going to get started. Similar to the glass, I started a version
yesterday that I will go to so that we don't need as much time for
the paint to dry. The shape is this main ellipse. I always need to go around
and around a few times to get my first ellipse shape accurate. There's another one here that is just right
underneath and that can define the
bottom of the bowl. I speak about this
in my book and in other lessons that you
can overlap your pencil. And that is the beauty of
starting with a pencil, you can just work right on top and your lines can overlap. There's totally nothing
wrong with that. I'm looking here, I can see the top of this little canister is cutting into the
bottom of the bowl. And I can see a little
bit more of the top, so it's a little bit more of a full circle, but
it's still in the lip. This ladle is, I can sort
of define that first shape, which is the shape of the, the, the spoon part. So there I have the basic
shapes and I've drawn this shape of this
little long spoon and the ladle handle right
on top of each other. After looking at it, I
can play around with. I'm adding this
little shape here, handle or the little
hole inside of the. Again, I know that the handle
of the spoon falls a bit, if I'm doing a vertical line, falls just a little bit of
where the end of the ladle is. And it looks like
I'm pretty accurate. Might want to add
a little bit more, but remember, your final result does not have to be exact. I'm not going to worry about
it too much. Pretty good. Now that I have a
very basic sketch, I can start to add the darks and I'm just going to
start to block in. It's a little bit
in a way easier. I do have my metallic
paints here as well. I'm going to add those
at the next layer. I can just go in
really dark right from the start and start
to block in shapes. There's a shape, that
triangle shape right there. That shape the out side of the bowl here has a
dark line and then it, that darkness comes
out a little bit. This shape here at the bottom of the bowl
is a funky shape. This is definitely, you
can see reflections. The shape that I'm outlining now is showing the reflection of the top of the canister here. Just looking for those shapes, if you squint your eyes, you can see them a
little bit easier. I think I'm going
to fast forward this stage to my
previous version, which is really just
the same exact thing, but a little bit further along just so that we don't have to wait for
the paint to dry. This is the version
that I started yesterday and it's a
little bit less precise, but you can see how I blocked
in a lot of the darks. And now I can go in
having it just be a little bit further along here. You can see I saw the same
shape here on this side. These two shapes here. I'm now adding a little
bit more detail. I might add a little
bit of pen as well. One thing that I want to do is make sure that the highlights
are the whitest white. Some of this is going to
have tone added back in. In a way this already
looks like It could be, depending on your, your goal and your desire for
a finished piece, it could be finished. It gives the illusion
of metal objects. You can see the
darks and lights. It doesn't look exactly
like what it is, but it's close and it
just gives you that idea. But if you want
to, at this point, once the basic start and
shapes are blocked in, then you can start to add
more and more detail. I'm going to add a
little bit more. I might not finish
the whole thing, but again, at the
end of the class, I will share how
the paintings look, once I am happy with my
level of completion. So now I'm going to
add a little bit of metallic paint just
for a little bit of shine I'm working on
with this pure silver. This is again, it's fine
tech metallic palette. I'm just going to add some
metallic right to this. This is a really nice
touch when you're painting metallic objects because
they actually shine. And you can add as much
or as little as you want. If I just add a little
bit to certain parts, when you turn the page or look at your artwork
from a certain angle, it will shine just like metal. So this fine tech palette
has a metallic black. I'm just going to add a
little bit of that to the darks because it has a little bit of
shine just right in it. I wanted to talk a little
bit about reflection. The reflections on glass and the reflections on the metal is what makes it intimidating and what makes the
subject look harder. Those shapes can be intimidating because
there's so many of them and it's hard to decide what to leave out
and what to include. If you really look
especially on metal, clear reflections of
what's in front of it, then it actually makes
those shapes much easier to find a way the metal subject might be a
little bit easier depending on what your references and
what you're looking at. Mainly reflections here for the spoon reflecting
onto the bowl, the canister reflecting onto the side of the bowl as well. Yeah, if you have
some metallic paint, it's really fun to play if you want to add any
highlights back. In a nice way of
doing that is really, really opaque white guash
or even a gel white pen. You can add some
small highlights to. What is really nice
about metallics and metals is if you add just
little touches of white, it just that suddenly it
pops and I'll try and show an example just right there. If I can get some of those
white highlights on this rim, it just suddenly
pops and really, really feels metal like. So you can either leave the
white of the paper or you can add those white
highlights in with opaque opaque wash. My paint is not completely dry right now, so my highlights are
getting a little lost. I'm going to stop for now and
I will finish this again. I might add some ink and I
will share the finished piece at the end with your
ink with a pen. I can even add in
ground black pepper, which is what it says on
the side of this canister. I can add some smaller
details like that at the end. All right, now that is all
I'm going to do for this. Now let's jump into the last lesson where
we'll do a little bit of reflection and talk about where you can share
your finished project.
9. Class Reflection and Conclusion: So congratulations on
making it this far. I hope that I broke some
things down for you that previously seemed a
little scary and intimidating. And maybe now it seems like a little bit more approachable. And here are some key tricks and key things to think about
as you move forward. So the first thing
is to really look, just squint your eyes. Look at the shapes that you
see no matter what it is. I mean, even if you're drawing
a busy cafe or a person, let alone the four subjects
that we worked on today, really look, see, shape, relative shape,
how big something is next to something else. How you can sort
of scale things, how you can take out a lot of the noise
and just simplify. Remember that it's useful to convert your images to black and white
to see the shapes, even if you just do it on
your phone or you print out a reference image in
black and white just to have as like extra reference. There's also a real
nice benefit to just keeping your palette
very limited so you don't have a lot of confusion about
what colors to add. And it's just really
simple, black, white, grays, dark, dark. And you know, definitely like a white white for highlights. If you're working
on metal objects, it's nice to add
some metallic paint. Why not use metallic paint
in like a realistic kind of way and incorporate into your work where it really
makes sense to use it. It's fun to play with
metallic paint anytime, but why not add it to actually metal objects and
then they kind of shine. Remember to relax and have fun. That's the most important thing. So no matter what you're
drawing and painting, just, it doesn't matter. It doesn't matter if you fumble or make mistakes, just have fun. Another really important
thing that I want to highlight is every artist, and everyone wants to achieve their own personal style
and works in their own way, in their own unique,
special artistic style. I encourage you to take any
lessons that I teach you, just use them as like
a starting point, a touch point, a way
of stepping off, getting the idea of glass or metal or you know,
water or clouds. It doesn't have to be done
in the style that I do it. I encourage you to have fun and create your
work in your own style. Please upload any of the paintings that you create
to the project gallery. I always give feedback. I love seeing what people create after they've
taken my classes. And I know that it really
helps other people as well to see how you have
interpreted the lessons. If you want to keep
in touch with me, please do so by being in touch by e mail or direct
message on Instagram. I share old and new work on Instagram which is
SDN Baker Design. And if you want to keep up with me and learn about any
classes that I'm teaching, I always send out
that information first to people on
my mailing list. So I encourage you
to sign up for that. I also share personal
stories through e mail and some
other work as well. And the link to sign
up is on my website, which is Don Baker.com I hope that the paintings
that you created open up a whole new world
of possibilities for you. And I can't wait to see what
you created. Thank you.
 Samantha Dion Baker, Artist | Designer | Author