Transcripts
1. Introduction: Meditation takes
you on a journey from external chaos
to inner silence. It takes you to a place
where you can rest, release old beliefs, and just
be in the present moment. While some access this
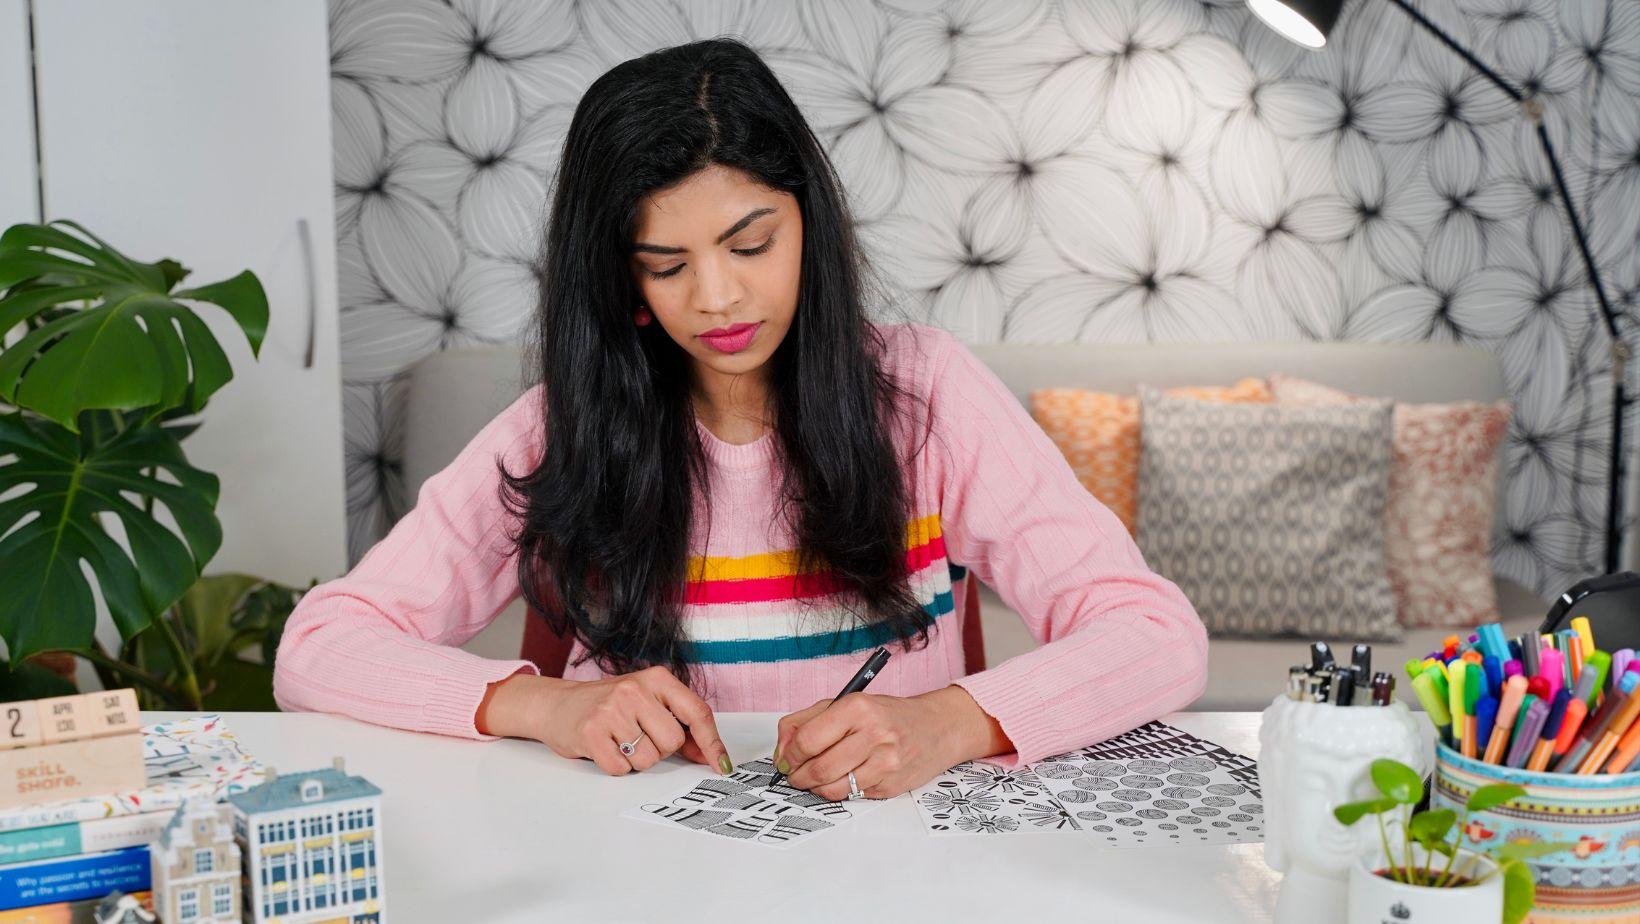
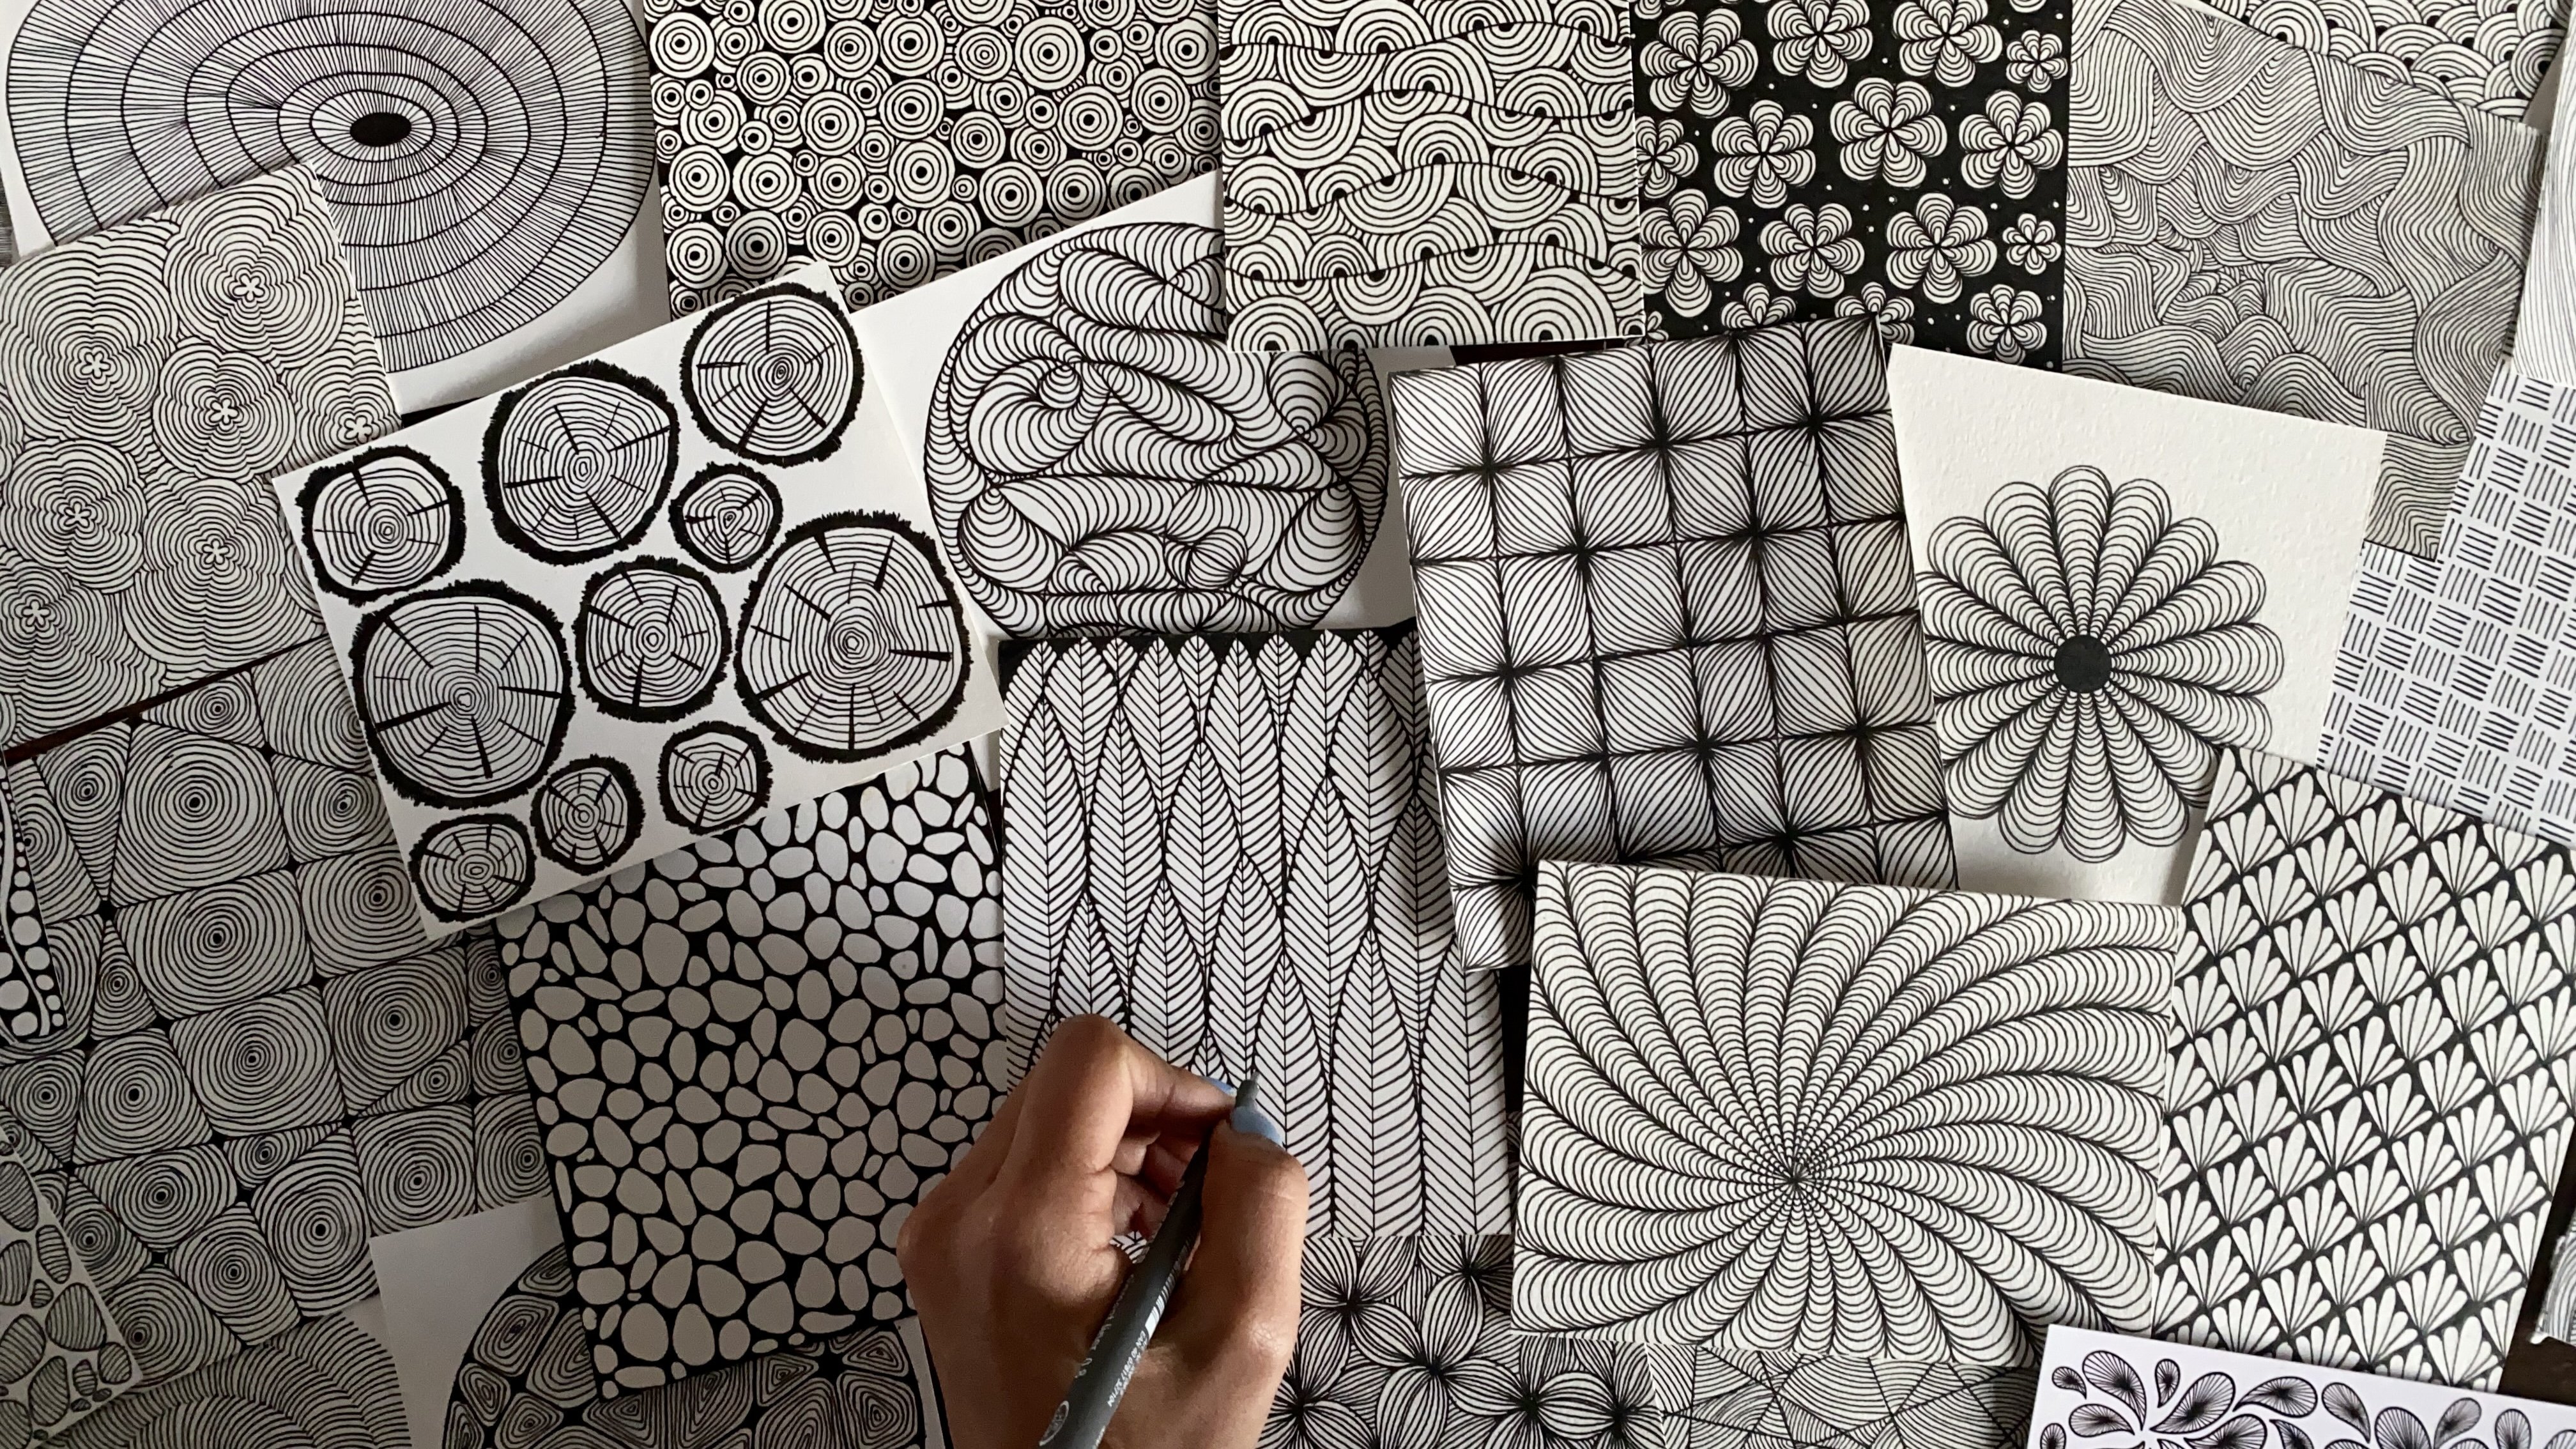
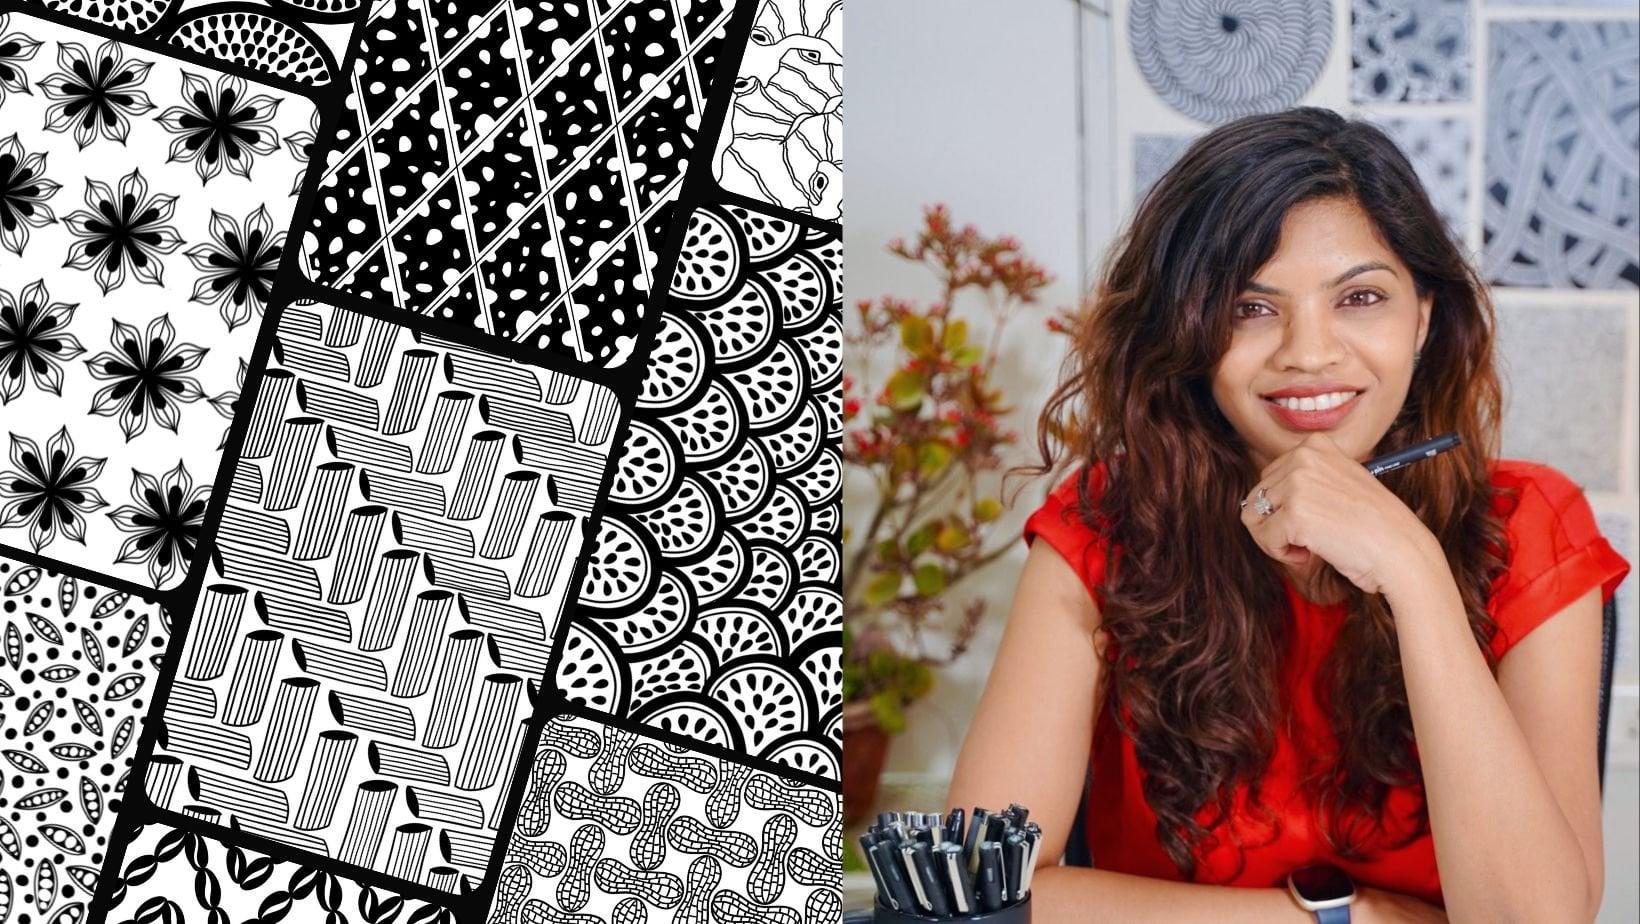
space by sitting still, I have been accessing it through pen, paper, and patterns. Hi. I'm Neha Modi, an artist, educator and a top teacher
here on Skillshare. My work is an intersection of mindfulness and creativity, and I've been fortunate
enough to share it with thousands of people
through my online classes, workshops, and social media
since the last few years. As I started making sense
of the world inside me, during my art
meditation sessions, I began to see the world
around me differently. My pace got slower. I paused more often and I stopped not only to
smell the roses, but also to observe and appreciate the everyday
objects around me. This habit of mindful
observation open doors to many more creative explorations and has become the
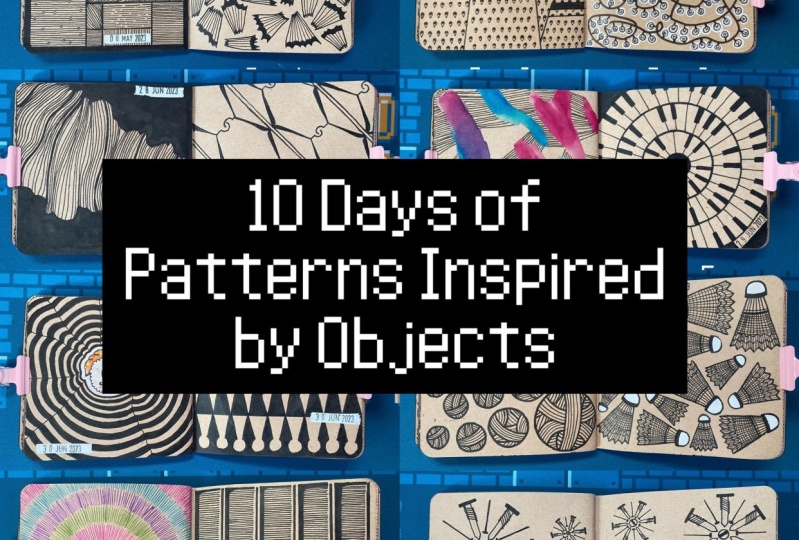
foundation of this class. This class is a 10-day
challenge that's designed to unlock your creativity and restore your inherent
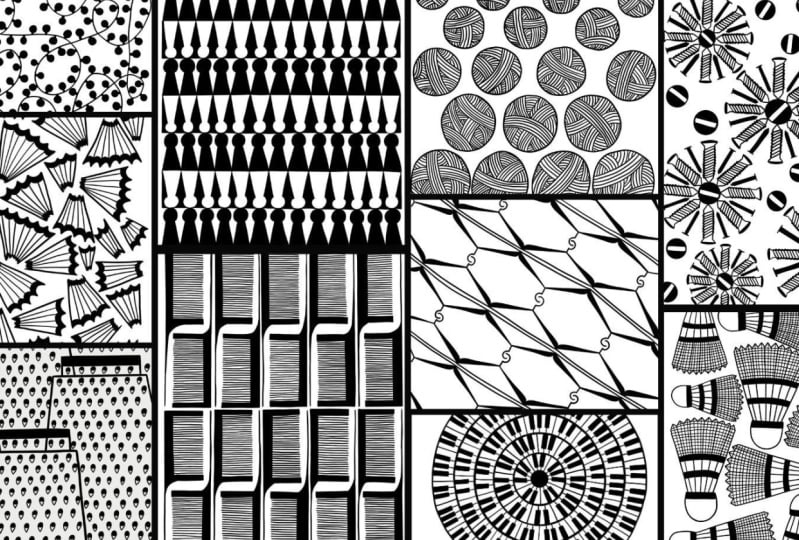
state of balance. Together, we will create
patterns inspired by everyday objects
without worrying too much about
realistic results. I will show you how to reduce objects to basic
lines and shapes, get past the intimidation
of drawing from real life, and eventually develop a never-ending source
of inspiration. Each lesson will focus not only on different
elements of mindfulness, but it will also
cover techniques and tips to create different
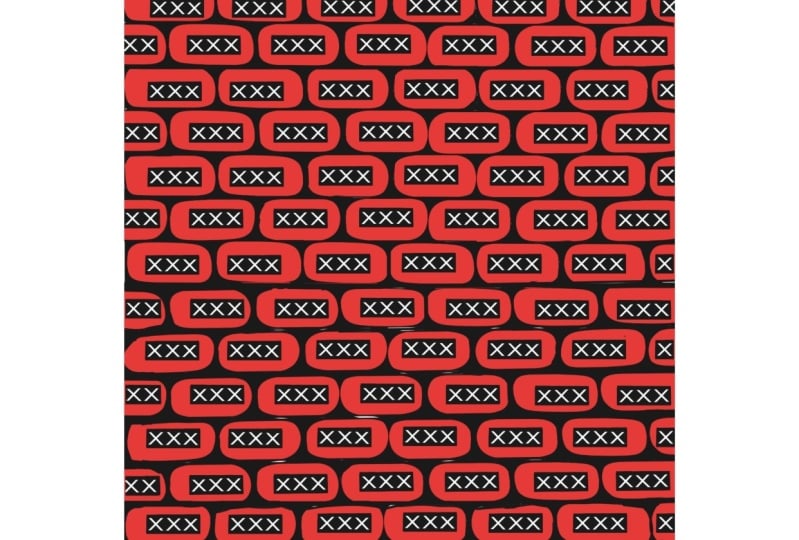
styles of patterns. For example, on Day 9, along with learning how
to brush off judgment, we will also
understand the way we can spice up a regular
block repeat pattern. By the end of this class, you will be on your way to find your own answers
for what to draw, how to draw, and most
importantly, why to draw. Whether you are looking
for an outlet to slow down and tame
your inner critic, or you want to dip your toes
into the world of patterns, or you want to rekindle your relationship
with pen and paper, then join me in this class
2. Class Project & Material : Welcome to the class. I'm so glad to see you all. This class is not just
about creating patterns, it's about diving deep into yourself and making a sense
of the world inside of you, as well as the world around you. I hope that as you move along
with me in this journey, you're able to turn drawing
into an act of slowing down and connecting deeply
with your surroundings. Now over the course
of the next 10 days, I'll guide you
through a variety of pattern prompts that will help you observe and depict objects around you
in various ways. Your class project is
to create artworks based on each of these
prompts. Simple, right? You can upload one pattern
each day or you can upload all of them together
at the end of this class. Now the intention
of the class is to capture the essence of objects, understand the basics
of creating patterns, and get immersed in
the present moment. The goal is not to make
perfect representation, so feel free to do what I'm
doing or look at the objects around you and do your own version or
do multiple versions. There is no right or wrong here, though no matter what you create please do share it
in the project gallery. It's always a delight to
see your interpretations. If you're comfortable, then please do share your
thoughts about the process too. I would love to see all the
snippets from your journey. Now, just like the
project the material you need for this
class is quite simple. All you need is
some fine liners, pencil, paper, and a ruler. I'll be using 0.6 and 0.8
fine liners from Uniball, and 0.3 from Staedtler. Depending on the detailing
or the space I have, I will switch between
the pen sizes, but you don't need to
have the exact same size of fine liners or
even the same brands. Use what you have, though, having two different
sized fine liners, one for thick line work and the other for detailing
always helps. You can also use a
totally different medium, like crayons, colored
pencils, or even paint. There is no right or wrong here. Because honestly,
when you draw to meditate the mindset is way more important
than the material. If you feel like
starting off right away, then don't hold yourself back because you don't
have the exact material. Listen to your creative impulse, use whatever you have
or whatever you like. Now for paper I'm
using a 200 GSM paper, though you can use
any sketchbook, any kind of paper that you have. Just make sure that the
surface is smooth and the size of the
paper is something you find easy to fill in. I personally feel that when it comes to mindful
drawing practice, the size of the paper shouldn't be intimidating
and should be something that is based
on the time that you have and your mental capacity. There are some days when I
use big size sketchbooks, and then I keep going back to the pattern and finish it
over the course of time. But then on most
days I either use an A5 or even a smaller
size sketchbook. You know the things that
you'll finalize beforehand, like the size of the paper, the material, time of the day, or even the place
where you're going to sit and draw may seem like small things but they actually set the ground
for your practice, they help you ease
into the process. Do spend some time to
figure out the basics and then get ready to
embark on this journey. I hope that this daily practice will fill up your day with calm, joy, and beauty. Let's get started.
3. Day 1 - Pencil Shavings: Keep It Simple: It's Day 1, the beginning
of our daily practice. We're going to start it
by drawing an object, which is a reminder
of simpler times. Times when we looked
at things with a big-nose attitude and the fear of blank pages wasn't a thing. The thing that I'm talking about is not the pencil or the crayon, but the byproduct
of creative times; the pencil shavings.
Let's begin. Now. This is going to
be a random pattern, which as the name suggests, is a pattern that the
motif is arranged randomly to create a very
organic, non-linear design. Generally, a lot of floral
patterns are made this way. I'm going to start
from the center. You can start from wherever
you feel comfortable. Now the pencil shaving when
it comes out perfectly, is almost like a round shape with the rough scalloped edges. But I don't want to draw
it in its perfect form. I'm going to break the
shape and draw it apart. I'm starting by making small lines very
close to each other, some even overlapping to
give that rough jagged look. Once that's done, the next
step is to make lines from both ends and then connect
those lines through scallops. I'm making slightly rough, irregular scallops
here. Quite simple. Yes, we will add
the details like the pink-colored part on the
top and the lines later. For now, the first
step is to just fill up the page with the base shape. Now the interesting thing
about a pattern like this is that even though it is
inspired from an object, the shape has a very
imperfect feel to it. I mean, anytime you
sharpen a pencil, unless and until you're
very conscious and slow, you will not get
the perfect coil. You will have pencil shavings
of different widths. That is why when
you draw them here, keep changing the width. Even if the two sides of an individual pencil
shaving is not same, it is absolutely okay. I mean, if it's imperfect,
it's actually better. It will give the pattern
more organic feel. We are starting a 10-day journey with this imperfect object. We are starting our journey
by embracing imperfection, and that I feel is a
wonderful start. For now. Just keep your focus on
drawing the basic shape; the jagged start and the
scalloped end. That's it. Other than that, the other
element that you can focus on is the distance
between each motif. Like I have decided that I
want to make a tight pattern, which means I want to place everything close to each other. This condition helps me to decide where to
place the next mark. Now, again, this is
a personal choice. If you like tight patterns,
follow this approach. If you want to make a loose one, then keep more gaps
between each shape. But whatever you decide, try to stick with it. Keep the distance between
the motifs consistent. Again, all of these conditions are not there
to make a perfect pattern. Rather, these
guidelines will reduce the decision-making
process and will make it easier for us to get
into the flow state. Now when it comes
to random patterns, one of the ways to
make it interesting is to keep changing the
direction of the motifs. That is why throughout
this pattern, I'm making sure to flip
and rotate the motif. I don't want them all
facing the same direction. Another thing to keep in mind while doing a random
style pattern, not just this, but any pattern, is to stagger the
placement of your motifs. Make sure that when
you arrange them, they don't form a
line or a stripe. That is why even if
the shape is simple, be mindful of the placement. Take care of the things like
the direction of the motif, the spacing between them,
and their placement. Not just to make a
well-balanced pattern, but to give yourself some. These limitations will
give you a structure, will help you shift smoothly from one movement to another, and most importantly,
will help you settle and relax with the
repetitive movement. Now that the page is filled, it's time to move on
to the next step. In this step, I
will add the strip of color in each pencil shaving. It's a very easy and
fun thing to do. The shape is already there. All we have to do is
add some color to it. I'm just mimicking
the scallop shape and then coloring
in the blank space. Now I know that in
real-life pencil shaving, the colored strip is quite thin. But as this is a
stylized version, I have decided to make
it slightly thicker. I like the way it looks. But again, you can decide how you want to
approach this step. When I draw for meditation, I tap into every opportunity to bring slowness
into my practice. That is why, instead of using a bigger size pen to thicken this colored part in one go, I'm drawing first and
then filling it in. It takes more time, but then it helps me to relax. Also, before the step, even if the shape was
simple and it was relaxing, my mind was equally active. I could not completely shift
into the silent, calm, meditative state because I was thinking where to make
the next mark and etc. That is why this step and
the step after this gives us the perfect opportunity
to go inward for a little while and
relish the silence. Once you're done making
the colored strip, the next thing you can do
is to add in some lines. Now we're doing this
to relax further and add some personality
to the pencil shavings. You can add as many lines as
you want in each of them. Now to draw the lines, you can use a thin nib pen or the same one that you have
been using until now. You can also use a pencil
to give a different look. I'm using the same Size 6 pen, but I'm holding the
pen very lightly so that I can get thin lines. In this step, my focus is to start and end
the line properly. What that means is that each time I will try
to start the line from the jagged point and end it by merging it
with the ticker part. It's a little
thing, but it helps a lot in maintaining the focus. We're almost at the end, and it might happen that
you might start feeling distracted towards like, this pattern hasn't turned out well or I should have changed the direction of
the pencil shavings here and there; can come up. To make a shift from those
judgmental thoughts, keep paying attention
to these little lines. It's a small movement, but a continuous one. And if you get distracted, which is absolutely okay, it will reflect on the lines. When that happens,
you can take that as a sign and come back
to the pattern; come back to the act of starting and ending
the line properly. Once the lines are done, this is how my pattern looks. This was quite fun. I liked that the pencil
shavings can be broken down into so many
imperfect small shapes. You can change the proportions
and still have them work. That just opens up so many possibilities to
use this very basic thing, obvious thing, as a part of our mindful
pattern practice. As kids, we did not
think about perfection. We drew because we wanted to. We colored because it was fun. It is this attitude of drawing, just for the sake of drawing, is the starting point of an
art meditation practice. I hope you enjoyed this nostalgic start and
are ready to explore more.
4. Day 2 - Grater: Be Gentle: Welcome to Day 2. Yesterday, we did
a random pattern, so that's why for today, let's switch things up and bring a little bit of
structure to our pattern. The object that I have
today is very interesting. It's none other than the very useful kitchen
essential, the grater. It's something that I've
been using for years, but never actually observed it enough to see the
detailing it has. That's why I'm very
excited for today. Graters come in all
shapes and sizes from the box grater to the flat
one or the micro plane one. Each one has different
design and blade size, and each one can become a
part of our pattern practice. But for today, I'm going to show you my way of doing
the box grater. The aim of this
class is not to make an exact representation
of the object, but more of a
simplified version. That's why I'm
just going to make a flat version of
the box grater. The shape of a box grater
is like a trapezium. It's a flat shape
with four sides, with two of the sides a pattern. I'm also adding a small handle on top to complete the loop. I'm doing this free hand, but you can use a
ruler if you want. Now this is going to be
a full bleed pattern, which means there will
be no background and everything in the pattern will be connected to each other. That's why I started
from the center, and then accordingly, I placed all other
graters around it. Eventually, each grater
will be connected to the other for that cohesive
and tight look. Now to keep things interesting, I want to make sure that none of the grater handles are
parallel to each other. That's why the starting point of each grater is different. Also, this is going to be
a directional pattern, which means that this
pattern can make sense when viewed from
only one direction. Once the base is done, I'm going to outline the whole thing with
a 0.8 fine liner. If you're not happy
with any line, you can overwrite it
with pen at this stage. You don't have to follow the exact thing that
you have drawn. Feel free to make the changes. Though, as this is
just a base structure, don't spend a lot of
time perfecting it. Rather, get ready to move
on to the next stage, which will help us to be mindful and actually get
into the flow state. Now that we have our
base sketch ready, it's time to fill it in. Just like there are
various blades size, and styles in graters, there are various ways to
fill up your base shape. I'm going to draw the
smallest style of blade, which looks like
a teardrop shape. I have switched to a 0.3 size spin because I want to
make small size blades. You can decide the size and the shape of the blade
that you want to make, and then try to draw the same size and style
throughout the pattern. I'm making sure
that the teardrops are evenly spaced in each row. Other than that, I'm also alternating the starting
point in every row. In the pattern design world, this is called offsetting. This creates a zigzag or
staggered effect in the pattern, which can add visual
interest and variety. In this case, I'm doing this not just for
visual interests, but this is how the blades are placed in almost
every kind of grater. Now because this
is all free hand, your rues might not
come out to be perfect, but it is absolutely fine. It is not the
important thing here. We are doing this pattern
to practice mindfulness. To do that, it's important to
focus on closing the shape, because every time you
leave the shape open, it will indicate that
you rushed through the drawing process or you
weren't completely there. Strive for completing
and closing the shape and not making them all look perfect and in the same line. If you get perfect
blades, it's great. But if it doesn't happen, then also it's great. The flow state that
you will experience is not dependent on the level of
perfection in the pattern, it is dependent on intention, repetition, and the attention. So make these elements
your priority. When you approach drawing
with a meditative mindset, it's not always necessary to create intricate or time
consuming patterns. You have the freedom to
decide what you want to create based on the time and
resources available to you. Even if you work on large
scale or draw only one grater, it will be a
meditative experience. Follow the basics like
drawing directly from pen, paying attention to the
shapes, the repetition, and I can assure you that the rest will all
fall into place. Not just for this pattern, but for other patterns too, take the inspiration
from what I'm making, but also observe the object. Take some time to
reflect on the object you're drawing, your creativity, your sense of balance and shape, and your own unique
perspective are the elements that will
make the pattern yours. Use this practice as
an opportunity to first reflect,
observe the object, look around the variations
online or offline, and then pick a route
that works for you. Now, the blades on their
own looks quite fine, but I want to take
it one step further. That's why I will
go ahead and fill up the top part of each blade. That not only gives
it more depth, but it is also an opportunity for me to slow down further. I'm making these tiny circles
in a really small space. If I want them to come out well, I have to bring all my
attention to what I'm doing. The amazing thing
here is that what I'm making isn't complicated. It's not about my skill, rather, it's all about focus. Any mistake that happens on
the page doesn't upset me, rather, it indicates
to me that I wasn't fully aware of what I was doing. Instead of being critical of
a mark that didn't go well, I actually acknowledge it
with grace and take it as a sign to bring my attention
towards the pattern. That's why in the beginning, it's important to practice art meditation with simple
repetitive movements. That way, you will
be able to see the flaws on the
people as feedback, something that tells you about your attention level and
not your skill level. Because of this, you
will be able to quieten the critical inner voice and
focus more on the process. Achieving a flow state of mind is something widely
spoken about, and sometimes it can seem like a super complex
thing to achieve, but it doesn't have
to be that way. Any activity when done
with utmost attention, can shift you into
the flow state. When you let your pen move
across the page and you start seeing what is happening
without any criticism, you will find yourself
in the flow state. Now once the blades are done, the last step is to fill in the handle part and
finish off the pattern. This is how the
end result looks. Even though we drew
an everyday object, at its core, it's a page
filled with teardrops. That just shows that there are so many ways we can fill
up our sketch books. Sometimes all we need is a
little bit of mix and match, and we can have some really interesting
pattern combinations. I hope as you do this pattern, you remember to be
gentle with yourself. This is your me time, your time to take
care of your mind. Don't lose yourself into how a drawing should be or why
I can't draw a certain way. Rather, lose yourself in
the process of making repetitive marks
because that takes you into a silent and
comforting space.
5. Day 3 - String Lights: Lighten Up: String lights, globe
lights, fairy lights, no matter what you call them, they have the power to make any space look magical and cozy. They can accentuate the beauty
of anything around them. And mindfulness as a
practice, is the same. Any moments spent in the
present state has the power to lighten up your inner world and eventually your outer world too. For today, let's draw one of my favorite objects,
the string lights. Now, I want to draw the
version of string lights, which is at first a
cause of frustration, and that is the
tangled, messy form. And even though the dangling
string lights is not fun, drawing the jumbled
version is quite fun. So to begin with, take a deep breath and start drawing from any
corner of the paper. There is no need to
think too much about it, let your pen move
freely and let it create tangled and
overlapping lines. Just draw it the way
a child would with complete freedom and
without any inhibition. Now that the base is done, it's time to add the
little bulbs and transform these tangled lines into
a more recognizable form. Now there are countless ways to create bulbs for a string light, but for this tutorial, I will stick with the circular or the oval
style kind of a bulb. I'm starting by drawing a small rectangle and then
adding a circle on top. This is the basic style of bulb, but you can experiment with different shapes and
styles of your choice. There are so many varieties
of string lights out there, you can make
something you have at home or something you've
seen in the shops, or create something from
your own imagination, any kind of object or
shape can be used too. There are so many possibilities, and I feel that's the
beauty of this object. Try it from the way you can draw the strings to the
style of the bulbs, you can experiment and come up with as many variations
as you want. Now when it comes to the
direction of the bulbs, there are of different
ways you can go about it, you can alternate
the direction of each bulb or change
the direction, as in when you feel like. As you can see,
I'm not following a fixed sequence when it comes to the direction
of the bulbs. I am intentionally doing
this to maintain a sense of randomness and add a playful
element to the pattern. Additionally, there may be areas where I don't have enough
space to draw the bulbs, so I adjust the direction
of the bulbs accordingly. Essentially, I'm giving
myself the freedom to change the direction of the bulbs
wherever I feel like it. Sometimes it's fun to
play with the size, but in some patterns, the rhythm comes from the relative uniformity
of the motive. That's why, for this
particular pattern, where the base is
jumbled and tangled. I'm sticking with
consistency and making sure that the size of the bulbs is the same throughout
the pattern. When you start the pattern, decide on the bulb
size at the beginning and maintain it throughout
the drawing process. Personally, I enjoy creating
smaller-size models, and that's why for this
particular pattern, I decided to go with
small-size bulbs. However, feel free
to experiment with different sizes and see
what works best for you. With regular practice,
you'll start to develop a preference for
certain shapes, sizes, and styles, and then
all those elements can eventually become a part of your daily art
meditation practice. This is going to be a
non-directional pattern, which means there's no right or wrong way of looking at it. Since the string lights
are tangled and twisted, the pattern can be
viewed from any angle or direction and still maintain
its overall appearance. Generally,
non-directional patterns can be very useful in design because
they are versatile and adaptable to
different context. They can be used on fabrics, wallpapers and other surfaces
where the ability to look good from any
direction is beneficial. Additionally, non-directional
patterns can help to create a sense of balance
and harmony in a design, as they're not skewed or bias towards any
particular direction. Just like the wedge,
string lights can make any space cozy. The repetitive
movement of drawing one shape can lighten
up your mood. Each time your mind drifts into the past mistakes
or future worries, you can bring your
attention back to the present moment by
focusing on the pen movement. The repetitive
movement of the pen helps ankle you into
the present moment. The slow act of
repetition helps you release stress and
create a sense of peace, even if the world
outside is tangled. So continue filling in your
pattern all the way down, and eventually you will have something that looks like this. Because the string light
consists of two elements, the wires, which are
fluid in nature, and the bulbs, which
are more structured, you can have a lot of
fun with this object. De-dangling the string
lights is a tedious process, but once it is done and the lights are switched
on, it's worth it. Well, the similar sense of
lightness and joy comes when you let your stress out through art
meditation practice. I hope you do your version of string lights today and
I'll see you tomorrow.
6. Day 4 - Hanger: Hang In There: We are on Day 4 and today we are going to
draw some hangers. I wanted to pick an object from the wardrobe and hanger
seemed like a good option; they are very basic. They don't come across
as something that would strike as inspiring and that is why I'm very curious to see as to how this
will turn out. This is going to be
a diagonal pattern and that's why I'm starting
with a basic grid. I have kept it two centimeter
distance between each line. You can create diagonal lines
at an angle that you like. Though, I would recommend not to make them too close
to each other. Now the basic hanger motif can be broken down into two shapes, a question mark and a triangle, and that is what I'm going
to do here, like this. Now for the next hanger, I'm going to invert the shape. This time I'm
drawing the triangle first and then the
question mark. Now, after inverting
the hanger shape, let's add one more
interest in this pattern. For the third
hanger in this row, I want to play around with the question mark,
shape of the hanger. That's why I'm starting this new hanger from
the one before it. The starting point of this
question mark is connected to the ending of the previous one to give it an
interlocking effect. This little interlocking that
we will be doing throughout the pattern will
create a sense of connection and flow
between the hangers. Now, I will follow the same
sequence throughout the page. I'll keep playing
by inverting and interlocking the hangers and
we will see what happens. Now, just like the
way hangers are quite close to each
other in a cupboard, I want to keep the gap minimal between the hangers
in this pattern too, that is why every time that
I will invert the hanger, I will make sure that I draw them very close to each other. Now this is just one of the ways I thought
of using this motif. You can follow the
same route or you can change the direction or
the size of the hanger, or even change the space
between the hangers. Every variation will give some different results and it will be interesting
to explore that. Now that the first row is done, let's move on to the next. I will follow the
same format here too. Though, this time the drawing
process becomes easier. I don't have to think where
to draw the next hanger. I just need to connect
the triangle part of each hanger with the
one parallel to it. Eventually the pattern becomes interconnected both horizontally
as well as vertically. It's like a broken chain of
hangers where each one is connected to the other in a continuous and
flowing pattern. Mindful drawing isn't just
about repeating a shape, it's about the intent
with which you repeat the shape and that is why the mindful drawing
process actually starts before you even
draw on the paper. It all starts with
our intention, so before you start your
pattern for the day, think about the reason
you are doing it. Remind yourself
that you are doing it to practice meditation and mindfulness and not to create a masterpiece
or to prove something. When your intention ranges
from drawing for relaxation, to slowing down, to having fun, or to just do something which
doesn't involve screen, then you will find it easier
to detach yourself from the final outcome even if the pattern doesn't
turn out as expected. Because of your intention, you will be able to find
meaning and joy in the process. One of the things that I love about creating
patterns like this is the sense of exploration and creativity
that it allows for. Once I have established the
basic motif and layout, I can experiment with different variations
by adding details. So that is why in
this last step, I have decided to
add a little weight, a slight curve on the
sides of each hanger. By doing that, I'm
transforming it from the basic metal hanger to a
plastic or a wooden hanger. I'm not doing an
exact representation, I'm just adding
some more details based on what I felt like doing. You can decide the look that you want to give
to your hangers. You know one of the
best parts of drawing stylized version of objects is that once you take
the basic inspiration, once you know what to draw, you can take it in any
direction you want. You can add details based
on what you are seeing or you can tweak the details
as per your own preference, there is no fixed format. Along with practicing
meditation, this is also the time to
explore your creativity. Experiment with the objects as well as the pattern layouts. The use of negative space is also an important
part of any design. In this pattern, by leaving space
between the hangers, we created a sense of balance and allowed
the eyes to rest. However, too much
negative space can make the design feel
empty and unbalanced. That is why, by adding little line weight to
each and every hanger, we have been able
to reduce some of the negative space and create
a more cohesive design. I keep adding the details
and once it is finished, it looks like this. The interesting thing here is, that when we started
the pattern, it was flowing from
one direction, but now it is flowing
from the other direction. It is still a diagonal
repeat but the direction has changed and that is quite a
fun revelation, isn't it? I feel that this pattern is a great reminder
that when we view mundane objects with curiosity and draw them without
any expectation, interesting things can happen. Do keep an eye on boring
everyday objects, you might not know what
creative route they might take. Keep exploring, keep drawing just for the sake of drawing, just because you want to do.
7. Day 5 - Keyboard: Find The Rhythm: One of the ways I like to make a pattern is to make
a shape and then to keep building onto
the same shape so that it creates a
pattern of its own. So to do that, the object that I have picked
up today is a keyboard. Now I know it's not a very
common household object, even, we got it recently when my son started his
keyboard lessons. But then even if you don't
have it at your place, at some point or the other, you must have been drawn
towards the rhythm created by this beautiful
musical instrument. So why not create some rhythm in to our daily
practice by creating a pattern inspired by the black and white
keys of the keyboard? Let's get started. Now we're going to
start this pattern by creating some
concentric circles. I'm using a compass
to draw the circles. But if you don't have
one, don't worry. You can use cups and plates of different sizes or even draw
the so-called freehand. It doesn't matter if they
end up a little wonky. It will still work. Once the grid is done, we are going to fill
up the space between each of the circles with lines. As you can see, I'm not making the lines very close
to each other. I'm keeping it a little
loose as I want to have some space between the lines
to create the black keys. I'm trying to keep equal
distance between the lines. Though, if you misjudge
the space at any point, like the way I have done at certain places, then it's okay. This is hand-drawn art. It's okay if some lines end up coming close to each other. You can try for equal
spacing from the next one. The goal here is not perfection, the main intention is to make lines that start
and end properly. As you can see, each of my
lines touches both the ends of the circles and that's
what makes it a proper line or a complete line. Along with making an
intentional line, another thing that will help you focus on the simple process is to make sure that you draw
an odd number of lines. We need to do this so that
when we draw the black keys, there is a possibility
of alternating between two and three keys. So keep filling up
each layer with lines. Lines are one of the
most basic marks. Making repetitive lines
is very therapeutic. Especially in this case, as the lines we are
making a really small, there is no pressure to draw the perfect long straight lines. Without that pressure, it becomes easier to
go with the flow. Once the lines are done, you can go ahead and
outline the circles. Now at this stage, this looks like a
concentric circle pattern filled with lines. So it's time to transform it into a recognizable
keyboard pattern. Now, doing that is
very simple and fun. All we have to do is
create the black keys. I'm making a rectangle around the line and then
slowly filling it in. You can do it this
way or you can use a thicker nib pen and just draw a thicker line to create
the black key look. The thing that you have
to pay attention to at this stage is to maintain the black and white
keys pattern. I'm going to draw two black
keys first and then I will skip one space and then
create three black keys. Then again skip one more line and then add two
more black keys. I'm going to keep repeating this till I reach the endpoint. Quite simple. Now, as you reach the
end of the circle, depending on the number
of lines you have, it might happen that in the end, a set of two black
keys or a set of three black keys are
next to each other. The way it has happened
in my pattern. I have to set up black
keys next to each other. But you know what, it is okay. The goal is to maintain
the alternate rhythm and not to have the
perfect set of keys. The interesting part about
this pattern is that, even though it is quite simple and you have counted the lines, you won't know how it will
unfold till the very end. That is a little element of uncertainty with regard
to how the two and the three black rhythms of the keys will play
out in each round. There will also be times
when you might have space issues and will find it difficult to
draw the black keys. But if you still keep moving
forward with each circle, in spite of the
little imperfections and along with making art, you're also practicing
acceptance towards uncertainty, acceptance towards the mistakes that might happen
during the process. The more you accept, the more you let things unfold without trying to control
each and every move, the more relaxed you start
feeling while creating. The marks the pen meets both good and bad shapes our pattern. And the more accept and
honor this process, the more flow and peace we can invite into our art
meditation practice. And to be clear,
acceptance doesn't mean that you succumb and fall
victim to your circumstances. It means that we shift the energy you bring
into a situation. That shift actually helps
you find the next move, helps you navigate
hardships with ease. At the end of the day, learning, evolving, and creating the
life we desire is a process. Even if we can't always
see the bigger picture, it's important to trust
that we are being guided. So keep enjoying the
process and once done, this is how the pattern looks. This style of pattern
where you keep repeating the base design and growth with each round is a very easy style to create
a meditative pattern. I feel it looks great too. Just like the way the repeating pattern
of black and white keys helps someone find notes
on a piano or a keyboard, the process of making repeat
pattern helps us tune into our inner world and create
a beautiful calm melody. So I hope you enjoyed the
rhythm that we created today, and I look forward to
seeing your creations.
8. Day 6 - Keyhole: Widen Your Gaze: All the objects that
we have drawn till today have some details in them, but that doesn't mean
that you have to restrict yourself
to such objects. You can draw patterns inspired from an
interesting shape too, and that is what we
are going to do today. The object that we're going
to draw is very tiny, but nevertheless, very
important, the keyhole. First thing that we
are going to do is to divide the paper
into several rows. I've already done that here. These rows are two
centimeter each. Now, before starting
the drawing, I'm going to first
approximately mark the start and end
point of each keyhole. I'm doing this so that
there is enough space to draw the keyholes
right till the end. Now, the keyhole is a
fairly simple shape. I'm making the lines first and then joining
it with the curve. You can do it this way
or the other way round. Do what feels
comfortable to you. Now, as I move ahead, I'm making sure to connect
each keyhole with the other, and I'm trying to ensure that they all are fairly same size. Now, I could have divided the paper into vertical columns, I need a much more detailed grid for more uniform shapes, but I went ahead with just the basic row because I want it to retain
the freehand field. But yes, if you want you can make a detailed
grid and that way, all the key holes that
you draw will be exactly the same in height
as well as width. Now, I understand the drawing directly from open
hand is challenging. There are times when
you end up making some mistakes or
misplacing the marks. But then when the
intention is to relax, the whole attitude towards
the mistakes changes. Rather than thinking
that drawing directly from pen
is challenging, you start looking it as a way to bring yourself into
the present moment. Every time I draw with pen, I automatically end
up drawing slowly. I try not to rush
through the process, and that just helps
me in being more mindful of each and every
mark that I'm making. Now this is going
to be an all over pattern with a two way layout, which means that all
the motifs will be distributed in an even and
somewhat dense layout, and the pattern can be viewed
best from two directions. That is why now
for the next row, I'm going to invert the shape. The shape fits really
well when inverted, and it also gives more interest to a regular block
repeat pattern. Another advantage of
inverting the shape is that it gets easier
to place the motif. I just have to
follow the cues from the shape above and
create the keyhole. That is why in this step, instead of focusing
on where to draw, I'm able to focus more on how I'm moving
the pen on paper. I start to feel more relaxed
and I slowly settle into the rhythm of repeating the
motif one after the other. I tried to be very gentle and compassionate with myself
when I draw to meditate. I don't always like the way
each drawing comes out, and it might happen
with you too. But do remember that
mindful drawings you make are for you
and your progress. It is not something
that you have to always share with others. I mean, you can if you want to, but that's not the point. At the end of the day, it's a safe place for you
to connect to yourself, to your art, and
practice mindfulness, and even build your skills as an artist if that's
what you want. Challenge yourself to
finish the whole page. Even if you don't like
where it is going, you will always learn something, it's part of the process. The more you practice making
different kinds of marks, the more you will find what works for you and what doesn't. Keep alternating the shape, move slowly and after a while, you will have a page filled
with interconnected keyholes. Now, in this next step, we are going to reap the
benefits of the first step. What that means is that
after the drawing part, it's time to relax even further, and we will do that by
filling in the motif. It's like coloring,
and coloring is always fun and
relaxing, isn't it? Now, I'm using the same pen as before because I want this
to be a slow process, but you can use a
bigger-sized pen, something like a sharpie if you want to fill
your shapes faster. My first row is done. Now when it comes to
filling the shapes, there are two directions
that you can take. The first one is
that you can keep filling in each shape as it is, or the other one is to
alternate the coloring part, and that's what I'm
going to do here. In the second row, instead of filling
in the keyhole, I will fill in the background. As I said before,
this is just one of the ways to play around
with this pattern. I wanted to create some
unpredictability in this pattern. By inverting the shape and alternating the coloring space, I feel I have been
able to do that. In most artwork, the
subject or focus of a picture is called
the positive space, while the areas surrounding the main subject are known
as the negative space. In this pattern, the keyhole
is the positive shape. But then, I went ahead and
filled in the negative space in every alternate row to
create some optical illusion. This is just one of
the ways to play with positive and
negative space. Now, spaces both positive and negative ties your
design together. The intelligent use of space
can tell a harmonious, coherent, or a complete story. Now, just like the
way understanding of positive and negative spaces are essential for a
harmonious composition, and understanding
of certainty and uncertainty is essential
for a harmonious life. It is important to realize
that we don't have the keys to solve each and
every problem that we face. A lot of things are
out of our control, and that is why it is important
to learn to distinguish between the solvable
and unsolvable worries, and meditation is
one of the ways to become more at ease
with uncertainty. When we let go of what
we can't control, we can focus on what's
actually in front of us. Life can flow with a
little more ease this way. The doors which can be
opened and which can't be opened can co-exist together without adding onto the stress. Continue filling
in your pattern. Keep alternating the color, and eventually you will have something that looks like this. I really like the play of positive and negative
space in this pattern. It's interesting to see the way the negative space has acquired a shape of its own
in this pattern. Meditation isn't the key
to unlock all the answers. Rather, it is a slow and
long-term process that helps you widen your gaze and gives you a
clearer perspective. It helps you see
the doors that can be opened and eases you into accepting the
unknown so that you can take care of your mental
and emotional well-being. Art meditation is one
of the ways to do that. I hope that as we move
ahead on this journey, you keep discovering
ease and peace. That's it for Day 6.
See you tomorrow.
9. Day 7 - Yarn Ball: Let Go Of Limitations: Once you start practicing
art meditation on a daily basis,
limiting beliefs like, I'm not creative, I cannot draw, I'm not good at it, start loosening
that hold on you. The more you draw, the less intimidating the
inner critic becomes. Gradually with
time, the voice of the inner critic
starts fading away and you are able to replace that space with positive
and uplifting parts. To capture the gradual fading
away of the inner critic, today we are going to draw
a gradient style pattern. The object that
we're going to draw today is a very fun, yarn ball. The basic idea here
is that I want to gradually decrease the
size of the yarn ball. I'm going to sketch everything
first with a pencil. I'm doing so because
in this pattern, the size of the yarn balls
is really important. Each row should have similar
size circles because only then we can achieve
the size gradient effect. The circles don't
have to be perfect. After all, even a yarn ball
is not a perfect circle. All we're looking for in
this pattern is consistency. This first row has
four circuits, and this is going to be the
row for the biggest circles. Based on the size of your paper, you can decide the number of circles you can please
in the first row. After the first set
of circles are done, the most important thing
we have to keep in mind is to decrease the size of
the motif with every row. Now with regards to placement, you can follow two directions. Option 1 is to please
the circles in a line. If the first line
has four circles, then the rest will
have four too. Just that the size will
decrease with every row. Now option 2 is to offset the
placement of the circles. That's what I'm doing here. I'm placing the
circles in the gaps, and that is why I
keep alternating between four and three circles. I'm going to keep doing this till I reach the
top of the page. This is how it looks once done. As I moved ahead, the space between the motifs increased and thus
from a type pattern, it has gradually become
a loose pattern. I will now finalize everything by going
over with a fine liner. Once that is done, I will start transforming these
circles into yarn balls. I'm going to start by
drawing curved lines in pairs to indicate the yarn
wrapped around the ball. Some set of lines will overlap, some will go under. It's a fun and low
pressure process. The only thing I'm
paying attention here, is the direction of the lines. I want to get that yarn ball
effect, and to do that, I keep changing the direction of the lines variable possible. Even in the species where I didn't make the pair
of lines first, I'm randomly filling
in the lines along with being conscious
about their direction. It's a very little thing, but that's what will make
the pattern interesting, and will also keep me
engaged in the process. Good. The first yarn ball is done. Now let's move on
to the second one. I'm going to follow the
same approach here too. But for this one, I'm intentionally making
sure that my basic set of lines flow in a
different direction compared to the first one. That is why for this circle, I'm starting from
the other side. The concept is same, but I'm just playing around
with the direction to bring some variations
in the yarn balls. Now I'm making the lines
quite close to each other because I like
this tight look. You do what you enjoy doing. You can keep more distance
between the lines, or you can even
make heavier lines. Either way, it will look
like a ball of yarn. The interesting thing
about this pattern is that even if some
lines are crammed up or a are wonky or the distance
between them values at certain places, it
absolutely works. After all, that's how
the yarn ball is. There were so many things
that we used to do as kids that would fill us
with joy and excitement. But very few of us carry these practices on
into adulthood. One such practice is
drawing, for drawing sake. Just letting the
pencil glide across the page without the need to create something exceptional. We stop these things
because as we grow old, we go from knowing
ourselves as a field of infinite possibilities
to limited identities. We begin to internalize our
outdoor experiences and start creating stories about ourselves around
these limitations. We shift from thinking
anything is possible to, I'm not good enough. Now when we meditate, these limiting beliefs
don't go away instantly. But with regular practice, we learn to create
a distance between ourselves and these thoughts. We understand that the
limiting beliefs don't own us. Just like any other
thoughts or sensation, it arises, persist for a
time and then fades away. Just like the way
the yarn balls have started feeding away
in this pattern. As you make this pattern, anytime a thought pops
up be it related to the drawing that you are
making or something else, don't resist the thought. Let it come, just
don't engage with it. Get back to your drawing, look at the marks
that you are making. Remind yourself about the
task in front of you. It will not be easy and will take time to get
into this habit. But with regular practice, you will start getting better at these thoughts will come and go. It's a continuous cycle, but you will learn to witness them rather
than react to them. That can make a whole
lot of difference to your creativity,
to your well-being. I'm working on the
smaller yarns now, and these don't require
a lot of detailing. Just few curved lines and you
can get the yarn ball look. Here's how the
finished piece looks. I think this pattern is a good example of how
a simple object can be used to make patterns
by just changing the skill.. Next time, when you sit to draw patterns, think about how you
can play around with the scale and create
some variations. The beauty of meditation is that it helps us loosen our grip over labels and judgments that we have about ourselves
as well as others. That's why let's keep
moving on this journey. Let's keep filling
up our page with patterns so that
we can keep seeing things the way they are rather than the way
we think they are.
10. Day 8 - Shuttlecock: Embrace Play: The object that we have under spotlight
today is a shuttlecock. Now, I'm not into sports, but the only sport that
I ever enjoyed playing, or I play even sometimes
now is badminton. The badminton racket has
lot of interesting details and I think it will be
quite a fun object to draw. But I wanted to draw
a different shape and that is why the shuttlecock
seemed quite a good idea. Let's begin the game. This is going to be an
all over random pattern. I'm going to play around
with the direction as well as the size
of the shuttlecocks. Also, we are not making
a full bleed pattern, which means we are
going to leave a tiny border all the way
around the edge of the paper. I'm going to start by sketching. At this stage, I'm only drawing the basic shape
of a shuttlecock. I'm focusing on
drawing the skirt, as well as the coke part and I will add all the
details later. I'm starting from one
corner and then we'll keep building the motif
around the first one. You can start from anywhere
you feel like and then as you go you can figure out where to fit the next object. You just have to
ensure that you place the motif the way it is
pleasing to your eyes. Now, there are two things
that you can keep in mind while making a well-balanced
random pattern. The first one is to
ensure that you have equal white space
between each motif. You can place them close
to each other or far, that's absolutely up to you. What's important is that you maintain that distance
throughout the pattern. The next thing that
you can do is to ensure that the motif
doesn't form a line. There should be
some variation in the starting point or the
size or the direction, otherwise, it will not look
like a random pattern. This is a little tricky shape and I'm also drawing
it quite big. That is why fitting it all
together does get challenging. But then I treat it like
a puzzle and that shifts this basic composition step into a fun process instead
of a challenging one. If at anytime you are confused
as to where to draw next, simply take a pause. Look at the paper
from all the angles, rotate the pitch to
get a better sense of which space you
need to fill in first. See which spaces are more
blank than the other, and then decide
where to draw next. Now that the basic
layout is done, it's time to add the details. I'm starting with
the small triangles. The curved line we made in the beginning comes
very handy here. From this step on-wards, you can decide the level of details you want to add
in the shuttlecock. I'm taking inspiration from the plastic shuttlecock
I have at home. That's why I'm adding two
steps of curved lines in the skirt part and
one in the **** part. As always, I'm not aiming
for exact representation and that's why I have increased the width
of the curved lines. I'm going to fill in all of
them in the later stages, for now, I'm just drawing the shapes and
building the motif. Planning and thinking
part is over and now it's time for
my favorite part, which is to add
the tiny details. I'm going to first draw
vertical lines and then horizontal lines to
create the shuttle skirt. The first set of
vertical lines are done, now I need to add more lines in the skirt part to
create tiny squares. For this step, I'm going
to change the pen. I'm using a 0.3 pen to do this. I'm going to first add
vertical lines in-between the existing lines and
then horizontal ones. I'm drawing the lines
very close to each other to get those tiny squares. I think this has
come out quite well. The size of the squares may
not exactly be the same, but it doesn't matter. I think I've
captured the feel of the shuttlecock and
that's what is important. Now this part is going
to be very relaxing, so don't rush through it, take your time to
draw the lines. You don't have to draw them
as close as I am drawing, you can decide the parameters that you are comfortable
working with. You can get as
creative as you want and bring as many variations
in the shuttlecock. I understand that creating
something without any expectations is
not an easy task. Throughout much of our lives, we relate to actions
with outcomes. But meditation added score is an activity that
is non-striving. The only aim is to be
in the present moment. There is no other goal. Now, of course, with regular
art meditation practice, you start experiencing
lower stress level, better understanding
of emotions, better sleep, improvement in your drawing
practice, and so on. But all of these other
good side-effects, the practice itself is
all about letting go of any need to try and get
somewhere or achieve something. Once you accept that, once you realize that there
is no pressure to perform, it is a very liberating
feeling and here's a secret. When you create from that
expectation free zone, your creativity flows without any obstacles, it becomes play. The pattern is almost done. I just have one
more thing to do. I need to fill in the curved
lines to complete the motif. Because this is coloring, this is one of the most simplest and relaxing things to do. Once done, this is how
the pattern looks. I like the way we broke down
the shuttlecock motif in several small steps and
designed this pattern. Also the fun part about this one is that we have got
these big motifs with tiny details in them and this contrast makes it a
really interesting pattern. I hope you enjoyed this pattern. For me, it was absolutely fun. Not only did I enjoy
making the shape, but I also enjoy making random patterns so it
was quite a win-win. Do remember that when you
embrace experimentation, when you embrace play, you start making the shift from, I can't do this to
let me try this. Just the simple act of making marks, exploring
different objects, doing your own interpretations
without thinking about the good or the bad becomes
a joyful experience. Keep sharing your experiences in the project gallery and
let's move on to Day 9.
11. Day 9 - Comb: Brush Off Judgement: Hair brushes have been around
for thousands of years. But then no matter
the shape of style, one thing that has
remained consistent is the tooth and that in
drawing themes means lines. Now, any shape or
object that gives us the opportunity to draw
many lines should be drawn. Now, just like the way that our various varieties of
combs and hair brushes, there are various ways
you can do this pattern. Let me show you one
of the ways to do it. Then based on that, you can decide how to use your favorite hairbrush as part of your daily
pattern design. This one is going to be a non-directional
block repeat pattern. But instead of drawing the
exact motif in each block, I will invert the
direction in the next row. Let me show you what I mean. I've already made
the basic grid. I have divided the
paper into 20 columns. They are around
2.5-centimeter width-wise. I have kept a small
border on each side, and I've also kept a little
distance between each column. You can decide the size of your column based on
the size of your paper. Now the next step
here is to draw the basic comb structure
in each of these columns. The comb that I'm taking inspiration from is
called the rat-tail. It's a very fine-toothed comb
with a very thin handle. Now the first column will
have the tooth part of the comb and the column below it will have
the handle part. In the upper column, I've added lines on
all the three sides of the rectangle to
indicate the shaft part. The vertical line is slightly thicker as that's
how it is in a comb. Now when it comes to the
handle part of the comb, I'm drawing a slight curve
from the endpoint of the rectangle and
then merging it with the straight line
of the next column. This whole drawing part
very much depends on the hair brush or comb you
are taking inspiration from. You can just add a
straight line or a slightly thicker line to
indicate the handle part. You can have combs
with bigger width and a heavy handle and thus
bigger columns to draw them. Or you can follow something
from my patterns, few elements based
on what you like to draw and then just
mix and match. Now I want to invert the comb
and fit two combs together. That is why in the second row, I'm making the rectangle
on the other side. I'm keeping a small
distance between each of the rectangles as that space will differentiate
the two combs. It might seem a
little confusing now, but as we move ahead
in the pattern, you will get to see how
everything comes out. I'm repeating the same
process in the next column 2, I'm following an
alternate rhythm. First row has rectangle
on the left side and the second row has
rectangles on the right side. The third row and forth row will also follow the same sequence. The process of making this grid may feel a little
labor-intensive. But once you are done and
start adding the lines, I can assure you it
will all be worth it. My grid is done
and in this step, I will finish the base
structure of the comb. I'm just filling in the
three sides of the comb, which will become the shaft, the part of the comb
that holds the teeth. Because of all the detailing, we did in the previous step, this step becomes quite simple. I just need to go
over all the columns and pay attention
on coloring it. If I'm not happy with the
line width at certain areas, I make sure to change
it at this stage. Even though there
is a fair amount of refining in this step, it is all very relaxing too, because of the coloring part. I'm also adding a little
weight to the handle. Now this is a stylized
version of a rat-tail comb. I have drawn some
things as it is, while some I have changed. Instead of a heavier handle, I have added only
a slight curve. I've done that because I want both the combs
to fit together. I'm going to continue doing
this in all the columns. The basic structure is
ready and now it's time to add a lot of lines and
make this into a comb. Drawing-wise, this
part is super easy. All I have to do is
make small lines. The grid that I made,
in the beginning, is helping me to maintain
the end point of the lines. Instead of thinking what
to draw and where to draw, I just have to
focus on the lines. Now, anytime while
drawing a line touches with another one or the distance between
the lines changes. I instantly realized that
I wasn't fully aware. I gently bring myself
back to the paper, to the pen and start
creating again. What I love about
combs and hair brushes is that it allows us to play
with lines and density. You can make really thin lines like the way I'm doing here. Or you can draw
really thick lines. You can play around with
the distance between them and come with
different variations. You can even draw
different types of lines, maybe a zigzag or a dotted
line or something else. It's your pattern, it's
your interpretation. Take a route that you
find fun and interesting. Now that you have been doing
art meditation for a while, you might be tempted to judge each odd meditation
practice as good or bad, you might have liked some end results more than the other, which is absolutely okay. But then try not to judge the patterns solely on the basis of how the
end result looks. Instead, if you want to
analyze your progress, then take a stock of how
the process makes you feel. Have you noticed any
changes in your mood? Have you noticed new things
about your drawing style? Do you feel more relaxed when you approach
the blank page? How do you react when
you make mistakes? Honestly, there is no
right or wrong answer for all of these questions. The more you draw, the more you will experience and what you feel
is your answer. This is how our
ninth-day pattern looks. I absolutely loved the
way it turned out. I feel because of the
numerous varieties of combs out there, this is just one
of the many ways that this object can be used. Do experiment with
this motif and I'm sure it will lead to some
really interesting results. The art of mindful drawing is a wonderful journey
to embark on. Cherish every moment and be proud of every
drawing that you made, regardless of how
technically good it may be. When you look at the end result. Instead of looking
at the mistakes, see the effort that you took, and notice how the
process made you feel. If you want, you can also share your experiences and your
process in the project section.
12. Day 10 - Nails: Beauty In Mundane: Meditation or any other mental well-being
practices may seem small, but when done regularly, they help us hold
our lives together. Similarly, the object
that we're going to draw today is very small. It's mostly hidden, but it is the one that actually
holds our pieces together. And it's none other
than the humble nail. I'm very excited to
draw this. Let's start. In most of the patterns
we did till now, we draw the object from
only one perspective. For this pattern, I'm going to incorporate the
nail in two ways. I want to draw the
nail part as well as showcase the flattened
head part of the nail. That's why in each of these
circles in the center, I'm going to draw the
flattened head of the nail. Then several needs
radiating out from that. I'm going for a floral look. We'll see how it turns out. For now, I'm dividing each
circle in several parts. Each of these lines will later help and
placing the needs. Before starting the pattern, I recommend making some
grids on a rough paper to figure out the layout and the number of circles
you want to draw. You can also make one big circle and do only one set
of nail arrangement. The choice is yours. Now that we have the
guidelines ready, it's time to bring out our fine liners and
draw some nails. A basic shape of a
nail is very simple. I'm starting with
the small triangle to represent the
tip of the nail. To start, I'm making two diagonal lines to show
the body of the nail. Then I'm ending the lines by making two small slanting lines and then joining
them together with a curve to showcase the
head part of the nail. I've made the glove slightly thicker to highlight
the flattened part. This nail is called
the drywall nail. It's not an exact
representation, but it's close to one. Like so many other objects
we have drawn in this class, there are several varieties
of nails out there. In this first step, I'm making the slightly
thicker version of nails. But you can follow what I am doing or
checkout the nails you have at home or online and
draw them however you like. While doing research,
I found that there are at least 30 different
varieties of nails. That just means that you can do so much with
this tiny object. You can pick up the V-shaped
from one pair of nail and the details from the other
and create your own version. Now the guidelines
that we made in the first step are
a big help here. They helped me decide the start and end
point of the nail. That just reduces the
decision-making part. I can focus more
on the lines and how everything is
connecting to each other, rather than thinking where
to make the next to nail. In this first step, my goal is to just draw
the body of the nail. I will add the details in
each of these needs later. Now, I do it this way because I don't like to switch
between the actions. The more I repeat a
particular movement, the more the brain
gets familiar with it, and I end up feeling at ease. This first step is done. But as you can see, there's lots of
empty space here. My plan is to draw some more
nails between these needs. But this time I will not
draw the thick nails. Rather, I will meet
the common nail, which is nothing but
a thin basic nail. This one will just have a
nail tip two parallel lines, and a thin horizontal
line in the end. I'm going to fill it up. I'm doing this because I feel it looks more
realistic that way. Also, the black thin nails will provide a good contrast
in the pattern. Some of my meals aren't
coming out the way I wanted. I wanted to make
purely thin nails. But you know what? It's okay. I'm doing this free
hand and I'm enjoying the process of drawing these nails and
then coloring them. Perfection is not
exactly my aim here. If I wanted that perfect look, I would have first sketched out each nail and then draw over it. With time, I've
learned to detach myself with how a
pattern should look. Rather, I focus on how
the pattern made me feel. I think adding these nails
has been a good idea. Each of the circles
look complete now. I just realized that
if you draw a lot of common nails clustered
together in a circle, it will give the look of
a wild dandelion flower. You can try that too. I think it would be quite an interesting
pattern exploration. Now in this stage, I'm going
to do my favorite thing, which is to add details. Now some varieties
of meals have rings similar to the rings that
screws have around them. That's what I'm going to do now. I'm going to make lines and
then join them with a curve. Now, instead of making
just landing lines, I'm starting with a glove from outside of
the nail and then doing the line and then again
ending with a small curve. It's a very little thing. But then it helps in bringing out the texture of the nail. This is just one of the ways to draw the rings on the nail. You can add slanting lines or maybe curved lines or anything else that strikes
your imagination. Either way, it will
resemble a nail. It is such a recognizable shape that once you are done
with the base shape, you can get as realistic or
as creative with the details. In the end, it will
still look like a nail. You can try out some options on a rough paper first and then decide the ones
that you are most comfortable with or
excited to draw. Play around with the space between the rings
or the width or the angle of the curve to
come up with different loops. As you move ahead in your
daily drawing practice, you will start noticing
the marks that you like, as well as the marks
that you don't like. If you slow down enough
and often than you will start noticing and listening
to your intuition. First, it will be
related to drawing, and later it will
lead to other areas. That just one more benefit of using art as a
medium to meditate. It's a safe and personal
way to let go of the surface thoughts and
lean into your intuition. When you active thinking
mind has something simple and repetitive to focus
its attention on, it starts becoming quiet. The thoughts I never turned off because that's not possible. But then their volume
starts lowering down. That's where the sound of the intuitive inner voice
starts becoming clearer. Many times when I feel lost and cannot come up
with a solution. I don't do art meditation
at the end of the process I either come up with
a solution or I realize that I don't
have a solution. Either way I feel relaxed
and get a grip on what's happening around me
rather than feeling lost. Don't shy away from repetition
and simple movements. They might look simple, and even test your
patients in the beginning, but then slowly they will lead you to some more
interesting discoveries. The rings are done and
now I'm going to draw the head part of the nail in
the center of each circle. Again, there are various
ways to draw this. I'm going to make a
rectangle and then fill up the rest of
the space around it. I will play with the direction
of this rectangle in each of the circle to bring
out a little variation. I also think that there is some negative space
between all the circles. I'm planning to add
some more nail heads, just like the way I'm doing
right now in the empty space. This is how the pattern looks after adding all the elements. I think this pattern was quite different from the
ones we did before. Even if the inspiration was one. We used it in three
different ways. That just opens up
new possibilities of making patterns
from everyday objects. Well, I never
thought that I would ever make a pattern
inspired from nails. But I'm so glad that this tiny simple object became a part of
this drawing series. Every time I look
at the pattern, it reminds me that
when we slow down, inspiration can be found
even when it's hidden. That's pretty much one of the biggest takeaways
from this class.
13. Final Thoughts: We have made it.
Thank you so much for spending this time with
me and taking this class. I hope this
experience has helped you break through
any creative blocks, caused by overthinking, and that you're feeling inspired to keep
observing the world around you through the medium
of mindful pattern design. You know what? This is
just the beginning. I'm very excited
to tell you that this class is the first part
of a three part series. Consider this as Season 1, and get ready for
more inspiration, more creativity, and more fun. With every class in this series, we will continue to
push the boundaries of what is possible
in the world of mindful pattern design and keep finding new ways to fill
up our sketchbooks. Stay tuned for Season 2 by following me here on Skillshare. Do remember, to upload at
least some of the patterns that you created during
this daily exploration, so that we all can see them
and be inspired by them. If you have any questions
or suggestions, then please leave them in
the discussion section. Your feedback means
the world to me, and it also helps others
to discover this class. Please do consider
leaving a review. If you'd like to stay
connected on a regular basis, then you can follow me on
YouTube as well as Instagram. Once again, thank you so
much for taking this class. I hope you keep finding joy and relaxation in this
mindful drawing practice. Take care and I'll see you soon.
 Neha Modi, Mindful Artist & Educator