Transcripts
1. Introduction: One of the biggest struggle of any artist is drawing cats. I think we can agree on that. It is hard and intimidating. When I was a beginner artists, I tend to avoid drawing them
in every piece of artwork, but at a point, I just
have to draw them. Decided to look at
it differently. It does just like
any other object. So I have to observe it. Well, yes, practice
drawing it up. After several 100
thousand sketches later. I got some skills
that I would love to share with you in this class. Hi, my name is Alexandra, aka the art mother. I'm an artist, a
professional art teacher, mother and illustrator
with a superpower of making complicated our
topics easy for beginners. In this class, I'm going
to teach you how to draw and illustrate hands
in the easiest way. The tension, this is not an anatomy class and it will
definitely not be boring. We will take advantage of the freedom of the illustration, and by following the rules, we will create hats, fit or illustration style, and we will have so
much fun with it. We will start with learning
the construction of the hand and assemble
way of drawing them. Then we will practice
drawing hands in different poses like
hand from the side, a fist, and we post fingers. After several sketches,
we will be ready to customize the drawings
to our styles, then learn about skin tones. Last but not least, we will create an
illustration of a hand. And as I love tattoos, I will show you how
to add them to add even more style and
uniqueness to your artwork. I'm going to use Procreate
for all of this, but you are free
to use software or media that you would
love to work with. The glass is a perfect
fit for beginners. And to anyone who feels intimidated when it
comes to drawing cats. What's your need
for this class is a working knowledge of the media that you are going to work when the little
sparkle to be ready to demystify the topic
of drawing hands. The class comes with
some cool resources. For example, worksheets,
a completely new brush set designed by me and
the color palette. After finishing this class, you will be more
confident when you are adding hands to your artworks. And what's more, you will have a cool illustration that you can print as a wall art to
remind you your new skill. So are you ready to draw hands? If yes. See you
inside the class?
2. About The Class: Welcome to the class. I'm super happy to have
you here in this video, I'm going to talk to you
about the class resources, the class structure,
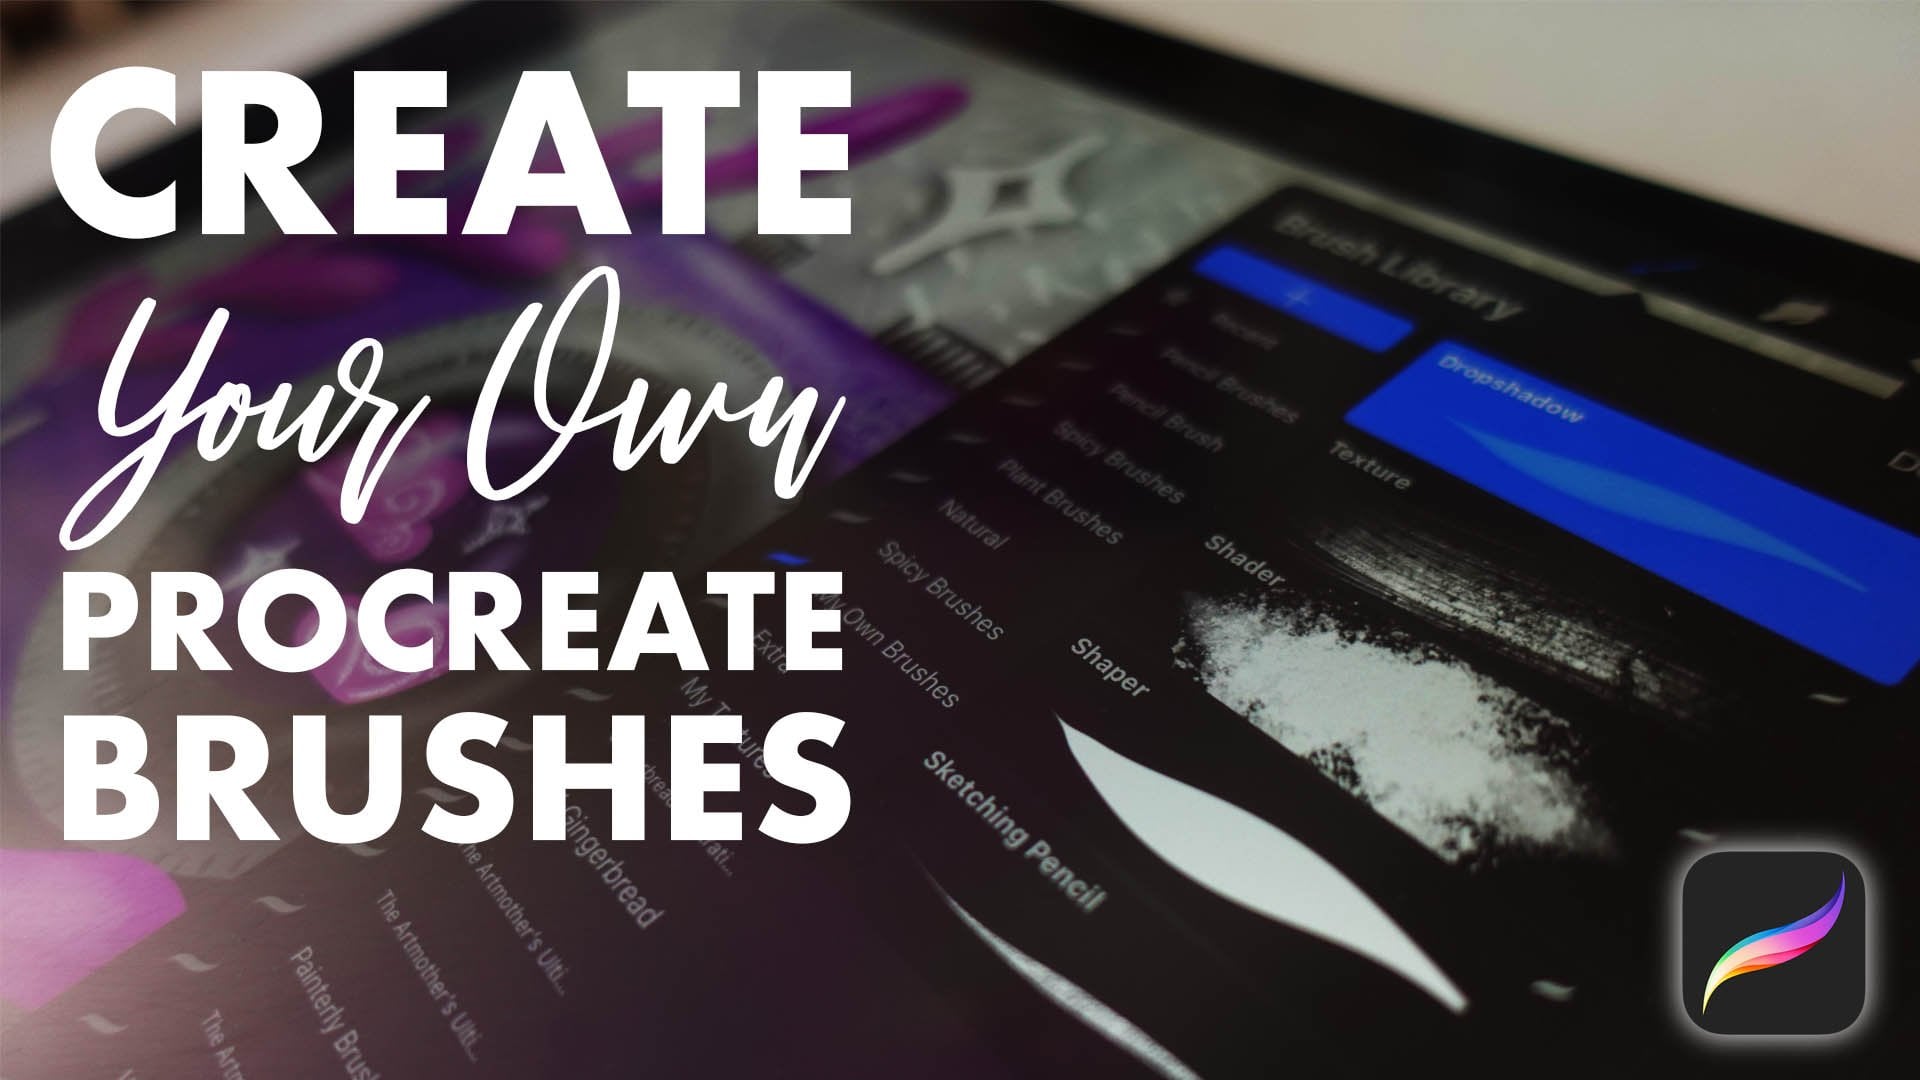
and the class project. So let's just start with the class resources
we discussed. You will get worksheets, a color palette, and a completely new brush set that I have designed for this class. After you have downloaded
all their resources, I'll just check out the
structure of the class. So we're going to learn about the
construction of the hand. Then we're going to
do drawing exercises, drawing a simple hand, drawing hands imposes, then
learn about sterilization, how to create a color palette. And then we're going to create a final artwork in this class, we are going to create an
illustration of a hand. It can be any pose and made from any reference
photo of your own hand. You can use pictures that I am having Endo videos and in
the worksheets as well. All the worksheets are
designed to weigh that. I have. For example, this one, I have prepared
it in other ones, but you can turn off the
example and we are going to work together in real time
with any color palette. You will have this skin
tones that you can see here. And all the colors that we are going to use
during the exercises, you are free to change them
or create different ones, obviously with the
skin tones as well. I will show you how to
choose colors for the skin. Then about the brushes. There are five brushes. There was a sketching
pencil that you can use for this catching part. There's a drop shadow
that we will use in the illustration part. And there's a shadow, a shaper, and a detailed brush
for freckles to create some cool details on the skin that is absolutely
optional to use. Alright, I think I covered everything that you
need for to start. See you in the next video, where we're going to learn about the construction of the hand.
3. The Construction of The Hand : In this video, we
are going to learn about the construction
of the hand. So let's see. To demonstrate you the
construction of the hand, I'm going to use a
picture of my own hand. As I'm not really
going to talk about some general rules because I love to rely on my
own observations. And that really
helps me a lot with trusting my own
experience of reality. This trust adds so much to my personal
illustration style. So I really recommend
you to start observing your environment
as an everyday practice. So to start with it, you can take a photo of your
own hand and use that as a reference in the
upcoming exercises or a later after the class. And you are also free to use my own drawings of
my hands and also you can check on
your own hand image. If my observations
fit your hands, you might find something works
differently on your hand. Alright? Now, before I start to explain the construction
of the hand, I will love you to create an
intuitive sketch off a hand. Even mind that you can see now here and really
do it so that you can compare your
intuitive drawing with your observational drawing. And at the end of this exercise, we will compare them. And we will see if
it really helps. When you go here to the layers, you will see an
intuitive sketch layer and you can just turn it on. Then you can select black
and from the brush set, choose the sketching
pencil and try it out. And now quickly just
sketch the hand. I will do it without too
much observation, okay? Okay, not bad, but
not perfect as well. If I knew already with
this intuitives catch, make sure to turn off this layer so that it doesn't distract us. Back to the hand. Drawing the hand is challenging because
it is very complex. So there are 27 bones in the hand and it can move
in, in finite ways. It can appear in any angle. And most importantly,
it communicates. So it is really important from a storytelling side
of illustration. So let's just start
with the parts of the hand that we can
differentiate just super quickly. I'm just going to create a new
layer and choose this pink to just select the areas or parts that we
can differentiate. So let's start at first. We have the palm, right? I don't know how he's
called from the other side, but basically this is
the base of the hand. Then we have the fingers
and we have joints. Five in the poll here. Then the other
extend the fingers. We can do wide stem by them. Then we have fleshy parts that
we can see when they move. Can you see this part and
this part and this part? I will just select
them like this. So these are the fleshy parts. Then we have nails, right? And wrinkles that are very important at this part's, right? And we have these lines of the poem we can tell
the future from right? Okay, So these are
the parts that we can differentiate
into hand and a which makes anything look like a hand when it's added
to where we have five. When kids draw, they just draw. Oops. They just draw like this. And it can be a hand, right? Then later on the kid
starts to do this, maybe even five fingers, but it's still hand and then it just improves by
time and practice. All these, we can build
up a hand, alright, so we need to simplify this
into something that we can use as a construction to build up a hand in
our drawing, right? And when observing
anything, any objects, the best is to
start with finding the basic geometric shapes and complex forms of the object. The most basic geometric
shapes, our circle, triangle, square,
rectangle, trapeze. So let's see which
ones we can find. In my hand. I will turn off this layer
and create a new one. I already have the
construction of the hand here, but I will create it from scratch so that you
see how it builds up. I will choose the blue from here and keep this
catching puzzle. So we have a trapeze. As you can see. We can start from
here, the wrist, and now to the finger, I can draw another line that
can be straight like this. And let's just create a trapeze that will give
the base for hands. Okay? So we have the trapeze, and now I can see a
triangle here like this. What about this part? Now we have a circle, but we can have a
half circle as well. So this is something like this. Then we have the joins are
circles that we can place into this combination of
basic geometric shapes. I will place these
circles as joins here. I will draw lines
for the fingers. And we can divide them to three even parts
for the joints. And wallah, there's a
general rule that's the middle finger is
exactly as big as the poll. It might be true for some
and not true for the others. Like it is really, I think person's specific. Someone with very short fingers might not how this
rule-like, true. It also depends on age
and things like that. So I really love to
trust my observations. Now what I can observe
at least hand as well, that there is this nice curve defining the hate
of the fingers. Also, it is very common that the middle finger
is the highest, then comes to index finger, finger than the ring
finger and the pinky. And we have the thumb a little bit as an outsider
from this family. Alright, so this applies
to this one as well. I will just turn off
this drawing and turn on the original construction
of the hand. Now, you can draw this
and I recommend you to go find a picture of your
hand or create a picture of your hand and
just find a trapeze, the triangle to half
circle the joints in it. This finger lines and
seed curve that you have, for example, on your hands. Now that we have these
construction drawing, see you in the next video
where we are going to use it to draw a hand. So see you in the next video.
4. Drawing a Simple Hand: I know this was a
lot, but don't vary. After finishing this class. It will come automatically
when you are drawing hands. So let's get back to drawing. As you can see with this
construction drawing, we can create a drawing
of a hand very easily. So in this video we are
going to draw a simple hand. Using this construction drawing. I will go to layers and
turn off the example, but only this cache. So let's keep the
construction drawing here. I will just create a new
layer above everything. Choose black and still
keep the sketching pencil. So now when I'm drawing a hand, placing the wrist first
is helping a lot. So these are just two lines. And as I have deconstruction
drawing here, I know where they go. When drawing this
hand right now, keep your eye on the
reference image. So it will help you a lot
to find the perfect angles. Alright, now I'm going to
continue with this line. It is pretty easy. I have the construction drawing
here so I can follow it. It doesn't matter if you
don't follow it 100%. It is practice. So with the fingers it will be a little bit more tricky
because as you can see, it has kind of a curve. So I will just keep observing and tried to draw the finger. Now you might not see
in the reference image, but you can turn off
in the worksheet, this construction drawing
to see that here. As the pinky ends, there is this line.
Can you see that? This is how the other
finger starts and it goes on at this finger as
well and this finger as well. And they unlike bit
more simply here, that also here is
a line as well. So observing will
help you with this. I will turn this
construction drawing back. So when I'm drawing, I will start with
this line, okay? So I'm not doing
fingers like this. Okay? But there is this line of
starting of the other finger. So I will go again following
this construction drawings around going up to this
curve and then going down. I am now not really
taking a concentration. This is where we deform, it is on my fingers. But the point is two. To look for these lines
and really pay attention. Go up to the curve. Down. Again. We have
this finger here. And it goes down here, helps. Down here to the end
of this trapeze. Okay. This is where the fingers, and then again this line
comes down like two disjoint. And this finger starts here. Whoops, this is a bit unnatural, so I'm taking a look at it like this. And connecting these
two lines and wallah, I have the finger, but we will need also
the parts right, where we were talking about
the nails and the wrinkles. So let's just add them. I will add the nails. I think it does. And I will
add two at each joint here, two lines like this. And to hear free here, to free up to react. This is just my way of, of a quick drawing of hints, but we'll delete this. Alright, use this line and
add something to the wrist. I will add a tattoo because I have one
here, as you can see. It will make this drawing
look even better. Flowers, just as my inspiration. And I will turn off the
construction of the hand. And this is my hand. Can you see that? And when I go back to
the intuitive drawing, you want to just turn it on and turn off
the construction. Can you see how different
I will just place it to that one so that
we can compare. Just placed in here. Well, this is an improvement. Can you see that? So yes, using construction, drawing and observation always
helps us to draw hands. Oh, how easy it
would be if we would only need to draw hands
in this position, right? But in most cases, naturally looking and
are pushed into pulses. What we need to do in this case, this is to observe again and use the construction
that we have just learned. In the next three exercises, we are going to draw hands in different poses so that
you can try it out.
5. Drawing a Hand From The Side: Alright, so let's click to the first exercise
where we're going to draw a hand from the side. As you can see, we have the same geometrical
shape combinations. So we have the trapeze, we have the triangle, we have circles
for the joints and these lines for the fingers. In this part we're going
to add shadows as well. So let's just go and do it. Go to the layers and
turn off the example. In this exercise, I'm going
to show you how to find these basic geometric shapes to create this
construction drawing. So I will create a new layer. Choose this blue, and you can
keep the sketching pencil. So I always start it
all with the wrist. So I will just draw, find the angle where it can
be the most like straight. And then here I can see this trapeze and here I can
continue with this sharpies. Yeah, like I am not over complicating this with
free dimensional drawing of forms because this lies
really within observations. It is very useful to practice
different kinds of poses. And then your muscles and hands will just
remember drawing them. So I will, I can see this
triangle here as well. What works for me
when I hand this in an angle and I'm dividing
it to a front and a back. Now I can see this index finger, finger is in the front, so I will just simply
focusing data. Here is disjoint and I'm
dividing this again. Here is this joint as well. Then here is the adjoint of this middle finger
and goals like this. This is the front. And then at the back, I cannot even see this muscle. I will just draw it in a plus. Here is the back. Yeah, unfortunate
thumb is here, right? This is a construction
drawing for me here that I can just duplicate and move
over my blank page. Now I will create a new
layer, choose black, the sketching pencil,
and start drawing. Again. I will start with the wrist. So I can start
drawing it like here. And here. Then I will continue by this line and start
with the front. Start with drawing the
front so the index finger. And it goes until the
top of this trapeze. And a little bit beyond as the thumb starts where this
triangle stars starts. So again, don't forget these lines here and connect. Now you have the front. What I'm going to do now
is to create a new layer below and adds the
other fingers. So that is the background. Doing this when illustrating is very useful because
then you will be, it will be easier
to add shadows to the fingers that are in
the back when painting. So I always keep track
of what's in the front, what's in the back, and
where I will add shadows and within the illustration
process, it will be easier. So I will now just
add this finger. This finger starts here and
it just appears like this. And we can see the pinky here. Well, now let's
add the parts that makes or lines fingers. Okay, So let's add D. The nails. The most perfect ones but k. And you can add the wrinkles. Can see them here. You can see them here. And I will add my little tattoos like this. And I will turn off these,
the construction drawing. And voila, I have this hand, but I can see that this front
hasn't got the best shapes, so I will make it a bit more
smooth like this. Okay? I will add now shadows. So again, create a new
layer below the sketch. I have to grace at the
palate for shadows. I would love to
add deeper shadows to do the things that
are the background. And we also have shadows
at the, at the front. Okay, so let's make these darker gray
sketching pencil that you can make it a bit bigger to the finger that you
cannot even see here and to the pinkie and to this
part here like this. So I'll just fill it and
let's choose a lighter gray. And as you can see, all these fingers have
some shadows here. I will add shadows
just with lines. Also this is in shadow. I will make it a bit bigger. And this part of
the hand is full in shadow and it already
gave me dimension. Can you see that? I just added a little bit of
gray where there is shadow. So these are hand studies. This will help you
to know where, what shapes you will have, where to add shadows, and which elements will
make it look like a hand. Okay, I think you're
already a pro, but let us exercise
a little bit more. See you in the next
video where we're going to draw a face.
6. Drawing a Fist: The point of this exercise is to learn to draw close fingers. So let's just get into it. So in this video we're
going to draw a fist. In the previous one,
we had the hand from the side and now
again from the front, but with the fingers
that are closed. On the example, you
can see that again, found the base geometric
shape combinations. So we have the trapeze to
triangle, the circles. And actually we will not have the long lines now,
but the joints. And that will help us
to draw this hand. I will again turn
up the example. I'll let just find
it in this image. So I will choose again the blue. I have the sketching pencil. Again. Where do we start? We start at the wrist, so I will hopes that is big. So I will just draw a line here. Yeah, This side. Okay. I have the trapeze. Now, I will add this triangle. I have this joint. I will add these joins up
here and it will help me a lot when drawing
these fingers. And I will draw this, this lines for these joints
here we can add these joints, well, we have the
fleshy part here now. We will add that with shadows
and we have the wrinkles. Yeah. So I will just duplicate this construction and
just place it here. Now I will choose the black and the sketching pencil and make
sure to make a new layer. So again, we will
start with the race. I will just draw the wrist here. And let's again, what is in
the front, this thumb, right? So let's draw that at first. We are continuing with following
the, um, triangle here. Here we have this joint. There, we have this curve. And then we are
drawing the thumb. And the thumb goes down this
triangle and then starts a flashy parts here that will help us to define
all the other fingers. Then we can continue
with drawing this joint up here and
the one next to it. And as you can see here that
these finger continues. So I will just try to add it here and there is
a fingernail there. Then this finger continuous
at a and ends at this joint. And here is another one. Again, ending at the
joint, like this. Starting at one joint, ending at the other end. I have a little nail
here that can look odd, so maybe I will
not draw it here. Then we have some
flashy burns here and we can connects
to the wrist. And I can add the wrinkles and every fingernail
that we can see. So we can see free fingernails. This looks a little bit odd, so I will just tried to
make it better. Alright. So we have lots of
wrinkles that help us to express this tension that we have in the hand
when showing a fist. So I will add this top
wrinkles may be here as well. Right here. Yeah, so we need
at rest as well. I will turn off this
construction drawing and we have drawn a fixed. Again, let's do something
with the shadows. I will create a new
layer below this construction drawing like this. And choose this darker gray. Maybe sketching
pencil bit bigger and add shadows to this very dark
parts below the fingers. Okay, this is going
to be very dark. Maybe I will include this finger there and also a light gray. We will have a shadow here. I will make this bigger and we have shadow
below this finger. And this part, then
add this fleshy part. Right? Maybe even here. And down here. Yeah. And I forgot my little tattoo, so I will just add them with my sketching pencil to make
it make it look even nicer. And finished. I have drawn a fist and I am sure that it
worked for you as well. In the next video,
let's combine the two, the closed fingers and
the open fingers and connected with the communication
function of heads.
7. Drawing Posed Fingers: You can communicate so
much with our hands.
8. Quick Sketches: Okay, so to integrate what
we have just learned, I decided to put a very
quick exercise here. Alright, so we are
going to create quick sketches with on
the reference photo, you will need to draw all
four poses that we have already created in very,
very quick sketches. So let's get into it. Alright, so in this video, you can guess we're going
to create quick sketches. And let me just explain you why the exercises
that we have done already were wearing much
based on observations. And I want you now to integrate a little bit what we have
learned in these exercises. So do this definitely now
so that the information doesn't get lost and that your muscle memory, remember set. So what I want
from you now is to grab the blue and
it's catching puzzle. I'll let just quickly sketch all the four pauses that we have created a video our hands. So the first one was
the simple hands. So let's just draw a trapeze triangle
than the half circle, where there are these four
circles than the one circle. Then here is 12345. Fingers, yes, there
was this curve. And then just create
a new layer and with black very quickly. Starting from the wrist, then I will just add D. I'm 1234. Really nice. I have this
fingernails very quickly. All right. Let's create another
one with the blue. So then there was the
hand from the side. There we had a trapeze
somehow like this. And there was a
triangle like this, and there was this finger. And then there was,
I don't remember. Well, but let's just place this index finger here than there was
another finger here, another one, another one. I will choose black at
the wrist and quickly. Okay. And one finger down. And another one here. Yeah. That was there is another finger here and
another one, and another one. This is another pose actually. Looks great. Like this. Fun. Alright, let's do the fist. So there was again, as you can see, we always
start with the trapeze. There was a trapeze, there was this triangle. And I'm looking at my finger. So it is like this. Then 1234 joints, 1234 fingers. Let's do it like this. Okay? Then I will draw the
rest again, follow this line. For the thumb, we
had the fleshy part. One join 234 and close it. 1234. Yeah, wrinkles, nails. Pretty amazing. And then again, let's do the peace sign. Again. We had these triangle. Again, we had the thumb. Then we had this half circle. Or you have these four? We have four. There are two joints. Again. Wrist, thumb. Like this. Yeah. Cool. Alright. So not perfect, but so much better than before these
observational drawings. And if these are like
my intuitive sketches, okay, but now I use the
construction drawing. I know that the trapeze
defines the base of the hand than this triangle is
very important because the thumb is a very
important finger. As you can see, it appears
almost in every pose. And this is really weird. This is really weird,
but these last two are a really great, alright. So I hope that now you
are convinced that you are ready to move on
to the next level. So see you in the
next video where we're going to talk
about civilization.
9. Stylization: Shape language plays a huge
role in illustration and also the bay that we are drawing lines can communicate so much. For example, with curvy lines, we can make something
cute and with edges we can add a masculine
factor to our artwork. In this video, let's try
it out in our drawings. I love the freedom in
illustrations so much. The most important thing is
to communicate ideas as well, not particularly keeping
everything real. There are so many ways you can stylize the drawing, right? So when you are
observing anything, you are making note of
every detail, right? That you can see in that image that we've done
at the beginning. So we were kinda
copying the real image. But in illustration generally
we are stylizing things, so we don't need to be too
realistic in our drawings with every little detail and Everly
the curve, we are drawing. The most important
thing and the point is to make our
illustration readable. So there are several ways
we can stylize or drawings. Let's just take a look in
this worksheet I have done. There are several
illustration styles as well. So here is the original one, as you can see in
this second one. Let me just show you an
artwork that I've done for one ink topper
in previous years. So as you can see, this hand is very feminine, it very delicate and acute. And as you can see, if you take a look on the lines that are more or
less straight lines, There's one little edgy curve here at the end of the fingers, but it has lines are more or less a really straight and thin. And it makes this
hand really cute. And we are going to try it out. We're going to replicate this exact same hand
in several ways. So I'm going to try
it out on this one. And this is simplifying lines. Alright, so we are
simplifying lines here. We are not adding these curves
and little shapes in it. We're really just focusing
on the lines themselves. And then we are, we can
simplify the whole shapes. So if you take a look on this artwork that
I have created, this fingers are pretty
much like sausages. But still it is a readable, it is a hand and it
is a cute, right? So when you are drawing curves, it communicates really the
cuteness of the drawing. So these nails are
just simply noted. The rules kept that there are five fingers and you don't
even need to do that. So if you take a look
on this drawing, this is really this
sausage fingers and I loved this one out. It just over complicated. We can say that, okay, we cannot see this middle finger because it is behind this one. So it doesn't matter. Alright, so if you have an
image like this and you don't have all the fingers in a pose. Obviously, when it
can be like missing. It's totally okay to do that. Alright, so let just turn
off the example group. And we have the
construction of the hand here duplicated from this hand. So let's just click on that
and select this shape. Or if you are not working in a worksheet just on your own, you can just create one with this construction of the hand in any pose that is
totally on, you. Just make sure that
in this example you are simplifying line. So I will grab black and
the sketching pencil. Make sure to draw on a new layer above the construction
of the hand layer. So don't draw it inside it. And let's just start. Alright, so what do we need? We need to stylize
lines so we don't need to draw every
little curve and shape. But just to make the
hand like readable, you can use the quick
shape function, which is when you
hold down the line, it makes it feel,
make it straight. If you want to draw a curve, it will make it again straight. This will help you a lot. So what I'm going to do is
to start at the breast, as always, here, this tubing
and make it smaller bit. You can make the line
straight or you can add a little bit of
a curve into it. Up on you. I will make a little
bit of a curve here. To make it a bit more natural. You don't want to
make the places where these lines meet very edgy. It will be unnatural. So keep, you can
keep these curves. I will continue with
a straight line here. I will make a little curve
here. Straight line. Again, I'm drawing the front. That's first as we did
at the first time. Straight line. And when I want to add
a curve, it helps me. It's like, Okay, straight line, straight line. I will maybe add a little
bit of a curve here. Draw the thumb. This little bit of a curve here to connect like this. Then I will add
this finger again, straight lines, straight line. And I will make a curve here. For this finger, I can add a
little bit of a curve here again and just connect it
here with a straight line. Amazing. And it was the pinky. Let me go down here with it. Finger. Like this. I will note the nails like this. And I will add my little tattoo. And it has finished. So now I will turn off
this construction. And also from here. So if you go to the worksheet, there is this construction
that you can turn off. Can you see that it is so much more stylized, more feminine? You can play a lot with these straight lines and
curves and things like that. So as you can see, it can be really beautiful. And this line,
artworks are so great. I love them so much. You can do that. Alright, let's move
on to the next one. So I will just do it
on this construction. And I will duplicate this one. So slide the layer
and duplicate it. And select. Okay, turn them on and select, and you can move it into
this last worksheet. Now we're going to
simplify shapes. The fingers are in 2D detail. There are chubby, don't
even move naturally, but it still fits the
image pretty well. Because they are kept the
most basic rules, right? And it communicates
what I intended to say. Okay, so if you take a
look at this artwork, you can see that I
really didn't keep too many rules when
I draw on this hand. Fingers are into detail. They're chubby, don't
even move naturally. That is still fits the image
pretty well because I kept the most basic roles and it
communicated what I intended. I say this to help you to
realize that you can lower your expectations and look at this whole topic of drawing
cans like a simple, playful experiment,
has a stressful task. So let's just try to create a little play
with the construction. So select this
construction and hit the Select tool and actually
you can make it smaller, make it bigger, you
can distort it. And actually I'm
going to distort it. And it means that I
can make it longer. And I want to make it
a little bit smaller. So like, I don't want this
fingers to be this long. Alright? And I will display with
this construction, you can do that. Fraley, alright? So I will just exaggerate
this thin rest. I will just draw it like this. Okay? Then here is this poem. Then. I will not
keep it to perfect. Like this. Just quickly follow
the shapes and don't even think about these
last word are joining. We are just drawing
this sausage fingers. And yeah, here's this pinky. Maybe I can draw one here. And you don't even need to
draw this one. Look at this. It will just a little bit
complicated the whole. But if you leave it out, it will be total in natural. I don't like this wrist, so I will just make it
a bit more Like this. Yeah. I will note the nails. And voila, here is
my very stylized. And maybe this index finger
is a bit too chubby, but it doesn't matter. This is practice. Alright, so let's just do
a little recap of what we have done in this video. We have learned that we can
communicate so much with the, with the lines and
we did shapes. And in illustration we have to actually stylized
illustration. We don't need to go
into too much detail. We don't need to keep it real or goal is to communicate ideas. So if we can do so,
like for example, even with leaving out a finger or moving the
fingers are naturally, it is totally okay. This isn't a magic world and
illustration that we can do. Anything. We need to keep these rules that we have five fingers maybe that the middle finger is the highest or the thumb is the smallest and
the chubby biased. So that the viewer
of the illustration realizes or understands
that it is a hand. So keeping these characteristics help us to communicate
our ideas. But actually we have artistic freedom and we
can stylize our drawings. Alright, so I hope this
helped you a little bit to understand how to
work with these things. And now let's move on to
the colors are right. So see you in the next video.
10. Colors: In this video, I will be
talking about the best ways to find color for the skin
in your illustrations. Color is a very important
aspect of every illustration. As we are talking about hands, we will need to find a
perfect colors for the skin. In this video, we
will be talking about the best ways to find
the colors of the skin. It is not easy to
find skin colors. Most artists experiment
out there palette for the skin tones and use those in all of their illustrations. So your task now will be to find the perfect colors for painting
skin in your artworks. If you don't have them
already in their resources, you can find a color palette
I created for you, right? This one. You can obviously use
that or choose only some from it and add them
to your own palette. Let's just see how did
I create this palette? So you can see now in this little skew circles how I combine these two colors
together to paint skin. But I need a base and
I need a color for the shading as we
already did, right? We had the colors, these gray ones for the shadows. Every color that we have at
desk line is for shading. And these are the
base colors and these are these color pairs or color combinations
that you can actually vary as you wish to start with, the base of the skin color is
a bit peachy, bright color. Obviously, it depends
on the skin type can raise even
lighting situation. The important information here is that it is a warm color. Warm. If we go to the disk, you can see or if you, I hope you know that
this is the color wheel approximately here is aligned. So these are the cool colors and these are the warm colors. When we are choosing
or skin color. I love to choose
it at the classic. I usually go to a bit orangey color and add this area to
have it really bright. And we'll go a little
bit more, more reddish. And this is perfect
color for skin. Again, it depends on the skin. Alright, so and the situation, the character is n. But
this is the most basic rule that I love to keep because if you choose
a color for the, for the skin, let
this be this one. Okay. I will use
it now to paint. I would create a new color here. To paint a circle. I will hold down like this. And painted this is my peachy light color. And now for the shading, it is better to choose a
cooler and a bit darker color. So to go to cooler, it doesn't mean that it will be like blue or pink or purple. It means that you can
slide it a little bit. I will choose a brown color
and slide it from worm. Little bit brighter. Let's go on to desk. These colors next to each other. As you can see here, if I push it to the bit pinkish, it already goes to a bit darker. And here are the brows. I choose a little bit
brown color here, or it is a little bit
magenta, but it will work. Okay. Maybe I can go back to
this reddish and it would give me this nice brown color. Okay, I'll let just
try these two. So if I alpha lock this layer and I will
choose my shadow, brush and shade, I'll just
say we'll make it smaller. I will shade it here.
Can you see that? It looks so great,
they fit together. And now if I want
to add a detail, I choose the freckles. Just add them here
and I have a skin. Can you see that? It looks so great. So I've done this with all these little
color combinations. This is a totally new one. Actually, I can add it to the color palette and
I love it so much. So actually I'm
going to use that in my illustration just to prove
to you that I'm alright. I will add them into
the color palettes, so you will receive
the color palette, which has these colors. Okay? This is one way how you
can choose skin colors. So let's do a
little recap on it. So choose a light,
peachy, bright, warm color for the base
and for the shadows. Choose a cooler and
darker version of it. You can add skin details
with the freckled brush. And there you go. So here you have 12345. Now six color combinations
that you can choose from. There is another way. And it is so fun. If you go to the palettes and click the Create
New Palette button. You can create one from photos. And if you created
photos of your own hand, you can create a
palette from that. Let's do it. I just chose the photo of my
hand that I had like here. And here you go, Here you have so many
nice skin colors and you can just grab ones that you like and put
it into our palette. So this is a really nice
way to do so if you want to draw skin and you cannot just find the perfect color
combination on your own. You can just take a
photo of your hand, put it in as a color palette, and choose the ones
that you like. Totally easy, super
cool tool in Procreate. Alright, so these are the ways you can choose colors
for your skin. Now let's see what
we can do with our brushes on what
are their functions. And then we can move
into illustration.
11. Brushes: In this video, I'm going to show you the brushes that I
have created for you. So in this video,
let me just shortly show you the functions of these brushes so that you
know how to use them. So we have the sketching pencil, this we used already. This is where great for details. For example, driving nails. Then we have a drop shadow. Drop shadow is good when we
add some props to the hand, for example, bracelets or rings, we can add a little
drop shadow and also where things such there
is a little bit of line and little bit of drop
shadow where these touch and this drop shadow brushes perfect for adding this shadows. Then we have this shadow brush. Obviously, we can
add shadows with it. We have the Shaper, and this is the one that we will use when painting for
building up shapes. And we will put
shadows on those. And then we have the
freckles that give you the skin details that
you don't really need to use if you
don't want to. Okay, so are you ready? I think we can move on
to the painting part. See you in the next video
where we're going to start by creating a scotch.
12. The Sketch: Alright, so this is the
most exciting part of it. Let's just create a new canvas
for creating or artifact. And when I'm going
to do is to use a square canvas because I want this artwork
to fit Instagram. Yeah. Okay, So square canvas. Now what about this catch? But I would suggest is you can go into any of these
sketches that you have already done and put it into it so that you
don't need to draw. Again. I want you to enjoy these guys. Don't get too much
overwhelmed with it. I would love to use this one in this little
stylized version. So I will go here and grab
this catch that I have here. So those, so I will
hold down this layer. As you can see, I'm grabbing it. Go here. Okay. I will make it bigger. And also I will I
want this hand to be a bit this way as if it was
holding something. Okay. I can do so as well. Like this. I will make the
sketch lasso pack. I will create a new layer over it and refine the
sketch a little bit. So I will go back to black
and the sketching pencil. And now I'm going to
speed this up while I am like refining
the whole sketch. As you can see, I play with the shapes that is
so much feminine. Now, it is so nicely refined. It will look pretty well. And I will just add some prompts that will make
this a little bit nicer. Okay? So it looks pretty well. I will make it a little bit
bigger to fit the image. I don't really know if we need to place anything in the hand. I will just keep
it as it is. Okay. I will turn off this
back background layer. I added tattoos. I've added some bracelet. Really enhance that. I added a ring, I added some tattoos, and now I am ready to continue. Alright, now that
we have this catch, I think we are ready to
move one to start painting. Let's do nothing. The next video.
13. Painting: All right, So let's
start painting. The way I'm
illustrating is that I, again, lower the opacity
of this illustration. And I will create a
new layer below it, and I will choose
the skin color. I will go back to the palettes. I will choose this, hence
palette as my default. Go back and I told you
that I will use this one. So let's keep that promise. I will choose the shape, okay, so the first step is to use the shaper to build the shape. So now I'm going to go
for this index finger, the thumb and wrist
and the whole hand. And on one layer and
second layer we will have the fingers that
are at the back. Okay, so again, I'm
going to speed this up. Also. I will lower the
background color a little bit gray
because this is a pretty bright
color and I want to see the shapes on
creating better. So this will help me. Okay. Alright. Now I can alpha
lock this layer and choose the darker
version and the shadows. And if you remember, we had shadows like down here and a little bit of a disk part. So I will make this a little bit bigger and lower the
opacity of this brush, so it is smoother like this. And then I will add these
shadows here. Pretty nice. But let's just continue and
add a layer below this hand. And Jews the same
color for the skin, we're just going to
shade them a bit darker. So if this front distracts, you can turn it off and
just draw these ones. It doesn't distract me. So I will keep My Shaper, this skin tone and
just be a layer below it and continue. Alright. Okay. I will again alpha
lock this layer, choose this darker version of the color, choose the shadows. Let's just start with
this finger. Okay? Maybe I'll make it a
little bit like this size. And when we transparent, what I want is to
make this finger that dark where they
need to carry so that you can differentiate the
fingernail is in the front from the finger that is here
and approximately from here. So I will just add
this darkness. If you overdone it holds down for the original skin
color and just go back. You can always do that. If you're saying
that it is too much. Okay. This finger, it is very dark, but maybe not that dark. So I will just go over
several times and try not to fail it fully with that color or soviet
the pinky tried to keep it this side and
just a little bit darker. Here. You can look at the
original image. For these shadows. Feel how few. I love it. I will turn the sketch back on. And let's just add the tattoos. This is my favorite part. So see you in the next
video where we are going to work on this little cool things. Alright, so see you there.
14. The Cool Stuff 1.: Alright, so I will
just start with adding the tattoos because
that's my favorite part. If you take a look
on the color palette you have here, here is a color. It is indigo blue, and it looks so
great as tattoos. And for adding tattoos, I will use the
sketching pencil, okay? And I will create a
new layer on the top. And if you can see, it looks super cool. I will a little bit at it. This shape to make it a
bit nicer, solidly nice. Then you can actually
make it a clipping mask so that the tattoos don't go outside of the
shape of the hand. Okay. Okay. It looks so cool. Now, let's add the bracelet. And I thought that it could
have like this color blue. Because why not? I will create a new
layer above and just add This little circles. And I will add shadows to it. So I will now turn off
the sketch and alpha lock this bracelet and
choose this indigo. Now we have here and choose the shadows and make
a little bit smaller. And I will add shadows to these
little circles like this. Okay? I'm going to maybe choose a
very bright one, very small. And to add a little
bit of light on top, these little circles, I really
like pearls. Like this. I will edit some
shapes here and there. And what is important now is
to add a drop shadow, right? So I will create a
new layer and put that layer below this one. It is okay that it is a clipping mask because
we want this shadow to fit only the handshape
so it is totally okay. I will just add this shadow
to this clipping mask layer. And I can go to the adjustments Gaussian blur
and blur it a little bit. There will be an effect that this bracelet has
a little bit of shadow on the hand.
Can you see that? It looks totally cool. Alright. I will add
another bracelet hair, and I will choose it to
be another, any color. I will make it a
little bit of orangey, maybe lighter, yellow. Okay. I will create a new layer above this two and choose this shaper. Yes, I will Alpha Lock, choose a darker version,
little bit orangey. Think. And choose the shadow. And just add a little
bit of a shadow into it. Like desk. And you know what
I'm going to do? I am going to go to the
layer of this drop shadow. Choose the drop shadow
again with black. Maybe create a new layer for this one and make it a
clipping mask because we are going to Gaussian blur it
again and make it a little bit of shadow below
this bracelets. Okay. The skin. So much fun. I love
to do this so much. It can stay like this. Harsh, harsher shadows. Alright, so I don't want
this to be too long. See you in the next video
where we're going to finish up with the
nails and the ring.
15. The Cool Stuff 2.: Alright, so let's continue. Let's choose a color
for the nails. And now I have red ones, but before I had like
a color like this. So I will just try to
make it like that. I will choose this shaper, create a new layer above all, and just add to that
layer the fingernails. And turn off the sketch. K and alpha lock these shapes and choose a darker version
with the shadows. And I'm going to just
add a little bit of shadows to the fingernails. As you can see, I'm
missing some pixels here. And let me just show you a
pro tip how to fix that. So I will create a
new layer below. Choose the skin color
and just paint below. It helps, maybe with a shaper. And it has gone. Okay. This is a great way
to get rid of that. Okay, and now let's do the ring. I will turn on the sketch. I will choose maybe this
yellow because I want to fit. I will create a new layer. Alpha lock. I choose this dark. Again. I've, I've found
it into history. Okay, so I'll just choose a darker version of
an orange color. Shadows, make it small, and just add shadows like this. And I will make it a bit bigger so that it looks like it really is on a
finger and not in the skin. Okay. And yeah, the drop shadows, I will create a
layer below again. Jews did drop shadow, brush the black and a bit
of a shadow below this. And I will just Gaussian
blur it like this. It looks a little bit
to a digital format. So this is the point where I'm
going to add the freckles. I will choose this darker
color and freckles and create a new layer
above the base hand. Whoops. I didn't make it
where it transparent. And maybe a little bit
bigger and just experiment. You can add little bit of
freckles here in there. Alright, and let's finish it up. Let's choose the
background color. I will go to the
background color and see what colors fits my hand. Who's good? I will create a new layer
above the background. Choose another color
and shadow brush. I can create a texture over it. What I'm missing
from this tanned as the details and
the wrinkles, right? This is why this looks
a bit unnatural. So after rehab this
little background color, I'm going to create
a layer on the top. Choose brown, but make it a little bit lighter
and more brownish. I choose a brown like this and choose the
sketching pencil, and I will just
add the wrinkles. Alright, so what do you think? I think this hand
looks pretty amazing. I will add a little
special magic element that I always do. Okay? There is some magic coming
out from this hand. Maybe this little witches
already doing some magic. And there is this nebula. Let's try it. Maybe with this pink. Make it bigger. And then I just add
some magic here. Wow, this looks
pretty great. Okay. It already makes sense. Alright, I love it. This is so magical. Oh my God, I love it. Alright, so I hope you enjoyed this tutorial and
this class and that you now are more confident in drawing cans
and then illustrating ends. And that we destroyed the procrastination and
your fear of drawing hands. You can see that it is doable. So let's just do a little
recap on what we have done during this
illustration process. So at first, we have chosen
the base skin color and added the base skin shapes. Then we added shadows so
that we have the dimension. And actually, it is
not necessarily it is, it depends on what kind of
illustration style you have. If you are like kinda this more realistic so
that you add is very nice gradations to
create the new mentioned. Or you are doing flat design
or this edgy shadows. It depends on you, but basically
we had the base shapes. We added shadows to that than we added details
like the tattoos. We created the bracelets with drop shadows and also the ring. Then we added the
fingernails, which shadows? Then we created a background. Okay, this is estab
dot you can exchange. But then we added details
with the sketching pencil. So we added the
wrinkles and we drawn around the nails to make
it look even better. And then we added a
magic and will allow, we have this beautiful
hand illustration. I'm really proud of you and I can't wait to see your artworks
in the project gallery. Now see you in the
final video where we're going to do a little
recap on the whole class. So see you there.
16. Final Thoughts: Congratulations on
finishing the class. I am so proud of you and I'm sure that you can be proud
of your new skill as well. Let's just take a look on what we have learned
in this class. In this class you
have learned that by approaching drawing hands, just like drawing, any
other object, can help you. You need to identify the
basic geometric shapes and user combination as
a base for your job's. You'll learn to draw hands in
different angles and poses, and also different styles that simple changes in drawing
lines can give you. Then you'll learn about the easiest way for
choosing skin color. And lastly, you illustrated the hand with some
cool accessories. Such a fun way to learn to
illustrate hands, right? Make sure to upload your
project to the project gallery. And when you are sharing
it on social media, tag me as the art mother. Follow me on social media, on Instagram and
Facebook and here on Skillshare to get notified about the latest
classes, challenges. Announcements. Also leave me a review so that I know what you think
about the class. It was a pleasure
to have you here. See you in my other classes. I wish you all the best
and happy creating.
 The Artmother, Professional Art Teacher and Artist