Transcripts
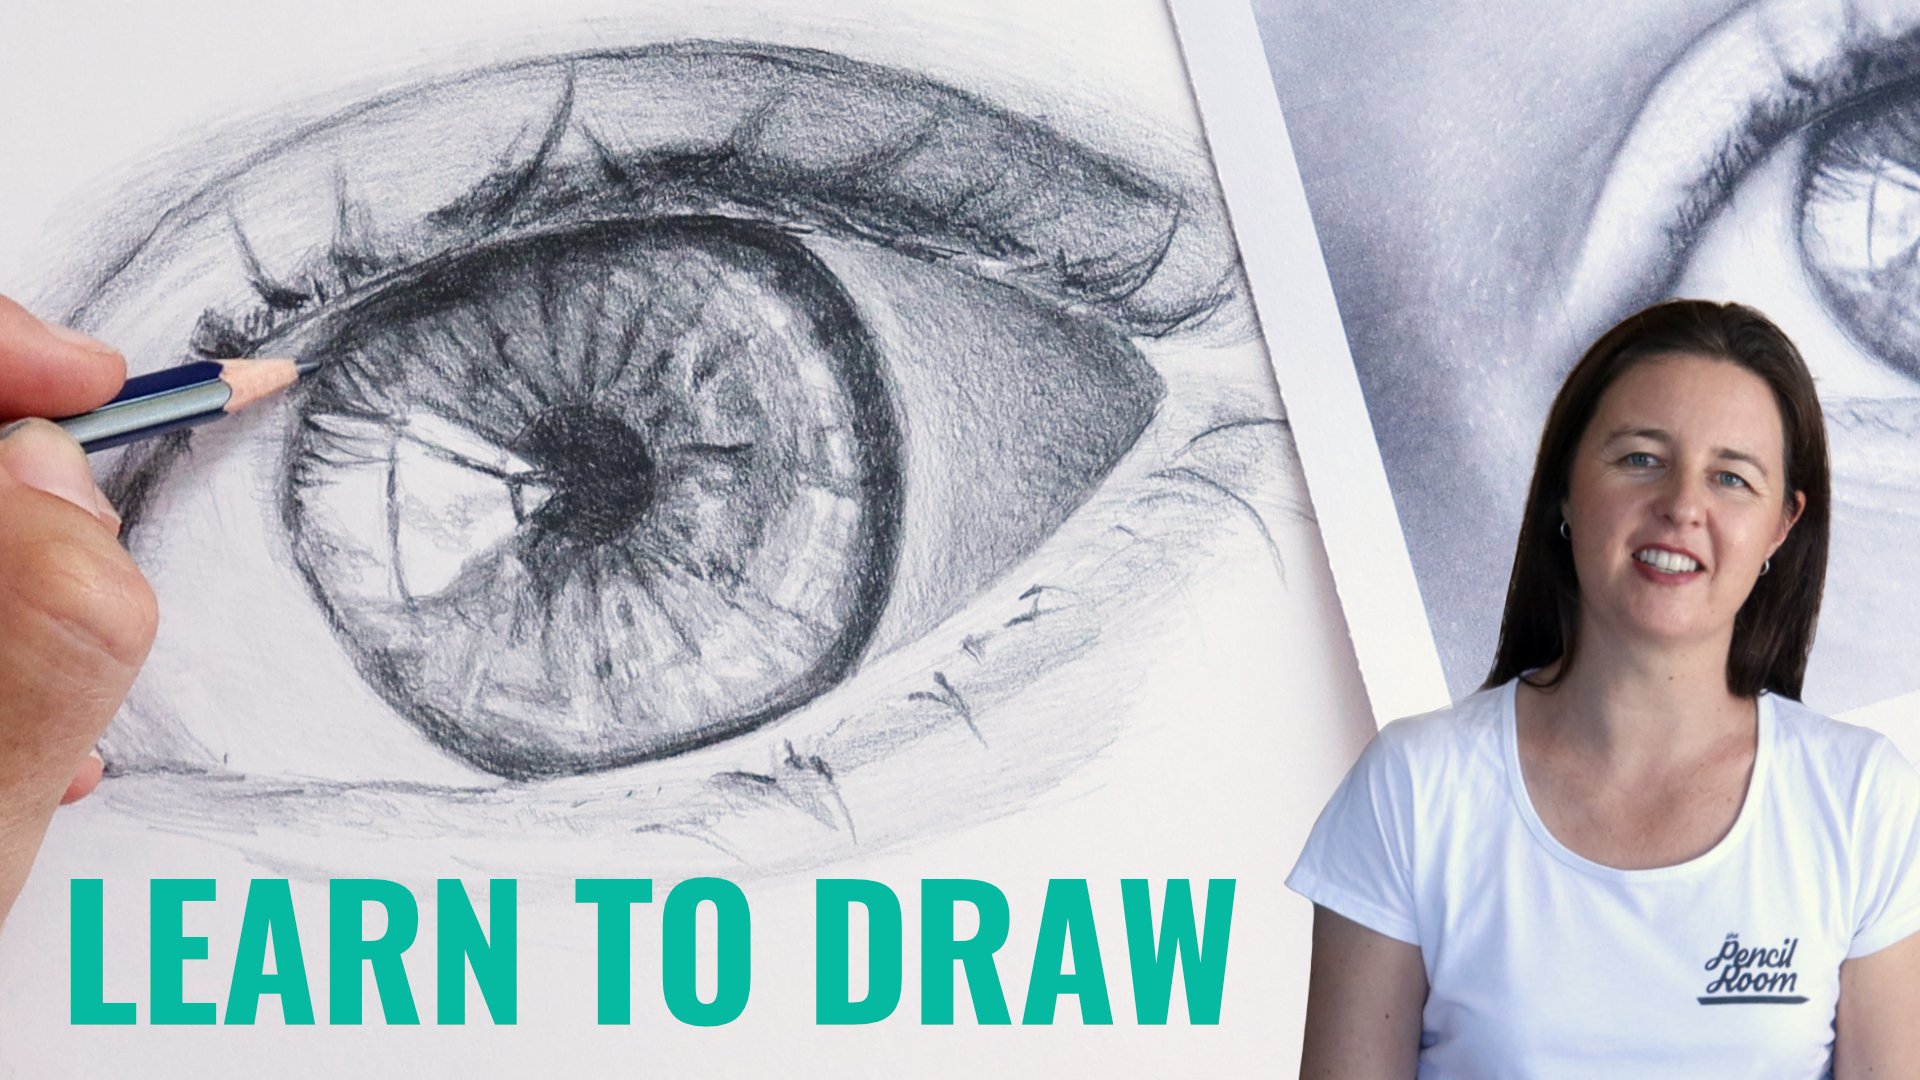
1. Introduction: [MUSIC] Hi, I'm Emily Armstrong. I'm an artist from New Zealand, I teach drawing and painting classes here in my local community and I also run the pencil room online, which is a resource for beginners and improve those who want to learn how to draw. In this class, I'll take you through my process for drawing a realistic eye. This class is suitable for complete beginners or for people who want to improve their portrait drawing. The focus in this class is how to capture the lightness of the particular eye, which means instead of drawing any eye I'll show you how to create a drawing that looks more realistic and actually looks like the photo or person that you're drawing. This would take a quick look at the parts of the eye and do some warm-up during exercises. Then we'll work through four steps to complete a finished drawing. Finding correct angles and structure of the eye, sketching and shapes, blocking and shading, and building up detail. I've designed this class to simplify the drawing process for the beginner artists and to help you improve your drawing to get more realistic results. Let's get started. [MUSIC]
2. Materials: You can use a range of pencils from 2H to 6B to sketch and shade with. You'll need to be able to achieve light, middle, and dark tonal values. You could use a light pencil like a 2H for starting your drawing and for some light shading, and then use a 2B or a 4B pencil when you're ready to add some darker shading. I'm using regular sketchbook paper which has a slight texture to it, and this will show up in your shading. If you prefer a smoother look, you could use a smoother paper or card like Bristol paper. But keep in mind that for smooth paper you actually need to take more care and patience with your shading to cover the smooth surface. Alternatively, you could also apply this class to drawing an eye using digital media like Procreate.
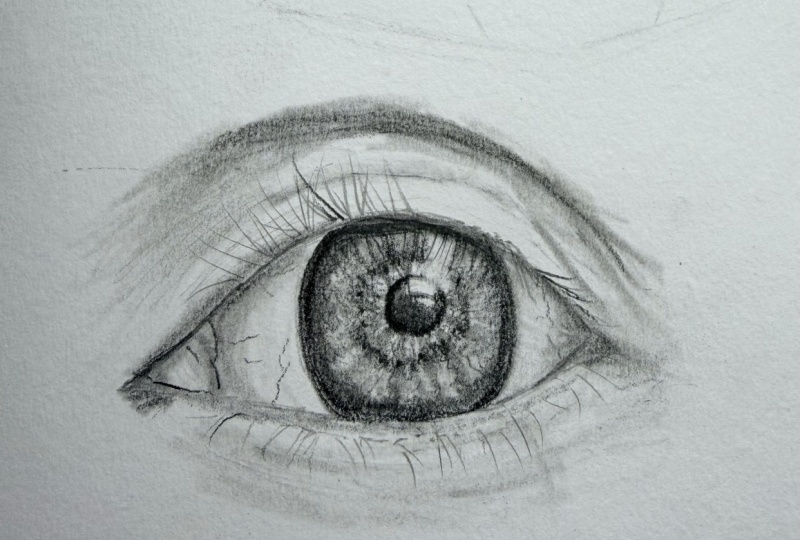
3. A Quick Look At Eye Anatomy: We'll get started drawing soon. But first let's take a quick look at the basic anatomy of the eye. The eyeball itself is made up of the white outer covering of the eye, otherwise known as the sclera. The colored part of the eye is the iris, in the middle of which is the pupil. There is the upper lid of the eye, the lower lid of the eye and in the tear duct or lacrimal caruncle, as it's technically termed. Remember, the eyeball is a sphere. It's a rounded three-dimensional shape. This means that the upper lid and the lower lid close around and over it. Both lids have thickness. This is important to remember when it comes to achieving the realistic three-dimensional effect we want when we're drawing.
4. Warm Up Drawing Exercises: Before we start drawing, I've come up with some quick warm-up drawing exercises. These will loosen up your hand and ease you into some of the techniques we'll be using later on. Get your hand ready to go with these quick warm-up exercises. Draw angled lines using an upward flicking motion in whatever direction feels most comfortable to you, and then reverse the angle. This may feel a little bit strange. Repeat the same exercise using a downward flicking motion at one angle and then at the opposite angle. Draw curved lines by flicking your pencil upwards. Again, try it in the opposite direction. Draw light angled lines flicking upwards, less pressure on the page. Then draw a light angled lines out alternating between flicking up and flicking down. Next, draw some simple eye shapes using only straight lines. Three lines for the upper age, two lines for the lower edge. 1, 2, 3, 1, 2, try out different angles in heights. Now we are warmed up and ready to start drawing the first realistic eye.
5. Introduction To The Project: Now we're ready to get started on our drawing. You can download the photograph from the resource section of this class on the Skillshare website. Print this off or have it visible on the screen and then follow along with me as we work through the four steps to complete the drawing. Take a break whenever you need to, especially if you find yourself getting tired. Sometimes we just need to take a rest from drawing and then come back to it with a new perspective. I'm going to take you through drawing an eye with me in real time so that you can draw along and listen and look as you go. Now you might find that you work at a different pace or that you notice aspects of your drawing that require attention while I'm working on something else. There are many different drawing processes and whatever process works for you is the best one for you. But we worked through four stages which are designed to break down the process into manageable steps. Even if you prefer to work at your own pace, I'd recommend ticking off the key points for each stage before moving on to the next one. You'll find a checklist at the end of each step.
6. Step One: Structure: Step one is structure. To be able to draw accurately, we first look for angles instead of curves. We can make the shape of the upper lid using three angles, the lower lid using two angles, and we can make the structure and position of the iris by looking at the angle where each side of the circle of the iris meets the lower lid, and meets the upper lid. It may seem strange to think about drawing a circle with straight lines, but this is our path to accuracy. We can also use this stage to find the position of the pupil. Is it right in the middle of the iris, slightly up, slightly down, slightly to one side? Let's quickly draw a diagram up here in the corner to find the angles of this particular eye. First, find the three lines of the upper lid shape. Look at the angle of the curve on either side, is it above or below 45 degrees? Now draw the two main angles of the lower lid. Sometimes these ones are a little bit harder to see as the shape is quite shallow. It can help to look at it and ask yourself whether or not it's horizontal. Sometimes it is. Check check your diagram by drawing a light line from one corner of the eye to the other, and looking at the angle of that line, and comparing it to the photograph. In this case, the eye is on a slight angle, maybe five degrees or so. Next, look for the angles of the shape of the iris. Now, this one is tricky because the iris is round, and we think of it as a perfect circle. But have a look at where that circle meets the lower lid, and try to draw the angles of the edge of the iris as they come up from the lower lid on either side. Look at the left side of the iris as it comes up from the lower lid. That angle is maybe 45 degrees, and if you have a look on the right side of the eye, it's more like 50 degrees. These subtle details can be really important in capturing the likeness of what you're trying to draw. Draw the left and right lower angle in the left and right upper angle of the iris, and then find the position of the pupil. In this case, it's slightly above center of the iris. You could also look for the three angles that make up the curve of the crease of the upper eyelid. If you're happy with your diagram, then go ahead and start your main drawing in the middle of the page. Make it a minimum of two inches long. It's large enough that you can draw a small details, but not so large that you need to spend hours shading it. Look at the photo and repeat the upper lid and lower lid angles as we did in the diagram. Add in the iris and position the pupil. Take a look at this diagram and compare it to your drawing before moving on to the next step.
7. Step Two: Sketch: Step 2 is sketching. In this step, we'll round off the angles to create a more natural shape and sketch in more detail, including the shapes of light and dark that we can see. Even at this early stage, you should by now have captured characteristics of this particular eye, by finding the angles of its shape. Draw in the thickness of the upper eyelid and make sure you can see this in the photograph. It's a slightly darker line of shadow underneath the lashes. It's where the edge of the lid curves over the eyeball. As long as you're happy with the accuracy of the angles from your initial sketch, start rounding them off. Be careful that you aren't changing the angles, you're rounding off the corners to create a more fluid curve. Find an angle and the thickness of the lower lid. It's a pale section of skin that goes right along that inner edge of the lower lid, above the bright highlight as you can see. When you draw the lower lid, make sure you keep your lines very light. Unlike the upper lid with its dark line of eyelashes, the lower lid is usually very light. If we want to create a realistic eye that has the illusion of three-dimensions, we need to keep light and dark values in the correct place. That includes our sketching lines. Keep the sketch light to start with and then we'll add in the darker areas later. Using very light lines, you can add in the shape of the highlight on the iris. Also look for any other shapes that stand out to you, anything that is going to make your job a little bit easier later on by identifying them now. For instance, can you see the bulge of the lower eyelid? I'm lightly drawing that in as a shape. Before we start with any shading, we need to make sure our lines are light enough. If any of your lines are dark outlines, you can dab a part of the eraser over top, and push them back so that they're not going to show through your layers of shading. Check your drawing against the diagram before moving on to the next step.
8. Step Three: Blocking In: Step 3 is blocking in. This stage is simply blocking in the light in the dark areas without worrying about the more subtle tonal values. We'll identify the light parts and the dark parts. Looking for the lightest parts is usually the easiest way to go first. Which parts are going to remain the white of the page? You can very lightly draw shapes around these areas. There's a highlight on the upper lid. There's also a highlight on the lower lid. Maybe you draw in some of the darkest areas as well, like the shadow area on the crease of the upper eyelid. Once you've identified all of the highlights, everything else is going to need to be shaded in so that those highlights can remain white. Use your pencil on its side with a very loose side-to-side motion to block in the shading. Using your pencil this way should give you a soft mark without any harsh lines. If you wanted to, you could switch to a to 2B pencil here and use it very lightly, but if you are heavy-handed then a 2H pencil is best for these first layers of shading. Use your pencil lightly to shade in any of the areas that are not going to be white. It might be tempting to shade in all of the dark parts like the pupil and the eyelashes early, but we're going to leave those until last and work on building up a solid sense of three-dimensional form. To build up good depth and form, we need to have accurate tonal values, which takes some careful looking and some careful shading. If we start light, we can always go darker. As you shade, try to compare tonal values in the photo to each other. Compare the highlight areas. The highlight across the iris is the brightest part and if you look at the eyeball, it's not as bright, which means we actually need to add some light shading to the eyeball as well. Once you've shaded in every area of the drawing that is not going to be white, using a light layer of pencil shading, go through and shade one more tonal value to show the darkest areas. Shade in any area that is black or dark gray and the value doesn't have to be accurate yet. It's just a way to indicate that these are the darkest parts, before we take the drawing further. The darkest parts are the ring around the outer edge of the iris, the crease of the upper eyelid, a small section on the lower lid, and along the thickness of the upper eyelid. Go ahead and shade in these four areas with the darker tonal value now, switching to a darker pencil like a 2B, if you need to. We now have three tonal values, the white of the page, a gray, and a dark gray. Before we continue, if there are any white areas in the photograph that have become muddy or have sketching lines in them on your drawing, go through and gently erase those areas so that they're nice and white. Have you blocked in all of the areas in the photograph that aren't going to remain white and have you added a second tonal value for all of the darkest areas you can see in the photograph?
9. Step Four: Building Detail: Our final step is building detail. We've indicated where the darkest areas are. Now we can start to build up our shading until it reaches the correct tonal value. Look at one part of the photo and decide if it is a light gray or mid gray or dark gray, and ask yourself, is it darker or lighter than the area next to it? It helps to have a sharper pencil here as you still want to keep your shading soft, but you also need to be able to draw in some finer details. Define the upper edge of the crease of the eye. The shadow of the crease of the eye has a sharp upper edge but a soft lower edge, which means that we really need to try and control the pressure of our pencil as we shade. Pushing harder to shade a dark area up the top and then as we move slowly closer to the eye, lessening the pressure creating a really nice soft transition from dark to light, so that it fades out. Shade in the area of the thickness of the upper lid. Look for the shadow along the underside of that lid. Also, look for the tonal values in the corner of the eye at the tear duct. I'm adding in a dark gray. This stage is all about adding in subtle tonal values in details. Look for subtleties in the thickness of the upper eyelid. The vary and the edge of it is quite a dark line along it. Just here at the top of the iris, the upper lid is casting a shadow. Can you see the thin section of almost black in the photograph. It's part of the iris, but it is in shadow from the upper eyelid. Remember to compare the tonal value that you're working on with other areas in the photo. Is it lighter or is it darker? You may find you need to switch to a darker pencil, perhaps 4B or 6B pencil, as you build up your drawing in the darkest tonal values
10. Working On The Pupil And Iris: Let's shade in the pupil now. I've left this until close to the end because once you go very dark, it's hard to change your drawing. If we found that we needed to move the position of the pupil, it's much easier to do this while the drawing is still light. Add in the dark tone on the pupil, making sure that you are working around the shape of the highlight. Also add in the dark at each of the iris. Remember to consider soft edges and hard edges. For the iris, the outer edge of it is a hard edge. It's sharper where it meets the white of the eye. But the other side of that dark ring is soft, as it moves towards the pupil, it gets lighter. You'll see a lot of detail in the iris. Now, if you had patience and good eyes, you could take the time to draw every single detail that you see. But instead, I'm picking out the main shapes, lines or patterns that I can see. Look for any marks that stand out. Work your way around the iris, drawing in only the darker lines that stand out to you. They'll be moving out from the pupil and around the iris like a clock face. If you look closely, you can see some darker shapes in that orange section around the pupil. They look a little bit like long triangles. Add these in with a dark gray. Work on the iris in layers. We can always go darker later, but it's better to start light and build it up. You can get away with creating an idea of a pattern rather than drawing every single detail in the iris. To create an idea of the pattern on the iris, try moving your pencil back and forth with very short strokes.
11. Balancing Tonal Values: From here on in, our job is to compare tonal values and adjust them so that they are in the correct order from lightest to darkest. When you have a range of tonal values from light through to dark, and you should start to see that illusion of three-dimensional form coming through. You may find it easier to see the tonal values by squinting at the photograph. This helps to break it down into simple shapes of light and dark. Do this now and you notice how dark the ring around the iris is, is the equivalent of a dark gray. Compare the tone of the highlight in the eye to the iris around it. In my drawing at the moment, there's not enough contrast and I can see this by squinting at the photograph first, that highlight really stands out and then I squint at my drawing and blends into the iris. That tells me there's not enough contrast and I need to add a darker layer of shading to the iris, to make that highlight really stand out. When I squint at the photograph and then squint at my drawing, I can also see a difference in the tonal values of the lower eyelid. In my drawing, it's still very light. But when I squint at the photograph, I can see that it does have some gray and some dark gray values in it. It's important to gradually build up tonal values like this, so you don't have any hard edges around your work. When you look at the lower eyelid in the photograph, it's very hard to see where it changes from dark to light. We need to make sure we reflect it in our drawing by building up layers of shading gradually and controlling the pressure of our pencil, as we move towards lighter areas, lightening the pressure and blending in the layers to each other [NOISE]. Take a look at the eyeball in your drawing now. Does it look like it's a sphere, a three-dimensional shape? If not, check your tonal values. We assume that the white of the eye is white, but as we saw earlier, it's not as white as I highlight in the middle of the eye. In each corner of the eyeball, there will be some gray values as it curves back into the eye socket. You also see some gray values under the upper eyelid where the eyelid is casting a shadow along the white of the eye. Here's a really subtle detail that you can add. Have a look along the inner edge of the lower lid. It's very tempting to outline the lower lid with a hard line, but when you look closely there's only a small section of sharp dark line. It's to the right side of the lower lid. Try to get the same sharp thin line as you see in the photograph.
12. Adding Lashes: Now we are finally at the point where we can start to add in those eyelashes. We're only going to draw what we can see, not what we think eyelashes look like. First, identify the ones that stand out to you along the upper eyelid. Look at the direction that they go in, and use a flicking motion to get a natural feel to the lashes. If you need to, take a moment to practice a flicking motion on another area of paper. There's a dark clump of lashes just to the left of the iris, and then as you move further left, there are a couple of main eyelashes that stand out. Make sure you're drawing those eyelashes, and at the correct angle. As you move back along to the middle of the lash line, there are some eyelashes that are coming out towards us and you might be tempted to draw those lashes curving upwards, but have a close look at the photograph, they actually appear as very short lines or even dots. As they come towards us, the line of the lash is foreshortened, so they can be drawn as short lines or even as an area of darker shading. Moving to the lower eyelid, you can see how the eyelashes are sparser and lighter. Again, only draw the ones that stand out clearly to you at first. Look at where the lashes you can see lineup with the pupil, are they directly below it, slightly to the left, slightly to the right? Look at the direction that they move in.
13. Adding Black Points: As we get closer to finishing the drawing, add in the black points. Again, squinting of the photograph will help to reveal where any of the darkest areas are. The pupil is the most obvious area of black. Use your darkest pencil to add the darkest value that you can. Once you put in the black of the pupil, you may find that you need to darken up some of the other values in comparison. How much lighter are they than black? Notice how when you put the darkest points in, the whole drawing has a lot more contrast, and this helps to create realistic tips. Work your way around the drawing, adjusting the tonal values. Keep flicking your eye back and forth between the photo and the drawing. For example, when you look at the upper lid in my drawing at this stage, on the left-hand side, it's still very light. But if you look at the photograph, it's much darker, so I need to work more on the upper eyelid. Look also at the line of the crease of the upper lid. As it moves further towards the right-hand side, it's slightly lighter. Try to control the quality and value of that line. It has a soft point to it, not a blunt high-ending. You might also like to loosely shade in above the crease of the lead to show how that fold of skin recedes back into the eye socket. Probably, that's something we should have started a little bit earlier, but it's not the main part of the drawing, so it's okay to edit in now.
14. Final Touches Including Tear Duct: Finally take your time to go around and re-assess again. Look for all the lightest areas in the photograph and make sure these are the lightest areas in your drawing. Do you have the darkest parts in the photograph as the darkest parts of your drawing? If you're feeling stuck or unsure on what to do next, just take a break and then come back and do another assessment of where the light values are, where the middle gray values are, and where the dark values are. Also where are the hard edges in the photograph and where are the soft edges. I'm going to speed up the video here. It's a fairly long section of me taking my time to balance out tones and bringing the darkest values up to where they should be. It's just part of my process as I keep re-assessing my drawing. It may not look like I'm doing much, but the subtle layers of shading can really make a big difference. I encourage you to give yourself as much time as you need to finish this drawing by making corrections or additions. Trust your eye and spend a decent amount of time looking back and forth from your drawing to your photo and revising your drawing when needed. One last thing you can look at is the area of the tear duct. There are some very subtle tones in there, you'll be able to see a highlight and then some very soft light grays for the pinkish areas and in the reddish areas are quite dark. Sometimes it can be difficult to determine a tonal value from color and this is where it could be helpful to refer to a black and white version of the photo. However, it is really good practice to try and figure out the tonal values of color. Remember, squinting at your subject will really help break down to simple shapes of light and dark.
15. Final Thoughts: That brings us to the end of this class on drawing a realistic eye. I'd love to hear what you thought about the class and to see your final drawing. If you share your drawing to the project section, I'll be glad to let you know what you can improve on and also to let you know what you're already doing really well. What's most important is that you are happy with what you've achieved. Sometimes it can be hard to look at your own drawing objectively, especially when you've been working on it for a while. But take it easy on yourself and try not to compare yourself to others. Before you do any judging, take some time away from the drawing and remember to think about where you started and how far you've come. With each drawing project, you'll learn something new that you can bring to your next story. Thanks for taking this class with me and I hope to see you again soon.
 Emily Armstrong, The Pencil Room Online