Transcripts
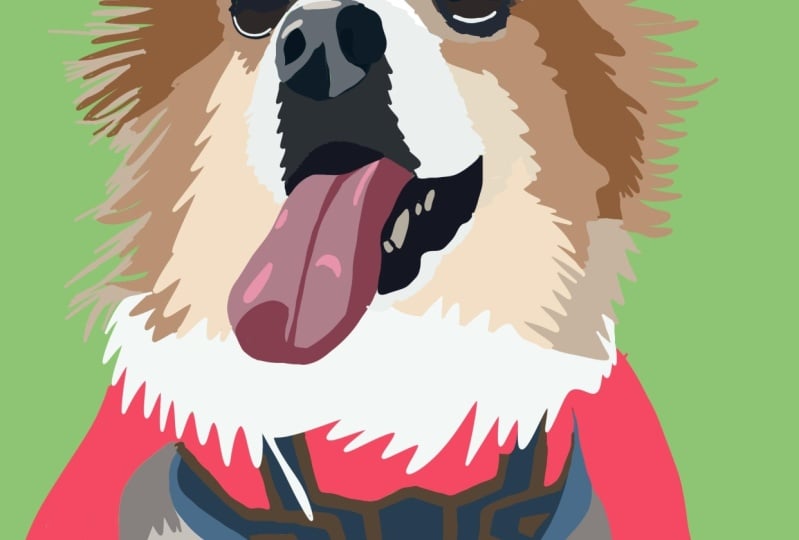
1. Introduction: Hi, my name is Meghan and I am here to show you how to draw your pet. Just like this. This is the project we
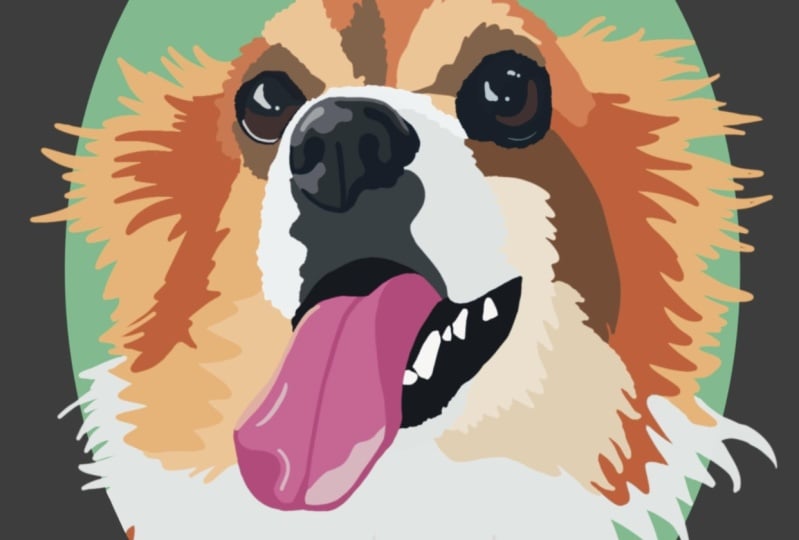
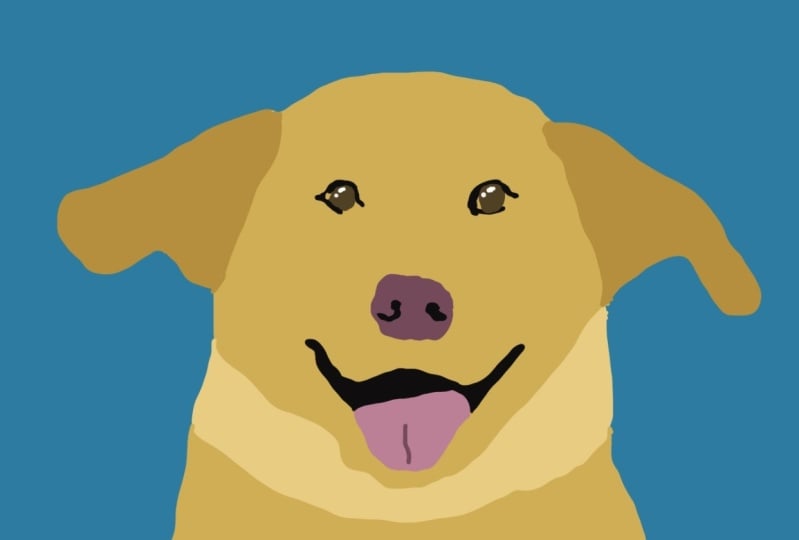
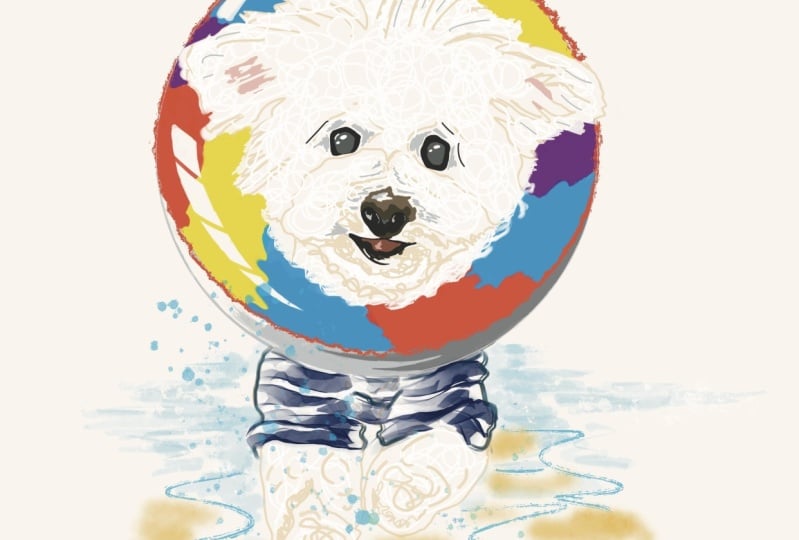
will be doing today. I draw pets like
this all the time. I have so many. If you want to just order one without learning how
to do it yourself, you can go to nerkyart.com n-e-r-k-y-a-r-t dot com I do illustrations
like this of pets. And I do custom cartoons of people in different
pop culture settings. So that is what I do. Like I said, I am an artist, an illustrator, a
graphic designer. I illustrated a children's book. It's here. I paint wall murals. So I am an artist
through and through, and I am excited to
share how to illustrate your pets in a minimalist
style with you today. So you will need an
iPad and Apple pencil, the Procreate app, and
a picture of your pet. You can also use, just use the picture I'm
providing of my dog, Shelbee. He is a beautiful cuddly spaz. So feel free to draw him or you can draw your
pet too. It works either way. If you want to just pull
your picture, That's fine. So without further ado,
let's get started.
2. Setting up Your Canvas: Okay, We're going
to open Procreate. And once we have the
procreate app open, we're going to select
this plus sign at the top and do a
new canvas size. So once you select
this plus here, then you select the smaller
plus just below it. And we're going to
add an eight by ten Canvas with a
quarter-inch bleed, and I'll tell you
what that means. So we're going to choose
inches down here. And for width, we're going
to put 8.25, For height we're gonna do 10.25. That adds a quarter inch to both the width
and the height. And that's going to
be where our picture, once you have it printed
somewhere and they cut it, they will cut off an eighth of an inch
on either side. So an eighth on this
side and an eighth on this side will equal
a quarter-inch total. And then that way, once
you haven't printed, the color will go all the way
to the edge of your canvas. Now if you don't want to
mess with that, that's fine. Just do eight by ten. You don't really have to
mess with anything else here except the color profile. You do want it to be CMYK. That's going to be the
best setting for printing. So otherwise you don't
have to mess with anything else and we're
just going to hit Create. So once we have our
canvas created, we're going to
insert our picture. So what you'll do is you go to the wrench icon and
then add, the plus sign, the very first one, and
then insert a photo. For this part,
you're going to need your picture to be
saved to your iPad. So if you're using the picture, I'm using my dog, Shelbee, save it to your iPad or whatever
picture you want to use. So we're gonna go grab
that picture from our iPad photos by
selecting, Insert a Photo. Once we have our photo inserted, we're going to size it. So we want our
dog's face to take up about half of the whole picture. So this is such a
cute picture, Shelbee, I love his little bandage
that he has on his arm, but I think we're
going to crop it out. He had to have blood work
done that day at the vet, so they put a little
bandage on him. But I think that we're
gonna kinda zoom it in and crop it right in there. So I'm just using two
fingers to zoom in and out. And I'm just going to
pull it like that. We're not really paying
attention to the background. We're not paying
attention to the car, everything else that's going on. We're just going to -
That's pretty good. I might go down
just a little bit. We want his face to definitely
be the focal point. We won't wind up
drawing anything else, so just his face and his body. So we're not going to draw the
car seat or anything else. So none of that stuff matters. If it gets cut off, you just want your
dog to be or your, your pet to be most of the picture. I think this is pretty good,
leaving it right here. So to get out of
this bounding box, you just hit the arrow up there. There you go. Now
we're ready to go. So the last step in getting
our canvas ready to start drawing is to go to
our layers right here. And we're going to add a layer. Now we're going to make
sure we are on that layer. So we are on our layer two
and we are ready to go.
3. Drawing the Facial Features: Okay, so we're gonna get
ready and start drawing. So what we're going to do
is go to our brush up here, we're going to choose
the mono line brush, it's in the calligraphy section, so just the monoline brush. And then you can
change the brush size with this slider here. We're gonna do kind of small, gonna go about 3%,
and then zoom in. I want to make sure you are on that layer number two, okay. So we're gonna start by
doing his facial features. So his snout and
mouth and his eyes. We're going to start
with his nose. So what we'll do
is we'll come in here and we're gonna long hold on the darkest gray
in his nose. We're gonna do a dark
gray, light gray, a little bit of a
highlight and then a black for his nostrils. So long hold and you can see, see the different colors there. So the color on the bottom is the color I already
have selected. The color on the top is where
my finger is on the page. Okay. So we're gonna come down and
choose that, that dark gray. We're gonna take our
brush and just kinda make a shape with that gray. Then what we can do
is pull from the top, see how I've grabbed the color. And we're just going to
drop it in to that shape. It doesn't have to be perfect. This is meant to be
a minimalist style. So it doesn't have to
be exactly perfect or exactly where the colors are, I'm going to connect
to that there. It doesn't have to be
the exact colors even. We are just picking an average of the
colors that are there. So I've chosen a dark color. Now I'm going to come
in with a lighter gray. That one. We're gonna do
the rest of his nose. One thing with the
color drop tool, the shape has to be closed. So say we draw a circle but
we don't connect it there. If we pull the color
in and drop it, it's going to fill
the whole page because the shape isn't closed. To undo, you just take
two fingers and tap once. Okay. So if we close that shape, then bring the color drop
in, then it fills up. One thing you might
be running into is lines around the edges. Do you see that? If that's something that
you're running into, me, show you how to fix it. So we've got our circle. We drop our color in. I'm still holding down
with the pencil on the iPad. You see at the top it says
color drop threshold 0. If we keep holding down and
we move it to the right, you see that threshold
percentage is moving up. That's what we
wanna do for that. If you move it too far, it will fill the
whole page again. You want to get that
sweet spot, alright? So I'm just going to double
tap once with two fingers, two times, three times actually, to get rid of that.
And we'll keep going. Let's fill in this spot here. And now what we're
gonna do is take a black fill in the
nostril on this side. Then it looks like I
covered it up accidentally on this side. To see underneath what we can do is uncheck the layer that we're on. So I'm just going to eyeball it. That's my bad because I covered it up. It's because when I
did the light gray, the shape wasn't
close so it filled in this area where his
nostril would be. Okay. So now what we're gonna do is little highlight at the top. So we're going to pull one of those lighter grays
right in there. Just kinda come in on
the top like that. Gonna do a little
highlight over here too. There's his nose, now
let's keep going. Let's do his eyes. So once you zoom in, I'm going to pull black color
For the top of his eye. His eyeball. Color
drop. Same thing. I'm going to find a
good brown in there. We're not gonna do all
those different shades. I'm just going to
pick one, color drop. This part in the fur. I'm doing kinda
squiggly lines because that way it will follow the
line of the fur better. So it'll look more like fur, I mean. Let's do a little bit of a dark
line on the bottom. But we're going to
actually come back through with that
lighter color, white. But I wanted that dark
to still be there. It's more of a gray.
And we're going to use that same color to do a
little sparkle in the eye. So two ovals, one
bigger than the other. One final bit on the eye, we can take some of
this gray in here. And just like we did
with that first layer of black along the top,
do a little bit of gray. Okay, Let's move
to the other eye. This one's a little bit
darker, it's in the shadow. And as we move on to do
the rest of his face, I'm actually going
to pull some of the colors from this
side to do this side of his face because I know he is
lighter than this. He's just in the
shadow in this car, this side, or in the car, this side of his
face is shadowed. But for his eye it's
mostly dark anyway. So I'm going to pull one
of these dark black shades and do the same thing. We
will do his eyeball first. I'm going to come over here
and pull that same brown. Because see over here,
it looks really dark. It looks almost black. But I know his eyes are brown. So I pulled it from the other side because
that's where the light is. And then I'm gonna do all this
black around the outside. That same with those same
squiggly lines we did before. And it doesn't have
to be perfect. Now we're going to
come back and choose that same color we used
for the sparkle over here. Come over here and
add some sparkle. There was a little
bit right in there too. Then take some of that black from the top
part of his eyeball and line the bottom also. There we go. Alright, we're getting there. Okay. So now we've got his eyes, we've got his nose. Let's do his tongue. So we're going to move
down and do his mouth. For the tongue, I do
three shades of pink, a dark, a light, and
then a highlight. So we're going to pull in
one of the darker shades, but not too dark since
we're only doing two, really two color values for the tongue and then also
adding a highlight. We're just going to pull
a dark grayish shade. And then we'll just follow that outline and then fill
it in with a color drop. Sometimes for skinny
areas like this, It's easier to just color it. Okay, So we've got
our dark shade. Now we're going to pull
a lighter shade of pink. We're going to put a
light shade and then a highlight so we don't
want it to be too light, somewhere right in there and see what
that looks like. Close off the shape. Yeah, that's gonna be good. It doesn't have to be perfect. You see how I kinda went
off the lines over here? This is a minimalist
style drawing. It does not have to be spot on. It's going to look good
in the end, don't worry. Okay, so now fix this
up here a little bit. We're just going to connect
those two little better. Alright. And now we're going to
pull a highlight so long hold on the light color. Come up to your color wheel
and just drag that center dot up a little bit to
a lighter pink. I'm going to do highlights
kinda like that. Just little rounded shapes along the tongue, then over here. Okay. All right. Let's keep going through
the rest of his mouth. So we're gonna long hold
the top of here and just kinda squiggly lines a lot
around his little snoot. Sorry if that shook the camera. Color, drop it in there. That's a good opportunity
to be able to smooth out any weirdness with the
tongue back there too. If you just go along it. We're going to take
that same shade. And what I'm gonna do
for his teeth over here is just outline them. And then come down here. And outline his lip. Color drop it in there. So now to do his teeth, I'm
just going to pull the brightest white that's in there, just the brightest shade. Drop it in to every space. Now let's finish off
his facial features by doing his little snout. So I'm gonna do this gray
spot here right in the front. I'm just going to pull
one of those medium grays in there by using my finger. Right. Squiggly lines like
we did before. Sorry if that shaking the
camera, I'll go slower. So we're going to
outline both sides. And then color drop it in, make sure that shape is closed. Then we'll do the snout part. So this slide is a pretty bright white and this side
is in the shadows. So what I'm gonna do is
pull one of these kind of medium shades from over here and actually color
this side with it. Because I know that
his face is all white. I just, or not his whole
face but his snout. It's just that the
shadow makes it look a little bit
darker on that side. So I'm actually going
to pull from this side, then fill in the other
side of his snout. Okay. Drop it in. And then we can come over to this side and do the same thing just with that color
that we selected. Want to make sure
we close the shape. Alright, then I'm going to go pick a bright white for
this very top part. So the way you can
choose true white is click your color
up there and then just double-tap on the
white and then it will pull the color match
to very white. You can do the same
thing for black. If you double-tap down here, it just pulls it to
the deepest black. But we want white this time. We're just going to come in and fill in that
little section there. Okay, so now what we can do is look and see what it looks like. So what you do to see how you're progressing is you
go to your layers. And then you just turn off
the reference photo layer. So you can see there
that we've got his face.
4. Finishing the Face and Head: So now that we have done
his facial features, we're gonna go through and do the rest of the fur on his face. Basically, this is just
gonna be shades of different light grays and whites to some light, medium,
and darker browns. So let's get started. Since this side
is in the shadow, we're going to pull colors from this side just like
we did on his, on his snout here. So we're going to do
this side first so that we can easily pull these colors. So we're going to start with
this kind of a whitish tan. Actually, I'm going
to pull this color here from a snout, it's kind of gray, and do this right
here under his lip. Just color drop that in. Now I'm going to pull
that light tan color and come over here
and do all this. We're gonna do those just
kinda squiggly lines. Let's pull a brighter white
from over here and come in. Do all of that
because you can see, I don't know if you can see, but you can see that the white in there,
it's just shadowed. Every time you want
to look at it, you can just kinda zoom out a little bit and
then zoom back in. So now for this
bit right in here, I'm going to pull this
medium brown color that's on this side. And then we're going to pull a
darker, or a deeper brown, I'm gonna turn it sideways a little bit, and then come to some
of these fluffy hairs. Color drop that. Looking good so far. I'm just going to
fill in some of these spots that I miss here when I was going too fast. Sometimes, I don't know if this is going
to come through on camera, but sometimes when
you color drop in, it doesn't go all the
way to the tip if you have a pointed area like this. So it's something to notice, but we'll actually go back through and address
those spots later. So like right in here, you can just pick the color
and come back over the top. But I'll also show
you how to address those spots in a later video. Alright, just a little
bit more right in here. And some at the top. Okay, So now we're going to pull a lighter color and just do these final little
wispy parts of his ear. Then we'll be done with his ear. And you can see that
this isn't exact, okay. Like I said before, it's
a minimalist style. We're just picking the
average of the colors. It's not going to be exact. So we've got that
side of his face. Let's just do this
little bit around his eye and then we'll come
across to the other side. So now I am going to start
pulling from this side because his head is in a
little bit of a brighter spot. I'm just gonna do this
light brown around his eye. And I'm gonna pull a medium brown, like right in
there for this little spot. And then same thing
right in here. See how I'm just doing
these really jagged lines. That's what's really
going to make it look like fur in the end. We'll use that same
color around this eye. Alright. He's got a couple of
grayish spots in here, so we'll do those. One kinda right in here.
That looks like almost exactly like
this color here. Let's just extend that up. Alright now we're
just going to pull this lighter color. We're almost done. We're going to come
around on this side and just do the same thing. So I'm going to
just be consistent and pulled the same color. So I'm gonna start with
this darker color. And just come in And do these darker
tones and his ear. Make sure those colors
connect, that way when you color drop it in, it works. I'm going to grab that medium brown and come in down here. This shade for this
lighter brown color. And then we'll get into
those tans and whites. Alright, and then come back
in on his cheek, grab the color and we
pulled from the other side. Whoops. See, my color, my line
didn't connect and you can see right there
where it didn't connect. So we're just going
to pull that. Now it'll work. Get that spot. Alright, let's just do his neck. I'm going to pull
the brightest white in here, right there. Do these just jagged lines all
the way across to get that fur. Don't worry about going
over the top of the harness. We are going to do
that on another layer. So don't worry about it.
Just going to come all the way across and
connect it up here. There we go. We've finished
the rest of his head, so we've got his head
on his face done. And in the next video, we'll do his body
and the harness.
5. Drawing the Body and Accessories: Okay, So you've
finished the head and now let's move on to the
body and the harness. So what we're gonna do is
come up to our layers. And we're going to select our reference photo
and then press plus. That's going to
put our new layer above the reference photo, but below the layer we
were just working on. And that's what we want. We want our layer
to be underneath the one we were just working on. So make sure you're on
the right layer there. Then we're going to
zoom in and we're gonna do the harness. So remember this is still
a minimalist style, so we're just going to pull just the average
of these colors. I'm going to pull like kind of
a bright medium blue in there just by using my finger and then we're
just going to outline it. So we've got our blue. Now I'm going to pull a
darker shade and just outline the top of
that line so that it differentiates it from
the other blue sections. And then just right in here, I'm actually going to color
that in with a darker blue. I increased the brush
size to fill it in faster. It's just another way you can color instead of using the color drop. Okay, so now let's
go back to the light blue and we'll do
this inside section. There is a little
bit up in here. And you can see I'm
coloring behind the layer. Okay? So let me show
you better down here. Right there when I go across, see how that blue it's
behind the white. One thing you need
to be careful with is say we're doing
this section here, we're going to
outline it in blue. Make sure it's
connected over here. And then it looks like it
intersects with this white. But if we've colored drop it in, it fills the whole page. That's because it's not
actually intersecting, because it's on a
whole different layer. So basically what you
have to do is take that top bit and
just connect it to the other side so that it closes the shape underneath the
layer you're working on. Or on the layer
you're working on underneath the layer
that we did before. We're going to just keep
going with these shapes. Just basic shapes, doesn't
have to be perfect. Color drop that. I'm doing all the blue first. Alright, same thing over here. I'm just going to connect
it back behind there, even though I can't see it. Fill it in, and then come
pull that darker blue and do that same line just so that it differentiates
between the seam. I am also going to do over here like we did
on the other side. Just fill in that right
where it goes under his arm. Okay. Let's do the red. So I'm going to pull the
brightest red that I can find. And we're gonna go through
and do the same thing. All right, we've done the
red, we're not going to worry about any of
the black lines. And now we're just going to
come through and do the gold. So in a lot of these
areas. We've already created the path for the gold. We've already created
that closed shape. But some of them we're
just going to have to come through and close, use our best guess
back behind there. You can also just
turn off this layer and see you can do it like that. Just another way to do it and
see what you're doing. I'll turn that layer back on. There we go. Now we've got this cute
little Spider-Man harness. So now what we're gonna
do is do his, his fur. So we're gonna do the
shadowed parts first. The parts where his harness is , kinda up under his
arms or his harness is touching his fur. I'm just going to pull one of these
gray colors, a light one. We don't want it to
be too too much. Right in there. I'm going to come
along the harness. Just kinda, and then we're definitely going to make sure it's
shadowed under there. Okay. Then we're just going to
pull that black color for that last little
spot, fill that in. Coming back over to this side. Same thing. Just using the same gray
from the other side. Fill that in. I didn't close it off over here. I'll just pull that black
also and fill that in. And now what we can
do on his legs, It's just pull a bright white. Follow his fur with those. jagged squiggly lines,
color drop it in. Same thing on this side, even though this side looks darker, it's just because
it's in the shadow. So I'm coloring it the
same as the other side. Let's just do his body. We're going to pull that medium
brown color from the top. I'm going to - this little clasp, here, that's part
of his harness. I'm just going to skip that. It's not important
to the picture, so I'm just going to
not worry about it. Make sure your colors connect. Color drop it in. Alright, last step is just come through and
touch up on this harness. We're going to grab
that dark blue color. Just come through this spot in here where all those
lines intersected. Just give that a
little touch up. And then what you can do is turn
off your reference photo. And we're gonna take
our eraser tool. And using the monoline brush, same thing, same brush
with our Eraser tool. We're just going to
come select the eraser. We're going to
come just clean up that edge where the harness is. This side. This side doesn't really need it. But what we will do is grab that blue and clean it up this way. There we go. Alright,
it's coming along guys. So we've done his
arms and his body and its hardness and his face. So now we just have a little bit more to
go before we're done.
6. Adding a Background and Finishing Details: Okay, so for the most
part we finished, but we're going to add
our background color and then we're gonna
do some touch ups. Okay? So we're going
to add another layer. Go down to your reference photo and hit the plus
sign and that way, this layer winds up
underneath everything else. And we're going to choose
a background color. So I think a green would look really good. With
the color wheel option. You pull the color
around like this, and then in the middle,
you choose the value. Let's see what this looks like. I love it. We're going to roll with that. So now. If we zoom in, we're gonna be able to
see little bits of green. You see that? We're going to add
a fix-it layer. I'll show you what I mean.
So above the green hit the Plus new layer. I'm so guilty of never
naming my layers. So if that bothers you, I am so sorry. But I just, I am
so bad about it. I just don't name my layers. So this is gonna be our fix-it layer and
we're going to be. So it's important that
it's above the background, but below your artwork at
this point, if you want, you can just pinch
these two layers and squish them together into one. That would be just fine. So what we want thought, is
our fix-it layer below the artwork but above
the background. So we're going to
zoom in. We're going to find one of
those green spots, pick the color closest
to it, and just fill in. We're just going to go all
the way around the picture, looking for those
little spots where you can see the green
in the background. And what this is doing
is we're drawing actually underneath our artwork. So like right here,
when I do this, it doesn't actually
interfere with either of these other colors because I'm drawing back
behind the artwork. It's only filling in the
spots that are see-through. So that's why I do it like this, because it just saves you
from messing up your picture. So we're just gonna come
find all those little spots. This is also what I
was talking about. When you have those
little spots that came through on the points. This is the, this is how
we're going to fix those. Now, if you merged
your layers together, and you have the harness
coming through the white. You are actually going
to need to go back to the artwork layer because that red is, they're
on the same layer. Now I'm back on my
fix-it layer and we're just going to keep
going, but we're almost done. I do go through the
whole picture though, find all those little spots, but it doesn't take very long. Alright. We've done
our background, we've done our fix-it layer. Last thing left to do
is sign our picture. So remember, we added a
bleed to this picture. So that means that an eighth of an inch is going
to be cut off on all sides if you
have it printed, so you don't want to sign
too close to the edge. You don't want to
sign down here. You want to sign
far enough away from the edge that it
won't get cut off. So what we're gonna
do, the very top, add one more layer. This is our signature layer. And we're going to
sign right in here, right in his arm. So what I'm gonna do is
pull that white, long hold. Now I've got the white selected. I'm gonna go to the
color wheel and just drag it down into
the gray a little bit. And that's gonna be
my signature color. So it kinda matches the white, but it doesn't get lost in it. And then we're just
going to sign it. There we go. We've done it. In
the next video, I'll show you how to export it.
7. Exporting Your Picture: You guys, we did it. I'm so excited. I can't wait to
see your pictures, so I'm going to show
you how to export it. So one, you can post it in the
comments below this video, but two, so you can have it
printed however you want. You can have it
printed as a piece of artwork or take it to be
printed somewhere else. But I'm going to show
you first how to export. So what we're gonna
do is where, we've got our picture,
we're going to hit the wrench icon. We're going to select Share, and then we're going
to select JPEG. And that's it. You just now at this point, you can just share
your JPEG wherever. You can save it to your
iPad, in your photos. You can save it to, if you have any kind of file storage
installed like Dropbox, you can email it, text
it, whatever you want. So all you have to do is just export it as a
JPEG and that's it. You've got it. So you guys, I'm so proud of you. Like I said, I can't wait
to see your pictures. So definitely show me in the comments so I
can show it some love. And I am so excited
that you're here. Thank you for taking my class.
 Meghan Stockinger, Artist | Graphic Designer