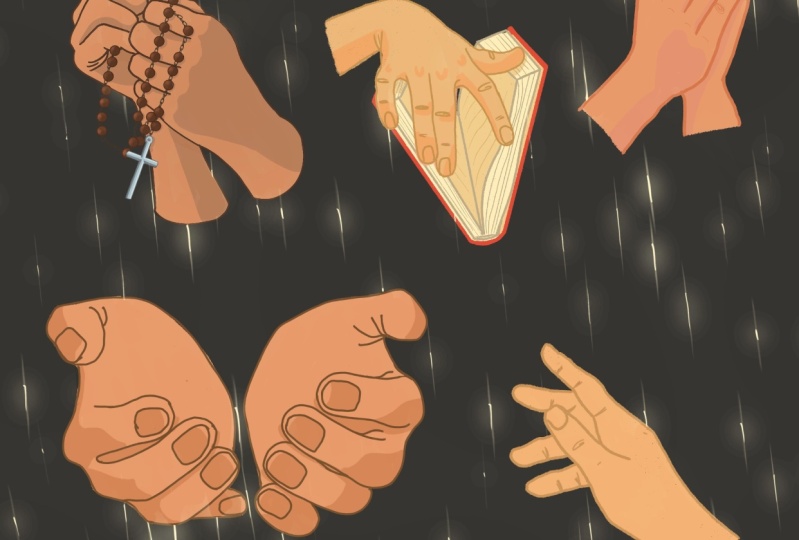
Transcripts
1. Introduction: Hello and welcome
to another class. In this class, we are focusing
on drawing stylized hands. And we will dive into the
art of simplifying and using basic shapes if you
want to feel more comfortable and to boost your confidence
in drawing hands, either for your personal
projects or client work. This class is for you. Hi, I'm Eva, and I'm
full time illustrator. Drawing hands helps you to create more engaging characters. And that also helped me to work on many projects
big and small. So I want to help you to do
the same during this class. And even if you are a beginner
and you to procreate, I will take you step by
step through the process. During this class, we'll
start off with looking at references and tips and tricks on what to focus
on when drawing hands. Drawing hands can be tricky because of the amount
of bones and muscles. So in this class, I want to help you to
simplify the shapes and break the process down into
more manageable steps. So you can soon be creating hand drawings that
make you proud. I hope when you watch this video and follow this
project illustration, you will feel super happy about what you created and
you will feel like, oh, I can't wait to share my
illustration with others. And when you are sharing
it on Instagram, please make sure
that you take me in the image not only
in the description, because that way I can see your illustration and maybe you'll see it in one
of the next videos. So if you don't know yet, you can find even more drawing
tutorials and classes. There are procreate
and other tutorials. And I have more than 30 classes. There, there is a variety
from beginner level to more advanced levels and you can also find
different topics. So without further ado, let's start and see
you in the class.
2. Flat vs 3D Shapes: All right, we will start
with simple shapes. Now with the brush. I will be sketching
with brush number 21, which has a little
bit of texture, but you can choose any
brush that you like. For this drawing exercise, I will be sketching
with warm brown color, but again, you can choose
any color that you like. When it comes to palm, I usually like to think
about the first shape, which is the palm from the
top or from the bottom. I imagine this simple shape. As you can see, it's very loose, so we can even zoom out. You can always imagine a
grid on this simple shape. Then if you want to twist
this shape in space, you would still imagine
that the grid is following the shape of the palm has
this three dimensional shape. It's not just like
flat shape like this, but you can start thinking
about palm in these terms. This usually helps me to imagine these
shapes much better. I can reduce the opacity of
this first one even more. We have a nicer looking sketch of the sketches don't
have to be perfect, that's why the warm
up exercises help. All right, first thinking
about this flat shape, then what I do next is think about this flat shape in space. Basically, we still
have this rectangle. Once again here I need to make sure that the sides are aligned. Then I can create a box
in a three D space. This can represent the palm. You can imagine the grid on
top of this box as well. Then it should be easier to move this box in
different angles. I can imagine this as
a base for the palm. And as you can see,
you can do many boxes like this as an exercise just to practice creating the
type of shapes to imagine this kind of box as
a palm in three D space. All right, I sketch
a couple more of these boxes in very
rough line art. It's not perfect. But
basically when you imagine starting from
very flat shape, then you would imagine how this shape can bend
and twist in space. For example, if you bend
it like upside down, you can have shadows
on the edge. You can imagine that
your palm is bending. And then you might have
a shadow here and here. And this is in light. Of course, this is
very simplified then If you have the
three dimensional shape, you can always
imagine the side of the palm and the
top of the palm, you would have a darker side on one side and light on the top. If the light comes
from the left side, then if you twist and
turn this type of shape, you would have always
the shade or shadow on this side and light coming
from here in this case. All right, now let's move
on to the next part. It would be the best if you practice more with these shapes, you get more comfortable
imagining shapes in three space.
3. Sharp Angles vs Curves: Now let's start looking at
real life references of hands. Well, this one is mine, as you might have guessed. Now let me share a next step. What helps me when
drawing hands? First of all, as I mentioned
in the previous lesson, is practicing drawing
the basic boxes. I have more of
these images here, so I can sketch this
box on top of the hand. Also on this one we have the
top side and bottom side. The top side is
called dorsal side and the bottom side of the
hand is called Palmer side. Then let me show you what helps me when sketching
hands. Another tip. It's this angle with the thumb. Always try to pay
attention where is this angle when looking at
different references of hands. Because on the left side, on the left side, when we are looking from the
top, we have a bone here. On this side there is muscle. This one is a little bit
more round than this one. The same when you look
from the other side, obviously you have a bone
here and the muscle here. Let's look at these
other references. This angle is a little bit
less sharp than on this side. When you look here,
the angle is here. It's this sharp angle. When you are looking
at the hand, the next thing is
what I'm looking at, especially when you have the
top part, the dorsal side. Then when you have
the bottom side, as I mentioned, you
have a bone here. But there is the muscle here. There is this iconic muscle
where we attach the thumb. We can disregard
this one for now, focus only on this big muscle, which is here on the
bottom side of the palm, which usually helps you to
define the hand when drawing. Just to recap, when
looking at the hand, first try to imagine the box. How the palm is positioned? Is the box from the side, or you see it just from the top? As a flat shape. Usually we see the hands from the side
or many different angles. But the angle of the
bone, which is here, always helps me to
define the placement and the shape when
drawing the hand. The angle, if it is from the
bottom side is this muscle. All right, now let's
move to the next part.
4. Simplifying the Silhouette: Now to continue with
the same references, let me mention another tip
which helps me to draw hands. That is, imagining
the hand as a mitten. Maybe you already heard
about this approach, but it's basically
imagining the mittens you wear in the winter
where you group all the fingers together
and then you just have this whole thing becomes one silhouette
and one shape. How can you approach that? I will use the
angle of the thumb. Then here I can round of
the box that we used. Then for the top part, I would just use
this type of shape of the part with the thumb.
You have the mitten. If you draw the shape
from the bottom, the muscle as we talked about, because that helps me
to define the hand is in a different
view that we are looking at it from the bottom. Then I can add the thumb
again with the angle. Then I can add the top part of the mitten from the bottom. I can also draw the connection
where the fingers start. I can imagine if the hand
is from the Palmer side, as I mentioned, or from the
dorsal side from the top. This is another thing
which really helps me when drawing the hand
in different angles. We can practice this approach more in upcoming
lessons as well. Now to continue with
the mitten exercise, always imagine where is the muscle from the
bottom of the palm, as we mentioned before. Then where is the angle of the bone that
we also mentioned? Then you can draw the
thumb as a mitten. Then for now, you can draw the part with the fingers
just as a mitten. And then you have it. If you just focus on
the mitten shape here, you would have the palm with the muscle and the rest
of the mitten shape, If we do the same
thing over again, we have the hands, then we
have the top of the palm. Here we have the angle, then we have the thumb there. You have your mitten. Now here we don't see the bottom
side of the muscle, but there is another
muscle here. If you push your finger towards, the hand will
create more volume. They use this in Tarzan
Animation Theory. If you watch the animation or look at some of the sketches, they utilize drawing
this muscle lot in the animations because it creates this realism
to the hand. Now if we create
another mitten here, first I will create the rounded box as
we looked at before. Then I will add the
angle of the bone here. I can just at the
top for this part, I can just draw the
mitten in this way, because we will have the fingers splitting the mitten with
the light and darker part. Then if you imagine
this type of mitten, you can again draw the top part flat because
we have the bones there. The bottom part will
be more rounded, but still we can
emphasize the bone here. Then the finger and just top of the fingers on the
top fingers, right? You can actually simplify this whole top part to
be more flat when we are talking about
simplification, all right? Always pay attention
which direction is the thumb and the
bone of the thumb if we see this little bit more rounded or you see
more of this angle. But I like to
emphasize the angle of the bone because it makes the
drawings quite interesting. You can decide to make it
a little bit more rounded, as I already mentioned, or a little bit more angular. Always pay attention where is
the soft part of the hand, which means the muscle, and where there is
the bone of the hand. Because here obviously
there is bone and here we can create the curve
because we have more soft part and
the muscle there. All right, now let's
move to the next part.
5. Wrist and Palm Proportions: All right. Before
moving on to focus on fingers and the palm
in different angles, let me show you what
I also like to pay attention and what
you should notice also on your references
when drawing. That is the distance or the amount of volume
when you consider the wrist and the palm
placement on top of the wrist, which means on this side there is the angle
here, which is smaller. And on this side, the angle is quite big. What I want you to notice
is the distance from the wrist in whatever angle
you are looking at the hand. Always try to pay
attention to this angle or the width of this part versus the width on the other
side where the thumb is, if I sketch it on top. All right. Basically what I want you to notice
and pay attention to is the placement of the palm compared to the wrist wide. Or how big is the side
where the thumb compared to the side where you are drawing the hand from the
wrist to the pinky? So this angle will be usually
smaller than this one. All right, now let's move
on to the next part.
6. Palm, Joints and Fingers: Now let's look at the placement of the
fingers and the joints. If you first look at the
palm from the dorsal side, you will see that the knuckles, the joints are somewhere here. The placement of the joints, it's following this
type of curve. Then the top of the finger, okay, this is not a
knuckle obviously, but you will see the
joints are here. The top of the finger
has different placement. You will see that the
top three fingers and the middle finger
is the tallest. And then there is a
bigger jump to pinky. When you're drawing
the ten shape, you can always create more, this angular line going
towards the pinky. Now if we look from
the other side, you will see the lines splitting the hand from the Palmer
side little bit differently. Because if you notice the
parts of the fingers, they are split more evenly, approximately the same. Let me sketch this again in different colors so
you can see it better. The parts from the bottom are a little bit more even compared to the other side
where you see that the bottom part or the
first part of the finger, it's much longer and then
it's shorter and shorter. Also try to notice that the palm is longer
from the bottom side. I can edit this, We can see better compare to the dorsal side where
it's a little bit shorter. That's when you where
the fingers start. On the top side, it's a little bit lower
compared to the Palmer side. That's why when we bend the hand where you
have all the knuckles, you have the lines here, right? Always notice how you
can create these lines and placement of the knuckles when you are sketching the palm. You can create the man like this and the same here on this side. So pay attention where the joins are and how you
can connect them. When drawing the hand, you can always imagine these lines going closer
and closer together. When drawing the fingers, of course you want to follow
this one to the top here. Pay attention where the
fingers are starting. And if you want to
draw the lines, then you can split
the fingers more or less evenly, All right? Just to recap, evenly split the fingers
from the Palmer side. The palm is a little bit longer from the dorsal
side, from the top. The palm is a little bit
shorter when you look at it, depending from the jangle. Then creating these
curves when connecting the joints on the hand helps When you are
drawing the met, you can create curve
part and then going down the same here and
sharper down then the angle. Now before we move
on to the next part, just to reiterate what
we just talked about, the Palmer side versus
the dorsal side. When you look at the hand from the side and you would
imagine the box, we would have our mitten. Basically this line
is not the same, right, Based on what
we just talked about. If you would need to
actually recreate the box, you would need to create a
line something like this. Because this part is longer
and this part is shorter. Think about that. When you're placing
the knuckles or the placement of the shadows
and like bumps if you want to add them when
drawing had this part is longer and this part is shorter when
simplifying the hands. All right, now let's
move to the next part.
7. Drawing Fingers: Now let me mention another tip. What I use when thinking
about drawing fingers. That's a cylinder technique. I always imagine
these type of tubes. Because if you think about it, the fingers are like
these cylinders. If I imagine this type of shape, it's easier for me to think how the curves would be in
different perspectives. Basically, you can take any
shape which will help you to imagine this type of
like a cylinder tube. And you can move it around if you want to use
it as a reference. You can use any shape that you find at home if you want to practice these type of cylinder shapes when
drawing fingers. Because I can twist it and
turn it in different ways. And that can help me to imagine
different perspectives. And also foreshortening
in more difficult angles depending how curved is, this kind of shape. You can also imagine drawing a fingernail on top of
this curved surface. Basically, the fingernail
would be following the shape, maybe, then the fingernail
is something like this. It's hard to imagine
that this is a finger. But thinking about
these three D shapes, it helps when imagining different things on
top of these shapes. Like on top of the surface, for example, the fingernail, the cylinder
technique, helps me to imagine the fingers in
different perspectives. Okay, now let's look at
some hand references. First of all, when
drawing fingers, of course we have the palm as we practiced in
previous lessons. And then the fingers are
spread wider than the palm. If you are drawing
them in this way, then the same, you can imagine this curve and then
connect them to the wrist. Let's create lines
for each finger. Imagine this, but of course, when we are drawing
different hands, we see an overlap
on the fingers. What helps me to
establish the shape is to focus on which fingers
are on the top. Then I can focus on the other fingers which are
overlapping each other. This one is on the top. Then all of these other
ones are grouped together. Then we have the top of the palm with this bone and
the angle and the breast. When we are creating
stylized wrist, you can make this
part more narrow. What also helps me in this is establishing
the fingernail. Basically, the placement of the fingernail helps to show which direction
the finger is turned, Depending how much
fingernail we can see on the finger
or we don't see, helps you to create the
shape of the finger and show in which angle
the finger is turned. Let's look at another reference. The same goes for this one. First, I will focus
on the thumb. You can create the ovals to
help you create the shapes. Then you can draw a little bit of that muscle which
connects the palm, I mean the thumb to the palm. Then here on top of the
finger where there is bone, you can draw straight line, then curved lines to create the rest of the
finger, the bottom part. As we looked at the cylinder, you can imagine that the
finger volume is the same, like the cylinder here. I can simplify with
straight lines on top and create the curve
part on the bottom. Again, try to imagine
the cylinder. This part we can either simplify with
little bump and going down that you can start to notice the cylinders on the hand and how
you would shade it. You would follow these lines
when shading the palm. But of course, we are not
creating realistic palms, but we will be simplifying the silhouette and
the shapes here. I'm already thinking, what can I group and simplify when
drawing this hand? We can practice a little
bit more on this one. Again, I forgot to mention on this one that we
see the fingernail here. I would draw the
fingernail on this one. We see it only on this
part a little bit and we don't see it much
on the other fingers. All right, on this one, I can create straight line here, another straight line here, curve the finger,
then go down here, create the cylinders, which can help me to
imagine how to shade this. Then the thumb,
you can round off, this line is a little
bit curved here, I can exaggerate the bone
as we talked about before. You can create this
subtle curve here, then add most of
the other fingers. As you can see, we can imagine the cylinders for all the other parts as well. And then we can simplify the top part just
with a straight line. Think about the cylinders, how it can help you
when creating the palm. Then how you place the fingers, because that will
help you to show how the palm is turned and how the fingers are turned
in perspective. Okay, now let's move
on to the next part.
8. Gesture and the Silhouette: Looking at different references, always help me to draw hands and imagine the hand poses for
illustrations that I want. But sometimes,
either when you take a picture of your own hand
or you find the reference, the silhouette can
be hard to read. Maybe it's not exactly what you want for
your illustration. How can you simplify
this type of silhouette? My first thought would be these fingers probably
can be grouped together. Then the bottom finger, the forefinger can
be grouped together. This type of hand or pose for the hand is often used
in animation as well. Where you have the pinky
out a little bit more, maybe the thumb is out as well. Try to think about how you
can simplify the silhouette. Here. I try to take another image or another photo where I group these
two fingers together. Then the pinky is sticking out a little bit more just to
create some interest. As you can see, the fingernails are in a little bit different
angles for this one, and this one is on the side. Then we add the
angle for the thumb, and here we have the muscle. Of course, there is that pencil. Think about how you
can group the fingers, the silhouette becomes
more interesting. What I usually like to do is to group at least two
fingers or three fingers, and maybe the pinky is separate
in the silhouette here, I try to take another photo where I
actually group the fingers. This was not natural
pose for my hand first, but I try to group it, as I mentioned, in a way
how I like to draw it. Basically, the thumb
is separate here, we have the muscle here, you put the bone. These fingers are grouped together and the
pinky is separate. I like to create hand poses like this because for
my illustrations, I like how elegant they look. Of course, it
depends on what type of illustrations
you want to create. But try to think about the
silhouette of the hand, if it is readable, and how you can
group the fingers. The same goes for this one here. The fingers are more angled, but I can group the
fingers in this way. I have the curve, then I
can add another curve here. And the wrist, just to recap, try to think about the silhouette
of the hand and how you can create this nice overlap
and group the fingers. Now let me mention
another thing which I found important
when drawing hands, and that is a gesture. Gesture is one of the most
important things when drawing hands because we want to communicate with
our illustrations. Hands and their expressiveness
can help us to do that. We talked about the
simplification. Now let's try to
simplify this gesture. We will have this ten
shape and the fingers. Then you have the thumb,
the curve, and the wrist. What is also important
when you are simplifying, try to decide on what is the important information when simplifying the edges
of the fingers. Because maybe on this part, when I will redefine
the illustration, I still want to keep
the knuckles right. Even though I simplify the silhouette and group
the fingers together, I'm still keeping some of the bumps and the fingers
are rounded at the ends. But the important part
of the gesture is one of the fingers is out and the other fingers are
grouped together. Also with this type of gesture, try to avoid creating
just one round block. Because as you can see, some of these fingers are
higher up and others are lower. Even though when you start
and first try to notice the shape when
simplifying, of course, use the simplified shapes, but then when you
redefine the drawing, try to add some of these bumps, still, keep the silhouette simplified if you want
to have that look. Of course we are not creating
hyper realistic look, but try to think how to simplify or how to balance
the simplification. And little bit of interest in
the silhouette on this one. What I want to
show you is I also pay attention to the wrist. Is the wrist more like this? Maybe the hand would look
even more relaxed or post. If the wrist is in
a different angle, pay attention how
you place the wrist. Is the wrist very
much stretched, for example, like on this one? Because when you place the fingers and the
wrist in this way, it creates more
tension and creates definitely different
gesture than a relaxed hand and
arm like on this one, where the wrist has
different placement. Try to pay attention to how you simplify and the silhouette
that you create. But you don't oversimplify
and just create only blobs. But pay attention to the silhouette and
the wrist placement. All right, now let's move
on to the next part.
9. Male and Female Hands: All right. Now
let's briefly talk about male versus female hands, because of course, there are many different
hands and palms. So this is not, uh, you know, set in stone
or anything like that. It's more like
generalization of some of the more common hands or
what you see around you. Of course, this is not something
that is always the rule, but let me just mention it. Let me move this back. Female hands or for some people
the palm is more narrow. The fingers can be longer and more slim compared
to maybe male hand, which sometimes tend to
have much wider palm, bigger fingers, and maybe
sometimes even shorter fingers. They sometimes utilize
this type of look in animations where the male
have the bigger or wider palm compared to females which
have more narrow palm and longer fingers also sometimes
happens or sometimes what you can see is the
wider thumb for males, then females have
more narrow tube. Of course, some females
have also longer nails. This is how you can
also draw it in animation or when drawing female fingers
versus male fingers. Also another part, how you can differentiate is to
draw wrists which are more narrow compared to male wrists
which can be wider. Let me move this
chunky finger here. This other chunky finger, let me make it smaller. Just to recap, some of the more stereotypical
proportions for female versus male hand
is the palm shape. For male, it can be wider, for female, it can be
longer and more narrow. The wrist can be also more
narrow versus the male wrist, also the length of the fingers. For males, you can draw
them shorter and chunkier. You can use more square shapes. For females, you can use
more round and soft shapes. You can see it in some
of the animations, how they use the
shapes of the fingers to differentiate
different characters. For example, if you are
drawing maybe old grandma or someone with bigger knuckles and more angular shape fingers. You can play with bringing
the character into the hands for your characters when you're drawing
illustrations. And the same goes
for the fingers. This person has
long fingernails. Or you can draw fingers with still like
longer fingernails, but they don't go outside
of the shape of the finger. They are not like much
longer. Something like this. You can also
research and look at different fingers and
different fingernails for males and females, depending what you want to draw. All right, now let's
move to the next part.
10. Project Illustration #1: All right, now let's catch
with some references. I collected variety
of references to choose from for this
first exercise. Or if you do more
of these exercises, which I definitely suggest is
to follow the same shape or the same hand gesture and placement as I'm doing
in this exercise. And then later on you can find your own references and
practice different hand poses. For the first one
I was thinking, we can take something
like this and then we can some plants or the
flower into the hand. I am sketching on
a separate layer. For this part, I will
take a softer brush, but you can continue with the same brush that you
are using right now. I also prepare a color palette. If you want to use the
same colors as I am using, I will first sketch
with this warmer, darker brown or lighter brown. Then I will try to look at the hand and
imagine the mitten. First of all, I am
sketching the palm, trying to see the proportions. We have the muscle here, Then the thumb is
somewhere above the palm. We can draw this
round circle here. Don't worry, we can
always move these shapes. The finger or actually
this is the index fingers, just above the thumb. We can place it somewhere here. Then this finger is aligned with the top part of the muscle. It will be somewhere here
and then we can move it. This other finger
is somewhere here overlapping the pinky is
hidden there as well. Then we have the shape where we have the top
of the finger band. We can imagine the mitten here. We can add the bone angle which goes a little
bit out of the palm. So let's see. These two fingers can
be grouped together. The pinky can be separate. I will draw this line here. And then the second line of the bottom part of
the finger here. I can see that I need to move
the fingers a little bit. This is the first, the
thumb needs to be smaller, maybe something like this. We create the space for
these fingers here. Then the position of the wrist, don't forget that it goes
from more narrow to wider. And we want to have bigger space on the right side than
on the left side. Now I will reduce the opacity of this sketch and I
will sketch on top. So I want to group these
two fingers together and this should be aligned
with the middle of the finger. Here, I'm looking
at the alignment. Drawing the bone and here, imagining the cylinder shape. We will create this
part a little bit S and then the muscle a
little bit longer here, then we have the angle here. I will break the
silhouette with the pinky. I will hide the
reference for a moment. So I can simplify these shapes. I want to group
these two fingers. If you remember the
pink is always shorter, Then we have the
top of the palm. We can connect it on this side. The forefinger
looks quite short. We can always move it to
make it a little bit longer, and maybe we can angle
it a little bit. Then let's double check with our reference if that
looks all right. I think we need more
space in this part, but other than that,
I think it's fine. Maybe this finger needs to
be a little bit more narrow. As you can see, it's not
exactly the same because I wanted to group these
two fingers together. This one needs to be
a little bit longer. The knuckle or the joint is a little bit lower
than on this one. Then we can add nails. They're on this side. The shadow will be in
the middle of the palm. Little bit on this finger, on the bottom of this one, and also on this side. All right. I will hide this one and I
will add some color. I will create a new layer. I will set these to multiply, so we can draw under it. I will take the light color for this one and change the
brush and color it in. Then checking if I
like the silhouette, then I can add the shadow with
a little bit darker tone. Let's see if this
one is too dark, maybe this one is too dark. I can, yes, this one works
a little bit better. I will add the shadow
here under the fingers, in the middle of the palm. Following the shape
of the muscle, I can create the clipping mask. I draw only within this shape. Then I will reduce the
opacity and I'll just draw on the edge to blend
it in a little bit. Now I will add the outline
on top with a darker color. And the same, following the
sketch that we created, we need to adjust the
opacity back 200. And I will add the nails with the darker color as we saw in the reference on this finger. It will be just from the side. We will see also the nail
on the pink a little bit. All right, we can
also add a flower, let's do that on
a separate layer like we looked at
in the references. We can have a flower going
through the hand here, the top of the flower can
be this pinkish color. And we can imagine
maybe a field flower. We can alphalog and then add
lighter tones to the edges. And the same for the petals. And we can also add some shadow. Maybe this one is too dark and release the alpha Oc. And we can add a few petals
in this lighter tone as well. All right, let's move
to the next part.
11. Project Illustration #2: All right, now let's create
another drawing on this one. I cleaned up the lines a
little bit so they are a little bit sharper just with
the eraser on the edges. Now I will draw
the other hand on different layer can group
these layers together. And depending how many
layers you have available, you can either draw
on a new canvas or you can scale this
down and draw next to it. All right, now I will go take
my sketching brush again, take the darker color. I will choose a
different reference. I think for this one we can choose another
one holding a plant, just to go with the same topic. I will draw this hand first, I will focus on overall
silhouette to make it easier. And then I will add the plant. First I see this drop shape. I will try to create
something like that. Then here on the side, we have the wrist attached. Obviously we need to move it, and then this will go wider. All right, Now I will try
to see bigger shapes. We have this bigger shape
which is in the shadow, then the palm is in the back. You don't see the
whole palm here. We have the muscle
from the thumb, but the fingers
are folded, right? So we have the
palm here and then the other fingers
are folded here. All right? And then we have this one finger going
somewhere here. And then the thumb is behind. Okay? So now it
looks like a mess, right? Let's reduce this. But to see the proportions, it always helps me to see the silhouette
and bigger shapes. Now I will try to
create these angles. I have this one angle here, then the knuckles are aligned. Then we have this part of the hand that should be aligned with the muscle here. And then the wrist
and the fore arm. I think here we can
add a little bit of bump for that bone in the wrist. Now we can simplify this finger that we
straighten it a little bit. Then I will use this line, which is here, to
straighten this part. That ends where this
other finger is. Okay? That will be
one of the fingers. Then I can draw this half
circle for that finger. Then this finger will be
a little bit more angled. So we will have this gap
between the fingers. Because this finger is lower, it goes further out
of the silhouette, but the knuckles are
aligned in this way. Then we have this curve here. We can create that. The
pinky which is hiding here. All right, and then we
need to add these lines. Now I see I can reduce
this part here. We can at the thumb, it's behind the forefinger. Index finger. The index finger can
be a little bit longer because this knuckle is
a little bit higher up. And I will align it
with this other one. And we need this middle split where we have the muscle from the thumb and we can add the shadow in the middle
part of the hand. Then we will have
this soft curve. We will do that with the shadows going a little bit higher up here in the wrist
then back down. And I think that will work. I can reduce the volume
here a little bit, then we can make everything
a little bit smaller. We have space for the plant, so we can add the leaves here. Oh, oh, it's kind of like a mix between the eucalyptus and a flower. Okay. I will hide this
reference for a moment, so we can then I will create
a new layer for the color. We will set these to multiply, so we can sketch under this one. Now from the colors I will
go for this midtone brown. I will change the color to something a little
bit more solid. And let's sketchy but
still be texture, the same brush as
we used before. I'll just fill in
the silhouette. All right, now I will bring back the reference and try to focus on the shadows
and highlights. I will alphalock it or actually, let's create a clipping mask. It's easier for us to adjust
new layer clipping mask. Alphaog clipping mask,
basically they do the same, but with alphaocdraw
on the same layer. With clipping mask, you can just adjust easier because
it's on a separate layer. Now I will take a darker
and more saturated color. And I will create shadows based on the reference imagining. The cylinder as I talked
about in the previous lessons here will a little bit less of the shadow because I don't have
the same plant here. They have the shadow here also. Probably from the plant,
I can reduce that. Then I will add the shadow here on the thumb,
under the other finger. Then here I can recreate the shadows in
between the fingers, even though we group them more. Here I'm creating a curve
because of the knuckle, again, the cylinder shape. Then we need the shadow in the palm for the rest. We are following our sketch. Now let's also add
some lighter tones, and they're mainly on the left side and on
top of the fingers, I will make this smaller. We can focus on
simplified shapes. I have to take the color again. Now I can add the highlights
here on this side, I reduce the opacity
now on full opacity. And then I can add the highlights
here as well on top of the finger and top of the
other fingers as well. All right, now let's add the line art on top and we
can hide the reference. We don't need it anymore. Now we will follow
our sketch with the darker shade and create nice outlines
for this one as well. I need to make the brush
with full opacity. I can actually
show the canvas on the side so I can see if everything works well
in the smaller preview, for example, here I can
see that this finger looks a little bit too wide
and chunky for my liking. I will make it a little bit
more narrow and more slim. And I will also move
the layer on top of the other sketch layers
and I can reduce the, the opacity of the
sketch later on as well. For now, I will
keep it as it is, so I can see it better here. I'm making these lines
a little bit wider on top and more narrow at
the bottom because I think it looks
better on the sketch. As you can see, I'm also
adding the fingernails. If you have a problem with adjusting or checking how
they should be angled, you can always look
at the reference. But imagine if you are looking at the finger
from the side, you still see a
bit of the flesh. You don't see the
whole fingernail. That's why I'm leaving some
flesh on the side here. Then I can add some darker
color to the fingernails. For this illustration, I think this darker nail polish
works quite nicely. All right. I think this hand
turned out quite nicely. I will just color in the flower now before we move on to
the next part. All right. When you are happy
with everything, you can hide the sketch layers. And check if you like your
illustration here on the side. Now we can look at
another reference.
12. Project Illustration #3: All right, now let's bring
up another reference. One of the images that I
collected on the mood board. Now I think we can
take something with open palm because we're
drawing a lot of the fingers. I quite like this one, but maybe we can
turn the palm a bit. Let's see if I have
a better reference. Sometimes when you are drawing for your own illustrations, it's best to take your
own pictures if you need exact reference for
the hands because you can basically never find
exactly what you want. All right. I will take this
other brush again and I will sketch the basic
silhouette for this one. I will try to start
with the palm, and as I said, I will turn
the palm a little bit more. I need to start somewhere here. I have some space
for the fore arm. If you imagine the box as we talked about
at the beginning, the box will look
something like this. We are turning the
hand from this type of position to something like this. All right, here I like that the fingers are grouped
together. I will do that. We are creating this ten
shape as we talked about. Then the pinky, I
think we can angle a little bit to break
the silhouette. Then the fingers, there will
be somewhere around here. The thumb is on the other side. I will sketch the oval
for the fleshy part. Then we will add angled part, the triangle for the bone
as we talked about before. Then we can connect it here. We need the middle
part of the palm, then the wrist and the forearm. I will choose the canvas
as a preview so I can see the hand from
more like a distance. I can see that I need to move the thumb and make it
a little bit bigger. And I think I will angle it, I will keep it straight
as a straight line on this side and then angle it on the side where
there is flesh on the top. We have this rounder
shape because the fingernail is here. Here. I can angle it a little bit more and because it was
on the reference, actually, there is this
little curve on the palm. I will add that there, oops. And then create this curve here. I like this bending of
the curve going on here. I need to make sure that the middle finger
is the longest, then the pinky is here. Then I can redraw the sketch on a separate layer and make
sure that everything works. I will go back to canvas here. This one I will
move a little bit. This one should end
where the wrist is, somewhere here also. This curve needs to
be near the wrist. Here I'm creating the
overlap because we see these fingers which
are closer to us, they are overlapping
the other fingers, even though this reference
is a little bit different. All right, now I need
to add the pinky, just to break the silhouette, I need to move this line because the other
finger looked too wide. Now, I reduced it a little bit. We will have the shadow
here, also here. If we look at this reference, you can see that this part is
similar to this other one, but we rotated the
hand a little bit. Now I just need to
check if the alignments are okay for the fingers and the shadows will be
a little bit different. Let's see on this one, I think I can make it a
little bit more narrow here. This one should be curved. I think the thumb is nice. I just need to curve
it here a little bit. And I will also make
the brace little bit more narrow, like more slim. I will adjust these
lines a little bit too. Okay. But other than
that, I think it works. So now I can fill in the shapes with color the
same way as we did before. I will set this layer to
multiply the same with this one. I will create a new layer
under the sketch layers. I will take a lighter color for this one and change the brush. Now I will just fill
in the silhouette to help us show
that this is palm. We will add shadows
For that one, I will take a little bit darker color and we can test it out
on a separate layer with clipping mask to
separate the fingers. I will add the shadow somewhere
here in the middle part. Then let's check the
reference if it helps us. We will add the shadow
to the middle part of the palm to show that
there is a muscle. Then the thumb sparing. Basically we are separating the thumb from the
rest of the hand. Then we will add a shadow here just to separate also the pinky from
the rest of the hand. That should work for this one, even though it's a
little bit different. Now I will switch again
to the Canvas preview, and I will add a line. So basically the
outlines here with a little bit darker color
to redefine the handy. When you are happy
with this drawing, you can reduce or hide the sketches and fix the
color if you need to. As I see I have some gaps here. Who, what I think we can do on this sketch as
well is to find the line art. Create the clipping mask. No, actually not clipping mask. I wanted to select alphalog
from the darker colors. I think we can emphasize
some of the shadows. I'll make the brush 100% Again, there will be a shadow here on this side of the palm
a little bit here. I can add some
darker color here. These darker shadows
where the fingers meet. And just to emphasize the
ends of the fingers here, I think that works
pretty nicely. I hope that you like
your sketches so far. I can always make this finger a little bit more defined that we see
it from the bottom. We can add some of these lines also on the other
fingers if you would like. But I think here
it's not necessary. Maybe I can add it
here to the pinky. I think I like it only on this side just to
keep it simple. All right, now I will do a few more
adjustments like this. I will show you the
outcome in a moment. I made the hand a little bit
more narrow on this side. I just moved the line little bit higher up to have the bit more lean and gracious because I wanted to
achieve that type of look. Now let's move on
to the next one.
13. Project Illustration #4: For this one, I think
we can choose one of the more storytelling moments where the hands are
holding something. I was thinking maybe
holding a book can be nice. But I think when the
hand is like with this finger hidden behind the
book is a little bit nicer. I found this reference, which is unfortunately
a little bit dark. Hopefully you can see it. Let's see, something like this. Yeah, little bit. I mean, you will see what I'm
sketching, right? Let's catch on a new layer with a softer brush or any
brush that you like, I will try to focus first on the shape of the
hand, which is here. First we have this elongated
box like we practiced. This part is a
little bit angled. Then we have the finger here. The thumb goes up here. Let's sketch this
one to help us. And then we can add the
angle and the thumb. Then we need the arms
going down here. We need to sketch
the wrist here. Then we need the
other arm as well, which is next to it. The wrists are approximately
in the same height, but in this angle. Because of the perspective here, there is this soft curve. Let me make it a little
bit bigger if I can. Yeah, there is this
soft curve here. I need to choose the color
again, so we can sketch. With that, I will
sketch the curve here. Then this part ends here. The pinky knuckle is
in the middle of it, this type of angle. Then the thumb goes out a little bit. So
there is this gap. I don't have it here, so close. I can create the gap here. Then I can move this other
hand, there is more space. Okay, let's catch
the book as well. I need to make the reference
smaller, so we have space. The book is angled and
it's in perspective, but you can always
check where are the lines in relative
to the other parts. I will sketch it
something like this. Then the book needs volume. It's similar to the box we were set when we're practicing
drawing hands. And then this line
goes a little bit up, It's also curved, then this part goes here, so we can create that
line something like this. But it needs to end higher
up. I went too far. I need to connect it behind
the thumb like we have here. Then there is this other line
going towards the thumb. It will be somewhere here. We need to align it with the
other blade of the paper. The pages of the book
needs to be aligned. They just need to work together. Then we have this other
blade of the paper, which goes down here.
So we can do this. This finger, I think
it's too long, so we will need to shorten it. And also it ends a
little bit lower. As I said, the pages of
the book needs to be, all of them need to be aligned. This box of the book
works in perspective. All right, I think this works. Let's adjust the hand. This finger needs to go
lower because of the book. Then we can add the knuckles, so we can imagine that. And we can maybe use the
other reference for that. We have the knuckles and
overlapping fingers. All right, so I can sketch
on a separate layer. Now, just to redefine the
sketch a little bit better, I want to have these
lines straight. Then looking at this finger, I can see it straight up here. We have three lines in
different angles here. I can just connect it. We can do the same
for this other hand. Let's look at the
other reference again. Okay, let's switch to canvas to check if
the drawing works. I think here I need to reduce
the volume a little bit, but other than that I
think it's working. Let's see and add color. I will set this to
multiply as before. On the new layer, I will
choose a different brush. You can choose any
color you want. Maybe something you
haven't used yet. I'll just keep it
simple and I will use the same color as
I just did before, just color in the silhouette
like we did previously. Now I will add shadow
on a separate layer. I will use this darker tone and I'll just imagine that the
light is coming from the top. So I will add a shadow from the book and on the bottom
parts of the hands. As before, I'm imagining the
shape of the muscle here. The shadow is a little
bit more curved here, it's more straight, following
the shape of the hand. The same goes on this
other side here, I will make it a little bit curved because of the knuckle. We can always double check with the
reference on this one, it's too dark, but you can see on this one it's a
little bit curved here. Then of course, there is shadow on the bottom
side of the finger, but it's better to check on your own drawing just
to see if it works. Here we have a shadow
from the book. I will add a shadow on
each of the fingers. All right. Now I will color the book on a separate layer.
It's easier for me. I will move the layer
and I will choose of white color so we can see
it against the background. Now let's add
outlines on the top. And I will take this darker color and just follow the sketch
like we did before. And I can read, use
the sketch more so it's easier for me
to see the outline. I mean, the new outline, so we can see what we
are drawing better. We also need to add
the fingernails here because we can still see them on some of the fingers. We will add them
here on the top. Always double check
with our reference, I mean, the artwork
in smaller scale. Then here I can read this. I think we can see the
less of the finger. We need to add some shadow
on the book as well. We need to create the
clipping mask with a little bit darker color so we can take something what we
have on the canvas already. We can add some shadow
to the bottom part of the book where the leaf, the book or the
page of the book is turned and also on the side. Okay, if you are happy, we can hide the sketches
and check if we filled in all the silhouette,
which I can see. We still need to fill some
parts also in the shadow area, also on the book. I think with the outline. I think we can make it a little bit more angular in this part, so we see a little bit
more of the finger. All right, I think
this works better. I will draw maybe one more or two more illustrations
to fill the page, and then I will show
you that one as well.
14. It's Your Turn: All right. I added
one more illustration into this collection
of hand illustrations. Here you can see
all the drawings that we created
during the lessons. I hope that you enjoyed creating these hand
illustrations. To summarize, don't be afraid to use references
because using references can
always help you to practice creating
these illustrations. Also consider a perspective, how the fingers are
overlapping each other. And think how the
simplified shapes would look like in space or
within the three D space. And try to simplify and use minimalistic
silhouettes and lines. How you can simplify what
you see in real life. I hope that you
enjoy this class. If you had fun and you
learn some new things, please leave a review. I would appreciate that. Also, I would love
to see your project. Don't forget to upload it
and share it with others.
15. What to Draw Next?: How did it go? I can't wait to see all your
awesome artwork. Please share your drawings
and illustrations, also the work in
progress if you want. In the project section, if you want to expand on the knowledge you
learned in this class. You can watch my other
classes about characters, also about colors called color palette and color
and light master class. Visit my teacher
profile to find them. If you would like me to share
your projects on Instagram, please take me in the
Instagram stories in the post and post description so I can help you and your art to be
discovered by more people. Thank you so much for watching
and I hope that you share your illustration project with others and see you in
the next class. Bye.
 Iva Mikles, Illustrator | Top Teacher | Art Side of Life