Transcripts
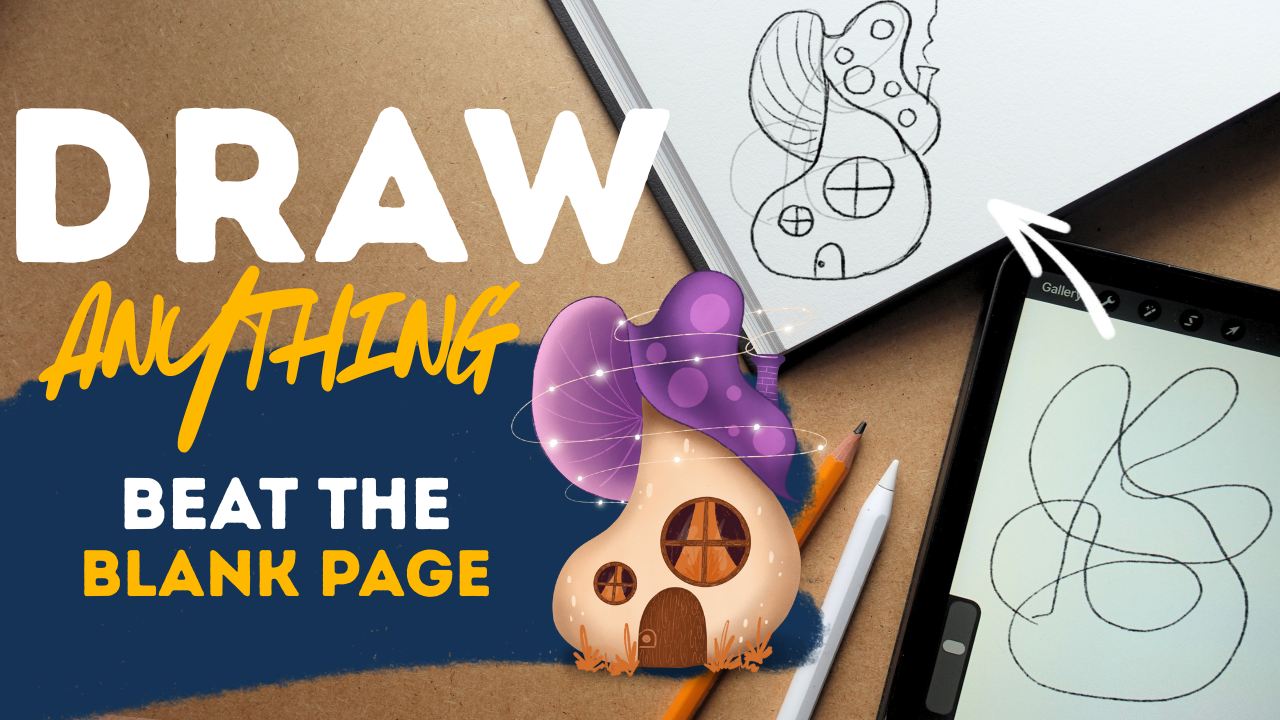
1. Introduction: Do you know that
feeling when you crave creating and have that
internal calling? But you open up
your sketchbook or your iPad and you
are like, Now what? This is what we are beating
today in this class. Hi, I'm Alexandra, A KAD artmer. I'm an artist, illustrator, online educator, and
a forever beginner. This means that I return to this feeling and this
moment frequently, mainly when I fall off
of my creative practice. So I know that I can
paint, I can draw. I have the skills, but I still have that fear
of the blank page. But over the years, I created some starters that
get me going every time. And this is what I'm going
to share with you today. So we are going to go through five simple exercises that
will spark your creativity. You know, it will turn
on your creative brain, your imagination,
your muscle memory, and well, you know, just get you into that mood filled with
motivation and confidence. We will scribble and make
invisible things seem. We will play with
having constraints. We will flex our shading skills. We will use time as our guide, and we are going to play with
some random prompt mashup. It will be super fun, I promise. All these exercises will teach
you something different. But mainly we'll bring
more awareness to your box and to what actually
sparks your creativity. And we will go one step further. We are going to grab
one little sketch and turn it into a
full illustration. This class is really
for anyone because you can follow it using
a sketchbook or paper and pencil or
with any software where you can draw and most
importantly, procreate. By the end of this class, you
will be packed with ideas, tiny sketches, and the skill
to beat that blank page. I hope this sounds
exciting for you. If, yes, grab your tools, and let's get started.
2. About The Class: Oh, you're here. I'm so
happy that you joined me. In this video, I'm going to talk to you about
the class structure, the class project, and
the class resources. So the class can be done
traditionally, okay? So on a paper with pencil. And you don't need
anything special, okay? Printing paper is just enough and whatever
pencil you have at home. This is why I say that this
class is really for everyone. You can follow the
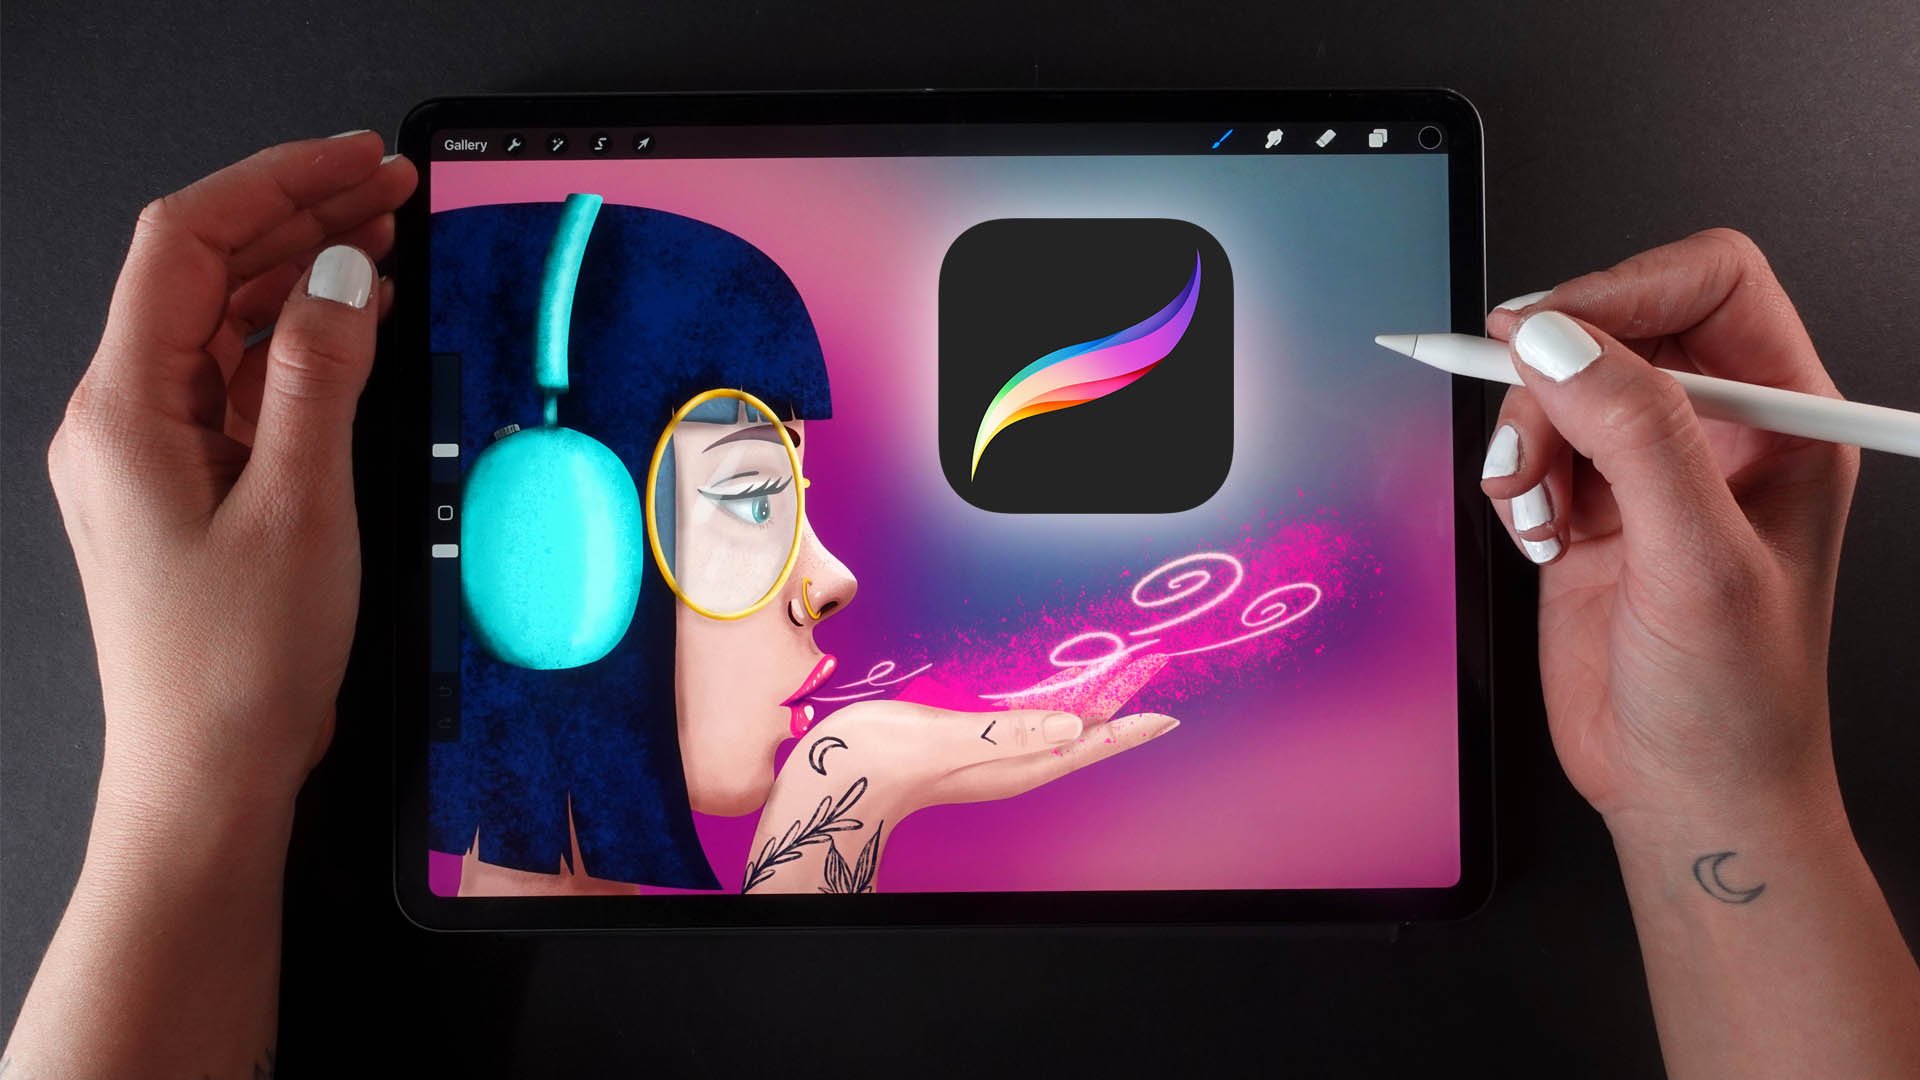
class on your iPad, as well. This is what
I'm going to do. I'm going to use my iPad and Procreate to do the exercises. And you are totally free
to jump between the two. So do one exercise on paper and do the
other in Procreate, whatever feels right for you. I love to jump between the
two because traditional feels sometimes more relaxing and sometimes we just need
time off the screen. So the class has two main parts. The first one is the main part is the core of the
class where we are going to do the
five exercises to spark your creativity,
or imagination. And you know to be that moment that you
have when you open the sketchbook and you are the blank page and you I
don't know what to draw. I just want to draw, right? So this is our point
to get through that moment because usually it can be so disappointing
that we just, you know, close this
sketchbook, turn off the iPad, and just do something
that we are sure of that will give us
the feeling of success. But these starter exercises
will get you going, will help you to put those
first lines on paper and turn on the switch and get
you into flow state and, you know, just do
something creative and satisfy that
craving of creation. Second part of the
class is mostly for those who are in Procreate, but you are totally free to
watch that part as well. So what I'm going
to do is that I'm going to grab one of my
little drawings that turn out during the process and turn it into a
full illustration. It will not be complex. It will be simple,
cute, and magical, and I will just grab you know those creative ideas that turn up for me during
the whole process. And put them basically together. So I'm going to
work in Procreate, but you are free to complete an illustration on your
own in your media, traditionally, with markers,
watercolors or whatever. The class resources are mostly for those who are
following me in the second part for
illustrating in Procreate. So there will be
my usual brushset, color palette, and my sketch and my original
file for reference. So this is for very beginners. So if nothing turns out well
for you during the process, it can happen, okay? You can just get my sketch, and you can just use the step by step video guidance to
complete the illustration. But I really
encourage you to put something from
yourself into that. So use your own colors, change something on
the base sketch, and yeah, enjoy your
artistic freedom. Our class project is basically
to enjoy the process. But what you are
going to upload into the class project section
is your sketches, and you can just
choose those that turned out well for you or
you can include everything, or that would be the
best if you would also include the artwork
that you create at the end, if it turns out for you. But that's just optional, okay? Our point here is to
enjoy the process, to learn these starters, to get going and to spur the creativity so that
you are, you know, set up for beating that moment of freezing in
front of the blank page. All these five exercises
are designed to teach you something new and to enjoy your freedom with the help of rules because rules
are there to break them. That's one, but
also to guide us, okay, and not restrict us. I will be talking about this
a lot during the process. So in the first lesson, we are going to
do some scribbles and make invisible things seem. In the second one, we
are going to have limits or constraints and enjoy
our freedom within it, and then we are going to relax our imagination and just use our skills to relax our
nervous system and our brain, which is very important. Satisfies basically sometimes
this craving to create, then we are going to have
time limits to create, and that can help us to look at the big picture and not
focus on details that much. And lastly, we will
play with prompts and create something unexpected and unique, and that will, you know, spark our brain to solve
problems because sometimes our logical brain
just interrupts our creative process and we can use it into our advantage. So I'm so excited. I hope that you
are, too. So let's just get started and see
you in the first video.
3. The Scribble: Alright, so welcome
to the first lesson. Our goal in this class is
to beat that blank page. So what we are going to do is to create a completely
empty canvas. You don't need anything else. So click the Plus button and
open a screen sized canvas. If you decide to follow
me, traditionally, just grab your sketchbook and your pencil and you can
totally follow along. So in the first exercise, you are going to scribble If you have been
with me for a while, you might have done
this exercise before. Um, so what the point of
scribble is that, you know, in the moment when we are
in front of a blank page and we don't really know
what we want to do, we just need to turn
on that creativity, okay, to push through that fear. So we are going to
create blobs of lines and use our creativity to
see something in them. When you are scribbling, it is really good
to give yourself a limit because
you can overdo it. You can totally overdo it, okay? So we are going to count to five and just let our
hands do its job. And I don't really want
you to look at the page. You don't need to go
for blind drawing, but the point is that you are not intentionally
creating the lines. Okay? So you are not having something in your mind
to draw something. You are just drawing, okay? So let's just do that. So let's count to five,
choose black color, and from the Brush
Library choose the six B pencil from the sketching brushset
that comes with Procreate. Of course, you are
totally free to use whatever your favorite
brush is, okay? It should be a pencil brush. That's the only limit, I think. So let's do this. One, two, three, four, five. Second one. One, two, three, four, five. We are going to go for three. Again, one, two,
three, four, five. Okay, so let me just show
you how would this look like for those who are
following me with, you know, traditional media. So I have a sketchbook here, and I'm just getting
whatever pencil. It doesn't necessarily has
to be very, you know, soft. I love to do lines with freebie. So freebie pencils. So one, two, three, four,
five, one, two, three, four, five, one, two, three, four, five. So I have my free blobs here. And what our mind can do, it is really fun and it is so freeing it is looking
for familiar things. Now, if I say to you
different things, like, see something in this one, see another thing in this one, you can find it, okay? So in this first exercise, we are going to see different
things to different blobs, but you can do this
with character design. So if you are looking for, you know, specific
things for a frog, in this and this and
this, you will see different frogs in
these blobs, okay? So let's do in the first one, let's go for a house. In the second one,
let's go for an animal, let it be a bird. And for the third one, let it be a plant,
whatever plant. So I'm going to
lower the opacity and create another layer on top. You're going to, you know, draw over these blobs
and let them guide us. Now, if you are
traditionally here, for enhancing the lines, you can just use a micro
pen or any sharpie, you can use an acrylic marker. So or even a darker
softer pencil. This is 13 B. This is the
softest pencil I've ever seen. I'm just saying that
pencil like this exists, but I usually use eight B. If you are working
with the lines, you can just enhance
them like this. What I also wanted to say
is that you can add lines. You don't need to use
only these lines, okay? So a house I can
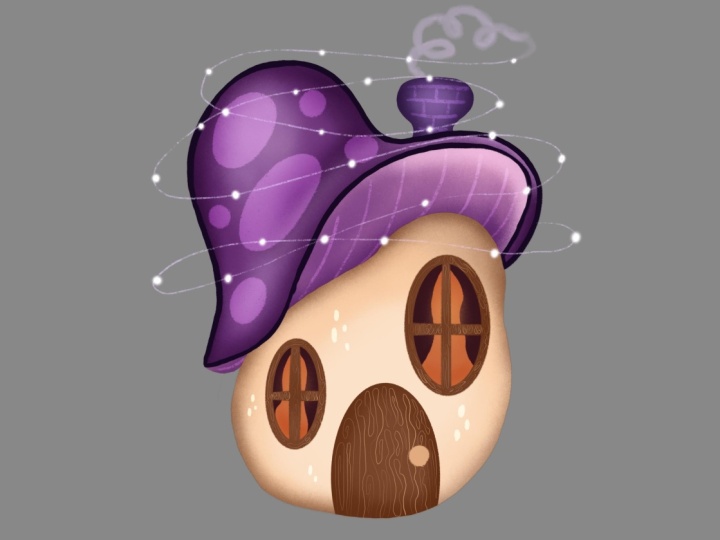
see a house here. Okay. So I can I can
see a house here. I can add this. I can see mushroom. So this is going to
be the lower part. And can you see this hat? So let's just add it. This is going to be a mushroom
house with a hat. Okay. I can go like this
and like this, I can work with this line
better like this, maybe. Okay. It looks cute. Alright. And this
shape can be a window. So maybe I will add a circle in the middle that is
going to be a window, and I can add a little door. I can add the
smaller window here. I can add, you know, these circles up here. And my creativity
immediately kicked in, okay? So I can add these lines here, and I can develop
this idea further, and I can add the
chimney, probably. And I have my house, and I can create an
illustration from this, and I already have
a rough sketch, and I have spent on
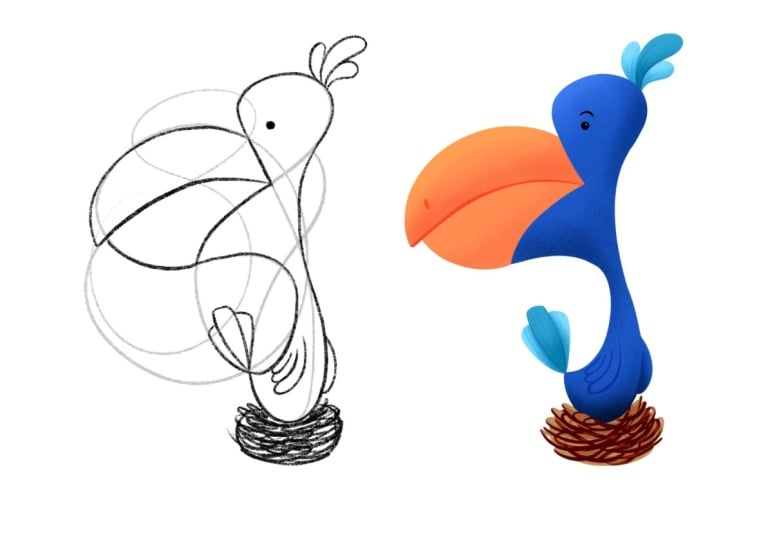
it like 2 minutes. So cool. Let's go for a bird. Okay. This looks like a head. I can actually see a
Buddha in this blob. But let's go for
bird, bird, bird, bird, bird, a bird. Okay, I have a curve here
that I can add as a head. This is the neck, okay? Um, I need to erase this one. This can be the body
shape of the bird. Okay. Here I have the beak, here I have the wing, and this can be water around. And I don't know.
This can be the sun. So cool. It looks really nice. And, you know, in this exercise, it is really cool that you don't need to do
something beautiful. These are just concepts, okay? Ugly drawing is still good because it just
pushes you, okay? So the next one is a plant. I'm looking for this thing, you know, a pot. Probably. Um it can be here and like this. And this can be a little tree, maybe like this, and these
stings are coming off of it. And I will add little leaves. And you don't need to
use all the lines. And again, you don't
need to follow. This is really just
to guide you and turn that fear off and
read the blank page. Okay. And this can be a
really nice plant. Okay, so I already
have three concepts, how great it looks like, right? If I would choose a concept to develop
to an illustration, it would be definitely
this house. It looks so cute.
I just love it. Okay, so this was our
scribble exercise where you learned that you can look for familiar
things in random things, and it will just help you to, you know, push through. All right, so see you in the next video where
we are going to do something called constraint
drawing. See you there.
4. Constraint Drawing: All right, so in this
second exercise, we are going to beat
the blank page again with the method called
constraint drawing. Let's create another
screen size canvas. Now, with a constraint drawing, we are giving ourselves
limits, okay? So in the first challenge, we are going to go for
ten Lines. No more, okay? And no curved lines, no circles, no triangles and stuff. You will have just ten lines
to do something, whatever. And if I say, Go, you have just ten lines.
What would you do? One, two, three, four, five, six, seven,
eight, nine, ten. And I will just complete it. And yeah, this is where our comfort zones usually come out and we are drawing
familiar things, and it is totally
okay because, um, to go out of your comfort zone, you need to at first be
in your comfort zone. So it looks cool. It's a really nice house. You can just, again, I don't know what I have
with houses today. But you can just add again, a chimney and
develop it further. But let's just go to
the next constraint. And now we are not going to go for constraint in quantity, but we are going to go for
a shape, plus a subject. Let's just choose
circles plus a tree. So you are not allowed to draw anything else that circles. You cannot outline the tree, only work with circles, smaller ones, bigger ones. So let's just go with the trunk and I am
going to just fill up the spaces that I would usually draw with
circles, smaller ones. It is okay if you just leave out some spaces and let's
just go for branches. Okay. There's going to be a bigger one. This
is so much fun. And I will throw a
bigger branch here with some Oh, it looks cool. Okay. And I can add
some bigger, you know, circles here and there to add that part of the tree. Okay, I think it looks so cool. It is something new I
haven't done before, and I would totally do an
illustration from this one. I think it looks super cool. Okay. So the third thing
is going to be on you. You need to create constraints
for yourself, so limits. Okay? So maybe you choose, like you can do Here's
going to be okay. We'll write your own. So you can do I don't know. Seven triangles. Just seven triangles
with no subject, or you can do, I
don't know a car, so there's a subject, plus
I don't know, um squares. Et cetera, you don't
need to do these ones. I want you to come up for
yourself with one and create a little sketch
and include it in your class project so
that you practice it. Okay? It is little
challenges for yourself and you will see that
when you start doing this, you will come up with
all different kinds of constraints for yourself, and it will be totally fun. All right. So in
the next lesson, we are going to have some
shading fun. See you there.
5. Shading Fun: Okay, so there are times when you don't really know
what you want to draw. And yes, you have this
calling to create, but maybe you are burnt out, maybe nothing is in your head, you know, and uh still, you want to create you
want to flex your skills, and what you can
do as an artist, draw lines and shade, let's just create a new
screen size canvas and we are going to do an alternative version
of the first one. We are going to
create one scribble and we are going to shade it. So let's do a more
complex scribble. Let it be for 7 seconds.
Let's just count. One, two, three, four, five, six, seven. Cool. Now let me do a little reminder
on how we are shading. When we have a round object, we are shading alongside the shape and we are
doing gradation. Going from darker to lighter. This is a time when you can
practice your shading skills, but you don't need to
be very strict with it. When we are shading
objects with edges, where there are straight lines, we are going from one side to the other creating
a smooth gradation. And what we are going to
do is that we are going to go through this whole random
shape and simply shade it. And it is going to
be meditative, okay? So it is just, you know, relaxing your brain
and it just simply fulfills your need for creating, flexing your skills and,
you know, practicing. So I'm just going to Oops. I'm just going to go
on the edges darker, and I always just go
lighter to the middle. If you put a lot of
effort in this one, you can do totally cool
frei random objects. And it's so fun. So like this, what should
I do with this one? Let's shade it, too? Like this. And don't worry about the
crossing lines and stuff. You know, this is also a time to practice your
creative ownership, like you can do what you want, because this is your
drawing, right? And that's so cool. And, um, What I love about this exercise
is that it really is just, you know, relaxing my mind. Probably in 1 minute, you will
hear me in the flow stage just saying random stuff
that I'm already doing. It's so fun. Okay. Oh, it looks interesting. It looks like a sausage. Yeah, and sometimes
very fun things turn out from an
exercise like this. And Okay. And, um, at this part, I will
probably go like days. This exercise is
more satisfying, I think, with traditional media. So with a pencil, I really
love practicing, you know, this pushing thing and
drawing in angles. It looks really weird. I don't know what it looks like. At first, I've seen a sausage, but maybe now I see a medusa, but let me show you
what I've done. This one looks like a guy
that is running, right? He's head, hands, legs, and maybe the path that
he's running from. So yeah, Okay, so the shading fun is really
fun with real pencils. So I'm just going to
create a blob, one, two, three, four,
five, six, seven. And when shading, you know, you til your pencil
and just work your way through these shapes just as you would, you
know, procreate. And even if you are working in procreate with me, you know, you can just go and grab a pencil and just get
off the screen a bit. I love this exercise. It is really fun. Looks cool, right? I hope that you enjoy
it. Now, see you in the next exercise
where we are going to go with different limits,
okay. See you there.
6. One Minute + Shape: In this fourth exercise, we are going to beat the
plank page with a time limit. So I'll just create another
screen size canvas, and I will leave my
phone for a timer. So I'm going to set a
timer for 1 minute. Now, what we are going to do is we are going to
choose a shape, okay? Just one shape, and then we will have 1 minute to
just go with it. So this time limit
will give us urgency. Uh, you know, to do something
and finish something. So this helps you to focus out of the details and
focus on the big picture. So sometimes 1 minute
is even a lot, and you will go to very,
very little details. I love to play this
with my daughter. This is a great exercise to
at first, like, bond, okay? And we, you know,
draw for 1 minute, and then we just switch papers, and we are drawing at
each other's papers. And it is just so fun. So let me just, you know, start the 1 minute. I don't know. Okay. Start, and my shape is going to
be an ellipse, okay? I start and I'm just
drawing an ellipse. And I I have my comfort
objects for this shape. I often draw ks, but it doesn't matter. Now we are not
creating masterpieces. We are, you know, beating the blank page. So it can also, you know, spark that creativity, and
turn on your imagination. And I already see a spiral here. I will add little stars.
I don't know why. And you can do whatever,
you know, when, um, you are drawing like this. So it is similar to
constraint drawing, but now we are
working with time. Okay, free to one, and I'm done. Okay. So this is my 1 minute sketch.
Let's do another one. And now let's do a triangle. I haven't worked with a
triangle in this class yet. So let's just set
the timer start. I have a triangle. Can you
hear the urgency in my voice? Um, I don't know what
I have a stars now. Okay, this is going to be a
gnome for whatever reason. Okay. Oh. I got a Mustache.
Maybe it doesn't need. Okay, I cannot erase. You cannot erase in
this exercise, okay? So don't waste your time on it. This looks really weird. Whatever. Whatever. Okay, I
will add these things here, and I'll continue this spiral. I love this spiral.
Can you see that? I just invented a decorative
element for my illustration. And 1 minute is over, how quickly that goes, right? I will just put it in a side, and let's do a third one. And can you see that these are oriented like
this, but whatever. Let's do a square.
So let's start, and I'm doing a square, and I hope not to
do a house now. Okay. What is
immediately a computer. Okay. I haven't run. This is an old school computer. I remember I played a lot of sims when I was a kid and
heroes of Might and magic. I still remember a cheat
coat for black dragons. Oh, childhood. I just
love these things. Blah, Blah, boba,
bam. Maybe. Well, uh, and I don't know. There will be houses there. I cannot get rid of
this house thing. Okay, and let's add that
spiral here as well. Okay, this is a
magical computer, a magical glom and a
magical, you know, mug. Coffee. Yeah. Alright, so I have three little beautiful
sketches done in a minute. And I can, you know, I already invented this spiral thing that I don't know
where it came from. If I would choose a
concept to develop, it would be maybe a computer. It looks cute, you know? Maybe I would work on this canal because it just turned
out like a weird face, and I love the smug. I really love the smug. So giving yourself time
limits and, you know, shape limits and, you know, the point is that freedom, it doesn't come from being
able to do everything. It comes from play
and curiosity. But, you know, this
too much freedom can can block you, paralyze you. And even if you add just a
little bit of, you know, limit or a rule, it can expand your creativity. And, you know, rules
can limit you, but you can use limits
or these rules, you know, for expansion and
use as guidance and not as, you know, a box that
you put yourself into. This is a perspective change, and I hope that these
exercises help you. So let's just see
you in the last one where we are going to, uh just do some
random things again. See you in the next video.
7. Random Prompt Mashup: Alright, welcome to
the last exercise when we are going to create
another screen sized canvas. Now, this exercise I call
random prompt mashup, where, you know, we are
not starting with drawing, but with building up concepts. I really love creating
mindmaps mainly before I, you know, do some character
design and things like that. So a creative process
doesn't necessarily have to start with drawing. Can start with sketches, I can start with all the
things we've done. But sometimes it starts
with words and ideas. So what I'm going to do is
I'm going to create one, two, three, four, five, and one, two, three, four, five, into each column, I'm going to write
two different things. Into the first column, there are going to
be small things, and in the second one, there
are going to be big things. Let's start with small, there can be a duck
and a big thing can be a sitti a small thing
can be a gnome. Let's work with
that one. Oh, okay. Gnome. And the big
thing can be the sun. Sun. A small thing can be um a snail and a
big thing can be, I don't know, a forest. And then a small thing can be a mug and a big thing
can be a rainbow. Let's think about
the small thing. Small thing can be a flower. A big thing can be a mountain. We are going to connect this. Let's start with this and
let's connect with this. We have a duck plus a mountain. We have a gnome and the rainbow. Oh my God, this is so random. These two gnome plus a rainbow. Snail and the forest. We have a mug plus
the sun and the 50 is going to be a
flower and the city. I will make this smaller
and put it aside. Now I don't want you to
work on every concept. Choose one concept,
and what I love is the snail and the forest. The point is that we will exchange these
two things in size. Okay? So these bigger things are going to be small and these small things are
going to be big. So for example, with the
snail and the forest, the snail is going to
be the big one and the forest is going to
be small one, okay? The mug and the sun, the mug
is going to be the big one. Sun is going to be
maybe the decoration or it is going to be within the mug or in the
gnome and the rainbow, and there is going
to be a gnome, and it will have a rainbow, for example, in his heads,
a duck and a mountain. So maybe there is going to be a small mountain with
a giant duck on it. Or, you know, a flower that
is bigger than the city. So with this random
prompt mashup, the point is to go abstract. So choose one adjective
and another one and, you know, list these things and then exchange the qualities. So you can play with that. So let's just work with
the snail and the forest. So I'm just going to, you know, create a little bit of a sketch. So here is going to be one
eye of my little snail, the other eye Yeah, I will add eyelashes. We always need eyelashes. Okay. And Oops. Oops. Okay, here is
here is its house. Okay, like this. And maybe the forest
will be here. It's going to be not the most beautiful
forest I've ever done, but the point is to create abstractions and spark
again solutions, the logical brain of yours. Because sometimes, um, you know, creativity sounds like something superficial or
magical or something, and we are we cannot pretend we are not
logical beings, you know, and our brain has
to solve problems, and creativity can flourish
in problem solving. And it is just really
a great way to, you know, spark that
part of your brain, and maybe there can
be a little path, and maybe I can add a
little tree here and there too and Okay, well, uh, here is my
snail with the forest. And is not perfect. I could spend a
little bit more time on working on this concept, but I am sure that I've
bitten the blank page today. I hope that you did, too, so in the next
video where we are going to talk about
your class project.
8. The Class Project: So your class
project is to either collect your sketches
into one canvas, put them together, and, you know, you can present them, or you can choose one concept and create
an illustration from it. It can be whatever. What I'm choosing is
this little house. I really love it. So I'm going to create an
illustration from it. You can follow me to do that, and you can follow
me step by step, if you wish, just for practice. And it's going to be a very
simple little illustration. But you are totally free to choose whichever concept
that you developed. I really loved this,
you know, circle tree. It looks really cool. Yeah, so you can
have a final piece to present your artwork. You don't necessarily have to if you have a limiting time, but I really recommend you to do a class project to give
the class a full circle. Yeah. All right, so see you in the next video
where I'm going to illustrate this little mushroom.
9. The Linework: Alright, so let's just
have some fun with this little mushroom
house. Where is it? So what I'm going to do is that I'm going to go
to the layer of it. If you have followed me
with traditional media, you can just redraw
a nicer linework of your little sketch and color it in whatever
way with markers, war colors, you
are free to do so. I'm going to cut
this cut and paste, and now create a
screen sized canvas, go back to that little thing, hold down its layer. Open the new one and
just drop it there. I will make it bigger. Actually, I really
love how it is. I don't think I need
to do too many things. I will clean up the
linework a little bit, so I will lower its opacity, create a new layer, and just
spend some time refining it. Okay, so I don't really
like how this looks like. I think I will turn this a
bit around and make it more, you know, saddled like this. And yeah. And maybe I will add to
the hat a bit somehow, you know, um, better shape,
probably. Okay, cool. Two.
10. The Illustration: All right, so now we
have our clean linework. What I'm going to do is
to lower the opacity of the sketch and create
another layer below. And I have prepared a little color palette
here that you can use. At first, I will just set my background color to a bit darker so I can see
what I'm doing. And I will use my
clean shaper brush and choose this lighter
color for the base. Okay? So what I'm going to
do is to fill in the shape. When you are color
dropping with this brush, you need to sometimes just
check if every pixel is, you know, filled in. And I will lower the
opacity a bit more and kind of adjust places
where it is just not even. Okay. And on top, I will create another layer and
choose the base color, this darker purple to
fill in this shape. I will create another
layer now below. I think both and at this shape. And for that, I'm going to
choose this lighter pink. Um, and now let's
do some shading. Oh, okay, I forgot the chimney, so I will just choose this darkest color
and at the chimney. We Cool. I will alpha log all three
layers and go to this one. I will choose a darker brown or this beach color and
choose the shader brush. I will just add a little bit of shading and texture
to the whole. I'm going to push my brush
at this part a bit more, also at the bottom,
at the edges, basically of the shape and
then just slightly go over it. This will create a
really nice texture. Can you see that
color variation? I will choose an even darker
one of this brown and just very lightly add
the shadows up here. And probably to this down part, just as we did, you know, with the shading foam blobs. This is kind of another shape. And basically, that
in that exercise, you can exercise, shading, you know, random blobs. Okay. Looks cool. I will adjust this part a bit. Okay. And I will choose the darkest brown and
just at this upper part, I will add an extra
layer of shadow, maybe to the bottom as well. Cool. Now, let's add the door. I will create another layer. Keep this dark brown, choose the clean shaper
and add the door. And if you are having trouble by extending
the base shape, you can just add it as
a clipping mask and it will just clip to the
shape of the mushroom. And I don't really
like the shape, so I will just adjust it. Oh, and I will add
the windows as well. I'll just create a
circle, hold down, and add this menu, just edit it and
make it a circle. It is not going to be even. So I will just
even it out a bit. And add these middle things
kind of to the middle. Okay, I will create
a big circle, hold down, and make it a circle, and now this can guide me
to make a nicer frame. Well. Oh. Nice. Okay. I don't
like this one. I will rotate it a bit. Okay, it doesn't
need to be perfect. I will alpha lock this layer, and I don't have the color here, but I will just add it. It is a lighter orange brown. I will choose my shader
and just go through these little frames to
add a bit of a texture. Okay. Now I'm going to choose a sketching pencil and choose an even lighter color that
I'm going to just add there, and I will create a
scribbly wooden effect. I'm just going to go through these little elements and add a bit of texture, basically. Cool. I can add
this handle here. Nicely. And I will go through these little
elements as well to add some nice things. Okay. Choose a very light blue. I will just add it here
and this clean shaper. Let's create a layer below
this frame and add the window. But I'm not sure if
I like this blue, let's just go to adjustment
to saturation brightness and go through the colors. I think a darker color for
these windows look good. It can be pinkish. I love how that looks like, but I will go for
the orange one. Orange one. Yeah. It kind of
fits the white a bit more. I don't like the
door either now. I'm just three pleasing things. Okay, so I will just select this door and push it
a bit more like this. Okay, let's go to the hat. So I have it off locked. I will choose this
darker, um purple. Choose the shader and just
shade around that hat a bit at dimension. I will go with the even
lighter one at the top. To add some light.
But maybe less. So like this and
maybe here a bit. Maybe at the edge. Yeah. This looks good like this. And at this part, I
will choose that layer, choose this darker purple, and I will add shading there. So I will just go outward
and go darker at the middle. And maybe I will go to this very light one and
even a bit lighter. And at the edges, I will
add a bit of a light here. Super cool. I will create another
layer on top and choose the sketching pencil and add
these little lines here. And I can go to the
blending mode and see if there is another version that
fits there a bit more. Oh, I love this overlay. Okay, let's stay
with the overlay. The soft light looks
great as well. Okay, soft light. I will keep it at soft light, and I will create another layer, keep this light pink, get the clean shaper
or the texture shaper. Let's go for the texture shaper
and just add these dots. Cool. And I will do the same. I will go to the blending modes and see if there's one that, you know, fits it a bit more. I think the soft light
u works here as well. Soft light. Cool. Let's go to the chimney and I will just probably
shade it a bit. I will or lighten
it a bit, Lighten. I will go for the slighter
pink, the shader brush. It is alpha logged and I
will just lighten it a bit. Maybe I can create
another layer. And with the sketching pencil, just add, you know, some bricks. There. Really cool. Now, I'm missing something
from the windows. So I will just create another
layer over the, you know, this back color
at the top layer. I will with this dark purple, I will add some curtains. What if I place it behind
the window? Let's see. Okay. Uh Oh, it's fine. I made this layer multiply. I will pick up this color and I will need to add
some pixels there. I can add some shadows as well about the plant to
fill it in a bit more, and I will do the same
at this curtain layer. I will just add
curtains here as well. Really cute. Alright. It looks great. I
can decorate it, and I can add some
linework, as well. But what I miss is drop shadow. So I will create another
layer below it all, hose black and my
drop shadow brush, and I will add a bit of a drop shadow here
and gosh and blurred. Like that. And I want some plants in the front so I can create
another layer on top. I really love this orange color. So I think oops I will choose my texture shaper and add
some plants here and there. Mainly at the bottom. As if it was over the grass. It looks really cool. On top, I think I
need some linework. I will actually turn off the sketch and create
another layer, choose this dark purple and the sketching pencil
and I will just enhance some parts of this top part so that it is more
sketching probably. I need some linework at the top. It looks really fun. I love it. And I think it looks beautiful. But it is not finished yet. I will create another layer, choose this very light
color and sketching pencil, and I can do some, you know, little decorative, like dots here and there on
the body of the mushroom. So nice. And onto the window, I will create another layer and choose the top shadow brush, make it smaller, and I
can add a little bit of, you know, light on the glass. Cute. And I'm missing
something from the top. So let's go for luminance. I'm looking for the
luminous brush, and I have the light pen, and I can, I guess, on a top layer, just add some mushroom
lo here and there. And I just want
to try something. You remember that
at that drawing, where I did this spiral. Maybe it could look
good. Let's just try. I will create another layer, choose my sketching pencil, and do this around
that little house, and it comes from the chimney. And I'm going to just
add little stars. Isn't it an overkill? Maybe I will turn
up that luminous. No, I love those. What if I'm just experimenting. I turned up those
long luminous things. I'm creating this magical
glow around the top. This is where I'm going
to add this Yeah. I love it. I love how it
turned out. Can you see that? It is beautiful. One thing I want to try
is that I'm not sure. I love the top. Okay? So I think I will just experiment
a little bit with this hue saturation
brightness thing. I will change. So what if I change the top color of this
little mushroom? What was the original color? Okay, it was this purple. Maybe more reddish one. I love this blue,
turquoise blue color. It fits this orange a bit more. I love also this reddish color. So you can just
change the top, okay? I will keep it, as it was
as though I don't want to, you know, overdo it. Maybe I would also
make it a bit bigger. Because I feel there is a
bit of an empty space here. But this was made
from a scribble. So I'm pretty pretty, you know, satisfied
how it turned out. So I will just keep it this way. But you have so
many possibilities, and I really love
how it turned out. I hope that you love it, too. And yeah, see you
in the next video where we are going
to sum it all up.
11. Final Thoughts: Congratulations. You did it. You are at the final video, that means that you went
through the whole process, and I'm so proud of you. And I believe you can be
proud of yourself, too. So let's just see what
we've done in this class. So in this class,
we've gone through five different exercises
to beat a blank page, to spark your creativity
and imagination. We scribbled and made
invisible things stem. We were enjoying our freedom
in limits in constraints. We flexed our shading skills. And created something beautiful from something pretty random. We used time as our guide
to look at the big picture, and we played with
random prompt mash up, and we experimented with
exchanging the qualities to create something new and unique. I hope that you enjoy the class. It would be so cool if you would leave me a
review so that I know what you think about
the class and for others to see if it is
a great fit for them. Follow me on Skillshare and on my social media to stay updated. And I hope to see you in
my other classes, too. It was a pleasure to have
you here. See you next time. Oh
 The Artmother, Professional Art Teacher and Artist