Transcripts
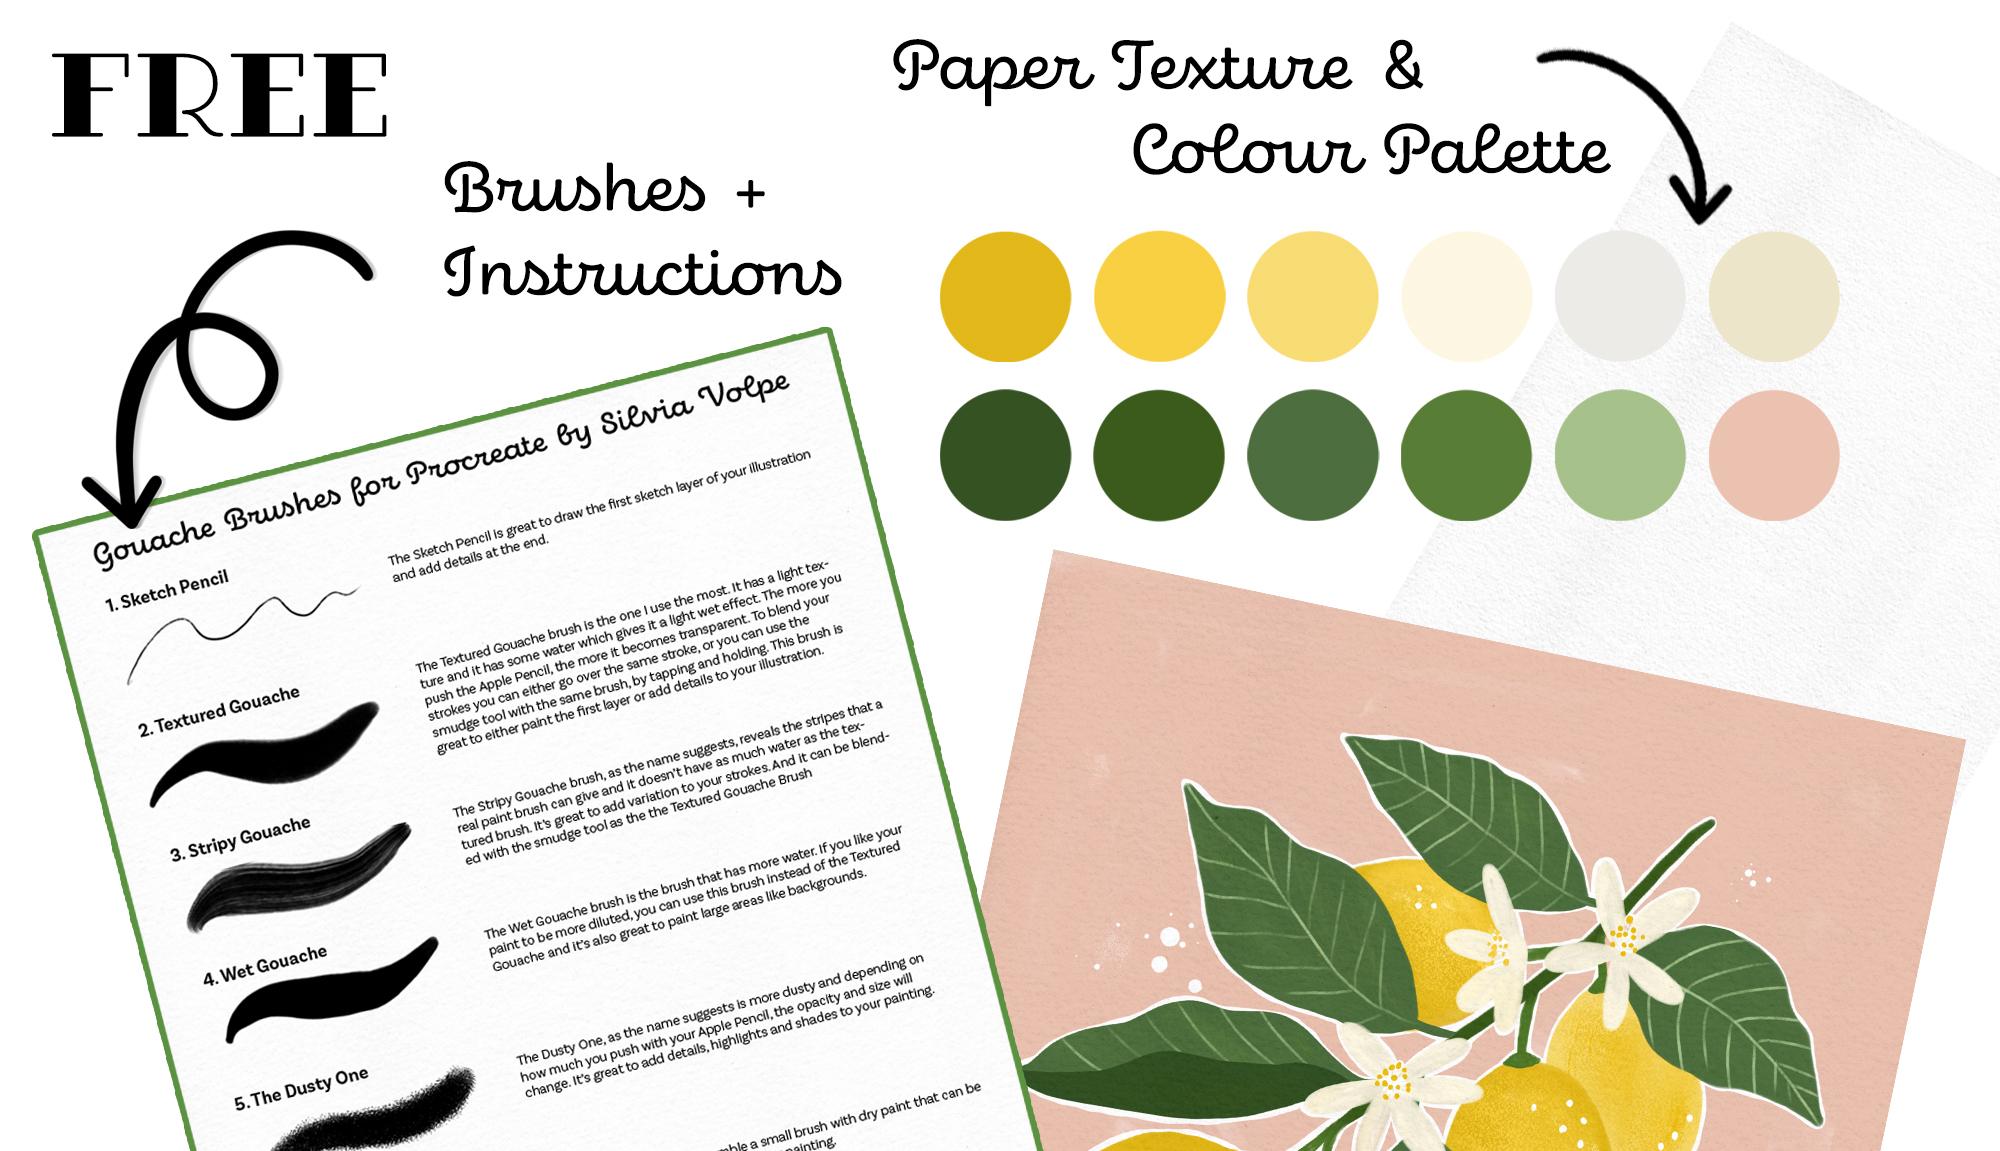
1. Intro: What if you could create a gouache illustration without using water, real paper, and brushes? By the end of this class, you'll be able to do exactly that using the app Procreate on your iPad. Not only you will be able to create a digital illustration that looks like a real gouache painting, but you'll learn all the skills you need to master the brushes provided, and create many more designs. My name is Silvia Volpe, I'm a surface designer and crafter. I used to work as an interior designer for hotels and spas, but a few years ago, I discovered the app Procreate and the world of patterns, and I never looked back since. Today, I design patterns and illustrations for the licensing, for textiles, greeting cards, and gifts. In this class, I'll guide you step-by-step towards the equation of a gouache illustration of a subject of your choice. The perks of creating directly in Procreate are that you won't have to scan your work to bring it into your computer, everything will already be digitized and on its own layer. It will be much quicker to tweak things and change colors. Plus, it will be easier to adapt your design to whatever print size or format you need. Let's not forget that you can create from the comfort of your sofa. We'll start the class project by looking at reference photos to spark your imagination, and then we'll move on to the actual illustration, learning exactly how to achieve those cool gouache paint strokes. This class is geared towards paint and illustration designers, or whole digital design enthusiasts. So whether you are already familiar with Procreate, or you're brand new to this app, I'm going to provide tons of tips and tricks along the way, that will come handy for your future illustrations. By the end of this class, you will have gained a deep understanding of how to create your own digital gouache illustrations. Plus, when you take this class, you'll get all the gouache paint brushes are created using real acrylic paint, a PDF with a description of each brush, the color palette I'll be using, and a paper texture for free. Are you ready to create your digital gouache illustration? I'll see you you in the next video, where we'll talk about your class project.
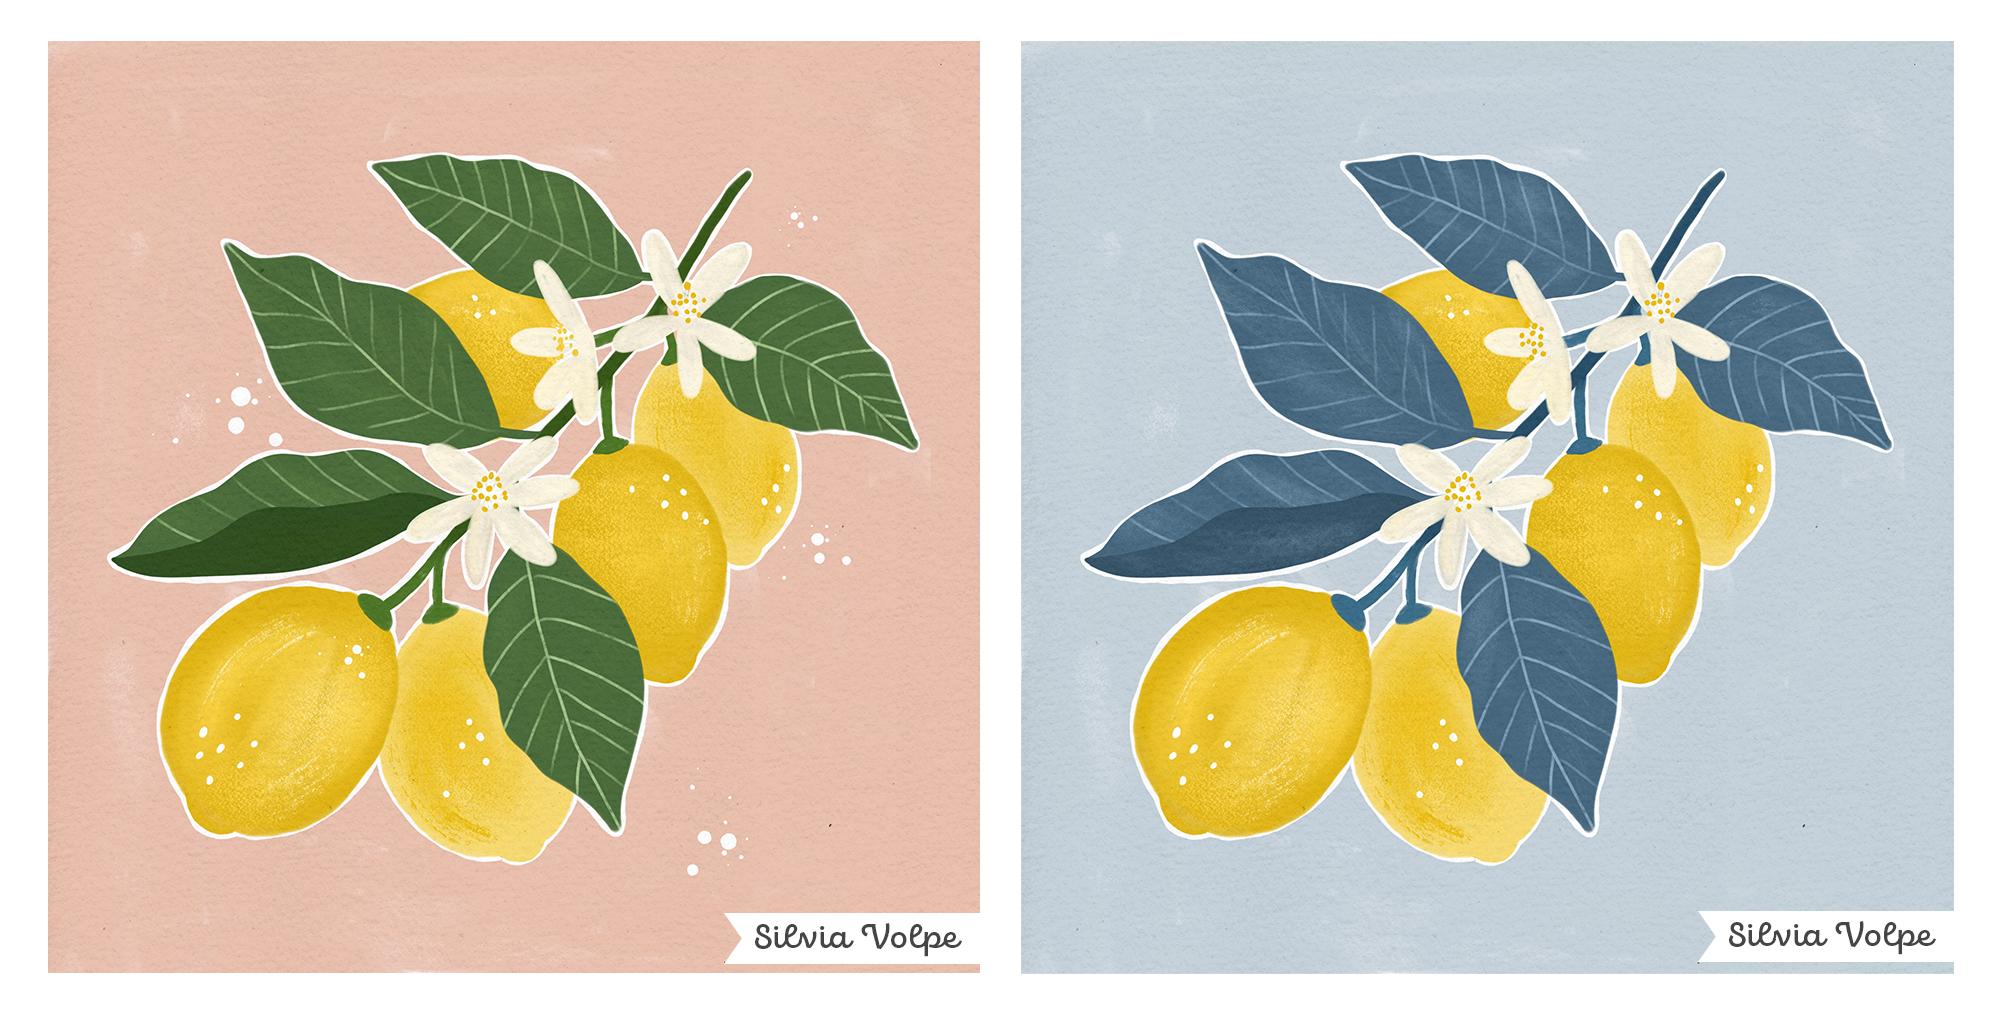
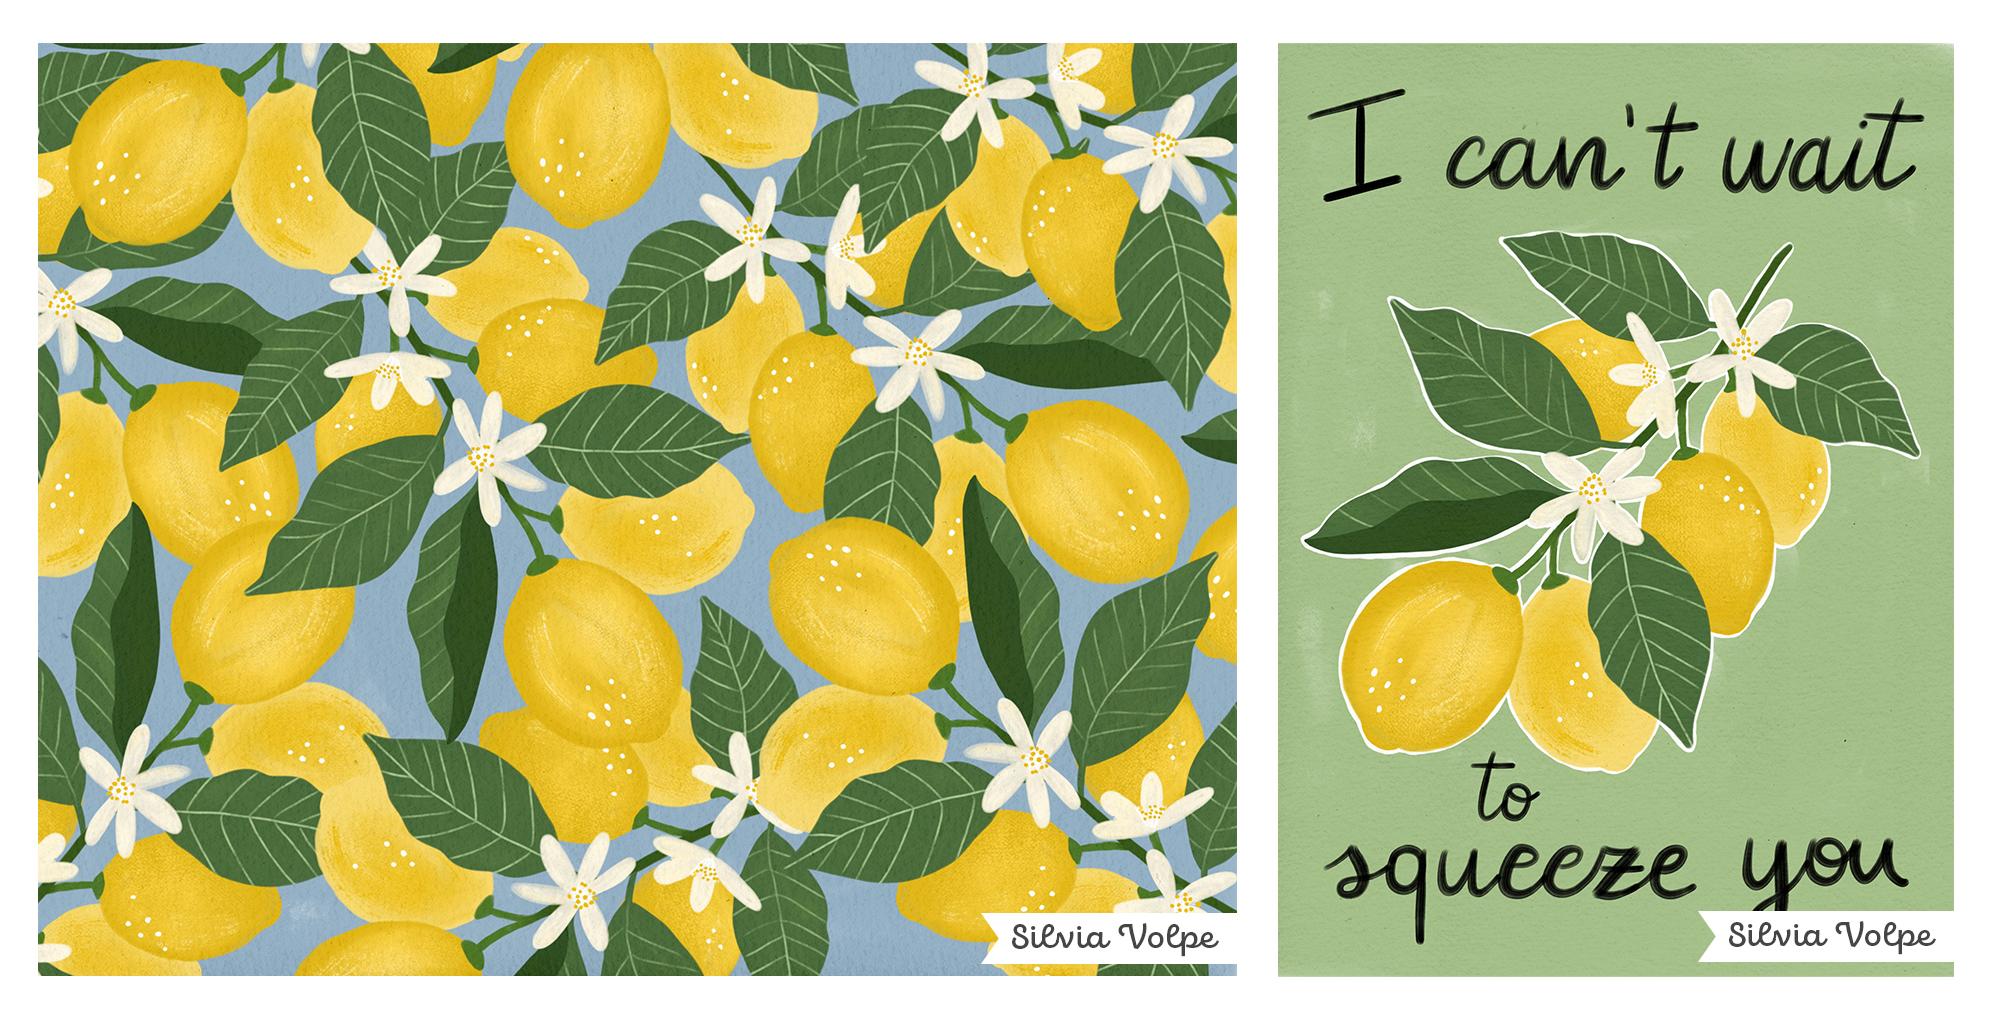
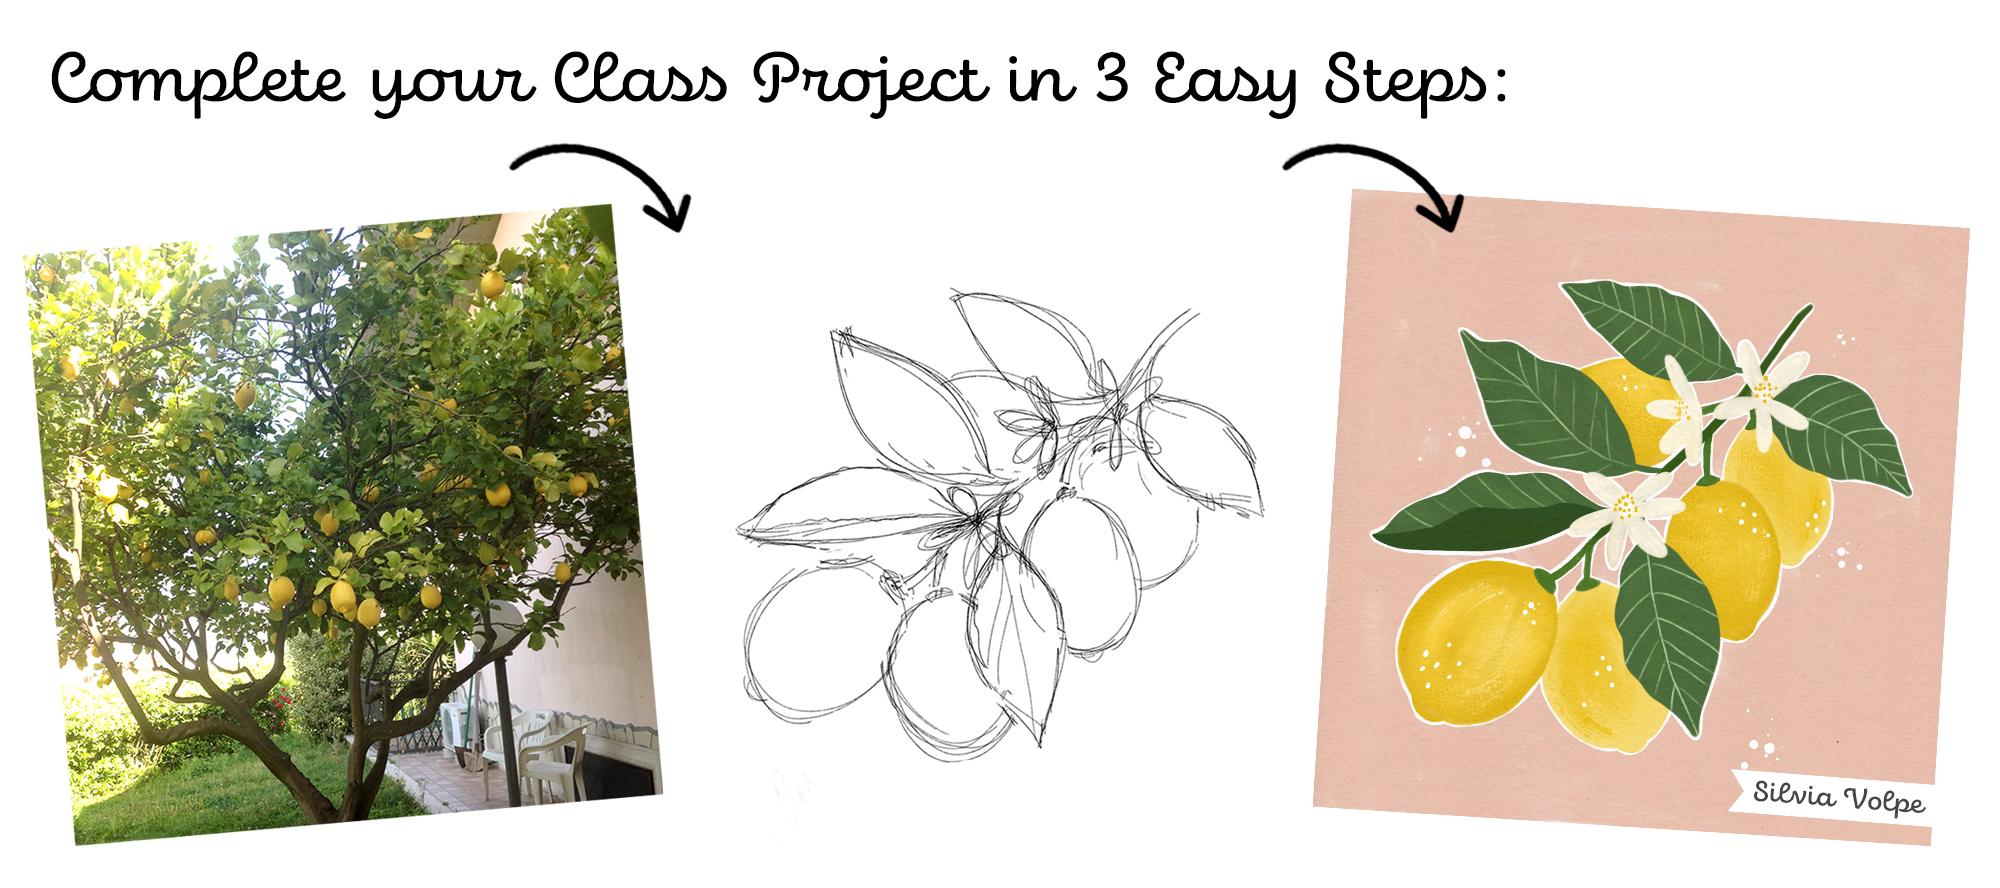
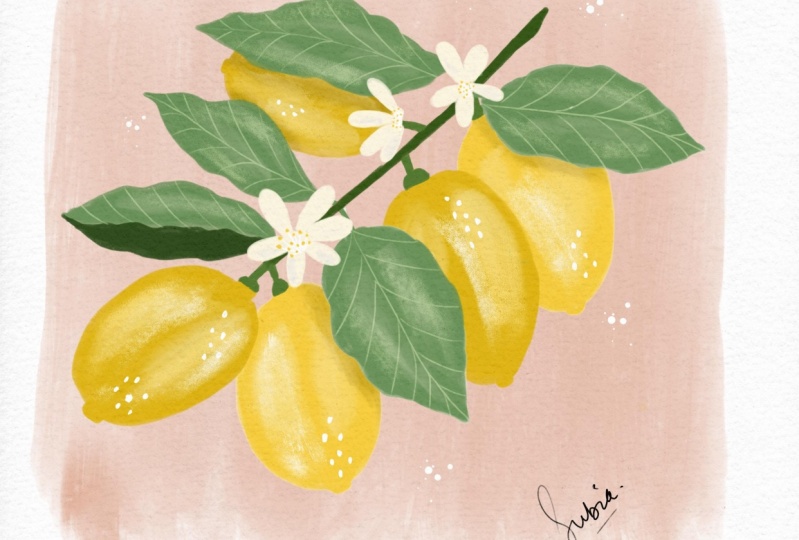
2. Class Project: In this lesson, we're going to cover what the class project is, how to access the class resources, and how to post your project in the Project Gallery. We are going to be working on an illustration on the app Procreate using the Gouache brushes provided. You can choose to follow along with me drawing a lemon tree branch or draw something else, the general process will be the same. If the subject of your illustration is accessible to you in your home or garden, then I recommend taking a picture so you can get the right shadows, highlights, and proportions. But if you're like me and don't have a great picture of a lemon tree on hand, in the next videos, I'll show you where you can find great reference photos for your subject. To download the class resources you need to be on a computer or on Safari on your iPad. All you need to do is go on the Projects and Resources tab and on the right-hand side, you will find the Gouache brushes I created and their instructions, a paper texture, and the color palette I'll be using in case you want to follow along with me. To share your project, you need to be on a computer or on your iPad, and click on the big green button above the class resources. You will be able to post one or more images of your final illustration, a text, and a cover photo. Don't forget to look at other people's work and let them know you appreciate their work by clicking on the heart symbol, or by leaving a comment. I'll see you in the next lesson where we're going to dive right in the class project.
3. Set Up your Work Space: Before we start, I want to quickly show you how to import the class resources in Procreate, so-called Safari and access the sketcher class from your browser. Tap on the paper texture Canvas and save it in a folder that's most convenient to you. Then do the same for the other files. Then, open Procreate and open the file location of the resources you just unloaded on one side of the screen by dragging the icon on the far left. Tap on the paper Canvas file to import it in Procreate. You'll notice that a new Canvas appeared on your board. Then go back to your files and tap on the file called SB quash. Once it's imported, you'll find it at the top of your brushes list. If you want to use the same colors as mine, you can import them exactly in the same way. You can also download the PDF where you can find a description of each brush. It may come handy even once you complete this class. Now that you have all you need, we can move on to the fun part. I'll see you in the next video where I'll show you where you can find reference photos for your project.
4. Get Inspired: In this lesson, we are going to start looking at reference photos for our illustration. I'd suggest starting with something simple, and that you feel inspired to draw. If you don't know what to draw, you can either follow along with me drawing a lemon tree branch or you can look for inspiration either on Pinterest, books, photos of a vacation, or anywhere that usually sparks new ideas for you. If you don't have great photos of the subject of your illustration, there are many places where you can find pictures that you can use even for commercial purposes, such as the website Unsplash. Of course, we're now going to copy this, but they can be a great help to understand many details such as highlights, colors, shadows, shapes, and proportions. All you need to do is go on the Unsplash website and use keywords to find photos of what you're looking for. In my case, I'll type lemon tree. If you create an account on the website and you find something that you like, you can even save it in a separate album so that all your reference photos for that particular subject stay together. Or you can tap on the arrow and download it. If you want in the class description, you can also find a link to the collection of photos I created. Start by gathering all the photos and ideas for your illustration either using Unsplash or other sources and I'll see you in the next lesson where we're going to start sketching.
5. Sketching: In this video, we are going to use the reference photos to start sketching. The great thing about Unsplash and ProGate is that you can go about accessing reference images in various ways. You can decide to download a photo and use it as a reference within the app, by going on the action symbol and then on reference. Then import and choose the image you want to use. Or you can split the screen like we did earlier having the photos half open on one side and ProGate open on the other side. Or you can split the screen between ProGate and Safari having Unsplash open. Go ahead and choose the method you are most comfortable with. I'm going to keep it like this because I like that I can go back and forth easily and take inspiration from more than one image at the same time. I'll start by choosing the sketch pencil brush and start sketching the branch, giving it a nice angle for the square Canvas. By looking at these pictures, I notice that the lemons tend to be either one on its own or in groups of two and three. I'm going to give myself a rough idea of how much room each lemon is going to take. Then I'll add the leaves which I notice can be quite big and wavy in some plants. The other thing I want to add are some flowers. Although it might not make much sense from a reality perspective, I think they are going to have interest and movement to the illustration. I think I have the general shape of my illustration. Go ahead and sketch your illustration using the reference photos you have saved for your project. Look at elements you find in common that capture your attention and you want to retain in your drawing. I'm going to keep my sketch and I'll meet you in the next lesson where we're going to start painting.
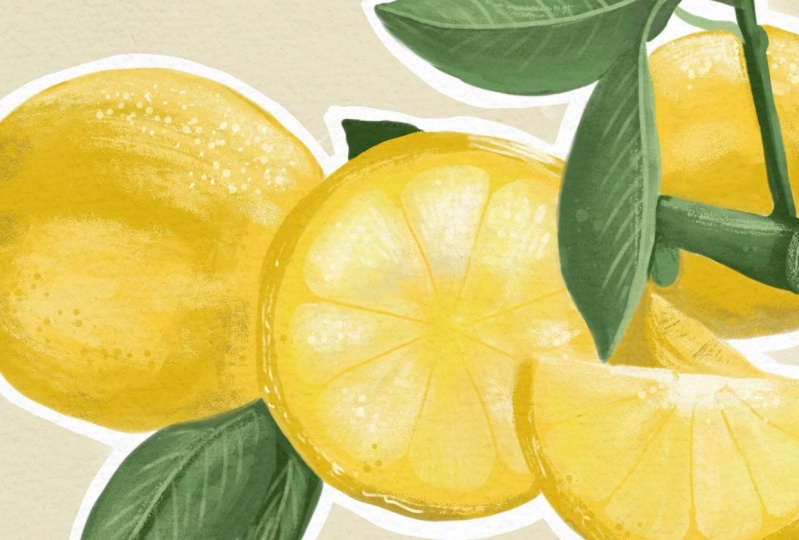
6. Let's Get Painting!: Before we start diving into painting our illustration, I just want to give you a quick overview of the brushes I provided. They are placed from top to bottom in the order I found I most likely use them. At the top, you'll find the sketch pencil, which is the brush we have just used, and it's also great to have details. Then you'll find three gouache brushes, which may look similar but behave slightly differently one to the other. The next four brushes can be used to add details and movement. On the PDF included in your resources, you'll find descriptions for each brush. You can look at it for reference in the future. But don't worry, I'll show you how to use them as we go. I'll start by reducing the opacity of the sketch layer, and I'll create a new layer underneath. I'll choose the darker yellow to create the layer of lemons on the front using the texture gouache brush. As you can see, it has a light texture. The more you push your hyper pencil, the more it becomes transparent. But if you go over the same stroke, you'll notice that it actually blends really well. For a more blended effect, you can use the Smudge tool with the same brush by tapping and holding. These brushes tend to either paint the first layer or add details to your illustration. Then I create another layer and I choose a lighter yellow to draw the lemons at the back. This time, I use the striping gouache brush so I can show you how it compares to the texture brush. As the name suggests, it shows the stripes that you sometimes see when you don't have much water to your paint. Now, that we have our first layers, I'm going to add white and lighter shades of yellow on top of each layer to replicate the irregularity of gouache and to add highlights. You can do this with either of the brushes we just used. Using this Smudge tool to blend the effect. Moving on the branch itself, I'll use a darker green for the main part and the lighter shade for the stems. For leaves, I use the texture brush again, the same way I did for the lemons. To create depth, I use a darker shade of green for the underside of this leaf. The last thing to add are the flowers. I use enough white and create the first layer. Then, I create a new layer on top and then add shades of this light gray, blending them with the Smudge tool as we did earlier with the lemons. Finally, for the center of the flowers, I use a white color with a sketch pencil and brush on a new layer and draw the lines indicating this part of the flower. Then, I create the little dots on top with a medium yellow. The main part of demonstration is complete. In this lesson, we saw how to use three different brushes to create the main shapes combined with the Smudge tool to replicate the irregularity of gouache. Experiment and play with these brushes to create the first layer of your digital gouache painting. Don't worry too much about refining it, because that's what we're going to do in the next video.
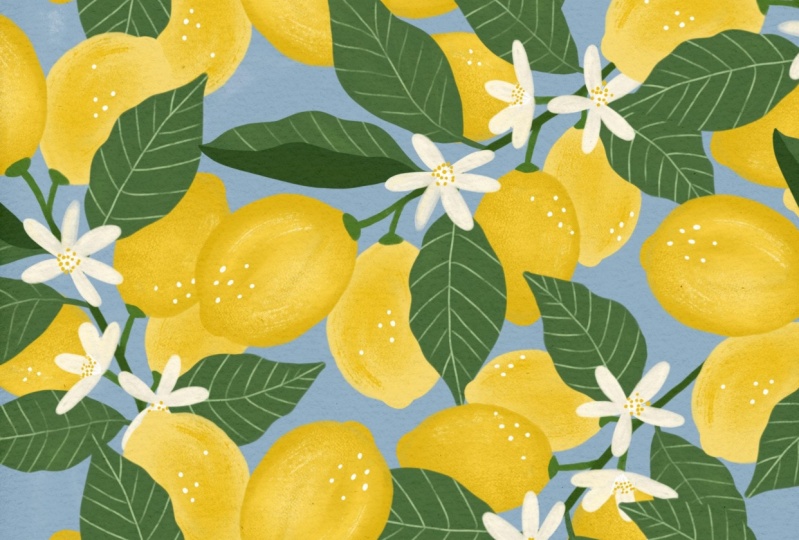
7. Refine Your Illustration: In this video, I'll show you how to add the final touches to your illustration using the rest of the brushes. I'll start with the leaves using the dusty one brush very gently with a lighter shade of green. Then using the sketch pencil, I'll create the veins of the leaves with a clipping mask. For the lemons, I'll use the paper accent brush with a lime yellow, where I want the paper texture to show more and where I think the lemons are hit by the light. Then I'll use the stripy one brush to have interesting highlights. Almost as if I were to have paint when the first layer is dry. With a cream color and the dusty one brush, I'll add a darker shadow along the edges of the flowers to make them stand out more. Using the sketch pencil brush with a white color, you can also add some interesting dots to accentuate even more, the highlights on the lemons. If you want, you can color the background with a contrasting color or you can leave it white. In my case, I'm going to add a pink color. I'll grab the wet gouache brush, which is basically a very diluted gouache, and I'll paint the background leaving a tiny white line around the illustration. In the brushes, I've also included these paint drops brush. If you want, you can also have those on top. The illustration is complete. In this lesson, we have explored different brushes to have details and interest to your design. Now, all you need to do is export it and save it as a JPEG to upload it to your class project. I'll see you in the next video where we're going to wrap up with some final considerations.
8. Thank You!: Thank you so much for taking my class today. We covered all the steps, tips, and tricks to create a digital illustration of something that inspires you. We used reference photos to understand highlights and proportions. Then we used the brushes provided to create a cool modern gouache painting. But remember, the secret to creating something that you love is experimenting, having fun, and enjoying the process. Don't forget to upload your class project to the project gallery, and if you post it to your Instagram, either as a story or post, feel free to tag me @bysikiviavolpe so I can share your work. I would also be grateful if you could leave me a review. Your feedback would mean the world to me as you would have me become a better teacher. If you want to receive updates on my new classes, click on the "Follow" button above this video to follow me here on Skillshare. Thank you so much for taking my class and I can't wait to see what you create. I'll see you next time.
 Silvia Volpe, Surface Designer