Transcripts
1. Introduction: Hello, everyone. Thanks
for taking my class. I'm Tammy, an artist from Texas, and I do mixed media art. Today, I'm going to be
showing you how to do a bold and striking
Gerbea daisy. I'm going to be showing
you how to draw this flower in a couple
different views. So I'm going to show you
how to draw it straight on. As well as to the side, say you want to put
it in a bouquet, you'll be able to draw it
from the front and the side. This is a very beginner course. This is a pretty simple flower. I'd say it's not the most basic, but it's not complex either. If you're just a beginner,
feel free to come into this course and
start right here. If you want something
that's even more beginner, I have a calaly class that's really basic
shapes and you can get into that class and try that and then come back to the
Gerber daisy class if you. So if you want to get
started, come along with me, and I'm going to tell
you what you're going to need to get started
in this class. You need very few items
like a black pen, some paper, a pencil, eraser, and some
things like that. So join me in the next lesson, and I'll go over
all your supplies. See you there?
2. Supplies: For this drawing course, you need just some
basic materials, like a number two pencil, some copy paper or
some sketch paper, whatever you have an eraser. Whatever eraser you have at
home, I've got a few here. I've got a needed eraser
that I really like there. A black pen. I've got a
couple Pigma microns. This one's a number
three, and I also have a number five. That's
the nib size. They're different sizes, and just a black pen
will work though. A sharpener for your
pencil will be helpful. If you happen to have
some colored pens, these are very optional,
all these other items. Some colored
pencils, if you want to decorate your flowers
with some color. I have this white pen, that's a gel pen that I like for making different white spots
and highlights on stuff. Just a basic gel pen. That one happens to be from Japan and a ruler if
you happen to have one, but it's not
required, as I said. In the projects and
resources area, you'll also be able to
find some pictures of these beautiful
Gerber daisies that I purchased and you'll be
able to find your anatomy. Next step, we have an anatomy
sheet that I'll go over.
3. Anatomy: Hebera daisies are known for their cheerfulness,
purity, and positivity. They come in a wide
variety of colors. I love this orange and they're
native to South Africa. I've got an anatomy
sheet you can download in the projects
and resources area. In the middle, you'll
find these disc florets, also known as the
inner flower petals. Then you're going to have your
anther tubes and stamens. Then here outside here, you'll be able to
find the ray florets, which are the petal and
then there's a stem. You'll often find
them in stores with a little green piece on the stem because they do like
to be top heavy. I've got these pictures in the project deck gallery to help you out with
different viewpoints. Next up, draw the
front view with me.
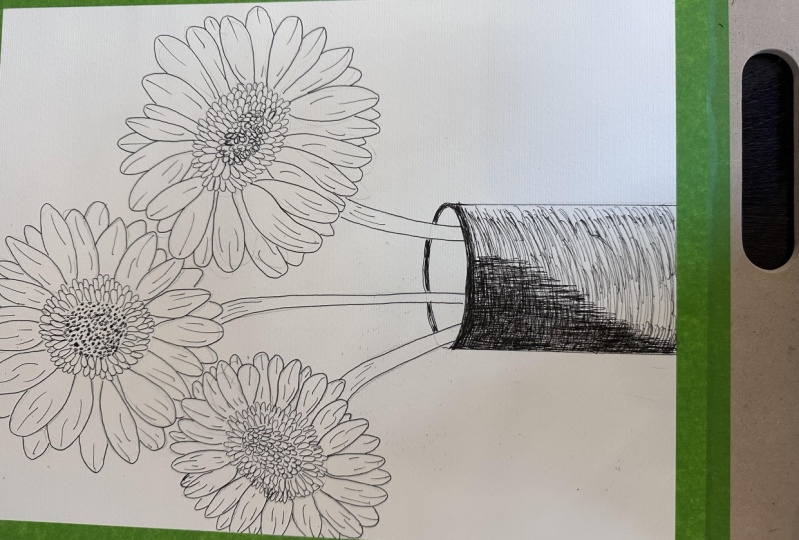
4. Draw the Front View: Make sure to get your
front view sketching step by step paper in the
projects and resources area. You can see here I'm going to show you how to
bring some texture. Step one, you're going to create some small dots in the
center of the circle. You can also do little arches. Do pause the video
if you need to. It could take a
while to do this. You can decide how big or
small you want those to be. Now we're going to add on some little arches around the circle. You're going to
make sure that you create some layering as well. You're going to do small
arches, large arches, and then connect
them all together. You'll want to end up with
a fairly round shape. You're going to have
some that are larger, some that are smaller, and
you want that variety. It's a little little
s. Attach them all. You don't have to be
perfect or anything, give it some texture in there. You can think of them
as arches or rainbows, but they're really just
little micro petals and they're actually
little flowers themselves. Let's move on to step three. Create these little
lines to give yourself an idea of where the petals are
going to come out to, you want them to be
fairly evenly spaced. Now you're going to
create a large arch, keeping it round
there at the top. You'll want all the flower
petals to be similarly wide, and sometimes they're
going to come behind each other too, so you can create little
petals off of other petals. You'll want to go
all the way around. Feel free to pause
the video as we go if you feel like you're
going a little slower. I'm just going to mark in where I think the
pedal should be. I find doing each section independently works and
then attaching them, but you're keeping
to just putting in all the different little
pieces so you feel like you don't have too big of
ones and too small ones. And you want some of them
to be shorter than others. So once you feel like you've
filled in most of it, we're going to move
on to step four. In step four, you're
going to add in some back petals,
some smaller ones. Fill in those little
gaps and make sure that everything feels like it's
circular but not too circular. You want it to have
that more organic feel. I'm feeling good
about right here. I'm going to add in my stem, just make a line down and they're not
too thick. Step five. Let's add in some texture. I'm going to make a
really sharp line on each of the little petals. So I start out hard and
I come up with a flick. I start hard and then flick up. It's a really strong center. Now we're going to add
in some additional ones all the way around. I feel with this step,
it really comes to life. That's an excellent. So now lightly
erase your flower. Do pause the video
if you need to. Everyone has a different speed
when it comes to erasing. I'm going to take
a long time and I'm going to speed
it up here, though. Let's get into some inking. I'm going to start out with
my pigma micron number five, the larger pen. This
could take a while. I'm going to speed up
some sections for you. But do take your time
and make this your own. Just go over all the main
lines with that larger pen if you have a larger one
or if you just have your regular black pen, go
over all of it with that. When doing the petals, try
to do them all at once, or you do your full arch. Once you've done everything
including the stem, we'll move on to the smaller nib if you have one for
some texturizing. With this smaller nib,
I'm just going to do those strong lines
and doing each petal, making sure it has
loads of texture. Feel free to put in as
many lines as you like. Some people like to add more, some like to add less. That's all in part
of your personality. Once you feel like you're
done, add your signature. In our next lesson,
you're going to learn how to draw the flour from the
side view. I'll see you there.
5. Draw the Side View: Get your step by step guide in the projects and resources
area of the class. It's going to go over all the
steps that you're going to be needing to create
this Gerbera daisy. And I'm going to show you how to draw it here in just a moment. Step one, make this little oval, and that's going to be the
center of your flower, and it's going to
be at an angle. And then you're
going to erase it, and that's just going
to be your guide, giving the side view. So create some little
dots and arches, and you're going to be
filling in that full area. They're gonna be these
little tiny arches and just fill them in, let
them touch each other. And they're gonna
be fairly small. Step two, create an oval around that's going
to be your guide. And then you're
gonna create these big arches within that. You're going to fill
in that full oval at that angle again because
this is the side view. It's giving it some fluffiness, and then they're going to
go in the other direction. Make sure you refer to your guide to get
the angle on these. It's looking like little
feathers, I think. You're keeping them going
all the way around and doing the little rainbow type arches on top of each other,
connecting them. You can go over your
sketching line so that it's not exactly you want
that randomness, so it's not exactly the oval. Step three, create large petal
arches around the outside. And you're going to
make sure you're going in that correct direction. Some of them are
going to go up, some are going to go to the left, and some are going to go to
the right. Just follow along. And make sure that you're
connecting them together. These ones have round tops
and differing lengths. Some are wide, some are
thin. You want that variety. If you need to do a race
and just keep on going. There might be
areas that are not connected just for variety. On this side, you're
going to make them just a little bit smaller. Step four, add some
behind petals. You're just going to give
some additional arches in here and connect
everything together. Then I'm doing these little ones over here where I'm going
to add in the stem. These are just like
the prior petals. You're just connecting them
together and giving it depth. He Step five, add the stem. The stem has just a little
bit of a curve, not too much. Add a line in the
middle of each petal, then add in some additional
lines going with the shape of the petals
so we get some textures. You'll be able to refine any of these lines when we
do the pen step. So do some additional flicks, and this just gives
it additional texture along the petals. I'm just giving each 11
or two additional lines. Feel free to do more or less. It's all in how you want
your flower to look. I'm liking that. I'm also going to do some
lines down the stem. You can do those if you
like. You don't have to. So next up, let's lightly
erase everything. Feel free to pause the
video at any time. Let's get inking. I'm going to ink my flour
with my black pen. You should use whatever
black pen you have. I'm going to start
out though with my pigma micron size five. That's the thicker nib. Then those little
pieces in the center and all the little flicks we're going to do with a smaller nib. But as I said, if you
only have one pen, just do it all
with your one pen. Try to do each pedal
as one stroke. It's going to make
everything look better, and it's going to make everything
look more bold as well. So take your time, feel free to pause the
video if you need to. I'm going to do this at my pace and forward at times because
it can take a while. So let's move on to using
the more finer nib, my size three micron. And as I said, use
whatever pen you have. If you have different nib sizes, it just gives it more
variety and textures. I love the size three for
all this little stuff. And I'm doing a pull and flick, and it's giving it
that fun little tail, where it's just a
little bit more dragged out a little bit fainter. Next up, I'll tell you
about your class project.
6. Class Project: Hello. I hope you're having
a great class and that your Gerbrea daisies are coming along and you feel like you're
learning along the way. For your class project,
I want you to draw a Gerba daisy from the
front or the side. You can pick and choose, or you can find another
view of a Gerba Daisy and draw it from a
different viewpoint if you want to go
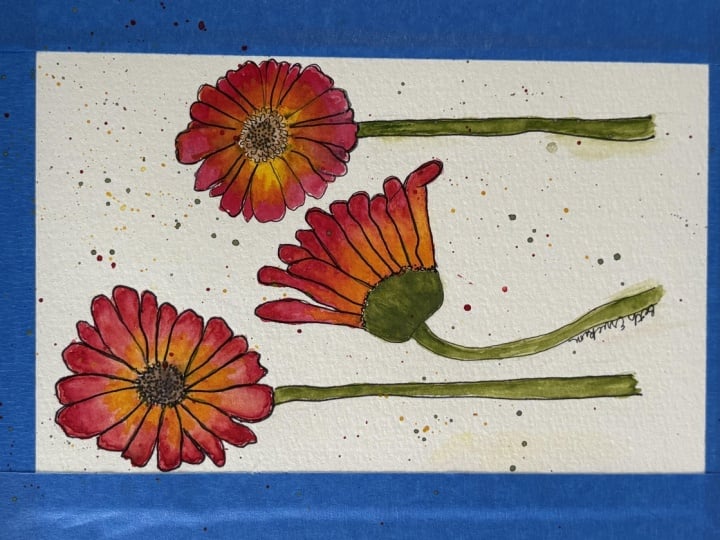
above and beyond. If you like, you can add
color to your Gerba Daisy, and then you're
going to actually upload your image to the class. You can take a little
snapshot with a camera, and then you're going to go to the projects and resources area. Once you get to the projects
and resources area, I'll show you what to do. Once you're on the page,
you're going to click that submit project button, and then you're going to upload your image of your
Gerber Daisy drawing. Give it a title
and a description, and then just click Publish. I'll be able to see
your Gerbera Daisy in the class project area as well as the other students
will be able to see it. They can give you
a little bit of love and I can give
you some feedback, and it's all going to be fun being able to share
what you've created. Thank you so much and I'll
see you in the next lesson. O
7. Thank You: Thanks so much for taking my
Gerbra Daisy drawing class. It's been great having you, and I'm looking forward to
seeing your class projects. If you want to do more classes, I do have more classes. The Gerrera Daisy,
I'd say it's on the easy to medium
style drawing. But if you want something
more challenging, I'm going to be
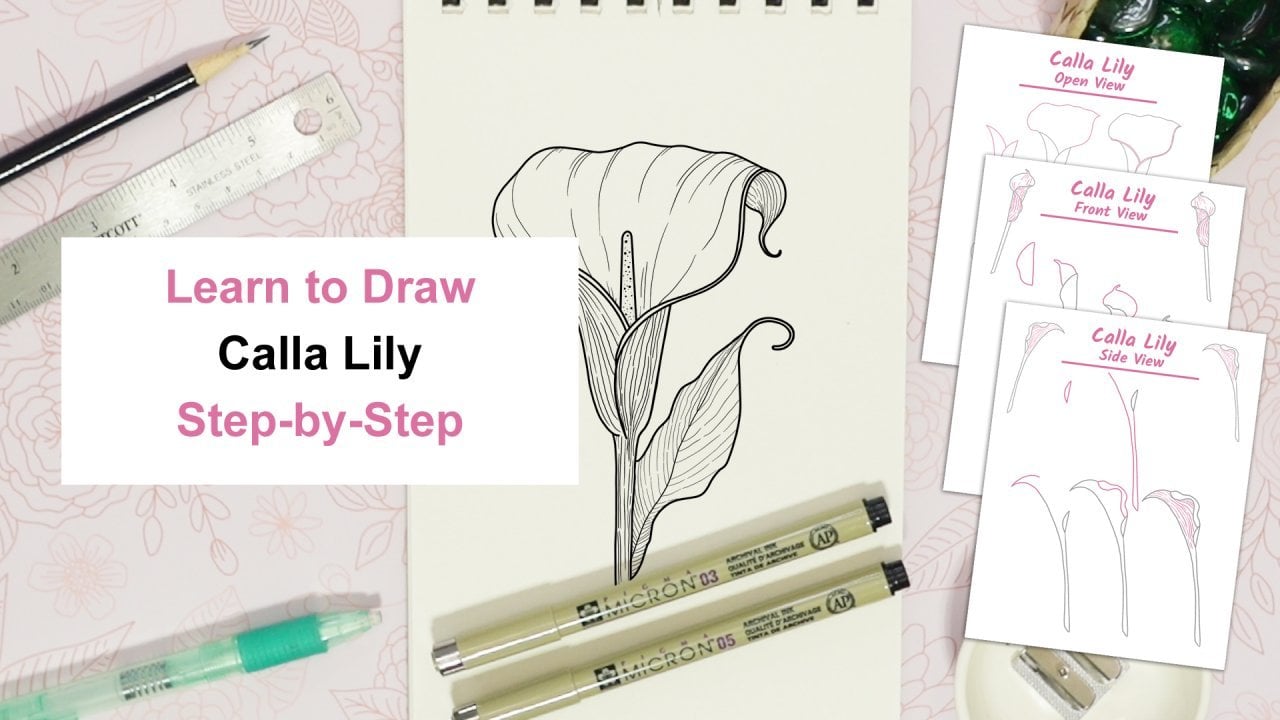
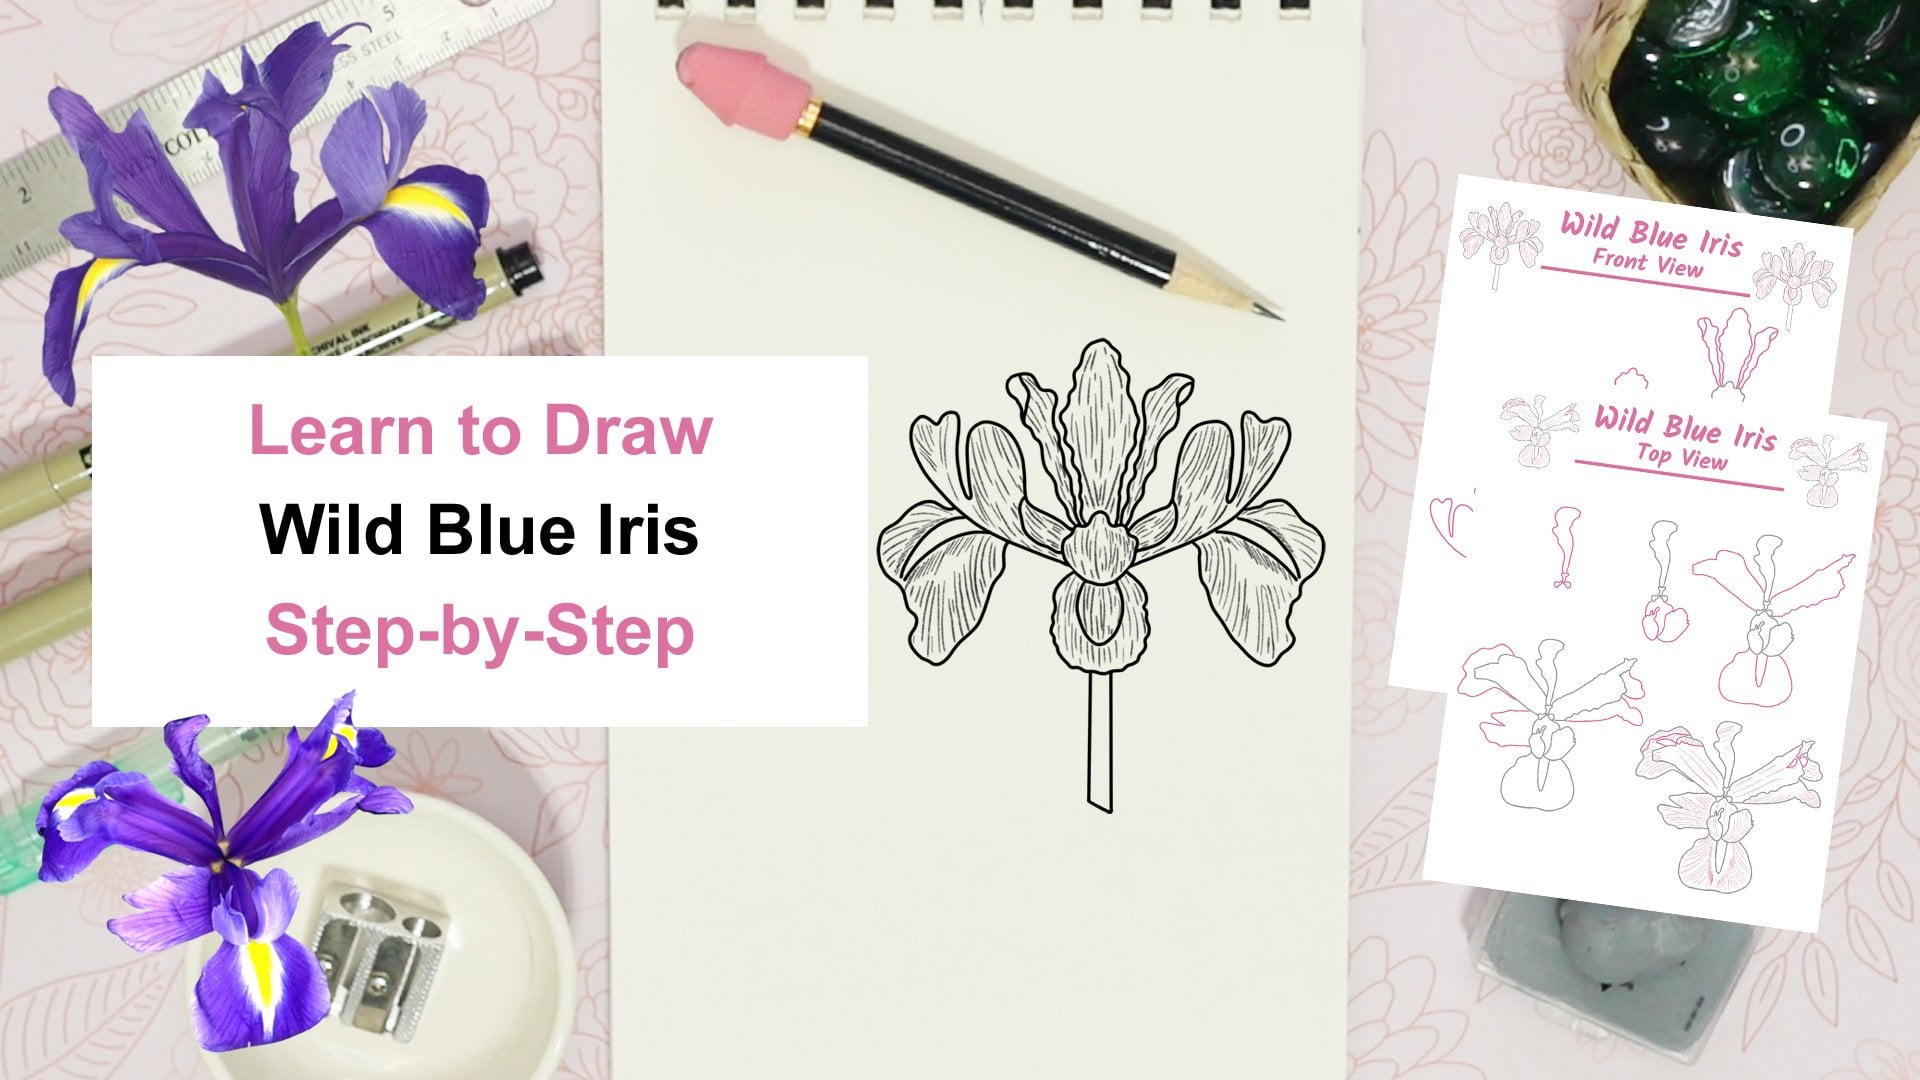
having a class on drawing Wild Blue Irises. They're just striking
and beautiful, and it's going to be a little
bit more complex class. If you want to go on to doing
something more complex, I'm recommending that you take the Wild Blue Iris class next. I hope you're feeling
inspired and comfortable on doing something more challenging after learning this flower. Keep learning, keep drawing, and most of all, have fun. If you'd like to
connect with me, I would like to
connect with you on the Internet through
social media. You can find me on X,
YouTube, and Instagram. Thank you so much.
I hope you had a wonderful time learning
to draw this flower, and I'll see you
in another class. Take care, and bye bye.
 Tammie Ann Creative, Artist & Crafter