Transcripts
1. DJ Starter Pack: An Introduction: Hi, my name is DJ house cat and welcome to my DJ
starter pack class. In this class, I'm gonna show
you how to become a DJ or even just how to be
able to play for fun or your friends
but your parties. What exactly does a DJ do? Sometimes you'll look at a DJ and they're just
standing on top of a table there hyping up the crowd and you're
like their hands on, even on board, what
are they doing? Sometimes there's a performance
effects for added up. I did height, but
at the core of it, a DJ's job is curate
the vibe of the night. Whatever you have to
do to add to that. Sometimes we put
doo-doo showing things. But at the heart of it, the number one foundational
skill is beat matching. And that's where you
take two sounds of different templates and
you mash them together so that you can play them
and mix them together and have the music continue
uninterrupted. So in this class
we're going to talk about just how to do that. We'll talk about the
equipment and you might want to get
to get started. We'll talk a little bit about
setting where acupoints. We'll talk about
counting your music, will talk about EQ
thing with your EQ and how to mix them
the music smoothly. And we're gonna talk as well
about some of the effects you can play with
and scratching. Would you like to do
days way of talking to people like another
way you can sort of solo and you musical
with your craft. Talk a little bit
about the settings. Since we're gonna be
working with Serrano, we'll talk as well about troubleshooting some common
issues you might find. And then talk about
music selection and give you some tips on how to get your own style
and find your own voice. So are you ready? I'll see you in the class. Let's go.
2. Module 2: Equipment Overview: Alright, so let's start
with talking about the equipment that you're
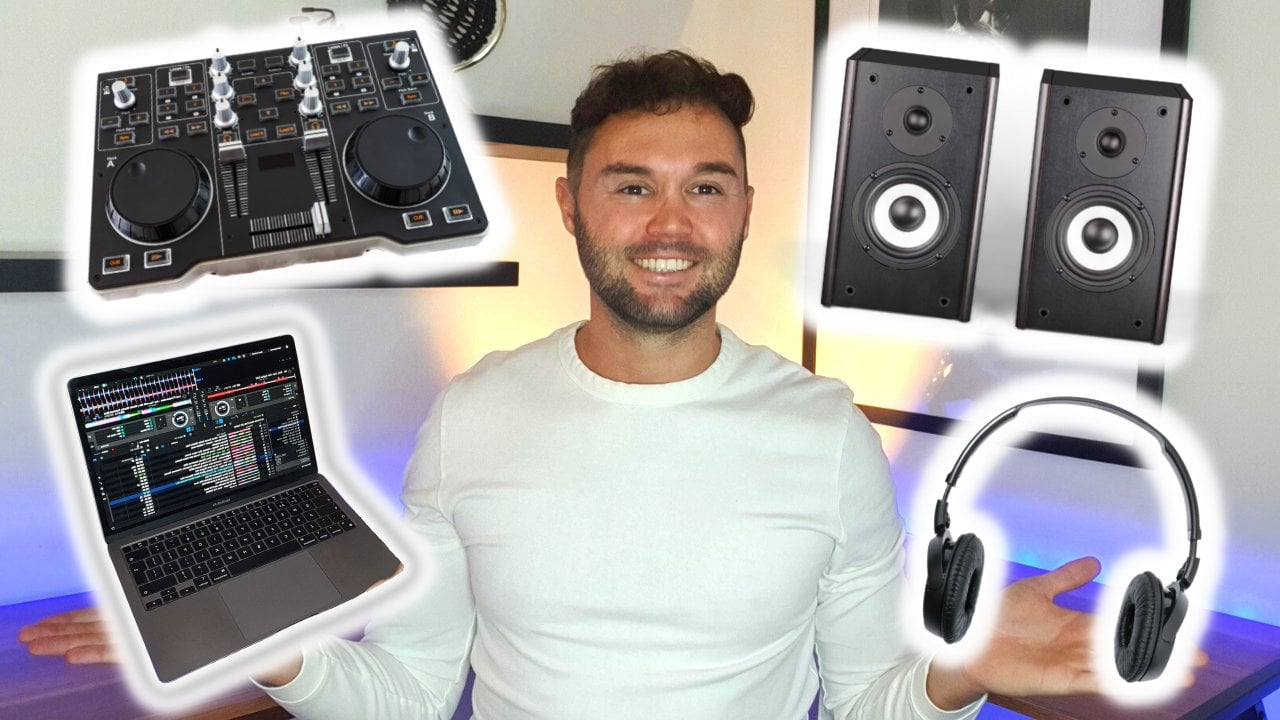
gonna need to get you started. As an overview,
you're going to need a mixer with the
crossfire action that you can mix
two songs together. You're going to need two decks. You're going to need headphones. You're gonna need some sort
of amplification speakers, your cables to connect from
your mixer to your speakers. And if you're working with
software like Serrano, a record box, you're
going to need a laptop, your music library. So let's walk through
each of those one by 1. First off, the mixer, you're going to need a
mixer with a cross fader. As the whole point of DJ is that you're mixing
two songs together. You need a way to be able
to mix between the two. You're also going to need
two decks so that you can play two songs
at the same time. Now, this can be accomplished
with vinyls, see DJs, or as we'll go into later, something called a controller, which you're looking
at right now, which is the mixer
and two decks all in one piece, controlling
your laptop. We'll talk about the different
options as soon as I introduce the rest
of the equipment and then we'll talk
about which options would be suitable for you. Next up, when we talk
about the headphones, I want to go over
the headphones real briefly because with deejaying, you're not gonna want
just any old headphones. You're going to want something in addition to
having great sound. Of course, you're going to want headphones that
have swivel action. Because when you're
monitoring a mix, you're going to want to hear
what's going on in the room, as well as the queue. And you can do that
easily if you're able to move the headphones
on and off, I'll just leave one out. And I usually just leave
this sometimes I even open this up if I really
want to hear them. I'm clearly some people do this. I used to do this, but it
kind of made my next door. You're really going
to want something with that flexible action. I love these 18 fifties
because the flexible, you can store them in your bag and they come in
some great colors. Now, next up we
have amplification. We need some sort of speaker
so that you can actually play your music
out for the world. If you plan on
doing mobile games, you're going to want to invest
in some powered speakers. Or there's different
option I recommend, Let's say I recommend
powered speakers. I especially recommend the QC, the QC series, like the K12. That's what I have. Or you can even get the 10-inch. Those have great sound as well. If you want to go
bigger, you can go 15. I don't think it's necessary for small backyard parties
or mobile gigs, but you can look into it, test them out and
see what you think. You'll want speaker
stands as well. You go that route. Now if you're just practicing
at home or in the studio, I have the studio monitors. Now. I'm just using these
because I use these for mixing. I will say that
they don't give you great bass sound because
they're a flat response. It's for if you're mixing
sound and you're making music. However, they will do
the trick if you're at home or if you already
have a studio setup, you can plug
straight into those, which brings us to the cables. You're going to want
probably XLR connections. Some controllers like this. This is an older model. You need a TRS cable because
this one in the back, you need to convert it to XLR and then you
can write it out. You might also see
RCA connection, so you can use that as well. Most mixers have a variety of options you can choose from. So just take a look
at the back of yours and see what connects
to the speakers. If you're just getting started. And again, you don't have
money to invest in speakers. You can start by just
playing off your headphones. And most mixers or the
software and not on the mixer, has an option for split cue. And you can hear the mixed in one year and the
q and the other. So that's something you
could do to get you started if you just want
to start practicing. I would also mention a laptop if you're playing off and allow you if
you're playing off, fine, obviously you
don't need one. If you play on CD j's, you could just use
the USB sticks, but you're still going
to want a laptop to prep your music and do
all your key points. For our purposes, I'm probably going to
focus a little more on laptop and software for this class just so you can
understand how that works. All the same principles
apply to analog as well. Just a little more simpler. If you understand the laptop,
you'll understand analog. Of course you're going to want the software that goes with it. So I recommend Serrano
DJ is very versatile. It's very standard record
buck is really good as well. If you want to use CDKs, I have both softwares. I DJ Serrano, but I
use reco bucks to tag my tracks if I'm
using USB sticks. Alright, let's talk about
the difference between vinyls, CDJ and controllers. Which one is right for you? Let's start with finals. Vitals were obviously
the original. So if you're a purist, are you like
scratching turntables? Obviously, you might want
to look into that route. Vinyls also because it's
analog, it doesn't age. Of course, you
might have to serve as your equipment
over the years, but you can have turntables from 25 years and it's still
running very well. You might have to
replace them parts, but unlike digital equipment, it will just keep
running in money. Another pro of
vinyls, the field. As you're scratching, you really feel it because the
platter is turning, you get that heavy feel. People like it. Let's
talk about the cons. There's a cheaper price point. You're going to have to buy
two decks and then mixer. That can cost you a couple
of thousand dollars. Another con, you gotta
deal with needles and cartridge and you're
going to need a control. It's not really a con, but
just things to watch out for. Let's say this. You're gonna need
control vinyls to control your software if you want to be deejaying
with yourself, where if you're deejaying with actual vinyl is you're going to have to lug your
vinyls everywhere. More moving parts. Now, options for vinyls. The standard techniques, SL
12 hundreds, those are great. They're kind of like
the gold standard, but there's also
other cheaper options you can look into
geotechnical make some, there's a lot of things
you can start with. There is something
called a phase. You can look into that it's a Wireless Controllers,
pretty cool. You don't need needles that we'll be able to talk to
your serratus software. Now, moving on to CD Js, c, d, j's are the club standard. You'll find them all around the world at
festivals and clubs. Pretty much. Everywhere you go. You can see Pioneer
seed DJs and a mixer. A major probe getting CDJ is, is that if you
practice on those, then you have those at home. You get really comfortable
with that equipment when you start playing out
these type of gigs. Another pro is you don't
need to rely on your laptop. Cdj is we're actually
built to DJ with CDs. Now, most people aren't
doing that anymore. But they also have a
slot for USB sticks. You can put all your
music that you're playing for that on USB sticks, bring that with you and
then you don't have to be staring at a
laptop all night. Let's talk about cons. Again. The price tag, CDKs are going to run you a
couple of thousand each. And you're going to
need to get a mixer. That's a couple of
thousand again. And it makes it that's
compatible with your software. The total apply the
something like $7 thousand. I don't know the time
you're watching this, there might be inflation, but it's going to cost
me a pretty pain. It's also going to
be more things. You have to move around heavy. You got to carry
around more things to decks and a mixture. When it comes to
playing off USB sticks. You're also not going
to be able to search your entire music
library on Serrano. Now, there's an
easy fix to that. There's something
called a control CD, which is what we've
used for a long time. I send that tone
and you'll be able to access erato and your
music library with that. But more recently
there's the HID mode. You can plug in the USB and then you gain functionality of
everything on the mixer. So I really liked that. Used to be you had
to use three USBs, one for each deck and
one for the mixer. But the new mixers coming out, you can just use one. So check that out as well. Now that brings us
to controllers. These are my favorite option for beginners or just for
people, not even beginners, just for people who
want to get going, who don't want to have a lot
of things to lug around. A controller pretty much mimics what we talked
about the CDJ is, or even vitals are some
that mimic finals. But it's all one piece. And it plugs directly
through USB to your laptop. And then you have access to
your entire music library. And it functions as if
you're planning on TD Js, but you can use everything
through your software. The obvious pros are, it's lightweight, it's
easy to carry around. The price is generally
going to cost you much less than if you invest
in CJ's or vinyl. You have access to a lot
more in your software. Let's talk about
some of the cons of controller, obviously. Not going to feel as
nice as the vinyl or doesn't have that showy
effect of the CDKs. It doesn't have that heavy feel. But I think that's a
small price to pay for the convenience when
it comes to controllers, there's a couple I
want to mention. Because if you do like that, vinyl field, but you don't
want to invest in vinyls. Rain one ranges
came out with one. Fascia is called the rain one and it has motorized platters. There are seven inch
but they do spend, so it gives you the heavy fuel. New monarch has the NS seven, I think it's in the
third-generation. I don't want to go
too deep into brands as these things are
constantly changing. There's always new
things on the market. But those are some to look into if you'd like that vinyl field. Or if you want to kind of
understand the pioneer layout, since that might be where
you're playing in the clubs. Pioneer DD, JSR is
really nice beginner. This is what I've got here. I would get the newer versions. This is the older generation. There's SR2, there's Sx, Sxx three, I think we're at now. See all these lines. It's a pioneer. Then a new Martha's are all
great brands to look into. So I would do your research, see what's on the market
and go play around with it.
3. Module 3: Equipment Walk Through: All right, let's do a quick
equipment walk through. I'm gonna go over some of the
basic features you're going to find on most DJ equipment, regardless of brand
or if you're using CDJ is controllers, turntables. Let's go over some of
the basic functions. First off, we have the
mixer or on the controller, it's all one piece,
but let's just imagine for a second on the mixer. You're going to find across later that's going to allow
you to mix between two songs. You're going to have
to up theaters. Sometimes there's four channels. But for this purpose we
have to Union at least two. So there'll be at
least two channels. Each channel will have
its own separate updater. It will have a trim knob. And that will just allow you to control the gain a little more. Specifically, if
you have two tracks that are different volume, you might want to adjust one before you bring up that fader. Then you're going to have
EQs, high, mid, low. You're going to have some
kind of color effects here on this particular
mixer is set at filter. If you turn it to the left, is going to be a low-pass. Turn it to the right,
it becomes a high-pass. So you can kind of do a sweep. Some mixers allow you to change that setting so it
could do a sweep, could even do some of them have noise that you can sweep.
There's different features. You're going to have a master
level that will allow you to control the main mix output. You will have Q button, or sometimes it's a switch. They can switch
between channel 12, but that will allow you to cue the track That's that you're queuing up that
you haven't played yet, that will allow you
to hear it in your ear if it's lit up. That means it's being cute. Or sometimes it might
just be a manual switch. You're going to have a
knob that was going to allow you to control
the headphones mix. So if I turn it all
the way to queue, it would just be to
queue in my ear. But sometimes you might be at an event where you don't
have a booth monitor or the speakers are kind
of far away so that there's a little bit of a delay by the time it
reaches your ears. You might want to
hear it in your ear. So you can have both the
master and the q in your ear. Some mixers allow you
to do a split cue. So one ear is the master, one cube, one year is the q. Let's go to the decks. Each deck you're going
to have a jog wheel. Or if you're working
with turntables, there'll be a platter and it
spins on a lot of mixtures. You're going to have
a rack of B to fix. A lot of times you'll
find it on the mixer. In this particular case, it's sort of on the
virtual decks here. But they're gonna be also effect similar to how the
color effects are. But they mostly
play with the beat. It could be half a B and a quarter be things
like delay echo. But you can also put sometimes
there's the common ones, reverb, flame, GER course, all sorts of different
effects you can add. If you're using CDE j's, you'll be using a mixture
and it will be on the mixer, and then you would
have to select which channel to put it through. So in this case, I
just leave it on 12. But if you have it
on the mixture, you might have to
switch between the two. And you will also have a
tempo adjust slider here. So I can make the temporal slower and I
can make it faster. I have a key lock
button that will just allow me to keep
the song and the same key so that
the pitch doesn't change as I change the tempo, you'll see some pads often. Again, this might be found on the mixer and not the decks, but in the case of a controller, since this is all one piece, you might find it on
the side of the decks. So you might find
different things here. It's varies from mixer, mixer, hot Q button somewhere. And that will just
allow you to jump in between different viewpoints. You might have something
like roles, values, YouTube, roll a little loop, things like that, sampler, perhaps all those extra
features you'll find there. You might find an
auto loop feature it automatically on CDJ
is if you hit auto loop, it will just
automatically default to four bars, or sorry, four beats. But you can change that. I can happen. I
can make it more. That's really useful if you have a song that you
want to mix in with a short intro and maybe you
want to loop the intro so that you can have a
longer time to mix it in. You want to have a Play and Stop button or
pause on turntables, just keep in mind, if you stop, it stops the platter from spinning and it's gonna take a little time
to get started. So sometimes if you want
to mix an assignment, I want to hit play
and keep your hand on the vinyl and allow that planner to start spending so
that when you let go, obviously it's not
the case here, but you can imagine,
you can scratch it in so that when you
drop it as in time. Some mixers have virtual decks. For example, this controller has technically for
virtual channels, but there's only two channel
strips on the mixer. You can activate
the virtual decks like this and you can
see the color change. Now you probably won't
be using that too much. You're going to want
to focus on just mixing two songs
really well together. But before you start adding
a third or fourth song, slip mode, that just means
when you play a song. Let me show you an example. Let's say I'm playing a song. If I have slipped, not actually stopped it. Continue where it would
have been claimed. Stopping there. I don't have it on. It will continue from where
I just allows us on to slip. It might be useful
if you want to do some scratching on
some of the samples, but you don't want to lose
your place in that song. Let's go over the Q
button you real quickly. The Q button is something you'll find on CDJ is you won't
find that on turntables, but you'll find that and CDJ is. And a lot of controllers. I haven't song. This song is loaded up. If I press the Q button, you see those two little
white arrows that show up that says the hue there. And I can go open
the cecum here. I would maybe do this in my ear. And it's kind of similar
to how you might be scratching it and
keeping the time. So if I had a song playing ball, ball and I wanted to
drop it in time, I go. I'm ready. I hit
the play button. Remember if you set the Q
button, it won't play it. If you let go, you see this? Hold it down. When I let go, it goes back. It's really just
meant for you to. But when you're ready,
you got to remember this vinyl mode. If I haven't in vinyl mode, that's lit up now I can I can
I can catch it and scratch. I don't have an environment. It doesn't stretch. It will just speed up. Doesn't allow me to
express by Domo easy. Think of it as vinyls. There you have it. Those are some of
the basic features on most DJ equipment. You might find them in
slightly different places. If you're using
some new equipment, something that you're
not familiar with. My advice is to just
take a minute and get a lay of the land and find
out where everything is. It's just like driving
a different car. All the basic features
are still gonna be there. There you go. I'll see you in the next module.
4. Module 4: Counting Music: In this module, I'm going to
show you how to count music. Before we can mix
two songs together, we really have to understand
the structure of the song. This way when we mix in a song, we can line it up so that one section is coming out as the next section
is coming in. And your transitions
will flow very smoothly. In order to understand
counting music, I want to give you
a little quick crash course on music theory. Most modern songs are in
the time signature of 44. That just means there's
four beats in every bar. You understand this intuitively. If you're ever at a party and
you're bobbing your head, or you know, the
classic instance. Instance. For, for each bar, each of the four beats is
separated into strong, weak, weak, weak, strong,
weak, weak, weak. Now, you might find
the third beat sometimes is kind
of strong as well. So it's kind of
like a mid strong. So it would be
something like this. Strong, weak, strong, weak. So the downbeat or beat
one is the strongest beat. Oftentimes you'll hear
a kick that beat. House music you might
hear keep on every beat, but the first one will
feel stronger because maybe you'll have a snare
on the two and forces. Maybe a here the high hats are some of the
other instruments might be helping to
accentuate that downbeat. Just to illustrate my point, listen to this song. Strong, Strong. Here, how that first
becomes stronger. So you can really feel
where the bar divisions are apart from beats and bars. We also have something
called a musical phrase, and that's just something like a sentence like
when you're speaking. So if the beats where the letters and the
bars were the words, then the phrase would
be the sentence. Beyond that, the next thing
up would be a section that would be something like a
verse or pre-chorus or hook. This is what we really
want to pay attention to because we want to
count how many bars in each section so that we know in the next
section is coming in and we know also how
much to mix over. For example, if a hook
that you mixing out of the 16 bars and the intro of
the next song is 16 bars. You can line them up exactly
and bring in the one, the next song on beat,
one of the hook. How do we keep track
of how many bars? Well, a good way to do
this is to count the bars. And as you count each bar, to number them, for example, 12342234 and so on. But it might get
easy to lose track if we just keep counting
up and up and up. So it's good to think of
things in groups of 48. A lot of sections might have
multiples of eight bars. For example, eight bars, 16 bars, or 32 bars. When we get to eight, we can count all over again from one. But just keep in mind how many groups of
eight there aren't. Let's try one together. When we get to the
end of eight bars, pay attention to what happens. Okay, Let's count
this to get it ready. And 1234563723, tangent there. What happens here? Let's
talk for a second. Did you hear something happened
at the end of eight bars? There was a little
bit of transition. As we build up. It's
still the intro. Let somebody happen at the
end of those eight bars. Like I mentioned before, a lot of the phrasing
is in groups of 48. And so that's why it's important to count
and goose with eight. Even if you're not
familiar with the song. If you're good at counting,
you might be able to make a very smooth transition as you knew the
song really well. Let's keep counting
from where we left off at the end of
those eight bars. So this is a second
group of eight bars, ready n into 678. Listen, little transition into the next group of eight bars. So that was a group of 16. Now we have another
section is the intro, but they bring in some
of the vocal samples. Actually, you can hear
that transition again, ready to go. Building up. The brick is gonna
come in there. You here, if we are used to
counting in groups of eight, we know exactly when it bring
in the next song because we know something's
going to happen at the end of those bars. That intro was 32 bars. And I'm going to show you
just for demonstration sake, but we will talk about
mixing in a later module. But just so you understand how this might work in practice, I will show you how we might count it to mix a section in. I'm gonna play the breakdown kind of climax part of the song. So that might be where
you might want to mix in the next one. For example. That might be a practical use for counting your box because you know now
at the end of eight bars, you can do a transition, you can switch out
something like that. And we'll go a little
more deeper into that later on when we
talk about mixing music. Apart from using counting to
line up in your sections, It's also really useful when you are bringing
in the next song. You can count, for
example, if you're mixing over the hook, then you might want to count when the
pre-course is happening. So then you really know when
the next section is coming. I'll show you, for example. There'll be nothing in every song is built
differently and not every song is in groups
of eight or four. Sometimes you have a little
extra bar at the end. You really want to
listen to your music as you play and as you get
to know your music better, you might find though, that certain genres have
certain conventions. Like house music tends
to have longer intros, 16 bars, Thirty two bars even. You might find that a lot of modern hip hop songs have very short intro is
maybe just four beats. The older ones maybe it's a, so these are just
general guidelines. A lot of pop songs might not
even have an intro at all. It might just come in
straight with vocals. So you could mix that
in a more creative way. But one thing you could do if you're just starting
off and you're not comfortable mixing in acapella
or mixing scratching. What you can do is look
for songs with DJ intros. Lot of MP3 pools that you can sign up for online
such as DJ Sadie, BPM supreme, DMS, club killers are so many that you can just do a quick Google
search and fine. But they will have
songs that have DJ interests at the
beginning that allow you to mix in more smoothly and not have to worry about songs that don't have a beat
at the beginning or that constraint
in with the vocals. I would recommend learning your music and getting familiar
with it ahead of time. What you want to
do is kind of have a general idea of how long each section is
really easy to use. And this is for those
build-ups and transitions. There you go. That's the basics of
counting your music. And in the next
section we're gonna be talking about how to
set your cue points so that you can
know which part of the song to bring in.
I will see you there. Great work. Everybody.
5. Module 5: Setting Cue Points: All right, So now we've
learned to count a music. We're clear on the
song structure. Next thing we want to
do is set Q points. This will mark where in the
song we want to come in. We can do this with
software or vinyls. I'm going to show you how
to do it in Sarajevo. But the same principles apply
if you're using binomial, just going to have to
rely only on your ear. You can't use the waveforms
to help you find that sound, but I will show you how
to do it both ways. First of all, what are Q points? Well, they're just points
of interest in the song. And if you're using
something digital, like a controller or CDKs, you can mark them on a hot Q here and
you can jump from Q to acute. For example. Whatever, you know. As you can see, there's
a lot you can play with. You can use the hotkeys
to manipulate sound. You can even play other
songs with points in some. But for now we're just gonna
do the basics and we're gonna mark beat one where we
want to bring in the song. I picked this particular song because it's not so
straightforward. So I want to show you why it's important to
mark your cheese. Oftentimes it's the
first beat of the song, but in this case there's
a pickup in the song. Listen. There's one bar. Here we go. It's over main, and
then comes the beat. If I want to match this section and I want a full eight bars over
another eight bars. Then I'm going to want
to bring the song in. At the beginning of
an eight-bar section. I won't bring in. Now Levi's these cases sort of. Now, I might want to mark that, let's mark that
first beat anyway. Because it might be a
point of interests. Maybe if you're manipulating or doing some scratch and you
might want to play with that, but I'm gonna label
it so I know that's not the start of phrase. The pickup. Okay. I'm gonna catch that beat.
And if you have software, you have an advantage because
you can see the waveform. So that started that be
I'm just going to mark it. So let me show you how
I did that once more. In hot cue. I'm gonna get rid of
this so you can see me. I just press that pad button. And if I marked it wrong, I can always press Shift and
tap it again and delete it. You can also press X in your software, like
there you see? So I marked that beat. Now let's count the intro so we know how many bars
there are already. 23423462347234. I'm gonna mark that
next group of eight. This is so that if I want
to mix the shorter intro, I can just start it
there and I don't have to search and find it and I can just recall that much quicker,
so let's keep going. So that was one Barb eight. This is the next group of, sorry, one group of eight bars. This is the second
group of eight bars, ready to five. Now you hit a diverse company. I don't want to
mark that as well. That way I can
jump to it quickly is also a good visual cue, especially if you're a
beginner and you want to make sure you're bringing the
songs in at the right times, then you can look at the waveforms and make
sure they're lining up. Let's label that. How many total bars
was in the intro, we had two groups of eight. What's that? 16? That is correct. So the first one I went to
label with how many bars? Just sometimes it helps me. On the slide, remember? So I'm gonna say 16 bars there. Now there's eight bars
left to the intro. Sorry to the verse. This is the verse, so I'm
going to label that verse. Cool thing about the hotkeys. Let us say I was
mixing assignment. I brought it in 16
bars of the intro. But the song I'm mixing out-of only has an eight-bar
section on messianic, let's say it's the chorus. So at the end of the eight bars, I don't want the intro
to keep playing. I want to jump
directly to the verse. So watch this. In 23425234623723482. I'm going to jump to the
seamless whether your heart, cuz you can do that. If I'm marking the
cues on vinyls, it's really the same principle. I just can't look
at the waveform because everything is analog. But I would do
something like this. Catch that back-and-forth. Find that started
at song and I put a piece of tape and then
mark it the same way. So you would go back
and forth here, the edge of the sound
and you just mark it. So it's all the same principles
that setting acupoints. And it's pretty
simple, isn't it? Remember to go through and set your acupoints
before your gigs. It's worth taking the time to do so that you're not in a pinch trying to listen
with loud music and trying to find your beak one. Alright, I'm gonna catch you in the next module
where we're going to talk about beat matching. I'll see you there.
6. Module 6: Beatmatching: All right, So now we've
learned to count on music. We set r cubed points. And now we really get
to the good stuff. Beat matching. Like I mentioned before, this is the bread and
butter of deejaying. This is how you're
going to get this smooth makes all through the night without the
music getting interrupted. How do you beat match? Well, first of all, we have to determine the BPM of the two songs we are playing. Or we have to determine,
I should say, which one is faster,
which one is slower. So we can and make adjustments to the second song that
we're bringing in and make sure it matches to
the song that we're playing. How do we do that? Well, if you have software, you'd have an
advantage because you can see the BPM labeled. But I want to make a note. Don't just trust your eyes. You always want to use your ears first because sometimes
the software, though it's smart
and it can help you cut a lot of the workout. It's not always gonna
be a 100% correct. So you always want
to use your ears. Now, let me break it
down just to talk about. So this can apply for
people if they're on pure analog gear as well. The key would beat matching. You're gonna be listening
for the sounds, the lineup. And it helps if you
have a specific beat, the downbeat, maybe
it's the kick or the snare on the two and
you try to align those up. I sometimes find
it easier to use the snare because it's the
frequencies while higher, So it sounds like you more. So for example, let's try
to match these two songs. First of all, pretending you
can't see what the BPMs, or if we're just
trying to figure out which one is faster, let's say this one was
playing on the left. Bring in the next song. Let me make sure I'm
bringing it on beat one, peak, one line. Then often see which ones
subsequent to the next. Starting with that left. This was happening in
your ear since this is both plans because it's kinda
hard to separate the two. But if it was happening on your, you would be able to
hear that the one in your ear was going
a little slower, then you will make
that adjustment. I'm listening here
for the snare. It's not lining up
to the other snare. Let me do that again. And this time we're going to
start making adjustments. How we do that? You want to speed it up. You're gonna make
a clockwise turn. And you're just going to
make it a little bit faster. If you want to slow it
down, counterclockwise. Little bit slower, you
want to make tiny. That was probably
too big of a jump, but I just did that
so you could see it. You want to make tiny adjustments
because if you jump too quickly is gonna be noticeable
on the dance floor. Now if you're just doing
it in your ear, It's okay. You can make a bigger jump, especially if you're
just trying to get in the ballpark
to start with. Sometimes it is helpful
if you're not sure which record is faster or slower to make a big one and kind of overshoot it and then
you can bring it back. I'm gonna play this again
and I'm going to pretend this second track that we're bringing in is just in our ear. But I'll play it out
so you can hear it. And you'll just make the
adjustments as you go. One more time. Because I'm playing this rubber
for bringing it in here. Just listen in a new
year and let it play. If you think you've
got it matched up, let it play a little longer and see if it stays meshed up. It starts to drift. Then you got to keep
making those adjustments. Now, of course, if
you have software, you can definitely
look at the BPM. They'll help you get
in the right ballpark. But above all else, you should still practice listening with your ears because sometimes it just doesn't
analyze it correctly, or sometimes you will be
having to play on vinyls and you won't be able to
rely on the software. Let me run through
that once more. I'm going to show
you on both hands, since we want to make
sure we're adept at both hands to speed it up. We're going to be
clockwise turn. And you're going to make
it a little faster. Down counterclockwise. Little slower. If you're on vinyls, I like to tap the vinyl. You don't want to
push too hard though because then you're going
to stop the record. That's to go faster. So I would just tap, tap, tap. And I would make
that adjustment. If I want to slow
down on turntables, I drag the platter because
remember it's rotating right? So if you're dragging,
it's going to slow it down and make it slower. You want to use a light touch because if you are too heavy, you are going to
stop that flatter and it's going to
stop the record. Some people like to turn
the need of the nipple. Some people like to
push the platter, but this is what I
find works the best. A little tap on the vinyl or little drag on a
platter. One quick note. You normally would not
want to be slowing down the BPM as you
go through the night. Because in general,
we want to build the energy up as we go. You can always bring the
BPM background later on. But it is more jarring
to the ear as you're going through the night to hear the song that's
currently being played. Slowed down. It tends to bring the
energy abruptly down. We generally want to mix in
the faster BPM as an exon. And we're going to bring the BVM of the song that's playing up. In that case, um, I wanted to do a little
bit of a hybrid instead of speeding up the song of my ear and making
that adjustment, I'm going to make
the adjustments on the record that's playing. When I'm matching in my ear, I'll probably just slow down
the one that they can't hear just until I
get matched up. For example, I'm gonna play
this song on the right deck first and pretend that's
what's playing on the floor. And then we're going to bring in this faster record in our ear. But I'm going to, I'll
put the Q button Nazi. You'd just say, you know what, I'm going to play it
out so you can hear it. I'm playing this record. Ready. I'm going to slow down, but that's not in
this second step. Remember the other
one on the left, that's just naturally enough at this point for those snare. So I know I didn't do that on my ear right. Now. I know my represents. If I'm going to bring it in called how to adjust
the VPN cloud. You know, what am I in that present? When the temperatures
are lined up, It's such a smooth transition because you don't know
where one song ends at. One song starts and it
continues to flow seamlessly. So that's why beat matching
is really important. A couple of notes
regarding beat matching. It's helpful to make the
adjustments on beat. That way it's less noticeable. I like to do it on the beat one. And even if you want to do
at the beginning of phrases, so adjusted. Just tiny little bit. Let's see, I went too far. I want to go back for
just a little bit, especially that's known as the
board then if I were to do this all over the place. Another tip I wanted to add is it's generally a good
idea to stay within the plus or minus for BPM range when you're
beat matching. That way the songs don't
start to sound really unnatural and the jump isn't
too crazy all at once. That being said,
you can always use your discretion and sometimes
for artistic purposes, you can stretch beyond that if that's what
you're going for, practice your VQ matching. Don't worry too much about
all the other frills. For now. The matching is really the
core of the deejay technique. You want to get that down first before you start adding
all these crazy effects. A good way to practice is
put little post-it notes and cover the BPM on your screen
so you have to use your ear. Or you can have a record
playing from something like an iPhone that you don't know the BPM to and try to
match it in your ear. That's always a challenge
I like to do if I'm at a gig and I'm mixing out from, let's say something else is playing and they're switching
from the house sound. The DJ. I sometimes like to
try to match the BPM. There is a good practice and
it helps keep you sharp. That's it would be matching
and keep practicing your BWT matching and
you get it in no time. All right, I'll see
you in the next module where we talk about
mixing with EQ.
7. Module 7: Mixing with EQ: All right, So now we've
matched up the music and we're ready to bring
in our song and mix it in. How can we mix it in
without it sounding super obtrusive
when it comes in. Well, this is where the
EQ comes into play. When I bring in a song. If I bring it in at full volume
with all of the EQ unity, then it might just sound like too much because I'm basically doubling the game because
I'm playing two songs. I was playing one
song and now I'm playing another song
at full volume. You're going to notice
the difference. But if I bring in
the second song with the base cut and I swap
out the base as I go. Then I can sort of mix it in
and weave it in together. Let me show you what
I mean. All right, So this song on the right,
I'm gonna have playing. And I'm going to bring
in the left deck. I'm going to bring it in
with the base cut to start. I'm going to use my counting. Let's say I'm gonna be mixing
over a 16 bar section, 16 bar Hooke in
the 16 bar intro. Well, I'm gonna
swap out the basis, but I wanted it to sound
like it's part of the song. Maybe it's like
something's changing. I'm going to swap it out at
one of the eight bar changes. In this case, if
I have a 16 bar, 16 bars transition, I
might do it at eight bar, so it has half the time. It's sort of builds it up. So how do we swap it? Let me show you. This one is cut and
this one is up. You're just going to turn them. So they, they flip-flop. The new song. Let me
share that again. We'll do one at a time.
Left hand is going to, or whichever deck is playing. In this case, this is lifting. I'm going to bring it to one, but I'm gonna bring this
down at the same time. So the kick replaces the other. Now, depending on what's
happening in the song, you might not want
to do it briefly. My slight change. In this case, they both
have four on the floor. It takes it makes sense
to swap it out quickly because then the ear
maybe it doesn't even notice that there's
a new beat going. A little switch right there. It'll be the same thing. If it was the other deck plane, then this would be starting
off like this and I'm just fought them out like that. Now, one thing I like to do
is switch the base in time. So for example, if I
had 16 bar transition, I like to do it at eight bars. If it was an eight
bar transition, I'll do it at four bars. So I kinda like to
have the time of the transition just so
it feels more cohesive. Sometimes it'll be really
quick transitions. You just gotta do it quickly. I'm gonna show you this
on a 16 bar transition, and then I'll show
you an example with an eight bar transition. We've got this record
playing same spot. So I made some adjustments
to the highest and mid. And sometimes I like to bring in the other one with the highest admins turned
down a little bit, just not all the way down, but just like maybe a
little left of center, especially if that has really sharp vocals or something that's going on that's really high in obtrusive. This case, it's not really
subscripted where it came in, so I just left them at center. But you really want to listen to your music and listen
to what's going on. The whole point of this
EQ is to help you be able to mix smoothly so that
you can weave in the, the two songs seamlessly. That was an example
of 16 bars and then pull up an
example with eight. Same principle applies,
but I'm going to switch the base out at four
bars instead of eight, because eight we're going to swap out the song completely. Switched the decks just so
you can see both hands. I'm gonna be playing
this song first. And then I'm going to
bring in the right deck. In the case of these two songs, I know the hook here on
the left deck is a bar. None of the intro on the
right deck is eight bars. We have half the
time as we did in the last song to
make the transition. So it's okay, we're just
going to move fast. I'm gonna play this
song on the left. When that hook hits on the one. I'm going to bring in the
intro of the bright deck. This song comes into law hot, so I'm gonna keep the
high-end mids just turn a little left
to center. Let's go. She comes in. I didn't count that
out loud with you. So let's do it one more time. We're going to count
it out loud together. Same thing. We said this back. Let me turn this down. Just like that. Easy-peasy. I forgot to mention. If I'm switching out the highs, mids, I will do that typically on
a one as well, but that one, I might just do a little bit more in the middle of the phrase because it's
not as noticeable. So sometimes if it's
a quick transition, I do those on the one, the two, and then I'll swap out
the base halfway through. So there you go, two
different examples of how you can use
the EQ to mix in. Some, you can get
creative with it. You might want to
play around with the EQ a little bit and
just hear how it sounds. The most important thing
is to use your ears. Some songs, they don't have
a base in the beginning. So in that case, you
don't need to cut the base because
there is no base. In the beginning might just
be hi-hats or it might just be a vocal sample. As well as if you're mixing over a section where
the base drops out, maybe you don't want to bring in the next section with no base because now
there's no base. So really use your ears
and use your judgment. The catch in the next
section where we talk even more about some of the
effects you can use. The Beta effects and
the color effects that you can access through your software or
through a mixer. I will catch you there.
8. Module 8: Effects and Pads: Alright, now you've got
all your basic stem. Know how to beat match a song, and you know how to mix it in, and you even know how
to play with the EQ. So it's transition
is nice and smooth. I'm going to add some more
tools. You are small. Let's talk about
some of the effects. There's two types of effects. You might see. There's something called beat
effects and color effects. They are pretty similar, but it just varies based on
where you might find it, as well as what they effect. Beta effects, much like
the name suggests. Manipulate the
beat. For example, on this controller, the DD JSR, you'll find a rack up
here and these give you a fix in this
particular case, since I don't really have any options for
my color effects, all the effects
choice are up here. So there are some that don't necessarily
rely on the beat. But as you can see where
I see this record, also see a knob to
control the beat. And if you look on my
screen when I turn it, is changing the
number of beats or the division of beats
that it affects. If you're working with
CBGs and you have a mixer and let's
say the S9 are S11. You're gonna see
a similar thing, but it's not a rack like this. It might be a screen
here and you can change again the
number of V divisions. And you might see a little
knob here that you've turned that will let you choose between
the different beats, sorry, the different effects. And another little switch
where you can choose between which channel
you want to affect. In this case, you'll
find it here as we did do the walk-through
I showed you. It doesn't really matter
where you find it. You're going to
find some kind of control on any controller. Let's look at what some
of the effects do. In this case, I have these set to some of my
favorite common effects, but I have a river which just
gives you an echo feeling. I have delayed phase. Those are just some
of the effects are so many other choices. Some of the other
ones I really liked. There's echo oh, I have that
on this side of the wreck, so I'm going to
show you on there. I like using the echo a lot, transitioning out of a song. It's also a good lady,
lazy man's effect. If you're doing a
quick transition that you didn't match
at the BPM to well, it kind of masks it for you. You know, we try not to do that, but it is a really
useful effect too. If you have to turn off the music is still makes
it feel less abrupt. One thing to remember, you might have to
turn on the effect. There might be some
something that you have to press to turn on or off. It could have turned
up, but if it's not on, it's not going to
affect your channel. And you also want
to make sure you have it assigned to
the red channel. Here, I just leave it on 12. So because it's visually easy to see that this is for
here and this is for here. If you wanted to
have access to all of your different effects, you could have them
be assigning both and just turn it off or as you
wish or as you, as you go. I just kinda leave it on 12. Those are effects. Let's look at the color
effects on this controller. I don't really have any options. I only really had the filter, which is a low-pass filter on the left side and
high-pass on the right side. That just means lowpass means everything as I turn it more, everything above
the frequency, etc, that is filtered out and I can only hear what's below that. And as it turns to the right, everything below that frequency I said it too is filtered out and I can only hear
what's above that. So let's take a listen. I have it here in the center. The left delta E are
all higher frequencies. I'm only letting
the low frequencies pass back to the center. To the right side
of the high-pass. Filtering out all
the low frequencies. Sometimes on some mixes
you'll see a sweep. Also, you might see, I think there might be a gate. You might sometimes see a noise. Some mixers just have a noise
that you can actually use without a record
Play and it will give you a sound. That's,
that's pretty cool. Now how do we use
this in practice? Well, if I'm mixing
out of a song, it might add a little color to the end of the phrase
as I come out of it. So for example, let's
mix this record. Once again. Another refresher. Maybe do two at once. Maybe I want to add. You think there's a lot of the things
you can do with that. Now. Just a quick note. They are designed to
probably be at their best somewhere
around unity gain, which just means
right at the center. But if you really
playing anymore, maybe you want to distort
the sound a little odd. For example, maybe I want to have it go
deeper and back down, or I might want to
have the rebirth. I don't know. You can play with it, but if you just want to have the
kind of straight, you can just set
it to the center. You can turn on and off. There's different ways
you can use that. Those are effects
pretty much you can play around with them
with the software. There's so many options you can explore and you
can even download different effects to upload
into your mixer or into your software that you can
then use your controller. Let me talk a little
bit about some of the functions here on the pads as well because you might get
something like a role here. I can hold them down
with this role at same, kind of
similar to automate. But when I let go, I can change. I can change how
much I want to roll. I like to use this sometimes, especially with kind of EDM
songs. This is tremendous. That's all that does. It
just rolls this down. The slicer, just slices
up your song into eight sections so you can jump to those without losing
your spot in the song. So more interesting. That's a really fun
one to do if you have some vocals that you
can vocal chop it. Finally, the sampler here, it just, you can load
south into your sampler. Maybe I want an air horn. I could put that air horn here. You can even make a
little drumbeat here. So let's say the next bank. I have some here actually. Another cool thing you can do if you shift, I'm sorry, if you press pad
plus on this controller, not every controller has it, but they might have some
other kind of setting. I can, I can roll it so
that you could play a song. I said I was playing this. There's a lot of really cool, fun stuff you can do
with controllers because it's kind of like an all
in one piece auto loop. I think we touched a little
bit on that earlier, but let me just walk through the auto loop with you as well. When I hit auto loop
is automatically going to loop whatever
setting I have here. And I can change them right now is at a quarter of a beat. I'll put that on. It's going to loop that
I can make it longer. I can look this 1D or
I can look for these. This is useful again,
remember if we're transitioning to different
lengths Instructions, I can loop the beginning of one section so that
they actually line up. If you want to loop a part of
a song that is not in time, you could do a manual loop. This particular mixer,
you have to press shift because it's
a shift function, but other mixes
we'll just have it in your press shift in. And then when you're
ready to loop it out, you'll press out or shift out on this mixer in time, but it will allow
me to move them. If you wanted to eat
that word, I could be. Also another useful trick. If you're mixing sounds of
different BPMs and you want to change it without
feeling too abrupt, you can manipulate the
BPM by looping something. I think that pretty much
does it for all the extras. Keep in mind. You might not find all
the same functions on every controller
and there might be other functions on
other controllers that aren't available
on this one. But for the most part, they're not gonna
be too different in terms of the types of
things you'll find. You'll just find them
in different places or maybe controlled in a
slightly different way. So again, if you're working
with different gear, just take the time
to take a look at it and see where
everything is. In the next section, I'm going to start talking
about something really exciting and
fun scratching. I know some of you all
really want to learn that. Stay tuned and I'll
see you there.
9. Module 9: Scratching (The Baby Scratch): Alright, so you're on your way to becoming
a successful DJ. Now you've learned
how to beat match. You can mix in the
song using EQ. You can play around with
some of your effects. I want to talk to you
about scratching. This is the nano a
lot of you have been waiting for to learn about. We're not going to go super deep into the technique
of scratching. However, I will show
you the baby scratch, and I'll show you a little bit about how to pick sounds
for your scratching. And I'll show you how to use scratching in a practical
way in your mix. So why do we scratch? Well, originally before we had all these buttons and
digital technology, you have to really
listen and keep time. And we had platters spinning. We didn't want to
stop the platter and we want to bring
the song in time. You would have got a
sample going here. Let me show you what the song. For example, I would probably be like if something was going
my ear and it was playing, I bring in a song. It just gives you a
little bit of momentum, just like when we repressing
the Q button, right? Same exact principle. What we're scratching. We use two things. We're scratching the
platter and would also employ the cross fader. Now, the scratch I'm
going to teach you today, you're not going to need
to move the cross fader. It's just gonna be left
at the open position. But oftentimes you will
need to manipulate book. So just keep that
in mind that it is part of Scratch and you're
going to be using both hands. How do we scratch when
you're scratching a record? You want to have your hand in the lower left corner
of the platter. Sort of maybe like the
Buddha's that six o'clock. No, six is drink. Well, I don't know. Math is nothing like the
seven o'clock position. And keep in mind if
you're using turntables, there's a needle here, right? Tone arm, so you won't be
able to go past there. You really going to be
implying this area of the record of the platter to be scratching same on
your right hand, lower-left corner and you'll
be scratching this way. If you have a scratch where
you let go, for example, if you're always going to be following the
records so that when you return back to the
start of the sound, your hand is in
the same position as if you were scratching
with your hand on the record. Let's go over the baby scratch. Cache is really
simple. It's just a forward and backwards motion. You're going to have
the cross fader open. So you leave it right
in the middle and you probably have a track
play on this other side. You'll hear the track
and you'll also hear all the forward and backward
motion of your scratch. I'm gonna show you
a really slowly. First of all, to
scratch a record, you're going to want the
platter to be playing. We want to make sure I
already had this plane, but let's say I didn't have it. I would I would hold the platter so that
it doesn't start playing. And I hit the play button. You see how that lit up notes. You can't hear it
playing, right? You're gonna hit me. Do that again. Not
playing right now. I'm going to hold it and
then I'm gonna hit play. But it's not going
to play it because I'm holding the deck. But this way when I
let go, is going to play the baby scratch. You have your hand in
the lower-left corner. You do a chord motion, backward motion, and
you want to return it back to the start
of that sound. Ideally, if you're working
with vinyls or even CDJ is, you might be able to see
a little virtual queue. In this situation, we had
to look at the computer. It's not super ideal, but it doesn't jump. So we can look at the key
point on the computer. You really want to return
to the start of that sound. Let me show you.
On the other hand, it is the same thing. That is the base cash. Now we're going to practice
doing in time to a beat. Let me pull up nice
and slow beat. Cao, Cao, Cao, Cao, Cao, Cao, Cao, Cao. Cao. Play around with that. And when you get comfortable,
you can start introducing the cross fader and work in
other types of scratches. For example, stack, really
just like a baby scratch, but you're closing
theta the way back. There's a lot of
variation you can do. Now, let me show you one
other practical way you might want to use
scratching in mix. Let's say I have this song playing in my ear. I might want to bring it
in stretch a little bit. I bring him to stop. It
gives me a little bit of anticipation to the
next part of the song. We're gonna do it
on the last spar. That's a practical use
for the baby scratch. And it can definitely impress
a lot of your friends. People will love to hear that
sound at the DJ scratching. Scratching is really like the DJs way of talking
to the people. A quick note about samples that you might want
to scratch on. So if you're bringing in a record and there's
a kick there, that might give you
that nice boom. And like for example, this one. But sometimes you
get a record and it is just like one of those since that kind of has that sign TO those sounds might
not scratch so well. So you want to listen
to in your ear and see how it sounds before you scratch it in the sounds that
might be good to scratch on our vocal samples. Parts of the verse that may
be the B hasn't dropped yet, but there's a little
leader and you could scratch that and then build anticipation into the beat
backdrop, even drum samples. It can be good too, depending on what type of Trump's sample. If you're scratching
it with a kick, you might just want to
turn the bass down so it doesn't come in too loud. Like this one. As you missed it. Bringing the base
in, you can download something such as this
flower here in Scratch ammo. You can find these in DJ pools. You're probably find
them online as well. Or you can make your
own and you can take samples from
songs you like. But something like this has a lot of samples
that you can work with and you can just tag
them on your hotkeys. There you go. That
is the basics of scratching and that will get you started and play
around with that. And then who knows what
else he might come up with. You can mix different
types of scratches. And I look forward to hearing
what you come up with. Next. We're gonna be talking
a little bit about the logistical
side of deejaying, such as selecting your music
and prepping your crates, and how to handle
things like requests and keeping your
library organized. I'll see you in that module.
10. Module 10: Music Selection: All right, Let's talk a
little bit about selecting your music and preparation and organization
of your library. How do you select music
for a gig or a set? Well, depends on what type
of format you are playing. If you were invited to
play a gig at a venue, you might have a
specific format. For example, maybe it's RMB night there on
Thursday nights, or maybe it's a slinky
hotel and they want some new disk IO or has five. So if you are booked, It's always good to ask. Don't feel embarrassed. People like when you
can clarify with them, especially if they're
hiring you for the job, you don't have to
feel stuck by genre. You could be open
format and I always say vibe over genre. I tried to use a vibe to
hearing the night and keep the feeling in
the mood consistent. But I, I moved
between genres often. Don't feel like you're locked
into one type of genre. In fact, if you play only house all night
or only hip-hop, sometimes people's ears
can get a little fatigued. So it can be nice to
make something in. Now, you might not want to
jump too abruptly from, let's say, wrapped rock. You might find a song
that has a good segue, like a rock song or something. You know, it's all about divide. How do you go about organizing
and preparing you music? I like to prep a virtual create, just like you would if you
were using vinyls or CDs, you would prep the
crate before you. Even though now you can bring your whole music library
with you in a hard drive. It's still good to
prep some songs you think will fit for the night and pull them and put
them in your create. So let me show you on
Servo For example. I have my library here
organized by genre. But then I will have
other crates down here. I use that some typical events that I might do, for example, some of them I residencies
and then I split them up into maybe different times of the night or different vibes. It's up to you how you want
to organize your music. I would say a couple of
things to keep in mind is genre is good to tag your genres and you kind
of have a general idea, especially if you're
playing open format. It's really useful to know
quickly what January song is. Bpm is, unless you've got to tag your BPMs and your software
will analyze that for you. So just make sure you
drop it in in time and make sure you get the
all done ahead of time. I also like to sort my
music by the energy levels. So sometimes I'll say a hashtag, upbeat or chill, might
make a crate for lounge. And in Serrano there's something really cool called a smart grid. I can make. For example, I could add a rule. I can say all songs, all sounds with BPM greater
than or equal to 100. And I want these all to be
songs that are 2020 and newer. So I could say year after 2020. Then I have a smart guy here. And this is all
the songs that are 100 or faster that
are from 2020 on. As a great way quickly to
pull your songs and organize. And then you can go through
and prune them out yourself. You have to make a new
credit for that because it's smart rate is based on the rule. One thing to keep in mind is
sectioning out your night. So I tend to think of it in
terms of three sections. Early night, peak
and late night. There's no hard and fast rules. It obviously depends
on how long your gig is and what type of event it is. But typically it is going to be the heavy hitting songs That's going to be
all the top hits. If you claim those too early, it might feel anticlimactic. Maybe people are just
getting warmed up or maybe you put it too early and
no one's there to hear it. And then you want to hear an hour later, but
you just played it. So it's good to pace your night. When you get to the
heavy hitting section, you want to you want to
keep that energy level up. You don't want to run out. If you start too high up, then you have nowhere to go. Also keep in mind,
you don't always want people to stay at ten all the time
because it's a journey. Remember, people are dancing and maybe they want
a little break. If you can guide them through and give them those
peaks and valleys. That's really the goal
of your DJ career. You should play what you
want to hear and not what you think
people want to hear. Don't make the mistake
of trying to follow and playing requests
as they come in. Because then you're
just going to be human jukebox and
you're going to get all off track because if
you're playing for a room of 150 people and they
are different opinions, but not all going
to mesh together. So your job is to take all the inputs and
mix it together in a way that is seamless
and makes everyone happy. Speaking of requests, how
do you handle requests? While some people say
no requests at all, I'm sort of a school of thought. That I take the input in because I'm there to
make people dance. And if people have certain
things they want to hear, I'll take the input and
see how I can work it in. But again, you
don't want to just play one request
after another end. Just willy nilly, because chances are people
are going to request things that are not
a good fit together. You want to listen to that and see how you can work it in. And you also want
to read the room. If you're playing. Assign people are
really enjoying it. And maybe you had planned
this set and you are going to switch into a different
sign at that point, but people are really enjoying
that part of the song. Maybe you can let it
run a little longer. Maybe you can play
another song in that same genre, that same five. Vice versa. If you put a song
and it just didn't really seem to hit very well. You can pivot and
you can switch it into a different genre
or different mood. But you can, you don't want
to be too abrupt with it. So you always want
to read the room and adjust accordingly. Ideally, you're doing this. As you go. Let me show you a little bit
how I organized my library. I have all the genres
listed up top. And some of them I subdivided
into smaller divisions. And I have sometimes pulled some smart
grades just because within the genres I might have hashtags or things I
want to access quickly. For example, I
really like new R&B. I have my R&B songs
divided into decades, but I have this of all the hashtag is just
pulls automatically. That's another thing
I forgot to mention. It could be useful to
organize your library by ear as well. I just do a general
decade by decade, but that helps me access
quickly if I'm playing within a certain decade and you don't want
to jump too quickly. And maybe people are feeling
that throwback mood. It helps you find other
songs that fit well quickly. But after my genres,
I then have, sometimes I say
that sets I played before so I can
reference them later. And then I have some of the common gigs I play have
creates port for that. Then every time I
play a new game, I pull a whole new
credit for that. And I'm constantly updating my quiz this way I make
sure I always stay fresh. One other thing I want
to show you is how I organized my library
in my hard drive. Sometimes the
software will suggest for you to put all your
music all in one folder. However, I found that
if something happens to your software and
you lose that data, now you have to reorganize
your entire library. Future proof my music library is I also sort them
in my folders. Now you don't have to do this. I'm just showing you
what's worked for me. But I basically have the
genres sorted in folders, then the rest of
the sub categories, like the hashtags and things. I don't sort that way. I leave that in Sarajevo, but if something were to happen, I at least don't have
to go through and redo the entire library. The other good thing about
that is that when I use Record box or a
different platform, I can drag those folders in. I don't have to re-create
my whole library. Everything's already sorted out. So it's really useful if you're working between
two different platforms. That does it for our
section on selecting music and keeping your
library organized. So remember, at the
end of the day, just go with your intuition, go with your gut and
enjoy what you do because it's all about your
style and what you love. If you can stay present and stay true to your tastes in music, then everyone else will
be along for the ride.
11. Module 11: Settings and Troubleshooting: Alright, let's go over
some of the settings and troubleshooting
some common issues that you might run into. You can see there's a knob on the side, cross fader curve. And you see there's
one side that has this diagram and then
one side that has a line with two diagonals on one side, the side that's x
is going to give you a cross fader curve that slowly ease out from
one day to the other. For example, if I have an upset there as I moved to
phase it out as we go, if I have another track plan, it will slowly ease and the other I didn't match the match. That's not really going to be useful for us if we're
squashing because we don't want the sound to get louder or quieter as we're
within cross fader. The other setting where it's two lines and one line on top. That means, no matter how little bit of a move
that you make here. Just moving a slightly
there is going to open the fader for
the other side. If I have here, I just
want a little bit and go all the way over and then
that turns it off. That's the setting
we're gonna want if we're doing any scratching. Honestly, that's what I leave it on all the time
when I'm playing. Because even if you have the
cross fader in the middle, it's really going
to be hard for you to keep it exactly
in the middle. You might move it a little bit. And that's gonna make gain slightly different
on both sides. So I just leave it on that city. Now this x setting is useful if you're fading
a song in really, such as if you're doing
a wedding ceremony and the bridal party just
walked down and now the goons gonna
walk down and you can fade into a different song. But you're not beat matching. Lot. Really rough demonstration,
but you get what I mean. I want to show you
some of the settings within Sirona that
you can change. There's something
called Instant doubles. And if I check that now, if I play a song,
just sampling this, now if I load the same song, the other deck is
going to immediately place in the same place. That's really useful. If you only have one
working deck would say, Are you playing
with yet one CDJ? So you can do something
like you're mixing. Now you instant switch it
over to the virtual deck. Now you can mix in another song. It's also something really
cool if you wanted to do, let's say, find the
song. Instead double. And I'm gonna be something. It just pulls up the
song row quickly. At the same point that
you're already playing. You don't want to find it. It can really save you to if
something's not working on the other deck that goes
into troubleshooting. So this is kind of combine the two modules,
troubleshooting and settings. But that's something you could do if something is not working, maybe one of your buttons, this has happened to me before, one of the pads maybe underneath some liquid garden or
something and it's jammed up and it's
looping something, you get instant double
it quickly onto the other side so that it
doesn't stay jammed up. And then you can buy yourself some time
to figure that out. So let's take a look
at the router again. Mixers, you might have this
on the physical hardware, but this particular
one doesn't have it. So you have to adjust in here, but you can adjust the
stop and start time. So if I'm playing a song, I have the stop time. Let's turn it all the
way left with the fast. If I start, stops right away, there's no slowdown period. We put it all the way. Well, I won't put it
all the way because it's gonna be really slow. But let me move
it to the middle. Now. Let me show you that one
more time with the deck so it imitates real vinyl is
the way it would slow down. You can adjust that
to your liking there. Same thing with startTime. If you have it set all
the way to the left at fest, I want to hit Play. It comes in right. Now. If I have it slow. It's turntables, but that's also your preference personally, I like to keep it at fast. So if you're doing
anything like chewing, you want to leave that fast. Because when you hit Play, you want it to come
in bright and beat. If you have it
anywhere apart from 0, then you want to scratch in that already playing or
it's not gonna come in time. There's also an upgrade or curve that sometimes you can
adjust on the hardware. In this case, again, this is gonna be something
we find in software. Let me see where it would be. Here we go. If you go to the mixer settings, you can set all those
virtual settings that aren't available
on your hardware. That is just the, so if I
wanted to have a bit of a, it's kind of like
a linear curve. It's sort of linear,
but if I haven't fast, it's going to be a little
more of a hockey stick. Hockey-stick, sorry, the
other way, parabola. Just a little bit. It's going to give
you a lot of games. Then around them. Let's go over some quick
troubleshooting tips for some common issues
you might run into on a gig if you're not
getting sound out. What you want to do is
first of all, don't panic. Because panic is always going
to cloud your judgment. And sometimes most of the time it's something as
simple as a switch that needs to be changed or something that needs
to be plugged in. But you can check your
signal flow and start from the source of
the sound all the way out and just make sure everything's plugged
in all the way. So you would start
from your laptop, make sure that's plugged
in via USB and then you go to the cables
plugging into the sound, making sure everything
is switched on. The sounds so silly, but oftentimes that's where
you catch the mistake. Now, on CDJ is in a mixer, you also have another
knob that you have to change based on what
type of decks you have. If you're playing a mixer, you can plug in. Cdj is turntables or controller, or even an iPhone. So there's usually a setting
where you can change it to USBE phono or line. If you're playing
turntables, you want to make sure you have it set to Fano. You want to do line proceed DJs. But if you're going to be
playing through a laptop that's connected to your CDKs and you want to make sure you
set it to the USB sending. Another common
thing you might run into is if you're playing
with control CDs, you want to make sure that your key lock is
not it turned on. Because the way a
control CD works is that it sends a tone to your photo and
that's going to tell it when it's being sped
up or slowed down. So I can then translate that
to the MP3 file and playing. But if you have an a key lock, it's going to keep
that tone the same. It won't know when it speeds up. I think we mentioned
this earlier, but just to reiterate
because it might happen if you plan on
unfamiliar equipment. You have vital mode off. You won't be able to scratch. Do you want to issue That's
an equal distributor. Again, if you have slip mode, Let's say I have
forgotten I had to slip mode on and I was trying to adjust what's happening. Well, it's not letting me jump because it's going
to keep this place. Another common mistake for
people for starting off is if you're switching between CDJ or controllers or turntable, when you plug it
into your erato, you're going to see
another option come up that shows something. This is ABS or REL or INT. Int. Abs stands for absolute. That's gonna treat your
decks as absolute, basically like analog vinyl. Meaning if I have control vinyls and I
plugged that to my Serrano, but I have it in absolute mode. I can't really show
you on these because I don't have it plugged in. So it won't show up, but move the needle to a
different part of the song, is going to jump to that
same part in the MP3. However, I won't be
able to use my hotkeys. When the song opens up,
it will just run out. So generally, if you playing
with control vinyls, it's probably good idea
to have it on relative. That'll give you more access to some of the options you can use. Relative means that it will
keep track of where you are. But when you switch, you press a hot cue. It won't be absolute to the spot and the violin just be relative
forward and backward, but you can jump to
different parts of the song. Int, INT. That just means you're playing directly through the computer. So if again, if
you're in a pinch, one of your decks isn't
working, that can save you. You can run song directly
through throttle. And through that
just means there's something passing
through that channel. So maybe you have
another DJ coming in. They're going to
mix it on that deck and they plugged
in their laptop. So that means you
won't be able to use that deck on your cirrhotic. All right. That does it. I think your basis
are pretty covered and I can't wait to
see what you do next. Happy DJ.
12. Module 12: Closing Thoughts: All right, There you have it. Your intro to DJ,
DJ starter pack. I'm so proud of you
for sticking through the course and
learning how to DJ. I think you have everything
you need to get yourself started and play your
first couple of gigs. And from there you can build an agile personality and
style and creativity. Just to recap, we've gone
over how to count your music, headset, acupoints,
how to beat match, how to mix with EQ. We've talked about a little
bit about scratching. We've talked about some of
the effects you can use. We've walked through
the equipment that you might need to
get you started. We've talked about some of the different settings and controls. We even talked about
troubleshooting and some of the common issues
you might run into. So I think you're
more than prepared. Now, all that's missing is for you to come up
with your own DJ name. I can't wait to hear
what you come up with. Please share mix and I would love to hear it.
I'll see you out there. Ipv j.
 Jenyi Lee, DJ, singer, perpetual student