Transcripts
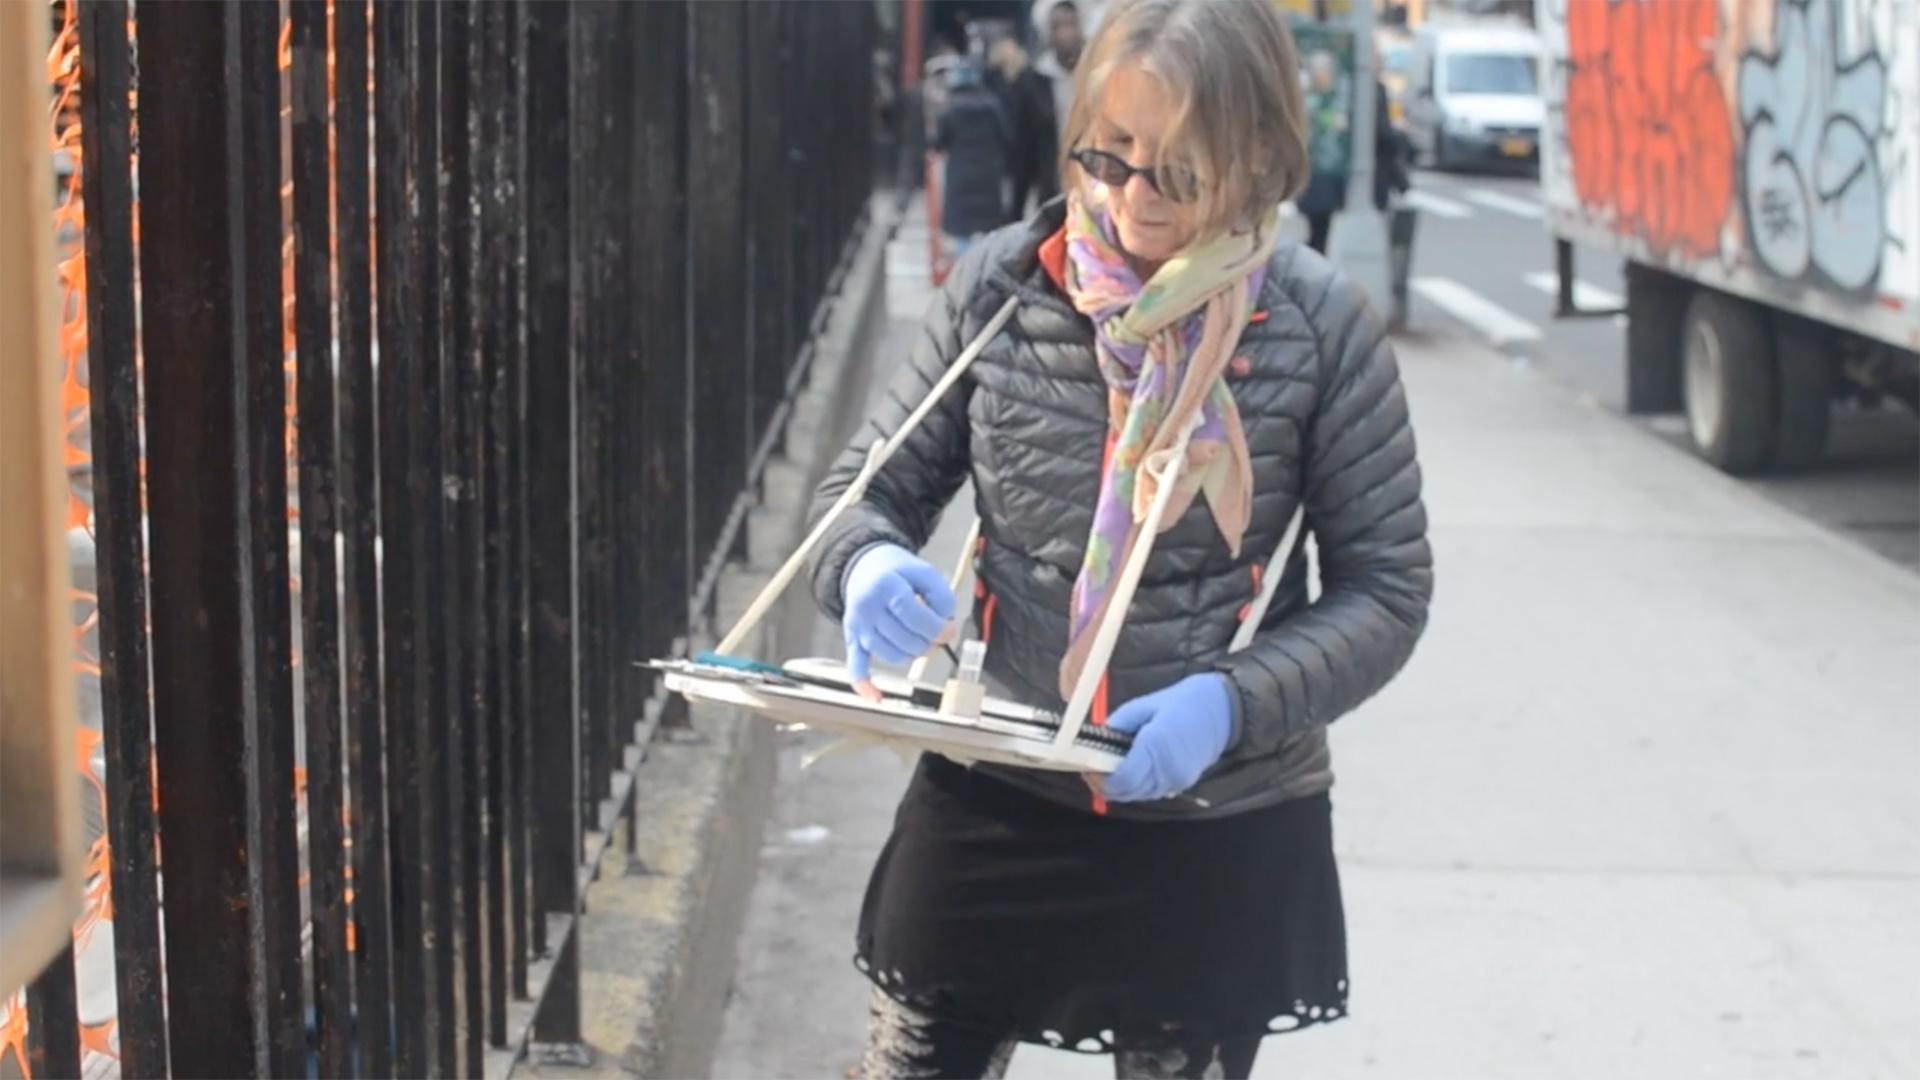
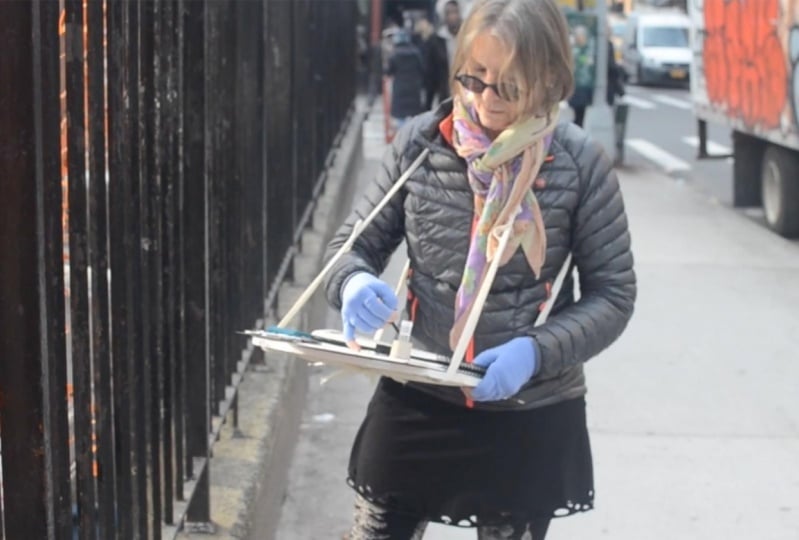
1. DIY Body Easel: Intro: welcome to another skill share. Of course, I'm Chris Carter in this class. I'll show you how to make ah, portable standing easel, one that actually attach is to you so your body acts as the tripod. Whether you're sitting or standing. Usually I use it when I am standing. You can use this easel for sketching in a crowd at festivals you could walk around. You could actually have quite a large surface to be working on it. It's a little bit like walking around with your drafting table attached to you. I adapted a version of this to use when para painting, and that's where I run off a cliff attached to my son and we fly around in the air. He he pilots the wing as I paint, and it didn't work very well the first time because I had made this wonderful aerial studio and it blocked my peripheral vision. And for the first time ever, I got really, um, experienced motion sickness. So I redesigned it and came up with another smaller method, and in this course I will show you that one, too. It's actually just using a sketchbook as a walking easel, so I'm going to show you. Um, several varieties of contraptions you could make for yourself. And the project at the end will be to make yourself one of these contraptions or one that's just inspired by the ones that I show you. And to then post that in the project section of the course. I look forward to seeing your projects, and I hope you enjoy taking this class with me. If there are wonderful suggestions ideas that you come up with, please share them. I am always open for inventing new ways to make sketching and painting possible. Everywhere you go at all times, every day. So thanks a lot. I'm Cris Carter, enjoying my class.
2. Part I - Board Sizes: Before you start to gather your materials together and looking for boards, you need to know what size you want your body easily to be. This doesn't make too much sense to me to make a body easel. That's this big, because chances are if you're carrying this much with you, you're going to want to be sitting at the table or something, and you're not gonna be standing in a crowd and putting this down at your feet and worrying about all of that. The idea behind the body easel is that you can put in a backpack and take off on your bicycle or motorcycle, or you're just standing in a crowd and you just got pocketbook or you know your supplies or in your pockets and eso. You wanted to be able to slip into a satchel that's on your shoulder or backpack person. So but in this case, if you want to make it this big, it would be about 15. That's the gusset, so that would be about 15 inches square. You could also make it this, you know, could be 20 inches. In fact, I have one that's 16 by 20 and it does fit in here, and I have used that on occasion, but it's usually just to show people that they could make. So I just want to show you. I'm sure you all have bags like this. And if you want to make it that size, be my guest, not a problem. What I did was I gathered all the bags that I normally carry with, and I am a few of your bad first. Now, these are the bags that I normally travel this canvas bag. It's great. It zips, All right. I call it the G 1000. I never remember what the actual name is and has a great sip here. It has a zip inside. You can hold it like this. You can hold it over your shoulder and what I love. And I usually stick it in here just for security reasons. It works his backpack. Okay, so I I use this when I travel all the time, so I would want one to fit in here. This is one that I use an awful lot to. Okay, again, this is it. Here, Some pockets in there. Pocket here. These things come in handy sometimes. Are you going to put things in their out? That on this this is bigger than this, but they're about the same size. They were kind of the My original iPad was perfect for that. They could fit into one of these. Then I have this great leather bag, the pocket here, a zipped pocket here. So zip in there. Zip here. Now this one is just backpack or like this, it's not really a shoulder bag unless you just look that over your shoulder. Serve would want month. And this is Ah, New one that Tom gave me for Christmas. He's really good at giving me bags. It's amazing. He thinks I have far too many, but then he still gives me more beautiful ones. Um, so it's got a pocket here. It has pockets in here. Zip, zip. I loves it when I'm traveling because and I don't lose things. I can hold it like this and it's over the shoulder. It is not a backpack, but that's okay. And this is a little longer and anta never aware but has a nice gusset. So I'm gonna take the height on the width or the length, and the women however you want to think about, you wanted to be able to slip easily inside. I made notes of that. I drew these out. 1234 I didn't draw. The purple went out because that's about the same size as this other Kenneth Cole on. I have the sizes. And then over here, after finding the boards that I'm going to use, I wrote down the sizes that I could make, and they were pretty close. This was 9.5, this one. I was 9.5 by 13 and I can make it nine by 12. This one is 10 by 14 and I'm making it 10 by 14. This one is 10 by 10. I'm making it 10. This one is 12 by 12 or 12 by 13. I can really This can come up a little bit higher and I'll be making it 11.5 by 13. Those my sizes. I will now bring my boards out and show you the board's. I'm making four for you and these are the four that I'll make
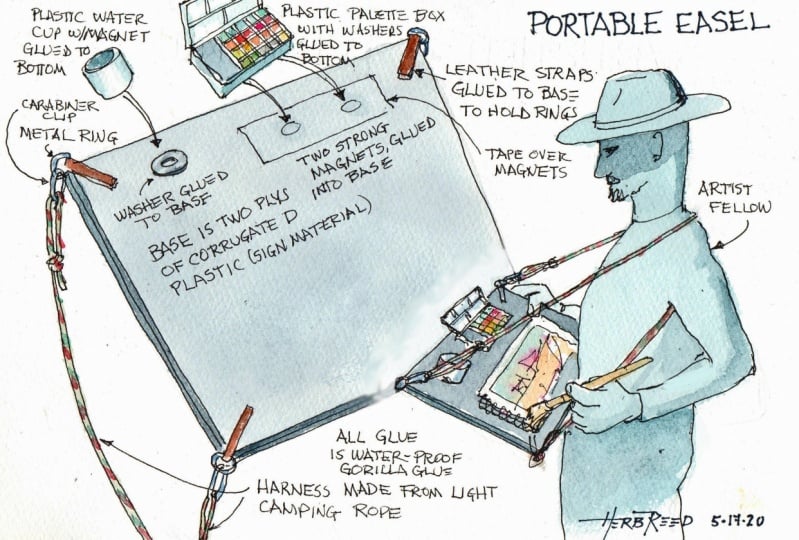
3. Essential Materials: these are the essential materials needed to make the body easel. You need a board. You need some kind of banding for the harness. I use cutting twill. You need tape to attach the cut 12 to the board. I used the clear packaging tape. I have three business card magnets self adhesive that I put onto the board. I have four key rings, then key rings that I consider essential. But I will show you in a variation how you can get by without them, um, thread for the needle and, of course, scissors to cut your ribbon or your twill tape. And that's all you really need to make a fabulous body easily. The first thing that you're going to need is aboard, and my preference is the, uh, I believe it's half inch yes half inch foam court. This is very, very light weight. It's really strong. It's fantastic up. The only difficulty is purchasing it in small quantities. You may have trouble getting that. If you dio there are a lot of other things you can use. You can use a regular foam core, but in that case you're going to want to double it up gluing the two pieces together, either with glue or double sided tape or something, and I suggest that you glue them together before you cut them. It just makes for a niedere nicer surface. You can also use the back of pads. Nice, stiff. It's similar to book board on. That works pretty well again. It's not gonna last long as the half inch foam core, and it's also heavier. I go for light, weight and strength. You can use regular corrugated board cut up a box that something was shipped to you, but I would again double it up as I showed you with the two foam core you're gonna want it blew to pieces together or double sided tape toe. This is another piece of the half inch foam core. You can also use a campus board that's pretty stiff. It's a little bit lighter way than the book board, Um, and you can easily purchase that it a Craster. These are even more secure backs of water color. Pat's this other one. This was, I believe, the back of a sketch pad, and it's not quite as durable as this. This is a tiny bit heavier, but it makes for a very, very sturdy sport. And they, of course, come in many sizes. Whatever size you are. Water, color, tablet or water color. Uh, pad waas. And I think that this was one of those where they're all glued together and then you peel it off. So you want to, uh, choose your surface and neither blew to pieces together? You want to cut it down to the size that you're going to make your body easel on, and then we move on From there, I mentioned two different ways of gluing or attaching two layers together. The first that I'm gonna show you this This is piece of corrugated cardboard that when I cut it in my Matt cutter, I didn't go all the way through and I took advantage of that. I'll just hinges on for this one. I will use the Elmer's glue and use any kind of wood glue. Thanks. It doesn't come out the tip. Just open it up and poured out like that. Press them together. Now, I probably would have been better cutting it from the other side so that I had a smooth side, but doesn't really matter. Thanks, we'll let that dry even wait that down with something if you want. The other way is double sided tape. I used double sided tape for so many things. Hey, this is it was a pretty beat up piece. That'll be my bottom piece, Dio Oh , obviously I'm not really measuring things. This could be 14 and you could be much more particular This double sided tape you put down and then you fuel off the plastic backing you have better nails in mind. Works pretty easy. Every now and then I get talked into wearing nail polish or giving acrylic nails or Jill Now polish. And it destroys my nails even more. Not going to go to the edge, because when I cut that nice, Okay, Now I will go and cut this to size, and I will cut this one to size. This is pulling up a little bit, so I will wait this until it dries because see, pulling up it would be fine once it's weighted. This is the piece the two pieces that I taped together. Double sided tape. This is an edge that wasn't cut. And these three edges are all cut. And you can see how nicely they're lined up when you glue the boards together first and then cut them. It's really impossible to get them quite that nice if you cut them separately and then take them together. So I per 40 used double sided tape. But you can use glue if you don't have no problem. Here are the four boards that I will be using in this course to show you ah, variety of ways to make it. The system is pretty much the same. This one is the half inch foam core. This is corrugated cardboard to pieces flew together. This is eighth inch or quarter inch foam core to pieces, double sided tape together, and this is the back of water color block. Just a single board on. I will be making four variations of the body easel using these four boards. The next thing that we need to use is some strength or some kind of banding that will work is our support, Andi. The way that we hang our body easel from around our neck and behind our shoulders, I use cotton twill. It's comfortable, it's lightweight and it's strong. You can also use any kind of string. This is from Home Depot, I think. And it's abraded. Very strong braided nylon strength. You can use river you can use, then leather strips on. Do you can use fancy shoe laces? So I will do one with this. I'll see if I can use the fancy shoe laces on something. And then I will just show you how these work. Some work better than others air more easily adjustable. But I My point is that you can just look around your house and see what you have and invent something from there that the please, you're gonna be funky and wonderful. I hope that I have enough to make this work, or I'll have to hunt up some other shoe laces to add to it. All right. You need some packing tapes and clear. It doesn't have to be clear. You can also use duct tape. I used clear tape. Duct tape eventually gets a little yucky on the sides. I've had really nice results with the clear packing tape. You can use duct tape if you want. I use an assortment of rings, different rings and cliffs, little carabiners in these s clips. Now you don't really need to have either one of these. You can just tie loops with your ribbon or your twill. These really make it convenient. I had to use thes for my aerial studio when I when I para paint these air really essential to be able to clip in and out easily and to make adjustments when I need to. So these are little accessories that will make it much easier. Um, rings like this, Really? You can just hunt around and see what you have. Um, each one of your body easels will be unique. Just see what you can come up with, and you can watch this whole course through to see how I use thes, and I will then also give you options. If you don't have these, it's something else that I use you may want to use is needle and threat. As I'm thinking this through, all probably make one just with that green ribbon that doesn't use clips or rings or needle and thread just so you can see that it's possible. And I I like to make things strong, insecure, So that's why I used the needle and thread and the rings and the clips in The last thing you'll need is a couple of the business card self adhesive magnets. Now you'll have other supplies, but you can use in the lesson on accessories, and you'll find all kinds of accessories that you can use with your body easily.
4. Constructing Support Board: This is the first body easel I made. I want to talk about it just a little bit to explain why I mates and changes in the design . This is the front of the easel. This is the back of the diesel. This is what I changed. I have loops here that I thought would work well for both. Holding it horizontally and holding it vertically. I found that that did not really work that well. I've changed the design to have the loops just inside. It just makes it a little bit less cumbersome. And it also allows the harness, which is what I'm calling this to be on this side and on that side. I can have this on and use it either horizontally or vertically. This is where I stitch the loop and I could just tie it off. But if I tie it, then that's bulkier than it leaves him. Not like that. So I I'm going to stitch it. Here is the board is going to be my front. This is gonna be my back. I will have a length going this way and the length going that way and on each one going to make a loop. So I'm going to give myself extra to stitch a loop, and that loop is going to be about there. I'll check the ring later, but this plenty and that. So I cut two lengths one length to go that way and one length go this way. You can also use the loosely finder rings like that. But these can come undone. So I prefer using the key rings. There are a little bit more of a pain to put on your loops if you don't put them on first. So what I'm gonna do is I'm going to loop it through there just to save myself some aggravation. I'm gonna want to have the loop at that distance I see up there, I can safety pin that. Usually I would use just thread like this, but I'll use purple thread so that you can see what thread the needle. I don't always put a knot in the end because that makes the lump too, just in case you don't know how to do this. I like my finger. Make it wet. So that holds. I wrap it around twice and then pull it and hide it so that it looks nice up with that inside. Okay. Don't have to stitch anything very fancy going through both sides. I'm just fastening the two pieces together. Tie it off, Cut it. It's there. Flip this around so that this will be easy here. I didn't leave us much. Really. There's still enough. It's just a little bit closer. It's I do make a not of the So there we car on the diagonal. I will tape this just to the point where this could be over the edge. Then I go cross, make sure that it's held down and I go all the way around. I think this is why I like the clear tape because it would annoy me of the use were gray or something. I would just be more careful if I had a nice colors of tape. I would cut them nicely. And who knows? Maybe I'd even do those shapes scissors to to make it nice. But, um, with the clear tape, I just don't worry. All right, so this is one direction, and now I will do the same thing going this way. Now I'm ready to take this run on, - but you want to make sure that it just bends to there? It doesn't. It's OK if it's a little extra. It just should at least be to that. All right, You don't really need to stabilize this any more than that right now for the stage of making the harness.
5. Body Easel: The Harness: The next stage is to measure the lengths for your harness and for everyone. This is going to be different. I think the easiest way to make it work for everyone is for you to take one end. Hold it like this, and then stretch your arms out. You're a full wing span. Sure. You're going tohave it the length of one fingertip on your left hand, all the way to the end of your fingertip on your right hand. So it's fingertip to fingertip at full wings, man. And that should work for everyone. That's my full ring spin. So there's plenty of room for this to go around your neck and through these loops and tie back to be adjustable. Okay, so you want to of those two of your personal wingspan in length? Okay, so you have to You're going to put the ends of each together all four ends. We're gonna be together. Okay. One, 23 for then you're going to find the halfway mark right here. You just tie a simple basic. Not okay. Now you have to there and you have to. There. The last step is to loop them through the rings and tie the slip knots. Now comes the tie the way that you tie it. I'll do this several times so that you can see I leave about that much. Okay, over under. And then you go over the top of this and through this ho, then you're going to pull. Not this one. But you're gonna pull this one. Keep adjusting it until it's tight, back and forth, and then this slips back and forth on your threat, and that is your slip. There's other ways to make slip nods, but I think that this is the easiest. So I'll show you again this that much over under, over and through that hole. Make sure that it slides nicely. That asked that this has to be pretty tight so that it doesn't come under. All right. Two more examples over under, across and up through the Hope slide. Perfect. If this is too loose than when it's adjusted on you, it could slip up and down so you can always tighten this or retire. One more example over under, across and up through. That's all. Now you can also untied easy by just pulling that. Okay, it's very, very easy to do to undo across under, across, up, through the hole Pulling, pulling this one Not this part pulling this richest part of that same threat. And then it slides. And now you're totally ready to go. These will adjust down near the bottom. You slip this over your head, your arms go through here if you want, It's up to you and that is your body easel. I'll be showing you all the accessories you can add to this in the next plus.
6. Part II - Variation 1: with this variation of preparing the board with body easel. You only need scissors, string tape and the board. This, if you recall, is two layers of corrugated cardboard. I'm going to use this string for the back support and the loop instead of the key rings. There will be enough extra on both sides to tie the loop. I will cut two lengths of whatever that is. I will tie a loop in one end, fold it over about there. The reason I do it like this is so that it will not pull out. And I will be taping it to about here so that the loop can go either way. Like it did before. Infected? Probably. Well, I'll do it right to there. So with over here, I'm gonna want my not to end up about there, so I'll be trimming some of this. That's where my knots going to be Around and up through the hole. Okay, that's pretty good. Taping it from the not Theo diagonal. I'll do the same going this way. Yeah, just like the other one. I'm going to do the four cross pieces here instead of the rings. You have these loops. The next stage for this one is to make the harness, and this is going to be a little bit different this time. We're going to stay simple. I'm going to make the harness out of more string on the fancy shoe laces. We take this string going to start at one end, and I'm gonna loop this around my neck and bring both ends down to my hips and cut that length. So that's my length. Okay for this, there are two options. I'm gonna show you this simplest one first entire loop in each end, under and through. Okay, that's a strong loop. Tie a loop on the other end. Put this around your neck and make sure that it comes about to your waist. If you put your thumbs in the loops, my thumbs come to my hip bones and that's just about perfect. The second option is to make thes slip knots instead of a loop. But I think that you're going to have more success making them a serious loop. Then they don't slide. The next step is to take your fun shoe laces and then through that loop and here you're going to make a slipknot. You go through your lobe with short end. You go over under and through from the top and again, you don't pull this one. You pull this part and that part part underneath. Then holding this, you can slide it up and down, tighten it up here. Okay, this is looped through one side of the string that goes around your neck, and you're going to do another slip knot on this other end through, over, under and through this loop, and you pull this one so that this slides back and forth. So now this part is totally adjustable. We have one side of your adjustable body easily do the same thing on the other side, over, under and through this loop. Okay. And we're pulling this one so that it slides back and forth. You wanted to be tight. You don't want it to be easy to slide. Okay, then you're going through your other Luke that you made in your around the neck part of your harness and through your other side. To me, this is a lot more complicated. I like using the rings better, but I just want to show you that you can make all of this without getting fancy hardware over under and through the whole pulling this and this this is addressed. So now you have your harness. Loop this around your neck and you can adjust this. You can have it up here, or you can have it there whichever way you want it. That is your body harness number two, Super, super light and small, it can fit in almost any bag.
7. Variation 2: here we have another option of making the board, and this is just a satin ribbon. It's a whole roll of satin ribbon that was in my sewing paraphernalia. And we'll go again with a A strip that's about six inches longer on the diagonal, and I'll make two loops, as they did with the last one. Okay, right now, we're gonna take these down as we did before. Okay? Not this time. I'm going to use paper clips. I can either use big ones and little ones because of the size of this loop. I'll use the big ones. They're little bit easier or to slip onto the loops than the key rings. Most of us have paperclips at home that we may not have four key rings. We can go ahead and slip are harness on a harness just like the first harness we made. Let's say this time we make our harness out of ribbon. So we take the wing span wingspan halfway, ty and not okay. We wanted on the front so that we can make the slip nuts. And you can either just go through here or you can go through here, over around and through. That's the one you pull and then slides over, around and through. You pull that. So now you have another adjustable harness.
8. Variation 3: And for the last variation, I'm going to show you using strings on the background, tying knots and then using the S hooks to clip your harness on. We're going to have a length five or six inches beyond H. Corner. String is much easier to tie a knot in, then the ribbon. Okay, this is not a slip knot. This is a secure. Not so it doesn't sign. - Okay , so they can take off this harness. And we can do that just by looping this around se so you don't have to make a hole and everything. So now we've got this harness. We got the loops and weaken. Take four of these s hooks. Group one on there and hook it through. And there we are. We have are adjustable harness. Now that I really don't recommend the ribbon because it does slip a bit more. It's a little bit herder to adjust in tight. It is an option. If you want to make something pretty and you don't have anything else, I find that what works best is the twill. Here we go. So those are a lot of options. You don't need to tie an extra loop in here like a key ring because you've already got a loop. So you're all set to go. The next part will be accessories for your boards.
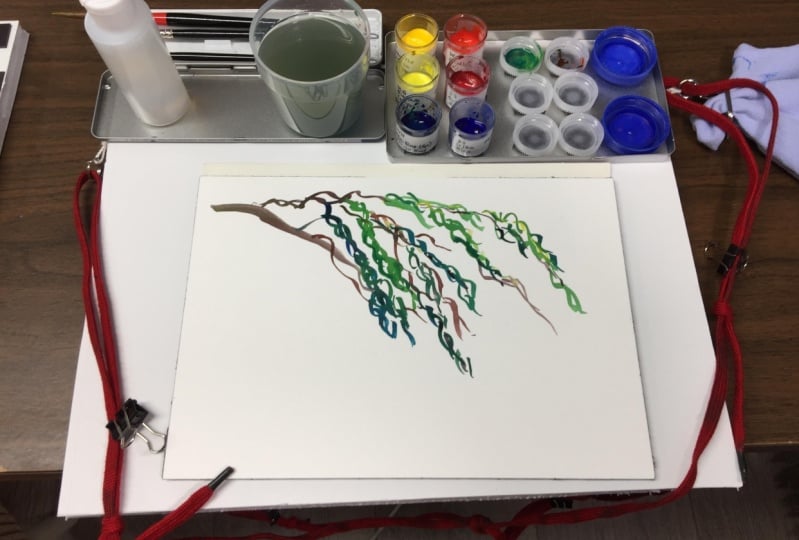
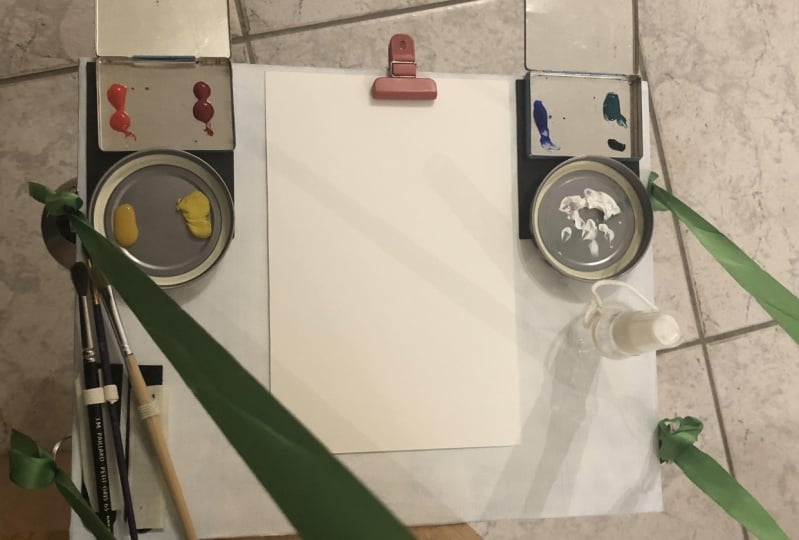
9. Accessories: my intention with this one had been toe have this the working side, not this working side, but I didn't do it that way. So I'm gonna take advantage of this opportunity to show what you can dio to change this judging my values. This is extremely important to me when I'm working, and I don't really like having a white surface to work on because my values I like to have lights and darks and mid tones. But if the board I'm working on this white, it's very hard for me to judge my mid tones and my darks. As a result, I prefer to work on a med tone surface like this. So if you squinted this, you'll see that this cardboard falls in the mid tones. And this way I'm working on a little sketch book. I have this to base my values on this being my value. Then I can leave whites of the paper and I can create my darks, and I just get going with sketch so much faster than if I'm working on a white background. I'm going to use double sided tape all around the edges, the extreme edges, because they don't want it to peel up. I'm gonna go all around the edges and I'm also going to put X is in the middle. This is all the double sided tape. That's the kind where you peel off this. The strips are all off and I'm gonna flip this over carefully, line it up and press it. Death. So now I have the value of service. My next step would be to put my little magnets on. Normally, I would work on it this way, but I like the option here. So I'm going to put one magnet there. I'm going to put two magnets like that. I often used to magnets and I'll show you why. This too, has adhesive. This is really meant to rest a sketchbook on not so much a flat piece of paper because these would give lumps for the piece of paper. I'm using a piece of paper. Then I'm using an additional board, which I'll show you. So now it does that a little bit of weight to it, but the convenience is worthwhile. My reason for adding these set my Altoid Tim, consider on it. I want to show you just a variety of things that you can attach to this, and they all are stable. I'm not going to shake this around with each one. This is an outward 10. Another out toward 10. Business card magnet. The art graph. Liquid graphite. If you needed to have water and have a measuring cup that will stay on, that's big were you can take the lead to some kind of lotion or potion and that will stay home. If you want to have some ink, I use the towel that's drilled out in the center so that my vial of ink and go in and then you can use a dip pen. That's great. Other cosmetic tens for mixing and this so it's kind of endless what you can do with the magnets. Of course, if you're working this way, go there now. If you're working here or here and you need some extra magnet, you can take one of these clips, a refrigerator clip and clip it like that. You also use that this I've just learned about recently, and it's very good also. Is that so? If you don't have these magnets on a board, you can just clip one of these on that. They're a little bulkier. Still there. Fantastic, very, very strong. They hope that if they hope that how great is that? Here's another 10. It has a lot of pans in a lot of mixing places, and they're strong enough for that, too. So you could have a small sketchbook and have all of the's colors with of water supply and dipping. Think I mean, what more could you want? It's great. The magnets are also good just for extra mixing areas. These air so lightweight, thes air, the I shadow tins. Another accessory would be an extra board and it can be held on with this elastic. The elastic can be purchased in yardage like this and then cut and tied on. This extra board is useful if you do want to use. This is a drawing table so you don't have the magnets on it and it can be flat. This can also be loose so that you can tip it this way and you can have the magnets here on the back side. You can have magnets show you have even more magnetic space for your supplies. But I have found that it that It does come in handy at times so it can fasten on this way. Or you can also use clips. And then you can also click the paper on like that. So that's pretty handy. Another reason you may want a separate board is that if you're using a screw top container now, this is for turpentine or medium for oil paint. But I also use it for water. If I'm in a restaurant, then I can put my dirty water in here. I don't have to leave it and, you know, glass looking kind of disgusting on the table and this clips on so this would clip onto your extra board. You hold that on this. Also clips on this I bought without leads. Didn't have. Let's so I think I bought it for 20 cents or something and that clips on and then I can have a clean water under dirty water. If you don't have the magnets on this, just use this. Okay? Ready to go. One of the accessories I really like are these locking sort of locking, and and there are some that are actually locking s clips. And these I had to use a lot for the first pair of painting easel set up that I used, and it's so, so much easier to work with these rings than just cloth. I just find it more convenient, and I can clip on all kinds of extra equipment like my water so you can paying things from it. Mrs Kimi, no, This comes up over your shoulder. You can see how useful that can be. These are the water brushes that I use when I'm flying and you can see that I had to make sure that the cap was attached and the brush itself, and so what I would do. I don't want to lock the brush in like that, so I would hold it Oh, onto the board by clipping there. Then I can take off like this, And then while I'm in the air, I can just undo that and paint with the water brush. And if this falls out of my hand, it's not gonna go anywhere. It's not gonna hit anybody on the head when it finally makes it down to Earth from here. Same thing with my fountain pen. Okay, there's a clip on both ends and this this actually hooked into their Okay, So everything is tied together with rings and clips and all attached my board. I did mention that I would come back to this one, and I used this ribbon justice, lived a sheet of watercolor paper under, and this held the paper on. I could have used a rubber band. I didn't have one at the time, so I found the ribbon and I used that and it was kind of nice. I I like that. I could fit it right underneath on both sides. I don't know that it's really efficient, but it was just something else that I tried with what I had.
10. More Accessories!: This is going to be a little tricky to film all by myself, but I'll do my best. I want to show you all of the supplies that
I can use on this. I think I wanted to
feel a little bit lower was made for travel, but since since I well, I could do a road
trip, that's for sure. But that can be that can be
challenging in these times to these times being
the coronavirus. I have supplies in here. Now this is, I guess it could be really for long
distance traveling too, because I everything pretty
much fits into this pouch. But to me, this is like a super deluxe version of
what I would bring with me. This has a sponge and a plastic seal so that
when these paints are wet, I can still transport
them safely. Then that holds the plastic n, and I put it back in here. And here I have my
sixth pigment palette. I have a cool and warm yellow. I have a warm and cool red. I have a warm and cool blue. So I can mix full palette
with this X right on there. Alright, this is
for my color wheel. This is a clip. I'll show
you what that does later. There. There's another, another clip. Those magnetic clips are great. This could be a water container. This can also be a
water container. This will be an extra
water container. This is an extra clip in
here is also my water. And I have a clip to
put my brushes in. And also this to put my
brushes in, my water atomizer. So my eyedropper. All very handy right there. Then in here, I have
a couple of things. I always keep my
travel brushes in a zip container because they really don't want to
lose them. Let's say. I'll use I'll just use this one. I can put it right. It's there. And I keep track of
which ones I have here. And I put this back in my bag. Here. This is my mixing palette. Magnetically stays on. I'm going to be working
with analogous or extended analogous to
complements, split complementary. So I can set up my whole
color scheme right there. And over here, I can put the
palette I choose to use. I can either leave
them in here for, say I'm going to use
those three right now. I can either put this away
or I can leave it out there. So if I'm using more than
three pigments, either way, it's very, very flexible as
to what I can do that here. I have my color diamond, eye color value diamond, which I can click on there. I have my value scale. That's what this is. Clip is four. I can put that in
there or there. Then I have my color wheel
and this is all set up, Oh, Zach, this is the wrong
template that I brought. This is for extended analogous
with three complements, but you'll get the idea. And then I can just
slip that right there. Now, in this bag, in this big bag, in
addition to the palette, I have a whole supply of five by seven and pieces of
watercolor paper. And I have my drying rack, which I will show you
a little bit later. This would just be
the preliminary film. How I can have an entire studio standing out here in
my favorite cornfield. The sun has gone away, so I will come back later this evening and film When I hope there's
a beautiful glow, that's beautiful warm glow as the sun is setting
over the cornfield. So when we're tracking that.
11. Conclusion: this brings us to the end of this class. This was the first body easily made. We used the 12 the cotton, 12 I. So the loops rather than tied them. I used rings and then I made the harness out of the two wings ban lengths of twill tied in the middle. These are slip knot tied onto the rings so that you can adjust both the distance from your neck and also the slant of the board. I've added the magnets to show you the different variations. I will place the magnets in different places on the four boards that I made during this class. This works really well in horizontal, giving me a lot of magnet space that also works in vertical. Because I have this up there, I probably wouldn't use this on the vertical. But I do have that one. This is the one that I showed you how to cover the white. If you want to use a mid tone for your base on and the magnets that I added there now, any of the harnesses can hook onto these paperclips here I used the satin ribbon I tied it on rather than sewed it, and I used paper clips instead of rings. Here's the lightest weight, double sheets of corrugated cardboard with a magnet just in the upper corner. That works well here, too, but it's really pretty much the same way. So that's find horizontally or vertically. I used string, just plain string that I tied. I didn't use either a ring or a paper clip. This is a slightly different harness. This is the centerpiece that goes around the neck, and then the adjustable pieces of the fancy shoe laces that go through the securely tied loop in the next string. And then the two ends that go right through the string roofs are adjustable, and the last one that we did waas two layers of the thinner foam core. I used a string on the back of the board, also tied knots own, and then I used these s clips instead of rings. I am made the harness itself out of quarter inch purple satin ribbon. This is for horizontal, and then it also works for vertical. Those are four variations, and you can see that you can make all kinds of variations on your own. So I'd love to see the body easels that you make if you post them in the project area of this class and we can all learn from them. Also, make note of the things you learned along the way. The extra ideas, what accessories? You decided to use what works for you and what doesn't work for you. And I'll see you in another class. Thanks so much for watching. This is Chris Carter. Thank you for watching my classes on school. Shit.
12. Bonus Lesson - DIY Portable Drying Rack: Hello again. I was asked by
one of my students to give a bonus lesson on
my drawing rack, and I have several
variations of it. I will walk you through it. It's very simple to make. The only materials you
need is phone core or cardboard and tape and
possibly a sheet of paper. If you want to make
a side like this, which I suggest, something
to tie it up with. The other thing I
use is elastic. Court. Okay. The reason I developed this drawing rack is that
I was going in every Monday night to New York City to go to the open Blues Jam night, and I would bring my paints, my dip pen for ink,
and my watercolors. And I would do anywhere
20-30 paintings. Very quick sketches. They rarely took
more than 2 minutes. And at the end of the night, I would have to get them home. So it was easy
enough to put all of my supplies into a shoulder bag. But to carry wet paintings
home was a problem. And the paintings were
like this really, really quick of the
musicians. Okay. So dip pen, which sometimes
didn't dry very quickly. Sometimes, it was just some of the people that were in
attendance listening. So I had a problem with it because it was New
York City and I had to get back to New Jersey with paintings that weren't
completely destroyed. So I came up with this device. Was easy enough to carry this in my hand instead of trying to manipulate carrying
multiple wet paintings, especially if it was windy that were dripping
down his water color. Now generally it dries quickly, but when the nights over, I needed to pack up
and leave quickly. So this is easy to
carry in one hand. And the way that it
works it held together. Tied together. Has two sides, just make it into a box. This is an important side. This is just paper that's taped onto phone core that's
hinged using tape again. If I didn't have the sides, the paintings that are slipped between here would
just simply fall out. This holds them together. And you can see that there are lots of different
slots here. So as long as I was
holding it this way, I could put multiple sheets in. I'll do it from this side. So I could just slip it
in. And it would be fine. Nothing is touching
the top of it, and I could get a lot of
paintings home this way. Now, what you're seeing
here is a variation of it. It worked so well with the watercolors that I
decided to start using this as a travel drying rack when I would go on road trips and I would be painting oil. Well there, I would have
thicker thicker sheets. Sometimes I'd be
painting on foam core, sometimes a wooden panel,
sometimes cardboard. So I needed something thicker and it wasn't
always really flat. If I painted with
a lot of paint, there would be a surface to it. So I What I did was I doubled up on these and I will
show you how this is made, but I doubled up on the hinged pieces here and
the hinged pieces there. I put push pins in to two layers of foam core so that I could
support this. Okay. So There's a painting. It's perfectly safe. What happened was I made this system
without the push pins, and if there was
any pressure here, it would push against the
top of painting because this is kind of a large
surface and Tm core, though it's stiff does
bend a bit. Okay. And then I realized that when I was painting urban sketching or
something where I'm I don't have my car, where I'm just using
public transportation, the Metro in Paris. I was doing a lot of plan air
painting in oil in Paris. So I created a new version that would easily just fit in to my shoulder back
with everything else. Now the problem here
is that I wasn't going to be carrying
it this way. I had to be able to
carry it vertically. So what I did for that is I have clips to clip the canvas
in or I used these edges. Here's a canvas. And I would cut the
canvas to fit exactly in my drawing rack because
I don't really care what size I'm painting when
I'm doing urban painting. Then this folds over holds onto the canvas and
it doesn't go anywhere. So I can put this piece. Now this is double
thickness there. On top and then just
hold it together. Okay? No. I just showed you
holding it together that way. But what I do is I put
the band around here. So if this did slip, I don't have that
paper cover on these. So this would hold the board or the canvas from
slipping out the ends, if for any reason, it came out from underneath
the pieces on the side. And you can bring multiple ones. They stack really nicely. This is another version. It's a slightly bigger one for a slightly larger shoulder bag. It's a single drying rack, and this has uses the
half inch foam core. And I hinged it on all four sides so that I didn't have to worry
about the slipping out. And I could put something. I could put a board there, and if it fit right in
in this open space, it wouldn't go anywhere either. Okay. So it's a variation
on the gorilla box, I guess, the gorilla
drawing rack. Here, doesn't matter which way you go because all
four sides are secure. When you're packing this,
if you're traveling by air where you're having to
fit this into a suitcase, it doesn't have to be this wide. You just unhinge the two sides, and it becomes half a sick. So you could bring the top, the bottom, and two sides, and you know, you have two drying racks that you
can just slip into a back. Okay. So the way to make this is to measure the
size of your back, whatever you're
going to put it in, if you're traveling, you know, public transportation, if you
have a back whatever it is, the size that you want
your piece to be. This is if you're trying to
secure a single piece similar to similar to this. Okay. So you want
to make the size. If you have a very specific size of canvas that you're
going to paint on, you want to make sure that
it's the drawing rack is wide enough and yet not too wide to be able to flip these
down and hold it secure. So you measure that out
and you make as many of these pieces as you want. And then you cut strips
that are the same length, but say half an inch wide, and you simply like this. And you simply take those strips and with
a piece of tape. You take them on. And that's one piece of
scotch tape it hinges, and it lasts for a long time. My work for several
years before I had to replace the tape or if
it broke or something. So it's really easy. And that's all you have to do. Tie it up with whatever
you want. I use. I use this twi that I
got at a rummage sale. The same cotton twill that
I use for my body easel. It's a whole roll of it, and it's one of the most
useful flea market drug sale finds that I've had. Okay. And that's it. So you can make it
any size you want, you can make it any height
you want. It's all up to you. What I found was
the most useful is this single unit
just for day trips. Day trips where I'm
working in foil and I'm pretty much
working just on one piece. This is super for
the pub painting, where I'm doing a lot of dip
dip pen ink and water color, very quick sketches,
and I can bring so many home and have
them perfectly safe. I don't even open
this up when I get home because usually it was
three or four in the morning. I just would put that
down on the table. In the morning I'd open it up everything was perfectly dry. I was perfect. Thanks for
watching this Bama lesson. If you make one of these, please take a photo and
post it in your project. Thanks. I'm Chris Carter.
 Chris Carter, artist, illustrator and explorer