Transcripts
1. Welcome to this Class: If you are looking to try different painting styles
and watercolor techniques in the hopes of finding your own artistic voice and loved florals
at the same time. Then this class is for you. Watercolor has a special
place in my heart that I wanted to share the
joy of painting to as many people as possible, hoping that lead to
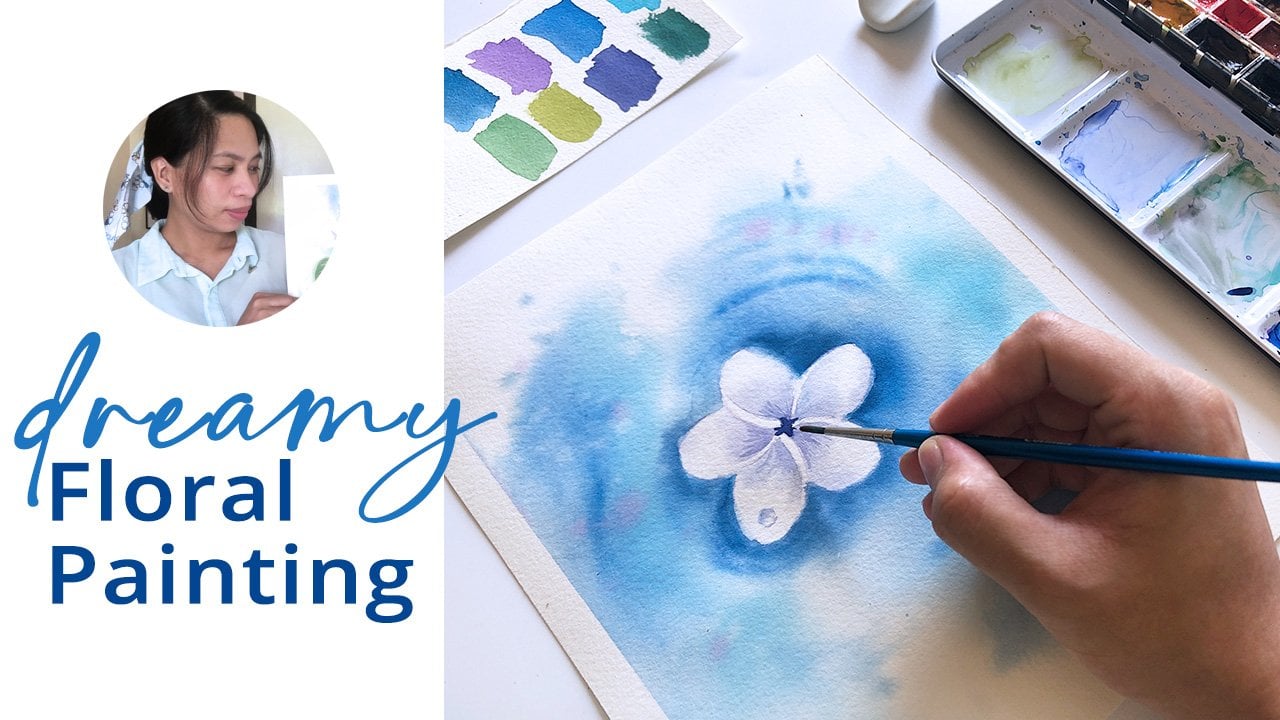
experience the same call. This medium brings. Hello. I'm Bianca lose stray, and aspiring watercolor artists from Beta1 because Philippines. In this class, I will
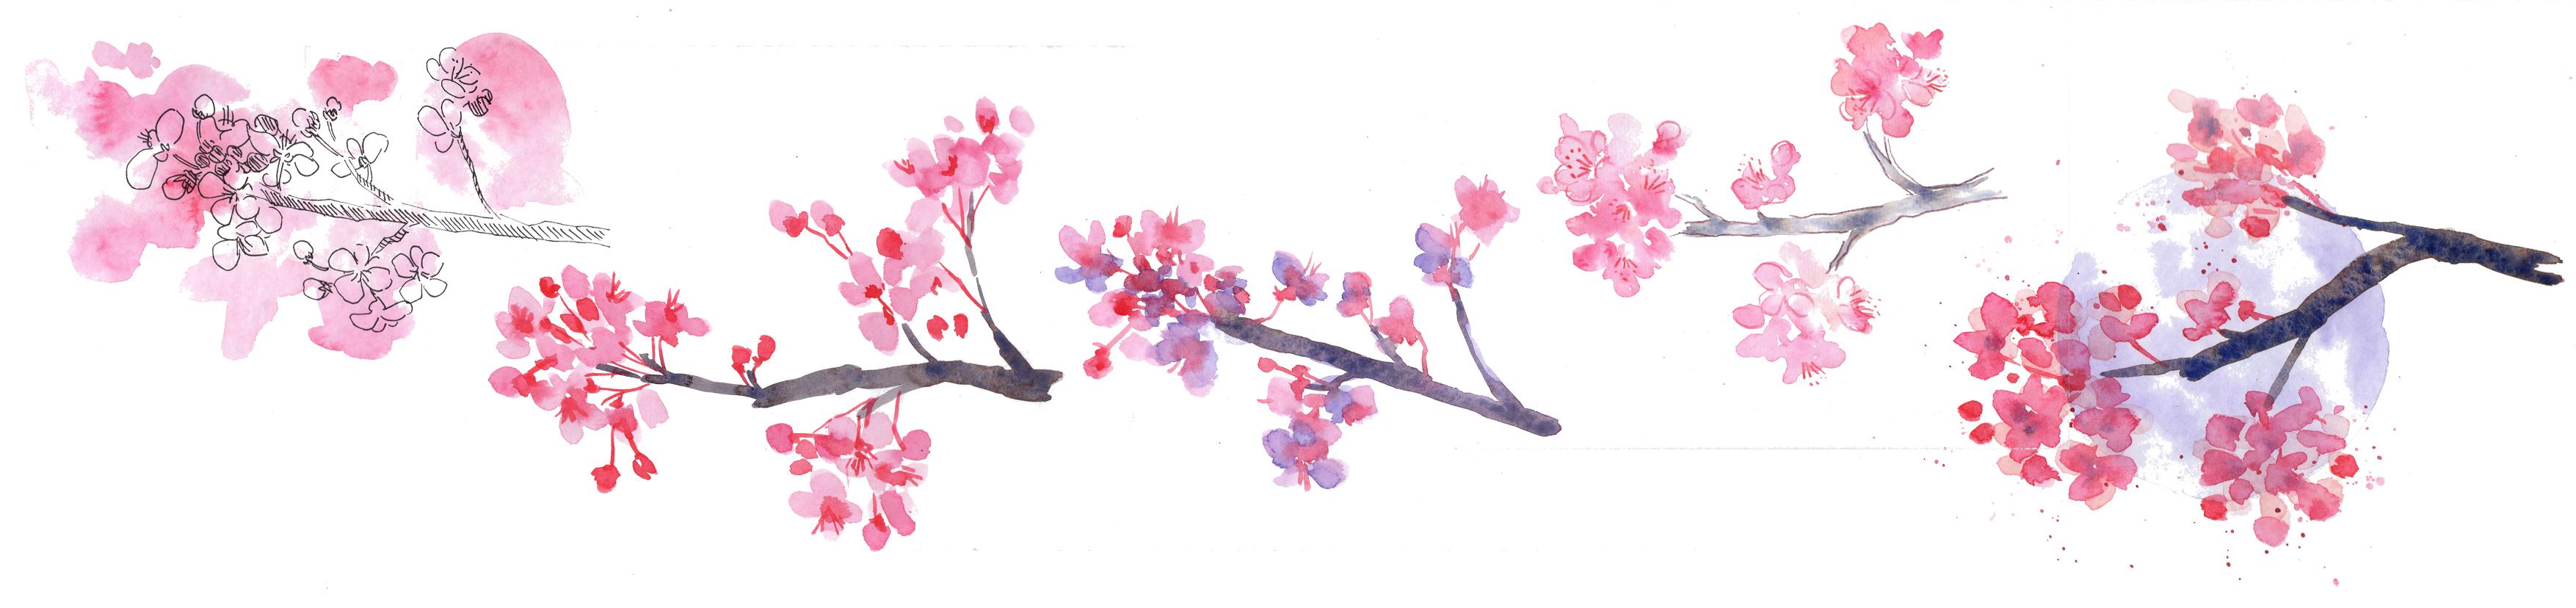
demonstrate how the main cherry blossoms in five unique
styles suited for beginners. Though you are free to
choose our reference photo, the features, your
favorite flower. Each style we'll introduce new watercolor
techniques coupled with a warm up exercise
to help you become more confident with
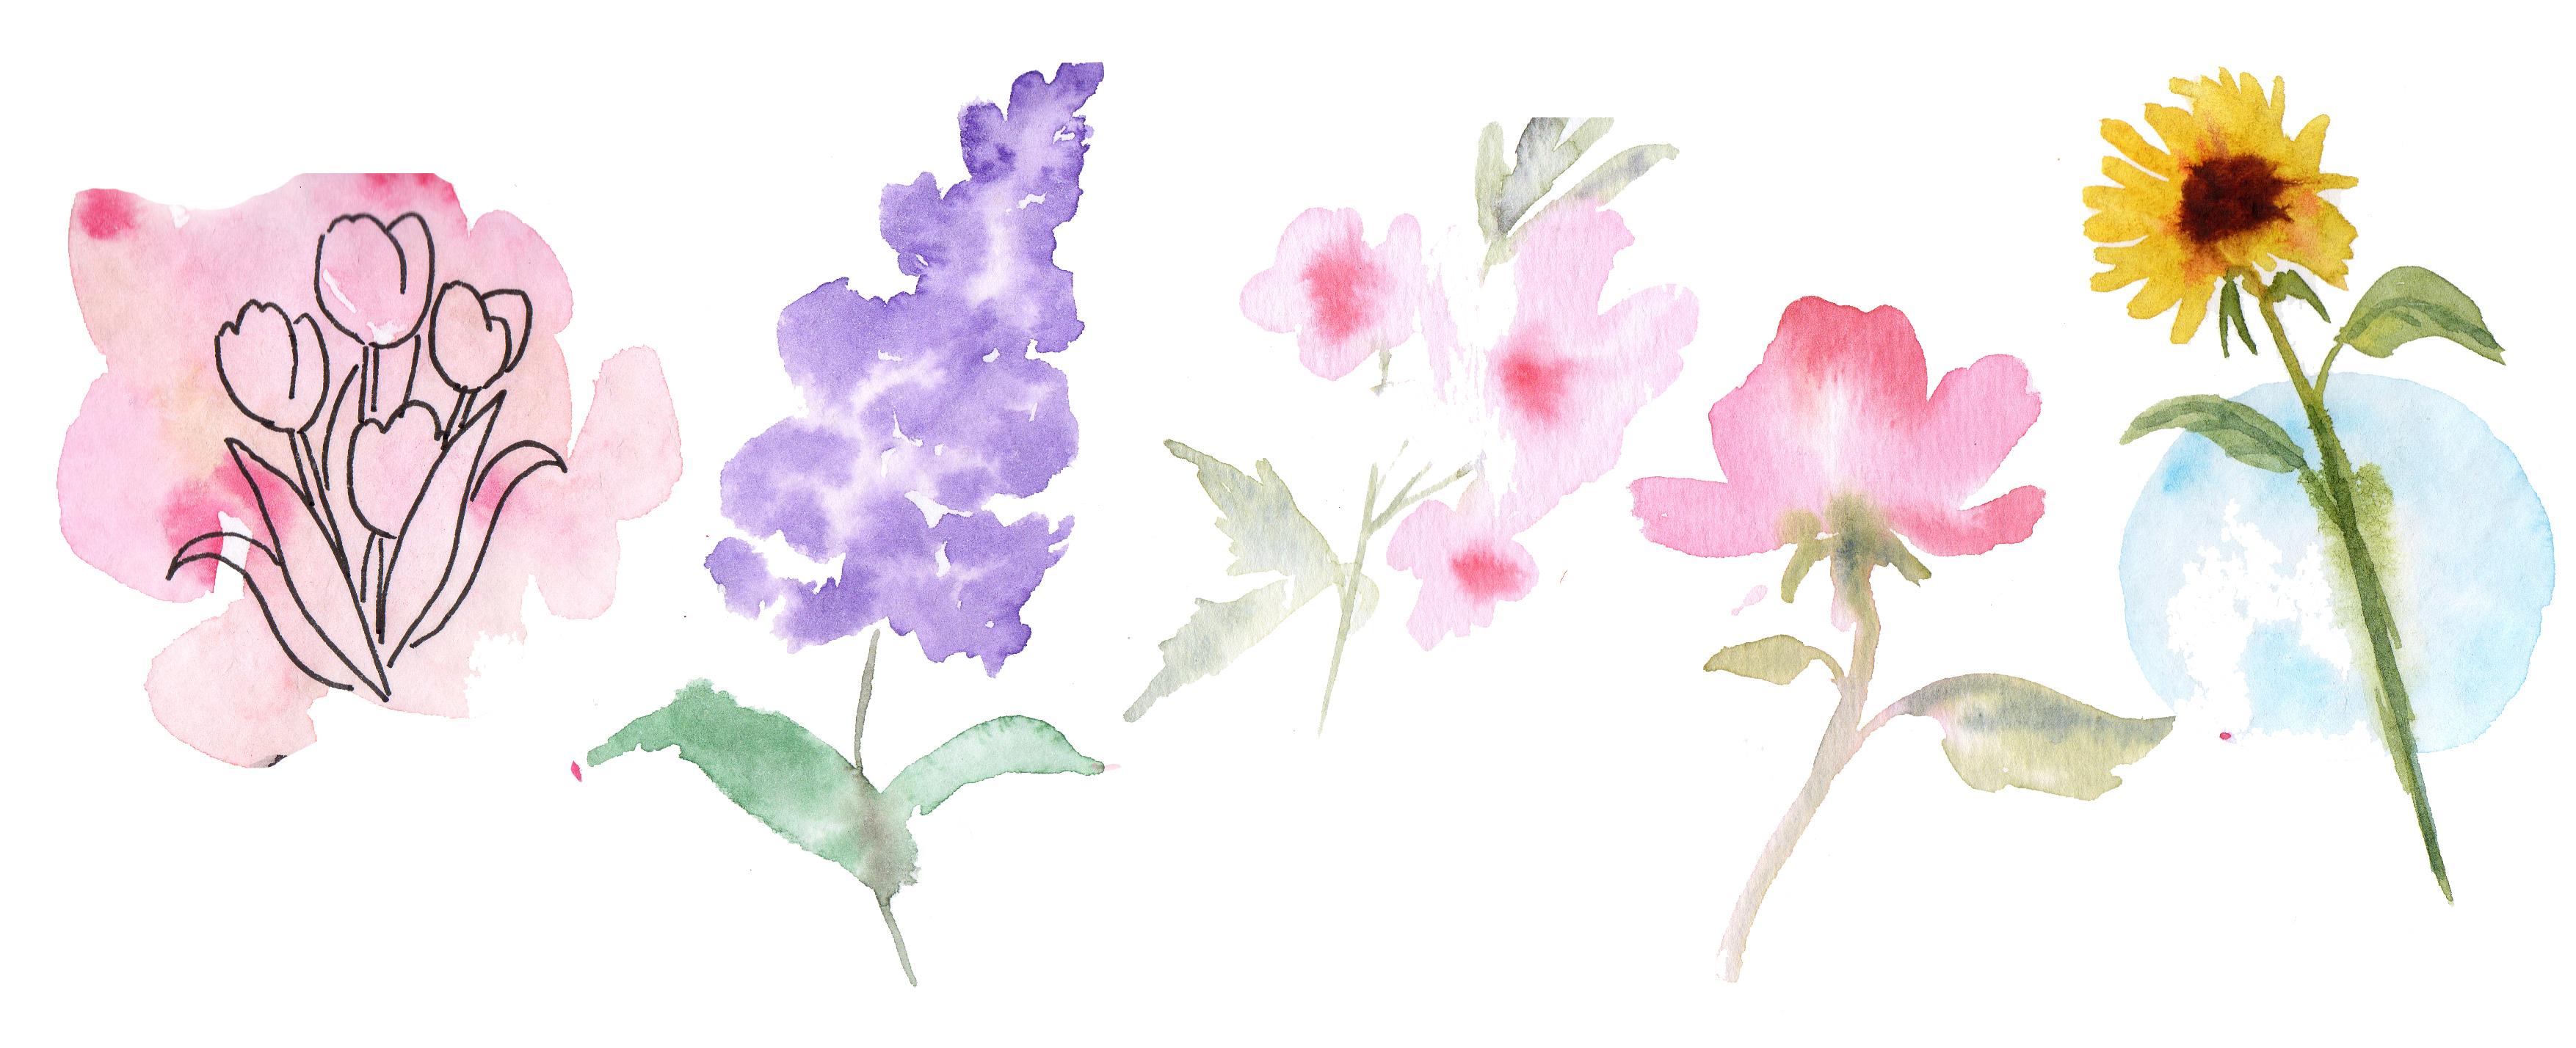
the class projects. By the end of this class, you will have a
better understanding of watercolor techniques, as well as the tools and knowledge to paint
other flowers, such as roses, sunflowers,
poppies, and more. To get the most
out of this class, I recommend that you try out all the styles laid out here, no matter your skill level. You're at with me. And let's get started. This is such a heavy burden
2. Class Project: In this class, we'll take
a progressive approach, gradually increasing the
difficulty with each style. To give you enough
time to practice your skills and
challenge yourself. We'll start with a simple
composition that requires only a few colors with not much mastery in
your brush stroke. And slowly move to an
illustration that will challenge you to paint
petals in single stroke. But this class is not
just about following along with step-by-step
instructions. Our goal is to help you find your own they're
distinct voice. And to do that,
we'll be exploring five different watercolor
painting styles to it might find that you love working
with a limited palette or that semi abstract has
a different appeal to you. You might find loose
painting more manageable than a tight wine or vice versa. In short, we'll have five beautiful paintings
at the end of this class. Though the demonstrations
feature cherry blossoms. I encourage you to choose a
flower that's meaningful to you and apply what you've
learned in this class. To get started, please go to the resources tab and
download the class guide, which includes a list of
materials you'll need. A scanned copy of the
five illustrations, color palettes, reference photo, and other sample illustrations. See you in the next video. And let's warm up
3. Exercise: Outlined Blobs: We'll start preparing
by just randomly painting blobs and
drawing over it. The key here is
to let go and let the colors bleed with
each other on the paper. I'll begin by painting some random shapes
with clean water. The node, my brush
with green, red, and drop it on the
puddle on my paper, and then rinse my
brush loaded with scarlet lake this time and let it bleed with
the first color. You may also paint
directly onto paper. Retouch some shapes,
lift some color bars. Basically you lifting
your brush dance on the paper and having fine let it dry completely
and I mean completely, and then draw some
flowers and florets. I'm using my unit pin 0.8 marker and drawing
on this dry blob, starting with the branch, just so I know where to
place my petals and florets. Use the reference
photo if we need to. The guide you where to place those lovely cherry blossoms. I trust you on this one. You can do it. One satisfied with the flowers. You may also warm
up with hatching, which we'll use later to
draw shadows on the branch. It's basically using
close parallel lines on the shadowed areas. Have fun practicing
and when ready. I'll see you in the next
video for our first project.
4. Project: Outlined Blobs: We will begin with the
ink and wash technique. This is a great
place to start mid, especially if you're
new to watercolors. The processes symbol and it will help you practice
your brush control, color mixing, and letting
go of perfectionism. Start. Prepared two colors, a pale pink and a reddish color. You can use any
pigment you like. But for this demonstration, I will be using Quinn
read and scarlet lake. Choose an area on
your paper where you want to paint your flowers, and then paint blobs
freely with your brush. You may begin with
clean water and dab the brush loaded
with pigment, or do the opposite. Just like how we
warmed up earlier. Don't worry about getting the perfect shape or
anything else at this stage. Just fine. And let your creativity flow to add more interest and
depth to your painting. Dropped some concentrated
pink pigment in some areas, and reds at the center
of some flowers. Then let your painting
dry completely and I mean completely
essence, this is important. In the next step. You can use a
hairdryer to speed up the process or as simply
wait for it to air dry. Once your painting has dried, grab your favorite
pen or marker and use the reference photo as your guide to draw
the flower shapes. To help me decide where
to place the petals. I'll draw the branch first. It doesn't have to
be perfect, okay? In fact, imperfections are
encouraged in this style. The goal is to create a
minimalist and a static piece of art that showcases your
interpretation of these flower. I will play this
in fast forward, since the next step is
pretty straightforward. Once done with a drawing of
the flowers and florets, try hatching to add
shadows on your Wrench. Remember to have fun experiment and don't worry about
making mistakes. Here's our project number one. In the next video, we'll practice our
brushstrokes to create a simple illustration
5. Exercise: Simple Illustration: The goal of the second
project is to help you gain confidence in painting
petals with single stroke. I love to use this
reusable water paper for a Chinese calligraphy
to practice my brush work, all you need to do is
wet your brush with clean water and paint to
your heart's content. When this guy is, the paper will return
to its original state. That's why it's sometimes called their usable magic paper. Or if this is not
available to you, we can just paint repeatedly
on your watercolor paper. Rotate your brush, vary
the pressure and NGO and practice painting and impression of a petal with a single stroke. Just an impression and not
a realistic wine. Okay. Don't worry if they're
not perfect yet. I believe you'll get there. This is also a great opportunity
to get to know airbrush. So try painting florets to red pigment and then switch to a smaller brush to
paint thin strokes. That would be the tiny branches
connecting them together. When you're done warming up. I'll see you in the next
video for our second project.
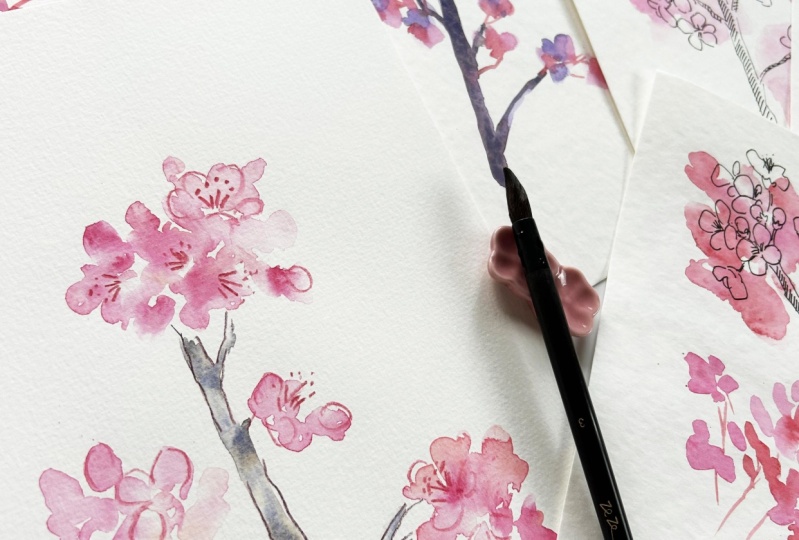
6. Project: Simple Illustration: We started with two
colors and one there. Now we're adding
another color which is a mixture of burnt umber
and ultramarine blue. Farther branch will be
working with two colors. And we'll need to practice vaping pebbles with
single stroke. For this style. Start by painting
the petals loosely. We'll use the same brush and mix a light pink color using
quinacridone, red and white. Just for variety. Start by painting
the outermost petals with a pink mixture. With the direct painting
or wet on dry technique. Don't worry about
the details yet. We'll add those later. Just like how we
warmed up earlier. I am varying the
angle of the brush, the pressure applied, and
how much pigment is noted. Achieve different petal
shapes with one stroke. But you are totally free to correct some shapes
as you see fit. We're not realist
trick on getting every petal correct
with one brush stroke. Speeding up the video a bit, since I trust that you
already know what to do, especially if you didn't
skip the warm-up exercise. From time-to-time. I'm also dropping fewer
quinacridone red on some petals to add variety
and avoid monotony. Then add the florets using
darker pink or red color. Use a single stroke
brush movement to create this tiny florets to. You may also paint
with the same color to darken the center
of some flowers. Makes sure that
there are more light pink than the red
color is though. Once done with the flowers, Let's paint the branches using burnt umber and
ultramarine blue mixture. This is so far my
favorite neutral mix. I am painting a broken manner and not with a long stroke to mimic the characteristic of
real cherry blossom branches. Make sure to keep your
brush moist and loaded enough to avoid strikes
or a dry spots. For the final touch. Use a smaller brush to paint
the center of the flower, connect them with each other, and to retouch some shapes. Remember to take your time and practice your brush control. Here's our second project. In the next video, we'll prepare for our
three painting style
7. Exercise: Semi Abstract: It's starting to loosen up. Once again with a
semi abstract style will utilize wet on wet
technique for this project. You can start practicing by painting a clump of flowers with clean water and switch to a smaller brush loaded with
different shades of pink. I'm using shell pink
and green, red, and drop the pigment on
random parts of the wet area. You don't really need to
cover the whole width area. Just let the pigment blend and bleed with the water and
go where they want to go. You can also retouch some of
the shapes as you see fit. But don't overdo it and let
watercolor do its magic. Continue doing this
until you're satisfied. This is a good practice
of letting go. The same on the branch. But again, make
sure not to cover the whole area for its
unique, dreamy look. Once you're satisfied with
your practice, peace. Let it dry and grab
some colored pencils or watercolor pencils to redefine some Bethel and flourish shapes. This will balance the soft and hard edges
on your painting. You can also use
markers or ink and pen, whatever is readily
available to you. When you're ready. I'll see you in the next
video for our third project.
8. Project: Semi Abstract: I'm so excited about this project because this
is my personal favorite. I discovered this style accidentally and I fell
in love at first sight. So it's time to loosen up and let's try semi abstract
floral illustration. Macallan we practiced earlier. Start with your
bigger brush to paint invisible clumps of
flowers with clean water. View your paper from an angle to check where the
wet areas are. I'm using the same approach we did with the exercise earlier. Recollecting some shapes,
varying the colors I use and the intensity
of the pigments. This will make the
floral illustration more interesting to look at. You'll also be
amazed by how dainty this looks once it
has dried completely. Watercolor gets
lighter when they dry, so don't be afraid to
experiment with your water to pigment ratio and
color combinations. We'll paint four clumps
of petals with Queen read and shell pink
or other colors that you may want to try and carefully paint the
branch later so that it doesn't touch the
petals and muddy the color. Using my bigger brush once more to paint the base of the branch. And the smaller one to drop the colors where the
branches are connected, I will drop more pigment
there to make those areas darker and make an impression that they are in the shadow. You'll also notice that I
am dropping my pigments on the outer part of the shape and nothing
then move inwards. This is to make the
shapes clearer, but still creating a
dreamy or misty effect at the center of the shapes. Leave this to dry
completely and grab your colored pencil or watercolor pencil
for the final touch. I'll use my other
watercolor pencils, or red, pink and a dark brown
colored to add accents. With a red pencil.
Draw the center. I'm sunflowers, and make
sure not to overdo it. The beauty of this style
is letting the audience see and interpret your painting
the way they wanted to. Then switch to your
dark brown pencil and outline the branch
in a broken manner. The next step is optional, which is outlining some of the
petals with a pink pencil. Again, trying not to outline all of the
petals are the flowers. Here is our project
number three. See you in the next
video and let's prepare for the Fourth Style.
9. Exercise: Underpainting: I've always thought that underpainting is only
for acrylics and oils. So it was a fun discovery that it could work
with watercolors do. To do this, I will be
using violet to paint the shadowed areas of some
petals and the branch. Then let it dry completely
and layer it with my pink, red, and dark brown colors. You can already
see how different this looks from the
other illustrations, where we only use
pinks and reds. There is a unique
via brands do it. You may also try blue as an underpainting and see if
it works better for you. I tried using a
combination of pink and green for the shadow shapes
as my underpainting color, but it looks doll
and muddy for me. So once you've decided which color to use for
your underpainting, try it first on a
different paper. Before it starting
with our next project. I'll finish with this
practice piece with darker florets and
connecting some flowers. Then I'll see you
in the next video. And let's try this style
10. Project: Underpainting: Here's another style I
discovered by accident. I thought the blues and
violets would it work well as underpainting for
flower illustrations? But on the contrary, it gave my cherry blossom
artwork are unique by brands. Just like the warm-up exercise, draw the branch with violet or blue with their bigger brush. I'll use a paper towel to erase or lift up some
paint on this part. Since I think it's too thick. Then observe their
reference photo to paint some petals
in the shadow. Some bits and pieces
here and there. We'll do no need to copy the reference photo
100 per cent, okay? Because where artists and not a photocopy machine,
you can do it. By the time I'm done painting the petals may branch
has already dried. So I can then work continuously and layer my dark brown
mixture on the underpainting. Please observe your artwork first and look at
it from an angle. If it's still shiny and wet
weight for a few minutes. Before doing the next step. Right? Now I'm adding another layer
of my dark brown mixture. And I'm so in love with
how it turned out. I find it so freebie that I did the same thing on a
portrait, but I failed. Orchards are not my thing, but it's for my little girl. So I tried. I'll begin painting my petals. Not all battles have a
violet underpainting. So you can immediately
compare and see the difference of what
this violet shadow does. Tried to paint the petals
with a single stroke and take this opportunity to
practice your brushwork. Continue by adding florets
with scarlet lake and darkening the center of some
flowers with the same color. As always, switch to a smaller brush and connect
the flowers to the branch, but not all of them. You may also paint those tiny
details as a final touch. Here's our fourth painting. How do you feel about
your projects so far? See you in the next
video and let's prepare for the final project.
11. Exercise: Background: Now that we've done various illustrations with
no background at all, we'll try a new
composition where a full moon pigs through
the flowers will use a combination of
techniques such as wet on wet layering and splattering, practiced by painting a moon
with wet on wet technique. I'll use lavender. Let it dry completely
and paint your bad boss. This time, I will start with shell pink for the
flowers and liter, add green, red,
and scarlet lake. What we're practicing
here really is our patients and letting the layers dry completely before rushing in to
work on the next one. There'll be working on
three layers this time, and facing the fear of adding backgrounds to complement
a simple illustration. The process is pretty much the same with the
previous styles, but to add the final details, spatter scarlet lake to mimic
falling bells and a tip. It's easier to use blathering
with a smaller brush. So I'll see you in the next
video for the final project.
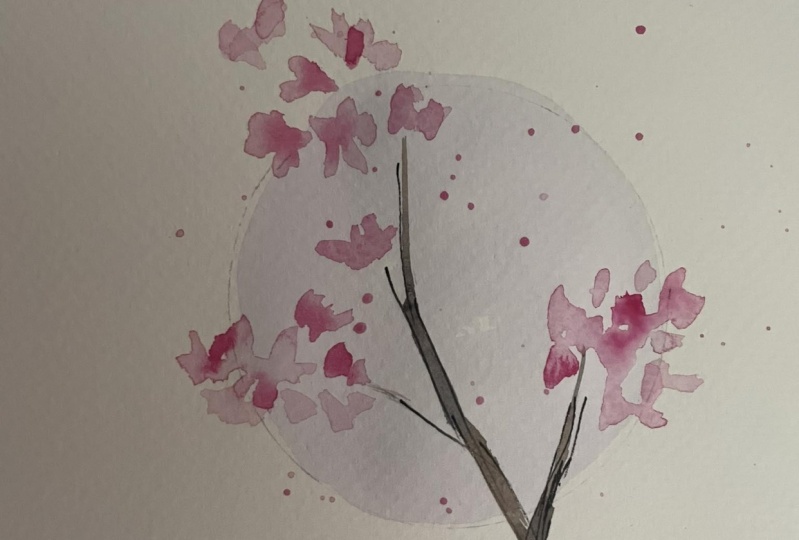
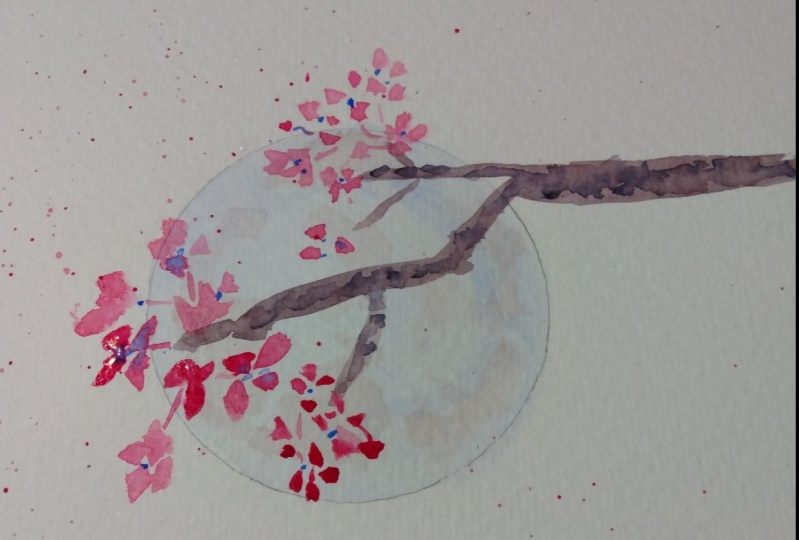
12. Project: Background: When I was a beginner, I've always avoided
banking backgrounds as they seem very hard to
achieve and intimidating. So in this style, that's used a anomaly full
Moines as our back marrow, which does not necessarily
cover the whole area. Let's start by drawing a
circle guideline for the moon. The size of this masking tape is just perfect for this project. Draw lightly since this will be for our light background too. Then paint the moon with a
very light purple color. Lavender is my choice. What's yours? You may also want to try
yellow or blue or even brown on this painting and pick your light color
for the full moon. Once you've covered
the whole area, switch to a smaller brush, grab a slightly darker
color than the moon color, and then drop random shapes
for the texture of the moon. Make sure that there's more pigment than
water on your brush. While letting this dry. Prepare your flower colors. Digital let it dry completely. Then you can go ahead
and paint the branch. Position it in a way that the flower is will
overlap the moon, but not covering
the whole thing. You can see that the change the brush slightly to do this. While still wet, add
more ultramarine blue to the mixture and drop it on some parts of the branch
for additional texture. Keeping in mind that the
branch is still wet, make sure not to touch it. When painting the first
layer of flowers, I will eat a shell pink, like how we warmed up earlier. As always, use the
reference photo to help you decide on
the floral arrangement. Keep adding layers of
petals as you see fit. And then let this dry before
working on the final layer. Now, all that's left
is practicing or a single stroke movement
to paint the petals. Paint as many as you
think is needed. And now for the
moon to look like it's picking through
the flowers, but not too much that it
covers our lovely background. We'll also be adding
the florets in this flower with
our red pigment. As a final touch, switch to a smaller brush, again, noted with enough
paint and splatter. If you're having problems getting paint out of your brush, tried tapping it
with another brush. Just a word of caution though. Make sure you don't
have any valuables near your working area or they
will get splattered too. Here's our final project. I'm so happy with this one and hope you are enjoying it too. See you on the next video for some suggestions on
what to do next.
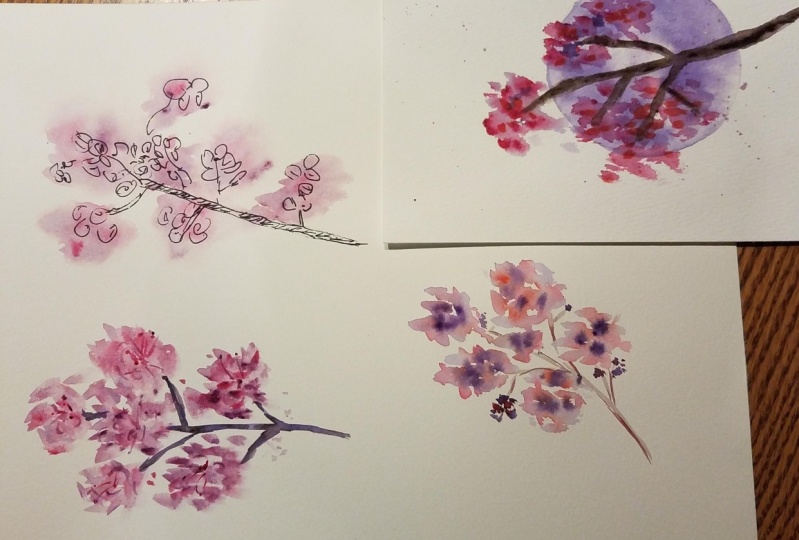
13. Before You Go: Congratulations you did it. Which one is your
favorite so far? To quickly summarize this class, we started with the
easiest style for our outline blobs added a challenge by
painting petals with single stroke to complete a simple illustration explored
using a cool color as the underpainting
for a unique look up and learn to let go
with a semi abstract look. And finished by
adding a full moon as a background with
splatters of colors. Now that you've learned about
these paintings styles, you may go ahead and try it
on your flower of choice. Don't forget to share your projects via
the projects gallery and share it on
social media with the hashtag, five flowers. And they'll features
some on my stories. You'll also earn
badges as you complete this class uploaded project. Soon as I can, I'll give
some feedback on your work. Now it's my turn
to learn from you. Kind of leave an honest
review on how I can improve my future classes because
I really loved the chain. If you have questions,
note Misha, and start the conversation
via the Discussions tab, do follow me on Skillshare for my new and upcoming classes. And I hope to see
you on some of them. And together, let's make
this world a little bit more colorful
with our artworks
 Bianca Luztre, Watercolor, Productivity, Color Mixing