Transcripts
1. Introduction: These earrings and
bracelet are some of my favorite designs
to have ever made. So I'm going to be showing
you today how to create some different chain designs using your wire and some beads. We're going to start by creating these dew drop dangle earrings, and this is simply creating three different lengths of chain and then attaching
them together. Then we will jump into creating the bracelet with
a similar design and similar techniques but with a slightly
different take on it. I will show you how to create two different styles
of chain links, one with beads and
one without beads. Also, be sure to
go and check out the wire necklace
tutorial that I have because it would pair perfectly with
these two designs. Now let's jump into
the videos and get started creating some of
my favorite designs ever.
2. Dewdrop Dangle Earrings: Everyone loves a
good dingle earring, and these dew drop dangle
earrings are no exception, and I absolutely love the
color of these beads. For our materials, we will
be using a 22 gauge wire, and this is a
colored copper wire. Next, we have two ear hooks, and then we have the
beads of our choice. For our pliers, we have
our Nylon jaw players. We have bent chain nose pliers, then we have our
needle nose pliers. We have our chain nose pliers, and we have our wire cutters. Now let's begin creating these
dew drop dangle earrings. Pulling out a length of wire, we are going to smooth it out
with our Nylon jaw pliers. Then we are going to choose a bead and thread
it onto the wire. Using our needle nose pliers, we are going to begin
creating a loop in the wire. Placing the wire into the pliers with a
tail sticking out, we're going to bend
the wire over. Then slightly bending
the wire back so that it is centered
underneath the loop. We are then going to
wrap that tail of wire around underneath the
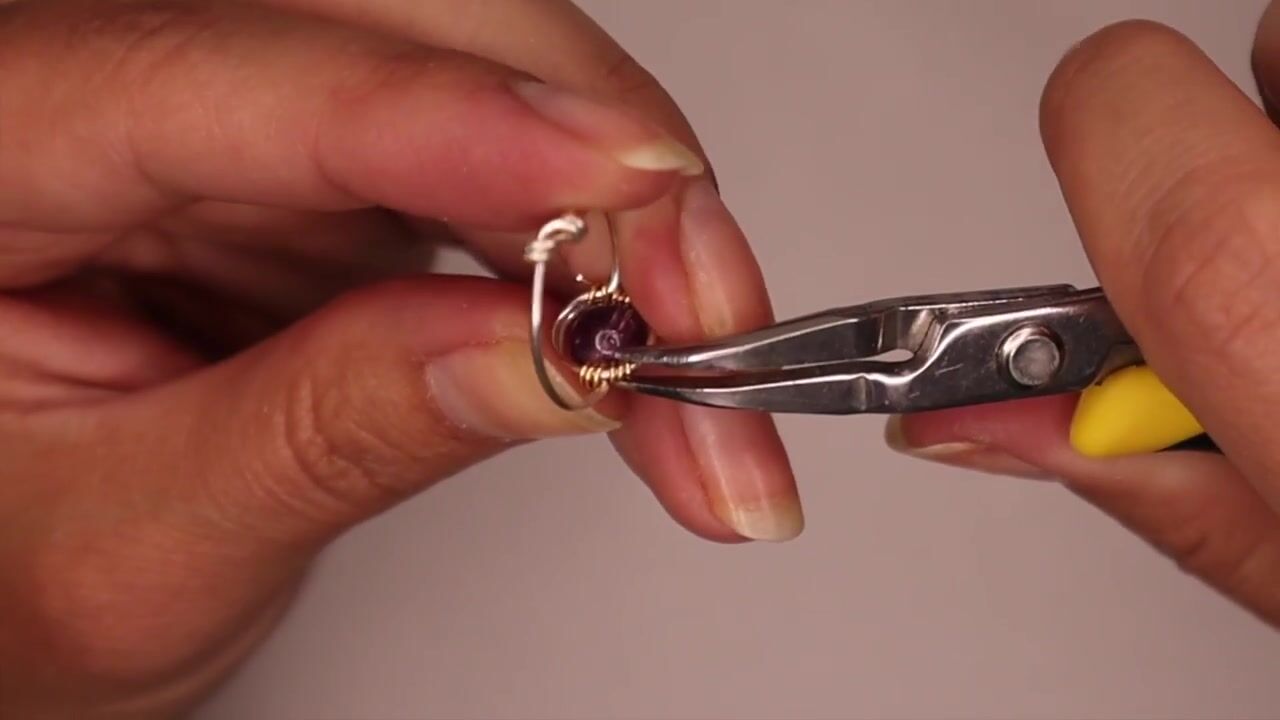
loop to create a wrapping. Using our fingers and then
using the bent chains pliers to help us finish
wrapping and securing the wire, then taking our wire cutters
to snip off any extra wire. For each of these chain links, I'm wrapping the wire
around two times. Pressing the end down with
our bent chainos pliers, we are then going
to slide the bead up against that wrapping and placing the wire back into our pliers with the pliers
right against the bead, we are going to bend
it over 90 degrees, and then readjusting our hold, we are going to
create another loop on this other side of the bead. In the same manner, we are
going to wrap the wire around one or two times
to match the other side. Cutting off the excess wire
with our wire cutters and then pinching the end down with our bent chain nose pliers. We have now created
our first chain link. To create the next
piece of the earring, we are going to thread that little chain
link that we just created onto our wire, and then we are going
to add two beads. Then placing the wire into
our needle nose pliers, we are going to repeat
the same process to create a wrapped loop, bending the wire around and then centering the
long end of wire, using our bent chainose
pliers to help us wrap that short end of wire
around underneath the loop. Cutting off the excess wire
and pressing the ends down, we are then going
to draw the beads up and begin creating
the second loop. Bending the wire over and
then readjusting our pliers, we are going to wrap
the loop into a circle. Before we close off and wrap the wire around
underneath the loop, we are going to draw up the chain link and add
it into that loop. And then holding the loop
securely in our pliers, we will wrap that
long enough wire around to create the wrapping. Then cutting it off
with our wire cutters, we can then press the end down, and now we have finished
creating our second piece. And now to create the third link of these dingle earrings, we're going to thread on the
chain that we just created, and then we are going to add
three beads onto the wire. Now, because this is
the bottom piece, we are going to be creating a very small wrapped loop
at the end of the wire. Placing it into the very tip of our pliers to create
a tiny little loop, we are going to use our
bent chain as pliers to create that wrapping
underneath the loop. Bringing the beads up, we
are now going to create a loop on the top of
these beads where we are going to bring up
the chain links that we already created and add
them into that loop before we use our
pliers to hold it as we wrap the long end of wire
around to create the wrapping. Then using our wire
cutters to snip off the access wire and our bent chainospliers
to press the end down. And now we have finished
creating the first piece. We're going to repeat
all of these steps to create a matching
second piece, and then we are going to attach
them onto the ear hooks. Using our bent chainos pliers to open up the loop on one
of the earring hooks, we are then going to
add our chain by adding the very first piece that we made with the single bead on it, and we're going to add that onto the loop and then close it. And then we are going to do
that to the other earring, and then we have completed
our set of dingle earrings. These beads were calling
my name for a long time, and I'm so happy
with this design where I get to showcase
them as a pair of earrings. I've been wearing these earrings almost every day
since I made them, so I hope you enjoy creating
them as much as I have. If you would like to see
more wire jewelry designs, be sure to go check
out my channel and find many more videos
there for you to see. Now, once again, thank
you so much for watching, and I look forward to seeing
you in the next video.
3. Beaded Bracelet: We are going to make
both chain links and beta chain links to
create a bracelet. Starting out our materials, we are going to be using a
20 gauge solid brass wire to create the chain links. Then we have a string of beads, and you can choose whatever
size and color you. For our tools, we will be
using some Nylon jaw pliers. We also have our bent
chain noose pliers, some needle nose pliers. We have our wire cutters, and we also have our chain
noose pliers just in case. Now let's jump into
creating this bracelet. I'm going to pop the beads into this little dish for easier access when we start using them. To begin, we are going
to pull out a length of our wire and use our Nylon
jaw pliers to straighten it. After smoothing out the wire, we are going to add three
beads onto the wire. Next, we are going to take
our needle nose pliers, and we are going to begin
shaping the wire into a loop. Placing the wire
into the pliers, we are going to bend it over and create a circle in the wire, slightly bending the long end of the wire back so it is
centered under the loop. And then we are going to use our bent chain nose pliers to wrap that short tail of wire
around underneath the loop. Securing that wrap
underneath the loop, we are then going to draw the beads back up
towards the loop. Again, using our
Nadle nose pliers, we are going to place them
directly on top of the beads, grasping the wire,
and then drawing the wire directly
over to the side. Readjusting our
pliers so that we are holding the wire
that we just bent over, we are then going
to take that long end of wire and bring it around to create a loop like
we did on the first side. Wrapping the long end of
wire around a couple times, we are then going to clip it
off with our wire cutters, and using our bent
chain nose pliers, we are then going to
press the end down. And now we have
finished creating our first beaded chain link. Now we are going to
create our spacer link. Placing the wire into
our needle nose pliers, we are going to
bring it around and down to create a teardrop shape. Then we are going
to create a loop on the other side of the wire
to create an infinity shape, bring it around and down
to create a tear drop. Then we are going to thread our beaded chain link into that second loop that
we just created, gently pulling the
wire apart and then threading it down across
the wire into that loop. Now we are going to
press that loop closed, and then holding the wire with our bent chain noose pliers, we're going to
bend it over once. Snipping off the access wire, we are then going to use
our needle nose pliers to help us hold the
chain link as we wrapped that other
end of wire down and around one time with our
bent chain nose pliers. Making sure that both ends of the wire are pressed down flat, we will then use
our wire cutters to clip the ends closely
to the chain link. After clipping off
the excess wire, we can then go back in with
our bent Chainospliers and make sure that those ends are pressed down into
the chain link. And now we have the
beginnings of our chain. Now, I went ahead and made
this part of the video as a time lapse because
all we need to do now is to create beaded
chain links as well as the spacer chain links for as long of a chain
length that we need. And, of course, the
length is going to vary depending on
whether you're making a bracelet or a necklace or an anklet or maybe even
a pair of earrings. It's all dependent on what you're choosing to make
with these chain links. An important note to remember is that whenever you are creating
the beaded chain links, be sure to always add
the beads onto your wire before you begin bending the
loop on the end of the wire. This also applies when you are adding chain links together. Thread the chain link
and then your bead, if you're adding beads onto the wire before you begin
creating the loops. If you watch this video closely, you'll notice that
I kind of wrap the spacer links a little
bit different each time. And this last
method that I used, I think, really worked the best. And so we are repeating
the same process over and over until we have the
length of chain that we need, creating the beaded chain links as well as the spacer links. As we continue building
the length of the chain, we are then going to start
adding the chain links that we created to the new links
that we are creating. So to create this next
part of the link, I'm going to add the
spacer link onto the wire, and then I'm going
to add the beads to create a beaded chain link. We are then going to create
this beaded link as usual, except for when we come
to that second loop. When we come to the second loop, we are then going to draw up
that chain that we added, and we're going to
bring it into the loop and then using our
needle nose pliers, placing them into the loop so that we can hold
it as we bring that long end of the wire around to secure
the chain together. Using our bent chain nose
pliers to press the ends down, we have now added another
link onto our chain. Remember to add the
links onto the wire before you go on and create whichever link you are creating. If you are creating
a spacer link, you're going to add
a chain that has beads on it first and then
create your spacer link. If you are creating
a beaded chain link, you're going to add a spacer
link onto the wire and then go on to add your beads and create
a beaded chain link. And so we are repeating
the same process over and over until we have the
length of chain that we need. Now that we have the length
of chain that we need, I'm going to show
you how to create a clasp for your
bracelet or necklace. First, I'm going to start by
adding a bead onto our wire, and then using our
needle nose pliers, we're going to create a
small loop in the wire. Leaving a short tail and
about a half inch long, we are going to bring the
wire around into a loop, bring the long end of wire back, so it's centered
under that loop, and then we're going to add
our chain onto this loop. We use our needle nose
pliers to hold it as we wrap that tail of wire
around underneath the loop. Then we will use our
bend chain nose pliers to finish wrapping
that wire around, clipping off any excess
wire with our wire cutters. Make sure you press
that end securely against the wire before
drawing up the bead. We're going to place our wire further down into the jaw of the pliers to create a larger loop for our
hook and eye closure. Bringing the wire around, we are then going to take the
long end of wire and wrap it around as we did
with the other side. Bringing it around
a couple times, we are then going to clip it
off with our wire cutters, and then using our
bent chain of pliers to secure that end
against the clasp. Now we are going to create
the hook for the closure. Placing a bead onto our wire, we are then going to leave
out about an inch of wire. We're going to bend the wire in the very tip of our
pliers directly over, and we're going to pinch
that bend tightly together. Placing our wire into the pliers about two thirds
down from that bend, we are going to
take that short end of wire and bend
it directly over. Then we are going to
wrap that short end of wire around the long end of
the wire to create a wrap. Using our bentchinos pliers, we are going to wrap this tail around underneath that
bend in the wire. Then we're going
to draw the bead up and we are going to create a loop here as we did when
we were creating the chains. Bending the wire directly over and then
readjusting our pliers, we're going to wrap
the long end of wire around to create a circle. Next, we're going to clip off the excess wire leaving a small tail to get
that out of the way. Then placing the double wire
into our needle nose pliers, we are going to bend it
over to create the hook. Then using our bent
chains pliers, we are going to create a little bend at the end of the hook. Now, opening up that loop, we are going to slide our chain into the little
loop that we created. Then using our bent
chains pliers, we are going to
secure that loop and wrap the tail of wire
around up towards the bead. Using our need on those
pliers to help hold the hook securely as we
wrap this wire around. Then we're going to
use our wire cutters to snip off any excess wire. Then again, using our
bent chains pliers to make sure that all the ends
of wire are pressed down. And now we have finished
creating the hook and eye class for our bracelet. Thank you so much for watching, and I hope you enjoyed creating this beaded chain
bracelet with me. If you would like to see
more wire jewelry designs, be sure to go check
out my channel where I have many more videos
available for you. Thank you again so
much for watching, and I'll see you
in the next one.
 Katrina Anderson, DIY wire jewelry and craft tutorials