Transcripts
1. Welcome!: Monograms are like puzzles. They are so fun to create. They're structured, elegant,
and a little chaotic, which makes creating
them addictive, especially once you
know a few tricks. Today, I'm going to
show you how to design monograms that feel timeless
and beautifully retro, blending style, structure, and a little bit of storytelling in a really approachable way. You can take this class using
any software on any device, and you can also follow it perfectly with just
pencil and paper. I'm going to be
using an iPad and Procreate to show the process, though, because it's my
favorite way to work. Hey, everyone. I'm
Jimbo Bernaus. I'm a lettering
artist, illustrator, educator, and also co
founder of Sha Dam. I spent the last ten years working with brands like Paper, Calsberg, Espresso displays, booking.com, Tablo, et cetera. But what I love the
most is teaching and sharing my process
with people like you. So if you're into
retro aesthetics, ornamental lettering,
and experimenting with different styles,
you're in the right place. By the end of this
class, you will have your own stylised
monogram billed with my favorite techniques
and polished with a few ornament tricks.
Let's do this.
2. Today's Class: This class, I'm focusing on retro style monograms instead
of super modern ones, just because that's the
vibe that I love the most, and it really fits the techniques
we're about to explore. Before recording this class, I actually practice drawing around 50 monograms using
my patrons initials. It helped me test all the rules and styles that I'm
teaching you here. So throughout the lessons, you will see me using some
of those real initials to explain each technique in a way that feels
clear and practical. After we go through all the monogram rules I came up with, we're going to create
a final monogram using the procreate brushes and
textures that I've prepared. You'll also get a
full PDF guide, so you can get back to it and
don't get lost next time. Just a little FYI, but this class is entirely
based on my own methods. It's not the definitive way to create or classify monograms, and it's just the way that
has helped me the most. Now, let me show you some
inspiration before we start.
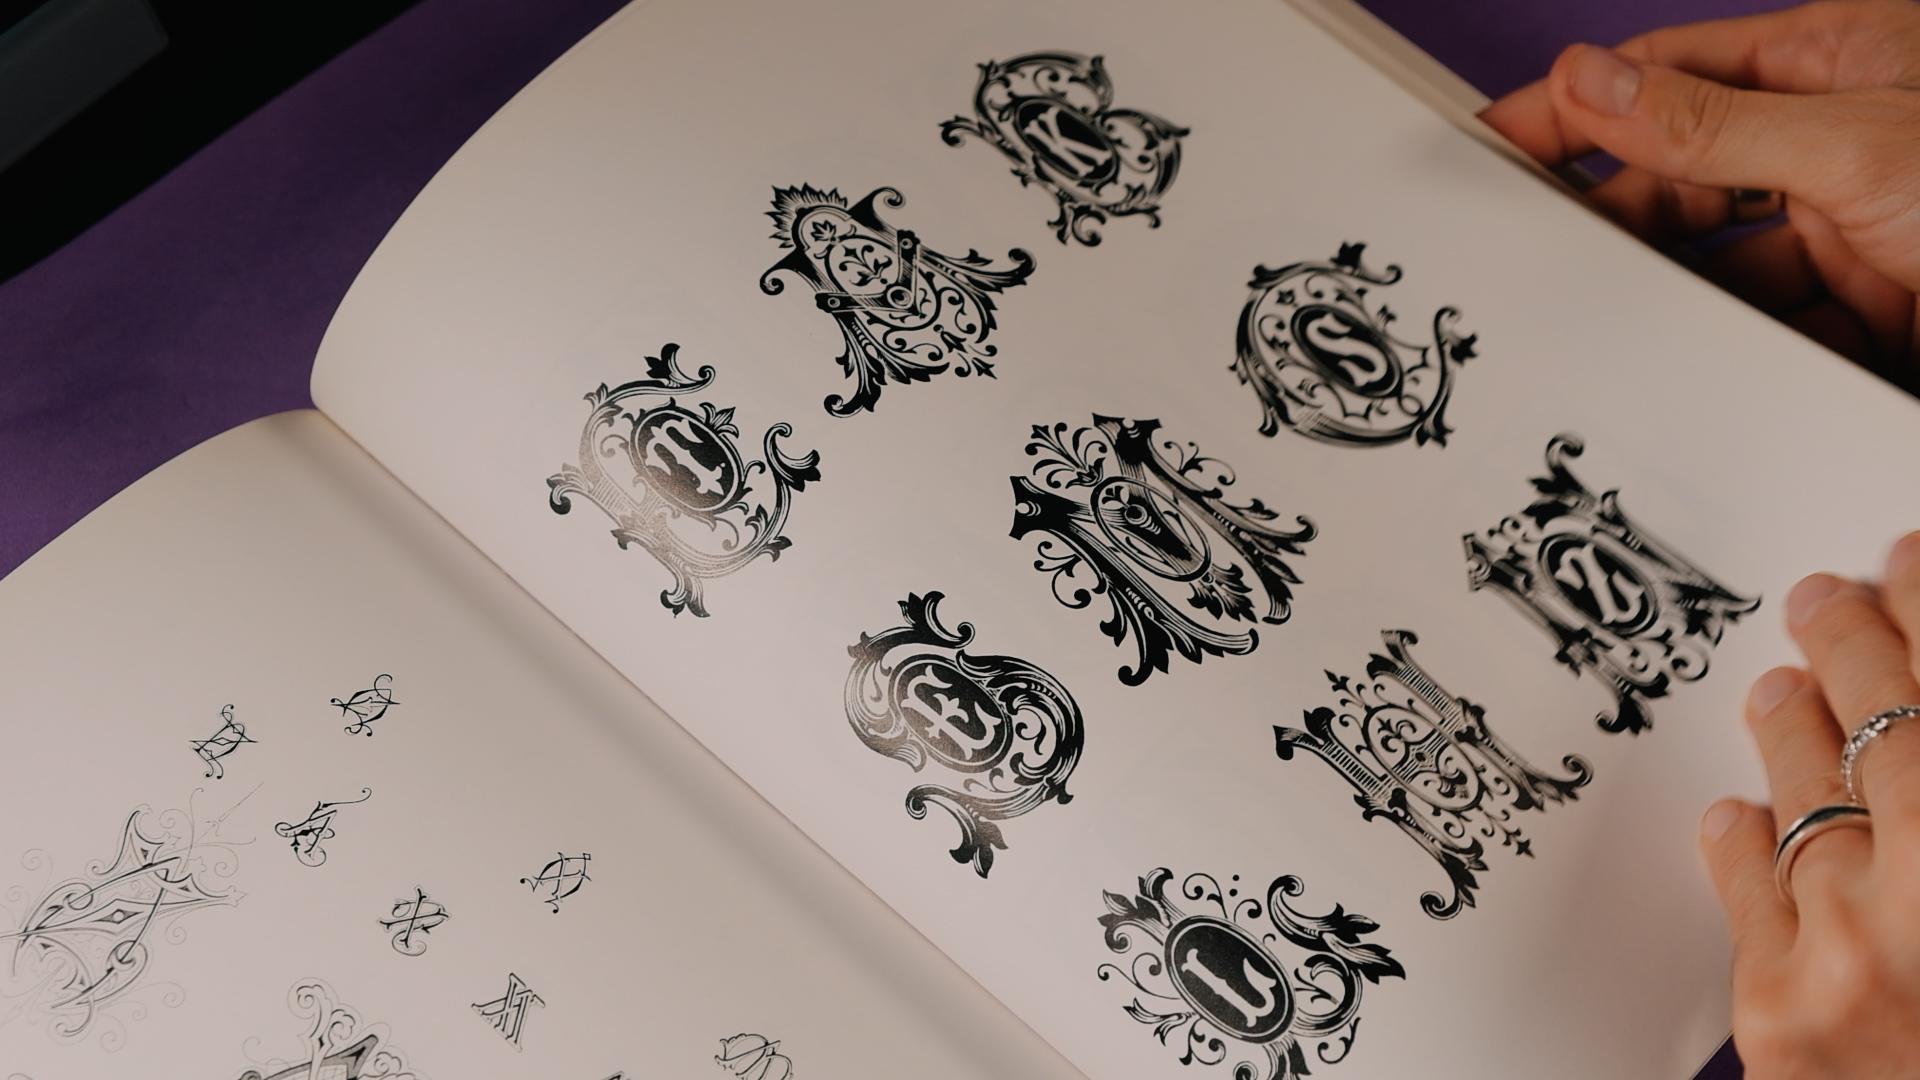
3. Inspiration: Time that I start a lettering
piece, not just monograms, I go straight to my books, old typography manuals, Art Nouveau collections,
vintage lettering books. That's really my happy place. Let me show you a couple of books that you can
grab for cheap, plus a Pinterest that I've put together to help
you get inspired. Okay, let me show you
a couple of books. Well, actually three books
that I think would be really cool for you to
have because they're really related to today's topic. Two of them are gonna
be about monograms, and then the third
one is going to be the Art Nouveau book
that we probably seen if you took my
first Art Nouveau class. I think I showed it there. Yeah. So, this one is
actually pretty cheap. I think that was, like, around, like, 15 bucks or
something like that. And it's all about
Victorian monograms. And since today we are
learning retro monograms, I think this is a must
have. It's not that big. It's like a little I would say it's like a little
magazine or something, but really, really
an incredible book. Now, even though
I love the cover, I'm having certain issues here with the spacing between
the V and the I, that curtly is not right. But apart from that,
incredible book. So, you will see that
it's not like a super, you know, cool edition. It's just normal,
like, very thin paper, but the reference here the references here
are really good, and there is so
many combinations that I really,
really recommend it. Are So you're going to have the link in the
description of the class. Now, let's go to the second one, a book that I had for
quite a long time now, and it's called 4,000 monograms. Here you will find anything from something like super modern like this to also something really Rococo like
this one, for example. Let me show you a little bit. This is a better edition. It's like, really thick. And I think you can
find it in Amazon. I think I saw, I'm also
gonna give you the link. But I think right now
there is another edition, and I think the cover is yellow. But anyways, yeah. I'll
put the link there. So let me show you a
little bit inside. Let me see where should I start? Like, actually, I believe, like, the first part is actually that book over there
because it looks the same. But then, as you go
past the retro ones, then the book completely
changes, as you can see. So I actually think that probably should get this one if you really want to get into it, because for what
I see now, like, I got a book, but, like, I already had it here,
pretty much everything. I don't know if they are
the same compositions, but I think they
might be similar. Anyway, so now, you'll see
that here there's so many, so many letter pairs. And also, they play with, like, two and three characters,
which is really cool. And here, you'll find,
like, pretty much any style that you
can play with. Um, Look at it's it's just
incredible, to be honest. You know, after checking
these books again, I think this is not going to be the last monogram class that I do because it's
really interesting once you get to learn
a little bit of, like, different
lettering styles, getting to monograms is
just so fun, you know, because you get to mess
around with all the letters, break some rules, which
is something that I really love always. But anyways, you definitely
should check out this book. And finally, I'm
going to show you one just in case you didn't
take my Art Nouveau class, but this one is a book
that I always loved, and you can also find the
link in the description. But this one is not
about monograms, but it's just about
Art Nouveau letters. But here, there's so many
styles that you could practice with And then you could
turn them into monograms, which is something that
I really recommend, especially with Arnall letters, all these letters
just look really, really, really good
with monograms. And you can see here
that even I mean, this is not Oh, yeah, these
are monograms, actually. Look at that. You also
have some monograms here. Let me show you a
close. You can see. Is it focused? Yeah, I think so. So, look, I didn't think I
would find monograms here, but there's also a lot of them. Wow, I didn't even I checked
this book a lot of times, and I didn't even see those
pages with monograms. But yeah, definitely go
check that one out, as well.
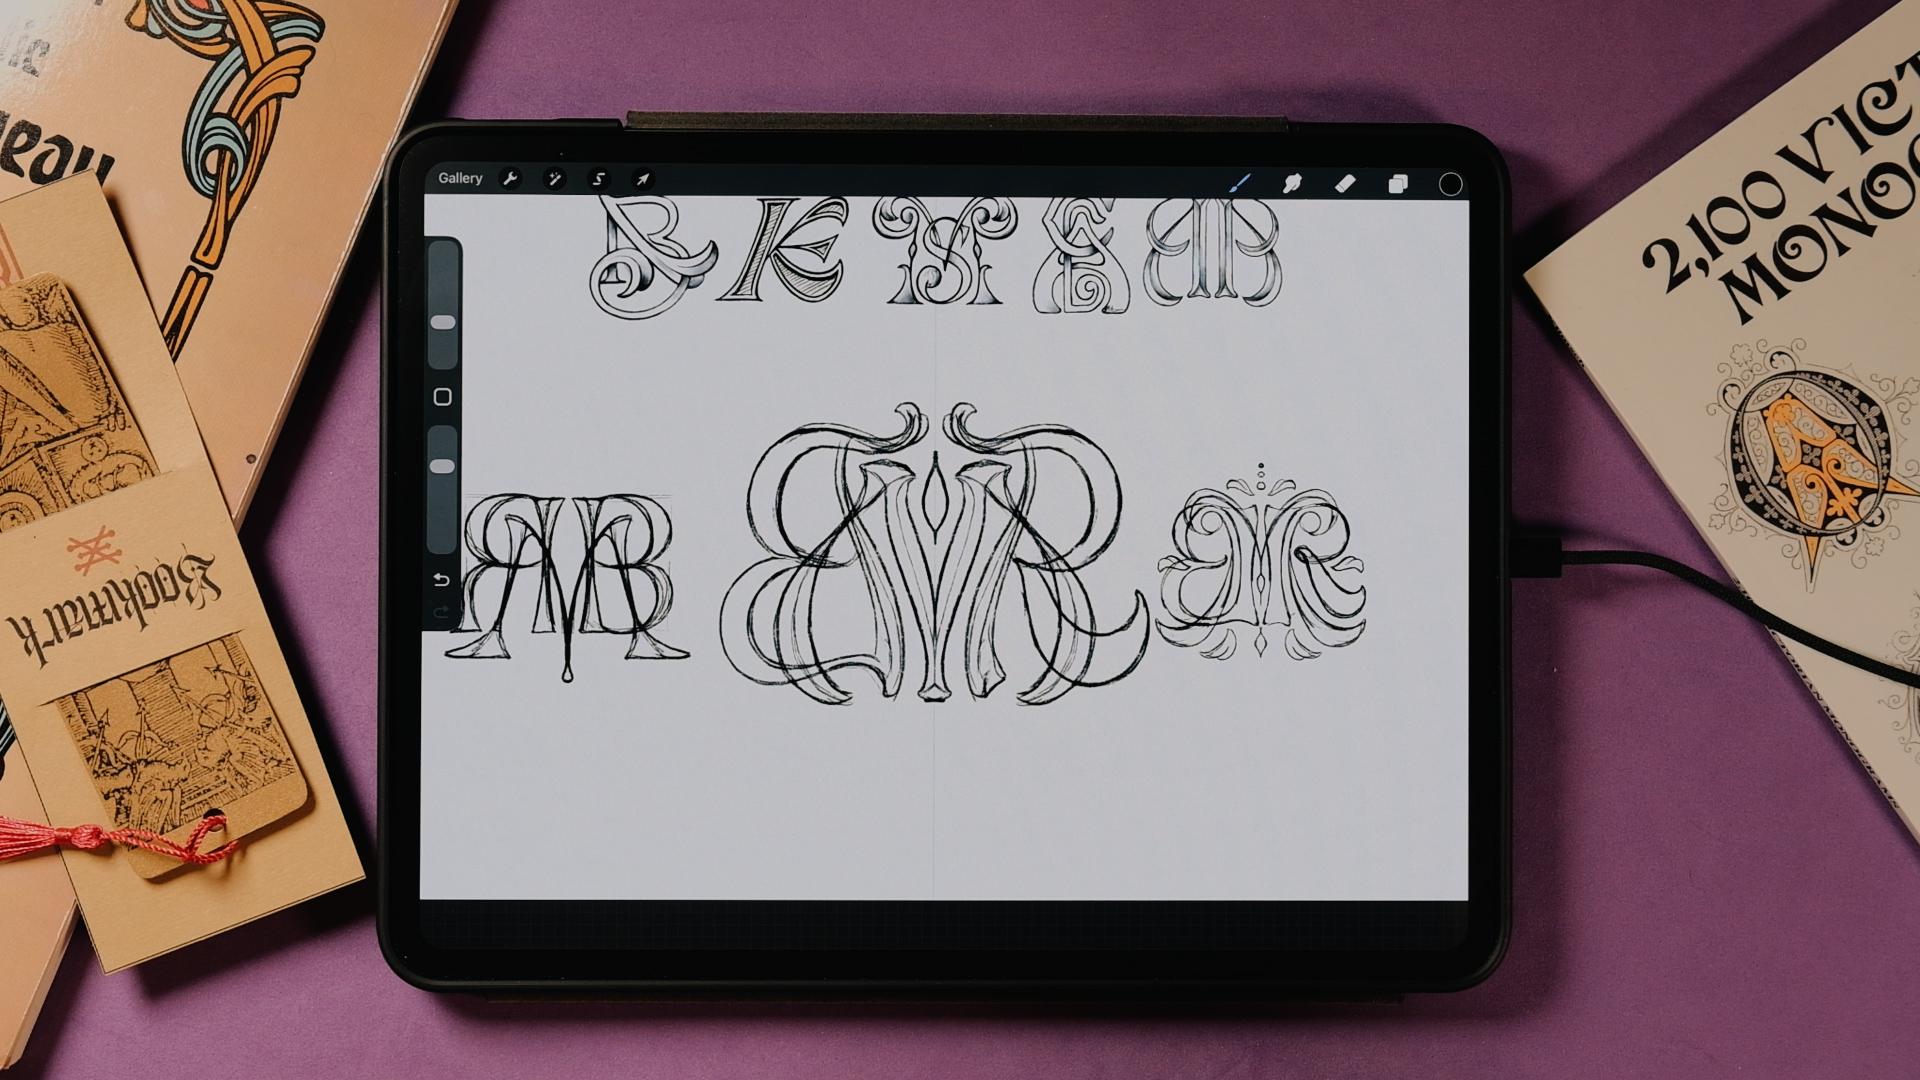
4. Discovery: Told you in the
beginning, I've asked my patrons to give
me their initials, and I sketched around
50 monograms with them. It's been an amazing refresh to what I knew about monograms. Here's a short brain dum of what visual material
we're going to use today. Okay, so before I show you all the rules that I've prepared together
with the workbook, I wanted to show
you the monograms that I've drawn preparing
for this class. And just letting you know that once you know
all the rules, making monograms becomes
super, super fun. Now, there's a couple
of things that I enjoyed most in this class,
and I wanted to tell you. And the first thing
is mirroring. I did a lot of symmetry
doing these monograms, and you will see that as one of my hierarchy
rules later on. But you're going to
see that a lot of these monograms are mirroring, so that's for sure my
favorite thing to do. There's letters that just work better when it
comes to monograms. For example, the letter
S works super good. It's not mirroring, but
it's following this, um central axis, and then you
can do so much around it. Now, for some mirroring letters that really work, for example, the T works so well, then the M and the A here. So, for example, you see that the H also mirrors
really nicely. The T and the M are absolute gorgeous combinations when it comes to monograms. And then you will see that
there's a lot of letters that are not
mirroring themselves, but then once you put
them side by side, they look really good mirroring. For example, these are two Ks, this one got a bit too logotypy
because because of this, it becomes a little
bit less readable. But you're going to see that some letters when
they're flipped, you say, let me erase this part in the middle so
it's more readable. So you're going to see
that these two letter Ks are mirroring perfectly, and there's letters
like this one that when you just choose
central axis here, you're going to see that
they are really readable, even if this K is looking
to the left, right? So there is a couple
more examples of this that we're going
to see at some point, maybe the letter A, even if you flip it,
it's also readable. And then there is letters like the J and the L. We couldn't do the same as we did here because when you flip certain letters, they become another letter
like this J and L. Okay, so you will see also that two letter
compositions are way easier. And sometimes when you
add three or more, it becomes a little bit
more complicated to read, but that's just like
the normal thing, especially when you create
tricky compositions. So you see this one has three. RAP really easy to read. But then there is other
ones like this one that I pushed some boundaries
here a little bit. So there's the C, the A, and the S. You see? So there's going to be
more complicated ones. You can also do a
four letter monogram, but I wouldn't advise you to. But in some instances, it can work if you want to
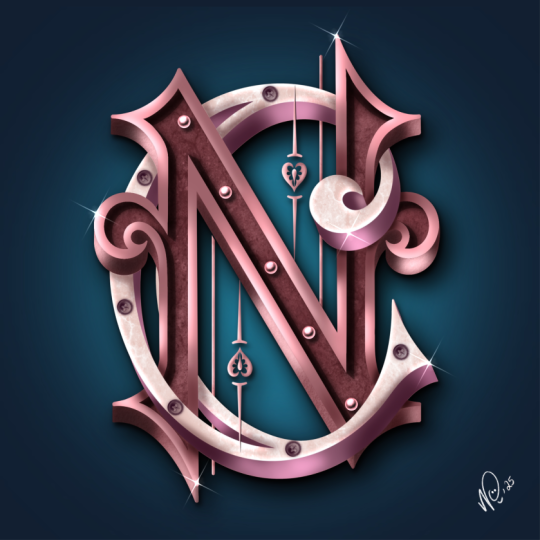
make it work, of course. Then when it comes to letters like the letter N
and the letter S, you'll see that the S has almost a really good
weight distribution around the whole letter. So the letter S is really
good to put it in the center, and then it can be pierced
through by other letters. So I really like the letter
S because of this, right? So I told you about the
the mirroring letters and the S is not one of them. Even though when you flip
it, it's still readable. But it generates this
nice negative space, so you can really put
letters around it. And then there's another
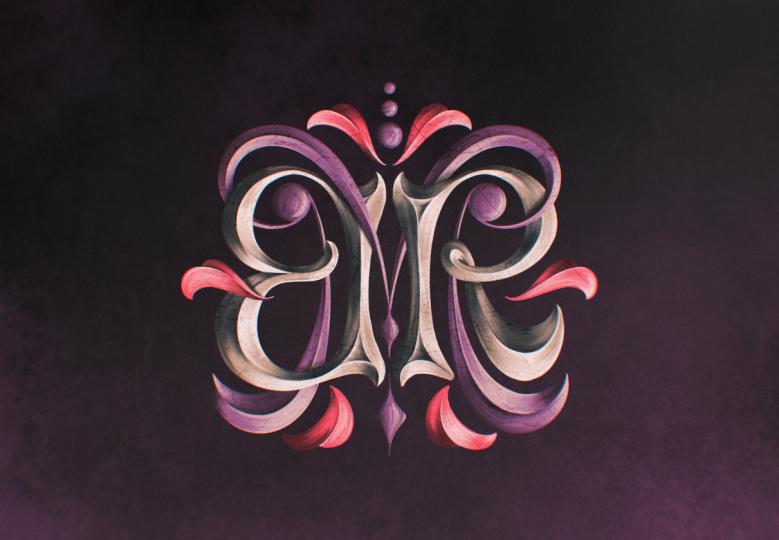
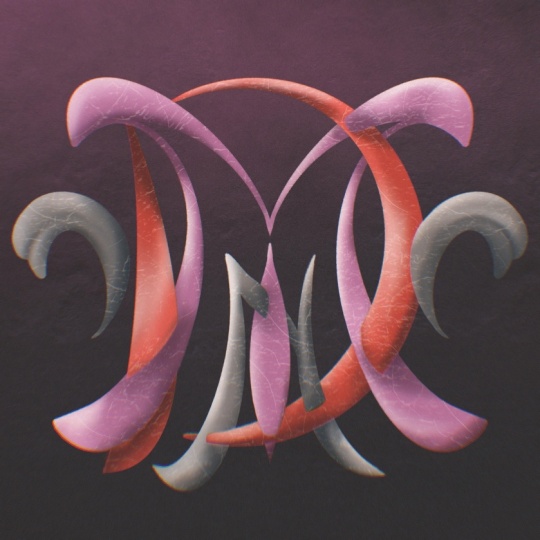
one that I like a lot, which is the letter M. So
we have it right here. Let me just draw this
in right so you see it because it has the same
weight left and right. And then there is
this part right here. And yeah, it's not mirroring, but it has the same
weight left and right. So it really helps creating a central
composition with it. Now, other cool things
here that I'm thinking about is that some letters
when you invert them, but you add just that
little something, they become also readable. And you can still create
mirroring compositions. So the letter E and the letter C is a good one because
you could always create the letter C first and then just make it
a letter E, right? So when you make
it the letter E, and you still can flip it, and it's still readable because not a single letter
looks like that. So that's for sure, a letter. And in this class, I just
want to encourage you to go ahead and break some
rules and boundaries. Just go a little bit further than what I'm going to teach you because there's so many things in here that just
break the rules, some of the things that
probably wouldn't make it in a final logotype because
it becomes less readable. You know, like, some monograms
are overly complicated, even though I love them, right? But like here, I really wanted to experiment
with letters, and I think that's the fun
when you're doing monograms. And the last thing
I want to tell you before we enter the workbook is that if you think
the combination is a little bit too
difficult, just go script. Because when you go script, everything becomes a
little bit easier. You can still play a
lot with flourishes, but it's going to
be readable, right? You're going to see
that you're going to read this way faster than any other more
complicated monogram when there's three
letters or more. Alright, so let's go to
the next chapter now.
5. Positioning: Alright, so before we jump
into stylistic variations, we need the foundation, how letters are positioned and how they relate
to each other. If style is about personality, position and hierarchy
are about structure. This is what makes a
monogram readable, balanced and also
intentional. Let's do this. Okay, let's get to
it. To follow along, you can open the
haben monogram guide. You're going to see
that I've prepared you a high res and a low rest, depending on the
iPad that you have. So let's open it up. Now, I'm just going to
tell you how this works. If you've played with
any of my guides before, you will see that
more or less I always use the same kind of
technique to go through it. You're going to
see that there is the background color and
the background as an image. Just keep these two
on all the time, just so you see
everything else better. Now, you can use this workbook as something that you go back to when you
create a monogram, because it's going to give you all the structural
and stylistic traits that you're gonna need to
create monograms, really. I want to tell you
that, as well. Like, this is just the
way that I see monograms. It's not the definitive way. So, for sure, you're gonna find other
classifications online. But this is what I came up with that really helped me create monograms
all these years. Now, you can see this in
the disclaimer that I put just in case because if you've been here for a
while following my classes, you're going to see that
I always try to find my methods just because my method is what
helped me the most, and that's how I see
the world of lettering. So I think that could
be useful for you. So before we get to see
the stylistic traits, I want to show you
how monograms can be positioned and who
leads the composition? You know, sometimes
there's going to be a letter that's going to be more important
than the other, so it's going to become bigger. And sometimes you just gonna do it just because
it looks better, and that's also okay. Let's go down here and let's open the position
and hierarchy. The first thing that we're
going to see is the position, and then we're going to
get to see the hierarchy. Now, for the position,
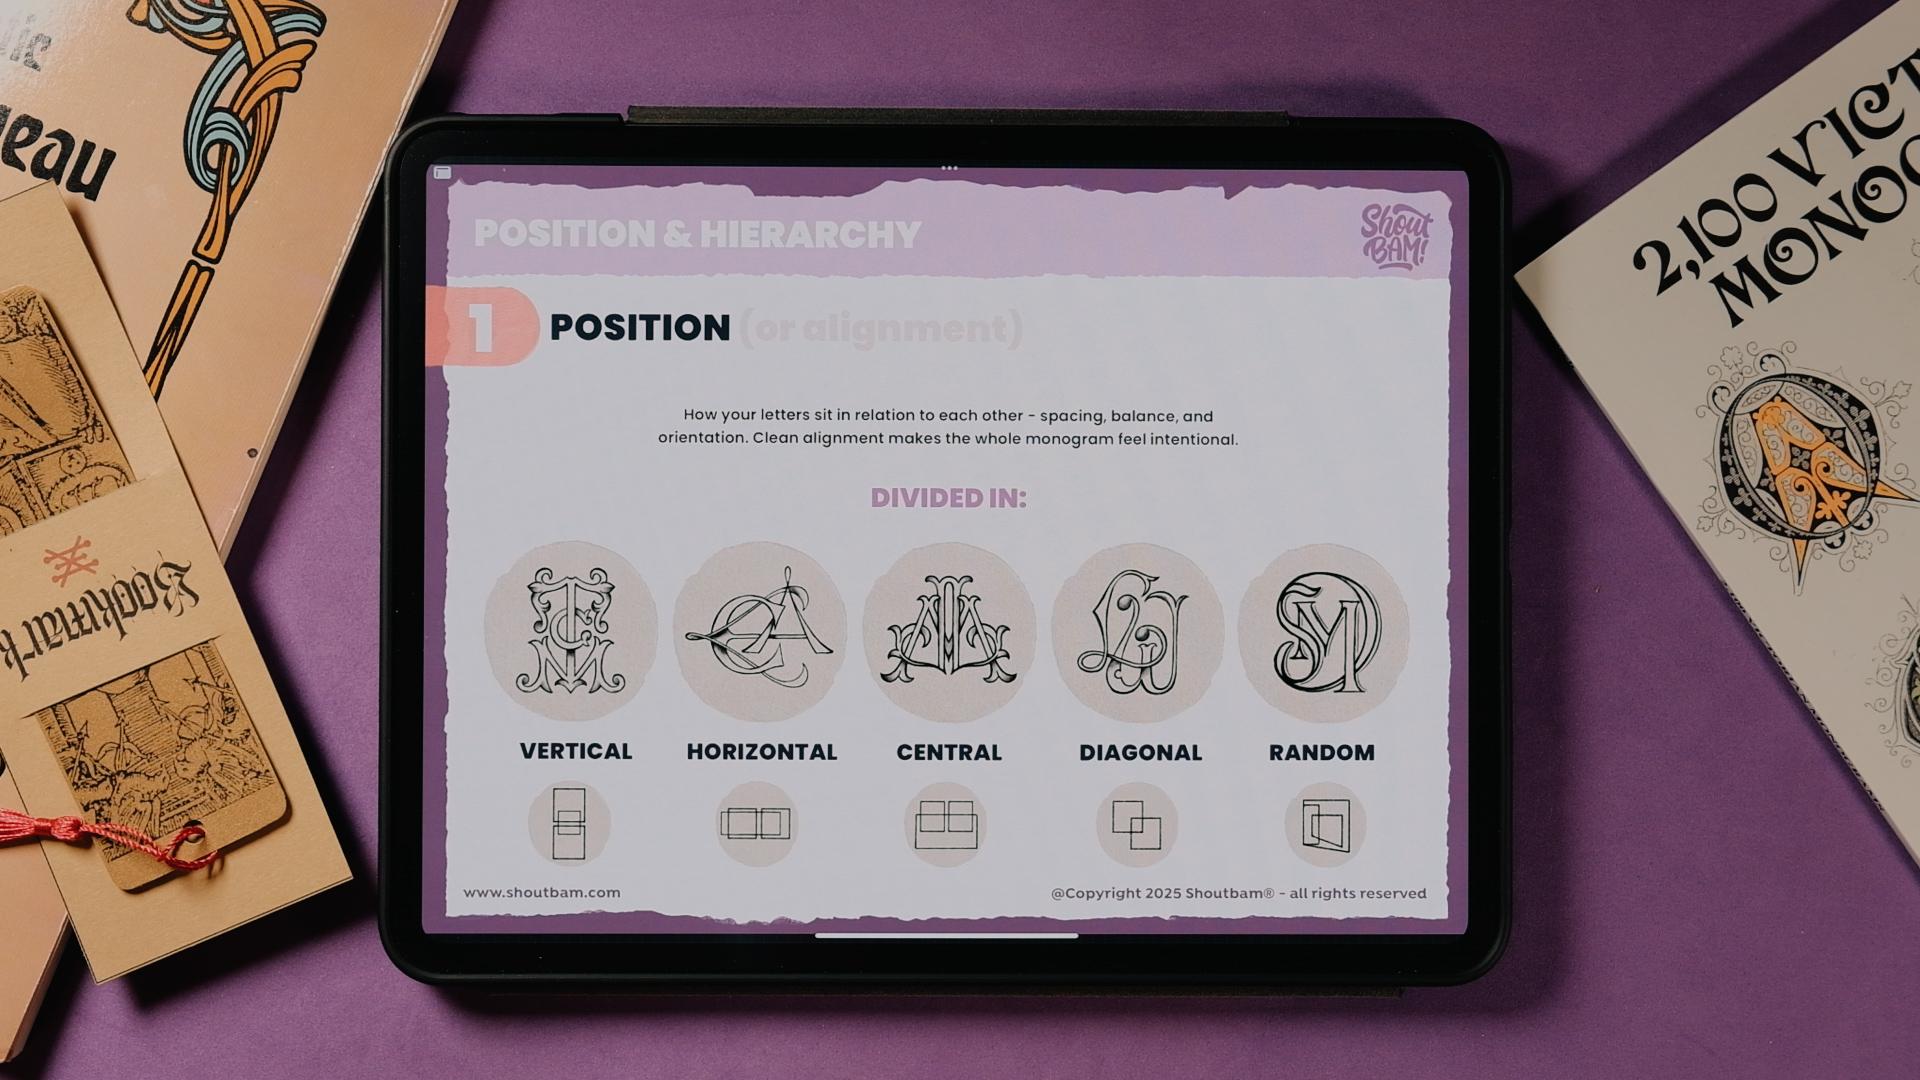
let me do this bigger. For the position, there is five positions that
I found, really. Like, for sure, there is more. But I think these
five really are the basics of what
you're going to see in most monograms, actually. Now, if we go to the
vertical alignment, you're going to see that
letters are stacked or aligned in a vertical flow. The results will
always be kind of narrow and tall, and I really, really like the legibility on this composition
because you have a lot of space here to breathe. I really like this
monogram that I've drawn, and by the end of this, I'm going to show you
a little timelapse of the five monograms and
how I constructed them, how I did the sketch of them. Now, the horizontal alignment is quite the opposite, right? So the letters
flow side by side, and it can also be super legible if you
create simple letters. But in this one, for example, I wanted to complicate myself drawing some unusual letters, and sometimes it could be maybe a little bit difficult to
read, but you get the point. Vertical, horizontal, and
now we go to the central, which is the most common one, I believe, the one that I've seen the most in the
books that I showed you. In this one, the letters overlap or just met around central axis. The most of them, you're going
to see that are mirroring, as well, just because
they look better, they look just more organized, but, you know,
they don't have to be mirroring, per
se, all the time. And this is the most traditional and iconic
monogram layout and personally my favorite. Now, the diagonal one, you're going to see that
I forgot to tell you, but here, I put a little
bit of these squares, kind of, like, to see, you
know, like, what's going on. Like here, for example,
you're going to see that it's the
same left and right. And diagonal now if you get a pencil, I just
wanted to show you. But in the diagonal one, let me just speak the layer. Yeah. You're going to see that the letters are
arranged on an angle. It is elegant, it is dynamic, and it's often used in
calligraphic or flowing monograms. So in this one, for example, I align them like this, you're going to
see that these are going to be the two squares
that I've drawn here. But you could always do
something like this, for example, you could put
this composition or this one. There is an example after
with the calligraphic RAP. The one that I showed
you, I'm going to tell you the logic behind. And that uses a
diagonal positioning. But, yeah, I hope that you get what the diagonal
is all about. And then we've got
finally the random. Now, in this random
distribution, letters float in a non
linear arrangement, meaning it's more playful and letters usually
have different sizes. It can be really, really useful when a
central composition is difficult to achieve because certain letters
sometimes can just, you know, have a more
difficult nature for them to be included
in a monogram. Now, I think the random
distribution is when I don't see how all
the rest would work. I think I go to the random one, and then you're going to
see that you're going to use certain blank
spaces from letters. You're going to see that
maybe using maybe, like, some hierarchy rules that
we're going to see now, you could make this
work, for example, you see that the D kind of, like, hugs the
whole composition, and that's going to be
parenting technique that I've seen used in a lot of
monograms that I'm going to show you now when
we get to the hierarchy, but really the random,
just try to place letters. If I was you, just keep
the three letters on a new layer here on Procreate or Photoshop or
whatever you're using, and just try to move them
around and see how they work. And then, you will
find that maybe, like in this D, for example, I used the letter S as if
it would be my main stem. Okay, so here's a timelapse
on how I sketched these five of them. So
6. Hierarchy - : Hierarchy tells you either how your letters can be
distributed across the piece or which letter has priority and how the
others support it. It's a little bit
complicated now, but you're going to see it. These are five
hierarchy structures that every monogram uses. Okay, so hierarchy defines
sort of the role of each letter or how they communicate and
relate to each other. Sometimes there is one that
will take the spotlight, and sometimes they will all share the same
amount of space. It really depends. Now, if
you go to the beginning, you're going to see
the stacked one. And for the stack one, it's going to be
like one letter just sits directly on
top of the other. It's super simple and great for creating
compact monograms. And you will see that it's the easiest one to
use because you just basically put one letter
on top of the other. This is not the final monogram that I actually
did in the sketch, which you're going
to see because I use the overlap technique. Now, in the overlap technique, letters physically overlap
to create one unified shape. It's really good for
two letter monograms, but you have to
watch out when you are using more letters, since it can get a
little bit complicated, as you can see in this one. We're going to see
different techniques after on how to make
this more legible. Just as a spoiler, one is
going to be different styles, and then different
textures for each letter. Let's say that we were to
paint this let's go to the A. If we get to paint
this letter B, for example, in red or
orange, whatever that is. And then the other one, sorry. The other one with yellow. And the other one
with a blue color, you would see that now, just becomes more readable just because of the nature of
this contrast, right? So I really like overlapping
with three letters because it just becomes a
little bit more complex and just fun to do, right? But you're going to
see the difference in between the stack and
the overlap here, some letters go on
top of the other, and then in front,
you're going to see. And then the same
here with the V, you see that the V is going underneath the M here, but
then it's going on top. So just play with the overlap, and you're going to get really interesting
things like this, especially when you add shadows. And here, you're going to
see that just, you know, letter S, that's it, and then the K is behind. But again, in this example, I'm also going to
make it overlapping in the video that I'm
showing you later. Now, piers through, the pierced through means that a letter
cuts through another stroke. It's not just about one
being on top of the other, but both of them are
creating the same space. Both of them are same important. For example, this K
and the D, right, they're all same importance, and then the V just
is a little bit, like encapsulated here inside, so it becomes less important. But it creates kind of like
a bold and I would say, striking interaction and
really at some tension. Now, you could use the pierce through technique everywhere. So in the overlap as well, now, imagine that this
letter could be like, let's say, the M, could
pierce here, for example. You see? And then here
you could create, like, some kind of a sorry, some kind of a shadow here. So like, let's you see? And even this, you could make it appears a little
bit better like that. But you're going to see that all the rules that
I'm going to tell you today are really
interchangeable. So let's go to parenting. Now parenting works a
little bit different and parenting is just I
came up with this term. Again, I'm not sure.
This is a real term. But I found that it was really easy to kind of,
like, explain, right? So in the parenting one, we've got like one large parent, which would be the big letter L. And then this one kind
of frames the smaller ones. In this one, I tried with
three slanted letters, and I saw that some
letters, right, just become easier
to use as a parent. So the L, if let's
make it bigger, if we get to do a normal L,
right, it would be like this. Yeah. Then there is a
lot of blind space here. So what happens if we do some more classical
retro inspired L? Where this serif goes
there. See that? Now, out of a sudden, we've created here a place where this can act as a
parent to the rest of them. Then one of the
most obvious ones to use as a parent
is the letter C, because we've got this
negative space in the middle. The letter O is also
really good for it. And the letter D,
for example, right, because the D also has this
negative space inside, and they're really
good as a parent. Actually, I showed you
this example where the letter D becomes
the S. You remember? Sorry. That it was something
like this, you remember? So yeah, now let's go
to the mirror one. And again, as I said before, my favorite one because letters mirror across
the central axis. I'm just going to
tell you once again. And you can also call the mirroring
technique just a symmetry. As I said before,
it's perfect for symmetrical pairs that letter A, K, ST style sets really work. In this example, for example, I used a letter T, right? And then I used these two letter Ss as it was
part of the serif of the T, and you're going to
see that this is actually the letter S,
how you should write it. But then when you
flip it like that, when you mirror it,
it's also readable. Now, the most common version
is horizontal mirroring, but you could also do a
vertical symmetry, too. So what I mean by that
is that here you're going to have the vertical axis, right, to create this
horizontal mirroring. But if you use a
horizontal axis, you can create here
this vertical symmetry. Okay, so here's a
timelapse on how I sketched these five of them. I don't include the stack, since it's a bit too simple, and I'm going to
overlap the letter with the K. Let's do this. Once you understand
position and hierarchy, designing monograms
becomes way easier. Now, you know exactly
how your letters should sit and who
takes the lead. Let's now explore the
15 style variations that you can use to bring
these monograms to.
7. 15 Stylistic Traits - Geometry, Effects, Textures & Connections: Now that we've covered
how to position your letters and how
hierarchy works, it's time to get into
the fun part style. These are the 15 visual
tricks that you can use to give any monogram
some personality. You can think of them as different outfits that you
can dress your letters in. Some are simple and some of
them are more complicated. But any of these tricks can completely transform
the vibe of the piece, and you will see that some of them just share
characteristics, and you can use a few of them in one monogram just to make your
monogram look way better. Let's do this. Okay,
stylistic traits. You go to see that I'm calling
them tricks all the time, just because it's easier for me, and I think they are the tricks that will make your
monograms better. So let's go for it. Okay, so the first one is
the geometrical structure. This looks a little bit more modern than the rest that I'm
going to show you probably. You go to see that this is
used a lot in shields for, like, football teams
and stuff like that. The concept is really basic. It's just clean
shapes, some symmetry and a really strong
foundation in construction. You can start by building
either the frame first, or you can see if your letters work nicely with basic shapes like these ones, for example. Let me just select the layer again so I can tell you a couple of things
with this orange color. Okay, so you're going to
see that in this example, I'm using the hexagon. And then I realized
that the letter N was perfect in the hexagon. You're gonna see
like, let's write it. Here, you're gonna see that just by doing this diagonal
line, we got the N. And then I thought,
What happens if you do an N that is basically wider? And then inside, you can
start placing things. You could call it
like I'm parenting the A and the D inside the letter N. So you will see that in a lot of these
stylistic traits, you're going to see there's
a lot of positioning and hierarchy tricks that
I showed you before. So when I place the N, then I could place this letter
A inside and then inside, I could place the letter D. You could also do it
the other way around if the D was to have
more importance. So you could do always, let's say you have
the hexagon let's. Look at letter
hexagon here, right? Okay, let me do it again. Let's concentrate a bit. Okay. Now this is better. So you could also
do that the D is, like, big, and then
you could figure out things along the way. So maybe you could place the A somewhere here, for example. And then the N inside. You could also do
something like this. I just thought that 40 hexagon, I saw the N and I saw a
hexagon because you see, we got that here. And then the A looks really, really easy to do as
well because you've got the shape, you
know, you got the A. And then the crossbar of
the A could be the N. You know, if you
wanted a bit more, maybe a bit more legibility, you could also add a crossbar
here or maybe the crossbar could also be the D. But
I'll leave that up to you. Let me show you how I created
this geometrical one. Okay, so let's go to the
second one visual trick, which would be bevels,
inlines, and extrusions. All the effects that you add in a monogram or just the
lettering would add structure and
elegance with some of these internal or
external details, right? It's not always the best thing
to add all these effects. Sometimes you will
just go with something flat if it's needed
for, I don't know, maybe it's a logotype that
actually has to be used in some print or maybe like a
stamp or something like that, you will always prioritize simplicity over, you
know, making it. I would say, I always
name it punk because I love adding a lot of
details to my pieces, and it's just fun for me, right? But sometimes you have
to abstract things. Sometimes you have to
make things more minimal. But since we are
doing monograms, I thought the second chapter of the stylistic traits would be perfect to talk about
these effects, right? So in this example, I'm using
symmetry, as you will see. And a three D extrusion. And I'm making the letters
kind of like overlap, so I can add nice shadows. You can see here. Again, this is all
going to be a sketch. We're going to do a letter.
Well, we're going to do a monogram that is actually rendered in
the end of the class. But if I was you probably here, I would just go ahead and try. I forgot to tell you, but here
you've got in every trick. You've got a little
let's say pad, little a little space that you can come up with
your own examples or work on what I did here just
to see what is this about? Now, when you draw it here, I think could be really
beneficial for you because as you draw things,
your brain remembers them. So that's why I made
these little thing. So you can just,
like, doodle here what's going on in here. Now, you're going to see
that when mirroring, and I think I told you in
the beginning of the class, but when mirroring
certain things, there's going to be the
letters, wait, let me. Select. There's gonna
be the letter A, for example, that just
mirrors perfectly. There's gonna be others that are a little bit more
indirect, I would say. So, for example, if we
were to do a letter B, we could always do
a letter R, right? That sort of mirrors, and that's an example that
we're going to see later. If you wanted to do
a B, that's also, you know, red as a letter B. But if you do the J and the L, well, something different
happens, right? If you do an L and
you mirror it, doesn't look like an L. Why? Because this letter
looks like letter and J. So you have to watch
out with this, especially with
these two letters. But this was perfect because
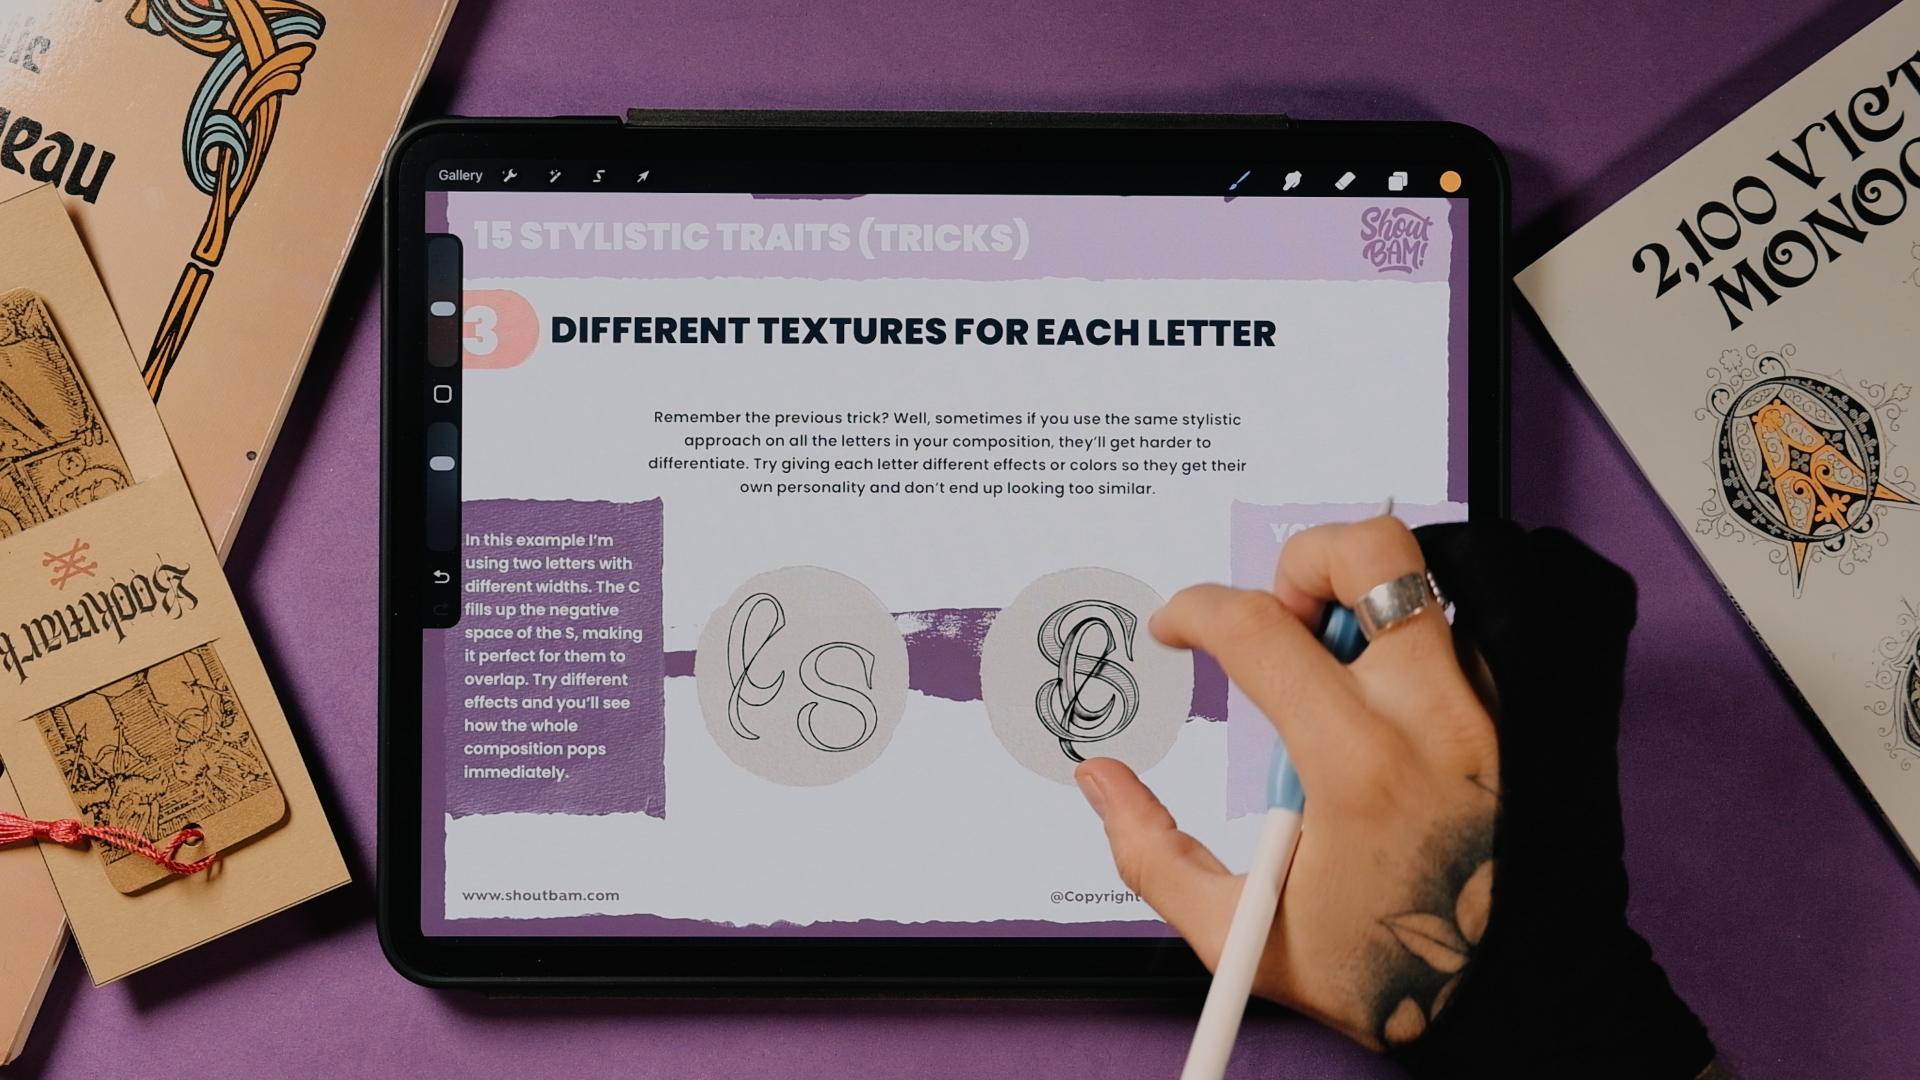
the monogram is JL O. Now, number three, different
textures for each letter, and that's what I was
telling you before. Okay, now, we all remember
the previous trick. Well, sometimes you can use the same stylistic approach
to all your monograms. But sometimes they will get
harder to differentiate, especially if they
are very complicated. So one way to do it, especially when you have three
or more letters is to just use a different effect
on each letter. So, for example, in this
one, I use the letter S. As I was telling you
before, the letter S is perfect to create some interactions with
other letters because we've got this This always
happens to me. So yeah, now. We've got these
negative spaces, right? And they're perfect. You know, here, you could put
an IC letter L. You could put a symmetrical A. The letter S is good because it has the same weight
left and right. When I say weight, I mean, like, you see, we've got this weight here, and
then we've got it here. We've got this weight here,
and then we got a here. And then here we also have it, but in three different levels. So it's actually perfect
to create monograms with especially especially
with something that mirrors. Again, if you were to use a
letter A, you could use one. It mirrors, but it
could also mirror a couple letter as if you
were to do something like, let's say, something
like this, right? And then maybe crossbar
could be here. So you could also do
something very, very nice. Um, so talking about
this one in particular, I put the s in the middle
because I just felt like it was fitting perfectly here. And then just to make it a
little bit more interesting, you could leave it like that,
just like a see, right? And then you overlap,
maybe you can clean this up, for example. But in this example, was really good
that I could just extend this flourish of the sea here just to make it a
little bit more interesting. And so the result gives me some nice overlapping monogram where even the the S goes a little bit on top
of the C right here, and then the C generates some shadows right here
in the spine of the S, and then you always play. You could always
bring the detail of the C on top of
the S or behind. But yeah, just try with
different effects. Let's go to the fourth one. Okay, the fourth one
is called connection. Really easy. It's just like one letter connects
with the other. There's 1,000 ways
that you can do this. But in this example, I
picked two letter Js. It creates unity
and a nice flow. And for this one, it was
kind of given because, again, the letter J, like the L that I
was saying before, creates this nice space
right here in the middle, this negative space here. So the more you
extend the letter J, the bigger or the
most enclosed space is generated here. So
I thought, why not? I could just do the big J, right, and then kind of
connect it to the second one. Now, if you were to
join this shape, you would have one letter J. But if instead, you do this
nice outline like this, like this double outline, you see that you create this that it's really
readable as two letters. Now, you can try with
a lot of letters, but let me show you
the posts of this one. Number five, the
negative shadows. Now, we talked about effects. We talked about shadows. But in this one, we're
going to carve white shapes behind the strokes instead
of adding dark shadows. It creates an instant
three D effect without changing
the stroke weight. So what I mean by that is
that let's say you wanted to add some shadow using
three D shape here, right? So let's say you create
a three D effect here on the letter
L. Now, immediately, when it comes to putting
this one on top of the S, you would see here that it would have changed this stroke, right? Let me Yeah, you see. And then you will have
to add the shadows. But for this one,
it's really simple. You just place
these two letters, one on top of the other, and then you imagine what stroke goes in
front and one stroke and what stroke goes
at the bottom, right? So here, for example, you will see that this
stroke goes on top, and then you just cut this. You just carve it out, let's
say, and the same here. Now, one of the things that
you have to decide as well as when you do shadows
is the light source. So let's imagine that this was in real life
just for a second. The light would come from here. So everything like the shadows will be generated
in here, right? So let's say that the light
would come from here. Now, this shadow would be wrong, so we will have to
cover this up, right? Let's put it in black,
just to show you. And then the shadow would
be right here, right? So just keep a logic. You see? They are here at
the bottom right. Same as this one or this
one. Okay, perfect. Now you have a
little example here as well on how to
achieve that effect. So
8. 15 Stylistic Traits - Ornaments, Mixing Letters & Monoline: So let's go to the next
one, which is framing. Now, framing looks very similar to the geometrical structures
that we saw before. The only difference is that
in the geometrical structure, you don't show the frame, but in the framing technique, you actually do show the frame. And again, as the other
one, you can use circles, shields, diamonds, or
any ornamental shape. Now, frames kind of, like, anchor the piece,
especially if it's busy. Now, for this letter K, which is something that I showed you in the beginning as well, I thought that I would
just mirror this letter K, the original one, which
is this one, right? Here. This keeps
happening to me always. Okay. So this one right here. And then we just mirror it, and then we would add a frame
that is also mirroring. And then you would
create a shape that looks like a unity. It looks like one piece. Now, if you think that
this is too illegible, which, you know, could be because I got a little
bit carried away. You could always just cover
this, as I showed you before. And if you were to paint, let's say, the two case, right, let's add some color here. So if you were to
paint this K in a color that contrasts and then the leaves maybe
in some kind of, like, another not that contrasted tone regarding
the background, you see, you would see that automatically this becomes
way more readable. And if you do the same here, you would read the two Ks. But kinda like this
logo looking monogram. So let's go to the
seventh trick. Okay, now, for the
seventh trick, we've got ornaments outside. Now, this is probably, I would say could be one
of my favorite ones. Maybe I'm going to tell you later that another one
is my favorite one, but I think but I think this one I really,
really like why? And that's, you know, because of my obsession of
always adding more ornaments. So there's two ways
to add ornaments, and the first one that I want to show you is the
ornaments outside. And then in the eight, there's gonna be
ornaments inside. So when you add more ornaments, it's just going to
become more Victorian. Um, more arnubo, just
more classic and retro, which is something that I adore. Now, these ones are usually decorative flourishes that
surround the letters. And what I say here is true. So if you're like me, you will always need more. So just use them because
they look fantastic. I mean, we're here to
create retro looking stuff. So I think things like
that really look nice. So this monogram
was already enough before adding all these
extra ornaments outside. But sometimes you
just want to go, you know, full retro
Victorian and add more. Now, let me tell
you a little bit about how I created this one. So I knew that I had a
letter S and V and an M. So I thought this
shape here kind of does. So I thought this
shape here of the M. So if you were to do it
straight, looks like a V. But then I was like, What
if I exaggerated, right? And I put the V on top. So that's the V plus the M.
Now, if I was to render this, probably I would do like kind of like two tones on the M and the V. So they actually look like they're
different letters. But then, as I told you before, the letter S in the middle
just always looks good. So you see here, the
process is a little bit, created this monogram that
actually looks good by itself. But then I wanted to
add a little bit more. I'm not adding this
in the example. I'm just showing you this one. So let's see it. Okay, so now let's go to the number eight
ornaments inside. These are just
flourishes that are inside integrated with
the letter forms. You can just use
it to maybe create more rhythm inside
the negative spaces. So for example, here on the J, I thought that, you know, just to make it look a
little bit more retro, I I would just add more
of these flourishes. And then I came up with
this nice style that I used a couple of times before
with letters like this. I started with
something like this. The idea was to do
something like this. You will see that
in the example, I already go directly with this. But I thought how
to integrate, like, a letter J with the F. So I thought here how one letter could become the
other one, right? So you've got the letter J, and then when you move
this letter F inside, you will see that, let me just draw
it for you here. So when you move
the letter F here, you will see that this part of the J can become a letter F. And then
just by adding one here, we got our monogram. So let me show you how I draw. Okay, so now number nine, mixing letter styles,
really easy one. You can use different
effects on each letter as we see as we
have seen before. But what about using
different letter styles? Now, this is really good when it comes to a
two letter composition. If you add three letters, it becomes more and more tricky. You can still use
it. By the way, I did use it in some of the
monograms that I showed you. But if you are
using two letters, as I tell you here, just make sure that the letters are really apart
from each other. Something that I really
like, for example, is Gothic versus San Serif, because they're just so
separated, it looks really good, especially when you overlap the shapes or when you
had shadows and effects. And this one, for example, is the other one
of my favorites, which is script versus Serif. Now, this is perfect because
you've got the letter V that adds this really stability in the center of
the composition, and then the letter J
just hugs the letter, and it does, you know,
some nice overlapping. And in this one, you don't
have to use, per se, two texturing
styles because it's pretty obvious that
this is a V and J. But why not? You can try different styles and also try different textures. Yeah, let me show
you the example that Okay, number ten, monoline. Now, you will see
that at this point, some of the rules kind of can blend with each other
because this is basically drawing
one letter that connects with the other
or using the same stem. But I put you this
example because it was a really good example
for what a monoline is. You remember that
two double J here, which was it negative
shadow connection? Yeah. This is also
kind of like monoline. Maybe here on the Serif
kind of loses it, but you will see that this has the same weight going through the
whole monogram. So this ones, like, are
really, really readable. And in this example, I wanted to kind of parent
some of the letters. So like, inside the
L, sort of, like, maybe the R. You're going to see that I'm just
using two strokes here, so I'm using this one
let's make it thicker. Using this in one stroke
and then this in the other. But this one, since
it was kind of becoming really simple
with the composition, I thought, why not
using some bebl? So really like how
it turned out to be, and it's really, I believe
it's really readable. So let me show you how I draw.
9. 15 Stylistic Traits - Sharing Stems, Stacking, Strokes & Balance: Okay, so number
11, sharing stems. As we already seen here, you see that like the L and the R are sharing the same stem. But here, I wanted to explain it just a little bit
better just in case. Now, two letters literally
become one monogram. By sharing the main stem. Now, for this rule, it's
very important that they share kind of like
the foundation stem, like, something that becomes really important
for the letters. Not just a flourish that connects with the other
like we've seen before, or like a crossbar or
something like that. But for this one, I wanted to
create this kind of, like, rule that it's always sharing, like, the foundation of it. L you know, the first line that you will do when you draw an A
is this one, right? Like, this one, and
then you would do this, or like this one, and
then you would do this. And then for the B,
you always would do the first foundational stem, and then from here
you would do the B. So that's the one that share that they
share in this bool. So for this one, I
started like very simple, as you will see now
in the time laps. But when I was cleaning
it up, I was like, What if we exaggerated
a little bit, just to give it more
personality because you can find a lot of these ABs online. So I thought, like, let's
just go full steam here. Again, maybe you could use, like, a couple of colors here. Let's say, like, if this
was an orange here, then everything
else could be like a purple. Just an example. Obviously, I wouldn't
use these colors, but you will see that now
if you use two colors, then it becomes really
distinct, right? So, you could add maybe
some orange here as well, like if you were to to add some nice lights
and shadows here. And you would see that, like,
the whole thing would be more visible by separating
the letters in colors. But yeah, let me show
you the example. Okay. So now let's
go to the 12th. Which are two letters
forming one simple shape. Again, same rule as, you know, sharing the main stem, one letter connecting
to the other. But in this one, I wanted
to show you that just by adding a little trait of
one letter into the other, you could make a monogram that
is actually very readable. So for this one, I was
drawing the letter K, and I thought, Hey,
wait a second. Actually, this part
could actually look like an E. If
you could modify it. Obviously, you could do
something more, you know, um, exaggerated like that, and still would be
readable as a K. But I kind of like this
shape for the E as well. So I just edit this
little middle arm here, and that's it. That's how I did this K E
monogram. Let me show you. Okay, so now that
we've got this one, we go to the 13th almost down here with the stacking
letters. Really easy one. When you don't know what to do with your
letters, stack them. It's always going to
be a nice result, and then you can always join
some parts of the letter. Like, for example, in this case, I put them diagonally, which is something
that I've seen a lot on a lot of these
calligraphic examples. Instead of just putting them, you remember in the
beginning when I was showing you the the positioning, right? So you would have the
horizontal vertical, and then you would have
the diagonal, right? So if you put them a
little bit diagonally, they will always
work really well, especially with calligraphic
things that you can add, you know, you can add
these flourishes, sorry. Little glitch here. You can add these little
flourishes and kind of, like, frame this together. So this is how I did
the monogram for the RA P. And once I
stack them together, I saw that the leg of the letter R could become an extension
of the piece bowl. So just like this, right? So it comes down and then it
goes to the piece bowl here. And then at the same time,
since the A was in the middle, I was like, What if I erase
the crossbar of the A? Because this is
already crossbar. So this is what happens. Let me show you how I drew this. S Okay, now let's go to the 14th, and it's one single stroke. So the entire monogram
looks like you could draw it using
one continuous light. It looks flowy and calligraphic, and it's great for
signature style marks. So, for example,
this one, right? It doesn't have to be drawn
per se, as I tell you here. It doesn't have to be
drawn in just one stroke. But if you were to
draw it in one stroke, let's think about it, you could actually do it, right? So you could start right here, for example, and then go
here and then do this. And then, obviously, just
like you go add the crossbar. But I just hope that you
see, like what I mean. It's kind of like one line just connects with the
whole thing, right? And this is how I
created this AM. Now, I wanted to make it
just a little bit better, so I added some extra
elements, some flourishes, and some nice serifs, and also a couple leaves here outside as one of the rules
that I told you before, the ornaments outside the
monogram. Let me show. Okay, and now, finally, we've got the dual stroke. This is probably I would say, one of the most complicated ones because it's quite
difficult to explain. Let's see if I can do it. So the negative spaces of this monogram has
the same weight as the strokes themselves. It creates sort of like a
nice, very rigid structure. That has a lot of
visual harmony, and it really works with a little bit more like modern
monograms, I would say. But obviously, if you add
a couple of these serifs, then it goes retro once again. But, you're going
to see that if I show you here with a
monoline brush, right? Like, let's say, something like let's see,
something like this. Yeah, that would
work. So you see, if we draw the letter T, yeah. Now, you can draw the
letter S right here inside, like using the
parenting technique. But then if you were to compare the thickness of the
stroke of the letters and then the thickness of what
would be the negative space, it's going to be the same
all across the piece. Obviously, in some places, it just becomes thicker just
because I needed to do it. But, in some of the places,
it's just the same. So it becomes like this kind of, like, labyrinth
looking like logo. Now, here I'm trying to
explain it, as well. So before I did the letter T, and then I came up with these
very structural letter Ss. But then I was like,
when you place it here, then we've got something
going on, which, you know, could have been good,
like, maybe to bring the S up and then bring
it down and maybe, like, add some shadows and
add some overlap here. But then I thought,
What if I skew it? And then I just
mirror it, you know? So I put this as here, and then I mirror this one
and I skewed it like that. So now you've got this nice spacing, and we've
got something like this. Obviously, in the sketch there, you know, it's just a sketch,
so don't mind it much. But, if you were to
render this better, then you would keep really the structure, just like
I showed you there. So yeah, let me show you
how I've drawn this one. These 15 styles are the core building
blocks of any monogram. You can use them
individually or combine two, three, even four of them, or even more in the same piece. In the next lesson,
we will sketch our final piece using some of the techniques
that we've just seen. I actually think that I'm
going to pick five of my favorite monograms and combine their styles.
Let's see what happens.
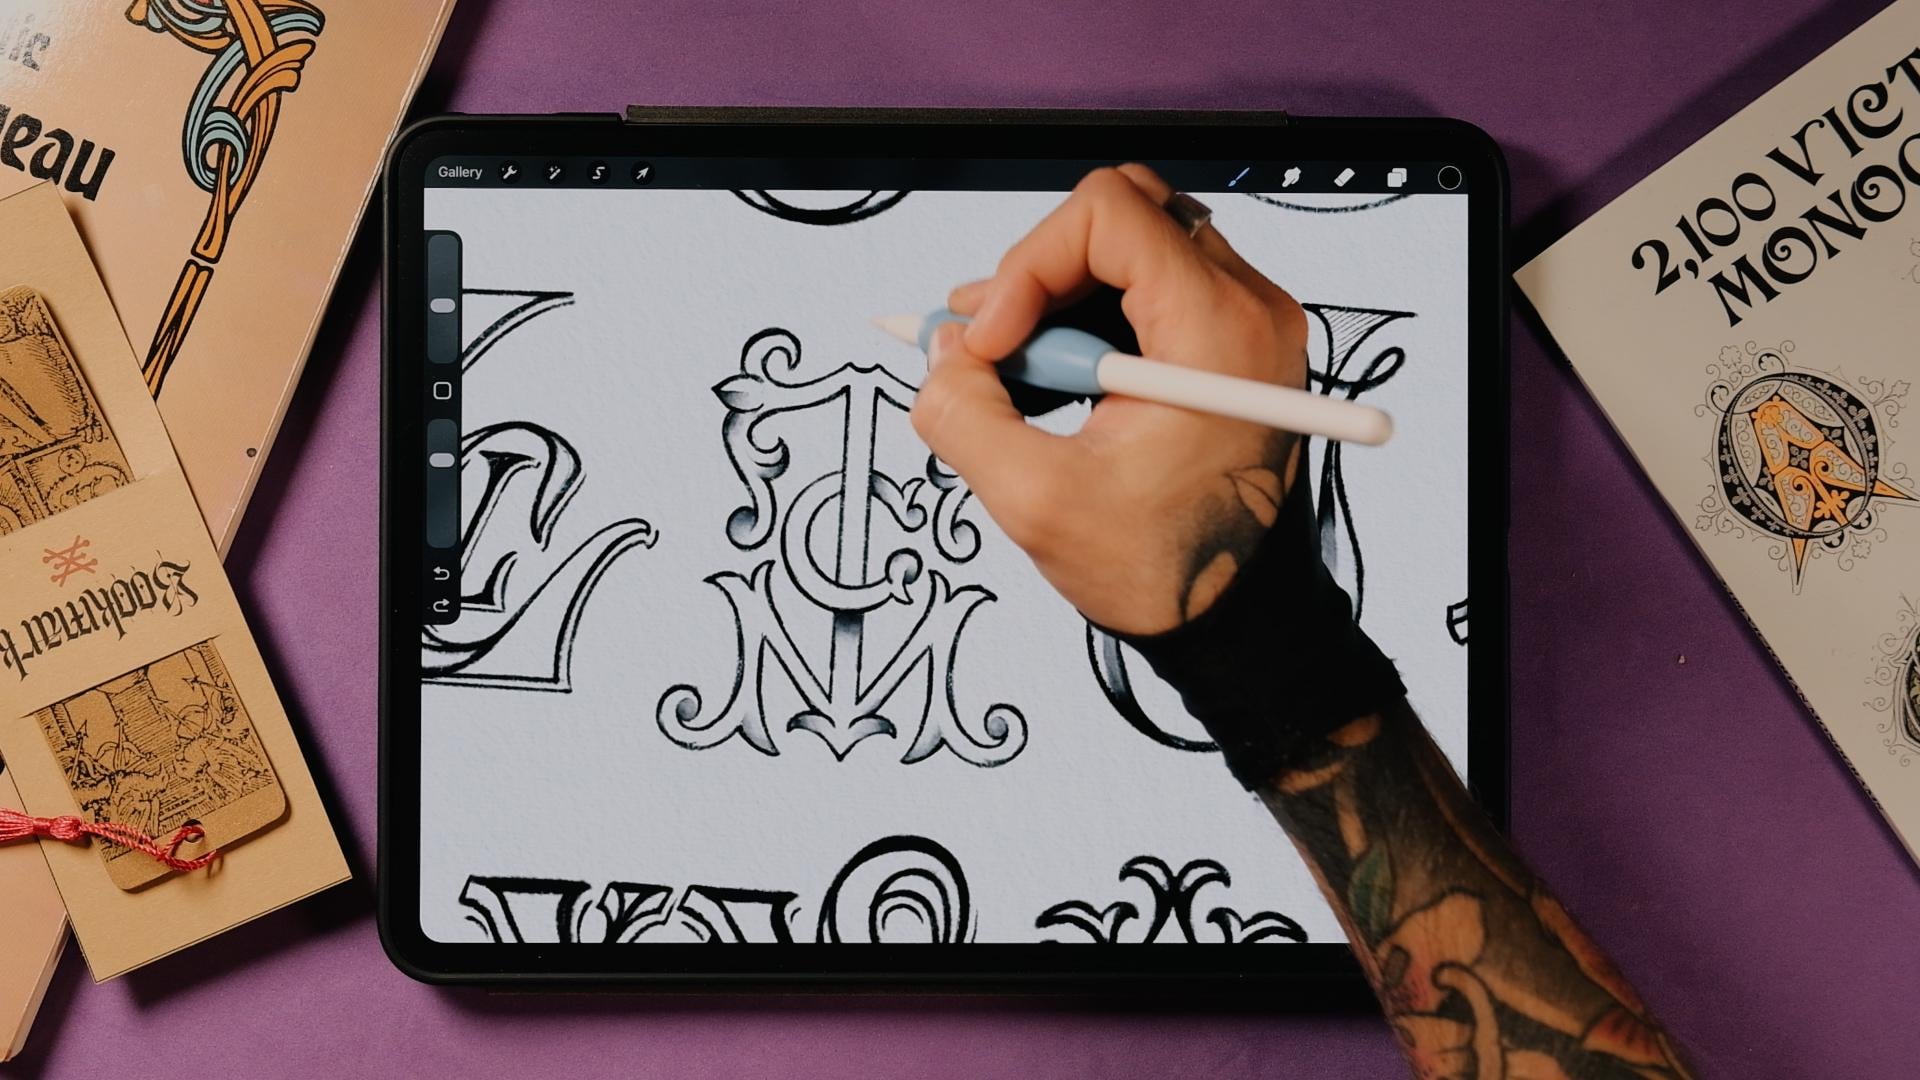
10. Final Monogram - Sketch: All right, time to actually
put all this theory to work. I'm going to grab a few
of the style tricks and hierarchy rules
that we just talked about and sketch a
couple variations, pretty much the same
way that I would approach a real client project. For this piece, I'm thinking
of mixing textures, maybe adding some
bebels or an extrusion, going heavy on ornaments. And if the letters allow try to make them pierce
through each other. Let's see. Also, I'll probably add a few extra
ideas along the way, because that's just
how my brain works. I'll sketch three
rough thumbnails, show where things fall apart, and then push the strongest idea forward into a cleaner sketch. This monogram could totally
work as a personal logo, since it's made using
someone's initials, but you can also imagine it living on some
retro product like a vintage perfume label or
an old school book cover, cigar box, a ceramic
bottle, or even on fabric. Monograms always carry a story, and part of the fun is imagining where they could exist
in the real world. So for today's monogram, I'm gonna do M R B. And let's see what traits
we can get from this one. I really like all the
flourishes and the leaves. So I think I'm going to get
something like this for sure. And I really like, as well, some of the bebel here or maybe some of how the letters
are interacting here. I also like this a
lot. So let's see. Now, the first
thing that I'll do is I'll go to Canvas, right? And then I'm going to activate the drawing guide,
edit drawing guide. Now here, you probably had it into degree I already
had the symmetry on. So here you can choose
the color of your line. And also the opacity,
so you see it better. And for now, I'm going to
use vertical symmetry. I told you that you could
use a horizontal one, but it's not that common and
it could get complicated. So let's use vertical,
and tap here. And now I'm going to
create a new layer, tap on the new layer
and make it a drawings. Perfect. So now let's
start sketching. Now, I'm going to start
maybe like with an M that looks like this one,
something like this. You'll see that sketching
with the symmetry on its going to be way easier. So maybe something
like this that could do maybe some sort
of shape like this. That could be nice. And then maybe I could start already placing
the mirroring here. So maybe. The B here and the R could be, like, located maybe
somewhere here. Maybe make them a bit thinner. So let's see what
we could do here. So this could be the B. And then, obviously, like, let's make this a
little bit smart. Yeah. Perfect. And then we're gonna fix
this into a lever R. Nice. So here we could I don't
know, maybe, like, make a little bit more
sense of these stems here. Maybe something like
this. Interesting. And then maybe the M,
obviously, let's make this. Some of the rules of the M, if you want to do a high
contrasted M will change because if you were to
do a letter M like this, this one would be thin, right? Then this one would be
thick thin and thick. But since I'm using
it in the middle, it kind of go like Zami could, but I wanted to for it to be completely symmetrical
and mirroring. So I'm going to have to bend
the rules here a little bit. So maybe something like this. This looks quite alright. And then maybe this could also be high contrast it.
Yeah, this looks nice. Okay. So maybe now you
can tap on the layer. Stop making the drawings. Now here we can fix
up this letter, so we can make it
into a letter R, for example, maybe
something that. And then here, if you
have the time, obviously, you can refine it a little bit, make it sticker, and make the
parts more distinguishable. So for example, this one,
should be here. Right here. We could have
something like this. Now let's get this sketch, make it smaller and go to
put it here on the left, and I'm going to do
yet another one. New layer, tape on
it, and drawing zit. Now for this one, I
want to do really this letter M. I'm going to go ahead and try to make something that looks
more similar to this. Is it something like this. Yeah. Then here there is like,
these two circles. You can do them
perfect if you just make a circle and then
with your left hand, left finger, just tap on it, and it's gonna be
perfect like this. So you can do
something like that. And then the M could
actually come from here. Angles down, I guess. And then maybe make, like, a nice terminal here, nice kind of, like, leafy serif, I would call it. Again, using my
own language here. Um Hmm. Interesting. I
think I like this. And then this could
be also maybe, like, thicker here,
yeah, whatever. You get the point here.
Something like the one here, but instead of this more
like straight shape, maybe something
like this. Great. So now let's do the R and the V. So maybe we could get
and do some stem like this. Maybe just a more down. So we could go here
in the middle, right? Like there. Sometimes I just think
about the overlap, you see? So if we overlap it here, it's gonna be better if we
overlap it here in the middle. So that's something like
this. Now we go down. This stem is gonna be a
little also like following this natural arnubos
arnubos shape. Sort of like more natural. And then maybe, like, do
something like this here. Actually, I want to
make this way bigger. Yeah, B like this. You're going to see
that I always go from pencil to
eraser really fast. It's because I have
the new Pencil Pro. So if you have it as well, you can activate it by
going to the settings outside the Apple Pencil
menu in the IOS settings. If you want to know how
and you don't know, you can always send
me a message, no. And I'll take you
there step by step. Okay, so now with this one, I could do the R.
Let's try to do the R here on the left, sorry, on the right side instead of so this could be
somewhere like this. Interesting. And then here, I can do some shape like this. For the R. So like. Hmm. You will see that also, sometimes the shape
looks good here. But then when it's
mirred, it really doesn't if you fix
the one on the left, and you make it
prettier, automatically, this one will become
way better as well, even if you don't see it
when it's on the right. That's why a lot of
lettering artists would flip the canvas just
to see things better. Okay, cool. So Interesting. What else now? We can
deactivate the drawing assist. And here we could the B. I think I'm gonna bring this
even more down now. Yeah, maybe like this. Connecting here, the B. And the shape just
go here like that. Great. Maybe we can
extend it a bit more. And this could also even
hug the letter M a little. Food. Nice. Okay. Perfect. Now I'm going
to activate again. The drawing assist to
change the M one more time. So I'm going to bring
it here. There. Now it starts looking better. So I'm going to do the R again. So it hugs really
nice here, brings up. Awesome. And now
just finish this. Great. So now I could actually do some sort of
flourishes outside as well. So let's put drawing
assist back on. I'm getting too
excited with this one. I should go faster
doing this one, but I kind of like
what's happening. Sometimes it happens then I just get stuck with one sketch. So there could be
something like this, maybe a bit bigger, but
it will do for now. And then maybe even we
could add a couple here. And you're going to
see that now it's not since it's not mirroring, like 100% because
of the B and the R, which is this indirect mirroring that I was
telling you before. You're gonna see that here
it's gonna go on top of the B, but it's also nice because then you can add some shadows on top. And now here, finally, like,
I'm missing something. So maybe the M
could I don't know, do something like this. Great. Thanks, and then
maybe even one more. And here we could add. Maybe something like
this. What do you think? Think, I definitely got carried away with this
one, but I like it. Now let's make it smaller. Let's also put it
here to the right. And now let's make the last one. Now, for the last one, I want to do something that
looks more like, let's see. Well, I kind of like this, too. So maybe maybe we could
do the that does this. Remember to activate
the mirroring. So maybe we could do the
that looks like this. Again, possibilities
are endless, and I think it's so fun
to create monograms really I did a lot of them before as logo types when I was doing more,
like, graphic design. But lately, you know, like when you learn
how to do lettering, this is just incredible. And I've been doing lettering
for the last ten years, but I never paid so much attention until I wanted to create this class at
the beginning of the year, and I started thinking
about techniques and how to how to just make
the process simpler, which is what I try all the time every time
I teach something. So, hm, we could definitely
do something like this. And then from here, it could be. Hmm. Interesting, and then maybe down, and we could finish. Like that. And then we
could have a babble here. And do something. Yeah, and then this beble would
actually go here. For example. Yeah, maybe,
something like this. Hm. Interesting. So we've got some things that
are going on here. Now, let's try the BNR. I think I'm gonna follow
this shape as well. So you can also create a
new layer if you want, so you can erase easier after. But now we could do
something like this, maybe. Maybe not until,
maybe until here. And then do this two. Maybe they can meet
here in the middle. Interesting. And now
let's see the B could be. Something like
this? Any thoughts? I think this could be.
This could be interesting. Nice. Let's let me add the weights. Hmm. And then here,
something like that. Interesting. Okay.
Now we could even do nice flourishes up here. Maybe a detail here as well, similar to what we did before. And now you can turn off the cyst and decide which one you want to
make into a letter R. So you can make this one. So we could do something like this, for example, maybe
this is too thick. So maybe something like this. I'm still following the
same curve somehow. But really, if you're mirroring, just you really have to make sure that a lot
of parts mirror, even if everything
is not mirroring, but, like, most of it is. Okay, we got it. Yeah, we got it. So just gonna pins
together, make it smaller. And just place them and you can pinch it together as well
and see what you like most. For what I'm looking at, I
think I like this one better. So now I'm going to just give you a little bit of a time lapse of me
redoing this one because I think I'm just going to put it as a
reference and draw it from scratch and see
where I take it. But it's gonna be
pretty similar. I just want to make it
a little bit cleaner. I'm also going to give you
the final sketch just in case you just want to apply
the effects directly. You will always be
able to do that, too. So just make sure
that Wait, is here. I think I'm just gonna
change locations now and go for a coffee
a little second. So yeah, let's see what
happens with this one, and we're gonna render it.
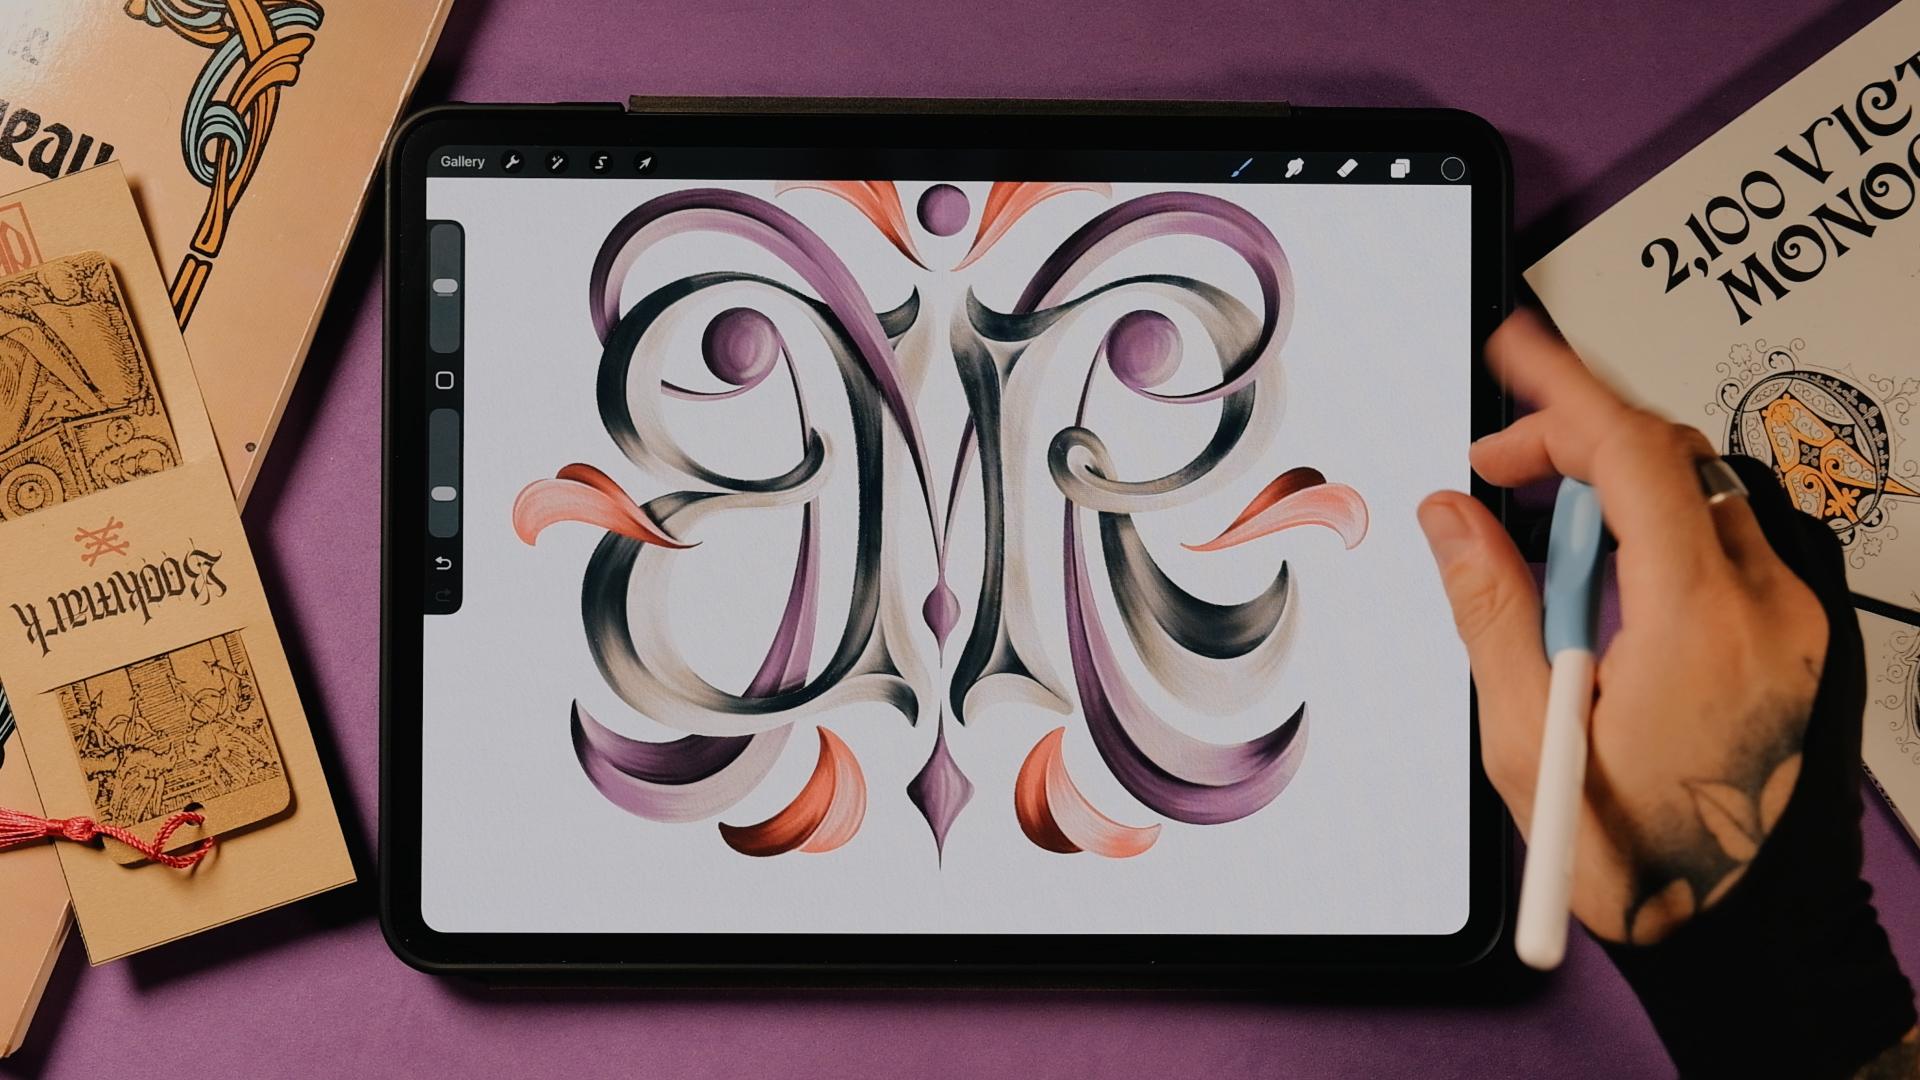
11. Final Monogram - Color & Texture: Okay, now let's make it shine. I'm going to clean
up the letters and add some colors and textures. Remember that you can download the brushes and the
color palette musing. So go do that before
we get started. Okay, so here is
the final sketch. Yeah. Remember that you
can download this sketch, as well, and you can start
rendering on my sketch. Or it would actually
be better if you did your own and do it there. But again, do whatever
fits most right now. So I'm just going to show you the different
layers of this. So first, we're going
to go with the B and the R. Then we're going
to get the solved. I wanted to actually do different effects
for both of them, but I think in the end, I'm just going to use bevel on both. And then finally, we
got the elements aside. So let's do this. I'm just going to
group this together, and I'm going to
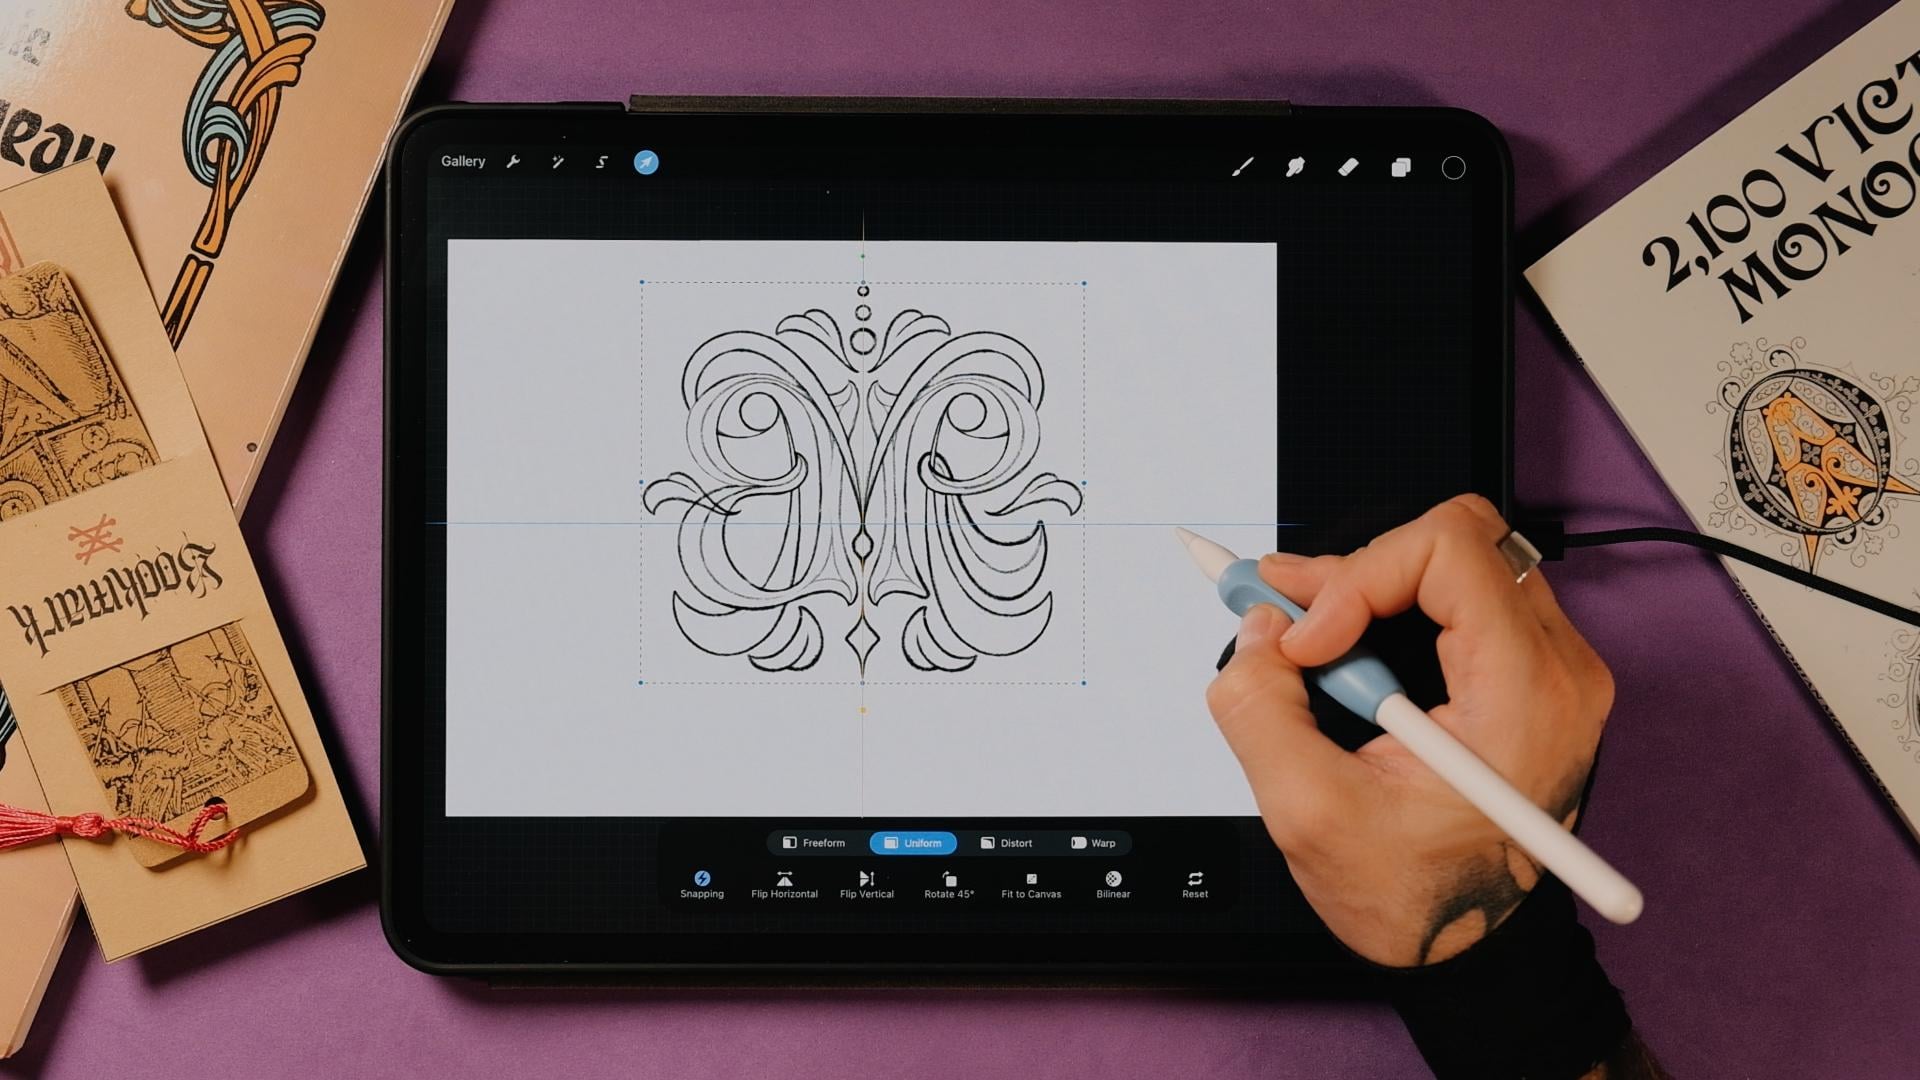
name this sketch. So I'm just going to go
to the Transform tool and make it bigger. Remember, it should
be on uniform. And I always have
the snapping on magnetics and snapping
just so I can snap here in the center until you see this yellow cross horizontally
and vertically. Perfect. Okay. So I think I'm just going
to maybe go step by step. So if I render this is going
to be easier for my eyes, I'm just going to bring
the B and R sopsty down. Perfect. And I'm going
to create a new layer. Now, the first thing that I will do is to paint this on
the same color base. So I think I'm going to use a neutral color like this one, and then I'm going to
add lights and shadows. So I'm going to tap on it, making a drawing assist. Remember that if you
don't have it activated, you can always go to Canvas, drawing guide, edit
drawing guide, and then symmetry here. And remember that it should
be a vertical symmetry of. Perfect. Let's start. Now, here in the brushes
that I'm giving you today, you have a lot of them
to add some effects. You could always do
just a grainy effect, which is one of my
signature styles, but it takes a long time. So I think today, I'm
just going to show you how to do a little bit of, like, coling markers,
probably, like, some dry shader technique. And probably we're going to add a bit of grain, but not much, just to see what mix
technique could look like. So let's go to the chunky
brush, and then from here, we're just going to
start rendering this. I want to give it this sort
of, like, painterly look, so you don't have
to make it perfect. So I think I'm going
to start with the B, actually, and then erase the
parts that I don't like. There. But here, always just feel free to add any kind of style that you want. If you've been checking my
other tutorials and classes, you can always just get another style and just try until you get something
that you like. You don't necessarily
have to follow this look that I'm
going for today. Nice. Now, let's
drop color inside. Remember, without
lifting your pencil off of the screen,
go left and right. And you're going to see
that if you go left, you're going to see
some gaps here. And if you go to the
right just before you flooding the whole
page with color, it's going to get better.
So let's do it again. You see, right
before you flooding the whole thing, stay there. And you still have
to go here because this is a dry brush, so there's gonna
be some parts that won't get perfectly covered. Nice. Now. That's the other one. Also, if you have to do different
parts, you can do this, and then continue
filling and tap both. There. Okay. Perfect.
Nice. So now I'm going to bring this
sketch even a bit more down. Wait, it's here. Perfect. Now let's create a new layer. Let's make it a clipping mask. And now this is going
to be for the shadows. You can always put here shadows. And now we're gonna get
one of these darker tones. We can start maybe with this one and then
get darker after. And we're going to add
some shadows here. So I'm going to start
with one letter. I'm going to show you
how to do this one so you can replicate
it on the next one because otherwise we will
be here for a long time. So I'm going to do the letter R. Now, you could mirror as well, the shadows and lights. But I think I'm going to
make it so kind of like the lights come from
the bottom right. So the shadows and the lights on both letters won't be
actually mirroring. It's gonna be quite
the opposite, really. So yeah, I'm just I'll
just do it like this, and then I'll show you
where to put the shadows and lights on the B so
you can finish it after. And then we're going
to go straight to the letter M. Great. So now I'm following these lines that I did here in the sketch. So I'm also gonna get the
chunky brush for now, and I'm just going to mark
where the things are at. So now, the shadows will be
in this part right here. So I'm just gonna add maybe
with a smaller brush. Just like a little mark
here like that. Nice. So that's gonna be a shadow. And then right here, we are going to have a light, and here we're gonna have a little bit of shadow, as well. I'm just gonna
work it like this. And then here as well. So I'm going to
start with this one. And now the shadows as
well will be right here. But let's do this
ones first, right? So now that we have this, I'm going to go ahead and get maybe, like, the
coloring marker. And I'm gonna start
adding some shadows here with this marker. You don't have to zoom
out zoom in so much because then you want to
see all the imperfection. So maybe it's better if
you just do it like this. And then this one
will go inside. Like that. Perfect. Now on a new layer. Sorry. Clipping mask and
even with a darker color. I'm gonna add some more. And we're gonna do this until we get the result that we like. For now, I'm just gonna
do it on the corners here. On these lines. And then we're gonna do the triangle effect
that I always use. So I'm gonna add darker here
as well on the other side. And then the shadows will t here in a triangular
shape like this. We'll kt like that, and then from here, we're
gonna do the same. So from thicker to thinner
here in the middle. And here in the middle
it's gonna be darker. Same? Triangular. Boom,
boom, boom, boom. I like that. You can always go to this much too, just in case you mess it up so you don't have to erase it. You can just much it a bit. That's There. Okay, perfect. Now, let's
go to the next layer, and then this is gonna
be for the lights. All right. Pre name lights. There. And now go to this light. I'm not gonna go full blight. So yeah, go with
this second one. And now, again, let's go
for the chunky brush, and let's add our lines here. And then here we will
do exactly the same. So I'm going to go to
the coloring marker. And let's make this a
clipping mask, I forgot. Gonna add some lights here. So they meet in the center. You can always erase. If you go inside the shadows, you can always just get
an eraser and erase. You see, now I'm taking
less care of it. And now, always with
this much bras you can. And you can always
add the color of the base right here in
the center, for example, and then you can smash
it up a bit. There. Now, let's add some
more white up here. Sorry, with this color. And then here just from it. I'm gonna. Perfect. Now, what would happen if
we go to this side here? So now, this side, let's start with the
shadows like we did before. So let's go to the chunky brush. And now here, you
can do it the same. So the shadows would
go right here from let's say somewhere somewhere here to here for now.
That would be shadows. So you can make them darker so you know where
these first ones are. So let's do the
triangle thing again. Let's place it somewhere here. And you see that now, we're going to meet the lights here. So right here when we are
about to meet the lights. Bit darker here. Let's actually at on the
second shadows darker tone. Then we do the same here. But this time a bit smaller. And remember that you can always erase what you don't like on the other side or just that the lights on
top, and that's it. Great. So now let's
go to the lights, and we're going to do
this meeting point here. Yeah. Perfect. Now, you could even turn off
the sketch now, so you see how it
actually looks like. And now, when we are here, we are just going to do shadows here and
lights down here. So now, since we are
in the light layer, we're going to go
the chunky brush, and we're just going to
kind of invert this, right? So on this other side, there's
going to be the lights. Up until here. You see, like this is gonna
be the transition point, so bring the let here. And then we're gonna
start with the shadow. Smooth it out. There. You can always smooth up the
shadows as well. A little And let's now do the final shadows up. I mean, the final
forts part, obviously. Now, let's go with
a darker color. Smooth it out and erase some light tones here
if they are on top. And that's how we
would do this effect. Now, for this bee, it would be similar, but for example, this would
be a little bit different. So you would have the shadows
right here, for example. Here on top, they would
be exactly the same. And then you would get
the lights right here. Right? So now, this
could look like, Oh, you're doing the same. Well, actually, the
right parts, right, they're going to become lighter, and then the left
and the upper parts, they're going to be
with the shadow. So what would happen
if I invert this, if I actually let's say
for a second, right, we duplicate this, we go to the transform tool
and we flip it horizontally. You would see that
here, it looks good. I'm not saying that it doesn't, but the shadows are placed
kind of incorrectly, especially because I
said that the light will come from down here. So you see the shadows are here, and I would like the
lights to be here. But anyways, you could
also do it like that. If you want to go faster,
it's really up to you. So let me finish this one, and I'll see you
in just a second. Okay, so I'm done
with the R and B. You can see that
pretty much it's the same that I did here and here, but I just replicate it, bear in mind that the light
source comes from down here, and you're going to
get it really fast. Okay, so I also by the way, I also have a Bbel tutorial on my YouTube channel at ShabeM. So if you put Procreate Sha Bem, you're going to see it there. I also break it down
using another technique, so you can also check
that out if you want. So here we've got the
that I already rendered. And in the sketch
that I'm giving you, actually, I'm
putting a line here. So if I isolate this, you're going to see
that in the sketch that I'm giving you in PNG, I included a line that goes
right here in the center. So if we were to do
the drawing assist, we would see and if you're doing it yourself
here without my sketch, you can just go ahead
and do a line here. So that would be pretty much it. And then the same here, so no so we know where the
bubble is gonna be at. Great. So now we can bring this back. And again, in the same way
that we did it before, the first clipping mask is
going to be for the shadows. So we can grab the chunky brush and use this color and
start with the shadows. I'm not going to show
you again a lot, but I'm just gonna tell you,
like, what colors I'm using. So from here down, I'm doing this one there. Right, so I'm just going
to turn off the sketch. So this would be the shadows. And then in another layer,
we don't have to name it. Since it's just the example, I'm just going to go
and do the lights with one of I'm not gonna
use the white color yet, so I'm going to use the
second one as well, the same as we did down here. And then on the opposite side, you're just going
to do the lights, remember to go back to
the coloring marker, make it bigger, and
just add lights here. There. And now you can go
with the smudge. Using the same brush
and smudge it. There. Actually, you could
also use the pink here. Maybe that's maybe a
little bit too light. So you can use this pink and then go to the shadows and
also smudge it a little bit. And that would be it. Let me put you the
little tine webs. Okay, so now let's hide
some of the things. I'm going to go
first right here, and I'm gonna tap on the
purple layer and add a mask. Now, with the same brush, we can use the chunky
brush with black. We're just going to erase
this and with white, we're gonna bring
it back to life. So don't worry if you overdo it. So select the black
again and erase. Great. Really. Now, I'm gonna do this one, as well. Or we can leave it
behind, for example, and just reveal this part
right here, for example. Or not, actually. Let me just do it all. I think it's gonna be better. Perfect. Now, let's see. We can maybe hide this one. You can also erase like this, and then with the white color, you just bring it exactly
to where it belongs there. So now we see exactly where
and not the same down. There you go. Perfect. Now we can always let's say, if this one is hiding, this one be on top,
that this one could also be hiding behind. Sorry, I'm gonna get the black. And I'm gonna do this.
What do you think? Yeah, I think this
could look nice. So again, erase a bit more. And then with the white
color, let's bring it back. There. Now, let's
do the same map. Perfect. And then finally, I think I'm gonna hide
this one right here. Again, this is really up to you. And pretty much everything that you hide or reveal is
just going to look good. Perfect. Okay, so now
that we have this, we just need to do a
couple more shadows. So I'm going to go to the BR. I'm going to add a new layer. Gonna make it a clipping mask. And now here with a darker
color like this one, and we can use the dry shader
since we didn't use it yet. And I'm just going
to add shadow. So if the light comes from here, and there's gonna
be some shadow. Up here, for example, There. Then there's gonna be
something here, as well. What else? Gonna have
some here? Oops. What I did here. I was supposed to erase
more. Sorry for that. Yeah, better. Okay,
now let's go back to that layer. Okay. And now I'm gonna add
another layer on the M, and I'm the same,
so clipping mask. And then add shadows on the M. What else? My here. Mm hmm. Here. And
there we have it. I think that's pretty much it. Here I'm forgetting some
of the lights on this, so I'm just going
to add a few lights here with the coloring marker. Now, I'm going to go to actions Canvas and turn off
the drawing guide. And that would be the
result for today. Now, a couple more things
that you could do, for example, is to change
the background color. Maybe you can put it darker.
So something like this. Actually make it pop
a little bit more. Even darker, I would say. This looks actually really good. Now, we could even
do some drop shadow, even though right now, I
don't think I'll do it. And for example, we
could add a texture. So we create a layer
in the background, and then we can play a little bit with these
brushes right here, so we could do a
soft texture brush. And then with a
complete light color, we can add some of this
texture down here. You might not see it
in the camera, though. And then maybe with
this purple tone, we can give a bit
of purple up here. Just add that nice texture here. There you go. Maybe even a bit
lighter pink. Up. Actually, I'm doing this
the other way around because the light
source comes from here. So we can grab this texture, go to the Transform tool, and rotate just because I'm used to do it all the time,
the other way around. Perfect. Now another layer, and with a black color, we could add maybe
like a marble wall texturizer maybe a bit. We can change the modes here. Really play with
these brushes and see what you like better,
what you come up with. Something like this
looks good enough. And then maybe even
I know what I do. I'll do some cracking
paint as well. And in the end, we didn't
add the grainy textures, but it really doesn't
matter right now. So now, I'll turn off all
the background layers, and then I'm going to
go to the wrench tool, Ed and copy Canvas. Now, go to go on top
of everything else. The fingers down the
screen and paste. Now we got our monogram here, so I'm going to
create a new layer, make it a clipping mask. And now with the cracking
paint and a black color, I'm just going to add
some cracking paint here. Just to make it a
bit more rococo. Like it's old. And now, go to the soft light and leave
it just like this. Now, let's turn
everything back on, and let's repeat the process. Wrench tool, copy canvas. Sorry, we just did
the sketches as well. So let's erase the sketches. Now, again, copy canvas, go on top of everything else, three fingers down the screen, base, go to adjustments. We're going to add a
little bit of noise here. At about, I would say, 12%, and then go to
adjustments again, and let's add a little bit of a chromatic aberration,
just a little bit. Here's the finished monogram. You can see how different
textures give it volume and actually help
the legibility, too. The ornaments frame the
whole piece really nicely, and the colors just yeah, they pull everything together
and make it feel complete.
12. See you next time!: So now you got all the tools to create your own
set of monograms. Maybe you can try your
initials first and then experiment with different
letters and hierarchies. Every monogram tells a story. So if you create your own, I would really love to see it. So share your project
with the community, and if you want feedback,
I'm always here for it. If you want to go
further, you can check out my other classes
here on Skillshare. And if drawing letters still
feels a little bit tricky, I've got full step by step
alphabets that you can use, both analog and
Procreate versions. You can visit showbm.com, and with the code monogram, you will get 20% off
on all my products. And that's all for today.
See you next time. Bye.
 Jimbo Bernaus - Shoutbam, Letterer & Designer