Transcripts
1. Introduction: Hi everyone. My name is Marilie. Like so many others I have a passion for fashion. I studied fashion design at the University of Pretoria in South Africa. I finished my degree in 2011. Today I'm going to teach you how to make a flared skirt. I'm also going to show you how to draw up a pattern based on your own measurements. I'll provide examples of how you can alter your pattern to use it multiple times for different skirts. For this class, you will require a basic understanding of sewing. If you are not yet so confident in your sewing skills, please refer to one of my previous classes on sewing for beginners where I'll teach you all the basics of sewing, as well as a few tricks that will guide you in sewing in the future. For this class you will need the following: a basic sewing machine, entry level is fine, and some needles, a fabric of your choice, a small piece of interfacing, sharp scissors, pins, thread, the zipper, measuring tape, and definitely your unpicking tool. Who knows? Maybe by next weekend you'll also have a new skirt to wear.
2. Class Project Discussion: In this lesson, we will discuss the class project as well as all the tools and equipment you would require to compete this project. Our project is to design and construct a fleet skirt based on our own measurements, or if you're making the skirt for somebody else, their measurements. You are also welcome to use the same principle to draw up a pattern for a young girl, if you're making for your daughter, for example. I am making a pleated skirt. However, you can also make use of gathers, if you prefer. I chose this project because I have used the same pattern so many times for myself, as well as for my friends, my family members, and even to construct bridesmaids dresses, so I just had to share it with you. For this class, you will need the following: a basic sewing machine. Entry level is more than sufficient. Machine needles. It is always good to have an extra needle close by as they sometimes break. It can be very demotivating when a needle breaks and you don't have extra close by. The type of needle you will require will depend on the type of fabric you choose. Usually a universal needle would be sufficient for most types of fabric. Rule of thumb is, the softer the fabric, the thinner and sharper the needle. You will also require the fabric of your choice. I bought about 1.5 meters for my skirt. However, the amount of fabric you will require will depend on your waist measurement as well as the length you want your skirt to be. If you are constructing a long skirt that will fall on the ankles, you will require almost double of what I used, about 2.5 to three meters of fabric. If you are unsure, I would recommend purchasing half a meter more than what you think you need. You can always use this extra fabric for a headband or a hair scrunchie. I will differently load some classes later on using these off-cuts to make small accessories. Feel free to have a look at my tips under the Resources tab on choosing your fabric. You will also require iron on interfacing. You will not need a lot of interfacing. Your interfacing will have to be the length of your waist measurement by about eight centimeters. Do not use the paper-like interfacing, like voile. This will disintegrate when you wash your skirt. You should ideally use a fabric-like interfacing, like staflex or dimension. Also make sure you have a lot of pins on hand. Make sure your pens are nice and sharp, otherwise they might damage your fabric. You will also need a zipper. I used an invisible zip of 20 centimeters long. You can use any type of zipper that suits the type of fabric you're using. Your zipper can be 15 to 20 centimeters long. You will also require thread. You will need thread that suits your fabric color. If you are using an overlocker, you will need five rolls of thread in total. When overclocking, I make use of what I have, even if it is different shades of the same color, to avoid having to purchase new thread for every garment I make. I will obviously not use these shortcuts when making garments for others, but when it is for myself, I try to keep it as economic as possible. You can do the same. You will also need a measuring tape. You will be required to measure your waist as well as the length you went to skirt to be. You can decide on the length of your skirt. You can also measure your hips if you prefer to have your skirt on your hips rather than your waist. My skirt that I will be constructing will be on my waist and fall on my knees. You also require an iron and ironing board. You will need to iron or press your seams regularly throughout the construction process. Keep a piece of fabric handy for pressing to ensure you do not burn or shine your fabric. I make use of an old pillowcase for pressing. You can use any type of fabric. You will also need an unpicking tool. It doesn't matter how experienced you are in sewing. You'll always need an unpicking tool. You will also require sharp scissors. Make sure you do not cut paper with your scissors. Some optional nice-to-haves includes an over locker, a large roll of paper and long ruler, as well as a pen to draw your pattern. You can also include lining. You will need lining if the fabric you choose is very light or shear fabric. You can decide whether you want the lining to be the same amount of fabric as the skirt. You can make the lining slightly shorter than the rest of your skirt. Before you continue with this class, make sure you have everything you need to continue. You can also find a list of everything you will need under the Resources tab. If you have a bit of experience in sewing, you will know it is quite a time consuming process. I would recommend, do not try to do everything at once. I prefer to work in natural light. Therefore, I often work over weekends, when I'm not too rushed and there's a lot of natural light outside. You can do the same if you want to. Always keep some snacks with you to make the process more fun. Sometimes a glass of wine also comes in handy. Once you have everything ready for your project, please join me in the next lesson on drawing up your pattern and cutting your fabric. Next up, we will look at the steps that we will follow to complete this class.
3. Steps We Will Follow: You will be following the next steps during this lesson. Step 1, measuring your body, both your waist as well as your length. Step 2, draw up your pattern by following the guidelines and using your measurements. Step 3, purchasing your fabric, your thread, your zipper, and interfacing, and anything else that you don't have available. Step 4, wash and iron your fabric. We're going to use cold water and iron on the inside, or pressing to protect your fabric. Step 5, use your pattern to cut your fabric. Step 6, constructing your skirt. Step 7, wearing your awesome new skirt. In the next lesson, we will take our measurements.
4. Taking Your Measurements: For this step, you will require a measuring tape. If you are making the skirt for someone else, you need to make sure you take their measurements and not your own. The measurements we would need to take is your waist measurement if you want the skirt to sit on your waist. Alternatively, we can take your hip measurements if you want the skirt to be situated in the hips. I prefer the waist, so I will be measuring my waist. We also then need to measure the length. The length of your skirt will depend on your preference, but where you will start measuring will also depend on whether you want your skirt to be situated in the waist or in the hips. If you prefer the hips, you need to make sure that you also measure the length of the skirt from the hips and not the waist. I would also recommend you maybe ask a friend to assist you in taking your length measurement as we sometimes skew the measurement when we bend over. My skirt will fall on my knees. If you are used to measuring in inches rather than centimeters, there are a lot of platforms available on the Internet where you can easily convert the centimeters readings to inches to assist you. In the next lesson, we will draw up our pattern.
5. Drawing up Your Pattern: The next step is to draft our pattern. For this step, you will require a large roll of paper. You get those big brown rolls of paper or maybe vilene depends on what you have available in your area. You will also require a long ruler, pencil, scissors, as well as your waist measurement. I know it sounds quite daunting to think that you are drawing up your own pattern, but you will actually see it's not that difficult. For this pattern we are simply using two rectangles, a rectangle for your waist band and a rectangle for your skirt bottom. We will be using the measurements we took in the previous step to ensure we draw up our patterns based on our own measurements. Again, if you are making a skirt for someone else, you need to use their measurements when you draw up the pattern. For this step, you're going to need a bit of space. If you have a dining room table that would be ideal or if you have a large desk, I would recommend clear your desk and work from there. It's also fine if you have to use the floor. Now that you have found the ideal location to start working, make sure you clear the space, enlarge your large piece of paper to start working. The first pattern that we will draw up is for your interfacing. I'm going to guide you how to use your measurement to draw up this pattern. Please don't get too overwhelmed. Just slowly listen, take your time. Please remember that every time I refer to my waist measurement, if you have decided to make your skirt to sit on your hips, please remember that you should use your hip measurement and not your waist measurement. Your interfacing pattern will be pretty much the same length as your waist divided by two. The reason why we are dividing it by two is because we going to place the pattern on a fold, then it's obviously going to double that measurement. You will see for all the other patterns that we are drawing up, we going to add an additional 1.5 centimeter to each edge to allow for seam allowance. However, this is not necessary when we draw up the pattern for interfacing. The reason for this is the interfacing actually makes the seams bulky. Therefore, the interfacing will only be placed on the areas that do not fall into the seam allowance. Once you have drafted you're interfacing pattern, you will use that as a guidance to draw up your waist band pattern for your skirt. The only difference between these two patterns will be the seam allowance. If you are unsure what a seam allowance is, it's the piece of fabric that's usually visible on the inside of a seam. Seam allowance standards differ from country to country. But in industrial use, we usually use one centimeter as our seam allowance to save little fabric. But for household use, we usually use 1.5 centimeter seam allowance. Please refer to the slides for the calculation on how to determine what your waist band pattern should look like. Please note that we are adding seam allowance only to the one edge due to the fact that we are placing this pattern on a fold. You will note that I recommended eight centimeters for the thickness of the waist band. However, you are welcome to make it a little bit thicker or even thinner if you want to just to guide you in terms of what that eight centimeters is four. Eight centimeters refers to the thickness of the waist band. However, the waist band will be folded, which means your thickness of your waist band when wearing it will only be four centimeters. Remember this is your skirt. You are welcome to alter the pattern as you like, as long as you know what the differences you make would make to your end product. Now that you've drafted your waist band pattern, we can move on to your skirt bottom. When drawing up your skirt bottom pattern. Please take note that we will not be cutting on a fold. We will be cutting out two separate pieces of fabric. This means we require seam allowance around all four edges of the pattern. If you are worried that you measured your length wrong, you can always make your skirt slightly longer. We can always cut off a bit of fabric later on or just work in a longer hem. Next up, we will talk about purchasing our fabric.
6. Purchasing Your Fabric: Now that we have completed our patterns, it is time to purchase our fabric. Before you can choose your fabric, it is essential to know what you would like your garment to look like, and for what type of occasion you would like to wear it. For a soft, flowy skirt, you need to choose a dress fabric like a silk or a light weave or even knit. You can also make a more firm winter skirt by choosing a heavier fabric such as a tight weave, woolens corduroy, or suede. For this pattern, I would recommend staying away from fabrics that stretch a lot, such as Lycra. The easiest would be to take your pattern with you to the shop to determine the amount of fabric and interfacing you would need. You need to make sure that you purchase the following; fabric for your skirt, lining if needed, iron-on interfacing, thread, a zipper, and anything else that you might not have at home that was listed in the beginning of the slides. Now that we have purchased our fabric, we need to wash and iron our fabric. We do not wash our fabric because we think it's dirty. Fabric can shrink if you wash it the first time. Therefore, ideally we want to wash it before we construct our garment. Because if it shrinks off the construction, the skirt will no longer be the perfect fit. Please refer to our slides for some tips on washing your fabric for the first time. Next up, we will cut our fabric.
7. Cutting Your Fabric: Now that we have washed and ironed our fabric, we can prepare to cut our fabric. When we prepare to cut our fabric, we fold the fabric. When folding your fabric to cut it, you need to ensure the self edges are on top of each other. If you are unsure what the self edges are, it's a piece of the fabric that was attached to the loom during construction. It is not the edge where the shop assistant cut the fabric when you purchased it. You can now cut your waistband and your skirt button patterns. For your waistband, you will cut one on fold. For your skirt bottom pattern, you will cut two. You can then also cut your waistband interfacing pattern. If you are using a lining as well, you need to use your skirt bottom pattern to also cut the lining. You also need to cut two of these. You do not need to cut a waistband pattern from your lining. In the next lesson, we will construct our waistband.
8. Constructing Your Waistband: Now that we have cutoff fabric, we can start constructing our skirts by putting all the raw pieces together. First of all, we will be constructing the waistband. Step 1, place your interfacing on your waistband fabric exactly in the middle. There needs to be 1.5 centimeters seam allowance right around. Make sure you place the glued side of the interfacing onto the wrong side of the fabric. Step 2, place a cloth over the interfacing and press with your iron. Continue until the interfacing is glued to the waistband. Step 3, overlock all four edges of your waistband. Step 4, fold your waistband in half in its length, and press. Step 5, now fold over your seam allowance on the one side and press. We're now done with this step of the waistband. In the next step, we will construct our skirt bottom.
9. Constructing the Skirt Bottom: We will now construct the skirt bottom. Step 1, place the right sides of your two skirt bottom fabric pieces together and match the side seams on the one side. Use a stitch length of 2.5 millimeters and seam allowance of 1.5 centimeters and sew your side seam. Step 2, repeat the step with your lining if you're using lining. Step 3, overlock your side seams on both sides for both your lining and dress fabric. This will include one closed seam, the seam that you just stitched, and two open seams. We will leave the seam open due to the zipper that will be inserted here later. Step 4, place your dress fabric and lining on top of each other with the right side of the dress fabric on top and the right side of your lining facing your wrong side of your dress fabric. Ensure your waistline of your dress fabric and lining match. Now you can use a longer stitch length, four millimeters to bind the two pieces of fabric together. Step 5, overlock your waistline. Your lining and dress fabric can be overlocked together. In our next step, we will add the pleats to our skirt.
10. Adding Pleats to to Your Skirt: Step 6, now you need to insert your pleats. You can make your pleats any size depending on your preference. Fold them, pin them, and then stitch them with a long stitch length of four millimeters. We use a four-millimeter stitch length due to the fact that it's a temporary stitch. Try to stitch in the seam allowance so that the stitch is invisible later. When determining the thickness of your pleats, refer to the slides for basic calculation on how to determine the size the best. If you know how to insert gathers rather than pleats, you are welcome to use gathers instead of pleats for your skirt. Next up, we will attach the skirt to the waistband.
11. Adding the Skirt to the Waistband: Our next step in constructing our skirt will be to attach the skirt to the waistband. Step 1, place the right side of your waistband, the seam that has not yet been folded on top of the wrong side of your skirt, bottom. Stitch with a normal stitch length of 2.5. Step 2, press your seam. To ensure your garment does not look homemade, it is important to always press your seams after every step. Step 3, fold over your waistbands so that the folded seam allowance is in the front, on the inside of the waistband, and all temporary stitches in the front of the skirt are covered up. Pin your waistband, stitch your waistband with a topstitch. You can use the longest stitch length of four millimeters for the topstitch. The trick is to make this stitch look like a decorative stitch. Try to make sure the stitch is parallel to the seam, and press your seam. In the next lesson, we will insert the zipper.
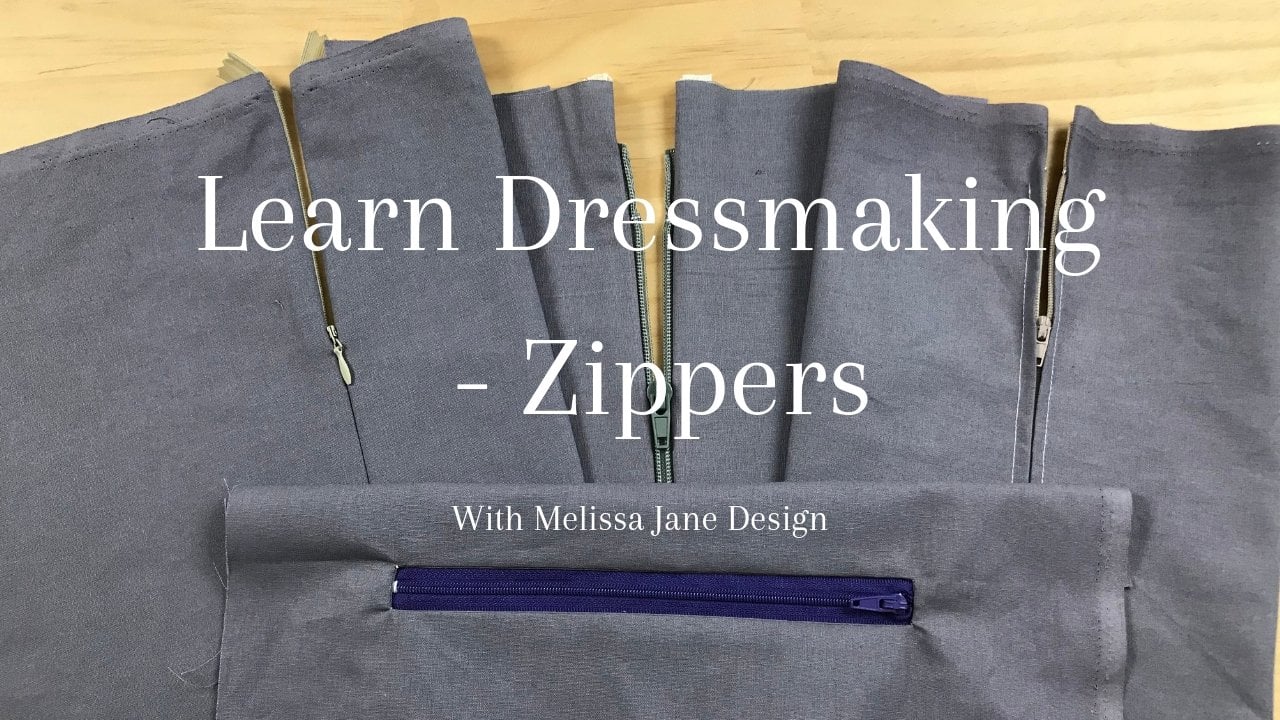
12. Inserting the Zipper: Now that we have attached the skirt bottom to the waistband, we can move on to the next step of inserting the zipper. Step 1, pin your zip to your open side seam of your skirt bottom. The zipper should be attached to both the dress fabric as well as the lining, if you're using lining. I used an invisible zip for my skirt. You are welcome to use any type of zip that matches your type of skirt. Step 2, remember to change to a zipper foot on your machine. Step 3, attach your zipper with a normal stitch length to both open side seams. Close your zip once inserted to ensure the zip is inserted correctly. Make sure the waistband lines up on both sides of the zip. Once your zip is inserted, you can change your machine foot again to a normal one. Step 5, pin the rest of your side seam and stitch. The lining and dress fabric should be stitched separately. Press your seam, the seam will be open. Step 7, there might be a small hole between your zip and the rest of your side seam. Use a hand stitch to close this. In our final step, we will insert the hem.
13. Inserting the Hem: We have now gotten to the point where our skirts actually look like skirts. The next step would be to insert the hem. Step 1, overlock the bottom of your skirt, both the lining as well as your dress fabric. Step 2, put on your skirt to determine how high the hem should be. You can ask a friend to help you pin the height of the hem. I use a sewing gauge to ensure my hem is the same height throughout. You can also make use of a ruler. Pin your hem all around. Step 3, you can now stitch your hem. You can use a longer stitch length of four millimeters for your hem. Once your hem is inserted, press your hem. Step 5, repeat these steps with your lining. Make sure that your dress fabric and your lining have separate hems. Do not sew the two layers together. You can make your lining slightly shorter than your dress fabric to ensure your lining isn't visible when you wear your skirt. That wraps up the construction of our skirt. Now you have a brand new homemade skirt and the only thing left to do is to wear it.
14. Conclusion: Thank you for joining this class with me. I hope you enjoyed it as much as I did and I hope you're as excited to wear your new skirt as I am to wear mine. This is what my skirt looks like. Please also share pictures of your skirt under the Student Gallery tab. Just to recap what we've done during this lesson; we have learned how to measure ourselves and then use those measurements to draw up a basic pattern. We then used our patterns to construct the skirt. We took our own measurements and drew up a pattern. After we drew up the pattern, we cut the fabric. We then constructed the waistband and then we constructed the bottom of the skirt. Then we added pleats to the skirt and then we attached the waistband to the skirt button. We then inserted the zip and inserted the hem and voila, we have a skirt. I hope to see you in more of my classes, where I'll teach you to construct more cool things, where we can live out our passion for fashion.
15. 15: If you prefer to make use of gathers instead of pleats, Here is a quick example of how to insert gathers. I used a leftover piece of lining for the demonstration. Please note that you will be mimicking these steps with your dress fabric. Should you also be making use of a lining, you can gather your lining and dress fabric together. For this quick demonstration, I did not overlock my fabric. To avoid fraying, please remember to overlock. If you do not have an overlocker, do a zigzag stitch or your preferred alternative method to avoid fraying. Place your fabric on your machine. Should you be making use of a lining, you will have two layers of fabric. If you are not using a lining, just your dress fabric. Set your machine on the longest stitch length of four millimeters. You are going to stitch two parallel straight lines. Make sure these stitches fall within your seam allowance as they shouldn't be visible once your skirt is finished. When we insert gathers, it is very important that you do not reinforce your stitches at the start and finish. Do not back-stitch. Make sure you do not cut your thread off too closely to the stitches to make it easier to handle. Once you are done with your parallel stitches, you can split the top thread from the bottom thread and pull. The fabric will create gathers like a curtain. Make sure you do not pull too hard because if you break the thread, you'll have to unpick and do this all over again. Before you start, it is also a good idea to check your bobbin to make sure you have enough thread left; because if you run out of thread while inserting your stitches, you will also have to unpick and redo. You can now continue to attaching your skirt bottom to your waistband.
16. 16: Welcome back. Welcome back. Welcome back. Let's go back. Okay.
17. 17: Yeah. Hello. Welcome back to class. Okay.
 Marilie La Grange, Fashion & Crafts