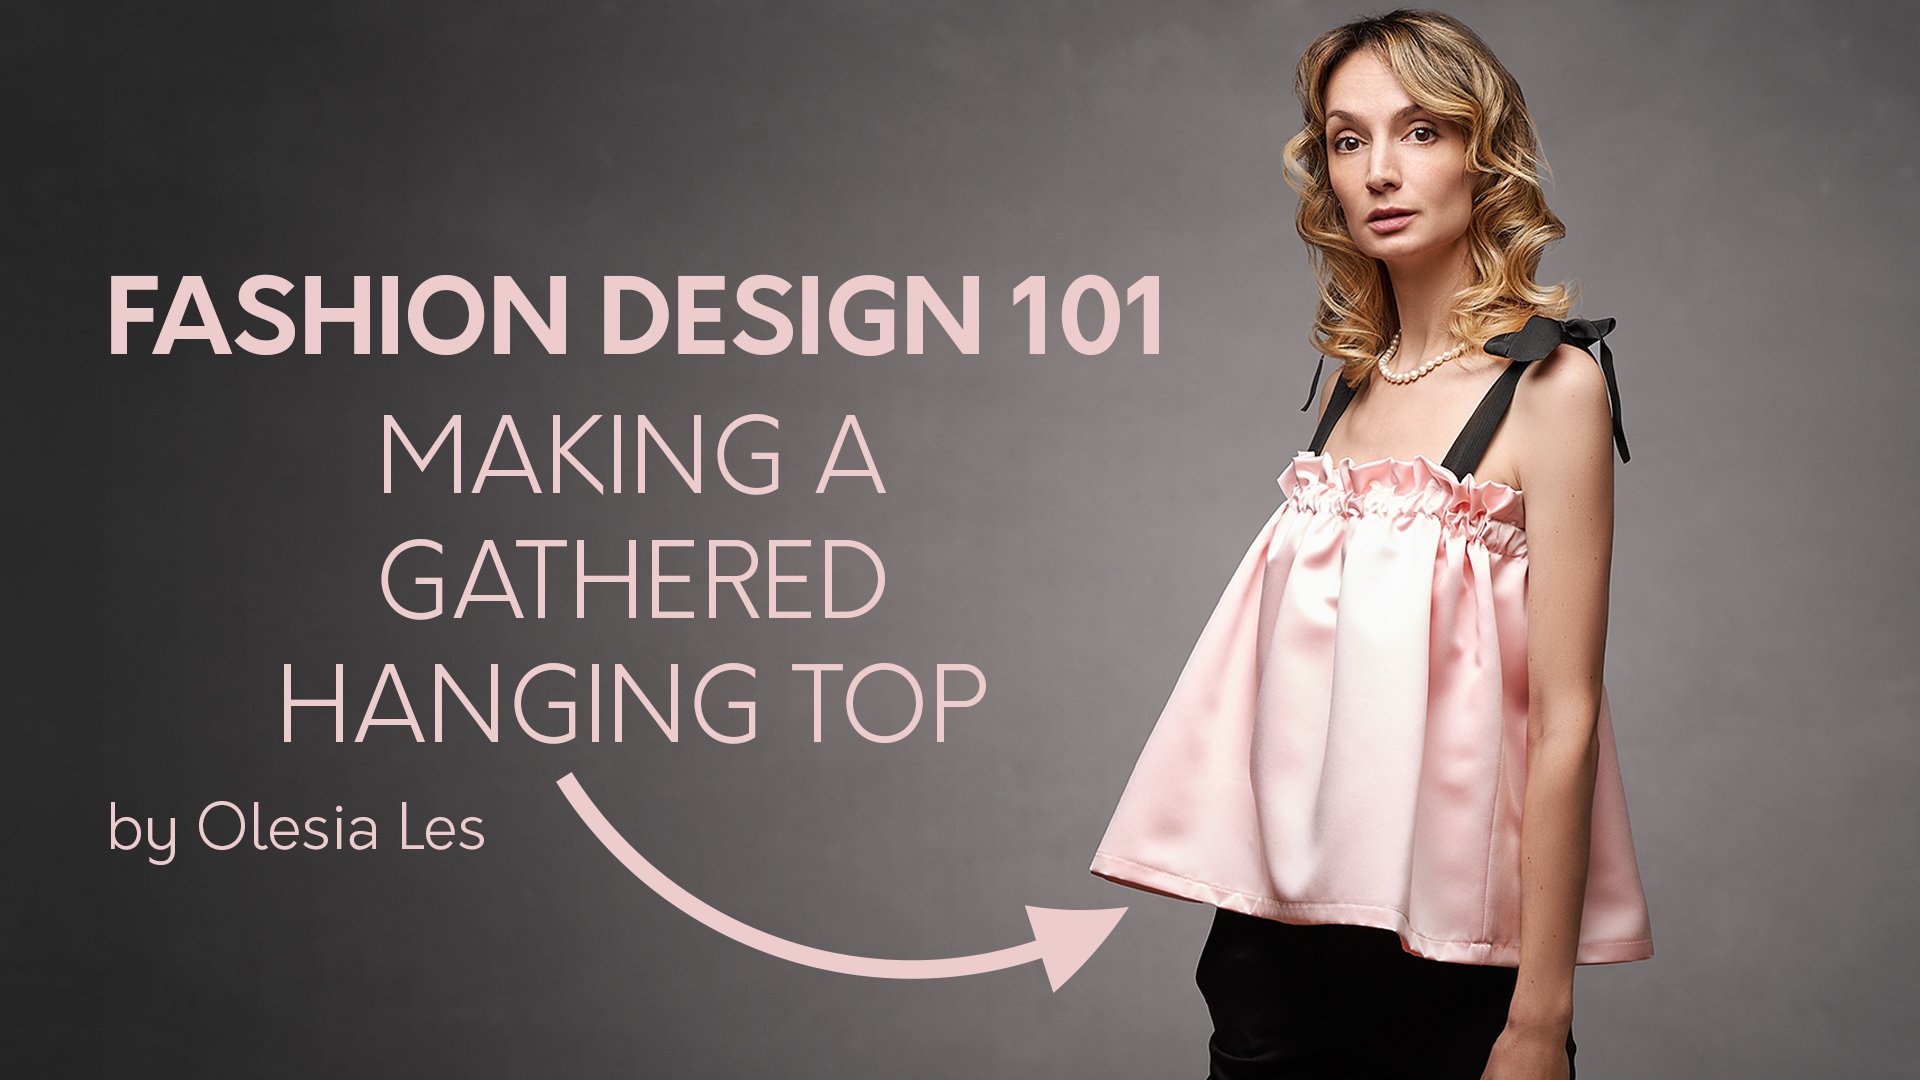
Fashion Design 101: Making a Gathered Bandeau Top
 Olesia Les, Fashion Designer
Watch this class and thousands more
Watch this class and thousands more
Lessons in This Class
-
-
1.
Introduction
0:21
-
2.
Measurements
0:40
-
3.
What You'll Need
0:38
-
4.
Cutting the Fabric
3:35
-
5.
Overlocking
1:56
-
6.
Sewing Front Edges
2:17
-
7.
Sewing Top and Bottom Edges
4:44
-
8.
Making and Attaching the Straps
1:55
-
9.
Finishing the Garment
3:41
-
10.
Results and Final Advice
1:00
-
-
- --
- Beginner level
- Intermediate level
- Advanced level
- All levels
Community Generated
The level is determined by a majority opinion of students who have reviewed this class. The teacher's recommendation is shown until at least 5 student responses are collected.
246
Students
--
Projects
About This Class
This is the first class of an upcoming series of “Fashion Design 101” with Fashion Designer, Master in Fashion Engineering, Olesia Les.
In this class you’ll learn how to easily create a gathered bandeau top without any patterns. Together we’ll go through the processes of taking measurements, cutting the fabric, sewing and finishing the garment. Along the way you’ll get lots of useful tips and tricks of how to speed up the whole process and improve the quality at the same time!
To complete this project, you should have an understanding of some basic sewing principles, a basic knowledge of how to make a straight seam with a sewing machine and how to overlock the edge of the fabric.
I bet you never knew it’s so easy to create your own fashion at home!
You can find out more about Olesia’s work at www.instagram.com/olesia.les
Soundtrack used in the video:
Synthetic by | e s c p | https://escp-music.bandcamp.com
Music promoted by https://www.free-stock-music.com
Attribution 4.0 International (CC BY 4.0)
https://creativecommons.org/licenses/by/4.0/
Meet Your Teacher

Hello, my name's Olesia and I'm here to share my passion for fashion design with you.
See full profileHands-on Class Project
Project? Easy! Create your own Gathered Bandeau Top. Mix and match different types of fabric, different colors, prints or different styles of straps. Don't forget to share it here! I'm so eager to see where your imagination takes you!
Class Ratings
Why Join Skillshare?
Take award-winning Skillshare Original Classes
Each class has short lessons, hands-on projects
Your membership supports Skillshare teachers
Learn From Anywhere
Take classes on the go with the Skillshare app. Stream or download to watch on the plane, the subway, or wherever you learn best.