Transcripts
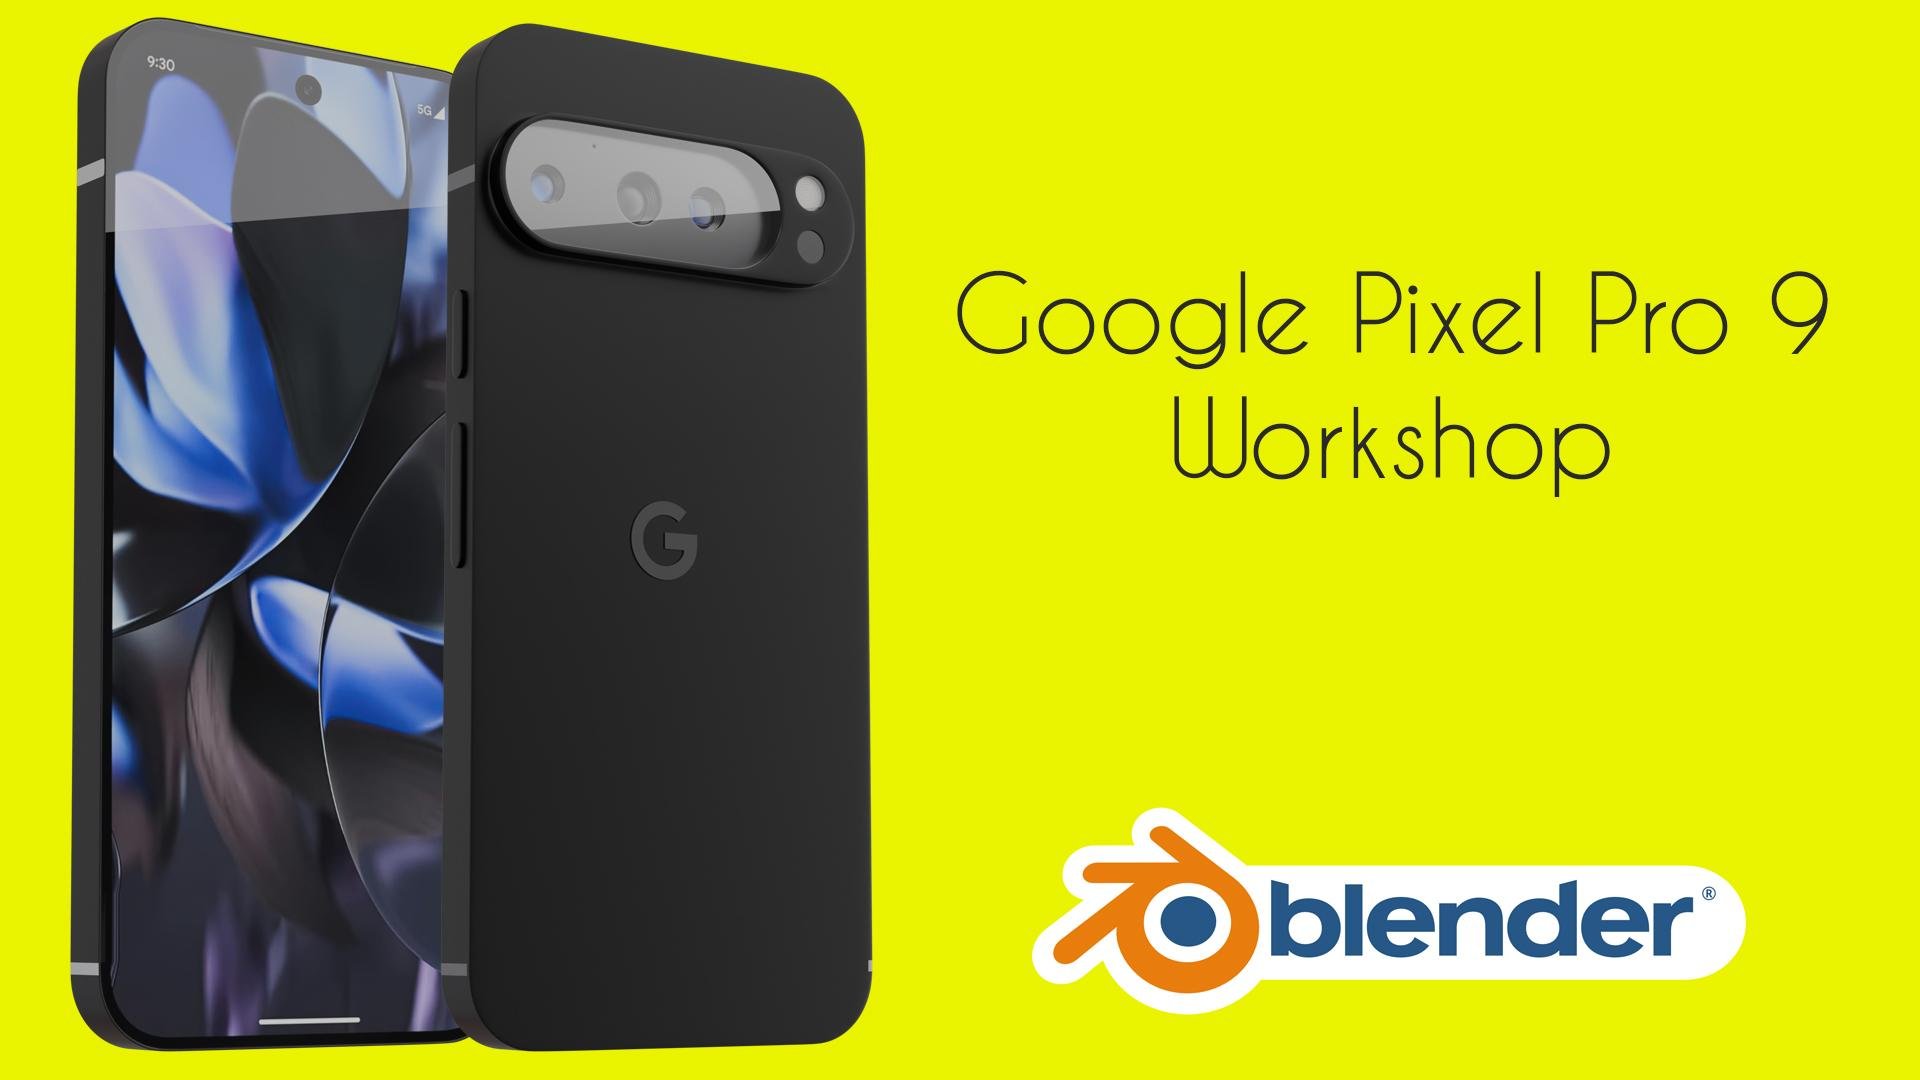
1. Promo: Do you want to design
your modern smartphone? Do you want to learn how to model phone case for c printing? Then this is the right
course to get started. In this class, I'll
explain how to model Google Bexl
Bruine from scratch, and we will render for variations with clean
wt backgrounds, and all renders are ready for commercial usage on
any online stores. We'll see how we can
render for variations. Obsidian Wintergreen,
porcelain and Bone. Tiger and you come, I am Camel, I am Syrian designer and
founder of anglestudi.org. With experience over seven years in the field of lock design, I will explain how to
design modern product. So this class is intended
for intermediate users, and if you are beginner,
you can still follow along. If you like me and
you want to learn new skills and
improve your living in Blender, then join now. So let's see how we can stop workspace and the guess
are some references.
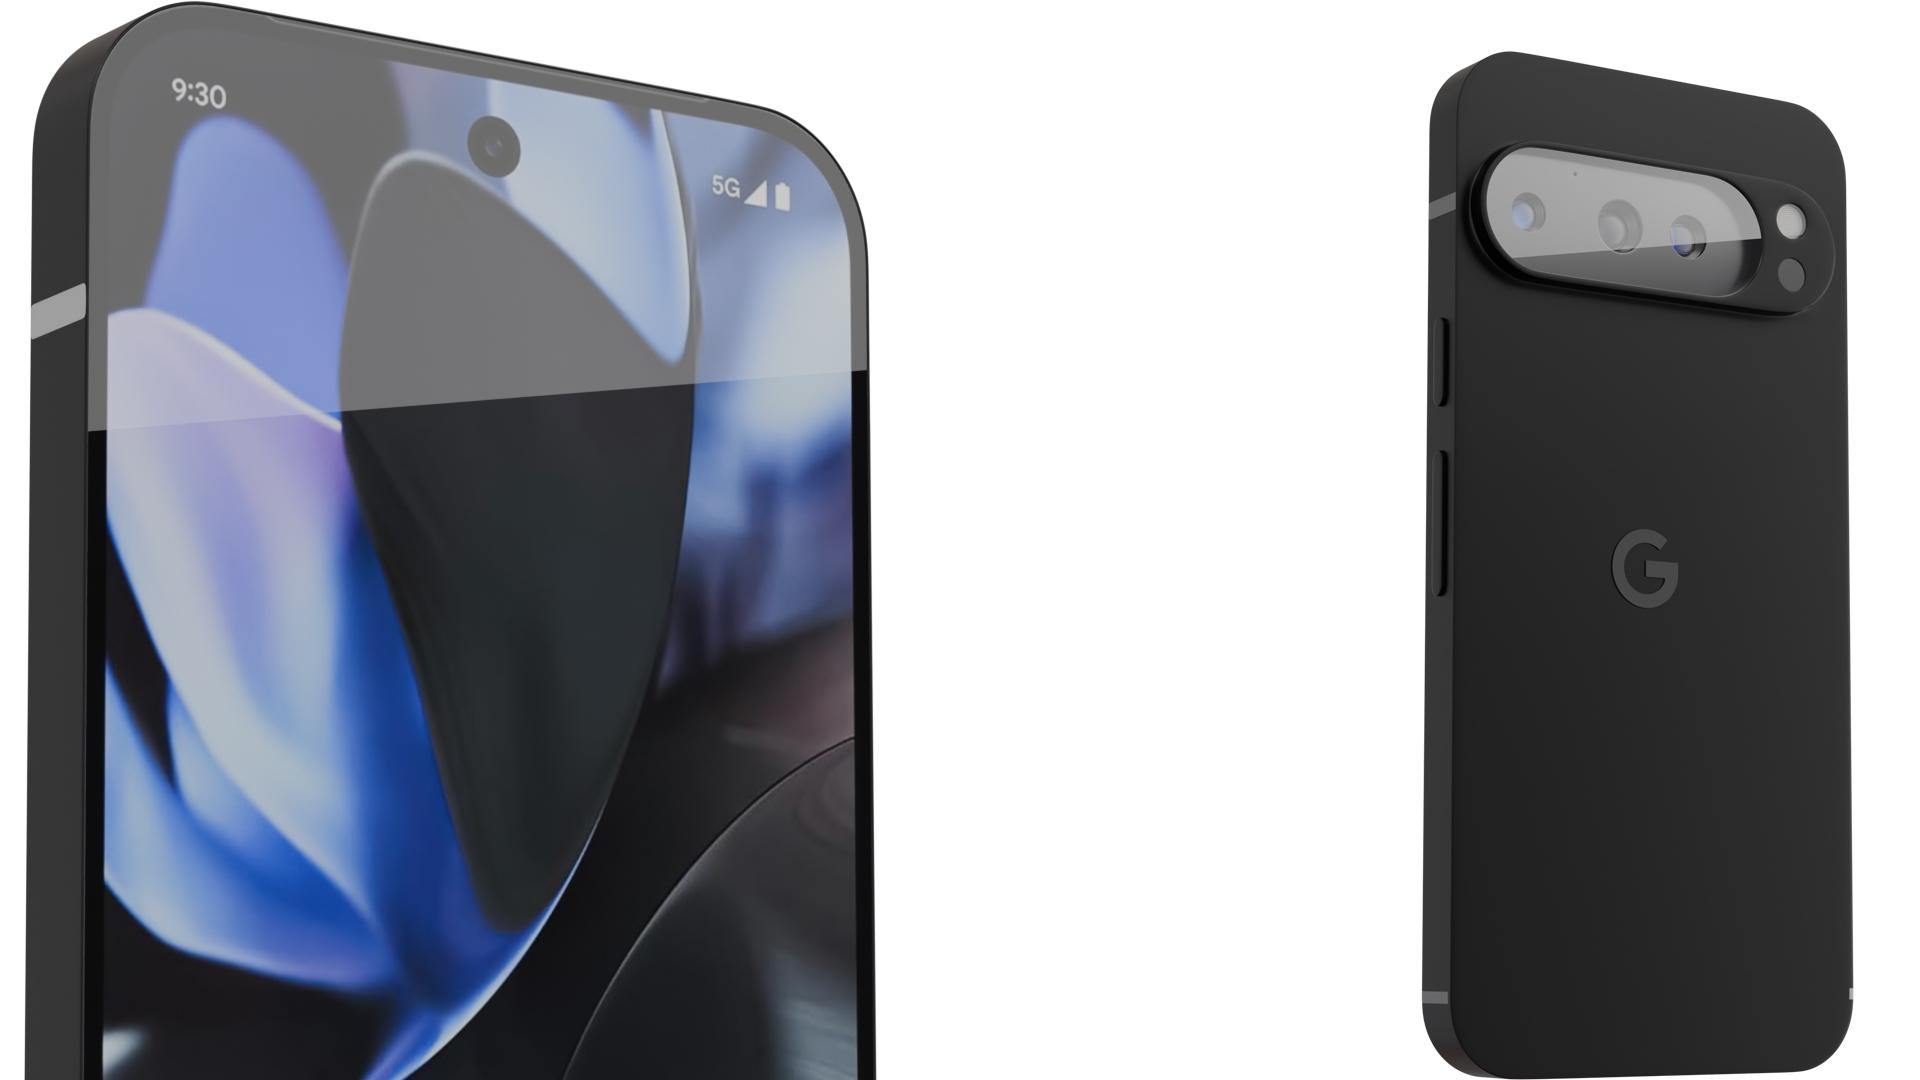
2. Modeling Google Pixel 9 pro: Hello, everyone come
here is coming, and they're going
to see how we can design the Google Big Sal nine P. We'll do our best to promote this phone to be
professional look. And also, after modeling, we will make semble
animation and maybe 32nd animation video
for the Google Big Sal nine P. With that first
to do, let's get started. Firstly, I will enable
the screen cast case. So everything I press
you will find that here, and you will not
need that line now, so we can hide
that for a moment. And I will manage the
collections to be organized. So we have some
reference, of course, and later, we may add camera and more
cameras for admission. So the design may be this
color reference as usual, will be yellow and
camera may be green, and you may have the trash. So the trash, you bought
all the temporary files, and let's get started by
inverting the reference images. Firstly, I have the front. So we have here the
front. That's fine. So I will call it ref front, and of course, we
must have the back. So here, the OST
may be bond nine, and let's move that to
be here on the ground. And after that, add
another reference, which is the back, of course. And this called B. So let's see So we have here
the back and the front, I put them flat, so it's snapped on
the same location, so we can now rotate
around the X. Here the front.
Here is the front, so we can make it here. And the, it will be, of
course, on the back. So let's see, this is the
front obviously 0.5 for both, or you can make them one for now to see if they
snap the correct. I add a cube, so
cube to be here. And this tutorial for beginner, if you have any question,
you can leave a comment. And if you want to
design any product, you can leave a comment
or any suggestion. So let's see here. So this the front
and for the back, control one and rotate
around the 180. That's fine. It's
snapped. That's fine. Both views are snapped
correctly. That's fine. Amazing. If you'd like, you can have the right view. Let's add if you'd like. You can add the right
of course is here. So we don't need that anymore. So we have the right
if right. That's fine. So let's make the OST
point for maybe for all and start by adding a blen. You can enable or lock
the selection filters, and I will add a blin. So add blin and after
that, we will fill it. Let's add a blin and
rotate around 90 degrees. I will not work by size. We can scale that later, so let's work based
on the reference. And after that, we will see how we can manage
the dimensions. So as you can see, it's
not correctly snubbed. It's correctly in the center, so we can move our references
to be in the center. So the circle here
to be in the center. So move that to be in
the center such as this. Amazing. Let's see. And the scale on
the X such as this. And after that, select O, apply the scale and
diverse control shift B to vil and add some curve, maybe add curve of seven
or something like that. Amazing. And I add Bevil here and Bruce Join
to join all these areas. Bruce join, and you
must join here also. Let's join again here. So I have on my channel a
lot of videos on how you can model phone such as
Motorll and phone cases. For seed renting,
you can take a look, and I will leave that
in the comments below. So let's join all of that. Why I'm making that because
I want to have the quads. No wrangles or angles. So we have a key mish as if
we add the subline surface, we don't have any
problems after that. So let's join all of that
here and we have licuads. Now, let's join that.
So we have lequds. As you can see,
we have all quads here and we have lequds now. So after that, you may
want to add the sickness. So you can move that here and add the
sickness such as this. And that's fine. What
about the camera? Of course, we have buttons. We will add the Google
Bx Sal is simple, you can model without
any problems. But for the til I want to
have exactly all the tills without any problems and we can call that to be
maybe full or body. I will increase that but first and s. So we
will model the frame. We will model the circles, and after that, add the
cameras in the side. So it's very simple
add here and circle. And this circle may
be 16 or let's say, firstly, I will add two circles. It rotate around X 90
degrees and add some circle here and add the circle one
circle here and shift D Z, and circle here and
another half circle here. So put the cursor
here and a circle. This circle may be
24, let's say 20. I think 20 will work 20 or 24. We want it as lobly as we can. So maybe move on the direction. And I think I think
that will work for now. And let's fill that
and fill here. And after that, we can
join, and let's fill. So make sure you have F
two addon is enabled. So we will use some addons
for free, of course. We will use the loop tools, and we will use also the F two addon and that's it for now. Later, we can use
the uadrangl in the shed erator but
let's continue. We can fill again here a
few times as you can see. And after that, we got
another circle here, so extrude on the
direction and add another circle maybe
this time maybe 24. No problem. 24 or I can decrease that to
be 20 see if that works. That's fine for now. Amazing. So we will join
that merge at center, and we will connect
all easy parts. So we don't need that anymore. So let's delete, and
delete this word. And you can use a mirror, maybe. And let's fill fill
here, here, here, and extrude on the direction and exit time in the direction. And let's fill
again, here, fill. And we require for one edge
here and two edge here, one edge here and to edge here. So fall here and fall here. Amazing. After that, we
can select this bird and shift TD on the
direction and bit control to e disable
that snapping option. And after that, if we
put the cursor here, we can select all
and etcetera scale. Based on the three D cursor. Amazing. That's easy. Make sure you would
move desert here. After that, we can
join these two and make sure these
are on the same by active and scale zero
and make sure that you have that scale zero and
that also Amazing. We did that. So if you
add the solium surface, you can see that to
have this nice shape. So we made the detail. Of course, after that, we will join this bird to
the actual phone. We want that to be
completely one object, and that will be fine. If you would like
to alrint that, if you would like to celebrant the phone, that will be fine. So I will stop the video here, and in the next tutorial, we will continue with
our Google Bec Line Bro.
3. Join the camera to pone body: Right? So let's continue what we have lived in the previous word. Here is the image or I mean, the phone in perspective view. So we have two buttons, but we will continue by making
the camera first. So the camera here, so you can name that camera. And after that, let's
see what we want. So the model is very simple. You must add edge here
and another edge here. And let's see, we will connect. So we require around one, two, three, four,
five, six, seven, around seven edges here, and here also, we
require some verts. So we will addre maybe I will add it maybe. And after that, I'll select all that and maybe scale on
the eggs and just delete. Amazing. So then we will
join this and after that, we must we can join these edges. But before that, let's see, we require edge here
and other edge here or edges here and same thing here. So we will let's hide that for and select all these
vertices and move in the X Solts connect edges such as this. And we connect. I think we don't need
that. We don't need it. So let's see the word. I select edge and defil and fill. So let's hide this
maybe this one. We don't need that anymore. And here we have another one. So we have here four. That's fine. I want items to be
snapped correctly. So I want every edge
to be in the same. So we have here a few loop cuts, and you can add here maybe
three if you'd like. And so we have here
extra edges. No problem. You can make that accessor with scale and looped to
be circle and rotate. All right. So we
did what we want, but I will move to the phase mode and
select all the vertices, which is here and all that. Of course, we will
extrude to this area extrude and other extrusion to here and other
extrusion. That's fine. You can now at sojun surface. Of course, we will modify
it and make it smoother, but for now, we will
modi the cameras. So we connected that, but we want to make
the camera better. So let's see what
about the camera. I will open the reference
for the camera maybe here. This is maybe this is the sensor for fingerprint
and this may be the flesh. So we will make it smooth and shift a cursor to selected, and after that, we add circle. And here, it'll be 28, and the scale scale down, rotate around X 90 degrees
and the scale down ex tough the scale That's fine. And for the flesh,
we will do the same. So we will duplicate. We can call it
flesh and that may be called censor. And after that have two ties. So the flash this one will be gloss and another one will be here which will be the flash and this flash
gloss on this flash only. So you can make a random if you'd like,
but let's continue. And you have, of
course, three cameras, different cameras, of course. Let's do so we will
not make textures, but we will model
the camera itself, so we have real geometry. I will hide the body
for it or firstly, I will get this one, which may be here. So I will get this one and several selection
and hide this body. Let's see. That's fine. So we want circle,
another circle here. So Bri adds the
cursor here and add circle maybe 12 I
think 12 will be fine. And the scale bot rotate
around X 90 degrees. This is the first
this is small camera. And after that, we have
a little big camera and another camera which
is here maybe three. And we have here
tiny thing which is maybe flesh or so which is here. So let's add a lane
and the scale, put it here and
just dissep front, and we want to so let's see I think we can have let's merge
that merge that merge it. And let's fill a few
times. Here we are. We require here and square. So I want to have what
is this tiny square. Let's see, scale Z zero
and the scale Z zero. We fix the circulator, but let's continue. So
we want to connect. I will connect these artis and let's connect
that here also. And we want to
connect these ties, and we want here between
that and between that. Maybe one, two, three, four, five, six, seven. So let's add here seven. So I fill and select fill
here and we want here too. So you can use the
mirror around the Z. It will be helpful for you. So we may use that because
it's mirrored on the Z axis. We have here little t. So
let's again model a few works. We want here one, two, three, so we want three and select
these two and's fill. We want hear other two. And well, let's see. So here also, we call
it vertex, of course. So when we require that to be no problem, we will select and exer scale and the fill a few times here. What else? I think we will select the circle and
accept through a scale, and using loop tools, we'll make it circle.
Perfect circle I mean. And after that, we may so let's connect subdivide each edge here. Of course, I am
using Control W two subdivide, and after that, let's connect this
and this also. And you may subdivide my
fault is using small vertex. So we should use here segste
but we will fix at a moment. So let's see if we go here and fill and other time here and fill and also so I'm feeling that
and here we feel that, and here we feel that. It's not perfect togy. You should have better tog than that than this what I'm making. But forgive me for that because
I didn't model it before, and I think you can
model that better. But let's see what we have. Here we can make we have here. You can model that here, we have So I think
we have here four, so control shift, B to have only four until
it's another time. I think it's not
the best G ever, but let's see what
we can get now. So here is the camera.
So in the next video, we see how we can model the
camera details of the camera, see you in the next video.
4. Adding Camera Details: Alright. So in this video, we're going to see
how we can add details for our
three cameras here. The same principle. But enable I will enable first the subline surface
to see what we should make. So as you can see, we have
here some sharp edges, so we a circle and
move that to here and try et's rotate around. We are on the front back. So let's add that here and try to rotate
around the Y direction. Sort it around the way also. So we can add a few
cuts here and there. So again, let's try
to add it here. And I think that's fine. Right. Here also is the
Allergic camera. I will accel through the scale and same thing it will be here. Maybe let's Control Z. So I will add cut here,
here, here, here, and again, make it to be circle. Same thing here. I will scale and after
it through scale, and let's try All right, so that's fine. I apply the scale and I'll do one camera
so you can do all. I will go to local mode. And after that, let's exitode on Zi and extrude scale move also here. And after that extrude
Zi and exciter scale, we have here vertex of 22. So we can add here a new sphere, maybe 0.1 here and the se 22, you'd like you can join. So let's delete this word. And after that, we
scales on the precursor. Scale down, such as this. You can rotate and move here. If you want to
snap it correctly, you can use the vertex
snabbing and move on the Y. And after that, you can
have here 22 and 22, so you can bridge it
So let's try again. Let's see if we can join
that such as this and select oil and you can flat make scale on the oil based on the ld cursor to
make it flat such as this, selecto and shift in. And after that, I
will add Locut here, another look cut here
and maybe another look at here maybe I will towards
that a little bit. And here also, I
will add three loop, and I will be only one
debrus extrude phase gnomalsO time and another
time and another time. That's fine. Here we are. We have one camera. Can you do the same? Let's see, here
we have round 24. So
5. Adding more details: Alright. Thanks a lot for
joining me on this class, and let's continue what we
have left in the breath spot. So let's add the tails
for our cameras. We will do the same here, but now we have
another if verte, 20, but here we have only 22. So you can do something better. So you can add more
loop cuts here. So have 22, and we can copy all of these words instead of modeling
that from scratch, I will copy the same amazing. And after that, I will
duplicate on the X axis. And here we will scale, of course, based on
the bounding box, I will scale until we reach
something such as this. And we don't need that anymore. And let's scale. So we can rotate, of course, and it's scale down. I will table the SolnsurfFment,
and it's rotate. All right. And let's move here. We can move on the direction. And we have here
22 and here at 22. So you can let's join that and join all of that. And as you can see here,
the camera is bigger. So we can select
the camera here. I think it's fine, but you can so let's leave
that if you'd like, you can. I think the camera here
is still is bigger than. So we can select all. Of course, let's first
add the carter here, and I'll select all these
bounties, select all. And after that, after scale based on the cursor, scale, shift oil,
and just scale. So I think we can
scale shift oil and So let's leave that like that. So let's go back and
here we have no circle, we have 24, but the
shape is different. So we can we have 24. So first, I will make a circle and make sure the
spacing is correct. All right. And you
can rotate on Y. And Let's put the cursor
here and add an ablane. I will scale the blane down, so I will scale the blane and
rotate around x 90 degrees. And after that, let's
we require some vertex. So let's see here
scale on the Z. I scale on X, and I will scale down and move in this direction. Then let's extrude
on the Y direction. And let's extrude scale and move move in this direction. And after that, Let's connect so we can we have here. Let's see. We have ten. So we require 24 vertex. So it's a here a few vertex. So let's see what we have now. We have 20, so we require
two more. And here we are. So we can join all of that. But let's make sure
that on the same place so enable snapping and
move in the direction. And after that, you can embrace here and
feel based on that. I think this is the best way. And we can now move on this direction on they and move in the
direction such as this. You can enable siging
but no problem. So we require, I
think, three here, and I will first
define the edges. So let's define some edges here and some edges here
and some edge here. And let's detail And that's fine. I think we can let's make
that flat, no problem. So I'll make it
flat and move here. And exit routes right, select oil and the
shift in that's fine. We made the three cameras. We have here tiny wool. You can make by adding here an edge and
the rest Control B. And I think it's
here in this area. So we can circle here root, et cetera Yep. All right, so we have made the camera tell and what we
make here is the same here. So let's make the
Ogle Bigel here. To be honest, I
like this detail. We can move. And I like that we can print this
phone, we can print. So we can hide that fort. And let's add abline and
scale Bonton routed around X 90 degrees and now let's move here and
move in this direction, we can exit root, and we can make here and circle. So let's add circle maybe 20 or 24 and maybe the radius 0.0. The move I mean rotate angle
X direction and let's scale. We don't require but we
require some edge here. I mean some verte. Let's join. But I select that
and a through scale. And join at lost
and join at lost. So you can add loop cut here, another loop cut here
and another loop cut here and we are done or that Alright. Let's say it
will be two and three, selectable and will shift in, and we can make it
space such as this. And this. That's fine. We made this logo. So I will move to
the logo collection. So what next I think
we designed the phone. But But the screen? If we go here, you can
see that we have buttons. We have the soil mix buttons, and after that, we go
to for the screen. So I will add here loop
cut another loop cut here. And for the buttons, of course, we can so let's make for those. I will make an edge here
and diverse control B for the bevil and after that, let's add cut here, loop cut here and
another loop cut here. And let's make three loops here and delete the
sport and this bot. After that, we will
put a circle here. We require, I think we
require a 12 let's say 12, one, two, three, so
maybe maybe eight. And root around maybe root
around 90 degrees and rotate around 90 degrees and move in the direction and the
scale is on the cursor. That's fine. So we have here Z, and what next one,
two, three, four. All right, so let's Join at last join at last,
and let's feel that. We can do the same above control MZ based
on the Bound in key box. And, of course, So there is multiple
ways for doing that, you can work on the
B machine directly. But let's delete the bontis and after that, we will at here. Join at Join that at last, and it's fell let's fill that like this or this one we can scale
directly and scale on the Z. But I think we can do the same. So if we go here, you can see So let's move such as this. And what we here, a circle of eight rot eight around 90
degrees and the scale down. For the setting, we can add navigation around selection. So we have navigation
will be better, and let's scale and
delete that part If you have any question,
you can leave the comment in the discussion page and I
will respond immediately. And let's fill that
and feel that here. Let's move again here. This is the best vertex. So we want that
vertex to be I think. All right. So it's
leave as this. And shift D and Z. What happens here? So let's go back. I
will do the same. So we hear a lot of detail. Let's Let's add circle the same it nine degrees, put the cursory and
move a little bit and let's this bird let's
move and let's join. Merge at last, and here also. Merge at last, and's
fill we did that. Sorry if it took out of time. But I think here we
have error maybe. So I think we have duplication. So let's move And here also, let's see if we don't
have any duplication. Merge. So not here. I think that G is correct. Yes. And they make
sure you merge it Merge at last. So let's select that here also, make sure you have merge This tutorial is recorded as live stream base. So if there is any error, so forgive me for that. And I don't make any
videoing for my tutorials. Let's extrude that on
the X direction and another time and select
all under shift F shift H. And now I'm going to fill that and let's add
here edge and fill. Here also, we will
fill it and add here an edge and fill fill fill. So for the tons, you can select all of that
and shift on X directions, several selection and select and exit root
exit root and exit root. So we have now the
buttons shift N. So what we have here
is the buttons. You can make the buttons later. So select all and go to the
mood and add here an edge, the same edge will go here. So we have the same proportions, the same edges. Let's add here. Add here. And that's
a poem. What about? So I think I think we have here
something or some error. So let's size it. Yes, we have here some vertis. And what else? Music. That's fine. So let's make the screen. I select oil and brise inset and the scale. So let's make sure the
sickness is the same. So I think I will add the set
one time and another time. And after that, I will extrude. Firstly, I will duplicate let's extrude on this direction, move on the i little
bit and extrude on the oil and we are
now done for that. This is a screen, so you
can unwrap from view, upload the scale and
unwrap from view. And after that,
you can duplicate shifty OI and several
by selection. We can name that the gloss. And scale up such as this. Andy. And here we can add
some bevil s here. We can move on the
i have this bevi. I think we have finished that, but the ******* is the material. So that's it for the slipon. I think now we can do the
glass and finish that. So let's see we can
duplicate right I sin we can duplicate that and by selection. And after that, let's fill fill and fill here one, two, three, four, five, six, seven, we require seven. Let's fill fill. Let's again move that on the Oil and select scale and let's name it gloss two. So that's it for this tutorial. In the next video, we are
going to see how we can deter and we missed a charger here, CVC I think slabs, we will make that in
the next tutorial.
6. adding usb c port and assinging materials: Alright, so let's
continue to have lived in the previous word and
to make the USCBCbard. So here I am here in the bottom view and Control 77 in the two view and control seven
in the bottom view. And I added loop
cut in the center, so you can add loop cut here and scale X zero and shift
to be in the center. And after that,
we would like EF. Let's add here and let's
add here EF, add here. And this is this curve, and we can delete this board and move
in the direction, and you can generate mirror on the X and selecting these two and enable cliving after that you
can accrue on the X. Control R, control R, and move in the direction. That's fine. And we may move that in the X You can use, of course, the bullion,
but I will not do that. I will add a loop cut here
and another loop cut here. After that, delete
all these faces. Then you can apply the mural and let's join and you can scale down a little bit. And we have to fill so we want an edge here
and another edge here and another edge here. So let's see what we have. We want to fill solid
sable the len surface, and I will fill the vertex here and here and here and here. And here. Same thing we will fill here and cut another cut loop cut here
and another loop cut here. So we can fill that
and fill again, let's fill that and again, let's fill you can
select some edge here. So this manual method
may take some time, but I prefer that instead of using the bullions if
you have any better method, you can suggest to me to use. But I don't like to use bullions because bullion is throw MH and the result isn't
fine for rendering. So if you enable
the sodium surface, you can see that you
have nice clean Form that you can extrude on the Z, ex root on the Z, and
extrude on the Z. And after that select
all shift Etch, let's fill that space. You can use the grid fill.
But we will do the manual. You can use the grid
fill, of course. Does that work is fine? I am happy with the result. If that doesn't work, you can shift this band and. So here we are. We
made the SCB C board. But let's add this
ship CUSCBCbard we can select that duplicate
separate by selection. And after that, let's
extrude in this direction. And a little bit of solidifoi little bit of solidify here,
generate solidifoi. Amazing. If you would like, so let's apply the scale. That's fine. You can add let's select the Ws and
ShiftD separate by selection. And let's add 0.2 maybe
and in this direction, and we will add two of them. So we can generate
mirror based on that on the Y direction and No problem. We can select that
and shift on Y. Select all shift N. So let's scale on the x axis and move on the Z. And after that,
let's add array on this direction
maybe maybe eight. And it's smaller such dies. That's fine. That's fine. Let's separate Bus
vertis and for this one, we can the mixes will
fi in this direction. That's fine. Shade smooth and
maybe smooth. That's fine. So here we are. We
made the CBC board. But I think we can
make it even larger, so we can make it 0.02. And that move in this
direction GI 0.1. Amazing and move that in the direction
of Y 0.1, Y -0.01. Amazing. And I will make here duplication and separate
by sorry for that. So I will duplicate and
separate by selection. And for this one, I will
add solidify in section, and we have a 2b14 maybe. And we can let's see what we have. And we can add hair
shade which smooth. That's fine. But so
I like the result. And It may be der but
let's continue. So we made the complete phone. Let's dive into how we
can make the materials. So the materials, as we
can see, we have silver. I think we didn't
make these strips, but we can add later. If you'd like, you can add Luce, so we can select this vertice and add tell but let's
see what we have here. We have here another grid, or you can change that and
move in the D direction. For the phone, we will
make a silver phone first. So I'm adding material
and call it silver bone, and it will be
metallic, of course. Roughness may be bone to six, and the best color
will be the silver, maybe so I'm
choosing the silver. And after that, let's
see the material. We can make it even glossy. And maybe to this
one for this one, it will be black Black logo. Let's throw metallic. And here also the same material. This will be gloss. And
this will be the screen. So project from view and
Image picture, add this one. And let's go to UV Image Eor so let's go back here to the UV Image Eor and
the project from view. After that, you can scale. You can scale Or you can read from view boundaries and
scale down such as this. It's not in the center, but we will fix
that moment and we will try to add the
camera to be real object. So it's scale down again, scale down and move on they we will make it a mission and image to choose the same
image such as this. And it's fine.
It's fine for now. It's fine for now. But we can move on the i. And based on that, we can scale So let's see what we have. Here, we have also
this will be gloss. And here it will be Amron. So the first we have the black
symbol material which is plastic and roughness
maybe 0.4 or 4.3. But for the flesh or
the camera itself, we make it lens, let's make the lens. It will be a gloss and
the roughness maybe 14. And a sign. So let's see. Same thing here.
This will be lens. And We can select this one and move on
the o such as this. Based on this one. So we can move in
this direction. So does it. And it through here. And all of that we can
make came, and that's it. Or this one, we can make another metal such as this. And this one will
be silver about different color, dark gray. And here, I think we have
the glass itself first. And after that, we
have the flesh, which is white, white flesh. For the flesh, we can let's try. Let's try here the shed later, and I will try to add wave. Let's try the wave texture. And let's try the ringes. Spherical and divers control T. Based on the object. Fine. That's fine. Fine, fine. Let's try 12, maybe 30. And for that we have color ramp. Here, we will choose white. Let's make that e or
with blin That's fine. And for that, we want
it to be maybe here. And that such as this. That's fine. And
for the material, we may use roughness of 0.3. That's fine. So we made the model, and I think we have to add
the board for the USCBCbard. We can go to image here and
let's see what we have. We have that to be
different. So maybe Chrome. All right. So it can be, but we will
adjust to the screen. So here, let's go
to the image or, and we will choose the image which is here
and the scale on Y on this preecursor And I hope you like that. And let's see what
we have here so we can scale based
on the direction. I like this. And I
find that helpful. So we have the complete phone. Next we'll add more variations. We will add three variations for the same phone, of course, but let's continue rendering
in the next tutorial.
7. Lighting scene: So what next? Next, we will do the rendering for the phone in four
variations, as you can see. So we have this color, which is called Hazel, I think, and this color which is pink and maybe white and dark gray, of course, four variations. So firstly, I choose cycles as render engine and choose GBU. So this is design now, and I will set up rendering. Basically, I'm choosing Blain, scale on X direction, scale on the Y, and move it to be in the
camera collection. And after that I will
extrude on the Z, add some bevil after
a bling the scale, add some bevil and
extrude on the Y, and the scale such as this. So that we'll call the back robe and for the light. I will add Evelyn So what we have here, no problem is abline comes
in the reference collection. We can hide the
reference collection. We don't need that anymore. And I will scale that two times, move it here, and
rotate around here. And we call it light one. We can add emission, but I have node setup. That will be best because
it have gradient, and this node simulate
the real softbox. I think I have the nodes here
in the nodes group here, which is I will leave
the link, of course. And after that, you can go to the Shatter and
add the group just here and just check if
you go to the this one. Of course, you must unwrap and So I saw wrap at method, and after that,
connecting to UV. And after that, you can add some ingredient width and you can make it
choose the fall off. That's why I like this
because we can fall off. And here is the strength,
you can make strengths of 16 or maybe eight. So this is one, and this is the best method
for stick lighting. I'm using it for
longer term now. And thanks to the developer of this method or this nod group, we can adhere one and
choose here to be here. And we can add here
also. Single Y. Let's say, single X. That's fine. And it's rotate and the scale
maybe like two B four. So let's add the camera. Camera will be squared
maybe 1004 Instagram. And for the view, we can see let's make a street such as this
front view orthographic. And this is the first one. And that's fine. You can add, of course,
HRO, but let's check. So this is phone one, and
you can docket collection. But so I'll choose the phone at MBT here, select the MBT two B, and let's select O
and MBT Control B, silver and object because
we can do animation. So let's use animation in here. I don't mean animation,
but more variations. So we can choose two B five. In the next frame,
the MBT will be here. And in the second diffreme we
can rotate Z such as this, maybe SST and K
location rotation here, rotate Z schist and the K location rotation and rotate sect and the
K location rotation. And here -60 and the
K location rotation. That's fine. We can, of course, what I
want to change in the design. I want to adhere basil and also we don't change here
the strip here. So let's choose that and add
here maybe call it stirrup. A sine dime sine. And you're the same here. And a sign. And let's see. Is that Cefoin and So let's choose faces here and a sign and the separate
shift E Micres
8. final adjustments before rendering: So in the previous bird, we add symbol lighting, as you can see here, and we
add the drop, of course. And we did some symbol animation for the phone so we can
render multiple shoots. So today, we're going to see how we can fix the materials. We will add symbol strips here and there on the
left and on the right, and we will do the
finite rendering. So if we go here
in the image eter, you will see that we have you can find that we have a strip
here and a strip here, and another one on the bottom. So I think we have one here. So I think we have
total of five. I will the camera for a moment. And we can say for
the black for now, we can say it's silver, and it's fine for now. We can say that it's
silver and here also. If you'd like to add no problem, and here shift is zero, as I create here,
I will disable. If we add here this to be
strip, it will be like this. And we can add it here and make it silver
phone. That may work. But did we lose the bevil So this is a strip on the lift, and we will do the
same on the right. So the same will be
applied to the lift. And what we make here
is we moved some edges, so we will do the same. So we moved some edges here. Disable the son surface and
disable it for a moment, we can go to the local mood. So I will select all these edges and move to the same location. You can use a sniping. So the snapping GZ
and snap to be here. And the same thing of
that GZ snap to be here. And of course, we will choose all of that
and all of that. Then choose all of that
strip and to be here. And below, we have that already. So that's fine. Let's see, we have the S. We can choose the edges on the top and edges here
and shift E into it. All right. 50.8 here. Below, we have, I think, one strip here so we can disable the sub
surface and move it to be here and another one here and choose
that and add here. So let's go back out of the local mood. So we did the materials. And I want to make some variations so the next section is
matter of reference. If you want to do a studio
door, you can do that. If you want to bless
the phone on table, you can do that, of course. And firstly, I will go to the Buller Heaven and choose
indoor and the studio setup. And let's see what we have
here we have for the studio, and we can choose that. So I will choose neutral, maybe this one and let's choose that
studio and Wlod four K. So I will choose and HRI, you can W D X or or HD, both ergon or both
formats can work, and I will Dude multi
ri and come back later. Alright, so let's add the HRI. I will go to the scene
tab or the tab here. And after that, let's
add environment texture, add HRI and go to the Blender, HD or I haven, and I downloaded few HRI, feel free to choose
any of the studio. So I prefer let's see what
the friction for the studio. I like this one for the studio. And if you go to the render, without camera or anything, you will see that we have this
reflection, which is fine. You can make a 0.5
or point maybe 0.6. Let's add our variations. We have four variations. So let's start with
this first one, and the color, of course, for the phone will be this one, and this is the first
and after the camera, after adding the backdrop, we will see that we have this
one and for the backside, let's see what the logo? Let's enable the logo. And for the logo,
it should be there. But let's see. So I will move on
the y the control, so it will be here. Be it's inside the pon
so let's make it here, move on the Oi and
rotate around 9180. And after that move
in the direction, we can use a shrin crab deform a shrin crab based on this face and by And that will, of course, variant to this one. If you want to add
dips, of course, you can add solidify. But I think we don't need that. So let's add simple
solidify on both sides. For that one, this
will be metallic, and roughness will
be such as this. And I think for the silver, it will be dark, but roughness maybe
0.3 0.35 maybe. And you should add
picture But that's fine. What else? We will make it not appear in
the final render, so we'll disable that
and fill me transparent. So that's it to get
to the render mood. So let's use some test render. For each variation,
we will render four and let's choose B&G
with Alpha conversion, no conversion, and we'll
choose the location. So choose the location and the type the name for each frame and start two D noise, use BU and maybe that will be 1,200 square format and
start by render and miss. So for the next lesson, we will see how we
can do more renders. And, of course, we will fixing because that will require
more improvement. So see you in the next tutorial.
9. silver phone: So here is a brief surrender, but we will do to enhance that first three will
disable the B group. And of course, we
have transparent. And in the setting, we can choose glossy
to be hidden. So that was glossy, or you can choose another HRO. We can choose small
bit that may work. Let's see. And again, So let's try that. And for this slide, I have
shifted that because when it become here, it the slide. I add some reflection here. So I shifted that. So let's do another test render
in the performance. I choose a 256 and let's do
another render. There's one. So here is rendered
from the previous. As you can see, we have
some reflections here. But now we have this one. So it's maybe better. But I think writing
should be improved. Io duplicated
duplicate collection, and here we have design too. In the first prim, we will move that to be here. And when we Okay. So for MPT, we can go to the graph eater and
in the location. We can move here. Let's select and oi
Let's exlocation and we can do that here or on each frame of X in the X four in their location. And here also move on the X four their location Of course, there is a way for doing
that in the graphic or, but let's add another
location here and another location here. And of course, we'll
change the materials. Now we have another
phone choose this one. And basically for
the phone itself, we have it be silver. So you will choose
that to be silver. Sorry for that, I will duplicate that and I will choose
that to be silver. And after that, we can
choose the same color. It's a gold maybe, and all the other
will be light colour. Roughness here
will be 22 and for the other bird which is here. Gold, silver, and that will be the color but I will make 8.4. So see and render a sign Okay. So in our frame, I will choose all
of that and assign. Let's see see I think we can crofnme and strip dark. So here we are. For the button, of course, we will make it
another maybe gold. Let's see. And that will be
another color which is here. And, of course, the screen We have some Gronk here. So for all phases, make sure that you have the
screen assigned. And for this one, the screen we select the
UV emulator will again, UV ripped from view and
choose this ticket char. Sorry for that. Let's come
back and mix this screen two. Screen two, and Select all
and project from let's see. We have to select
only the screen, which is here and
Bjct from view. Make sure you have applied the
scale and brjct from view. Et's choose Bond in books. And choose your
another you ticketure. Let's move here. Cursor to selected and scale based on the
two cursor, scale x. We have. And you can also scale on
the X and scale on the Y. That's fine. We include all the reflections. And that is the second So let's move the camera to be here. And let's do our rendering. The same, but we will
say we have here second. And render animation.
10. Render the hazel version: So we rendered the good
version which is here, and we will render
now the hazel, we have the hazel
and the root quarts. So I will add a new file, and after that, let's duplicate this collection
to be design three, which is the hazel and I will disable this one for now
and this one for the hazel, we have this one. So let's open the image for
the hazel which is here. And first, first, you will, of course, add the screen, which is here, the same file. I will hit for now,
and for this one, we will add screen three
and choose this hazel. Amazing. For the color, the silver will be the same. But of course, the
gold will be changed. But I want the silver
to be more shiny, maybe 1.1 or 0.12, and the metallic will be fine. I think we will change. Let's see. Let's see. All right. For gold, it will be hazel metallic and the
same color like this. It's a sort of green. And I think all
will be the same. For this one, it will be the same silver silver border, and this will be silver border. Let's see. All right. A camera isn't the best for now. But for the camera, of course, let's do
something quick. So here I will add an circle the
circle maybe 24, and the scale rotate
around X 90 degrees and the scale and through
scale and the fill. And I will duplicate. First, I will apply
the scale and unrabt from view and after that, let's add gloss or G
and add image texture. Maybe choosing one from this. It will be here, and
it will be gloss on the same image and
roughnes point to five gloss and
emission maybe and duplicate around here
and around here. Let's see. And we can move that
here and move that here. And we can mix it with emission. And it's such as this
and emission of maybe for This is shooting. And maybe here too. So let's render the Hazle. Of course, we have here. The G may be the same. So it will be such as so let's
render another set, which here now
will be called st. This time, I will increase
the quality to be 200 and setting render. I will increase samples. And after that light boss, I will increase that
50 and all will be 12 to have more light
bosses, and that's it. Save and rental animation.
11. Home work: So here is the version
of the rendering. I am sure that this isn't the best result
that you can make, but I'm sure that if
you bought some time, you can render more realistic
version for this phone. And here is some other renders. So what next? If you go to now, it's time for your homework. So go here to the
project resources, and for the download resources, you can download the
reference images for the ole pixel or in
the homework section, you can download the homework. And I bought for you another mobile phone,
which is motorla, you can download
and do your best to model this phone and do the same recess and
render realistic results. After that, you can
submit your reject and I will leave for you a feedback. I think making phone
isn't such complicated. And I'm sure that if
you but a lot of time, you can render more than me. So I hope you find
this tutorial helpful. See you another class in
Skillshare, see tutorial.
12. What next : Thanks lot for
watching this class and Cmulting all videos. So the blender is professional
and has many features, and we can't cover all aspects and all
features in our class. So I offer different and
advanced courses here on Skillshare and try to cover all fillies and all
applications of blender. And also, if you are
interested in Blender and CD, you can follow me
on social media. Links on Twitter and
Instagram at Camel Time. If you have any question,
you can contact me via mail admin at anglestod.org, H blending and see
you in another class.
 Kamel Altohamy, Designer & Youtuber , basically Engineer