Transcripts
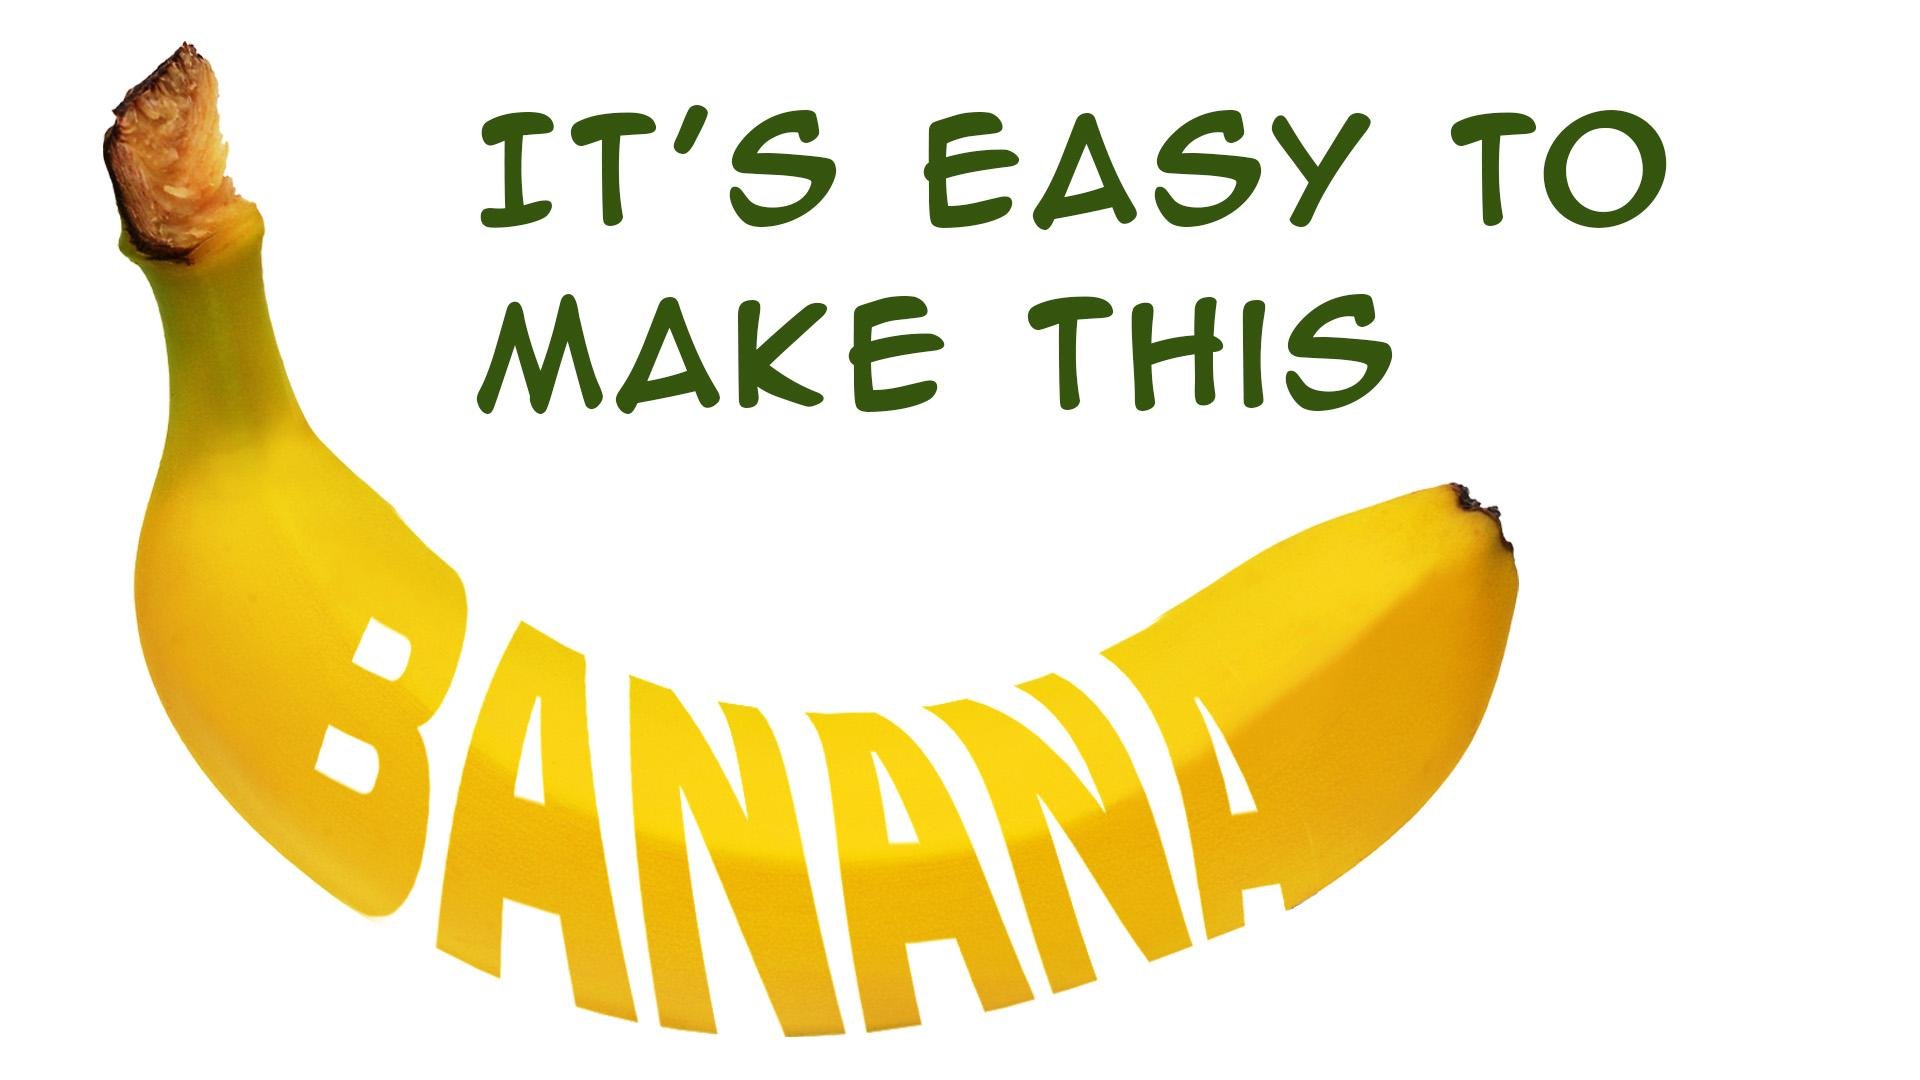
1. Create Pixel Drag Circles - Intro: If you've ever wanted to create these awesome radio
color effects that use color from your document,
you're in the right place. My name is Tim Wilson, and
I'm going to take you through this short course
on how to create these incredible effects.
Let's get started.
2. Get Image for Circle Pixel Drag: Let's go and get a donor image. I'm going to go and open
up this one over here, which I have supplied for
you if you want to use it, but find your own if you wish. This comes from Adobe
stock, the free stock. So I'm going to
open that one up. And what I want to do is
I want to cut her out. So I'm going to go along to this little Object
Selection tool. I'm going to go to select People and wait until it
recognizes her. I can then click on her, make sure I'm getting
the entire person, and then click Apply. Now, I want to actually separate
her from the background, but in a non destructive way. So I'm going to
get my layers up. If you can't find your
layers, by the way, you go to the window menu
and you find layers is halfway down the panel set. And I'm going to add a layer mask by clicking on
this little button over here. So by doing that, I'll then mask out the
background from her. So if you'd like
to get that far, get your donor image,
select the subject, and then go and add the
little mask down there, and that will mask out
your layer. Try it out.
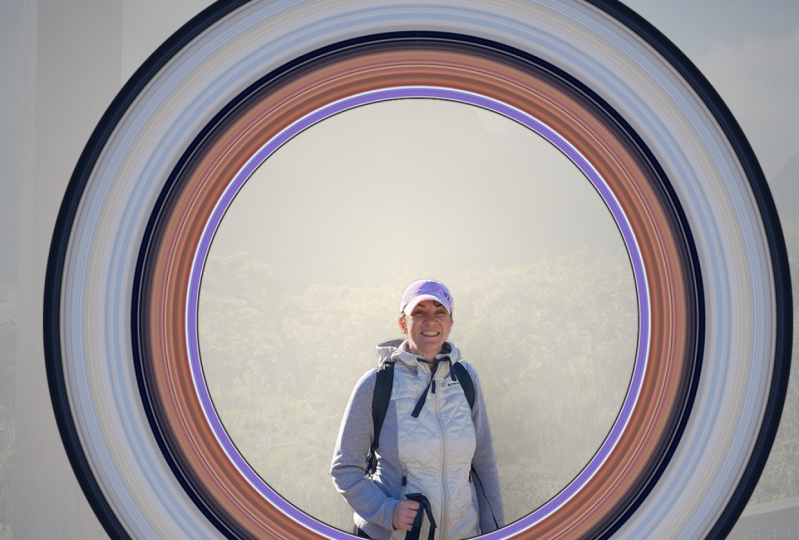
3. Make the Pixel Drag Circle: Let's make this wild
circle to go round. I'm going to use the single
column marquee tool, and I'm going to
move across to her, and I'm going to put a single
column over here somewhere. What I'm looking to do
is kind of put it from her head down to maybe
her middle over there. Now, I don't want to get this bit here or any
of that in there. So I'm going to take
a selection tool, the rectangular
marquee tool and I'm going to choose the
subtract option over here. This is the little button,
third one along in there. I'm going to click and drag to subtract that part
of the marquee, and I'm going to go
over here and say, I don't want this bit
either like that. And in fact, I'm going to
zoom in a bit further. And I also don't want that, but I don't want
to get any green. I just want this skin tone going through up to her hair in there. Now, make sure, and
this is so important, make sure that you are on the layer itself,
not on the mask. So don't click on the mask. Click on the layer
or this won't work. Click on the layer,
copy and paste. That's Command C or
Control C on the PC, Command C on the Mc, and then Command V or
Control V on the PC. And that will just paste in that little
section over there. It's one little row of pixels. Let's zoom out a bit over here. Now, I'm going to go
along and scale that up, so I'm going to zoom right out, and I'm going to go to edit, transform and scale,
grab the middle, but hold down the Shift key. If you don't, it
will just mis scale. So hold down the Shift key, and you can then just scale
this out horizontally. I'm going to scale
quite a lot like that. And then click on my tick. So if I now move this around, you can see I've got a huge
area in there to work from. Now, here's the making
it round magic bit. We go along to filter
down to distort. This is a really
old effect from Oh, it's been around in Photoshop
for years and years and years. Polar coordinates. Now, the polar coordont you
can't see anything in there, but what I'm going to
do is just scale out a little bit until I can see what I've done. I
can't see it at all. Let's try polar
rectangular, polar. Oh, well, I can't see it. Doesn't matter. I'll click Okay. There it is in there anyway. Now, I'm just going to scale
this to make it round. So I'm going to go
once again to edit, transform, and down to scale, and we're just going
to make that round. Now, as you can see, by
scaling it like this, all the points scale, hold down the Shift
key so that you can what's in reality is
actually mis scaling it. And let's get a little
circle like that. And then if I don't hold
down the Shift key, I can then scale that
up and down, as well. So I'm looking for
a little shape, something along that line over there that she's going
to be jumping through. You can do whatever
you want with this. I will zoom in a little bit over here because I'm going to make it a little bit larger. Something along that line. Maybe a bit smaller than that. Anyway, do try it out.
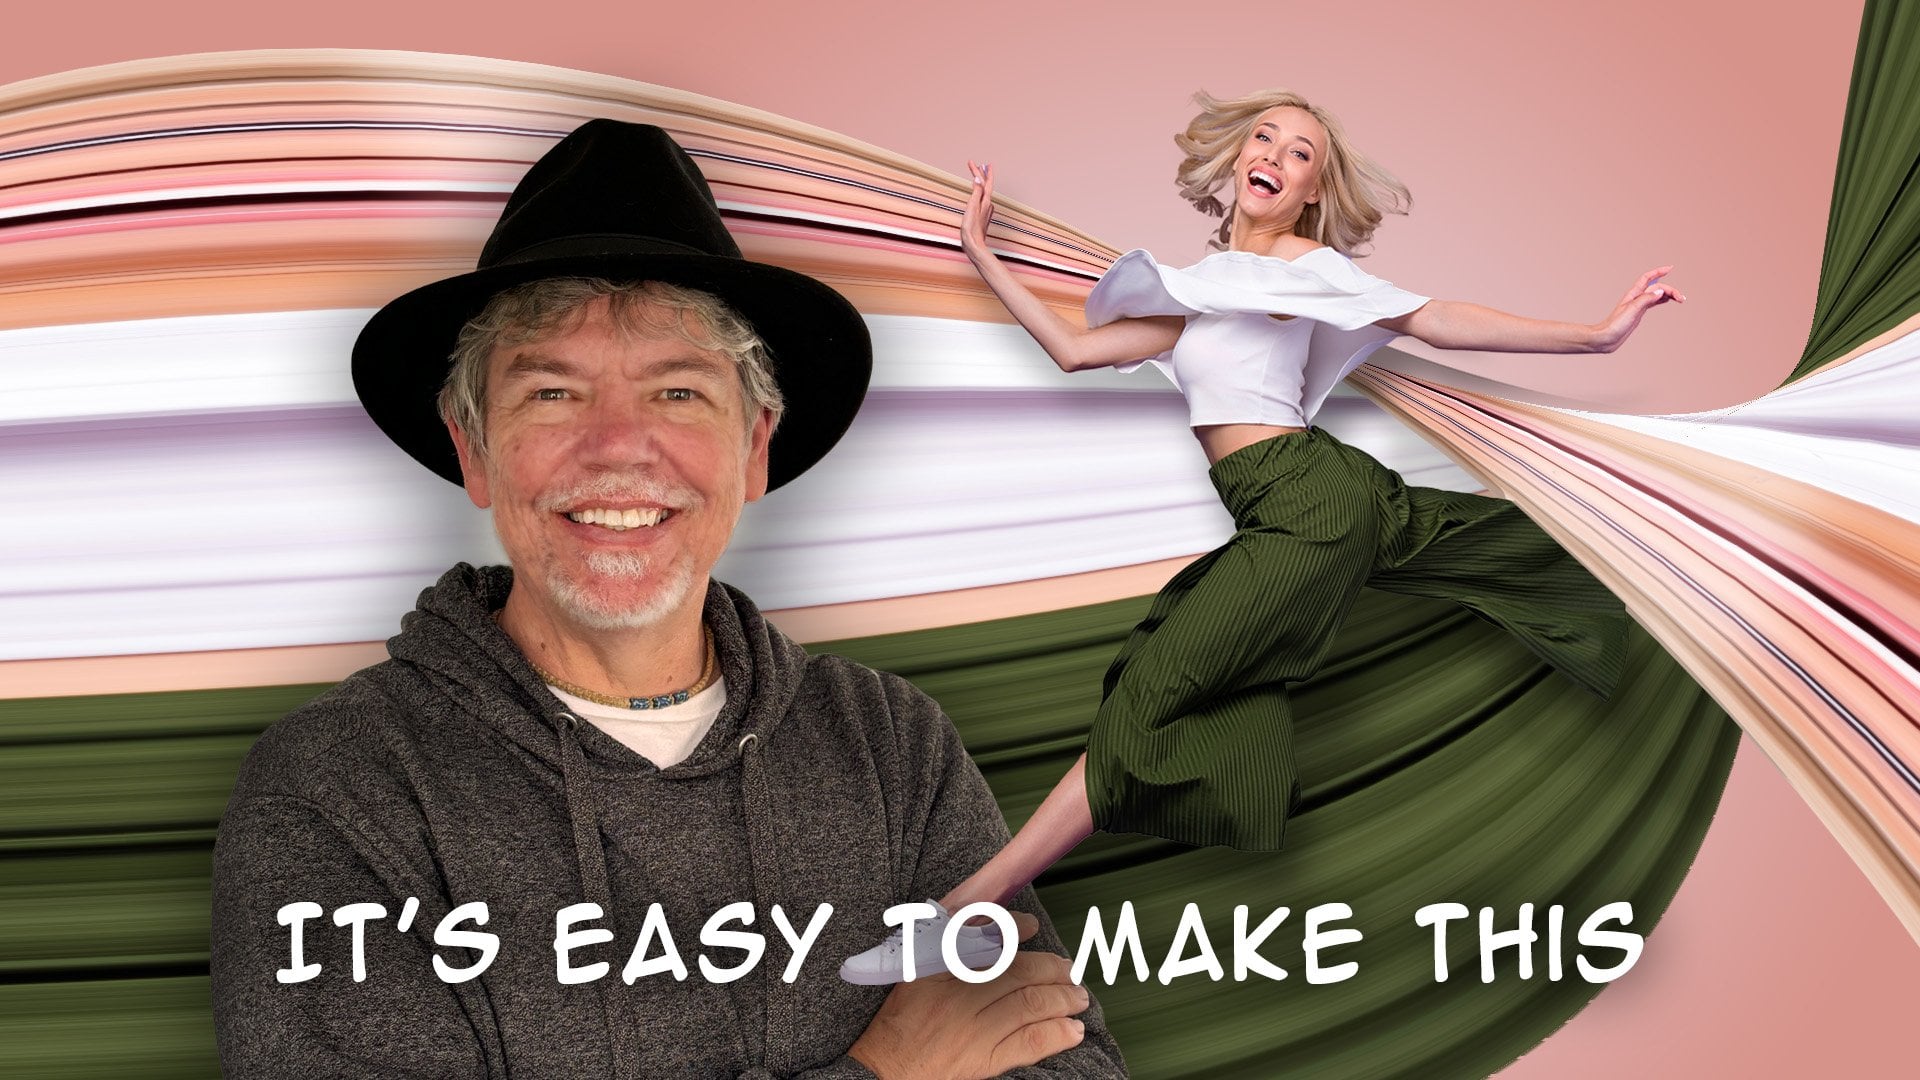
4. Make a Gradient Background: I want to put a
background in here. So I'm going to go to my
foreground color down here and I'm going to sample
a color that I want to use. I'm going to choose
her skin tone. Click Okay. And I'm going to
go to the background color, and I'm going to choose maybe a darker version of her skin
tone, something like that. Click Okay. Then down
the bottom here, I'm going to go along to the
adjustment layer button. I'm going to make a gradient. Now, in the gradient,
I'm going to click on the little drop down and choose from the basics, the gradients with my foreground and background color in there. If you want to go and experiment with some of these other ones, you can just go along to
them and choose all sorts of weird and wonderful
gradients from those. But as I said, I'm
going to be using ones from my image in there. Now, I'd like this to be a linear not a linear
gradient, a radial gradient. If you want to move
the gradient around, you can just click and drag. If you find that it
doesn't, you can just untick a line with layer. And then we can go in and we can adjust the scaling of that as well to make it smaller
or larger. Click Okay. Now, the gradient, I'm going to drag that below the
other two layers. I'm going to have my person
on top of the shape, and that's pretty much it. We're just now getting
ready to actually start to erase some of her leg, so it looks like she's
jumping through that shape. Have a go, get your
circle in there, get your background in there, and then we'll move on
to cutting her leg off.
5. Add to the Layer Mask to Hide Leg: Now, how are we going
to get rid of her leg? Well we're going to add
to the mask on her layer. But to do that,
we're going to have to make a little
selection over here. So I'm going to go
to the shape layer. That's the circle
that I've got here. I'm just going to
hide that top layer. So I'm on layer one,
which is my circle. I'm going to use
a selection tool over here to just select
that circular area in there. Now, I could try
some of these tools, for example, the
Magnetic Lasso tool. I could go and see
if I could use the selection brush or even go down to the Object
Selection tool. And well, you can see it's
not doing a great job there. But there's a little
trick that we can use here to select a shape. If I go to this layer and I hold down the now on a
Mac, it's command, on a PC, it's control, and I click, what it will do is it will select any pixels
which are on that layer. You can see if I hide
that background, I selected everything
on that layer there. It's just a fast way of selecting
something from a layer. Now I'm going to go
back and switch on my dancer or jumper. I'm going to click on the mask, so I'm on the mask, not on the layer itself. That's
really important. And we're going to take a
paint brush with black. You need to use black as
your foreground color, and then we're just going
to paint where the foot is. And you can see it almost
looks like it's erasing it. In fact, all it's doing is
by painting onto the mask, it's hiding that area there. Then you can go to select
and deselect like that.
6. Add a Drop Shadow & Clean Up Hair Cut Out: Let's add a drop
shadow to this layer. I'm going to go down
over here to the FX, click over there and
choose drop shadow. And I want to see
this drop shadow. I'm just going to change the opacity a little
bit over there. You can change the size. And I'm going to change the
distance because I want this drop shadow
to kind of go down a little bit like that. So it's kind of coming just
a little bit below her. I know it looks bad, but
I'm going to click Okay. So the problem with
drop shadow is that, yes, it's getting on
the shape very nicely, but it's also doing
weird drop shadows here, and I don't want any drop
shadow on this inner bit over here because that's supposed to be where she's jumping through. Likewise, I don't want to
drop shadow from her foot. So I'm going to go
to the layer menu. I'm going down to layer style. And I'm going to
choose create layer, and that will take that
drop shadow over there, make it into a new layer for me. Now I can actually
take that layer and move it around anyway. Back. So I think I will move it down just a little
bit over there so we kind of get
some of the shadow hitting these areas there and that area there
looking very good. But then very simply, I can take my arrays
till where I don't want the shadow to be
and I can erase it out. So I'm still on the layer there. I don't want this shadow here, so I can erase that one. I don't want a shadow over here because she's jumping
through this area. I don't want the
shadow on there. And in fact, I think
the shadow from her hair and her head is
just a little bit too harsh, so I will remove that. As well, and maybe get rid
of that shadow up there. So now we've got a
shadow just on the Oh, I've seen a bit that I
shouldn't have there, on the circle to give her
a little bit more depth. And you can change that. I can
go to my pasty if it's too harsh and just reduce
a little bit, as well. Lastly, I really don't
like this gradient, and that's the great thing about these adjustment gradients is that I can just go in there, double click it, and
then I'm going to click on the gradient
itself somewhere on there. I can then choose my color. So on this color here, I'm going to go to color. I think I'm going to
choose a lighter version. And then for the darker color, I'm going to double
click on that and I'm going to find a
different color in here, maybe one of those
pinks in there. That's quite nice. Actually, it's looking
okay. Click Okay on that. If I want to move it around, I can still move that sort of center of the gradient around. I can change the scaling of the gradient if it's
too big or too small. I think I'm reasonably happy with something
like that. Click okay. On zooming in, I've
noticed that there's some purple coming
out behind her hair, which doesn't look so good. So there's a really
cool trick that you can use to get rid of things
like that in hair. I'm going to go to the
mask on her layer. So I've clicked on
the mask over here, not on the layer,
but on the mask. And then I'm looking at
the Properties panel. And in the properties panel is something called
select and mask. Now, I'll click on
Select and Mask. Now, you might find that
when you try this out, you have a white background
or a black background. It doesn't really matter. All we're interested in
here is scrolling down to the bottom and clicking
on decontaminate colors. And you can see straightaway
when I switched on, those colors have
disappeared in there. Now, where it says output two, I'm just going to
say, over here, a new layer with a layer mask. We'll click Okay. So it's made a new layer
for me over there. And if I switch on the other one, you can
see the difference. That's the purple and
that's without it. So I don't need
that other layer. This one is now the one with
the decontaminated colors. All I need to do now
is to give it a save. So I've got my layered
version saved. I'm then going to go
to the cropping tool. I can then go into width
height and resolution, put in the size that I want for whichever social
media platform I'm going to put this onto, or if it's going to
be onto a document, I could put in,
say, for example, 10 centimeters by 10 centimeters
at 300 pixels per inch, put in whatever you want for
your final result in there, and you can then go
and export that out as a JPEG or a PNG file using file export as and choosing the
format that you want. Here. I hope you
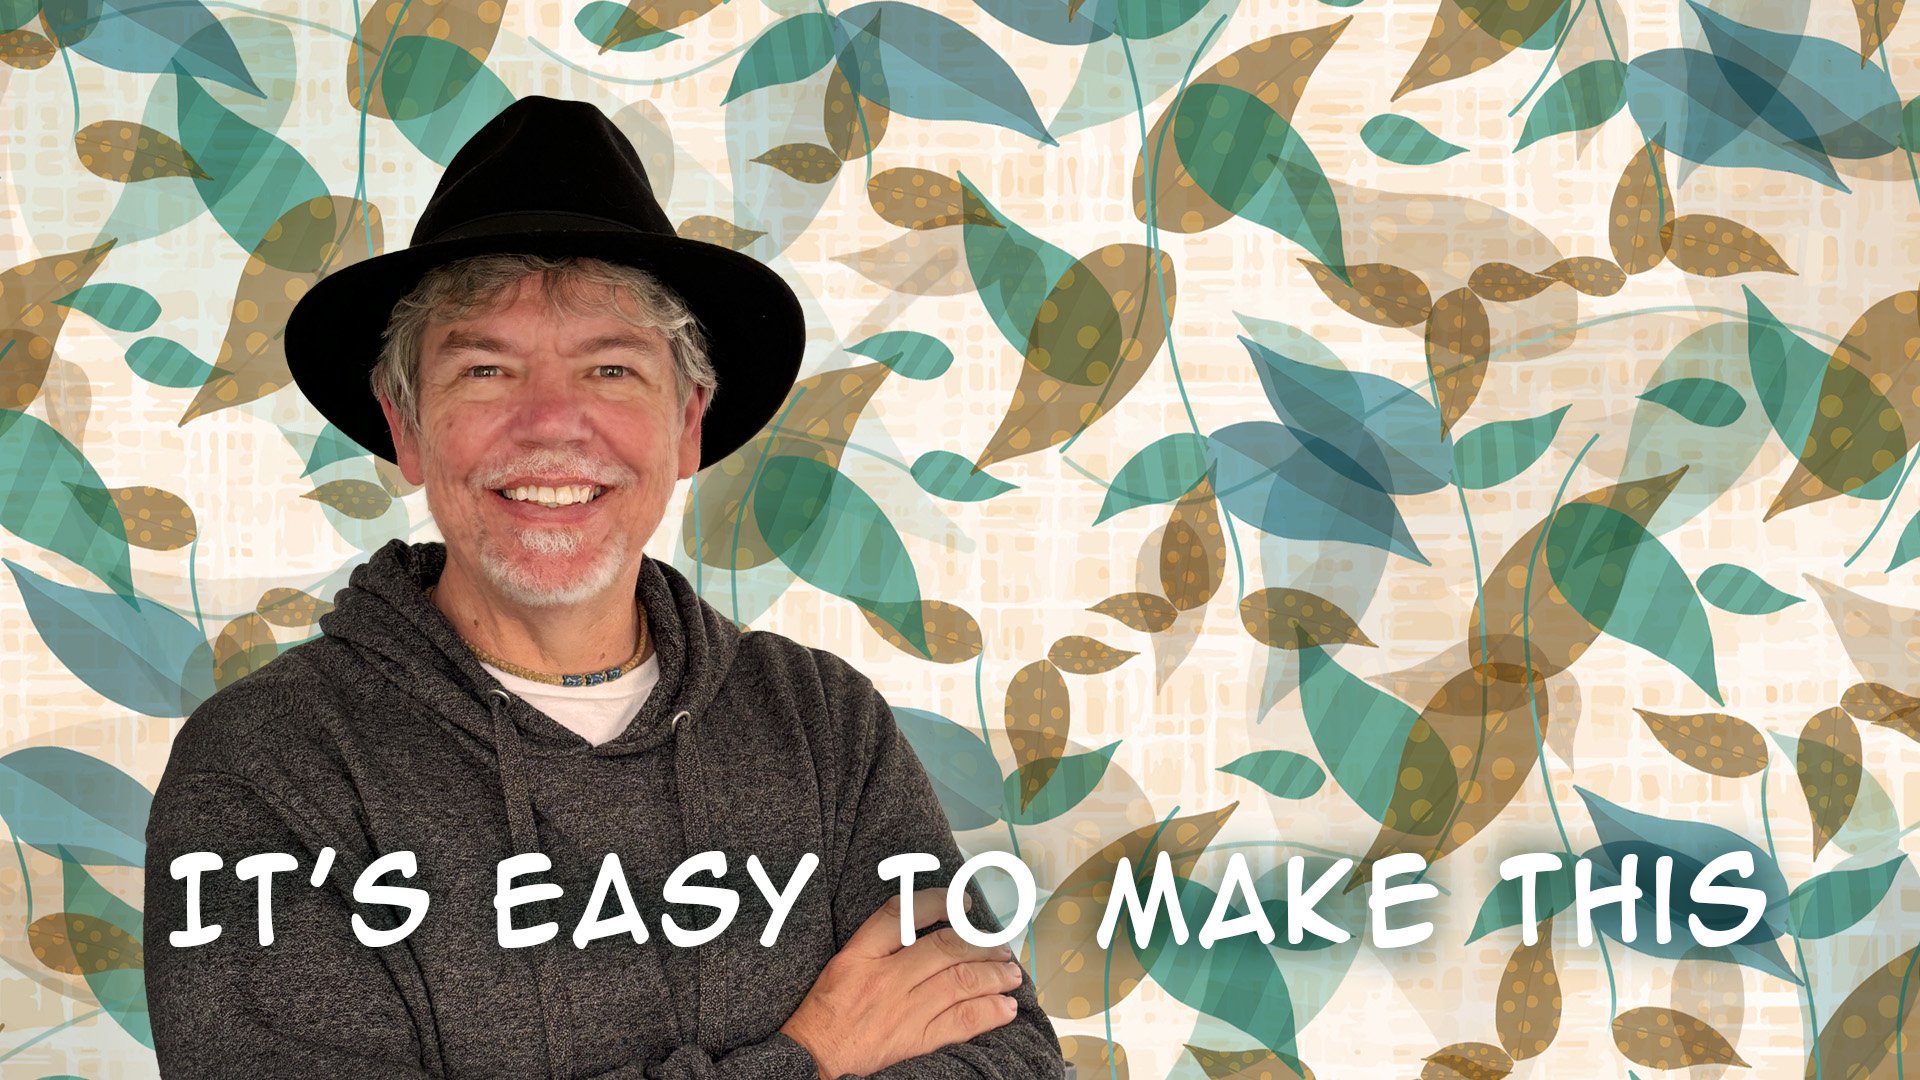
enjoyed this tutorial. If you'd like to learn
more Photoshop or see more of these type
of effect videos, don't forget to click
on my name right at the bottom and
go to my profile and have a look at all
the courses I do in Photoshop, Affinity, and Canva. And also click the
Follow button. That way, you'll be notified of any new courses
that I put out. Have so much fun with that. It's a brilliant,
brilliant technique.
 Tim Wilson, Adobe Certified Instructor and Expert