Transcripts
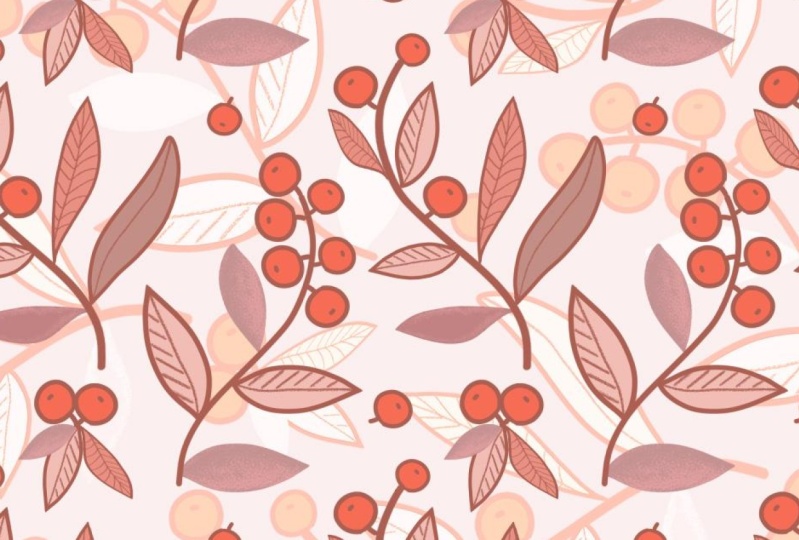
1. What We're Creating: I have to admit something. I love patterns. Have
a look at these. They are so simple to do, and they're just beautiful for applying to anything
that you want, whether it's walls
or through taking simple patterns like that and
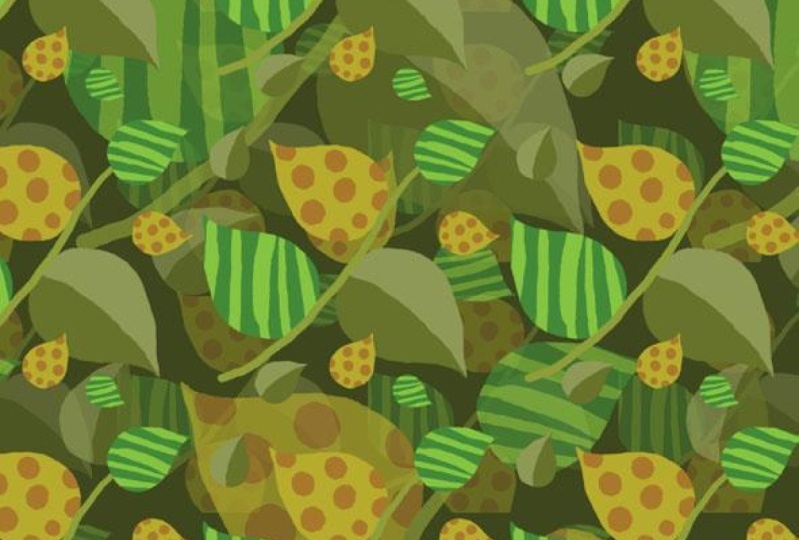
applying them to fabrics. In this little course,
we're going to look at how to actually
create the pattern, and we're going to do
something along this line, making colourful or
interesting leaves. Now, we will paint them, but if you can't paint,
don't worry about it. I'm going to show you how
simple it really is to do. Let's get started right away.
2. Make a Leaf on a New Layer: Let's make a new
file. Quite simply, this is going to be a square. I'm doing my 2000 pixels by 2000 pixels, Artboard
switched off. RGB color, white background. If you want to put in a profile, I'd suggest SRGB,
but click on Create. Now, I'm going to
make a new layer. So let's go to the
layers panel over here. I'll just make it a little bit smaller so it's
easier for you to see and pull it across because we're going to be using quite a
lot of layers for this. I'm going to do a new
blank layer over there, and I'm going to
paint in my leaf. Now, if you can't
paint, don't worry. This is really simple to do. I'm going to take a paint brush, going to get a very
small hard brush. So size, I've got
that to 11 pixels, hardness, I've got
to 100% in there. And the trick here is instead of actually having the smoothing right
down to zero, if it's down to zero,
you'll see it does exactly what it's supposed
to do as you paint. If you take that to 100%, you'll see it'll
actually smooth out your brush for you as I do that. It's almost like
having an elastic band attached to your pen
which smooths it out. So keep that at 100%, and we're going to draw
in a little leaf shape. Now, all I'm going to do is draw kind of a little bit of a
curve over there like that, and another one, but
kind of less curvy, so it's kind of going
to go there out. I may be round to here. You can see my leaf is not perfect by any stretch
of the imagination, and it doesn't have to be. No leaves or very few
leaves are perfect. However, if you look at your
leaf and go, You know what? Not really happy with the shape. What you can do, here's a nice little trick
is go to filter, go down to liquefy. And in liquefy, make sure that you are in this
forward warp tool. There is a brush, so
right at the top here, you'll find brush sizes. Get a nice big brush, and you can actually
push that line along so I can just
move it out a little bit and make a sort of a leaf
type of shape that I like. Over there, let's get a
slightly bigger brush for that. Whoa, that's a bit big. You can see I can sort of
pull that around, maybe pull this down a
little bit, like that. Honestly, it doesn't matter
what you do for this. As long as it's
vaguely leaf type of shape or teardrop
type of shape, that's all we're worried
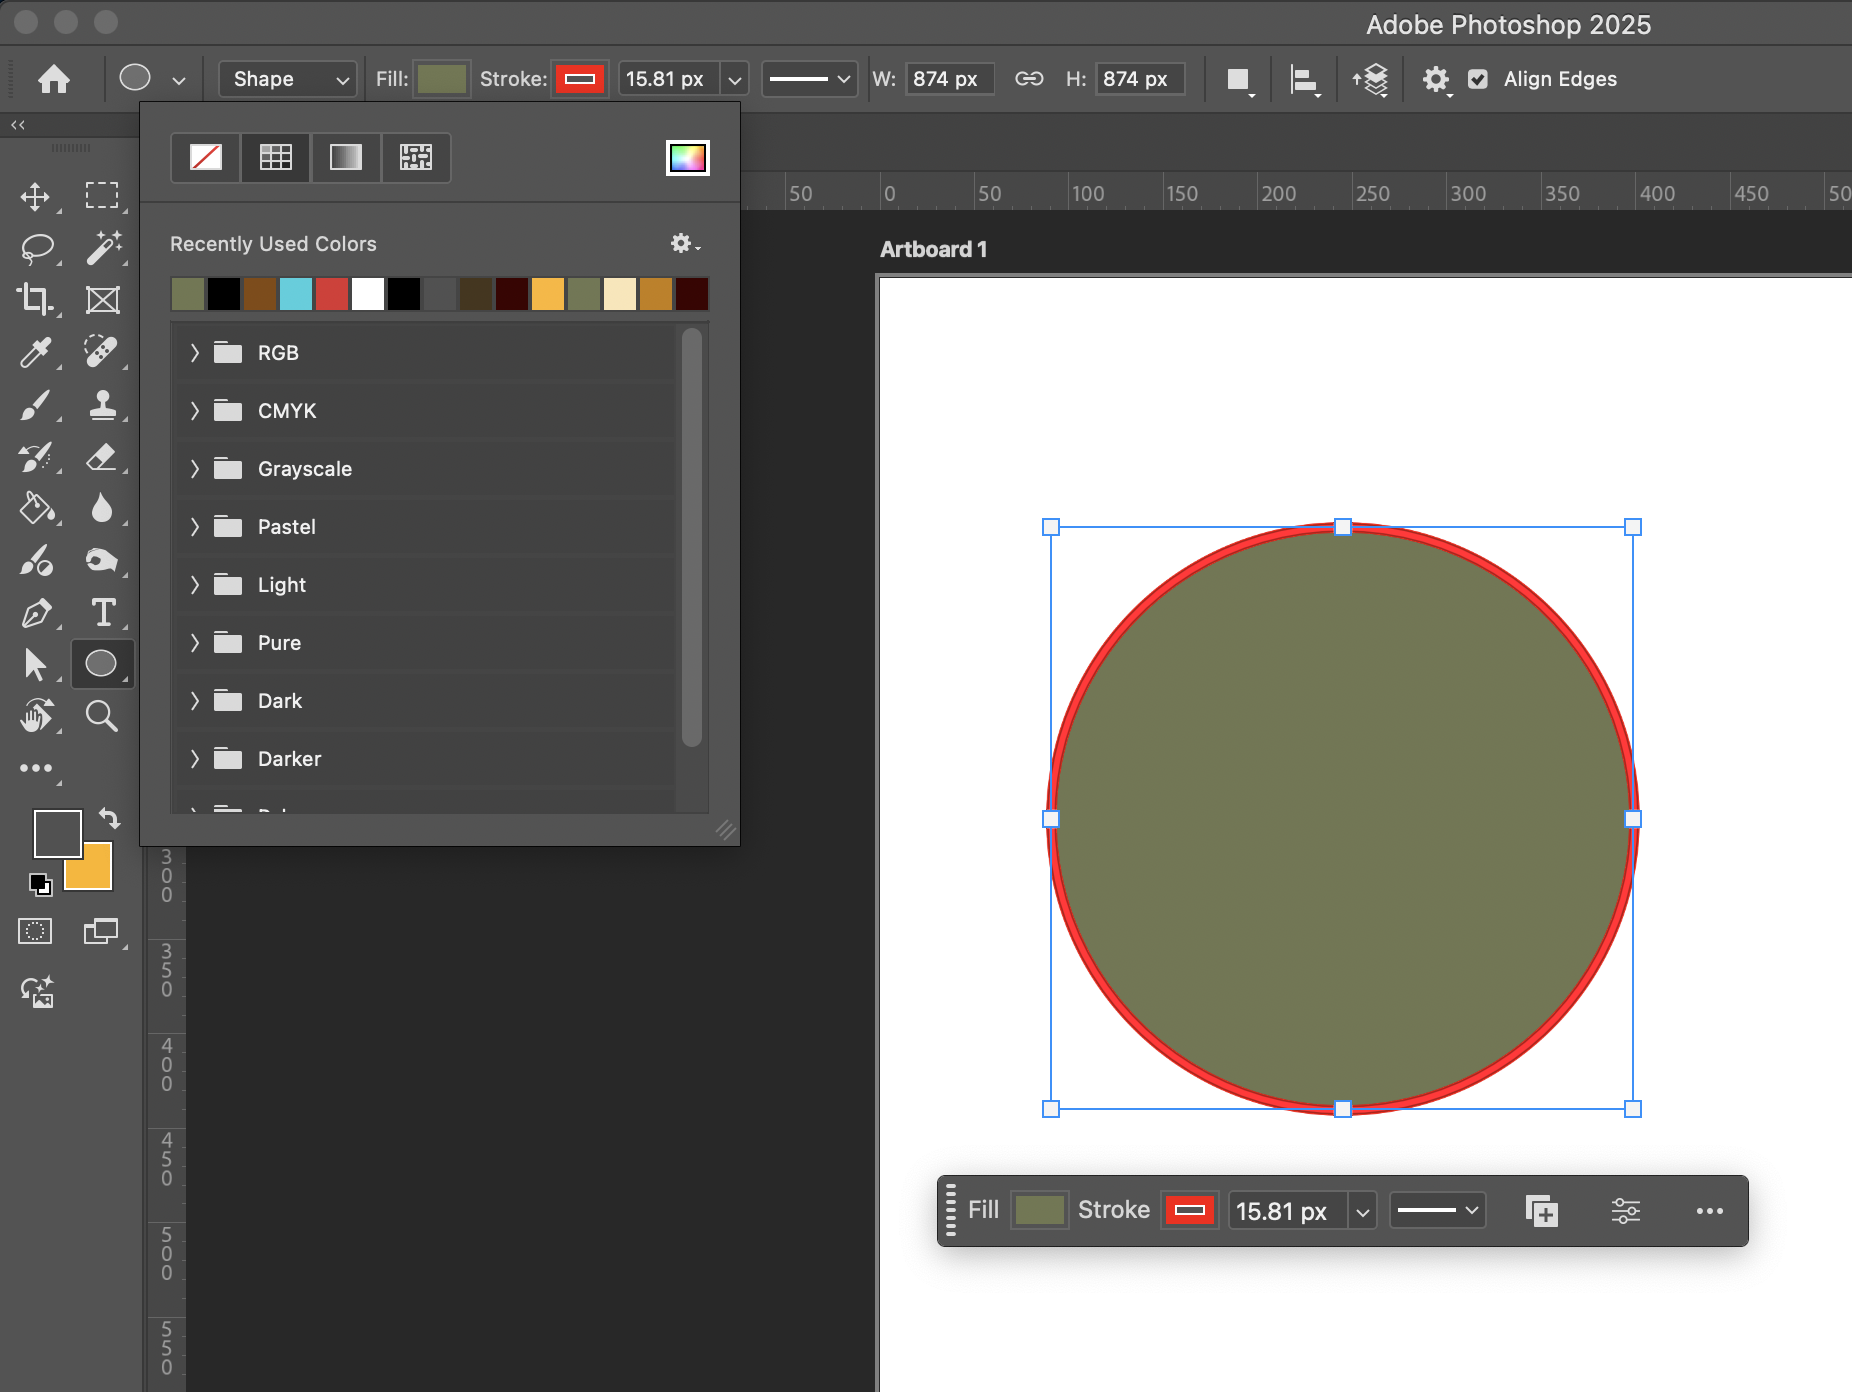
about. Click Okay. Lastly, we need to
fill this with color, and the easiest way to do that is to get the little
paint bucket. It's in with the gradient till, by the way, take your
tolerance reasonably high. If you have it too low, you'll
find that there might be a few little pixels that
are left out in there. So I've taken my
tolerance to 60. I'm going to just use the foreground color which
happens to be green, and I'll click to
fill it like that. Have a go, make the one leaf. You only have to make one,
we'll copy it from here. Don't forget to do
it on a new layer, and then we'll come back. We'll make some
variations on that leaf.
3. Add New Leaf Copies & Change Color: I've decided to change
the color of this leaf, and there's a really nice
easy way of doing it. All you have to
do is to go along to edit and choose fill. In the contents over
here, choose color. And then it'll ask you
what colour do you want? Why would you use
some sort of greens and maybe these foresty
colors over here? I want a dark green like that. Now, with preserve
transparency switched off, if I were to just click Okay, you'll see it will fill the
whole layer with that color. I'm going to undo
that. So the trick here is when you go to fill, choose the color that you
want. I want that green there. Switch on preserved
transparency, and when you click Okay, it'll only fill the pixels that have got something on them. It won't fill those
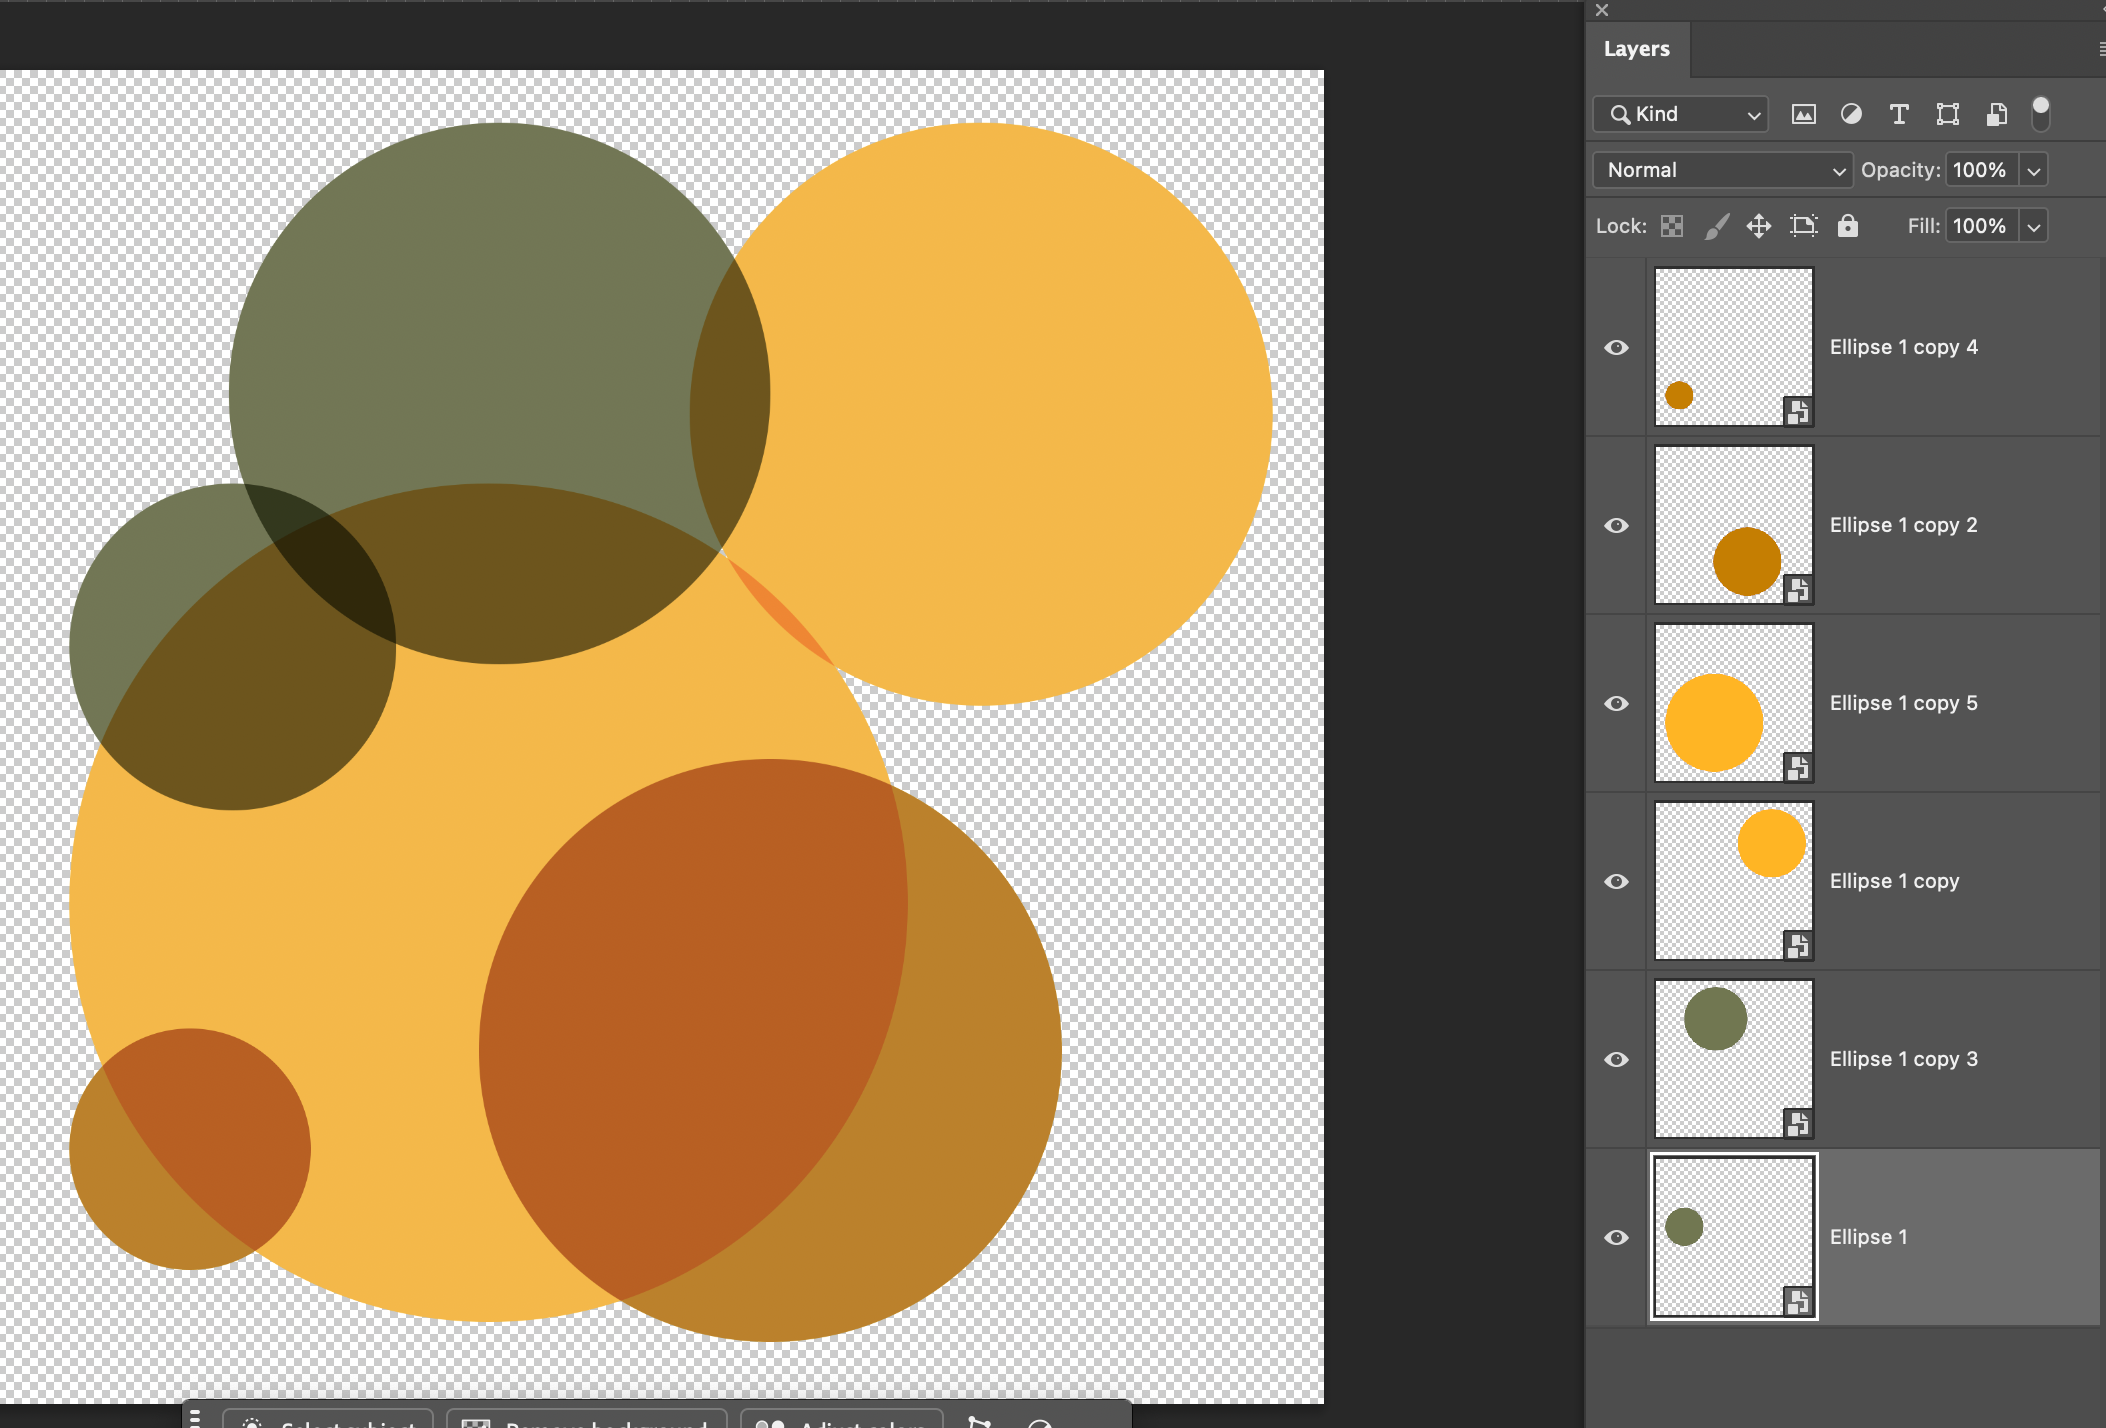
transparent ones. So there's my first leaf. I'm just going to move
it across like that. Hold down the Alt or
the option key Alt on the PC option on
the mac, make a copy. So that gives you a
second layer over here. Let's change the
color of this one. So I'm going to
go along to edit, fill, click on color, choose the color that
I want for this. Let's go with a slightly
darker leaf this time. Maybe I'll make it a
little bit more yellowy over there. Click Okay. Preserve transparency on. Click Okay to make that one. I want one more leaf in here, so I'm going to hold down
the alter the option key, make a copy of
that 11 last time, edit, fill, choose the
color that you want. And let's go with more
of a brownie yellow. For that one, click
Okay, and it's done. Have a go with that.
4. Add Some Leaf Details: I some groovy patterns on this. I'll start off with
this green one. And the green one, I
want some stripes. So I'm going to
get a paint brush. I'm using a hard brush because I want some
hard stripes on there. I'm going to make my
brush size a bit bigger, maybe a little bit
larger than that. Choose a color, so I'm going to go down to
the colors over here. I'll start off by sampling the green so I know that's
the color I've got, and then I kind of want some
lighter stripes over there. Now, I'm on that layer. If I were to click and paint
on that layer, first of all, my brush is too
small, but secondly, you can see it paints across
the whole of that layer. Let's undo that. So I'm going
to make my brush bigger. I'm just using the right square brackets to make it bigger. Go up to the top and switch
on this transparency lock. What happens with the
transparency lock is when you paint like that
preserved transparency, it keeps the transparent
pixels absolutely transparent. Let me do the same
on this layer. On this layer here, I'll hide the one at the
top for the moment. I want half of it
to be that green, half another green, so
I'm going to paint it. I'm going to switch on
preserve transparency, that little lock there. Go along, find the
color that I want. I'll click on the colors, start with this color here, and let's make that slightly
different color over there, and then I can just
paint that in. I'll just do a line
down there, paint that. As you can see, you don't
have to be perfect. You don't have to be a
brilliant artist for this. It'll end up looking awesome. Onto the last one over here, switch on preserve transparency, get my paintbrush, choose the color that I
want to work with. So I want to do that,
but I want it to be more of an orange. Click Okay. And I'm just gonna do
dots over here all over this to get
this really wild, spotty look. On there. Have a go with those.
5. Make the Patttern & Edit It: Now we also need a stem, so I'm going to do that
once again on a new layer. I've just added a
new layer in there. Small brush, I'm going to use my left square bracket
to make it smaller. I'm going to choose
a color for that. I think I want
something in the sort of greenish range,
but it's up to you. And with the smoothness
set to 100%, I'm just going to
draw a little line along here like that. Now, what we need to
do is we need to make all of these layers
into smart objects. I'll start at the
top, go to layer, Smart Object, convert
to Smart Object, and just work your way
down all of these. It works if you don't make
them into smart objects, but things can go wrong that way as well.
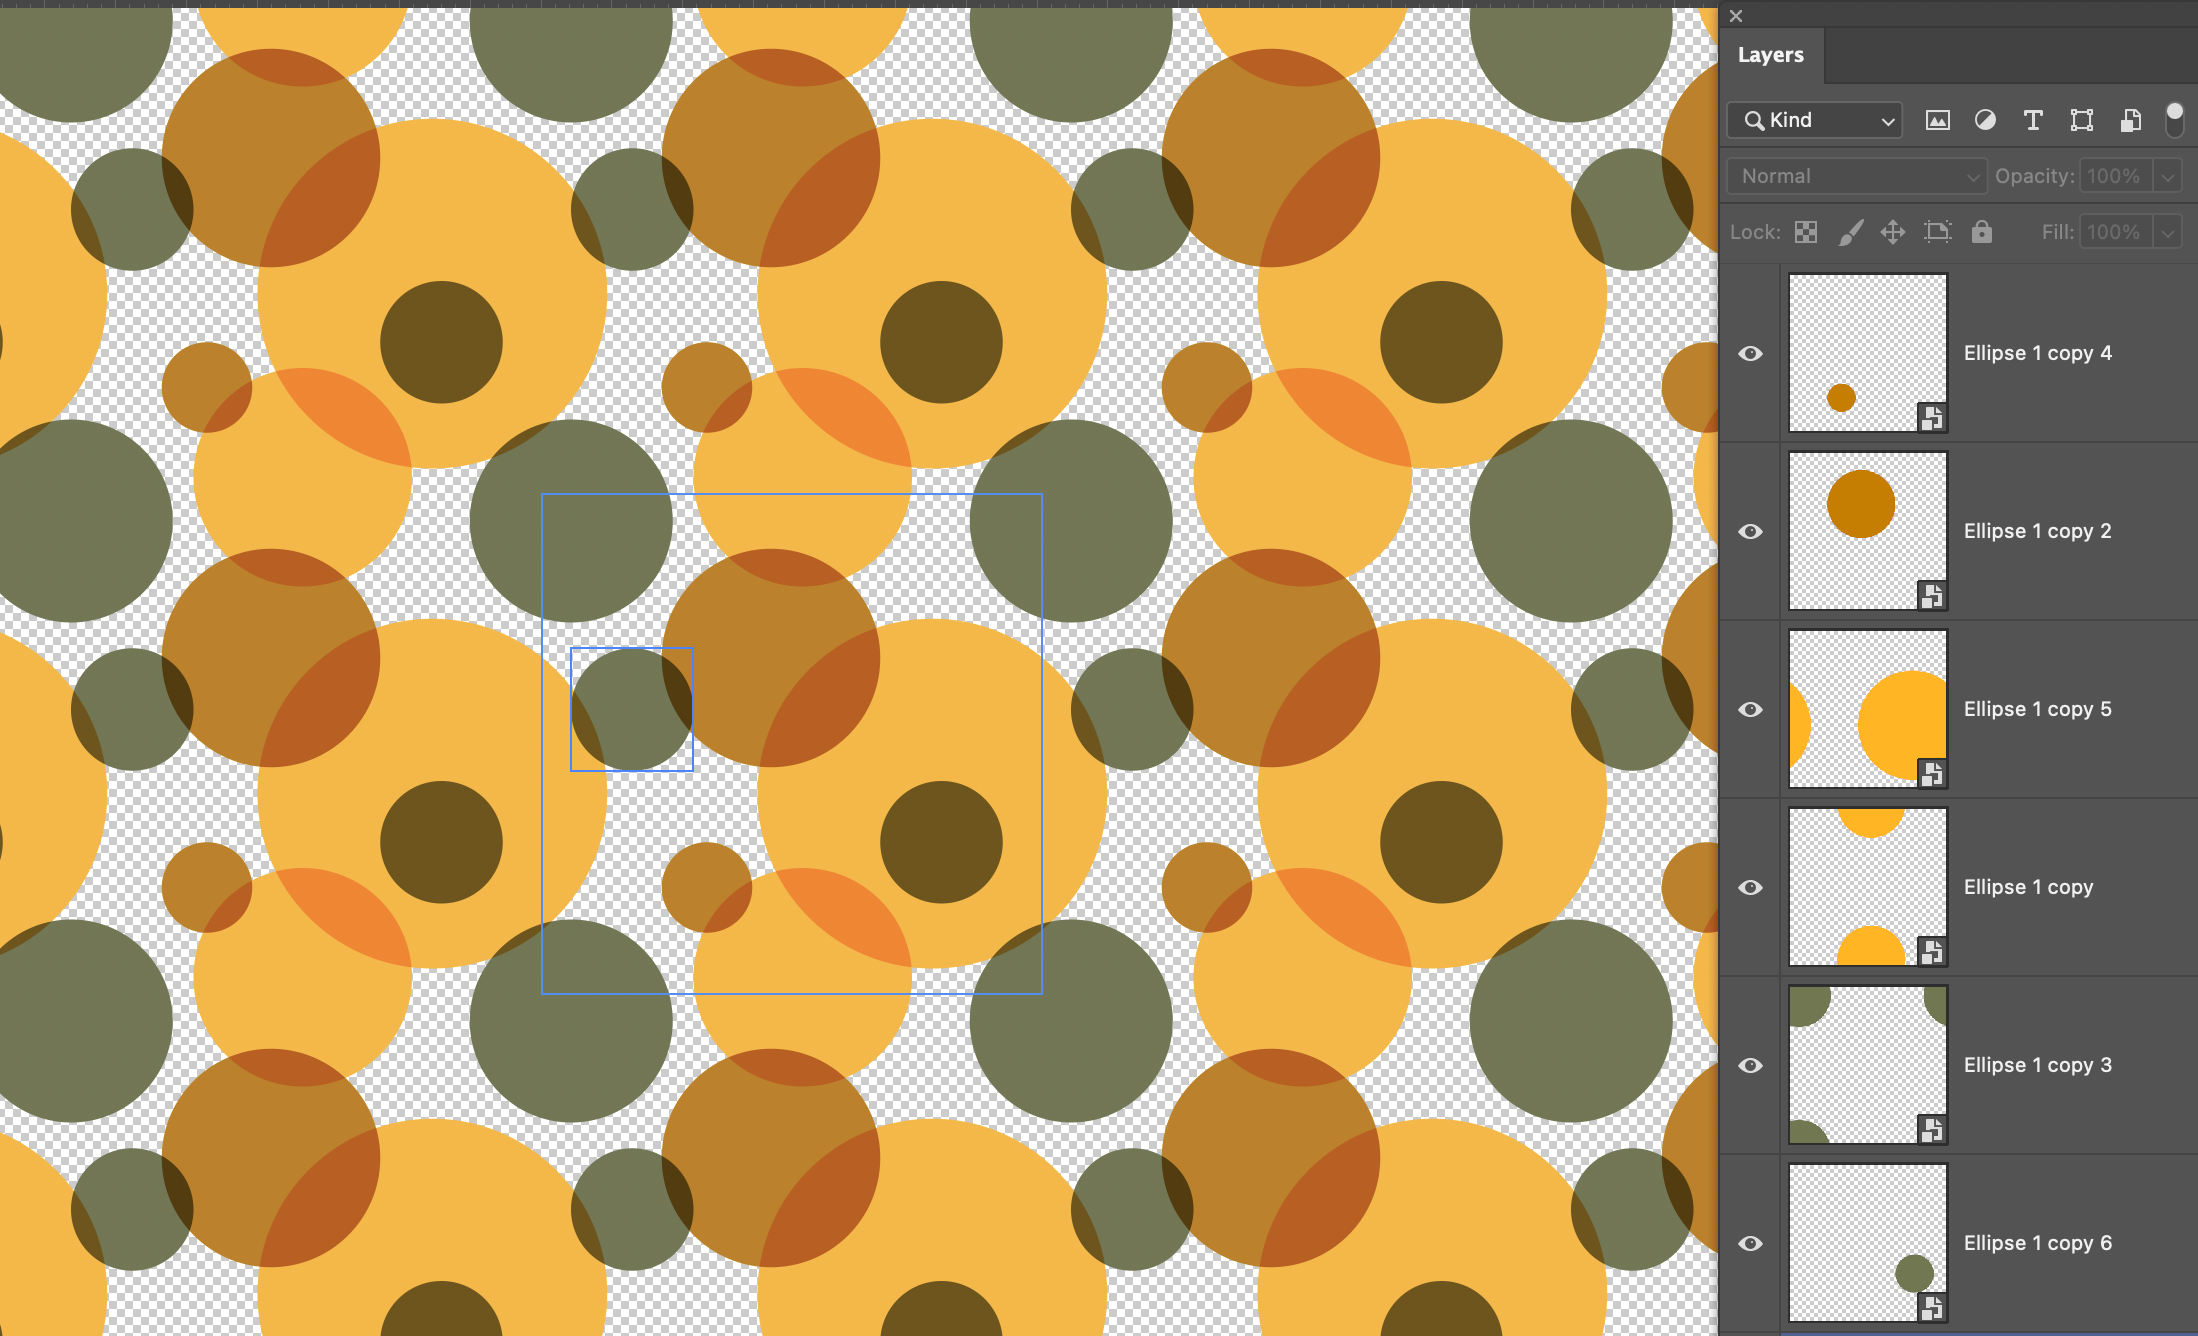
It's not brilliant. Now, here's the fun bit. We're going to go to view, and we're going to say
show the pattern preview. Now, over here,
this little thing says Make sure there
are smart objects. We've done that.
Click Okay. I'll zoom out and you can see
the pattern so far. I'm going to use my move tool, switch on Auto Select, and now I can click on
these and just move them around into any way that
I want them to look. And in fact, I can
also scale them, so I'm going to use Command or Control and T to transform. I'm scale this one down a
little bit, move it up. Let's go to this one here. I'll click on that
one. Once again, Command or Control T. Let's scale that one around.
Maybe flip it. This little sort of
heads up display gives you a quick flip option, and I'll do that one over there. This one, if I want to
move them above or below, I can just move them around like that by dragging
the layers around. I'm going to go to
that layer there, pull this one down, once again, transform that, scale that one down to get another
leaf in there. Now, if that doesn't look quite right and you want to add
some more leaves, well, you can just hold down
the alter the option key and make copies
and once again, scale that one down,
rotate it around, move it to where
you want it to go. I'm going to put that one on the end of the stalk over there. Just keep going with this, making copies of the leaves
and moving them around, scaling them, et cetera. I'm going to do a
few more on mine, but I won't force you
to watch me doing that. You'll see what it looks
like in the next video. But have a go yourself now. Don't forget to make
these into smart objects.
6. Define the Pattern: Now the fun bit.
I'm going to go to File down to Define Pattern. And you can give us
a name if you want, click Okay, and your pattern
is done as easy as that.
7. Put a Pattern Together from the Adjustment Layers: I've made a new A four document, and I've brought in this piece of linen over here
as a new layer. It was an image that I
found on Adobe stock. You can use any
background that you like. Any sort of fabric will do. So what I'm going to do now is I'm going to go to my layers. I'm going down to the
adjustment layers and I'm going to add a new adjustment
pattern layer. Now, it puts in this weird
one to start off with. But if you click
on the drop down, what you'll see right
at the bottom there, the last one is your pattern. If I click on that, you'll see that it's now
added my pattern. But the problem
that we have here is that although we've
put in the pattern, it's got this white
background we can't see the linen throughout. So let's just go back to
the pattern for the moment, switch off the background, go up to edit, define
pattern again. Give it another
name. Click Okay. We can go back in here again. You can see you can update
your patterns quite quickly. Let's add that in
as a pattern again. So over to pattern, find the newest one over there, and there I can see the linen. Now, in this pattern fill, I can go to my scale, and I can just
scale this down to whatever size that
I want over here. I can rotate it round at the
same time. I'll click Okay. And then I can go along. Well, actually, let's make it a little
bit more interesting. Let's make a copy of this layer, so drag it down onto
the new layer button. To the underneath one. I'm going to double click on there, and I'm going to scale
this one up so the copy is going to be quite big, like so. But then on the underneath one, I'm going to reduce the
opacity so you can sort of just about see it below. Let's go to this top
one and do it again. So we'll make another copy
of that one, the top one. Go to the one just
underneath it. Double click. Let's have a different sized
scaled one now for this, maybe sort of in
between those two. Rotate it round a bit. Click Okay and reduce
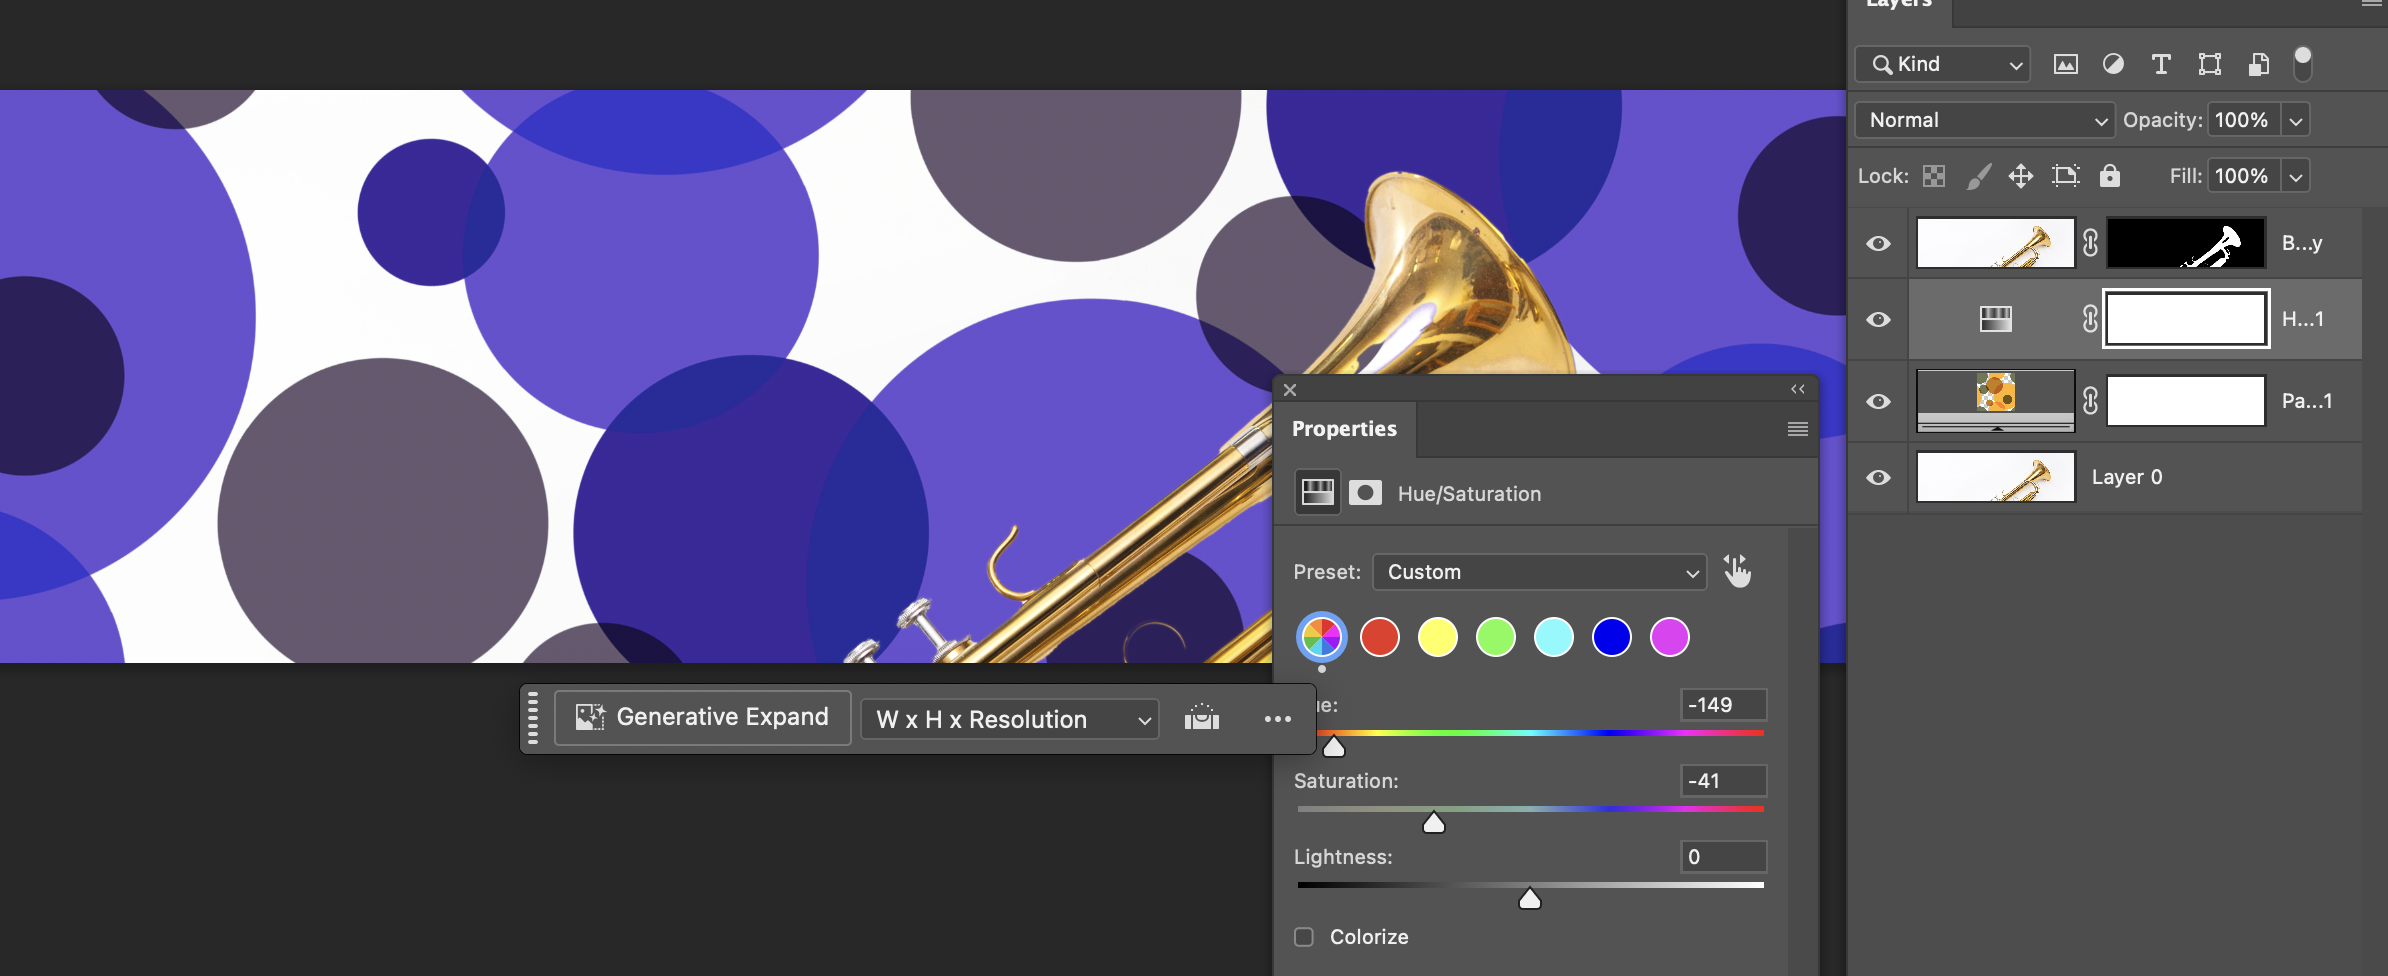
the opacity on those. You can also start experimenting with different blend
modes as well. Multiply will give you a
really nice result on those. You could even go down to
something like some of the overlays or soft lights and see what you
can get from them. I hope you enjoyed
this tutorial. If you'd like to learn
more Photoshop or see more of these type
of effect videos, don't forget to click
on my name right at the bottom and
go to my profile and have a look at all
the courses I do in Photoshop, Affinity, and Canva. And also click the
Follow button. That way, you'll be notified of any new courses
that I put out. Have so much fun with that. It's a brilliant,
brilliant technique.
 Tim Wilson, Adobe Certified Instructor and Expert