Transcripts
1. Welcome to this Affinity Course: Not only is Affinity free now, but it's the most incredible
all in one graphics package, which is so good for pros
and hobbyists alike. In this course, you'll learn
how to turn your ideas into powerful visuals for
your business, clients, personal brand or hobby, whether you're crafting
your first logo or refining a full
design system. Here's what we'll
create beautiful logos for brands and
personal projects. Marketing content
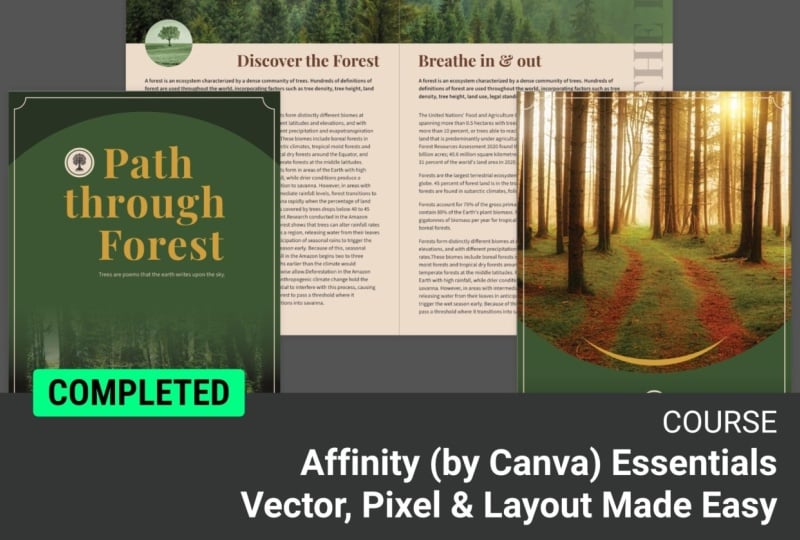
like social posts, posters, flyers and banners. Graphics for use in Canva, full multi page brochures
and plenty, plenty more. We'll start right
at the beginning, and I'll take you
through everything step by step in easy
bite size videos. Hi. I'm Tim. I live and work on
a beautiful barge traveling the canals around
London with my wife, Allie and our cat, Fuji. Before becoming a
professional designer, I worked as a CSI photographer for Scotland Yard in London. Since then, I've
spent over 30 years working with design software and have trained some of
the world's top companies like BBC, Disney, the Times newspaper, and many, many more. This course will help
you bring your ideas to life through visuals
that inform, inspire, and express
your unique vision. What are you waiting
for? Start right now, and let's get creating together.
2. How to Use the Course: Now, before we get
going with the course, there's a few things
I want to talk about. First of all, the images that
we're going to be using. Now, a lot of the
stuff we're going to be creating from scratch, but we will use a few images in some of the projects
and tutorials. There are some images in
with your course resources, but if you wish to
use your own images, that's absolutely fine. Or if you want to go onto the
web and find some images, I use a website
called unsplash.com, which do royalty free images, or get your images
wherever you want them. The second thing is I
found the best way to follow this course is if you watch what I'm doing
first on the video, and then at the
end of the video, stop and try it out yourself. And if you're not sure, go back and watch the video again. If some of the videos
are slightly longer, feel free to stop in
the middle and try it out and then continue and
then try that out, as well. So the whole course will
be in bite size portions, and you'll be able to just
watch a bit and do it. Don't forget if you
have any questions, put them in the questions area, and I will try and get back to you as soon as I possibly can. Let's get started right now.
3. Interface - Intro: Et's look at the interface. Now, for those of you who have been using Affinity already, there's lots of new stuff.
They've moved things around. For those of you who have
never used Affinity at all, I want to show you
where everything is so you won't get lost. So if you need a panel
or you need a toolbar, you'll know exactly
where to find it. The other thing we're going to do is we're going
to be looking at the difference between
Bitmap and vector. So if you don't know
what the differences are, well, you'll find out. If you do, just skip that video and go
on to the next one. Let's get started. I.
4. What Do They All Do?: Oh some of you might not know what
Affinity actually does. So let me explain. You see, Affinity is a combination of three apps that are mostly
used for graphic design. There is the vector side, which is the Vector Studio, and this is very much
like Affinity Designer, or in the Adobe world,
it's Adobe Illustrator. Pixel is like Affinity Photo, which is the same as Photoshop, and layout is like publisher
or Adobe in design. So if you're creating logos
or icons or any sort of interesting graphic could be something like a infographic, then the vector is really
the way to go for that. If you work on
pictures and maybe you want to take an image and you want
to cut somebody out, you want to edit it a bit, you
want to change the colors. Then we work in pixels. And finally, if you want to
put things together into a poster or a multi
page brochure or a book or a huge document, you can take your graphics and your photos and your text and put it together in
the out area here. Now, there's a lot of overlap between these three packages, but that's basically
how they work. A
5. Interface with Context Tool: When you first open up affinity, you normally see something
which looks like this. You've got this home
screen in the middle, and then your home screen
might look different to mine because I've got a document that I was
working on earlier. But we'll have a look at
those as we go along, and you can see we've
got things like recent and learning and
templates, et cetera. But if you want to make
yourself a new document, you can click on the
plus side over there. If you don't see that,
you can still get back to it by going up to
the file menu, new. And you can see
it's taking me into the little plus area
for making a document, and I can click
back to go back to the home screen. A
very simple, really. Let's click on the little plus over here because I want
to make a new document. If I want to open
existing document, I can click on the little
folder there to open up. I'm just going to choose
A four over here, I can go with either
landscape or portrait. I'm going to go with Landscape and click on Create document. Now we'll come back to all of this stuff and look through
everything later on. So when I go into my document, at the moment, I'm
in the vector area. Now, there is a
vector area, a pixel, a layout, a canva, and
believe it or not, if we click over here, you'll
see there's also a slice, a retouching, a color grading, and in fact, you can
create your own. These areas are called studios. So the vector studio is very much like what used to
be affinity designer. The Pixel studio is
like affinity photo and layout is like
affinity publisher. Now, when you go
to these studios, you'll see that it just shows you the tools for that
particular studio. Click on Pixel, they change to the Pixel studio and likewise,
with the layout, as well. The other thing
that's changing on the right hand side
here are the panels. So once again,
just very quickly, as I flick between them, you can see how the panels change. It's like going into a different piece of
software, almost. I say almost because
as you'll see, it's way, way better than that. Now, of course, all of the
panels are available in the Window menu in their sets. But what about this one
here and the tools? Well, you won't find
them in the Window menu. If you go to the View menu, you'll find the Context
toolbar is over there. So if I untick Show, you'll see it'll disappear. Once again, I can go
back and show it again. You can also dock it. You'll see in there
we've got a dock option, and same with the
tools over here. If I go to the view
menu, once again, tools, we can show hide,
we can dock them, and we can show the
subtols in there as well. Anyway, have a little bit of
a go, make a new document, and just check out these
different studios over here. Click over there. You can
switch others on and off. So, you know, just go in
there, switch them on, switch them off if you
don't want one of them, and see how you get on.
I'll see you in a second.
6. Panels & Toolbars: Now, let's have a look at the
panels and the tool bars. So if I go along here and
I'm in the Vector Studio, I can start to
pull these around, and it's exactly the same with
the other studios as well, and I can make a
complete mess of them and I can get rid of them. So if I didn't want the
color and the stroke, I can just have the
appearance up like that. But if I want to get them
back, where are they? Well, if you go to the
Window menu over here, we need to go down
and we need to find the panels which are
related to Vector. So if I go to Window,
down to vector, and you can see in there I've got my stroke over here as well, and I can bring the
stroke back up again. Now, what about the color? Where is the color in here? So, you'll find that I don't I don't seem to have
a color in there. If we go to the general though, this will be the
panels which will work across the board for all of
these different studios. I can go in there and I can
find the color once again. So wherever you are in a studio, you'll find that there are
panels which are specific, in this case, to the layout. But there are general panels which are the same throughout. However, even if I'm
in layout over here, I could still go to
the vector and I could open up something
different in here. If I clicked on styles, I can open up the styles, even though it was part
of the Vector Studio. So all of your panels
are listed in here. I can also go to the panels, and I can say just
reset them so I can just reset them back again
to their default setting. And I can do that in
any of these studios. So once again, over there, panels and just reset
panels from that. Now, you'll find that
there are some shortcuts and I don't want to inundate
you with too many shortcuts, but there's an important one
here which allows you to hide and show the studio
that you're actually in, so you can just see the
document by itself. Now, for me, the thing
about this shortcut is that it usually gets triggered when the cat
walks across my keyboard, and he does that quite regularly
when I'm trying to work. So it's the tab key. The tab on the left
hand side will show and hide all of the
panels that are in there. So do try those out, get to know where things are. And remember, you've got window. All of these are the
different panels. You can go to panels. You can reset them. You can hide the panels. You can
show the panels. And at the moment I'm
showing them on the right. You can actually
change them to be on the left, if you
wished, as well. You can make the studio look
how you want it to look.
7. Studios & Panels: Let's have a look at
these little studios. Now, there's vector,
Pixel and Loud, as we've already seen. There's another one
here called Canva AI. Now, Canva AI are all the AI functions that
you can use in Affinity. However, although
Affinity is free, this area here is not. If you've got a paid
for Canva account, then you'll be able
to use all of these. Otherwise, you
won't, I'm afraid. We're going to be delving
into these during the course, although it's not fundamentally the main part of this course. So just bear that in mind. If you want to get
a paid account, that's absolutely fine. You could just do that
once we get to that stage where we start to work with
some of those AI functions. Now, in here, we've also
got things like slices. Slices is kind of like the
old export option that one used to have in the
earlier versions of Affinity. There's a retouching
area over here, if I click on that, and there's a color grading area as well. And we can also create
our own studio. We'll look at how to do that
later on in the course. But now you can see
I've got all these different studios over here. There's my color grading. And when I choose one of them, what it does is it just gives me a different layout
of the panels. So these are all just
the different panels in here in different layouts. Now, if I go back
over here again, back to the three
little dots in there, you can switch them on
and off as you need. And I will just switch
off the ones that I don't want now to go back
to the default setting. When you go to the window menu, you'll notice that
the panels are set up in different groups. So the Pixel panels are
for the Pixel Studio, the vector ones are
for the Vector Studio. But we've got other
setups as well. So there's a text
option in here. There's tables,
everything to do with tables. There is some help. As I mentioned already,
there's the general panels, which are available
for all of them. Just going to very
quickly go down to panels and just reset
the area that I'm in. Now, of course, I'm in
the color grading area. I'm just going to go
back to Vector for now. Anyway, have a bit of a
play with that, try it out, see what you can do with those, and remember you
can always reset things in panels and reset.
8. Toolbar Features: Now, let's have a
look at the tools. If you go along to
the tools that have got the little arrow over there, you'll see they've got
more tools in their set. So when I click and hold, I can see some other
tools coming up. Click and hold over here, and there's tons
of tools in there. If you go to the tools, though, and you right click on
one of those tools, over here, we've got a
number of different things, so we can hide the tools, the first thing
to do over there. So you'll choose hide tools, and you go, Ah, how do
I get my tools back? Well, if you go to
the Window menu, they're not listed in there. But if you go to the view menu, you'll see over here, we've got tools, and I can
just choose show once again. So if you lose your tools, that's where you're going to find them to bring them back. Now, the other thing that
we've got if we right click is the fact that the tools
are docked on the side. If you untick it, you'll get
something which looks like this as a little double row
that you can move around. Once again, if I right
click and dock them, I could jump to the side. We go down over here. This is a new feature which
I really like hide subtols. Now, they've always been
hidden in the past. But if I untick that, now you'll see that as I'm
going to the different tools, the subtols in there just
automatically appear, and I can move them around
wherever I want them. So you know, if you're
constantly using a certain tool and you're
using variations on there, like this little Node
Tool over there, and you might be flicking
between those quite a lot or the text tool where
you're actually clicking between the two types of text. This is great to keep
them up all the time, but don't forget right
click and you can then just hide those
subtols as well. Now, there's a lot more
to do with the tools. We can customize them as well, but just have a bit of a try
with that at the moment. We'll get deeper
into them later on.
9. Vector & Pixel Differences: The last thing I
want to look at in this section before we
get into the good stuff is having a look
at the difference between vector and pixel. So most people realize
that vectors are usually for things like logos and
pixels are for photographs. But let me show you exactly
why that's the case. I've got two little shapes
that I've made over here, and the one on the
left hand side, this is a vector. And the one over
here is a Pixel. Even though I'm in
the Vector Studio, it doesn't really matter. This is vector, that
is pixel in there. So let's have a look at the
differences between these. And to do that, I'm
actually going to zoom right in. Over here. You can see when I go closer over there, look
at the difference. This is a vector. It's
absolutely smooth. Was this is pixels, and it's based on the
little pixel shapes in my document over there. So a pixel or a raster image, it's often called is
made up of pixels, whereas a vector is
made up of lines. Now, that's all very well if we are looking
at this at this size. But why is it so important, maybe to have your
logo as a vector? Well, it comes down to scaling. If I make a logo really
small like that, and then I decide,
Do you know what? I want to make this
really huge because it's going to go into this
massive big poster. And once again, I'm going to do the same thing with this and make this one bigger. Like so. And let's
have a little look. So with a vector, you can make the vector
any size you like, and that edge will always
be perfectly smooth. Whereas with pixels,
when you make it larger, you might find that
those pixels or that pixel effect and edge just keep zooming in, get
bigger and bigger. You can see the individual
little pixels there and you see how large
these have become. So the idea is that if
you're doing a logo, you want to create
something which is fully scalable so that
whether you've got it on a website or whether
you've got it on a 48 sheet poster on
the side of a building, it's always going to
look absolutely perfect. The last thing about vectors is that you can actually change the shape quite easily with the little lines
around the outside. Now, if I click on this
little shape here, remember this is
my vector shape. I'm just going to go over to the vector menu and just say, convert to coves
because at the moment, it's just a circle object. You can't do this with a
pixel object, by the way. So now I can use the
little Node tool up there, and I can select these points
that make up the shape, and I can pull them around and
I can adjust them in here. We're going to be doing quite
a lot of this later on. But it means that now
I can change this to any sort of
shape that I like. And you'll see how easy it is
to create things like logos and graphics with these type of shapes where you can pull
on the handles over there. These, by the way, are
known as nodes in here, and the curves are
called Bezier curves. If anybody ever talks about Bezier curves, that's what
they're talking about. These little nodes with handles. Don't worry about trying
that one out over there. Just go straight on
to the next video.
10. Vector Shapes - Intro: In this section,
we're going to be looking at the Vector Studio. So we're going to be
taking the shapes. We're going to be
putting shapes together. We're going to be using
something called geometry, and then we've got a
project after that, which I'll tell you
about once you've gone through the basics
of vector shapes.
11. Working with Simple Shapes: Now, I'm going to click on
the New button over there. Or, of course, you can
go to File and New to get into here, as well. And we're going to just
choose a A four size. So in the left hand side here, I've got page sizes, and I'm going to choose
that A four there. You'll see that says
page sizes RGB, as opposed to page sizes CMYK. Now, if you don't
know the difference between CMYK and RGB, I'll be talking about them
later in great depth. But for the moment, if you think of RGB as
anything for screen, and CMYK is anything that
will be printed out, that's the quick way around it. You'll see that there's
things like photos in here, canvases, videos, and what I just keeps
going and going and going. But we're going to
choose page size RGB, click on A four, and I'm going to choose landscape over there. I'm not going to do anything with any of the bits in here. I'm just going to
say create document. Now, we're going to add some shapes in here and have a look at how the shapes work. So on the left hand side, I'm in the vector
area here as well, by the way, I probably should have said
that a moment ago. So I'm in the Vector Studio. I'm going to go down in my tools to these
shapes over there, and I will just click
and hold on them. And if you want to keep
them out all the time, just right click and say, untakHd Subtools and that'll show you them all
at the same time. And then I can click on
one of these shapes. I'll use the
rectangle, click and drag my rectangle in like so. Now, got to admit, when
you first do this, you look at that and
you think that is just so incredibly dull. Well, let's make
it more exciting. I'm going to go up to this little tool over here.
This is the move tool. I'm going to select
the move tool, and first of all, I can click and I can actually
move this image around. So if you select a shape, you can do it by clicking
on it or you can click off of it on the outside that I've
clicked out there. Let me click back
again to select it. To change the color, we go over to this
color area here. If you can't see it, you can go to the Window menu. You can go down and
you can just reset your panels or if
you went to general, you'll find color is
in there as well. And I'm going to click
over here on the outside, and this enables me to choose
any color that I like. Now, once I've
chosen that color, I can click on
this inside bit to choose the shade and
the lightness of it. So outside is the hue. Inside is the saturation
and the lightness, so going from bright to dark. And this is why
it's known as HSL, hue, saturation and lightness. Now, if your colors don't
change when you're in there, make sure that this little
button over here is selected. If you are on the other button, this is known as the stroke, which is the line
around the outside. And if I'm changing the color
there, nothing happens, it could be that I'm changing the line around
the outside there. So let's click on that
and change that in there. Now, using my Selection tool, I can click to select
and move things around. I can also click and drag over part of the
object to select it. We can grab a corner and we
can scale things around. And if you hold down the Shift key while
you're doing that, it will scale proportionately. We can move up to the top to this little lollipop
that sticks up the top, and I can click and drag around on that to
rotate an object. And if I do it while
holding down the Shift key, it will rotate in
degree increments. Over there, you
can see it kind of going 30 degrees, 15, zero. So 15 degree increments around. When you're actually drawing
the shape to start off with, if I go down to my
shapes over here and I were to use the
same shape again, held down my shift key
before I started drawing, what it would do
is it would draw a perfect square for me. And it's exactly the same with
the other shapes as well. So if I go back in here again and I'll go back
to the little circle, I'm going to click and drag, hold down the Shift
key, and I get a perfect circle out of that. But once again, I can still use the selection tool
to move it around, scale it or hold down the
Shift key to scale it proportionately and change
the colors in there. Now, you can try this out with pretty much any of these
little shapes over here. You basically just pick
a shape, click and drag, hold down the Shift
key to get it to be perfect and change
the colors in there. Let's just do one more
over here, doughnut shape, click and drag, hold
down the Shift key, change the color on that. Have a little bit of
a play with that. You'd have to go
through all the tools, just a few of them in there
and see what you can get.
12. Select Multiple Objects & Transform Separately: I I've created a
few shapes here, and I want to select them. So I'm going to go up to the move tool at the
top and to select them. Obviously, I can click
on them individually. But if I want to
select them all, if I click and drag
across them like that, I can select them
really quickly. You don't have to encompass
them all like this. If you've worked on an
earlier version of Affinity, the default is that you actually have to
surround them all. Here, as long as you're touching
them, they will select. And then I can scale
them together. I can rotate them
together as well. But I want to show you this
little display along the top. Now, this changes depending
on what you're doing. If I click on the background, it gives me things
like the document set up and the app settings. If I click on an object, it gives me the fill
and the stroke and even the line or
thickness of that stroke. So I can go in there
and I can change the thickness of a stroke
on an object ready quickly, as well as some other
things we'll come to later. But if I select all of
these objects over here, there's a little
button that I want to show you over here. And this is quite unique because if at the moment
I rotate these objects, they will all rotate together
as if they are one group. If you switch that
little button on, now, only one of them looks
like it's selected, but if I rotate that one, they will all rotate
at the same time. If I were to scale this one, they will all scale
individually, like that as well. And this is really cool. But it's important to also know whether you've got it switched on
or switched off, because the moment
it's switched on and maybe I don't realize
that it's switched on, and I go and try and
select all these shapes, and it's like, Okay, why
they're not selecting? Only one of them is selected. But if I move that one
or rotate that one, you can see it
switched on there. If I switch them off, then
we go back to where we started with the selections
of multiple shapes in there. Do have a little bit of a go with that button
that's really useful, even if you never use it and
you just need to know that it's there in case you
switch it on by mistake. But honestly, it is
quite a useful item. Now, what about this little
window along the top? I can move it around and I
can place it wherever I want. Unfortunately, it
gets in the way. I found that as I'm working, it's annoying when
it's over there. So if you go to the top
over here and you move until you see that little orange square and move over
the orange square, it will then allow
you to snap it to the top so it'll
just stay at the top, no matter what you're
doing over there, rather than being right
in the middle of things. So I'm going to leave
mine up there for now. Okay. Do have a bit
of a go with that. Play with that and check out that little
button over there. Transform Objects
separately. It's cold.
13. Shapes: I'm going to delete
all these shapes. I'm going to select them and
press backspace to delete. And let's have a look at some of the options over here
with some of the tools. I'm going to start with
this rounded rectangle tool and I'm going to click and drag to make a rounded rectangle. Now, while I'm
still on that tool, you'll notice there's
a red dot up there. If I go back to my move
tool, it just disappears. But when I'm on this
tool, I can see that dot. Now, I can click on that
dot and I can change it to adjust the corners. And the same goes with most of the tools in here or most of the shape,
shall I say, in here. If I go down to the
star tool over there, click and drag a little star in. While I'm still on this tool, I can go to those corners and I can adjust them
and move them around. You'll see one of them
makes them more curved. The other one moves
them in and out. If I go to the one at
the top over here, I can round the
top off like that. Really, I'm not going
to go through all of these tools so you
don't have to worry. I just want to show you a
couple of them in here. I find this doughnut
one is quite useful because I can make the
doughnut shape like that. And then I can go along to this one at the outer side here, and this will allow me to decide how much of
that doughnut I want. So maybe I want three
quarters like that. And this one allows
me to make the inside bigger or smaller. Just experiment with
the tools over here. They've each got slightly
different functions that the red dot little red dot does. But don't forget you can't
be in the move tool. You have to be in
the tool itself. By the way, down
the bottom here, there's a CAT tool over here, and you can click and
drag with a cat as well. Honestly, I don't know why that's there, but
they put it in. The last one I want
to mention over here is the little QR code. And all you have to do with a QR code is to click
and drag it and then go to the top and put in the code or the
URL that you want. So I've just copied my
own website over there, and I'll paste that
in. Click Okay. Red Rocket Studio is
the business that I run or help to run with
Allie, and there it is. There's the QR code for
that particular URL. Anyway, try it out,
put your own URL in there and have fun with it.
14. Transforming Shapes with the Node Tool & Curves: I'm going to make a
little shape over here. I'm just using a
rectangle for now. And although I've shown you how to use this black arrow tool, the one at the very
top, the move tool, if I move the points on there, all we're doing is we're
changing the scaling of this, whether it's proportionate
or disproportionate. But if I want to move
these individual points around without affecting
the other points, then we need to use this little tool over here
called the Node Tool. Now with the Node Tool,
if I click on a point, you can see it just works exactly the same
as the move tool. What we have to do if you've got one of
these premade shapes, these are all kind of pre made different shapes that we can use and we can change
the options of, we have to convert that into a proper shape that
we can actually edit. There's a little button
at the top over here. You'll see if I hover over it, it says, Convert to curves. Now, that doesn't mean that it's actually
going to be curvy. It can, but it'll just
convert them into points. If you can't find that
little button over there, the earlier versions, if you're working with an earlier version, that had a big name next to it. What you can do is you
can actually go to vector and you can convert
to curves in there. It's both exactly
the same thing. When you do that, what
I can do now with this Node Tool is I can actually select
individual points. So I've just clicked and
dragged over that point there. You can see it's blue, and these ones are all
white in the middle. And I can now move
that around like so. I could select multiples, so I could select
those two over there, and I could pull
those ones around. We can do the same over here, those two plus that one. So I can move those
three around together, or you can go to the line itself and you can actually
pull out on that line. Now, I'll just make sure
that I selected this first and you see when
I go to the line, I can just pull that
out over there. So, click on the
shape to select. Go to the line and you
can drag it into a curve. You can still work with these
little points over here, but you'll notice that
you've now got some handles which are appearing
when you have a curve. Drag the handles around to adjust the curvature
on this shape. Just pull that down, like so. And you can see how we can
manipulate that shape around. Now, these curves and the handles we're going to
be dealing with later on, but it's worth just having a bit of a play with
them for the moment. Make a complete mess. You'll find that things can
go really weird over there. Don't worry about it. When
you want to delete it, just go back to your Node Tool, which you'll select
everything and press delete or backspace
on the keyboard. Now, of course, don't just
use the little rectangle. You can try this with
absolutely anything. To go down to this
cog over here, draw a cog in there, go up, click on
this little button. It's this one here which
says Convert to curves. It looks actually like a mini
version of a YouTube icon. It's got a little
triangle in the middle. Let's click on that.
Now I can select any of these points over
here with the Node Tool. So I just select that one there, and I can move them
around like that. You can do the same
with the inner ones if you wish, or you
can do multiple. Have some fun with that with
all of those custom shapes.
15. Various Ways to Duplicate Objects: One of the things we're
going to be using a lot is copying. So there are a number of
different ways to copy items. I'm just going to take a
little shape like this. I'll make a little
triangle over there. Let's give it a different color. So I can either go up here to my color to the fill and choose a different color there or to
this little area over here, click on that and change
the color like so, whichever way you prefer, and
it's easier for you to do. Now, back to my MVTol so one of the typical ways
to copy is using the standard copy paste
commands from the keyboard, and that would be on the mac, it's command C to copy
command V to paste. You can see that there is, well, just one triangle. But if I move it, it's copied that triangle right on top of the last one. Let
me do that again. On the PC, by the way, it's control and C to copy
and control V to paste. And once again, it's paste
another copy in there. I'm going to get rid
of those two copies, so I'm just left with
this one over here. Now, another faster way to do that is if you've
selected the shape, and this is just a one thing, you can do if you're on a Mac, it's command and J. If you're on a PC,
it's Control and J, and that will just
make a copy for you pasted directly
on the last object. Lastly, this is the
favorite one of mine. I'm going to use on a
MAC, the option key. It's the lt key on a PC. Just hold it down and
you can just drag a copy like that. Really fast. Option or Alt and just
drag your shape like that. Anyway, get to know some of those shortcuts which
every one's work best for you because we're going to be using them so much in
the coming projects.
16. Changing Corners with the Corner Tool: What if I want to round off
some of these sharp corners? Well, we've got a tool for that, and this is the one it's
called the Corner Tool. So with a corner tool, what I can do is I can
select a point like that. I just click on it to select it, and you'll see that it's blue
and those ones are white. If I drag now, what it does is it just rounds
off that corner for me. Let me do that again.
I'll go to this one. Click on that one to select it. And then if we drag that, now, why didn't that round off? Well, because it's defaulted
back to the Node Tool. Can we undo that? Make sure that you're on the
Corner Tool over there, and then when I click on that, I can round that
shape off like so. But what about if we want to do multiple points all
at the same time? Well, I'm going to go and
get another shape over here. Let's make that a
slightly different color. And what I can do with this little no tool is to click and drag
over the two points. Now, if I click and drag on one, they'll both move
at the same time. You could do all three
at the same time, so I can grab all of them on the corner tool and drag
them all together like that. This can be quite
fun with some of these shapes if you go down. So for example, if I take
this double star tool here, I'm just going to get rid
of the one that's there and draw in my
double star like so. I'm going to select all of
them with the corner tool. So I'll just click and drag
over all of them like that. You'll notice I haven't
had to actually go to the top and convert
this into a shape. So we'll just make
sure they all go blue and grab one of them, and we can make them all corners like that or curves like that. Have a bit of a go with it.
It really is a fun tool. More importantly,
it's actually really, really useful. Try it out.
17. Making Shapes with Geometry: And I've got a shape here and I'm going to go and put another shape
on top of that. I'll change the color, so it's pretty obvious what I've got. And I'm going to use my move tool here to
select both shapes. It's really important for
this particular example that you do select both shapes. Otherwise,
it doesn't work. Now, we're going to
be using something which Affinity calls geometry. You might also come across it in other packages
being called Boolean operations or
in the Adobe world, it's known as the
Pathfinder tool. Now, what this does is it allows you to take
two shapes or more. You can do this
with as many as you like and allow one
shape to cut away from another shape or
unite them together or you'll see as we go along. So I've got both those
shapes selected. There's some little buttons
along the top here. If I go to this one here, it just adds them together
and makes them into a single shape. I'm
going to undo that. So that's either Command Z if you're on a Mac or Control
E if you're on a PC. The second button here, once again, they're
still selected. The second button here subtracts the front object from the
object underneath it. So that's why the circles subtracted from
the square because the square was behind or the rectangle was
behind the circle. The next one over
here intersects them, so it just leaves the
overlapping area in there. The one after that subtracts
the overlapping area, and the last one here
divides the whole thing up. So when you click on it, nothing appears to have happened. But if you go here,
you can actually pull this apart now
and it's divided it into the little areas
that make up those shapes. Now, I'm going to undo those, so I'm just going to keep
undoing until I get back to where I've got my two shapes. There we go. We've got
the two shapes there. If for any reason you can't see these little buttons here or you don't like
using the buttons, you can do the same
thing from the menu. Now, remember, we're
in the vector area. We're dealing with vectors. So go to the vector menu. And down here,
there is geometry, and I could say, add
subtract intersect Excel. Which is this little
one over here, which is the third one, sorry, fourth one
along, and then divide. So I'll just use subtract does exactly the same thing.
Do try that out. This is really useful, especially when it
comes to creating things like logos and icons, and we're going to
be doing that very soon using this
particular technique. Anyway, have some fun with that. Make some interesting shapes
and just do multiples, not just the two. Try it out.
18. Making Shapes with the Shape Builder Tool: Now, we've got
another tool that we can use to add and
subtract from shapes. And I'm going to get two
little shapes up here. Let's get a square, and let's get a different shape. Over here, we've been using the square in the
circle all the time. I will just take
this little star and draw a little star in. Over there. Let's change
the color of that. Now, I'll put these
two together, and I'm going to
select them both. So I'll click and drag over both of them
with my move tool. And I'm going to go
down over here on the left hand side
to a little tool called the Shape Builder Tool. Now with the Shape Builder Tool, we've got some options
along the top. And you'll see this says
Shape Builder over here. This changes depending
on what tool you're in. If I click onto other
tools like that, you see it's changing
all the time. So when I'm on the
Shape Builder Tool, it's showing me options
for the Shape Builder. Now, in the actions, there's a plus or minus, or there's this little
option over here, which makes a new selection. I'll show you all
three of those. Let's go to the
plus first of all. You see, as I move
over the shape, the shape itself has these
blue diagonal lines on it, and I can just
click and drag over those three shapes to unite them into one shape because
we've got add on there. I'm going to use Command or
Control and Z to undo that. If you go to the subtract
option and once again, make sure that your
shapes are selected, you can then just move
across the areas and the diagonal lines are red
this time to subtract. There's a shortcut here. If you are on the plus and you want to then
change to the red, just hold down the
option or the lt key, and when you start to drag, it will change it
to the other one, that's now gone to
the minus instead. Same again over here, I can hold down the
alter the option key and just remove that
little section in there. So what does this last
one do over here? Well, this one's quite an
interesting one, actually. If I select both of those again, so at the moment, there
are two separate shapes. If I select them both, go over to my Shape Builder
Tool and go to the third one. Now, if I go to the middle
and I click on the middle, Nothing appears
to have happened. Well, it actually has. You see, if I go
back to my move tool here and go to the middle, it's actually made a copy of that overlapping area
that I moved on. So these two are still
the original shapes. It hasn't done anything to them. It just copies the bit
that you've dragged on. So do try those out over there. Once again, these are
spectacularly useful for a lot of things that we're going to be creating. Have fun with it?
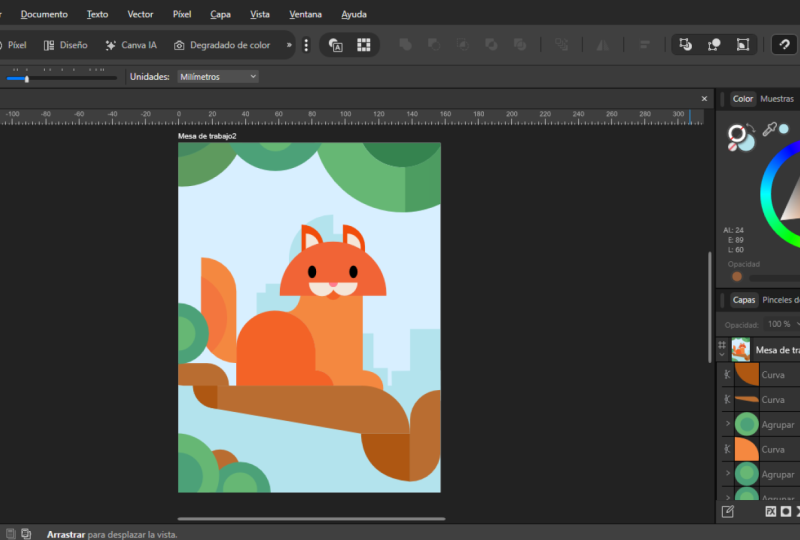
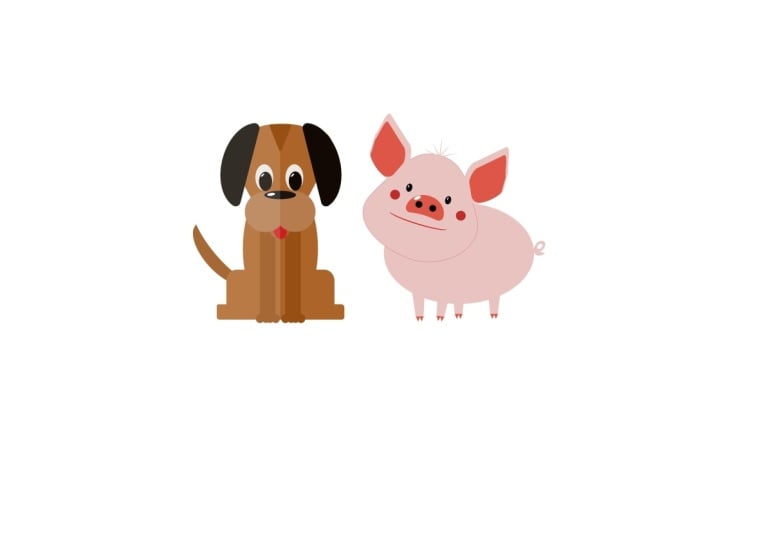
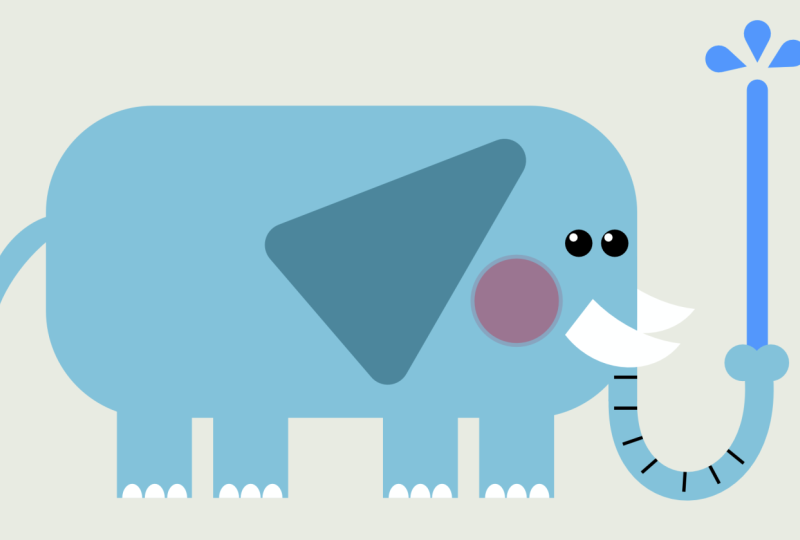
19. Project: Create an Animal from Shapes - Intro: It's project time. I love doing projects, and I
hope you do, as well. We've got a really
cool one. This time, you can see it on the side here. We're gonna be using
some basic shapes to create this little dog. If you don't like dogs,
you can do a cat, you can do a rat, you can
do whatever you like. And you'll see that I've done
some variations afterwards. So you can change this
to any animal you want.
20. Create the Dog's Head: For this project, we're going to start with
a new document. So I'm going to go up to File New and just make sure that you're over
in the sort of plus area. And we're going to
do something in RGB. So we're going to
choose a page size. I'm going with a five, and I'm going to make
sure that it's landscape. Not going to do any
other settings in here. Just check that this is
actually on RGB in there. Let's click on Create Document. Now, I'm going to create this little dog using
some simple shapes and using the Ni said Pathfinder and using
the Shape Builder Tool. So let's start by making the head and then
we'll move it to the side, and then we'll make the body
and the legs and the tail. So for the head, I'm going to
start off with a triangle. Now I can go down to the
triangle over here and find the triangle tool and I'm going to click and
drag a triangle out. Now, firstly, that's
the wrong way. So I want to rotate it
all the way around, so I'm going to go over here
and I'm going to drag this around holding
down the shift key so it does it in
increments over there. And then let's give it a color. Now, we can change
these colors later, so it actually doesn't matter what color you give your
dog to start off with. And I want to round the
corners of this face off. So I'm going to go up
here to the corner tool, I'm going to select
all the corners. I'm going to click
on one and drag in to get this rounded
triangle like so. Now, that's for the basic head. Let's make the jows I
think they're called. So I'm going to do
that with circles, so I'm going to go along
here and I'm going to get two circles. I'm
going to make one. I'm holding down the shift
key so I get a perfect, perfect shape like that. Let's just give that
slightly different color. And then I want two of these because they're going
to kind of go over there. So we've got one, hold down the Alt or the option
key and drag a copy. Now, I'd like these to
actually be closer together, so I'm going to just move them
in a little bit like that. Now, one of the
things you can see, as I'm moving these around, I can't always tell exactly where things are in
relation to each other. So what I'm going to do is I'm going to go to the view menu. I'm going to go down to
something called snapping. And in snapping, I'm going
to say enable snapping. Now, we can just leave all
of these on their default. I'll just click on the little
button to close that down. And you'll see now when
I move things around, can you see how it
actually snaps to each other so I can see
where things are? These are kind of
like smart guides. I'm going to pop those together like so so they're kind
of next to each other, so I know that they are aligned, select them both, and
then I'm going to use this button here to unite them
into one shape like that. So that's going to be sort
of the js of the dog. We then need a
little nose on top of that really
easy for the nose. It just can be a little
shape like that. And I'm going to
make that black, so I'll just choose
black in there and place that in the
right position as well. Once again, you can see now
how it just lines itself up automatically like that. We need some eyes, of course. So same again using these
little shapes here. Let's draw a little I like that. And my eye, I'm going to
have it as a black fill, but the line around the outside,
I'm going to make white. So I'm going to just
choose white like that. Now, you can't see
it over there, but when I put it
on top of the dog, you might see a tiny little
white line around there. Go up to the top. This is
your width for your stroke, and you can just adjust that width to anything
that you want. You can see how it can go
really over the top like that. It's very, very simple. We can make a more
interesting eye. And if you wish, you could make an eye just
using two shapes. You can have a little
shape like that, which is a white fill over
there and pop that over there. And then you could do your
eyeball separately over there. Make that a perfect circle. Fill that one with
black and I can move that one across and then put
the I in like that as well. It's up to you which way you
want to actually do this. I'm going to keep mine
really simple of this. I've got that shape there.
Hold down the Alt or the option key and
just drag a copy out. Now I've just made a bit of a mistake there by
dragging the wrong thing. I've undone it using
Command or Control Z. I'll try that again,
so I'll select that, Hold down the alt or option key, and drag that across
over to there. If you need your
eyes to be a bit smaller, that's absolutely fine. Just change whatever you need. Have a bit of a go and
get to this stage, and then we'll take it
on a little bit further.
21. Create the Ears: Let's do some ears. I'm
going to take a circle over here and just make a perfect circle like that because I just
want a half a circle. So I'll then take a shape like this and just put
it over the top. And can you see how when
I'm dragging it over, it's showing me when I'm actually right in the
middle of the shape. Selecting both of those and then using this pathfinder tool to subtract one from the other. Now, that's one way
to make the shape. Of course, some of you
might have noticed there is actually a tool like that
called the segment tool, and I can click and drag
to make a segment like so, and then go to this line and
just pull that up as well. So another way to
create a semicircle, use whichever way you like. But once you've done that, go along to your corner tool. Select the points and
pull them in like that. As I said, it doesn't
matter which one you do. I'll just do this one over here. Select it and pull that in so we've got
those rounded corners. Now, I'll use this one over here as it's kind of
in the right position. It's upside down,
so we'll do that. This one ear is going
to go over here. I'm going to make it
a little bit smaller, so we're going to have
one ear like that. Now, did you notice that? Look what happens when
I drag and resize this. The little circles from the
corners remain the same. So as I'm making the
smaller or bigger, the circles don't change size, but everything
else does as well. So you might find that if
you've done the wrong size, and then you need to
rescale it like that, you might want to go back into this corner tool and just grab the corners over there and just resize them a
little bit like that. You can always come back to
resize them at any time. So there's my one ear for
the dog on that side. I'm going to hold down the
old key, do the other ear. But I think this
one should be at a sort of an angle to give them a little bit more
character to place that one down like so. That will come in just a
fraction over to there. Once again, try that out.
22. Add Final Details to the Head: I want to add a little
shine to his nose, so I'm going to
take a little shape over here, just the ellipse. Draw a little elliptical
shape in there. Now, let's zoom in a bit here so we can see
what we're doing. If you're on a Mac, it is
Command and plus to zoom in. If you're on a PC, it's Control and plus to
zoom in and likewise, it's command and minus to Zoom out or control and minus
if you're on a PC. So I'm just going to
zoom in like that. I'm on a track pad, so I'm just using
two fingers to move across the page like that. But there are slides at
the bottom and sides, or you can use this little hand tool over
here to move your page around. And you'll see over
here, we've got a Zoom function as well. Now, let's go back to
this move tool here. So this is going
to be the shine. I don't want to stroke on this. I'm going to click on the
stroke and choose none. That's the little white dot
with a red line through it. And I'm going to
make the fill white. So let's move that up to there. We're going to rotate
it round a little bit. I might even make
it a bit smaller. Over there and just pop that on the side to get a
sort of a nice shine. The other thing while I'm
here is that these two ears, I'm going to click on that one, hold down the Shift key,
and click on the other one. I don't want to stroke on those. I'm going to click
on the stroke and choose none in there. Now, let's go along and give
this little dog a tongue. So I'm going to go and
choose a shape Over here, let's just use the ellipse or the rounded rectangle.
Red doesn't matter which. I'm going to go
with the ellipse. So we'll have a sort
of tongue which is going to be this
type of shape here. And I'm going to
give it some color, so let's make that a nice red. Now, I've done that
on the wrong thing. You find that you do
this so often where you put the color on the
stroke rather than the fill. There's a little button there, which has got two arrows on. If you click on that, it just
flicks those two around, so your fill becomes your
stroke and vice versa. Once again, on the stroke, I don't want any stroke. There. So that's going to
be the tongue of the dog. Now, he looks very strange there because the tongue
is on top of his jels. So if you get your layers up and you need to find
your layers panel, if you can't find it, go
along to the window menu, go down to general, and you'll find that
layers is in there. I'm going to drag
that layer, well, that object below the gels. So it moves it below those, but above the background. There. So we can now move that around. If you want to give him a
little bit more character, you can angle it
around a little bit. Whatever works for you, I'm going to keep it like that, just a little tongue
sticking out. Lastly, his eyes look dead. If there's such a thing
from a cartoon character, I want a little bit
of a shine in them. I'll use the same technique
that I did for this. So I'm just going to hold down the alt key. Let me
select it first. Hold down the t to
the option key, make a copy of that,
make that smaller. You might find you
even need to zoom in a bit further for this, and I can then put
a shine over there. We'll make that smaller still. A little shine in that
corner over there. Hold down the altar
the option key and do another
shine on that side. If you do a shine on
the left of the nose, then the eyes should be
on the left or right. If you do the nose on the right, then those should
be on the right, because basically it's
reflecting light, which is coming
from one direction. I think the head is nearly done. I'm going to select all of those parts on the head.
So I've selected them all. Over here, where we've
got this little option, one of those things says group, and I'm going to click on group, so it'll group it together. Now, if you have a
look at the layers, you see that it
shows as a group, if I click anywhere on it, now I can just move the
whole thing around. If you want to see
the original parts, you can click on the
little drop down in there. There's a tiny little arrow, and you can see all the
bits inside the layers. Or if you click on it, you can ungroup it
over there as well. So now we're back to
where we were before. So have a bit of a go, do the shines, do the tongue, select everything over there, and group it
together over there, and then we'll do the body over here, and then we'll
put them together.
23. Create the Dog's Body: Et's create the body. I'm
going to do that once again, starting with an ellipse. So we'll have an elliptical
shape like that. Now, if I want to use the same color that I
had for the dog's head, I can go along here to this little eyedropper, color picker, click on that, move across
to the head and click, and that will
actually select it. Now, why hasn't this
actually changed color? Well, it's because at the
moment I'm on the stroke, let's choose none
for the stroke. I'll do the same thing again. I'll select the fill. I've got this selected here. Get the eyedropper tool. Click on that, and
you can see change it to the same color as the dog. So this is going to be the body. We are also going
to have some legs which are going to be sticking
out with little feet. So let's do those. I'm going to do that using a
rounded rectangle. I'm going to draw in my
rectangle over there. And I'll use my move
tool to just move it around so it's in the middle of that shape. You can
see the green line. When I'm actually
aligned up vertically, the green line appears. The red lines show horizontal. So over there, if
I go, there we go. We've got a horizontal
line in there. So I think something like that, I'll just line it up like that. And we need some feet
which are going to stick out the end over here. So I'll do the same thing, use the rounded rectangle
and just draw in some feet. This is kind of looking more
like a rocket, isn't it? Over there. And same thing. I'm just going to move it until it's lined up in the middle. Now I'm going to select all
of those items over there, and I'm going to unite
them together into one shape using that
little button up the top. If you prefer, you can use
the Shape Builder Tool, go to the plus, and
then just click and drag over the bits
that you want to unite. You can see you've got
to go over all of them. So sometimes that
button is much faster, but the end result
is exactly the same. So that would be the
body for the dog. I know it's in front of him. So body and kind of the legs, the hind legs, which are
sticking out like that. Have a go and make that shape, and then we'll put
in the front legs.
24. Make the Front Legs & Tail: Let's make the front legs. What I'm going to
do for this one is make a long thin rectangle. So long one like
that over to there. And I'm going to build
the legs out over here. I'm not going to build
them on top because I can't actually
see what I'm doing. If you wish, you
could and just change the color in here a
little bit so you could see what you're
actually doing. But I'm going to do
mine on the side. So that's going to be
the first leg in there. And then I might make
it a little bit longer. And then we want some toes. Or the pause. So that's going to be simply a few little circles. Once again, I will zoom in over here and I'm going to do a
little circle over there. And we're going to hold down
the alter the option key, make another copy
of that one there, another copy there,
and another copy. Over there. This is all
stylized, of course. And then I can
select all of those, unite them all together
into one shape, and that will be the front leg. I'm going to place
that over there, hold down the old key once again and make another
copy over there. I think I'll just move these in just a little bit like that so they're fairly close together. I don't like the color of those, so I'm going to
select them both. Use the eyedropper tool. Make sure I'm on fill, use the eyedropper tool and just sample that color
that I had there. That's a little bit
more subtle for that. Once we can change all
these colors later, and then we need a tail. Now, the tail, I'm going to use a pre made crescent
shape over here. So I just click and drag to
make a crescent like that. That's going to be
the tail. And you can see we've got some
options over there. I think I'll do a
thin tail like that. I'm going to make this
a little bit bigger. Let's go over there and Yeah, nice thin tail like that. That's going to be
behind the dog, so I'm going to
pop it over here. I'm going to rotate it
a little bit like that. And then I'm going to move that object below the
two legs and the body. So I'm just dragging it below until you see the line there, and then you can let go and then I'll move it behind the dog. We're going to take all of that now and group it together. So how do we get
this behind the dog? At the moment the
face is behind there, all you do is you take that group and drag that entire group
above the other one. Now, you got to be careful
when you're doing this, because if you drop
it inside the group, it'll think it's
part of that group. So you need to keep going until you see just the one line, just on top of that
group and then let go. Now, this group is
on top of that one. I think the body is too big. I'm going to just
scale it down and I'm holding down the Shift
key to scale it a bit like that. There we go. Unfortunately, his
front legs are getting lost in the underneath his head. So we'll make it just a
little bit like that. So I'm going to go
and select them. Now, because they're
all grouped, I might need to ungroup them, then I can select
the two front legs and I can change the
color to something else. Let's try making them
darker. Like that. If you want, at any time, you can go along to these
things and change them. If you think that
his legs should be sticking out a
little bit like that, and that one should be
sticking out, just go in, rotate them a bit, have a
bit of a play with that. You might need to change
the size on some of these until you get the size that you're
actually happy with. And if you want to offset
his head a little bit, it might be quite interesting
like that, as well. But I'm going to leave
mine all perfectly lined up like that. Have
a go with that.
25. Add More Life to Your Dog: I have ungrouped my puppy, and I've just
changed the color on some of these things to
something which I prefer. Now, let's just give this
dog a little bit more life. And I'm going to
do that by using a rectangle and putting a
rectangle over half the dog, so it's on the left hand side. And I'm going to change the
fill of that color to white. So let's make that
pure white like that. Go along to my opacity. You can see over
here with an object, we can change the
opacity of an object, and I'm just going to take
that down quite a lot over there to just make one side of the dog slightly
lighter than the other. You can see it just gives us an interesting look to the dog. Don't do it with any other color because you will see the shape. If I selected that
and chose black, for example, you'd see
the shape around there. It only works with white
on a white background. There are other
ways around this. If you do have to put something
onto a different color, I'll be telling you
about those later on. You can change the
order in here as well. So if I went along to
my layers in there, and I could go in and I could
take this white rectangle. This is the one over here, and I could drag it down so it wasn't actually above the
eyes and the nose and the ears so that only the head and the body and the
legs got affected by it, it didn't actually affect this. You'll see if I change this now, the opacity, it's not affecting the eyes
and ears in there. It's up to you what you
want to do with that, but have a little
bit of go with that. And once you've done with
that, we're going to save it. So we'll have a look at saving and exporting our character.
26. Save & Export: Et's go and save this. I'm going to go to File and Save As, and I'm just going
to put this onto the desktop of my
machine over here. You can put yours
wherever you like. And I'm going to give it a save, I'll call this dog character. I'm going to click
on Save in there. Now, that is my
editable version. So if I were to close
this down over there, I can always go back to File, Open and find the dog. There it is the dog CHA, dog character, and open
that up, and there it is. And everything is still as
it should be for editing. Now, I'm going to
also export this. I'm going to go to File.
I'm going down to Export. I'm going to click
on Export in there, and we can export in so
many different formats. For those of you who
are using Photoshop, you'll notice there's
a PSD file in there. There's all sorts
of different ways. And I'm going to just
choose JPG at the top. So you click on JPG, and then you choose
your quality in here. I'm going to go with, I think, just high quality over there. Talk more about thes
settings and JPEGs and PNGs and all of them later on. But for now, I'll just
go down, say export, and I'm going to put that onto my desktop so we can see that. Now, let me close that down. We'll just click Save. And that should be on
my desktop. Over here. There is the JPEG file. You
can see we've got it there. And this one over here is my editable version
for Affinity. Have a bit of a go with that.
27. How to Find Your Files: Now, if you want to
open your file again, you could go to
File and go down to open and go and
find it that way in there or you can just click on the little A item A icon
at the top for Affinity. Click on that. It takes you
back to this welcome screen. By the way, if you
can't see this, you might be on that area there. Just click on Little House, and there is your recent
document that you're working on. You can just click on that to come back and continue editing. I
28. Make Variations: Don't worry about sticking
to standard colors. If you want to go wild with some different colors,
just make a copy. So I'm going to
select this dog here, hold down the alter
the option key, whoops, and drag a copy out. And then I can just go through the copy, changing the colors. And remember, if you
want to select a color, so I've selected that here, I could use the eyedropper tool to just click on the green that I've got from here there. And I just work my way around to get some wild
and wonderful colors. Not only that, you can
take these basic shapes that I've shown you and make all sorts of
different creatures. I've done another
one over here to show you that you could do
something like a mouse. It's the same basic principle.
The tail is bigger. I've made the head a
little bit longer, and then I've
created these shapes over here for the ears. Now, how did I
create this shape? Because we don't have
a tool like that? Well, what you could
do is you could take a rectangle like that, and we want to basically make this bit
come out so you can get your remember your Node Tool over there to select the
point and take it out. But in order to
change one of these, you've got to go to
that little button at the top there and
convert to curves. Now with a node tool, you can grab that corner and pull it out to make
a shape like that. So that was how I got
that shape there. And well, almost, I've
rounded the corners. So then I used my corner tool to select
all the points on there and just clicked and dragged in to create that
shape like that. So once I got that shape, it's easy to hold down the old key to make
a copy of that, make that one smaller. That goes inside
there, and that was the pink in the ear
that I'd used in there. Anyway, have a think you
might be able to come up with some amazing creatures that you've created on
your own, as well. And please share them. We love seeing
what you're doing. I might love to get some
other ideas from you, as well, about the creatures
that you've created. Most importantly, have
lots of fun with this one.
29. Backgrounds & Text: Et's make an interesting
background for this and make it into
a logo or an icon. So we'll start off
by just having a square background with rounded corners
behind one of these. And I'm going to do that by going along and making
a new document. So I'm going to
go to file a new. I'm going to create
a new document. Once again, I'm using
a four in there. Remember, size doesn't matter for vectors because
it's fully scalable. And I will just create
a document there. Now, I'm going to go back
to my dog and mouse. You've might have
different things, and I'm going to copy it. Now, you see the mouse
has got this sort of white area around it. So I'm just going to
move that to the side, and I'm going to then
select the mouse. Copy it. So I will use
Command C or Control C, depending Mac or PC. And I'm then going to go
and take that over here. But before I actually
paste it in, I'm just going to
make a little shape. So I'll get a rectangle, drawing the rectangle
that I want. I'm holding down the Shift key, so it's a perfect square. I'm going to use my corner
tool over here to select all those and just
round them off a bit to the size that I want. I think I'm going to
take that I'm going to get rid of the line
around the outside. So get rid of the
stroke over there, and then go to the fill
and give it a fill color, maybe a dark gray like that. And then I can paste my rat on top of that or
mouse, whatever it is. Now, I need to be
careful that I'm back on the move tool over here. You can see my mouse, well, it doesn't fit in
there very well, so we're going to have
to tweak it a bit. Now, I'm going to move
this to the side so I can do things to
this quite easily. And I'd like my
mouse to be white. So I'm going to start
selecting parts, and I'm going to say I want
to get that part there, and then I'm holding down the
Shift key to say this one, that here, and that here. Now, if you find that things are not selecting very
easily, remember, you've got group, you can just ungroup over there
very, very quickly. Now, I'm going to just
change the color of all of those at once and
make it quite light. Now, I've got this and this, which are really dark, so I'm going to
lighten them as well. Now, for some reason, the
feet in front of the head. So I really do need
to move them around. Now, over here, I can
do that in my layers. If you ever look at all these shapes that I've
got in my layers? What I'm going to do is I'm
going to take those two. Over there you can see
I can click on them to select them in there and just move them down below
the ears and the nose. But above the background shape. Now, what's happened here? This you'll find
happens occasionally. You think, I've
moved those round. Why are they just It's
almost like giving him stripes on his face.
Why is it done that? Well, because of where
you've moved them to, you see over here this polyline, if I click over there
those two shapes are actually inside
that shape now. We're going to be
looking at this later on this sort of masking effect. So if you find that
happens, just undo it. Use Control or
Command Z to undo it. And the next time you
grab it and move it, be very careful that you're actually moving it not
on top of the shape, but underneath the shape. So over there, I'll go
underneath that shape there. And I'm going to take this tail, I think, make it a
little bit more upright. Like so, and I'm going to change the color of those
to a much lighter, paler pink as well. When I'm happy with that,
I can select all of that, and I'm going to go
along, group it together, and then this one can
go underneath that. And my rat can go in the middle
or mouse, whatever it is. I think I might make it
a little bit smaller. There we go. It's presented
rather nicely over there. However, I still want
some text over here, and I'm going to
call this a rat, cause to me, it looks a
little bit more rat like. Also, I find that that's maybe a little bit
too dark, the gray in there. I might need to lighten
up a bit as well. But for now, let me
put in some text. Now, I'm going to go
along to the text tool. We haven't talked about
the text tool yet, but there are two
types of text tools. There's artistic text
and this frame text. I'm going to be using
artist artistic text, and I'm going to click and drag to the size of the
text that I want. And I'm just going to type in. All caps the word rats with a z. Now, if I select that over here, I've got some options
for the text. And instead of aerial, I'm going to choose
Aerial black. You can pick anything
you like in here. Your typefaces that
you've got in here will entirely depend on what
you've got on your system. That's quite an
interesting one for that. Oh, I quite like that. And then you can actually
just grab a corner with your move tool over there and just pull
it out if you need. So I'm just going
to pull that out, so it's the same size as that. In there. Let's select that. I'm going to choose a
color from in here. I think I'll go with eye drop a tool and pick that
gray. That looks good. But to emphasize the
word rat in there, I'm going to select
the z over there, once again with the same
text tool and I'm going to pick a pink from the ear. That looks quite
interesting over there. I will go and just change
the colors of those. Now remember, these
are grouped together. So if I click in my layers here, I can see all the parts, and then I can just
select them very quickly. So in here, I'm going to hold down the
Shift key, do those, those, and those,
and this one here. Now, because I use Shift, when I clicked on those three
and then went to this one, it also selected
in between ones. So what you can do is if you hold down either
Command or Control, depending on the MACOPC, you can then select
them individually. And I'm going to go
to my colors over here and just maybe lighten
them up a little bit. So we've got slightly more of
a light color rat in there. I'll do the same with the feet
now, select both of those, and let's make them
really light in front. Do have a bit of a go with that. Try putting your design
onto a background, get a bit of text
in there as well. Use sympathetic
colors to your shape. Don't put too many colors in. Keep it nice and simple
and create something interesting like that. Dry out.
30. Background Variations: Let's try another variation. I'm going to take
the dog this time, so I'm just going to get
rid of that light area, select the dog, copy it. Let's go and do a new document. So up to the top, over to the plus, and I'm going to just say create
document over there. Now, this time, I'm going
to do something vertical. So I'm going to take
my rectangle tool. I'm going to put in a
vertical shape over here. And I will round
off the corners, only because I like rounded
corners for no other reason. So I'm just going
to select this. But instead of actually
rounding off all of them, I'm just going to round
off the bottom ones. So I'll select those two and round those two off like that. And then let's
give that a color. Once again, just something
to get started with. I'm going to paste my dog in, and I'll place him down
the bottom, like so. I might make him just
a little bit smaller. Let's move him down to there. And then I want to put in
some text along the top, but I want to show you a
little trick with the text. So I'm going to go
and get my text, which is my artistic text, and I'm just going to click and drag and put in the word hound. Well, that's kind
of big, really. So I can take that. I'll just select it all. I'm going to go up here
to the size and just take the size down a
little bit alike so. We don't have to use this. As I said before, you
can actually just grab a corner and
scale it up and down. And I'm going to go with
something like aerial black. So it's a fairly heavy duty typeface that
I've got in there. I'm going to make that
a little bit smaller. And what I'm looking to
do is to make that just slightly smaller
than background. I'm going to pop
that over there. Now, I'm going to select the
background and the text. And then I'm going to go
up to my geometry options, and I'm going to say cut
out the overlapping areas, and I'll get something
which looks like that. Once again, it's
just very different. And let's say this is
a game called Hund, and I can just get a little
bit more text in there, click and drag and say the game. Just so we've got
something else over there. Of course, I can always go in and change that
background color, and we just try something
lighter, try something darker. Oh, that's actually
looking quite good, although this bit of text
will then need to be lightened up as well. And maybe we can change
the color on the dog. But anyway, do have a
bit of a go with that. It's such a lovely technique where you just take your shape, put some text over it, and then knock out the overlapping areas.
31. One More Background: I'm going to do one more
background over here, so I'm going to just do a new document up to
there. Same again. A four. Well, let's
do it landscape. And I want to do
something interesting for my rat or my mouse. If you're doing using the dog, maybe I'll do some
bones with a rat. I'm going to do a
piece of cheese, so I'm just going to select it. Copy it. And let's go back
to this document here. And the cheese I'm going to do, you won't believe
how easy this will be. Take a shape like that. I'm going to make it sort of
a cheesy yellow, like so. I'm going to go to my Node Tool because I want to make this
into a wedge of cheese. And to do that, I need to then
convert this into curves. So now I can select
that point and pull it down to get kind of a
wedge shape like that. I want some holes, so it's
going to be Swiss cheese, so I'm going to do
some holes in there, so I'll take an ellipse, like so, and I'm actually going to just
change the color on that ellipse so I can
see what I'm doing. I'm going to pop an
ellipse in over there. Hold down the alter
the option key, do another one, do another one. And then I'm also going to do another one there
and then make it smaller. So once again, every
time I'm scaling this, I'm holding down the Shift key, so that can go over there. Hold down the old key,
make another copy, maybe another copy over there, and one last little one. I can go there. Maybe we'll
have another version there. Now I'm going to
select all of those. So I'm selecting every
single one of them. And when we go up here
to the subtract option, what it'll do is it'll subtract all the top objects from the bottom object.
Look at the layers. You'll see we've got all
of these top objects and the cheese is
the bottom object. So when I choose that, it subtracts all the top
ones from the bottom one. There's my cheese.
I'll just get rid of the stroke around the outside. And I can then paste my
rat in front of that. Over there, we get interesting
little graphic like that. Anyway, try with the
dog if you haven't got a rat or any other animal that you've got find
something appropriate. For the dog, I might
make some bones, and I would probably
do bones by just doing a shape like that,
doing a little circle. Over there, and let's have
a circle on that side. Hold down the old key,
another one there, old key, another one there,
old key, another one there. I can select all of those and unite them all together
to make the bone. And then, you know, we
could have one like that and maybe hold
down the old key and a few more in a pattern
shape like that. And then put the
dog in front of it. Whatever you want to
do is absolutely fine. Just enjoy the process and use these little
tools over here. Have a go. I
32. Strokes, Fills, Colors & Gradients - Intro: Et's move on with the shapes. Now, we're going to be looking at different modes so you can see your artwork not
just as solid colors, but in something called X
ray mode and line mode. We're going to be
looking at strokes and we're going to
go into swatches. So we'll look at solid colors, how to create solid colors, how to save your solid colors, and also how to work
with gradients. And we're going to do some
really, really cool gradients.
33. Fill & Stroke - The Basics: Et's create a little shape over here and have a look at
the fill and the stroke. So when I've created the shape, it's coming with this
kind of gray background, and there's a black line
around the outside, which is the stroke over here. Now, to change the stroke, you can either do it by clicking
on the stroke up the top there or you can go
over here as well. And to change the width, I can just move
across and decide on a different width
for that little area. Now, we can also choose from more options
about the width. I'm going to go along
to the little well, it kind of looks
like a brush stroke. So I'm going to click on
that, and you can see, first of all, we've
got a slider in there. That's fine. We've
done it before. But within this area, you can also change things like the dots or the
dashes, shall we say. And then there's a
last one over here, which is a brush stroke, and we'll come to that later on. Now, when it comes
to the colors, as always, you choose
the one you want. Change the color in there. Now, I want to go from stroke
to fill, and of course, I can go up here
and I can click on it or I can go over there
and I can click on it there. But a really nice fast way of doing this is to use a shortcut, and the shortcut to
get between those two is just X on the keyboard. There's no control or command or shift or
anything like that. It is purely just X. X will toggle between
the fill and the stroke. So I can toggle and I want
that color for my stroke, press X, and I want that
color for my fill in there. You'll also notice that there is a little
arrow over here, so I can actually
click on that arrow and change my fill
and my stroke around. Now, there's a shortcut
for that as well, for those of you
who like shortcuts, and that's Shift and X. So shift in X does that, but X will just bring one
or the other to the front. Now, we can also,
while we're in here, remove the fill or the stroke. And we do that by clicking on this little forward
red line in there. If I click on that, I've
got rid of the stroke. If I do that, I get rid
of the fill from there. Now, this shape here has got
no fill or stroke in it. You see, if I click
around, I can't see it. If I click and drag over
it, then I will select it. And you'll find if you click
and drag just a little bit, it will pick it up, but by just clicking won't
actually select it at all. No, this looks like it's a
mistake, having no fill, no stroke on a shape like that, but these are helper objects, and we will in the
more advanced section, get into why we need to use those little shapes
for different things. So don't forget, you've got your filling your
stroke over here. You can change the
colors quickly. You can use X to
flick between them. You can use shift in X to
flick those colors around. And lastly, and I love this little shortcut because very often I'll go and I'll create something and say, Okay, I want that shape there, but then I want another
shape on top of that, so I go and create
my shape and go, A, I want this one
to not be filled. So rather than having
to go to the top there, I can press X to bring
the fill to the front and see how the
little red thing, it looks like the forward
slash on the keyboard. So if you click forward
slash on the keyboard, that will remove the
fill or the stroke. Quite a lot of shortcuts there, I'm afraid, but you can
ignore them if you like. And you can just use these
little ones up here. Finally, down the bottom here, we've got exactly
the same thing. You can go to the fill and
you can go to the stroke. Well, it seems quite a
long way to go down there, click on the fill, and then
choose it from up the top. You can while you're here, double click on these and bring up a color
picker, as well. There's so many ways of doing exactly the same
thing in Affinity, and you just choose the way
that works for you the best. Anyway, have a bit of a
play with those settings. I
34. Outline & X Ray Modes: I've made some shapes here, and I've got some
without strokes, some with fills and strokes,
some without fills. And there's actually one, if
I drag over it over here, you can see hasn't got
anything in the middle. Now, if I were to click and
just click in the middle of that shape just with one
click, it won't show it. If I click and drag
inside it or across it, it will show up and become
selected over there. And if I've got something like this that doesn't have a fill, you can see there's
none on the fill there. Once again, if I go over to it and click, it
doesn't select it. If I click on these items, because they've got a fill,
one click will select them, but that doesn't
always select it, you sometimes have to click
and drag to get it to select. You get used to it
and you just do it without thinking in the end. But just remember,
a click won't go, but a click with a drag will, whereas a filled item,
you can just click. Now, this one here,
Yeah, it won't select. That one will. Okay, now, let's have a look at
other ways that we can see this because if I've got objects on my page
which are not filled, how do I know that
they're actually there? Well, we can go along
to the view menu. And in the view menu,
if I go down to mode, you'll see I'm actually
in vector mode. There's pixel modes
in here as well, so I can actually view things
as if they were pixels. But we've got a wireframe mode. And there are two modes in this wireframe the one
is the outline mode, and the other is X ray mode. Now, let me show
you outline first, so if I go into outline, it just shows everything
purely as an outline. And you can see that this
one here that doesn't have a fill or a stroke
on it, it shows up. So with these ones here, once again, if I click on
them, nothing will happen. If I go to the line and click,
then I can select them. But if I click and
drag a little bit, I can select any of
those items in there. Oh, what's Xray mode? Well, let's go into
mode and you see. If we go to Xray mode, it shows a little
bit of the color, so you get an idea
of what's actually going on with colors in there. And once again,
you've just got to click and drag a
little bit to select the item before you can
start to move it around. They're really useful, those
little modes in there. I'll just go back
to mode over here. And especially if you've
lost something or you can't find it or you've got
white on a white background, just use X ray mode, or sometimes you might
have an object which is underneath another object
and you don't always see it. Once again, use
outline mode in there. So I'm just going to go
back to vector mode, which takes me back to
the normal mode of that. Have play with those, make sure you feel
comfortable with them.
35. More Shape Settings: Et's have a look at a few
more shapes that we can do. I'm going to go to
my shapes again, use a rectangle, and I'm just going to draw in a
little rectangle like that. Now, so that you can
see it a bit better, I'm going to go over
to my color and just make it a bit lighter
so it's easier to see. Over to the stroke, and
I think the stroke, I will change the width, so it's a bit thinner like that. Now, have a look over here at
some of the other options. You'll see as you move along, we've got this little settings
option or presets option. If I click on there,
I can then just very quickly jump to
a different preset. If I do that, you'll see that it shows me that shape in there. If I do that, it cuts
off the corners. Now, if you choose one of these, you'll find that you still
have the little red dot, so you can actually just
change the shape once again. Now, honestly, my
favorite of these is actually this one here
because when you click on it, you can then choose which of the corners you want to
round off independently. So the bottom right
at the moment has got a curved version on it with 60%. If I go to the top
left TL over there, and I'm going to
choose round it, and then in here, I can choose how much I
want to round it off, or you can go to
the little red dot, and you can just round
it off like that. I can grab this one over
here and round that one off. You can do these really
cool shapes like that. You'll see them quite a lot on different designs because
they're so useful. Anyway, do try that out. Remember, you can always
pull things back again. Like that if you
need to get back to the original shape
over there. Have a go.
36. Color Panels: Et's have a look at
this little color wheel over here, I'm going
to pull it out, so I'm going to grab it
by its name where it says color and just pull it over here to make it
easier for you to see. So with a color wheel, around the outside, we have
got what is called the hue. That's the color on
the color spectrum. If I click on this purple, you'll see as I drag it around, the hue is changing. The color is changing in there. When I go to the
middle, this then changes the saturation
or the lightness. So I can go from dark to
light across like that. You can see if I go almost
from black to white, dark to light, and
then really saturated, vivid or no saturation or hardly saturated at all
down to the bottom to gray. And you can do that with any
color in the color spectrum. Now, if you don't like
working like that, you go up to this
little V over here. Click on the V. That's
the color wheel. You can go with sliders instead. So in the sliders,
if, for example, you're working on
a document and you want a specific CMYK color, you can come in here and
you can just type in your CMYK values in here. Or you can click on this little color area down
here to choose the colors, or you can just drag the
slides to what you want. Of course, you could
always go in here and you could use RGB instead, once again, you can
type them and you can pick from the
colors in there. If you've got something like
a web color that you need, and that would be
your hex colors that you might have in
your brand guidelines, you can type your hex
number straight into there. Once again, that will show
those colors in RGB mode. Um, there are so many more
of them in here as well. I don't want to
give you all sorts, but I will go to HSL
because I like this. This gives you the
hue as a slider, and then the
saturation over here, from no saturation
to fully saturated. And finally, the
lightness from black through to white or the darkness or
lightness of that color. Now we can go to the top here again. There's so many of these. We can say, Well,
what about as boxes? So you've got the
hue over there, and you've got the
saturation over there, and then you can choose
the lightness over there. I just there are
so many options. You choose the one that
you want to work in. The last one that I do
want to mention here, which is actually really
useful is the tint. So I'm going to go up to the
top and choose tint there. Let's take this little
green triangle. If I were to tint this, I can change the color
and I can lighten it up. You can see I can get
a really light tint of that color all the way through to white or all the way through to the color that
I've chosen in there. So it's just
lightening that color like it's adding white to it. Now, it's important to know the difference between
tint and opacity. Because if I go to this one
here and we look at opacity, let's move that across
to there we'll change the opacity until
it's the same color. Look at that. Those are
almost the same color. This one is tint, that one is opacity. So what's
the difference? Well, the difference is that if I put this one
on top of that one, the opacity means that things underneath will show through. With a tint, it's a solid lightness of
that color in there. So just watch those two there it's important to
know the difference. If you don't have
anything underneath them, well, in that case, it probably won't make
any difference at all, but it's as soon as you
have something on top of something else that you'll
see the difference. Now, other ways to choose
colors in here as well. By the way, I'm going to go
back to my wheel 'cause I like to have that one up over
there, entirely up to you. I can go over here to the top
and I can click in there. We get the same thing in
there. Same with the stroke. We've got the wheel in there, or you can choose any
other way of viewing it. Lastly, I promise this is the last one I'll do
with these colors. As down to the bottom, you can go down here to
the fill in the stroke in your toolbar and double click
on that fill or stroke. And once again in here, you can then just
choose your colors from the hue along the top, and then the saturation
and lightness over here, or you can go in
and you can pick it using any of the other
methods that we've looked at. Lastly, you can put in
your RGB in there or your CMYK numbers if you've got those in
your brand guidelines, or you can put in your
hex number over here. If you don't need brand
guidelines, well, you can just go wild
and pick anything you like. Let's close that. I'm going to stop there, have a little bit of a look at those, get to know them and get to know what options there
are in here as well, just in case at some stage you open up and looks like that, and you go, Where's it gone? You can always change
it back. Try it out.
37. Swatches: Now, let's have a look
at how we can actually save our colors into a swatch. I'm going to go to the
Swatches panel over here, and I'm going to put it out again to make it
easier for you to see. Now, we've got different
color swatches in here. And if I click over here, you'll see that we've
got things like colors, gradients,
grays, hatches. There's some of the
other panels in here. All you've got to
do is choose one to see the colors in there. I'll just go back to my
main colors in there. And finally, we have got
these pantone range in here. Now, pantons what are
known as spot colors. Pantone is just a
brand of spot color. And if you are
printing something, we'll be talking about this
later when we come to print. You might want a specific color
ink that you want to use, and you can do that
from the Pantone books. Now, if I go over here and say, Okay, well, that's
all very well, but I want to save my
own colors in here and make my own particular swatch. Well, go to the top up to there, and we can then add
our own palettes. Now, there's an
application palette and a document palette. I'm going to choose the
document palette first. I'm going to say I want to
make a new palette called a document palette over here, and I'm going to
call this Blues. There. I'll click Okay. Now, I want to put
some blue into there. So I'm going to go in and pick the color blue that I want, so I want a sort of
a blue like that. And then to add it into
this little swatch, click on that little icon over there with one
with a plus on it, and we'll add it in there. Well it's difficult to
see because it's so dark. Let's do some other blue. So I'm going to have
this blue here. I'll add that one in.
Let's have a lighter blue. Once again, add that in
over there and a more sort of turquoise teal color
blue in there as well. Now, if I click over here, you'll see that I've got
this swatch called blues. If I go back to my colors, I can always go back to Blues, and I can then pick
colors from there. So I want to use that blue
there and this one over here, and that one's going
to go over there. That's okay for this document. But if I went into
a new document, over here and let's just click
the new document button. Now, where's my blues gone? If I go back to
this document here, the blues is there. Well, when you're creating
a panel or a swatch, if you do it as a
document palette, it's only for the document
that you're actually in. So let's do another one, which is an application palette. Once again, I need
to give it a name. I'm going to call
this one greens. You can call it anything
you like, really. And then I'm going to go and
add some greens in here, so I want to use
the screen here, sort of a very very vivid color. I'm going to add
that in, and it's adding a sort of a more
saturated version of that, maybe a darker version
of that green. I just keep adding as many of these in as I like
and maybe more of a sort of a yellow green
over there as well. Okay, so I've got
those greens in there. Now, if I go to another document and I'm just going to open
up a new document here, you'll see that my
greens are there, and it's part of the application rather
than just the document, they will always be there. If I go back to this one here, once again,
click in there. There's my greens over there. So do be aware of the
difference between these two. Document palette is only
for the document you're in. Application palettes
are for well, any document that
you're working in. One last thing. If you
go up to the top here, you can go in and you can rename any palettes that you like. If I click on Rename palette. This is actually
the color palette because I'm in that one. I don't want to call
that rename that one. I'm going to rename Greens.
So I'll go over there. I can rename it
greens and yellows. Over there. And I can also delete palettes
that I don't want. So we can go down here.
We can delete them. We can duplicate them if you find you've got a
really cool palette, but you want to
make some changes, adjust to a version of that. Anyway, do have a bit of a
go with that. Try it out. Get to know these swatches
because once again, they're so useful for holding your colors
and your brand colors.
38. Gradient Basics & Pigment Blend: Let's have a look at creating gradients or shades or blends. So people call them different
by different names, but it's when one
color blends into another color or as
a different shade. What I'm going to do is
I'm going to go across. I've got my object selected
across to my tools, and I've got a tool here
called the fill tool. If you hover over it, it's
called the fill tool. Now, if I click on that tool, I'm going to move
across to my object, and I'm just going to click and drag over there,
and you can see, well, it's very, very
subtle at the moment, but it's gone from purple here to a darker
purple on that side. Now, if I click on this, these are called stops
over here on our gradient. If I click on that one there
and I change the color, and I say, Well, let's
make that orange. You can see how we
get a graduation of colors from one color
through to the other one. I'm going to make
that a bit brighter in and at any point, I can go to these stops. I can click on that stop, and I can change the
color to something else. Whoa, that's a bit
much. Let's go back to purple over there. I can also drag
the stops around, so I can just pull
this over there to get my gradient to go
in different ways. You don't have to stay
within the shape, either. I can sort of pull
that out and maybe that bit out there if I
just wanted that sort of more subtle as subtle as purple to orange is
going to be in there. So do be aware as
you're doing this, that you can pull
them out over there, and you can get some really interesting
graduations of colors. All you have to do is click
on the stop that you want, whichever one that might be and choose a color or a
shade of the color. Now, if you've used
affinity before, particularly when
it was designer, you'll know that when
you do these gradients, you get a bit of a messy color. It's not very nice
color in between, sometimes, especially
if you're going from one extreme color to another. So there's an option up
the top which they've included called pigment blend. If you switch that on, you'll
see that this is changing, so it's going from yellow into sort of a weird
pinky brown color and then into purple over there. If that was more of an ink, when you went from
one to the other, let's do it with blue. Actually, that would
make more sense there. If that went from
yellow to blue, when you mix them together,
that would actually be green. So if you click
on pigment Blend, you'll see it'll go
from yellow into green into blue over there. So using pigment blend, it blends the colors as
if they were something like inks or paint or something where you know
that you take two colors, you mix them together to
get a third color in there. You can switch it on,
you can switch it off. It really depends
on what you want to do with those colors. But
do have a bit of a go. It's the fill tool over there. If you go back to
your move tool, that line will disappear
if you need to adjust it. Just go back to the
fill tool once again, and those little stops will appear for you to work from and don't forget the pigment
blend up the top. Try it out.
39. Add & Delete Stops: You'll notice there's a little
line in the middle there, just that crosses the main line. If you drag that, it will
adjust your gradient. So in this case, it's
predominantly blue, and then the graduation sort of middle point is over there. Likewise, I can do it that way. And if we have pigment blend
on, it's the same again, so I can kind of move the green from one side to the other. I'll just switch
that off for now. If you want to add more
colors to your gradient, just go onto the
stop and click on the stop and you can then
pick a different color, and you can keep adding as
many of these in as you like. Like so. If you want
to get rid of a color, that green looks awful. All you do is you click on it, and then you can
either click on delete or backspace on the
keyboard to remove it. I'm going to get rid of
that one there and delete. Now, I've got this stop,
this stop, and this stop. What would happen if
I deleted this stop? But if I click on that stop there and press
backspace or delete, now my gradient just goes
from there to there. If we delete that one, we
go back to a solid shape and you can click and drag
again for your next gradient. So do try those out
and get to know those the way that
little line works, adding points, moving
this middle section around and deleting them.
40. Save Gradients: Now, I've got this really
groovy gradient over here, and it goes from yellow over there to a burnt
orange on that side. And I want to save
this gradient. If we go to the swatches and I went down
instead of my colors, I chose gradients in there,
and I went to save it. What would happen is when
I clicked on the gradient, it doesn't save the gradient. It just saves one
of those colors. So, how's that working? Well, you see, with the stops, if I click on one
stop over there, that's now the color
that it's chosen. If I click on this stop here, that's the color
that it's chosen. And when you save, you're
saving those colors there. So how do you get the gradient? Well, go to the move tool. Click on your shape, and now you can see my fill or the stroke if you've applied to a stroke is apply has got
a gradient in it. Now, if I choose to
save it, there we go. It's saved in there. So just remember when you are working on a
gradient over here, let's just add another
color in there. We'll go from purple to I
don't know, green there. And I want to do
that one vertically, all I need to do is to
go to my move tool, click on there and then save that gradient
straight in there. Once again, you can save
these to the document or to the application itself. If you want to get
rid of something, so I've got that
solid color in there, you can right click and you
can just say delete fill, and you can delete solid colors. You can delete gradients,
you can delete anything that you
like with that. Once again, try it out.
41. Other Studios: I know what you're
thinking. You're thinking, Tim, we've been spending so much time in
this vector area. We've been looking
at colors, we've been looking at shapes so far. Are we going to go into
pixel and out mode at all? The answer is, you've actually been there.
You just don't know. You see, the great thing is, we've been learning
this in vector, and I've been doing color and
swatches recently with you. But what about if we
go into Pixel mode? Well, in pixel mode, there
is exactly the same. There's a fill tool over there. There is swatches. There's
colors. They are identical. If we go into out mode
or shall I say studio, once again, it's the same. We've got a fill tool there. We can do gradients,
we can do swatches. It's the same with
everything that we've been doing with these simple shapes. I'll just get rid of
this little shape that we've got over here. I can take a simple
shape like that. Over there, you'll see
all the shapes in vector. If I go to pixel mode, once again, I can go in there. We've got all those shapes
in pixel mode as well. And we can go to out mode, and you've guessed
it, those shapes are also available in Loud mode. So all the stuff that you've
been learning so far, although it's all
in the vector area, is absolutely applicable to
pixel and layout studios and, of course, any of
the other studios that you want to
work in as well. So you've been doing
three and one without actually realizing it so far.
42. Gradient Poster Project - Intro: And we've got another project. This one, we're going to create something which you
could use as a poster. You could use it as a
post for social media, but it's going to be comprised
of a lot of gradients. But look at this, look at the colors that
we've got on here. And I want to show you how to blend your gradients
together with this, and we're going to be
adding some text to it, as well. Let's get started.
43. About the Project & Clip to Canvas: For this project,
we're going to make this amazing poster
using gradients. And I just want to take
this apart first to show you how simple something which looks so effective
can really be. Now, this will be a poster
for a T which is going on. I've called it Tuesday Talks, and this one is all about
natural satellites which are things like celestial bodies orbiting planets, I E the moon. So it's just a intricate way of saying, we're going
to talk about the moon. Anyway, you can do yours on any particular
subject you like, but I've chosen things like moons because of these circles
that are so nice to do. Let me take this apart to
show you how simple it is, and then I'll show
you how to build it. But the first thing is, if I start to move things
around like this, you can't see them
on the outside. You see, when I
pull that out, you can see my groovy
colors in there, you can't actually see this. So I'm going to go
up to the view menu. And what I want to do is I want to switch off
clip to canvas. And what that does, then, is it shows you everything
which is outside the canvas. So if I pull that out over
there, you can see what it is. When I start to pull
these out over here, you can see them on the outside. So if you prefer to work like this where
you can see things on the outside or you've put something on the outside
and you can't find it, it's view and clip to canvas. You can switch it on and
switch it off in there. So what we've got here
is a black background. Over there, we've got some text, and I'll show you
how to put that in. And then we've got these
three little well, these three large
circles with gradients. And the gradients are
radial gradients. We'll be looking into that.
But more importantly, as you drag these
across each other, you can see how they interact
with each other like that, and you can kind of see
the overlapping bits. Underneath them, and I want
to show you how to do that. And then finally, we're
going to put a color over the top like that
just to once again, the top's got a
gradient on it as well, and we're going to blend
those together to get that really interesting
sort of blue, celestial look, but with a little bit of color
coming through as well. Anyway, I'm going
to close mine down, and then we're going
to get started. So let's get going.
44. Create CMYK Document & Radial Gradients: The poster that we're
going to create is going to be printed
on an office printer. So we're going to
make this a four. And the office printer works
with four colors of ink. So most printing works
with four colors of ink. These are Sian magenta,
yellow and black. Now, if you do this in RGB, or red, green, and blue, you're going to find that
when you print it out, even if you send it to
an external printer, the colors will change a bit, and I'll show you a little
bit about that later on. But we're going
to start off with a document which is in Ci
Magenta yellow and black, which is known as CMYK. So I'm going to go
to File and New. And down in my pages, I'm going to choose an
A four page in CMYK. You can see over here
these are page sizes RGB, page size is CMYK. There's my Ci Magenta
yellow and black icon. Now, over here, we don't really need to worry about
any of these bits and pieces. It has put in something
called a bleed. Now, we'll look at
bleeds at a later stage, but the bleed is just
an extra little area where if you've got
a printer which prints to the edge of the page, you usually want to print
it a little bit bigger, so when it gets cut
by the gelatin, because pages are not
usually printed on A four pages for
commercial printing, don't have anything leftover. More of that later on.
We don't actually need the bleed on here
because it's going to be printed on an office printer, and chances are it won't have it won't be able to print
edge to edge anyway. So I'm going to switch
off the bleed in there. And I'm going to click
on Create Document. That's this little pull
this up so you can see it, little button at the
bottom over there. Now, what is this
thing over here? Well, this just shows me very
quickly a little margin. And we can completely
ignore that. We don't have to use
it in the slightest. It helps us to lay out
the document, though. So I'm going to go along, and I'm going to make the
circles that I want in here. And I'm going to
start off by using an ellipse and just drawing
an elliptical shape in here. I'm going to put a
gradient in there. Now, let me start
by filling it with, and I was using green
for the background. I don't know whether
you noticed. But when you go to these
colors over here now, they're not as bright as when
we were working in our GB. I'll just show you if I
do a new document and this is a four, and
I go to the green. Look how vivid that green is. If I were to just put
into a circle like that, you can see it's
really, really bright. If we go to CMYK, that's as bright as it
gets because a printer, which prints to CMYK is not
able to print those very, very vivid colors that
you get using red, green, and blue light. So if you're creating
anything for print, and you think, Oh, my goodness, why is it not as bright
as it was on screen? Chances are you are seeing
it on screen in RGB mode. When it prints out,
it just uses CMYK. You'll find that the greens particularly change
and also the blues, the very bright blues in there. Once again, I'll just
change that to a blue. Oops, that's not
quite what I wanted. To a blue like that, that
looks so bright there, not quite as bright in here. It's just the
nature of printing. Because we're using cimagenta
yellow and black ink, you cannot get those super
vivid greens and blues. To a similar extent, it does affect reds, but not nearly as
much as those two. But anyway, we're going
to make the best of this, and we're gonna make
it look awesome. So I'm going to start off
with green over here. And I want to have a gradient which is a circular
gradient which is going to go from a darkish green
like that to a yellow. And I want it to be over here the yellow to give
it that sort of spherical look that I
want for my planets. So I'm going to go
over to my filtil and I'm going to click and drag. Now, at the moment, this
is not giving me a sphere. It's given me a gradient which goes from one side to the other. If you go up to the
type of gradient, it's a linear gradient. I'm going to choose an elliptical or a radial
gradient over here. I think I'll probably
go for radial. And you can see now if I pull
this over, and pull it in. It goes from that light
green to the dark green. Let's change the light one to maybe a yellow so you can
see it a little bit better. There we go, and
we'll pull that out so we get a radial gradient. And once again, I can move the center around
to wherever I want. And because it kind of goes
slightly darker over there, it gives me that really
nice sort of sphere. Over here, I might even pull
this out just a little bit. In there. And you can change
the colors and just get something which looks
really interesting there. Now, I want a second
one of these, so I'm going to hold down. Oh, by the way, I'm
going to get rid of the stroke from that before I forget. So no
stroke over there. I'm going to hold
down the Alt or the option key to
drag a copy in there, and I'm going to change the
gradient slightly on this. So over to the fill tool, and I think I'm going
to move the gradient up there, the dark a bit. Let's try it over there. I want to be able
to see one or the other in front or
behind each other. Let's move those to a cross
like that over there, so we can see both
shapes in there, they're looking
pretty spherical now. I might even go and
change this one a little bit more pull that out to there, make that a little bit
bigger. There we go. That's looking much
more spherical now. So have a bit of a go with that. Make yourself a new document. It's going to be CMYK. Your color is not gonna
be as bright as possible. If you want to make
it RGB, by all means, do so, but bear in mind that if you were to print it,
it wouldn't be as bright. But it's fine for the web. Have a bit of a go, get
that far, pop those two in. And once you've done those, do another one over here, and this is going to
be the little moon. Those are going to
be the planets. And over here, we're going
to change the gradients on this one from a yellow
to a different yellow. So we'll do something
along this line over here. So it's going to be
bright over to there. So you know how to do that now. Don't forget you change
the options up the top. When you in fill, you go
from linear to radial. By all means, have a look
at some of the other ones. You get all sorts of weird and wonderful
gradients in here, and we'll be looking
at some of those later on. Try it out.
45. Black Background & Blend Modes: I let's do the background. I'm going to go and
get a rectangle, and I'm going to put this over
the background like that. You notice that my rectangle slightly bigger than
the background. I honestly doesn't matter that
we'll be cut off later on. And I want to make this black, so I'm going to go over to my color and just choose
black at the top over there. Now, I want to move this
below the other shapes, and we can do this in two ways. We can either do it
from the layers, and you can see I've
got my shapes there. And I can actually drag that
down below those shapes. Or if you prefer if you find that you keep dragging it and dropping it onto
one and you think, why has that gone really weird, what you can do is you
can go to the layer menu, go to a range, and what we're going to
do is we're going to move the object which is
selected to the back, and that'll move
it down like that. You can choose whichever way
you prefer to do with that. Now that we've got that,
let's have a look at what happens when we start
to mix these together. So I'm going to get my
move tool and I'm going to click on this shape over here. And then I'm going to
go along in my layers. So I've got my layers up there, and I'm going to
change the mode. Now, these are called modes, and there's tons of them. And I'm going to change mine to something called hard light. You can just about see that second one through if
I go to hard light there. There's soft light. You've got all sorts of different modes, and you can experiment
and see what you like. In here, there's some
really weird ones. But I'm going to be
using hard light. Vivid light is actually
quite cool as well. I'm going to go with hard light over there. Oops, missed it. Let's try that again.
Hard light ever there. So I've done it. That's
on the second one. I haven't done the
background one because the background one
doesn't matter. It's the ones above
it that are going to be interacting with that one. Let's go to my circle
and do the same thing. I'm going to go to my circle
and try hard light on there. So, you can see now how they
show each other through. You might find that
you're not actually seeing quite as much of
the detail as you want, but go along to
your gradient tool. Click on the color
and try adjusting the color to see what
you get over there. You can see as I'm pulling this around or changing the colors. Oh, that looks so much better now that I've made it
ever so slightly orange. I can see the other
two underneath. I'm going to click
back on this one here. Once again, go to my fill tool, click on the dark green, and I'm going to experiment
with different shades of green in there to see if I can get a really nice overlap or change the colors
in there as well. Oh, that's interesting, but I
preferred that green there. So we've got that sort
of subtle overlay. Once again, just move
them around until you get something which you
find really pleasing. So have a go, pop in
your black background, and then go to the top two. Don't bother about the
circle at the bottom. If I go to that one
there and change it, all it's doing is
it's interacting with what is right
underneath. Over there. If you want to try it
out, by all means do so, but you might get some
weird results on that. I'm just going back to normal
mode in there. Have a ga.
46. Add the Top Gradient: Et's put the color over the top. So I'm going to go over
here and I'm going to do another color on top or
another shape on top. And with this shape, once again, I'm going to be using
the gradient over here. Whether it's solid or sorry, linear or elliptical,
doesn't really matter. I think I will I'll
try it like this. And I'm going to
choose some colors. Now I'm going to
choose some blue, so I'm going to get a light
blue there and a dark blue. Over there. Let's now mix
this together with the layers underneath and then we
can adjust it and see what works best. I'm
just going to go down. Once again, we've got
hard light over there. That actually looks
really nice with that soft light on there. I like those colors
that are jumping out, but I'm going to probably
go with hard light. Then I'm thinking, Well, that doesn't look so great because it's too
light at the top. Let's try that as a
radial gradient and I can move them around
kind of quite like that. Let's try adjusting the color in the that looks pretty good. It's a subtle background. It's not too much, and I can then put the
text over the top, and it won't interfere too much with the text and what I'm
trying to say about it. Anyway, pop something
on top. Try it out. Honestly, you can use any of these that you think
look really cool, and there are some
really amazing results that you can get in there. Just have a bit of a play
and see what happens.
47. Add Title & Use Tracking: I I want to bring
in some text now, so I'm going to go
down to the type tool. And when you go
to the type tool, there's an artistic text tool, and there's a frame text tool. Now, we're going to be using
the artistic text tool, and we're just going to
click and drag to get the text to the vague size that we want doesn't
have to be perfect. And then I'm going to put
in some text over here. So I've got the word
natural satellite. And I'm going to select
the text that I've got, and then I want to
start changing it and adjusting it with
my type settings. Now, first of all, I'm
on aerial by default. And I would like something a little bit more well, subtle. So I'm going to select the text. Sorry, I just lost the
N in my selection. I'm going to go
down. I'm going to find something like Helvetica. Now, if you're on
a PC and you don't have helvetica, try
something else. I honestly doesn't matter
what you use in here. I'm going to go with Helvetica, and I'm going to try
Helvetica light like that. Mm. Yeah, kind of like that. But then I realized,
You know what? I should have had
this all in caps. Now, although we've got a
lot of settings over here, I'm going to go to the
Winder menu down to text and open up the
character settings. So these settings here, are all the extra settings that are not along the top here. Of course, you can still
get to the same ones. There's my size over there. There's my size in there. Here's my typeface. There's
my typeface up the top. But one of the things that
we can do in here very, very quickly is we
can change things from lowercase to uppercase
with this little button. So I just click on that,
and all of a sudden, I've got the uppercase
characters or all caps. You've also got a small caps. If you want, that
means that capitals will still remain large, and the other ones which are lowercase will become smaller, but in the shape of capitals. I'm going to stick
with that in there. Now, I'm going to go
over to the text. I'm going to click on the little lollipop
that sticks out, and I'm going to
rotate this around. I'm holding down the Shift key so it'll rotate in increments so I can get it absolutely
vertical, like that. And then I think I'll
take my move tool and I'm going to pull this
out a little bit like that. But when I'm looking at that, I'm thinking, you know, that's
quite difficult to read. The moon is such an
important subject. I want to make this a
little bit more cinematic. So I'm going to go over here, and we've got some options
in position and transform. If you can't see
them, just click next to position and transform
in this character option. On that little arrow,
it'll drop down. And over here, we've got
something called tracking. Dragging changes the distances
between the characters. And you look, as I'm dragging, so I've just clicked
on that VNA, I'm just dragging like that to change the distance
between the characters. It's not changing the
characters themselves. It's not scaling them. It's
only changing the distance. I'm going to do that. Like, so, I think, make it look
interesting that way. And then I want
to scale it down. So I'm just going to grab
the end and scale down like that until that natural
satellite fits into my margin. You don't have to have
it within the margin. I'm just using it as
a guide to help me. The other thing is the
color of the text, which at the moment is
black on that background. So I'm going to go
and change that to white so it'll
be easier to see. Oops. Here we go. That's looking a lot better
and much easier to see. If you'd like to get your
main name along the side, whatever subject you've
chosen to put in, op it in over there, and then we'll get some more
text down the bottom here.
48. Add More Text & Use Leading: Now, as you can see, I've
put some more text in. And I've got this bit here, celestial bodies
orbiting planets. And just to do that,
I just popped it in, did a return after bodies, and then I wanted
the same thing, but smaller for the seven
to nine in the main hall. So all I did was I took that bit of text, held down
the option key, made a copy, changed the text, and scaled it down like so. Now when it comes to the
other text over here, this is pretty much the
same thing for this text, but I've just gone
for bold instead. But what I do want
to do is change it a little bit because
it looks boring. So I'm going to go over
to the character panel, and I'm going down over here
where we've got all caps, and I'm going to use
small caps over there. So I'm going to take off all caps so you can see
now that the T's are larger because they
were capitalized and everything else is
capsules, but smaller. Second thing I'd
like to do is to move these two closer together. I'm going to go up over
here to this little option. Now, this is leading. It's called paragraph
leading, as you can see, and if I click and drag, I can move things closer
together or further apart. So I've just moved
those closer together like so. And there we go. It's looking pretty good, very, very subtle background in there. Have a bit of a go with
the rest of your text.
49. Export as JPG: This is going to be sent
out to people who are going to print it on
their office printer. So I'm just going to
send it as a JPEG. I'm going to go to File, and
I'm going down to Export, choosing Export in there. And on the left hand side,
I'm going to pick JPEG. And then we've got
different qualities in here from low
through to high. I'm going to choose
the best quality, and this gives us a width and
height in here in pixels. We'll be talking about
all of this later on. The quality is set
to 100 in there, and I'm then going to
go down and export it. If this stuff doesn't make sense at the moment,
don't worry. We will definitely be
going into it later on. I'm just going to
click on Export over there and place it somewhere
where I can find it. So I'm just going to call this Celestial bodies
or CB over there. And let's click on Save. And that's now done.
50. Convert to RGB & Add Moon: We created this in SamwK mode. So the colors were fairly muted compared to what they
could look like in our GB. And we saved out as a JPEG, which is a SMweK JPEG. But what about if
you wanted to put it online and you wanted brighter colors than
what we see here? Well, click on somewhere
which is not an object, so just click so nothing is
selected on the background. Go up to your document
settings up here. Click that, and in here, we can change the document
from CMYK into RGB. And we're using the one
which is eight in there. So I'm going to
choose RGB eight, and I'm going to
then click OK. Now, look, you'll see straightaway
the colors have changed. If I just undo that,
that's how it was, and this is how it
is as an RGB file. The way the colors react in RGB mode is different
to the way they react in C and wear K mode
using these blend modes. And I can just change them in here if I don't
like it or if I think it's too
bright or not bright enough, I can go in there, go back to my fill over here, and let's just pick a slightly different or
brighter color in there. There's no right or wrong here. I'm just choosing
different colors to see what I can get over there, there we go, we've got a
brighter blue on that. And you see my other greens should be a lot brighter
than they were. Wow, that looks really cool. In fact, you can just change this and
do whatever you like. If you don't like the
overlay, get rid of it. In fact, temporarily, if
you go to the layers, you can just poke it in the eye. There's a little eye over there. Sorry, it sounds dreadful. But you can just poke it
in the eye and go, Yeah, I like that and then make
the text black instead. And that might look
really cool as well, depending on what you want. Just can't undo what I've done. I'm using Control or
Command Z to undo those, and I'll just switch on that
overlay color in there. And by all means, you
have a bit of a go with the ones underneath
and change them, too. But I want to bring in
a little moon, as well, a photograph of the
moon to just have in the corner because this is
obviously all about the moon. So I'm going to go up to file, and I'm going to
go down to place. Now, the image that I'm going
to place before I place it, I got from unsplash.com. Unsplash.com is a website
with free images, royalty free images,
shall I say, they're not just stolen
images. They're royalty free. You choose the ones that
don't have the plus on them, that one's got a
plus on them, but the ones without a plus on them, those are free to use. All you have to do is
to click on it and go and download it in here. So I downloaded a medium size, which then put that into
my Downloads folder, and I can just go back
again into affinity. And then I'm going
to place it in here. So I'm going to go to File and Place. I'm going to find it. So that was in my
Downloads folder, and there it is over there. Now, all I've got to
do is to click and drag to bring it across. Now, you can see
the problem here is that we've got this black
background behind it. But let's try and see
if we can get rid of the black background
and make it a bit more subtle using
some of these modes. From normal, if I scroll down, you can see we've got
things like darken, which only shows
the darker areas. The opposite of darken and multiply is actually
lighten and screen. And so you can see I can
choose one of those. Actually, I quite like
that screen because it's gone slightly bluish, and that gets rid of the
black background behind it, so I can go Whoops. I'm going to place that
wherever I want it now, and I've got that
background removed. Now, this technique only
works if you're in RGB. If you try it in CMYK, you actually end up with a slightly light color
around the outside, and you can see that
background in there. So just be careful. As I said, things behave
slightly differently. These modes behave
slightly differently, depending on whether you
are in CMYK or RGB mode. I quite like that where it is, but maybe I'll just pop it
in the corner over there, so we just get a little bit of the moon coming
through like that. So once again, if I like
that, I'm going to file. I'll go to Export, and I'm
going to export that out. Once again, as a
JPEG, best quality. This will be exported as RGB, and I'm just going to
choose Export in there. We'll call that one moon, and I'll save that
one out as well. Let's have a look at those. If I just go back in here again, you can see on my desktop. There's a lot of
files on my desktop. But these are the two files that we're actually
interested in. This one is the RGB version. You see with the bright colors. This is the CMYK version with the more muted colors in there. Have a bit of a go with that.
Have fun with that and try some other designs using different gradients as well
and see what you can create.
51. The Pixel Studio - Intro: It's time for another studio. We're going to go into Pixel mode and we can start
working with photographs. And I want to show
you a little bit about how they work,
how layers work. We're also going to use something called an
adjustment layer. And we're going to do some
adjustments to our images. So if it's not bright enough or dark enough,
you can change it. If you want to make it black
and white or a single color, you can change it in here.
52. Pixels & Megapixels: And let's go and open
up a photograph now. So I'm in vector, but I'm going to go to file, and I'm not using place. I'm just going to say open. Now, I've got an image
over here of a cat, and I'm going to open that up. I'll show you where to
find it if you want to try it out later on. But we've got a cat in here
and you can see it's opened it and it's jumped
straight into pixel mode. Now, does that mean I
can't go back to vector? No, I can go back to
Vctor if I want to do some drawing in there
on top of that. But when we're
dealing with pixels, we tend to work in pixel
mode because it's got the appropriate tools
in this mode or studio. Now, this is a photograph, so it's made up of pixels. And let me show you
the pixels over here. I'm going to zoom in, so I'm just going to use Command and plus or Control and
plus to zoom right in. Let's go to the I, and you can see all those
little squares there. Each one of those is
an individual pixel. So when you're
looking at colors, you're looking at a mass of pixels in here and you'll find that pixel can only be a
single color in there. So, the more pixels
we have in an image, the higher the quality of
that image is going to be. So when I go along
to something alike, Pixabay over here, and
I click on the Cat. I just searched in Pi sorry. No Pixabay. Pix Bay is another place where you
can get free images. I meant Unsplash. I go to unsplash.com.
I've searched for CAT. I've gone to this image here, and I've clicked on
the CAT and over here, these numbers here are the
number of pixels in the image. I chose the biggest one I could, which is 5,100 by
3,400 pixels in there. So for a high resolution, go with the highest
number you possibly can. If you're doing
something which is really small for social media, you don't need
those high numbers, you can go with something
in the medium size or even small size potentially. We'll come back to how
these sizes actually work on documents
in a little while. Let me go back to affinity over here and have a look
at something else. If you are taking a
photograph yourself, now, whether it's on a camera
or whether it's on a phone, the images are taken
in pixels now, the cameras and
phones don't measure pixels or don't measure images
by this number of pixels, by that number of pixels. They give you something
called megapixels. So what is megapixels? Let's say you've got a
camera with 12 megapixels. Megapixels means
millions of pixels. So if you've got a
12 megapixel image, it means that there
are 12 million of those little dots in your image. So how can you figure out how many megapixels
your image is? Over here, I can
see that there's 5,184 pixels across
by 3,456 down. And if you times that by that, it equals 17.92 million
pixels altogether. So one can just times
across by down, and that gives you how many
pixels in the whole thing, and that's what mega pixels are. They're just a way of measuring
the number of pixels. The more pixels you have, the higher the
quality of the image is going to be within reason. Anyway, I'll stop there, grab yourself a cup of tea to sort your brain
out after all that, and then we'll move
on to the next area.
53. Crop Options: I'm going to go to File, and I'm going to
open some images, and I've given you these images in the folder
with all the assets, and I'm going to start off
with this image of a car. Now, this image looks great, but maybe we want to
crop it down a bit, and we want to get rid of
some of the other things. So we've got a cropping
tool over here. So if I click on
the cropping tool, it gives me some cropping
options along here. It also gives me the size in pixels of this
particular image. So it says it's 4,000 pixels
across by 6,000 pixels high. Now, although you don't
need to know this, if you wanted to work
that out in megapixels, you would just times
one by the other. So 6,000 by 4,000 is 24 million. So this is actually a
24 megapixel image. Now, over here, I've got some
options for cropping this. First of all, I've got
unconstrained Unconstrained allows me to just resize it
to whatever size I want. I could do something maybe
like that where I've just got the leaves at the bottom,
which looks really good. And you can see my
final result will be 3,700 by 3,100 over there. I'll just click Apply and
that's it, it's done. It's cropped down. And over here is the information
at the top. So it's 3,700 by 3,100 in there, which equals, and it tells
you 11.383 megapixels. I'm going to undo that. So I'm going to use Command
Z or Control Z, depending whether
your Mac or PC. Over there, 4,000 by
4,024 megapixels. Now, that's using
the unconstrained can't pronounce it unconstrained
version of cropping. If I go down, I could
use the original ratio, and that just takes
this four by six ratio and allows me to crop up and down with that particular ratio. The next one is a custom ratio. So if I want to square,
I could go, say, two by two or one
by one over there. And that would then give
me a perfect square, and I can just change
that in there. Once again, when you're happy
with that, click on apply. And you can see we've
got a square over here. The pixel sizes are the same. Let's undo that in there. Now, once again,
moving down over here, we've got something
called resample. Resample is really
interesting, but to do that, I'm going to show you
this unconstrained first. I've gone back to my
original sized image, and this time, we're going to have a look at this resample. But to do that, we're going to start with the original ratio. If I use the original
ratio and just scale it down like that,
pop that on the car. You can see it's going down
to a different pixel size. Remember, it's 4,000 by 600. If I were to apply that,
we've now gone down. We've got 1,400 by
2,200 pixels in there. So it's gotten rid of the
extra pixels from the image, and the image that
we're left with has got a lower number of pixels in
it. We're going to undo that. If you do this and you
use resample, now, once again, I will still pull
this size down over there. And I'm going to
click Apply again. So what it's done is it's
given me this cropped area, but it's made up more pixels. You can see it's still 6,000
by 4,000 pixels in there. So Affinity has actually
made some up for us, rather than just giving us
the pixels that were left. It's taken the ones
that are there and doubled them up virtually. The quality is not
necessarily brilliant, but it might be better
than it was if you just used the other method of
going off cropping down. Let's go and open
up another image, so I'm going to go
to File and Open. And I'm going to find
this one over here. Now, the problem with
this image is that the horizon is a little
bit on the squiffy side. So what I'm going to
do is I'm going to go into the cropping tool. I'm going to move just
to the edge over here. You can see the cropping cursor has gone to a double arrow. And I'm just going to
click and drag around until I manage to line
that up perfectly. Having all of these lines in
there really helps to get that absolutely spot on.
I'm happy with that. I'll click on apply
and that's done. Now, there is a faster
way. I'll just undo that. If you go to the cropping tool, you can go straight over to
this little tool over here. It's the straighten tool. And what happens is, if you click and
drag on the horizon, it'll automatically
straighten it for you. It's really, really
cool and works so fast. Now, that's not just about
horizontal cropping. It also works vertically. So I'm going to go and
open up another image. I'm going to go to file and open and find this one over there. So the buildings
look like they're leaning over a little bit
to the right hand side. So I'll go to my cropping tool
over here to the Straten. And all I've got to
do is find one in the middle and drag that down. Alright, so you can see
it was very subtle, but it's just straightened up
those buildings perfectly. Don't do it on one of the
edge ones because otherwise, whoops. Let's try that again. Don't do it on one
of the edge ones because otherwise you find that your whole thing tends
to fall over quite badly. Once you've done that, you might find that you
actually need to crop in a little bit like that if there are bits
that are missing. Anyway, have fun with that one. Try it out. It's really useful. And then we'll move
on to the next area.
54. Layers in Pixel Studio: Let's have a look at layers now, and especially in
the Pixel studio, because we've had
a quick look at them in the vector studio. I've gone to my layers panel. Once again, if you
can't find it, you know where to look
in the window menu, and I'm just going to pull
this down a little bit so you can see my
layers on this image. Let's move it over
to that side there. So there are a few layers
on this image here, and I'm going to go in and just start
switching them on and off. You See, first of all,
at the background, we've got the background layer, and if I switch it off, you can see that's the background, and the other areas are
just layers on top. This bit here is
actually a layer. If I switch that off, you'll see that was the
original photograph, and that's the layer
that's been added on top. Let's go to the cat. If I switch off the cat, it was added separately, and I can switch off
the shadow as well. By the way, these images
I just got from Unsplash. And finally, the graffiti on
the side of the building, that can be switched
on and off as well. So if I switch off
all those layers, you can see what the original
picture looked like before I started adding in bits
and pieces on there. Now, those layers can be
switched on and off, as I said. If you don't want one,
you can take the layer. I really don't like
that graffiti, so I'm going to take it
and just drag it into the bin over there so we can drop it on the bin to
remove it completely. Likewise, this new building
here, I don't really like it. It's actually been AI generated, and I'm going to move that
into the bin, as well. But I do like the
cat over there. Now we can move these around
an object on a layer. This is layer one,
and if you want, you can just double
click on it and name it. I'll just call this one shadow so I can go to the
cat layer using my move tool I can move
the cat anywhere I like. I can also go to the shadow and then move the shadow around. Place that back underneath
the cat, as well. If you select one layer, you can hold down the Shift key, select a second layer, and then you can move them
both around at the same time. The individual layers can be
scaled, they can be changed. They can be adjusted,
and we'll be getting into all of that
as we go through. But what's going to happen if I then went to the vector studio? Look at the vector studio, and you can see the
layers in there show me exactly the same layers. We've got the background,
the shadow, and the cat. We don't want this
character panel up for the moment,
I'll get rid of that. So what about if I made a shape in here,
made a vector shape? And I went in and
decided that it would be really cool if I had a
little star in the corner. I'll just pick a
color for the star. Let's make it bright orange. Over there. And I click and
drag to make a star in there, and you can see the
star pops up as another layer or object
within the layers panel. So whether it's things
from the studio, the Pixel studio
or things in here, you can just flick
between those studios and it's the same layers
that you're seeing in there. Now, these are different types of layers because
these layers here, the can I've called it. Let's try renaming that
and actually call it cat. So the cat, the shadow, and the background
are all pixel, whereas the star is a vector
shape, and once again, it could just be taken and
scaled around if you wished. But I don't know whether you can see because it's quite small, but what we have over here
are slightly different icons on the left of the lay
if I just click on the background so you can
see that a bit clearer. That one there
shows little shapes of this kind of little triangle and a circle and a
square in there. Whereas this shows little
dots which are pixel. If I roll over it, you can see it says
that it's a star. Understands that
the star in here tells me that these are
pixel layers there. So you do have different types of layers, and they all work. In all of the studios. If I go in here, I
can go to my star. I can adjust my star I can
add more items in there. I can use multiple shapes. As we did before, I'll hold down the old key and
make another one. I can select both of those, and I can mix them together using any of the bits
that I did before. Now I've made those two shapes, and I'm in the pixel layer. If I go to the
vector layer here, I can then use these ones, and I'll just unite them
into one shape over there. Once again, you can see
that's now called a polyline, and it's got a very different little icon over there as well. So do watch these little icons as you're building or if you get an image from
somebody else because it'll tell you the kind
of layer that they are. But don't worry about doing one thing in one studio and one thing in
the other studio. You can flick between
these studios as much as you need
or as you like. Lastly, within the
layers panel in here, whether it is in the
vector or the pixel, I can go along here and I
can change the opacity on items I can also go in here and I can change the modes into
different modes. So I think I should
move that over so you can see what's
happening to the cat as I go down the
different modes, get different
overlays over there. And, of course, if I
went to the stars, the star layer, and I can use I'm I'm on top
of the stars now. Let's move that to
the side there. You can see I can use this for different effects on
the photo as well. Well, that soft light's
quite nice, it shows up, I still move those
around if I wish. Anyway, do have a little
bit of fun with that. I've provided the image of the beetle and the cat over here so the layered
file so you can open it up. It won't have the polylines, the stars in it, but it'll
have those three layers. Have a bit of a play with it.
Add a few more vector bits in there, do whatever you want. Just get to know how these
layers are actually working.
55. Save as Affinity & Photoshop: Now, if I decide to
save this image and I go to File and Save As, and when I'm saving it, what I'm doing is I'm saving
it as an affinity example, and it's the dot AF extension
that we have in here. So I'm just going to put this
onto my desktop over there, click on Save and it's saved exactly as it
stands at the moment. I'm just going to close it down, so I'm going to go to File and close to close
down that document. And you'll see if I go
and open it up again. There it is on the desktop. Over there, it's got
the AF extension. Open it up, and it's
exactly as it was. Now, if you're going to pass
this on to somebody else who's working in the Adobe area, IE Photoshop, well, what you can do is because
they can't open up AF files, but you can go to File
and you can go to export. And then when you're
exporting it, you can export it as
a PSD file over here. So with a PSD file, this will keep all of
those layers for them. And I'm going to say
preserve accuracy in there. You can go through
these settings and have a look and change
all the bits and pieces so you can preserve either the accuracy
or the editability. I'm going to click on
Export over there, and let's call this layer
example two Click on save, and that's then save that
out as a PSD file for me. You can open up PSD files
in affinity as well. If I go along to file and open, you'll see that I
can either open the AF file or the PSD file. Click on open, and there it is. All the layers are in there. Now, you can open up quite a lot of the Adobe
things within affinity. I have come across a few slight issues when I've been opening up
really huge documents, and I mean, really, really big
documents within affinity. But it's nothing that can't be overcome with a
few slight tweaks, but for most work, should
be absolutely fine. Anyway, have a
little bit of look and save this out as an AFFle. Save it out as a PSD if that is your thing and you're dealing with people
who are using Adobe.
56. Adjustment Layers: I'm going to go to file
and open up another image, and I'm just going to get
this one that we looked at earlier, which was the car. Now, I want to make
some changes to this, and I'd just like
to adjust the color or the lightness and the
darkness, those type of things. So to do that, I'm going to
use an adjustment layer. Now, the adjustment layers
are in the layers menu here. They are the little black and
white circle at the bottom. If you click on that, you'll see there's a lot of
adjustments in there. You can also go to pixel and we can get to the adjustment
layers from this area as well. So I can say new
adjustment layer, and they're pretty
much the same things that we have in there. Now, let's start off with
a really nice simple one. I'll click over here and
I'm going to go down to something called
brightness slash Contrast. The brightness and contrast
sliders give me two sliders, and the one allows me to
brighten up the picture, so it's changing the brightness, and the other one adjusts, well, the contrast to make it more
contrasty or less contrasty. You can see if I increase
the contrast on this, what's happening is
we're losing detail in the shadow areas and in
the highlight areas, but we're making the
whole thing to well, for want of a better word, pop, it just looks a bit
more exciting that way. If you go back this way, we're getting more detail in the shadow and
the highlight areas. Look at all the detail
that's coming in underneath the car as
opposed to the contrast, when's that way, we lose
the detail in those areas. So I'm going to increase
the contrast a little bit and maybe just darken
down a small amount. Now, if I'm happy
with that setting, and I like the look of that, I'll close this window down. And you see we've
got a new layer called the brightness
and contrast layer. So if I don't want to see it, I can poke it in
the eye over there, and I can switch it on
and I can switch it off. If I really don't want it, I can take it and drop it into the bin like that.
Let me do that again. So I'll just go in
here. I'm going to use brightness and contrast. I'm going to make
this a lot more contrasty and a
little bit brighter. Close that down. And once again, I've got that brightness
and contrast in there. But if I thought at this stage, you know what would
be really interesting if I could adjust
those settings again, all you have to do is to go to the adjustment icon
and click once on it, and it will open up the brightness and
contrast settings for you again or whichever
adjustment you've got. I can make my changes,
close that down. Come back again to this, click on there, and
it opens it up. At any time, back into the one click and I can see my
settings and change them. I can save the document out as well and come back to
it in six months time. And once again, I can just
change those settings. Nothing is set in stone, and as always, you
can always click on the bin if you
wish to delete it. But what about if
you have that on a layered file like this? Well, I'm going to click on
the top layer over there. I'm going to go and add a layer on here and an adjustment
layer to this. And once again, let's just go
to brightness and contrast, we keep it nice and simple. And I'm going to
adjust the brightness. And see what it's doing,
it's affecting everything. It's affecting the cat, the shadow, and the
background in there. Let's just go a little bit silly over here, close that down. So an adjustment layer affects every single layer
underneath itself, and that's really important. So if I were to take
this brightness and contrast adjustment layer and
drag it underneath the cat, not onto the cat,
but underneath it, now the cat's not selected
or not affected by it. If I drag it
underneath the shadow, the shadow is no
longer affected by it. It's only affecting
the background. So an adjustment layer
will affect everything, every layer that's
underneath it. Let's go over here to
the vector studio, and we'll put on a
little shape in here. Once again, I will just
choose a simple shape. Let's use a crescent over there. I'll draw in my crescent. I'm going to make that blue. And if I take my brightness
and contrast adjustment layer and move it above the crescent, try and get it above the crescent or we'll
move the crescent below it. It's easier to do it that way. You can see how it's changing the brightness of that crescent. If I switch this on and off, it's affecting the crescent. If I move that below it, it's no longer affecting
the crescent. Adjustment layers don't
just affect pixel layers. They affect all the layers. One of the things to
look out for here. Well, I'm finding
this very bright, so I'm just going to turn
it off for the moment. One of the things
to look out for here are the little icons. So once again, we've
got the Pix icon. We've got the Shapes icon, and over here, this little icon is the adjustment layer icon. Have a bit of a play
with that and make sure that you feel confident
moving that up and down. By the way, when you
move it, don't drop it onto a layer because
it'll just disappear, and you have to
go and find it by clicking over there
and pulling it out. Make sure when you drag it, you drag it to the
line. Have a go.
57. Levels: Let's have a look at the lightness and
darkness of the image. The question is, how do you know when it's actually correct? You see, when you go along
to brightness and contrast, and you change the
brightness in here, is that right? Is that right? It's very difficult to tell, and it gets even worse
because you might not be looking at your monitor
at its correct brightness. Let's say, for
example, you've got your laptop and you're
sitting in a tree in a park, doing a little bit of editing, and the sun's kind
of shining through. How do we know by changing the brightness that we haven't over brightened it
or over darkened it? Because the sun's
shining on our screen. Or you're sitting in
bed late at night with your laptop on your lap and
you're doing some editing, and you can see all the details because everything is so dark. But the next day, you
look at it and go, well, actually, it does look a little
bit too dark, doesn't it? So the brightness
and contrast is not an accurate way of getting
our lightness and darkness. The best way to do it is to use something in
here called levels. Now that's the one
at the very top. Now, I know that
when I open this up, you can look at that and go, Oh, my goodness, that
is just so scary. Well, it's not as bad as it
seems. Let's put it that way. I know a lot of people
don't like graphs, and I totally understand that, but this is not that bad. What happens here is this
little graph just shows us the light and the
dark areas of the image. We're just looking at
this white area here. Ignore the blues and the reds
and the greens in there, and just look at this
white area here. So on this image here, it's showing us that over here, there's a lot of detail. So these go quite high in the
darker areas of the image. So that's probably the dark
trees in the background. There's dark bits down
here by the wheels. This is quite dark down here. There's not that
much. They don't go very high of the
sort of lighter areas. And the very light areas, there's not that much either, which is surprising
because there's so much light sky in there. Now, if we have a look at this, this is looking at it in color. If we look at this in
grayscale mode over there, now you can see a
little bit more clearer that actually
all of this area here, which is really quite
dark, that's dark there. Even the car, when you
take away the red, is actually quite dark. This is dark down here, and there's a little bit of
sort of lightness in the sky. So this just shows us
the darker areas and the lighter areas over here how much there is
of each of them. Okay? That doesn't
make perfect sense, so let's have a look at a problem picture so you
can see the details. I'm going to close this down. If you want a black
and white picture, that is not the way
to go about it. There's a much better way, which I'll be
showing you shortly. So I've got another
image over here. Once again, you can find
this in the images folder. And this particular
image looks okay ish. But we really need to make sure that there's dark areas and
lighter areas in there, so it looks really good, and you can't always tell. Let's go down to
levels over here and have a look at the levels.
Now, look at this. What this is showing me is that there's lots of
darker areas here. Let's look at this
in gray scale. So there's a lot of
dark areas in here, and then it sort
of comes up here. It doesn't actually get
towards the whites. The whites are right over there. So, in fact, there's no
whites in this image, and you can actually see it. If I move this over,
that is white there. That's actually just dark gray. So you would expect that to be pure white or
very, very white. So if we've got that,
how can we fix it? And this is the important part. And this is where, as I said, it becomes really easy. You see, if we want to fix the lighter areas,
the white areas here, we go to the white level slider, and you just drag it back. You can see this a
little bit over here. Well, I'm going
to drag that back until it gets to where the
detail starts over there. And now we've got something
which actually is white. And the same with the
black, if I go back to the black level detail there
and pull it up this way, eventually, we'll
get some blacks coming into our
document, as well. And that is looking
so much better. If you have a look, the
before and the after. It's just got so much
more punch once we've got those black and white
levels correct in there. And at any time, you
can just go back, you can click on
that little icon. And if it's not right, you
can adjust it in here. Be careful pulling
these too far over. You'll start to lose
detail in the blacks, if you pull the black
too far across. Likewise, you'll start to
lose detail in the whites. If you pull the white
too far across, there's no detail
in there anymore. But you usually just drag
them in until they're touching the dark area and
the light area over there. Now, this level, as it's known or it's
also called a histogram, you'll find all over the place, a lot of cameras, particularly
professional cameras have got histograms on the back, so the photographers can
actually see if the exposures correct without
actually having to look through the lens
all the time and trying to hopefully judge it, even though there's a lot of bright and dark
areas around them. So it's a very accurate
way of working and setting up your black points and your white
points in the image. Once you've done
that, if you've got your black points and your
white points correct, you can go down to the gamma over here and just change
the middle tones to adjust it to how you think it should feel because images
are all about feeling. I'm happy with that. Once again, click this, but I haven't
done anything destructive. We can switch that off
if we don't want it. Do try it out on this image, and if you've got
any other images of your own that you want
to have a go with or any that you can find in the folder that you
want to try out, by all means, do so. I
58. Curves - What Do They Do?: I'm going to open up image. So I've just double clicked on the blank page there
to go in to open it, and I'm going to
find this image. And what we're going to do
is we're going to look at another way of actually getting the light areas to go darker and the dark areas to go lighter if we need an image. So as you can see
from this image here, we've got some
lighter areas here on the right hand side of
the screen, her left. And there's some darker
areas over here. Now, to control those areas, we use something called a curve. And I'm going to go and put
the curve in by going down to the adjustments over
here, find curves. And it brings up this once
again, slightly scary window. But let me take you through it so you can
see exactly what it does and how it works and how you can
get the best out of it. See, what we've got in the background are
actually levels. And you can just ignore those because we're not dealing
with levels at the moment we're dealing with this
line here called a curve. Now, I know it's not a
curve at the moment. It's a straight line, but
hey, we'll sort that out. So the thing is this
goes from the dark side, the dark pixels here, black, up to white over there. Now let's take that top point, and if I pull that
down to about halfway, you can see everything is getting darker and
darker and darker. So this side controls the lightness or the
pure whites over there. If I take that down to there, you can see everything's
getting really dark. The other side
controls the darkness. And so if I pull this up, nothing will be pure
black if it's pure black, it's down there, all
the way up like so. In fact, if I put this in the middle there and
this in the middle, the whole picture
just goes gray. If you do it the
other way round, everything that's white
goes black and vice versa, so you get a negative in there. But we don't want
to use that at all. I just wanted to show
you what would happen if you put it in the
wrong way around. Now, if you have been messing around with this, like
I've just done there, you can click Reset
to just get it back to the straight line so. So the middle here
is the middle tones. So if I were to click in
the middle and I move this down the tones
would get darker. If I moved it up, the middle
tones would get lighter. But as you can see,
it's also affecting the lighter tones and the
darker tones down there. So pretty much most of the image is getting
lighter or darker. If I'm darkening this down, I'm not affecting
the pure whites. The pure whites are
still up there. Likewise, if I lighten it up, I'm not affecting the blacks
which are down over there. So how can we actually use this? Well, you see, if I put that
in the middle over there, what we can do is we can go
along to the lighter areas. This is this pit over here, and I can click to put another
one of those points in, and I can lighten
the lighter areas, and I can darken
the darker areas. So you can see how it's
made it more contrasty, or I can lighten the dark areas and darken
the light areas over there. And that's made it
less contrasty. So what we're dealing
with here is contrast. And you'll see that
when you do this, if you make an image more contrasty, you get
the shape here, which is like an S. This is known as an S curve over here, so an S curve will make
things more contrasty. The more of an S I make that, the more contrasty that
image is going to become. If you want to reduce the
contrast on an image, then you do the
opposite of S curve. So this is a reverse S, so it kind of goes
like that over there. And once again, I'm
going extreme here. You can see how it's really
making the image look awful. Generally, with these curves, you don't do extreme
moves like that, maybe just little
moves to effect it. Let's just reset
that once again. So what I'd like to do is to
stop here so you can take a few moments to try this out on an image and just
have a bit of a go, move these around up and down, put some points on,
pull the points around, see what happens to the image. You know, you can go completely wild with these if you
like, and, you know, pull some things up and
some things down and get really mad looking
images in there. But if you make a mistake or you do something
deliberate like that, you can always just click Reset at the top to go back
to the original. So take a few moments.
Have a play with that. Don't do anything
perfect for the moment. Play and see how it works.
59. Using Curves: Now, I'm going back to
the curves over here, and I'm just going to
click on that little icon. And what I'd like to do
with this picture is to actually reduce the
lighter areas in it. So I don't want to
affect the darker areas. So I'm going to click
in the middle to stop me from affecting
the middle tones. I'm going to click in here to stop me affecting
the darker tones. I can just go to the
lighter areas here and maybe pull it down just
a little bit over there, and you can see
how we're reducing the lightness of those
very light areas. If you want to get rid
of the pure whites, you can actually pull
this down as well, so you can go to the top
and just pull that down. But we don't want to
do that. We want to keep the white areas in there. So now that I've done that, it's very, very subtle. I'm going to just close this
down and we can switch it on and off with a
little I over there, you can just about
see how some of those really light areas are just darkening
down slightly. Let me do this again, but with a different image and make it
a little bit more obvious. So we'll get rid of that. I'm going to double
click go in and find this other image
that I provided here. So with this image,
I like the face. I like the lightness
on the face, but I want to lighten up some
of the darker areas here, maybe because this
was a shot for this particular top and we want to see more details of it. So I'm going to go in here, go down to my curve
put them on there. Now remember, I don't want
to affect the lighter areas. I don't even want to affect
these sort of middle tones. So I'm going to put a point
over here on the line. Let's just make
sure it's right in the middle and a point
there so that doesn't move. And then I can go to the
darker areas here and I can just lighten up those
darker areas a little bit. Now, I'm going to pull
it from here and then maybe take this and drop that down a
little bit like that. Once again, I'm going
for subtlety here so we can just lighten up
the top a little bit. Let's close that down and have a look at before and after. And you can see
it's fairly subtle. Now, it has affected his top, but it's also affected
his hair as well. Over there, you can see
that his hair is being affected, but his face isn't. So when I switch that on,
no difference to the face. Yes, some of his beard is
being affected in there. Now, later on this course, we'll have a look at how we can control this where we can select certain
areas and just say, we want to only affect
that area there. We don't want to
affect his hair. But the idea is that you can
control the darker areas or the lighter areas just using
a little curve like this. And I hope that's taken
the scariness out of these because if you
just go wild with them, they don't seem to make sense. Anyway, try that out on this little portrait
over here as well.
60. Correct Image Color Using Color Balance: A I'm going to double click and go and open up an image that I've got of
this family with their dog. Now, it's a lovely picture. I really like the picture,
but something seems to be wrong with
the color in here, and the colors just look
very, very strange. So let's have a look at how
we can correct the color. What I'm going to
do is I'm going to go along to my layers. And first of all, before
I correct the color, I'm going to make
sure that I correct the lightness and darkness or check that the lightness
and darkness is correct. It looks okay here, but you can't always tell. Well, I say you can't always tell over in the
right hand side, underneath your color, you'll see there's a color tab there. If you click on histogram, there's a little
histogram that shows me the lightness and
darkness in that image. Now remember, from
our levels before, we were using a histogram, and this histogram tells
me that there doesn't seem to be much in
this right hand area, which is where the whites are. So maybe there's no
pure whites in that. So let's go along and see if
we can fix it with levels. If that went all
the way to the end, I wouldn't bother about fixing
it in levels over here. So I can tell that there's
no whites over there, so I'll use my white
level and just drag that little line until we get to the
whites in there. And look at the difference that that's made
to that picture. Already, it's starting
to look better. The whites are looking better, but it's still not right
from a color perspective. So color correction is really
a very subjective thing, and I might look at an image
and think it's one color, and you might look and
think it's another color. So if you don't see
the same colors that I'm seeing,
don't worry about it. It doesn't necessarily mean that you're wrong and I'm right. It's very, as I
said, subjective. Now, the way that I do it is I actually decide
what's wrong with the image first before going in to the color balance area. If you jump straight into
the color balance area, you've got these little slides and think, What do
I do with them? You start moving them
around and colors just go all weird and
all over the place, and you've got no
idea how to get back. So I'm going to get rid of that. So what we do is we look
at the image and we say, I think that the image looks too and put in the color that you think
it looks too much of. So for me, this
image looks very, very green, yellow over there. And that's absolutely fine. I can say that image
looks too green, yellow. You might think it
looks too green. You might think it
looks too yellow. You know, it's up to you. But I think it looks too
green, yellow. Now that I know that, we can go down to our
adjustment layers, and we can put in a color
balance, and that's over here. So we know or we think that this image looks
too green and yellow. So over here, we've got green. Over there, we've got yellow. These kind of colors are
opposite each other each other. If I think it looks too green, I add the color which is
opposite, which is magenta. If I think it looks too yellow, I add the color
which is opposite, which is blue, and look at the difference that's
actually making here. So as I'm adding or I'm subtracting green and
I'm subtracting yellow, the colors are looking better and better. I'll
just keep going. If you go too far, you can
always come back a little bit. That actually looks really
nice, just like that. And I'm going to
close that down. Now, let's have a look
at it before and after. So that's what it was before, and that's what it is now. So the idea is you need to
have a look at the image, decide what you think
is wrong with it, and then you can add
the opposite color in. Let me open up another
picture over here, so I'm just going
to use a shortcut, which is either Command and O to open on the Mc or
control and open on the PC. I'm going to find the other
image that I've got in here, this one over here. Now, when I look at that, it's looking I'm not
sure purple or red. I'm going to go with a
purple color in there. I think it's a bit too purple. Once again, I've
checked the histogram. The histograms absolutely fine. It goes from one
side to the other. So I don't need to
go in and put in any levels on there because the histogram is
already perfect. As I said, if you can't
see the histogram, it's in with a color or you can find it in
the window menu. I'm going to go down here
and find my color balance. Now, remember, we thought or I thought that maybe
this was too purple. I can't see purple. There
is no purple in here, but what there is is
blue and magenta. And on the color spectrum, purple is kind of a combination of those two colors in there. So if I thought it
was too purple, well, I would subtract magenta
and I would subtract blue. And let's see what we
can do over there. That's looking better already. What about if I thought
it looked too red? Well, if I thought
it looked too red, I could subtract red. Which is actually cyan. Yeah, I don't like
that, actually. It looks too cold still. So I think I was
right the first time, and I would then
subtract magenta. Oops, subtract magenta, and
subtract some yellow as well. And you can just play
with these until you feel confident
and happy with it. Now, should we actually go in and use the third
slider in there? Because I could go in
and say, well, actually, I want to make it
warmer so I could add a little bit more red to the image like that if I
wanted to. You don't have to. Ideally, you just use two sliders to correct
the color in there, because it's not actually about the amount of
color that you move, it's about the relationship that these three things
have to each other. Have a look at
this. You see that we've got that kind
of triangle there. If I moved that one
there, that one there, and this one here to create
the same triangular shape, you see the colors
are correct there. Same if I put this one here, that one there ish. I'm just sort of roughly, once again, we've got the
same correct color in there. So it's about the relationship that these three
have to each other. If you are going to
go extreme like this, be careful because it can make the image
lighter or darker. I don't know whether
you noticed. The image seems darker here. If I correct it up here
with that one there, this one here and
that one there, the whole image seems lighter. If you gain to do that,
switch on this little button. It's called preserve luminosity
and that'll stop things from getting lighter and darker. But I would suggest, let's just reset this again, doing two, we want to
get rid of the magenta. We want to get rid of
the yellow in there. And when you're happy
with that, you just close that down and have a look by poking
that in the eye to see the before and after. If it's not right, double click, go back in again, say, Well, maybe there should
have been a bit less of that and a
bit more of that. I think that's
absolutely spot on. Once again, we'll switch
it on and switch it off. Try it out and remember that it takes years and years
and years to get very, very fast at color correction. I'm not trying to put you off, but I'm saying that if you find that you look at a color
first of all and you think, I can't see that color in
there, don't be disheartened. Just keep at it. And it
does come with time. When I look at an image
to see the color, I look at certain things because if we go to
this image here, there's a lot of
green in the image. So how did I know
that it was green? Well, I'm looking at
things like whites. Do they actually look
white or a gray color? And that way, that tells me that there's a
color in there. I also look at skin
tones over there. So these skin tones here, did they look a little
bit sickly over there? And yes, I can tell
they're looking a little bit yellowy
green in there. Same with this one
here, looking at the skin tones over here at
the father and the baby. Once again, he looks very, very red or purple. And the child also looks
a little bit purple. Have a bit of a play with this. As I said, it takes time. Don't get disheartened, have a go and try a few
images like that, especially the ones I've
provided, which are incorrect.
61. Make a Color Image Black & White: I've closed down
that other image. If you wanted to save it
with the adjustment layers, remember you just do a save
as to save it as an AF file, Affinity file, or if
you go to file export, if you're exporting at
something like a JPEG, you will lose your
adjustment layers. They'll still remain. The
effect will still remain there, but it'll squash
them altogether. I'm going to double click, and I'm going to go into my images, and I'm going to find an image of a child with some pigeons, and this is the one that I want. And I want to make
this black and white. So there are a number of ways to make something
black and white. You've seen some
of them already, where you just remove the color. I could go into quite
a few of these, but the one I'm
after is actually the one called Black and
White. There it is over there. Now, it automatically makes
this image black and white. When we look at him, we go,
Yeah, it doesn't look great. It looks a bit
weird. Why is that? Well, in black and white here, we can control what colors
are lighter and darker. If that's switched
off over there, you can see that we've got
different colors in here. So there's some
blues on his hat. There's some greens around here. His skin tone is kind of
a lightish pink color. So I can go along to
the reds and maybe darken down the reds and yellows to darken his skin
tone a little bit. You see how that's actually
affecting the skin tone now, as I'm darkening those down because he looked
very, very light. You know, we can almost
go white over there. So we just darken those down to darken down
the skin tones. I don't go to the
greens over here, and I could lighten or
darken the greens in the image to get a bit more detail on the
bags that he's looking in. So with the black
and white option, you can lighten and
darken areas to make the image look as
you pictured it. Let's have a look at
another one over here. So I'm going to go along
to this travel picture. The sky is slightly blue, and we've got these
orange lights coming through over here. Let's make that black and white. So now I can actually
control things. I can go to the sky,
maybe the blues and just darken down using these
sliders over here, the sky a little bit over there. Remember, these were
sort of orange, so I could make them even brighter with the red
and yellow sliders, or I could darken them down. If they were too light in there, you can see I'm not affecting
the sky over there. Let's have a look
at another example. I'm going to take this
picture of a car over here. We've got a blue sky.
We've got an orange car. Let's go to black and white. Wow, that's really over the top. So I'm going to go to my oranges and take the orange
down a little bit. I can make the car
virtually go black like that by darkening down the reds and the
yellows a little bit. You See how it's brought
out the reflections really beautifully over there. And maybe the sky, I
want to darken down the sky with some
blues over here. Be careful you don't go too far. I don't know
whether you can see. If I do that, it kind of breaks
the sky up a little bit. So you have to be
careful that you're not overdoing it in there. There are other ways to
darken down the sky where we won't get that effect as well
that we'll look into later. But for now, I'm just going to tweak those and
darken down a bit. Greens, what about the greens? Are there any greens?
Well, it doesn't look like there's any greens in there
because nothing's changing. So I'm happy with that. And I'll close that down.
Now, one of the things that you can do with
an adjustment layer is you can change its opacity. So if I go up here, click next to the opacity,
little drop down. And I can say, Well,
I only want half of that black and
white to come through, and you can see I
can control how much of the black and white adjustment
layer I'm actually using. So I could bring in
almost a hint of color. It's kind of got that old faded postcard type of look to it now. Let's have a look at
one more example here, and I'm going to go and open up a file that we've
already worked on, and that is this
layers example here. So remember that an
adjustment layer affects every layer
below itself. So if I go to the top
and I put my black and white right at the
top over there, you can see the car's gone
a little bit too orange. Let's take the red and
yellow down just a little bit. Like so. That's right at the top there. If I move it below
the other layers, but just above those two, you can see everything
else goes black and white, but the cat's in color, and the graffiti is in color. If I move it above the cat, I can have the graffiti
in color, as well. If I wanted to have
the cat in color, but the graffiti
black and white, I can just drag the
graffiti and drag it underneath that
layer over there. So you can adjust
your layer stacking order to decide which bits you want in color and which
you want in black and white. And it's not just about
using black and white here. The same thing applies to any adjustment layer
that you're working on. Anyway, have some fun
with the black and white and get some color images. Have a look at the colors
first, and then try adjusting those sliders to lighten and darken various
areas on the image.
62. Recolor: Et's open up a picture and change the color to make
it look a little bit older. What I'm going to do is find
one of those car pictures. Again, that's the one
that I want over there. Now, this car is
absolutely lovely. The colors are so nice with
the pink and the blue sky. But I want to change this into a single toned image, not
just black and white. I want it to be a
sepia toned image, so it looks kind
of slightly older. So the first thing
I'm going to do is I'm going to go in here
and I'm going to make this black and white using my black and white
adjustment layer. Now, why am I doing it
black and white first? Well, this is so that I can
control the colors in here. Let's go to the pinks and darken down the car just a
little bit over there, and I'm going to go to the sky and maybe darken that down. A bit as well. There's
no right or wrong here. Adjust the colors
as you see fit. So I'm kind of happy with that, but I want to give it
the old image feel. So I'm going to go down here and I'm going to
find an adjustment which allows us to put the color
or put color on top of it. And this option is going
to be called recolor. Now, when you first do it, you look at it
and you think, Oh, my goodness, that is absolutely
awful. But bear with me. What we have in the recolor
window is a hue slider, and you can choose
any color that you like in that
little window there. I'm going to go with
something which is orange. But here's the trick. Take the saturation and drag the saturation right
down like that. So we can just have a little
bit of brown coming through. You could make it more yellow or more red, depending
on what you want. Now, I'm going to close that. Let's just hide the black
and white layer underneath. So you can see without the
black and white layer, it would kind of look like that. With a black and white layer. I've been able to get a bit
more lightness to the car. So you can go to either of these adjustment
layers at any time, double click the black
and white and go, Yeah, let's make the car lighter or darker. I'll make it lighter. And then I can go to
my recolor and I can change the recolor at
any time, as well. If I wanted something a
little bit more sepia like, I could maybe go along
to the blues and give it a little bit more color in
there to get that sorry, I said sepia, and I meant
more like a cyanotype. So I've gone along
to the cans over there and added a
bit more saturation. I like the Sepia look, so
I'm going to go back to the yellows. And
close that down. Now, if we wanted
to take an image and use it maybe in a
presentation as a background, put some text over the top, something along that
line there, let's say, for example, this
was going to go into PowerPoint and you're going to put some text out to the top. In your recolor, you can then go down to the lightness
at the bottom. If I drag that lightness
all the way up, you can see I can lighten up
the whole image over there, so we can then just
use it almost like a watermark and then
put text over the top, so you just get that sort
of rough image behind it. Or you could go the other way. You could darken the whole
thing down like that. And then once again put
white text on the top. This is a really
lovely feature for PowerPoint presentations or for social media posts where
you just want some text, but you want a little bit of
an image in there as well. And don't forget, once
you've done that, you can always still
adjust the color in here. If I wanted something maybe
my brand color in there. Let's say the brand color
was a sort of greeny color. I could do something
along that line there and then put my text
over the top of that. Anyway, there's so many
ideas. Just have a play. I'm just going to give you a few that you can think about, but I'm sure you'll come up with tons more ideas where you
can use this feature. Remember, it's recolor,
and if it's a color image, put a black and
white on top of it so that you can adjust
the black and white independently of the
recolor adjustment. Try that out and have lots of fun with it. It's
one of my favorites.
63. Split Tone: Let's open up another image. I'm going to go with this car, the black and white
picture of a car. And I want to put
a tone on this, but I want to use something
called a split tone. Now, split tone is a
very traditional method from analog photography, where you would take
a print and you would tone it so that the highlights
got toned one color, and then the shadow
areas got toned a slightly different
color so you could have sort of yellows and
browns split together. So what I'm going to do is
I'm going to go down over here to my adjustment layers. I'm going to find
split toning that's really quite near the
bottom over there. And when we do split toning, you have the highlight
area and the shadow area. So the highlights at the moment, I'm going to choose
the sort of yellow, and the shadows, I'm going to go with,
well, sort of a red. And then I can pull this up. So I can pull this highlight
up and you can see how the lighter areas
are going yellow. You can actually go quite
a long way with this. It's, it's quite delicate. If I go to the shadows, then I'm affecting the shadows. You can see how the
shadows are now going red. If I pull that highlight in, we've got mostly reds in there. So we've got a
split of two colors yellow for the highlights
and reds for the back. Now, you can do a very sort of traditional split where
you might have yellows for the highlights and
maybe some sort of more orange for the dark
areas, the shadow areas. Or you can go completely over
the top, and I could say, I want to have yellow
for the highlights, and I want to have
blue for the shadows. There. And we get a lovely sort of combination of those
two colors in there, and you can have as much
of them as you want. Now, there's a little
balance down here, and if I adjust the balance, I can have more of
the yellows or more of the blues in the image. It's up to you. There's
no right or wrong. You just decide what you
want to do with this. I'm going to close that down. Let's have a look
on another image. So I'm going to go
and open up the car. We looked at this car before
we made it black and white. But I want to take this car and use the split tone on that. So let's go and find split tone. Now, look what happens. If I choose, I'll use the
same yellow and blue, yellow there and blue there, and I'll push the highlights
up and the shadows up. You see it still keeps
the color inside there. So it's mixing the split tone with the colors that exist
in the image already. So I can still do
the balance and get more blues or more
yellows from that. Now, this is a great
way if you want to get an image which looks like
a very old photograph, that's kind of changed color
slowly over the years, it's a lovely way
to put a split tone on top of that to
get this effect. However, if you wanted
something which is more just the black
and white split tone, just go and add a black and
white adjustment layer. Over here, let's find
black and white. Lighten or darken the
areas that you want to effect in there. Now
what's happened? Well, I've lost the split toning because my black and
white adjustment lair. I'm sure you've figured this out already is above my split tone. If I do it the other way
around, there we go. The split toning is now
above the black and white, and I could just go back
into black and white. I might just make a few
more adjustments in here. But just work with the
ones that you have. Do try that out. Such
a lovely technique and so easy to do.
64. Use Hue & Saturation to Change Specific Color: I'm going to open up an image that we've looked at already, which is this one here
with lots of colors in it. And let's have a look now
at an adjustment layer. Called HSL. HSL stands for hue saturation and either lightness
or luminosity. You can choose either of those. Two, over here, they go with luminosity, but it's lightness. Now, when you open this HSL app, we have got a really weird
looking color wheel here. There's a hue shift,
a saturation shift, and a luminosity shift. Now, the idea here
is that I can go in and I can just shift
these colors around. And you can see the colors on my screen are really going weird. So what is actually happening? Well, if we look over
here at the car, you'll see that the car is
kind of a ready orange. And let's have a look
at it over there. So there's redy
orange over there. And what I'm going to do is
I'm going to shift the color. So watch that area there. I'm going to shift this over
until the car goes blue. You can see here
the ready orange, what was ready orange
has now become blue. Let's just go back
again. The sky is kind of blue,
which is over here. If I move this again, what was blue has
now become yellow. So it's taking all
the outside colors and just spinning them around, which then obviously changes
them on the image as well. We've kind of got a
greenish color in there, and if I do this, yeah, we've kind of got that green
going to a sort of a well, sort of a bluy color, I suppose, in there as well. So we can do that. We can also do the saturation here so we can reduce the saturation and
go to black and white. This is once again not the
way best practice to do a, um, a black and white image, and we can lighten
and darken the image. So what about all of these dots? Well, what I'm going to do is I'm going to
just close this down, close this image, and open up a different one to show you
how this actually works. So I'll say, Don't
save over there. I'm going to go and open
up another image here. So I've got this S
Volkswagen beetle, which is predominantly orange. So this orange in
the foreground, the background, you've kind of got blues and greens going on. If I want to change
the color of the car, I can go into HSL, and this is really
what it's for. If you've got a
specific color in your image that you
want to adjust, you can go in here
and you can say, I want to adjust
just the greens, and I click on green. And now when I'm
doing my adjustments, you can see it's adjusting
all the background colors. It's not adjusting the orange of the car because what it's
done is it's just said, Let's just adjust these
colors over here, and then it kind of
falls off to there. So it goes that's what
it gets adjusted, and this is sort of semi
adjusted until none in there. Okay, that's fine if you
want a background like that, but maybe I wanted
the background to actually not have
much color in it. I could use the saturation
and just desaturate the background in there as well so we can go virtue
to black and white. We can darken the
background or you can lighten it, as well. You can see how
those darker colors are lightning and darkening. But I'm sure what you're waiting for is for me to
change the color of the car. So, okay, I'll do that. I'm just going to reset
this again over here. The best thing to do here is to take the picker over here, click on the picker,
and then you can move onto your object
and click on it. So it's the picker.
Click your object, and you can see it's now chosen those oranges that
are in the car. If you wish, you can move
these actually further apart. So I could say,
Well, actually, I want to do those
yellows as well. Make sure I get some
yellows in there at the same time and
maybe any pinks. In there, too. Now I can go in and I can adjust
the color of the calf. So let's drag that over, and you can see I'm
only affecting the car, not the background as much. I say as much because
there's still little bits over there,
little bits over there. And if I move this out the way, you'll see the light has
been affected as well. So this is not perfect for
changing the color on an item unless that color
is only that color and nothing else is
selected, as well. But it's really useful later
on when we can actually do a rough selection around an object and then go
and change the color. So I'll just take that
one back again to there. Now, I'm going to do this again. But instead of
changing the color, I'm going to change
the saturation so I could desaturate the car. I could darken the car down. So if I wanted it
sort of a dark brown, I could do that, or I
could lighten up the car. In fact, I can lighten
it all the way up, so it looks like it's
actually white in there. That's a really nice trick
to change the color of an object using this lightness to very quickly lighten it up. Do be careful, though,
when you're doing this, we're losing those
reflections in there, and even a white car would have some sort of
reflection on there. I'm going to go with
something or actually, I suppose that color
there does work. With a very light
orange on there. But have a bit of a play with this and don't forget to
use that color picker. I will go back again to
that other car that I had the colorful car in
there. Or tell you what. Let's try, I don't
know what that car is. That one. So same again.
I'm going to go into there. HSL, I'm going to use the color picker
and I'm going to click on the C. Let's
try that again. I'm going to use
the color picker, so click on the picker, click on the pink of the
car to select it. If it's not quite
in the right place, we can always move this
around a little bit. I'm thinking there
should be probably some more pink over there. And then we can just adjust
the color of the car as well. That's actually working
really well because their backgrounds not
changing in the slightest. And we've managed
to make it yellow, and I can either increase
the saturation that looks horrible or
decrease the saturation, lighten it, or darken it. So we can actually get an
almost white car over there. As I said, although it's
affecting certain areas, it's actually affected his face. You can barely see
it, but it has, we will be able to get rid of those areas at a later stage. Try it out. It's a
really fun tool to use.
65. Selection Tools - Intro: So far, when you've been
working on your images, you've been affecting
the whole image. So we're going to
use some selections so we can just select
part of the image. So when you want to change
the color of the car, it doesn't affect
the background. It doesn't affect the
sky, for example. So we're going to be
using selections, and they're different
types of selections. Some work automatically,
some are manually done, and some work
better than others. And I want to show
you which ones you can use for which type of image.
66. What Do Selections Do: Now, what do selections do? Well, I'm going to go along, and you'll find that there are
different selection tools. We're going to be looking at the various selection tools
as we go through this course. But for now, I just want to take this rectangular marquee
selection tool to demonstrate. If I were to click and drag
like that over the dog, this area inside
here is selected, and that area outside isn't if I'm doing
anything to the picture, and although we
haven't got them yet, when we start looking
at things like brushes, if I were to paint with a brush, you'll see it'll only paint
in that selected area. I'm actually going to use Command or Control Z
to just undo that. You can just keep undoing. Second thing is, when we
add a adjustment layer, if I go down to my
adjustment layers here, you can see I've just got
the background in there. I'm going to click on
the adjustment layer, and I'll go down to something simple like brightness
and contrast. And when I change
the brightness, it'll only affect the area
that is inside that selection, whether it's brighten it
up or darkening it down. Now, what is it actually done? Well, first of all,
I'm going to get rid of the dotted line
around the outside, the little marching ants. I'm going to deselect
this area by using command or control
and D. It's a nice, easy one to remember
because D for deselect. If you ever looked at my layers, what I've got in
the layers now is an adjustment layer with
a little mask added, and once again, we'll get more
into masks as we go along. But this is a quick way of
just selecting the area. So when you apply the
adjustment layer, it only affects the area
that you want selected. Let me get rid of
that adjustment layer over there and do this again. So I'm going to take a
little shape over there. I'll take a little ellipse and draw in a little
elliptical shape there. And then I want
another one over here. Now, if I click
and start to draw another one there or
another one here, you can see what it's
doing is it's just drawing the ellipse
over and over again. So you'll find that if
you just click like that, it actually deselects as well. It's much easier to use Control D or Command D to
get rid of that selection. But you can just click. Oh, if I've selected an area there and I want to
add another area in, we can go to these little
buttons along the top. This is the different modes. If I click the
second button, now, even though I've got
a selection there, I can add a second one in. It doesn't have to touch, but it can, if you want. I'll just do a third
one over there. And then we can go
to the third button, and this one subtract. So if I click and
drag over here, you can see how it's
subtracting a circle from that. If I click and drag over there, I can subtract another one, click and drag to subtract another circular shape in there. Once again, if I then
add an adjustment layer, let's go in and just choose very simply brightness and contrast
and we'll darken it down. You can see it's only
affecting that area in there. So I'm going to stop this. You can just
experiment with this. You're not destroying
your picture at all, doing it this way because you've just done it on the
adjustment layer. Don't forget you
can deselect very quickly if you're on this
button here, by just clicking, or if you're on one of the
other buttons where you can't actually just click because it just things you want
to add or subtract, use Command D if you're
on a Mac or Control D, if you're on a PC to
deselect really quickly. Last thing in here, by the way, before you try out is when
you're making these shapes, let's just go back to
this one over here. You can move into them
to move them around. And if you're drawing and it's drawing from the
center, you can change that. So you can switch off
draw from the center, so now it'll draw from
the corner outwards. It's up to you as
to which way you prefer to draw. Try it out.
67. More Selection Uses: I what else can we
use selections for? Well, if I were to click and make a little
selection like that, and I'm just going to move it across over to the
dog over there, I can actually copy that
area onto a new layer. Now, if I go to edit and copy, you can see that copies
actually grayed out. The trick here is to
make sure that you've actually clicked on the layer, so the layers orange. Now you can use Edit and copy or you can use the shortcut if you
know the shortcut, and then I can use
Edit and paste. To paste that in as a new layer. Now, I want to get rid of that selection so I can
use my shortcut that I've showed you or just click
with the selection tool. There is one more
selection that I haven't showed you in here, and that is, if you've got a
selection like that, and you go to this
button over here, this will leave the
intersected area over there. You can see as I move over it, it just keeps the
intersected area in there. Anyway, I can now go back
to my move tool over here, and you'll see I've got a
new layer and I can just, let's try that again
with the move tool. And I can then just
move that selection or that layer around like so. We could, of course, do
exactly the same with a new document copy and pasted
into a different document. Now, what happens if we go
back to the vector area? Well, if you click
in the vector area, your layers will still be there. So if I was making
another shape in here and I put in a new shape over there, my new shape is between
those two layers, and I can still move
these around over there, I'll just take that
one and drag it below or above those shapes. So the shapes also come in
as layer objects in here. So once again, just try
that out using copy and paste to copy and paste
into as a new layer object, which is a pixel
layer, by the way. If I go in there, you'll see
that it's a pixel layer, that's a rectangle layer. And yeah, make sure you
feel comfortable with that and then come back and we will keep going and
look at some more.
68. Still More Things That Use Selections: Let's get rid of
that layer there. So I'm just going
to press delete or backspace on the
keyboard to remove it. Now, once again, one
more thing that we can use with the selections, I'm just going to do another selection
around the dog now. Nothing's happening. You
can see when I'm dragging, and that's because I
very stupidly forgot to change my mode back to the
standard mode in there. And I'll just draw
a little shape around the dog's head in there. And then if we go up to
the pixel menu over here, we've got various
filters that we can use. For example, I've
got a whole lot of blur filters in here and I can go along and
choose one of them. I will just use the simplest
blur that there is, which is Gaussian blur, which has just got a
nice little slider over here and you can
see how I can blur out that area as well. Now, this is very destructive
because when I click apply, you can see it does it
on that background. Let's deselect that. If you don't have a selection
up by the way, and you go to pixel filters and whichever of
these filters you choose, I will go back to Gaussian. Once again, you'll see it
will affect the entire layer. So be careful. They do affect everything unless you've got
a selection up. Have a quick go with that. You can try any filters
that you like in here. To be honest, there's
tons and tons of them. But for the moment, just have a go and make sure
that you understand how it actually works in there
with the selection. And
69. Invert Selection & Use With Adjacent Layers: I'm going to undo using
Command or Control Z, those things that I've
done so far to get back to my original dog and deselected. If you do have a selection and you can't remember
that shortcut, the Command D or Control D, just go along to the Pixel menu. Go down to Pixel selection and just choose
Dselect in there. That's the long way round. Now, let's say that I've made a selection around
the dog over there, but I want to affect everything except
the head of the dog. Well, what I can do or the
selection, shall I say, what I can do is I can go
along to Pixel selection, and in here, I can
choose to invert. Now, by inverting, what it does is it
inverts that selection, so everything is
selected except the dog. If at this stage, I went
along to my pixel, filter, and blur and gaussian blur, I can blow everything
except the bit that I've got in the middle
of that selection in there. Now, that's a very,
very harsh edge. You'll see if I deselect it, it doesn't look so great, but I'm going to
show you other ways where we can actually change that and get a much
softer edge from it. It works exactly the same if you're doing something
with adjustment layers. So I'll just open up
another image over here. Let's go back to this
car that we had. And if I had a little selection, I'll just use a
rectangular selection. Let's say, I'll like
that over there and just selected maybe half
of that image in there. I can then go and do
something on this half. So I'll go over here
and I'm going to say, let's recolor just that
one half over there, and we'll make that
all yellow like so. And then I can go
to my pixel menu, go down to pixel
selection and say invert. So it then selects
the opposite area. So then if I go to my
adjustment layer, go down, and this one I'll
choose black and white, so it'll make everything
else black and white. So we've got two different
adjustment layers here. One is selecting one part, which is that one
there, and the other is selecting that
part over there. This is non destructive because they are
adjustment layers, and you can always bin them
if you don't want them. And we will just deselect the
long way round by going to pixel selection and
deselect in there. Try that out with
having a selection and then inverting the
selection so it's the opposite way round and do it with some adjustment
layers as well.
70. Selecting Freehand: Now, do you remember when we went to the
adjustments over here, and we chose HSL on this particular picture
of this little beetle, and we could then decide
to pick a specific color. We can use the color picker, click on the color over there, and then just adjust
that color over here. But I don't know whether you
noticed that unfortunately, when we were adjusting
that color it was also adjusting a little
bit of light up there, some flowers over here. It was also adjusting
the front there, this indicator, and
the rear indicator and lights as well. And that's going to be a bit of a problem because
although the cars looking great and we can change it as much or as
little as we want, we don't want to
affect those areas. So let's have a look at how we can do this with a selection. I'm just going to get
rid of that over there. So I'm going to do this as
a pretty rough selection. I'm going to use the free
hand selection tool. And this little
tool allows you to just draw around the
shape that you want. Now, you'll see that we've got different types of selections. Here, I'm going to
take you through the other two shortly. But for now, if I just do
this sort of new mode, and I can say, Well, actually, I want to select this area here over there all
the way around. You can see I'm being
pretty rough with this over there around
the front of the car. But I don't want to
affect those flowers. Back to there. Now, I
haven't selected those. I haven't select these,
but unfortunately, I've got the front
light, the back light, and the indicator in as well. So let's go and get rid of
those from the selection. I'm going to use
Command and plus or Control and plus on
the keyboard to zoom in, and then we can
just drag across. Now, I'm on a computer
with a track pad. I can just use two
things to move across. You might have different ways of working with your computer
to move things around. But if you're not sure, there is a little hand
that you can actually use to move things
around the page. We'll come back to
that in a second. But for now, let me go over
to this little tool here, go to the not the add option, but the subtract option
and just subtract the bit that I don't want
to be affected. So I'm just going to
go up there like, so I don't want
that bit affected. I don't want this bit affected. Now, once again, I'm
going to zoom right in over here so I can
be a bit more accurate. I don't want that bit affected there a I want to keep
that nice orange. Let's go to the back over here. If you're having
trouble moving around, you can use the
little sliders over there and that one
as well, by the way. You can also, we haven't
really talked about this much. You can go to the navigator
up here and you can just drag the navigator around like that. It's quite nice, quick
way of doing it. But I'm still on subtract, so I'm going to just subtract
this bit over here and go down Oh, we're down there. And subtracted this bit. Doesn't matter about these
outside areas because the tool that we're using
won't recognize them. It's only going to be
recognizing orange. So we didn't actually have to be that accurate about
selecting the car perfectly. Let's go back here
again and say, Okay, well, let us
do the HSL now. And once again, you
can pick a color, use your color picker to click
on the orange of the car, and then I can change the color, and you can see it's not
affecting that bit there, it's not affecting the
lights or those bits or the light at
the back in there. So I can go pretty
extreme on this. I'm going to make this actually
a darkish red like that. Happy with that. We'll
close that down, and I can then deselect
this with my shortcut, and we've still got
our colors in there. Do try this out. Remember,
this is not set in stone. It's an adjustment layer,
so you can switch it on and off at any particular time. Try it out on that image.
71. Using the Magnetic & Straight Line Selections: Well, we start this
little section. If you can't find that
hand tool, I said, I'd show you in a moment, and you don't see it here.
You can go down. There's a little double arrow. If you click on that,
you've got the view tool over there and you
can then just move around with that
particular tool. The second thing is also to do with the way that you're
interacting with the image. If you find that
the layers are a little bit too small and you
can't see what's going on, you can go up to the
top to the drop down. Click on the drop
down, and these are the thumbnail sizes for
those little layers. And I'm going to say large thumbnail there
makes it a little bit easier to see what I'm actually doing or
what I'm working on. It's up to you, depending
on your screen size, you might and you might
not have those issues. Now, looking at this
picture over here, once again, it's been
provided for you, I'm thinking that I would
like to change the color of his hat to kind of
match the greens, something similar on the bags. Maybe it's a image
that, you know, you want to put your
brand colors into, and you're not quite happy
with the color of the hat. You don't want to
change everything. We don't want to change
this bit over here. We're really just looking
at the hat itself. But for this selection, we want to be a
bit more accurate than we were with the last one. So I'm going to just move across and use Command plus to
zoom in or don't forget, you've got a little
slider over here. You can zoom in, you
can zoom out with that slider and then move
around with the navigator. Just make it a little
bit smaller over there. So to select this tool, I'm going to use the free
hand selection tool there. But instead of actually having to draw very carefully
all the way around, I'm going to go across
to the little magnet. If you click on the magnet, make sure you're on the new
selection mode over here. Then you can just click
once on the edge. Now, you don't have to
hold down the mouse. In fact, don't hold down
the mouse, move it along. And you can see I'm not
actually being that accurate and it's finding
that edge for me. I'm not that
accurate. You'll see as I'm moving around
up and down here, it's still finding
that edge for me. I'm just going to keep
going all the way around. It means you can do a
fairly quick selection without having to be
super, super accurate. It's finding the edge for me. I'm going to move around here. Oops. Now, I made a bit of a mistake. So what
do we do then? Well, the easiest way is to use your delete or
your backspace key on the keyboard and just
click and move back along that line to where
you want to go to. So I'm just going
to go down there, follow this line around. Now, sometimes it will
go in the wrong place. I've just forced it over there, and we can just use
backspace to go back again. Let's get back to this bit here. And once again, just
around to that. Oh, now, it's gone a little
bit out, so backspace again. And I'll click back at my
Start Point to get there. Now, if you can't find
your start point, just double click
to finish it off. Then I realize that
I actually want this little section in
my selection as well. So this time, rather
than doing it freehand, I'm going to use the straight
edge selection tool. I'm going to click on the
Plus on this add option here. If you forget, when you
make your selection, you'll lose that one
that you've just done. I'm just going to click.
And what this does is allows you just
click point to point. You can see if I just do that. Point to point, and it
gives you a straight edge. And when you get back
to the beginning again, it'll just make that
into a selection. I'm just going to undo that. So this time, I can click over
there, click along there. Make a mistake by
clicking out there, so use the backspace on the
keyboard to get back to that. I can just add that
bit in like so. Now, I've gotten my selection. I'm reasonably happy with it. So I'm going to go along, and I'm going to add
an adjustment plan. I'm going to use HSL,
I'm going to zoom out. Over here. So we can
click on a color there. If that's not quite right, use the color picker and
you can then just pick the color that
you want to adjust. So we're just looking
at the blues in there. Although this doesn't matter
so much because we've got a very accurate
selection around there. But I'm using the
greens or the blues in there because that's
the bit that I want to really affect like so. Now, as you can see, as I'm doing this, there's some bits that aren't
actually changing very much. Look at that. I just do that. So you can see sometimes you're going to have
to pull these out, or if you don't
want to use them, you've got an
accurate selection, click on this little
multicolor one. That gets rid of that. Remember, you can always reset everything again if
you've made a mistake. So back in here, I would click on that multiclod
one which gets rid of the more accurate selection because we've made a
selection correct. I'm just going to change
this until I get to some sort of green that I kind of like over there. You darken it down. Maybe it's a little bit too
bright in there. We just want something
along that line. I think that's a
good green in there. And I'm done with that. Let's deselect that. Now
that you've done that, you think, Oh, my goodness,
do you know what? It'd be really nice if I could have another adjustment layer to control the contrast on that. So do we have to
select it again? No, not if you've got
one of these masks because all you do is you
go to your mask, hold down. Now, if you are on a
Mac, it's command. If you're on a PC, it's control. And click and it'll bring it
back as a selection for you. So I can then go and add
another adjustment over here. I'm going to go to well,
levels over there, and I'm just going to
increase the black level over there and maybe push
the white over as well. So we can make something a
little bit more contrasty. Like so. So you can keep going. If you've gotten rid
of your selection, going back to the last mask, hold down command or
control MacAPC and click on the mask to bring
it back as a selection. Now, why is mine not coming back as a selection
while I'm clicking? Well, make sure that you
go to the move til first, make sure that that
layer is selected, and then try it again, and that'll bring back
that selection for you. Do have a bit of
a go with those. We're using this free
hand lasso tool. Use the different types in here, the standard free hand one, the straight edge,
or the magnetic. And if you use one of these and you start to go and you go, Oh, oh my goodness, it's just it's just following
me all over the place, and you get lost like that. Press escape on the keyboard, that'll get you out
of it. Have a go.
72. Use the Object Selection Tool: I'm going to get rid
of these two layers. I'm just pressing backspace or delete on the keyboard
to remove them. And let's have a look at
other ways of selecting. Now, there is a little tool here called the Object
Selection Tool, which is actually
quite a nice tool, but it's not perfect, which is why you need to understand how to
use the other ones. You see, with the
Object Selection Tool, as you move around, it shows you areas that
it can select for you. And it shows that I can select the child very, very quickly, although it leaves
out the glass cup and I'd or plastic cup, and I'd have to select
that separately. But what about this hat? It won't allow me
to select the hat. Well, if I go over here and click and just drag a
rectangle around the hat, you can see it does it very, very quickly for me,
but it's not perfect. So if we zoom in, you can see how it's got some
of the background there, and this is why we
need to then go over here to the free
hand Lasso tool. I could then go to the magnetic Lasso tool, choose subtract, click drag along the line here, surround that area that I
don't want to get rid of it. Like so. Sometimes it
can be quite quick, sometimes it's
faster to select it independently and get
rid of it by yourself. You can see we've got all this bit here to remove, as well. So as long as you understand that sometimes it's
faster to do it manually, sometimes it's
faster to use one of these little object
selection tools over there.
73. Color Subject on B&W Background: I so let's try selecting
the child over here, so I'm just going to click
once and it's selected. That's not bad. We
will have to have a close look to make sure that we've got the
bits that we want, and I'm going to zoom into
his fingers over here. And it's not great. So let's go back to our
manual tools over here, the freehand selection tool. I'm just going to
do this free hand. I like to zoom in
really close when I'm doing this free
hand over there. Go to the add option
and just add in this little bit over
here that I want. And then I'll actually go
over to the straight edge Lasso tool and go to the
subtract option and say, I don't want this bit here, and I'm just going to
use sort of clicks. So click point to
point over there, all the way around there
and subtract that bit. And the same with
this one over here. If you do lots of little
clicks, it'll be right. If you just do one big click, you'll just get this
long straight line in there because
this is so small, nobody's going to notice going to keep going all
the way around here. And then what we're going to do is we're going to
select the opposite, so everything except the child. So I think that's okay.
Let's just check that. Oh, look at that. This is a
kind of a gap over there. So I'll use the free
hand lasso tool, go to the subtract option, and just subtract
that little section over there and
subtract that bit. You can be as accurate
as you want with this. I think that's
everything. You can see. The more you look,
the more you'll see. And if I go over here, I can
see there's this section. So I'm going to go to
the magnetic Lasso tool, go to the add option. You can see how we can
mix and match with these tools over here, and let's see if we can
just go along there. I'm just clicking to add my own points over there if
it won't do it properly. I try it's free hand. I'm just clicking. Let's
just add that bit in there, and we'll add this bit in. I'll do that free
hand for speed. So over to there
on the add option, I'm just going to add that
little bit in like that. Right. I'm going to stop
looking because I'll see more problems otherwise. So I've got that selected. I'm going to go to
select the Invert, so that's pixel Pixel
selection and Invert. Just be careful that you
don't go to layer and select in the layers because then you all this stuff gone? So it's pixel and the
selection is that way. Anyway, I've got
everything else selected. So I'm going to go over to my adjustment layers and choose black and white to make everything black and
white, except for him. And I think I'll
darken down some of those greens as well. Let's just deselect
that in there. We've got a color picture or in a black and white
surround. Do try that out. It's a nice quick and easy
way of having combination of black and white and color by just selecting your main object, which is usually
easier to select, invert the selection and then make everything else
black and white. Remember, it's not set in
stone, you can switch it on, you can switch it off and
you can also go along on this adjustment layer and change the opacity so we can get a little bit of color
coming through, just a small amount of color, but he's mostly in color there. One last thing. If I want
to get my selection back, remember, hold down Command on the Mac or Control
on the PC and click. And I can always
go back and I can say pixel selection, invert. Now I've got the child selected, and I could go up here to
let's go with vibrance. Vibrance allows you to increase the saturation
of the colors. I'll just increase
the saturation of the colors or you can
use vibrance over here. It's a bit more subtle
over there. Here we go. So one selection now selects the child
and its saturation. The other one makes
the background black and white or
almost black and white. Anyway, try it out. Once you've tried
it on this image, have a go with some
different images and see what you
can do with them.
74. Project: Create an Image Composition for Social Media - Intro: JectTi again, we're gonna be creating this
really cool image, and we're gonna be using cutouts to do that. We're gonna
cut out the house. We're going to add shapes
in the background. We're gonna add in text. We're going to change the color. We're going to adjust
the color in the window. So many things. I
hope you enjoy it.
75. Extend With Canva AI: For this project,
we're going to start off with an image
which looks like this. And we're going to
actually extend this image slightly because you can see
the roof is kind of cut off. Now, we're going to be using
the AI Canva AI for this, and you will only have
access to this if you've actually paid for the
pro version of Canva. So if you don't and you're on the free version, don't worry. I have actually added in the image which has been
extended for you to work on, or you can just ignore the fact that the roof is sticking
out a little bit. It's not going to be
the end of the world. But let me show you how we
can extend this first of all. So I'm going to open this image, and we've got this lovely, I don't know, cottage house. And what we want to do
is we want to change the background with a bit
of a gradient in there. We also and some text, we also want to
extend this out so we can see the edge of
the roof as well. That's the first thing
we're going to do. Now, to do that, from pixel, I'm going to go
across to Canva AI. If you can't see Canva AI, it could be because
it's switched off. If you click on those three
little dots in there, you'll see that you can actually switch it off and switch it on, so it appears in there. So just switch it on so you
can get into it quickly. Now, what I want
to do is I want to go down to these
tools over here, and I want to use
a tool which is called the Generative
Expand tool. So I click on that. Now,
it's really easy to do. All I now need to do is
to go to the end and just pull this out a
little bit like that. So pull it out, let go. Now, you can see
the way that I've done this is kind
of so the house, the middle section of the
house is in the middle of these thirds over there, and I'm then going to go
across and click Expand, and you just wait for
it to do its thing. Right, there we go. Let's have a little bit of a look at this. It's actually done a
really good job with this. You can see how it's extended that little section over there, made it look quite realistic, and it's done it on a new layer. So I can't see my
layers in Canva AI. I'm going to go back to pixel, and here's my layers over there. You can see it's put it in
on a new layer over there. So I'll just pull that
down a little bit, move that variation out, and we can switch it on,
switch it off. Over there. It's even added a little
bit of a tree in there. Now, sometimes it works
beautifully like that, sometimes not so much. So let me show you
an example of this. I'll go across to
Canva over here, Canva AI, shall I say? Click on that generate
and let's add in some garden at the
bottom over there. Once again, I will click on the Expand and we'll just wait. Right, there we go. Now, you can see it's done
some weird things with the stepping
stones over there. It's not as bad as
it could have been. I've done this sometimes. I tried it before on this image to see what it
would do with the foreground, and it had stepping stones all over the place. It
didn't make sense. Fortunately, this time,
it's not too bad, but it's still not right. The shapes of those
aren't correct. You can, of course, go in
here again and repmpt it to do a new variation in there as well. I'm not
going to do that. I'm actually going to undo
that because all I want is this little extra
bit added in over here. Now, I'm going back to my pixel layer because I'm actually really
happy with that. And I do want to keep
it as a separate layer. I really want to just
squish these layers down, so I'm going to
right click in here. I'm going to go down and I'm
going to say merge down. And that'll just merge
that layer into that one, and we've now got that
as a single layer. Anyway, if you have Canva AI, which is and you've got
the paid for version, have a bit of a go
with that, try it out. If you don't, just open up
the one that I've provided for you with the extra
area on that. But
76. Select the House & Clean Selection: Now, let's have a look at how we can actually cut this house out. So what I want to
do is I want to go along and try the Object
Selection tool first. Now, with the Object
Selection tool, I can just move over the image, and you can see nothing's
happening at all. Why is it not picking it up? Well, you need to
make sure that you've actually clicked
on the background. And now, when I go to that tool, it picks it up and
it sees the house. Now, that seems to be okay. Let's just click it and see what sort of selection we get. And it seems to be
quite a good selection. Now, it doesn't matter about this area at the bottom over
here not being selected because we're only interested
in making sure that the top half of the house
is cut out correctly, and you'll see why
as we go along. So let's have a look
at this selection. To do that, I'm going to go up to an option called refine. And that's this little
button at the top, and I'm going to click
Refine and it then shows me the selection against
a red background. Now, at the moment we're previewing it
against an overlay. If we looked at it
against a black mat, now you can see the
problem if we zoom in Look at the roof over there. It's not terribly clean. There's a bit of roof
coming through there. Let's have a look at
that on a white mat. There we go. It's
even worse now. You can see how
bad that roof is. Some of the areas of the
roof are pretty good. It's a bit of a funny bit there, maybe a strange bit over there. So what we could do is we
could actually start off by having this as a selection and then editing that
selection manually. So I've got that as a selection. I'm then going to go along, and I'm going to go down to
my Freehand selection tool. And then we can zoom right in. So once again, I'm using Command or Control
and plus to zoom in, and it's move along over here. You can see how bad
some of these bits are. Now, I'm going to
be honest with you, if you were doing this just for something to go on social media, so it's going to be quite small. This wouldn't matter. This bad selection
here wouldn't matter. Maybe you could clean
that up a little bit, it'd be alright. But if this was going to
go onto a huge poster, you'd want to make sure that
these were pretty good. So I'm going to clean them up. I'm not going to do every
single one of them, because otherwise, you'll get
really bored watching me, but just to give you an idea, I'm going to start off over here with the free hand
magnetic tool. I go to the plus, and then I can just run along here
and see how that does. Of selecting those
little bits over there. Let's go around on there. You can see it's starting
to lose it completely, so we'll escape out of that. The other way I could
try is by using the straight hedge
tool over here, and I can just go along there
and click onto those bits. All the way round. And
select them that way. Or we can use the free hand tool and
actually just do it freehand. I can go along
there around there, surround that bit
to select that. I want that little bit in there, surround that surround that. You see it could take
quite a while to do all of this correctly, but it will give you
a better result. Now, the ones along
the top over here, I want to subtract those. So I'll actually do that with the straight hedge lasso tool. I'm going to go
along to subtract, and I will click
over here and say, let's get rid of that
and all the way along here and then go all the way around it to there. Oops, I seem to have
made a mistake there, so I'll just get rid
of that one as well. You just play with these
until you get what you want. If I've gone too far, I can then go and add those bits in where these are not perfect, I can go round them
like that as well. If you find something like that, sticking out
on the outside, you go to subtract and you can
subtract that section too. Just work your way
around the document, you can suddenly
see how bad some of these are and once again, add or subtract them. Now, as I said, I'm not going to force you to watch the
whole thing over there. I just want to do
these two last ones, and then I will go around mine while you're trying
yours out as well. So let's just get rid of that
a little bit over there. Remember, you're either
adding or subtracting. If you go too far, you can
just add it back in again. I'll stop there, and I will continue with
mine to get it right. And you can have a bit of
a go with yours as well, until you get that
selection apodespot on. Don't forget that chimney
there is not part of this little cottage and the top of the house there
is not part of this cottage, either must be one that's
sitting behind it. So just get rid of those. Don't worry at about
any of this down here. So just make sure your
selection is from about here across to about there
as a good selection, and then ignore
the rest of this. It's absolutely
fine. Try it out.
77. Add Bottom of House to Selection: Now you've got your selection
looking really good. We're going to go and do one
more bit to our selection. We're going to take the
free hand selection tool, use a straight
edge, go to the ad, and I'm just going to add in
this little bit over here, so I'm going to click
over there, down all the way around to here. Just add in that bottom
section, like so. It doesn't have to
be neat as long as it looks something like that. Let's copy this
onto a new layer. So I'm going to go to edit
and well, look at that. It's grade out. Why
is that grade out? Well, it's because we haven't actually selected the
background layer. I'm going to click on
that. It's gone orange. Now I can do my edit and copy. You know your shortcuts,
that's absolutely fine. Copy and then edit
and paste over there. And that'll give us a second layer with a copy
of the house on. You see if I hide that first layer that's the
one that we've got. We don't need this
selection anymore. We can just deselect it. So I'm going to use Control D or Command D to get rid of that. So we've now got the house as a copy on a separate
layer like that. Now, this means that
if I go over to the vector side and
I take a shape, and I'll just draw in a
little shape over there, let's just give it some color. And I move that shape
layer underneath. Now, be very careful not into, but underneath that
copy of the house. You can see very
clearly where we've got that really nice
cut out over there, and we want to blend two
shapes together like this. But I'm going to get rid
of that for the moment. Have a go, make sure
you've copied and pasted it into there as a copy on a separate layer. A
78. Add Transparent Gradient Background: I I want this document to be
vertical, not horizontal. So I'm going to go and add
some extra space up the top. And to do that, I'm not on one
of the pictures over here. I've just clicked off of
them onto the background. So the document setup comes up. And if you're in vector or
pixel, it doesn't matter. It's the same document
setup button. I'm going to click in there,
and what I want to do is I want to change
the page height. And over here, I'm going to
change the height of this to 7,000 pixels in there. Now, you can see, once
I've changed that, this little window over here pops up and says, Well,
what do you want to do? What is your anchor point? I'm going to have the anchor
point being the bottom, so all the new space
comes in at the top. If you click in the
middle, the new space will come in above and below. And obviously, if you click at the top, it'll come
in just below. So I'm going to
click at the bottom, so the new space comes in above. Click Okay. And you can
see we've now got all of this new space right at the top. Now we're going to go over to vector mode if you're
not in there already. And I'm going to take a shape
just using a rectangle, and I'm going to put
a rectangle right over just down just below where the gutter
of the house is. So about over there, I think is perfect. And we're going to move that
below the house over there. Now, I've moved it and something's gone wrong.
What has happened? Well, as you can see, there's
a little arrow there. If I click on that
arrow, it shows that this red shape is actually
inside that shape over there, so it's using a mask. And this is something I've
mentioned before that will happen to you
time and time again. Just undo it. When you drag, don't drop it on there, make
sure you're underneath. So you just see the
line underneath the house and drop it, and then we've got
the house coming in above the red over there. Now, that should be fairly
straightforward for you to do. Just watch out for
that dropping it. But now what I'd like
to do is I'd like this shape to actually fade out. Over there. We haven't
looked at this yet. We're in vector, and
we're going to go along to where we had
the gradient fill tool, and we're going to use
the transparency tool. Now, the transparency tool, I'll just click on the
rectangle over there works the same as the gradient
tool with a little line. So I'm going to
start up here and just drag down to
the edge over there. And you can see how that
slowly graduates out. You can make this as big
or as small as you want. So, in fact, I
kind of like that. Maybe I wanted to go
a little bit further, so I could go back
to my move tool. I could make this shape
even bigger still. And once again, I'll go back
to the transparency tool, and let's make that fade
out a little bit more. So we get this lovely fade going across from top to bottom. Have a bit of a go with
that. It's giving us this really lovely feel where
the house is there in full, but the background just
fades out. Try it out.
79. Add a Gradient to the Shape: A Now, let's put a
gradient on here, as well. So I'm going to go once
again to the fill tool. Let's just select
the rectangle there, and I'm going to click
and drag like so. And then I can go
along to my gradient. Click on this side,
choose a color for it, click on the other side, choose a different color over there. Now, that looks awful. So let's start off
with this color here, so it blends nicely into
the entire background. I'm going to click on the
little Eyedropper tool. And move down and choose one of these sort of dark
greens over there. So you can see the dark
color comes in over there. And then I'm going to go
to the top over here. I want this to be an
early morning scene. So I want the top to be
kind of a bluish color, and let's just go with a
sort of blue like that. And then I want to put
another color over here to give the
feeling of sunrise. So that one there is
going to be sort of more of an orange type of color. And I can just move that up
or down as much as I want, move these around until I'm
kind of happy with the look. I think that is too dark. Let's go with more of a
lighter pinky morning sky, pinky orange morning sky. That's, yeah. That's not looking
too bad at all. I think we'll go with
something like that. You can sit and play
with this for hours until you get it as
you want it to be. Don't forget that's
a linear gradient. You could try it with a radial
gradient if you prefer, although that looks like really strange like there's some
sort of alien coming down. And don't forget. Try it
with a pigment blend, as well, and you
might find you get a slightly different result. I actually prefer it
with pigment blend off for this particular example. Anyway, once again, have a
go and get this lovely blend going on here. I
80. Add Adjustment to Affect Just the House: Now, how would this
work with adjustments? Well, I'm going to put a black and white
adjustment on to show you. If I go to my adjustments and I add a black and
white, you can see, because it's the top shape
over there or the top layer, shall I say, it affects
everything all the way down. If I move below the house, the house comes back in color, if I move it below that one, it's just the front and
background over there, which is in black and white. So that's all very well. But what about if I wanted to just affect the house over here? Well, when you drag this, and this is what I was
telling you not to do before, if you drag it on
top of that layer, it will pop it inside like that, and it now only affects
this layer here. You can see there
it is over there, I can switch it on
and switch it off. So we can have an
adjustment layer just affecting one layer like that. If I wanted another one
here on the background, I could then just put one on the background to
affect the background. It won't affect that one
because it's below it, as well. Now, let me undo that. Again, I'm using lots
of Control Z or command zs to undo the black and
white. There we are. Actually, what I want to do is I want to not make
it black and white, but I want to change
the vibrancy of it. So I'm going to go
down to vibrance. And I'm going to
affect the saturation. So just push the saturation up just a little bit over there, and you can see that it's now affecting both the
house and the sky. Now, that actually
doesn't look too bad, but if I only want
to affect the house, I would just move it and drop it on top of the house layer. So now you can see
if I open that up, it only affects the house layer. If I click on there and
adjust it and go really wild, once again, we're only
affecting the house. Have a little bit of a go with that and see how that works.
81. Add Warmth to the Reflections: Now, with this lovely background that we've got, when
you look at the house, well, it looks really a bit strange because you've got these warm lights in here, the warm lights over there,
but there's a bit of a reflection of a
blue sky over there, and it would look so much
nicer if these windows and those windows were a really nice warm orange type of color. So let's do that. I'm going to go
back to pixel mode over here and I'm going to zoom in so I can get close
to those windows. Now, for this example, you don't have to be
too perfect about it. I'm going to use the
freehand selection tool, and I'm going to go across to the straight line the polygonal. I always have problems
pronouncing that one. The poly or, you know, you know, the one
straight lines. And I'm going to just start
over here and just make some selections around the
window areas in there. I said, that don't have
to be too perfect. Now, make sure you're
on the add option and you can then add
in the next one. Over there. And we're
going to go through all of these windows
one to time slowly. If you make a mistake,
use your undo or you can subtract with the
same tool again as well. Once again, up to there
over there, cross. And then these ones, well,
we're going to cheat. We're actually just
going to go from there all the way up to a
great big square around there. Down that one and
back to the start. So, let's make sure we're
right on the top object. Just hide that one for a moment. I'm going to put an
adjustment layer on, and I'm going to go with, I think, a brightness and
contrast to start off with. Let's zoom out so we can
see the whole process. I can take the
brightness down a bit, so it's not quite so obvious. So now I've done that one. Let's add a second one. Once again, the selection
is still there. If you've lost the
selection, don't worry. You can always go
back and hold down the command or the
control key and click on that to get your
selection back again. And back in here, I'm going to use color balance this time because I
want to warm it up, so I'm going to add
some red over there. I'm going to add some
yellow to it, as well. Quite a lot of red, actually
to get that nice sort of warmth to the sky and there. Right, let's deselect that, and you can see what
we've got if I switch those off compared
to that over there.
82. Add Text and a Shape: I've put in a shape
in the vector studio, and I've put in two bits
of text over there, so they're kind of
the same font size. Now, the first thing that I
want to do here is to sort out where these bits of text should be in
relation to each other. And you can see I've just planked them straight
in at the moment. What I'm going to do is
I'm going to move the word cozy across to the
left until the Y meets up with the edge of the M in there because
I think that will look a little bit better by just
moving it down over to there. Now, you can use the
arrows on your keyboard to move things around over there. I like to hold down
the shift key, and that way I can move
bits around like so. So I think that
looks a bit better because you've then got that
sort of straight line there. The edge of the C goes there, the E goes over there, and
it's a lot more balanced. I'm going to take
my circle because my circle is just a
little circular shape. I'm going to move it underneath the house copy
layer, not onto it. Otherwise, you end up
with something like that, but right underneath
it over there. Now, do be careful when you've got text or any
object like this, and you put it too
close to a shape. You see if I put it right right over there,
just above the house. What happens when
you have two shapes next to each other is
they cause tension. This little section here is so close to the M that there's
a lot of tension going on. I know it's sort of it's
not really sort it out with a background if I
move that down to there. That would be better. But there's still
so much tension as one shape touches the other. So be really careful with that and make sure that
there's a bit of a gap. They should either overlap completely or they shouldn't
be touching at all. It just makes things look a little bit more professional when you're doing it that way. Now, we can then just play with our colors so I can
go over to here. And once again, I can use my selection tool over
there to pick a color, maybe something from
the photograph itself. I can go to the text,
select both bits of text, use the Eyedropper tool and select a text color
from the shape as well. Really, there's no
right or wrong here. Just watch that your colors
don't clash with each other. I like those two colors
because they come from there. I like the background, the circle, because
it comes from there. I'm finding that
I'm not that happy actually with the gradient
in the background. So what I could do
with the gradient is I could actually
just go and change it and maybe pick a different color for
the background itself. So instead of having a gradient, we could have a solid
color like that, and just play around until you get something
that works for you. I'm going to leave it like that, although I say I
leave it like that. I always go back and
fiddle a bit more. Let's try dark green on
that background instead. Anyway, as I said,
no right or wrong, experiment, try it out and get your layers
all sorted out.
83. Save, Resize & Export: I've changed my colors again. I can't help but fiddle. I took this gray from the curtains on the house because I love the
colors in here, and I think it all works
together fairly well. Now, obviously, you can put in much as many other
details as you like. If you don't want to circle,
do a different shape, or you can do something
entirely different in there. It's up to you what you
want to pop in here. Once you're done, go
to File and Save as. And in here, we're
going to save it. I'm just going to put this into the images folder that I've
got to share with you. So I'll click on save in there. And then I'm going to go to File and export it because I want to export this out for the web. And I'm going to be
using JPEG Best Quality. Now, what I do need to do here is to change the
width or the height. You don't have to change
both, just one of them. And the width, because I want this to go
for social media, 1080 pixels or 1080 piers, it's often called, which
is usually the height, but 1080 pixels wide is probably quite a
good starting point. So I'm going to
put in 1080 there. And you'll see, when I
click onto the other side, it goes over here and shows
me the equivalent size. So it'll just resize
it down to that. Let's go down and
click on Export. And once again, I'll export
it out, and it's ready. At another name. And this will be then ready to
upload to social media. Have fun with that. Once
you've tried this one out, try it with a different image. Now, I'm going to suggest
that at this stage, you don't try anything where
you've got people with hair because hair is a little bit challenging
to cut out initially. And I want to show
you some tips as we go through the course
at a later stage. But try it with cars,
houses, buildings, and anything you like,
really, which has got quite a harsh edge. Most importantly, have fun with.
84. The Layout Studio - Intro: Onto the next main studio, and this one is called Layout. And once again, if you
come from the Adobe side, you'll find this
is like in design. If you came from Affinity,
this is like publisher. So we're going to
be taking stuff. We're going to be
taking pictures. We're going to be
taking graphics, and we're going to put them
all together into layout. And then we're going to be
working with multi pages, and we're going to be creating
multi page documents. There's so many things
we can do and we can work between the different
packages as well. So we can start in out, but we can then go
into the pixel area, or we can go into
the vector area and add to the document. So rather than having to change to different
applications, depending on whether you want
to do photographs or logos, we can do it all in one. You'll enjoy it.
85. Why Use Layout Studio & Tweaks For InDesign Users: Et's go across to Layout Mode. Now, what I'm going to do is I'm just going to
open up a document so that you can see
all the details in here and I'm going
to go to File New, and I'm going to use
page size CMYK a four. You can try this with any page. I honestly doesn't matter. I'm going to go over to
Landscape because, well, it looks a little bit easier
that way when you see it on screen and click
on Create document, but any size will do. Now, let's jump back to vector. Let's go into L out
Mode over here. Now, the first thing is
that a lot of the tools in here are very similar to
what we get in vector mode. Pixel mode is
slightly different, but these two vector and Lot
are really, really similar. Obviously, we've got
a few differences in there, but most of
them are the same. Now, the next thing I want to address is for those
of you who have been using Adobe in design, because when you do this and you start looking at things
like master pages, over there and you
go, Hang on a second. That looks so strange. Well, I want to show you how
you can set it up so it will feel much more like in
design that you're used to. Just going to go to
the top over here, and I'm going to go
with small thumbnails. Can you see how that
already starts to look a lot like
traditional in design? If you take the pages and you put them over on
this side over here, then, well, all of a sudden, we have something which looks so much more like in design. And when we start to add
more pages in over there, you'll see it's the
same sort of thing. For those of you who are
not coming from in design, you can leave your
pages on the left, and I'm going to reset mine back to there in
a moment, anyway. But have a quick look around. You'll find that there's
a few new panels in here, like the Pages panel in there. There's a few more
tools over here, but it should be pretty
much recognizable, especially if you've
been to the vector side.
86. Multi Pages & Bleeds: So, why should we use layout rather than vector if
they're very, very similar? Well, layout allows
you to lay things out in multi pages
really quite easily. You don't have to
use multipages. You can just do it on
a single page as well, but it's all about ease
of laying things out. Let me show you how we can
do this with multiple pages. Now, what I'm going to do is I'm going to go to file and new. I've chosen CMYK page size
because this is for print, and I've gone over
to portrait mode, and then up the top here, we've got our size,
and there we go. We've got our A four
size in millimeters. You can change that
to anything you like. The color format is CMYK
because this is for printing, we'll talk about the color
profiles a little bit later, and then I'm going to go down. We'll also talk about
image placement. But let's go down
to multi pages. Now, you might find
that switched off. You can switch it on, and I can then put in the number
of pages that I want. I've just typed in
eight over here, and they're arranged
horizontally. So if I click on Create
document, over there. You can see I've
got all my pages 1 below the other over there, and in the pages
panel, I can see them. So we can just jump to pages very quickly
by double clicking. So the great thing about
this is that it's all about laying out
the document and working very fast with
a multi page document. Now, that's very much like word where you have
one page below the other. So let's have a look at how we'd create this
if we were doing it for a magazine
layout or a brochure, which is multi page. Going to go to File and New, once again, same
thing over there, just keeping the same size. But in multi pages, we switch on facing pages. Switch that on. Once again, I will stick to eight pages in here and create the document. Now, what you can see
is this one here, this is my cover, so the
cover is on its own. And then you open up the
magazine or the brochure, and you have two
pages next to each other and another two
pages next to each other, and another two pages. And finally, we get to the bottom where we've got
the back page over there. So this allows you to design things where you can actually
see the whole spread, the double pages together. And that way, if you want
to put a picture over both pages, that's
absolutely fine. Remember, you can just double
click over here to jump to the page that you want to
go to like that very fast. So you can kind of
treat this area like a navigator, if you wish. Now, you'll notice that
we have got over here a margin and a little line all the way around the outside. So let's go back
into here again. I'm going to go to file and New, and I'm going to go over to
my portrait mode over here, and let's look at a few
more options down here. So I'm going to move down
a bit to my multipages. I'm going to keep them
switched on for now. I'm then going to
move down to margins. The margins are the
inner blue line. They're just there to help
you with your design. You can completely
ignore them if you want. In fact, I think
they're too big. I'm going to make mine 12
millimeters over there, and I really should
link them together. So if we do that as 12, now I've messed them
up a little bit. I'll just do them
manually for the moment. There. So that
should be my margin. Then we've got the
bleed on the outside. Now, we've talked about a little bit about
the bleed before, but let's go into a
bit more detail now. I'm going to click
on Create Document. You see, I've then got
my margin over there. The little blue line is around the outside, so
that's the bleed. So what happens is when you
put something onto the page, it's going to go to the edge. Now, that could be
just a little shape. Like this, let's go and
give a different color. And let's say I wanted a shape over the bottom
part of my page like that. Over there, let's get
rid of the stroke around the outside, so
we don't want that. Oops. So, I could do
this in two ways. I could actually put the shape, so it went to the
edge of the page. Over there. And if I
was doing this for screen use, that's
exactly what I do. I just put it so it
goes to the edge of the page in there. But if this was
going for printing, when you print or when you
send these to the printers, they usually don't print on individual A four
size pieces of paper. What they do is they
print on rolls of paper. So you have this page
and then the same one again next to it
and next to it and next to it on this roll, and then they print
the other side. And then a big guillotine
comes along and cuts this up into
appropriate pieces. Now, these are not right
next to each other. There's a bit of a gap between this page and the next page. So if you imagine that when the gilatin
came down here and cut, and it was just half a
millimeter out, now, half a millimeter
is nothing when it comes to cutting up
masses of pages like this. So. What would happen is that
your document would appear, and I'm just going to do
this manually to have a tiny little white line down the side because the
gillotin was slightly out and cut over that
side a bit much, or maybe the paper
stretched or maybe it was just a very humid day and the paper was
slightly off a bit. So to get around that problem, what we do is we add some extra space over
here up to the bleed. And then the printers will print this out with that
extra space on there. And then when the glotin
comes along and cuts, it doesn't matter
if the giltins not perfect because it'll be just cutting off
that extra space, and your design will go right
the way to the very edge. Now, it could be
that you're doing it for colors like that, or it could be a photograph. If you've got a photograph, once again, I could either have it to the
edge of the page, but then there's the possibility that it might have a
little bit of white on it, or I would put the frame for the picture right the
way to the edge over there. Let's just go and bring in
a quick picture over here. I'm going to use
place. Find an image. And you can see that my image now goes to
the edge of the bleed, and these extra bits
do get cut off. So bear in mind that they will be cut off in the final print. As I said, if we're doing this for screen, it doesn't matter. We can just pop that in there. Like that. Nothing's going to get cut off because
there's no paper to print on. Do have a little bit
of a look at this. So go into your new
document over there. Go down here, change the
margins if you wish. But then go down to the bleed, make sure you switch the bleed on and put in a
bleed size in there. Now, the industry standard
is 3 millimeters. Occasionally, a printer will
ask you for a bigger bleed, especially if you're
doing a huge banner, maybe up to 5 millimeters. But if they don't specify, 3 millimeters is
absolutely perfect. Anyway, create the document,
have a look around, make sure that you understand what these things are doing. And remember, this margin over here is purely
there to help you. If you get it in
the wrong place, it's not the end of the world.
87. Adding Pages to Your Document: I now, I'm going to go along and do a new document over here and I'm going to put in just the
one page for the moment. These are in multi page format, and we've got facing
pages switched on, and they're arranged
horizontally. I'll show you what
happens when you arrange them vertically in a moment. And likewise, we're starting
on the right hand side. So all of this is
the default setting, and we can also switch on
the default Master page. Now, we'll get into
Masters later on, but let's just switch
that on for now. I'm going to click
on Create Document. So what we have here is
the master pages up there. So, you know, if you
don't see anything there, it's because the master
pages are not switched on. And we got our pages down here. Now, if I want to
add more pages, there's a number of
ways you can do it. Firstly, you can go up
here to the pages option, click on the little plus over
there and say Add pages, and you choose how many
pages you want to add in. So this is my cover, and then I want
two inside pages, and I want a back page. So I'm going to add in
three pages in there. And over here, it says, Which page do you want to do you want it to come in after? Well, we've only got one page, so it's going to
be after page one. We'll click Okay, and there's my extra three pages in there, and you can see
them on the screen. Now, another way
to add in pages is to go up to the document
menu over here. Go to pages. If you
just click on New, it just adds in one more page. You can see I've now got
five pages in there. If you go to the document menu
and you choose Add pages, it's kind of the
same as clicking on whips that little
button over there, and you can choose
how many you want. So I'm going to
add my new pages, and I'm going to add
in another three of those over there and click Okay. I've now got eight pages. One of the things to be aware of when you're adding
pages to a document, if you haven't done
stuff for print before, is that your pages over
here should be in sets of four if you're going to be doing this double page
spread kind of thing, and it's going to go for print. Because when they print
this, they don't print it on individual A four sheets. As I said before, it's
printed on a large roll, and this will be one page here. It'll be this sort
of A three size. That would be another
page over there. So you can only have sort
of four pages at a time. You can't have five
pages in a document. It just wouldn't work. So do be aware of that. When you're laying
out your document. It's always got to
be in sets of four. And if you find that
there's, you know, one or two over at the end, well, you could just have
them as blank pages. What I do is kind of
cheat sometimes and just put some lines
on it and say notes. So it looks like it's actually deliberate to have
those extra pages in there. You can make new pages there. You can make new pages by
going to the document. Lastly, now remember, I've
got eight pages there. You can also make new
pages by going to the master page and
dragging that in. And you can see I've now
got ten pages in there. Now, that obviously
doesn't divide by four. So let's go in there,
drag the scene again, and I've now got 12 pages. So this document would
actually work correctly. Have a bit of a look
at that. If you don't see anything
in the master pages, it is because when you've
done your new document, you need to make sure this
default master is switched on. If it's switched off, you
clereate the document, you won't have
anything in there. If you have done
that by mistake, you can click that little
button there and just make a quick master
page in there.
88. Document Setup to Change Existing: Now, as I said before, if you don't know
what a master page is, don't worry about it. We're going to go through
that step by step later on. Let's go back to our
pages over here. So I've got 12 pages in here. If I want to get
rid of some pages, I can just click on
the ones I want to get rid of and then
click the little bin at the top to remove them. I'll click there again and
use the bin to remove them, and I'm now down to eight pages. If you want to go back and change some of the
settings in your document, because maybe you've decided
that you don't like this to be as these spread
pages like that, and you just want them to be in single pages because
it's not going to be printed out and
you're just going to be emailing it around. What you can do is you can click the Document Setup button over here or you can go to Document
and set up document setup. It's exactly the same
thing, both of those. Now, this takes us into this really scary window,
but don't worry. It's absolutely fine. It'll be really easy once you
see how it works. So this shows all the pages in the document from page one, two, three, shows the
master page as well. So when we're making
any changes in here, it's going to be changing
the ones that are ticked. So if I didn't want to effect the master page, I
can switch that off. I can switch off page
one or page two, whatever I wanted in there. So I can go along over here and I'm going to go
down to my orientation, and I can then just
click on that to make my pages landscape if I wanted. If I click Okay, you'll see all my pages
are now landscape. Let's go back in there again. I'm going to keep the portrait because it's easier to
see what I'm doing. And so I'll click on there
and okay that. So back again. Now, moving down a
little bit over here, we've got facing pages. So as I said, I can switch
those off. Click Okay. And now my pages are just
as single pages in there. Let's go back to the
document setting. If I switch those on and chose vertical
instead of horizontal, now my pages will be sort
of up and down like that. So when you look at
the double spreads, they're actually vertical
rather than horizontal. Not something you're
going to be using too much of, I imagine. Let's go back there and
go back to horizontal. And we can start the first
page either on the right, which makes sense for a
document or on the left, which means that you won't have that sort of first one page. I'm going to switch that back
onto the right in there. And then we're going to come
back to the color later on and over here the margins
and the bleed once again. If you've forgotten
to put in a bleed, you can come and you can
put it in over there. Let's just click
Okay and go back to this document as it stands. Once again, try it out.
89. RGB VS CMYK: When we're creating a document, one of the options we
have here is to choose from CMYK or RGB. And if you go down, you'll see photos
don't have anything. Canvas is nothing, video
and web nothing as well. So why have some of them
got CMYK and some got RGB? Well, it doesn't matter
what it says up there, because if I click on something, I can change the
color format in here from RGB through
to CMYK in there. You'll find some of
the other things like photos will automatically
have an RGB, Canvases will have RGB, web will have RGB, as well. So when you go in here,
you can change them. These are just quick presets. So what is the difference
really between RGB and CMYK? I've mentioned very
quickly earlier on that CMYK is for print
and RGB is for web. But I want to actually show
you this in a graphic here. And then I want you to see what happens when you choose
the wrong colors. So there are two main color
modes that we have CMYK, which stands for cyan,
which is the blue, magenta is the pink, yellow, and K, which is black in there. So these are inks. By the way, why is it K? Well, it's because it was the key color that
we'd be using. Also, if you used B in there, it might get confused
with blue in there, so makes more sense. So these are inks that we use, and we put them onto a white
paper when we're printing. And most printing is
done using magenta, yellow and black ink
on a white paper. If you're doing anything
for screen use, and by screen, I mean, whether it's your laptop, your computer, well, anything
really that's a device, digital cameras use RGB. So do projectors, so do
well, smart watches. Anything which is a
device which has to have light because all those
devices have to have light, they use red, green,
and blue RGB. If there is no light, then you have black. So whenever you see black on a screens because
of a lack of light. And if you take RGB, light, and put it together at 100%, you get pure white in there. So whenever you see
white on a screen, because the pixels that
make up the screen are displaying 100% of
red, green and blue. So if we're creating something that's going to go on screen, whether it's a presentation,
a PowerPoint presentation which is going to be projected or put on a big television, or whether it is just something
to be emailed around, which is going to be
viewed on screen, we always use red, green, and blue color modes. If you're sending anything
for commercial printing, we usually use CMYK. I don't know if you
notice the difference in my language there. I said, we always
use that for screen, but we usually use
this for printing. Occasionally, you
might come across printers that can
print extra colors. I had a photographic
printer once that had ten or 12
different cartridges. So if I actually did
an image in CMYK, I wouldn't get as many
colors as I would have got if I'd printed
from an RGB file. Talk to your printer
first. Just check that they do want CMYK. Now, what about the color
difference in these? Well, the thing
is that with RGB, you can get much
brighter colors. I can get really vivid greens
and really vivid blues. You cannot create
those two vivid colors using cimagena and yellow ink. It just it doesn't happen. You know, blues are
never going to be that bright using
those two colors. So the problem is that
if you make something in RGB or you've
got an RGB photo, what happens when
you send it over to be printed and you
convert it into CMYK. Well, have a look. I've got these two photos. This is, I think, this paper
over there in textures, and this is from a painting,
which is really bright. If I go to the document
setup over here at the top, and I'm going to convert
this document because it's an RGB document
from RGB into CMYK, use CMYK eight in
there and click Okay, don't worry about the
color profiles for now. Can you see how dull that
is? That was really bright? These ones, the greens are
not as bright anymore, and even these images here, the RGB, that's not as vivid as it was.
I'll just zoom out. What I'm going to do
is I'm just going to undo that so you can
see the difference. So I'll use Control Z
or Command Z to undo. Look at the difference.
That's how it was. But the moment you convert it to CMYK, we lose those colors. Does anything happen to CMYK? Shouldn't should stay
exactly the same. Well, I don't know whether
you noticed it did a slight change in there, only because this is
trying to demonstrate CMYK colors using
an RGB document, so it's not quite
perfectly true. Anyway, the main thing about
this is if you use RGB, be aware your very vivid colors, the bright bright blues and the very vivid greens will
change significantly. Reds slightly, but not as much. Any cyans, magentas,
and yellows? Well, you shouldn't
notice any change at all, and if you do, it'll
be very, very minimal. The great thing is skin tones, and it doesn't matter
what color skin tone you are or your subject is, they pretty much remain perfect. So skin tones, whether they are from light
pink through to browns, they're all colors that are
in this sort of CMYK range. So that's the good news. Bad news is that blue skies, which are very vivid on screen, might not print
out quite so well. Now, one of the things you'll start to think about
is, hang on a second. When I go into the shop
that sells magazines, and I look at the magazines, and there's some really
beautiful colors on there, and the covers have got
these lovely images with blue skies, why
don't they look dull? Well, chances are it's because you've got nothing
to compare them to. I reckon if you took those and you looked at the original
image which was in RGB, you'd find that the printed
version is not as bright. The second reason is
sometimes magazines, particularly for
colors for covers, as well as certain brochures will use an extra
color ink in here, so they'll print with
cimagento yellow and black. Plus, they'll have another color in there as well or two colors. The downside of this
is it can be done, but it's very, very expensive. So they might have a
bright fluorescent green if they wanted that green on the cover
of the magazine. Or for a brochure,
you might have a specific color which is your brand color that just
got to be absolutely perfect. So these extra colors are
made by different companies. These different companies
create the color inks, and the most popular
one is called Pantone. So if you ever hear
about pantone colors, that's what they mean. They're extra
colors that you can print with all the
printers can print with, and they should look exactly as you saw on your
Pantone swatch. I'm going to stop talking there. The thing to take away
from this is be careful. If you work in RGB, your colors might change when you convert to CMYK for printing. I
90. Text Frames - Intro: Et's have a look at text frames. Text frames are not just a little frame where
you can put your text in. There's so much more to them. We can move them around. We can change the size of them. We can get
the text to flow. We can get the text to go
from one frame to another. So many things to do. I'd
like to show you now.
91. Using Frame Text vs Artistic Text: Let's bring in some text. Now, so far, we've been using this artistic text
tool where you click and drag to decide
the size of your text, and then you can
put your text in. So I've just popped in
a bit of text in there. I can then get my move tool. I can grab a corner and I can resize it around to
any size that I want. So what about this
other text tool? Because we don't want to
do that when we've got lots of text to
put on a document. Well, with this, what
I can do is I can click and I can drag to make a frame and you can see now that it's just a little eye beam over there flashing
in the corner. What I'm going to do is
I'm going to go along, and I've got word and I've got a document over here in Word, and I want to bring in some
of this text from word. So I'm going to select it. I'll just take it down to there. And I'm going to copy it. So that is Command C or
Control C if you're on a PC, and you could also go to edit
and copy in there as well. Anyway, I've copied the
text back into here again, and I'm going to paste. So once again,
command V on a Mac, Control V on a PC
to bring that in. And the text has
come in over there. Now, I've got the text. It looks pretty much the same as it did when
it was in word. But what about if I wanted to change it now
and move it around? Well, I'm going to go
along and I'm going to get my move tool and I can
move the text around, but I can also go to the corner here and
you'll see that there are two dots
in the corner. There's one on the square
itself and one just outside. If I go to the one on
the square itself, this will allow me to
change the frame and the text will just flow
inside that frame over there. If I go to the outer one, the dot on the outside, this will allow me to scale the text and the frame together. So the inner one changes the
box that the text is in, and the outer one changes the size of the text
and the box in there. And what about these ones here? Well, these are
pretty much the same as that inner one over there. You can grab them
and you can change the box to any size
that you like. Now, do be careful because once you brought in your
text and you do this, now you're hiding some
of the text away. And you can tell that it's
being hidden away because this little red eye pops up over here to say there's
something being hidden. If I pull that out, you
see the eye disappears, go back in there, and we've got text which is
hidden in there. We'll talk in a moment how
we can deal with that. Try that out. Have
a bit of a go. I have provided this
document for you with some text about train
photography in it, and you can use that, or you can use any other text from a word document
that you want to copy and paste
across. Have a go.
92. Why the Gray Background & Text Frame Color: You might notice that my text seems to have a gray
background on it. If I move it over there, you can see it's
definitely gray in there. So, this is not always
something that happens, but occasionally, it can happen. You think, Well, where is
it? How do I get rid of it? What we need to do is we need to go up to
the window menu. We're going to go down to text. And we're going to find the text frame panel over here
because at the moment, we've got characters and stuff. What we need is the text frame. That works with
the frame itself. And in there, you can
see there's a fill, and the fill happens
to be light gray. If I click on there,
if I made that red, it's the fill color over there. So what I can do is I can
click the nun button, and that's now transparent. If I move that over
the word trains, you can see it through there. Let me do the same
with the trains. I'll click on trains, go
to the fill over there, and I'm going to just choose
none for the fill color. Now, we've got the
same sort of thing with a stroke
around the outside. If I click on the stroke
and choose a stroke color, you can't actually see it until I increase the
width over there, and there you can see the
line around the outside. I could do the same with
this bit of text as well. Instead of none,
I'll just increase the width or the weight
around the outside. If you've got that
problem, have fix it. If you don't have that problem, open up the text frame so that
you remember where it is. So it is window, text, and text frame in there, and then just try
changing the fill and the stroke on the frame. I'm also, by the way, on the move tool up here
rather than the text tool, I don't have sort of
text or any sort of text selected at the time. I'm just on the move
tool. Try it out.
93. Typeface, Font Families & Font Basics: Now, when it comes to changing some of the character options, I can go in with the text Tool, and I can either click and drag over a whole lot of
text or to select text, you can click a few times. So if I just double
click, it selects a word. If I triple click,
it selects a line. Four clicks, we'll
select paragraph. And if I want to
select everything, then it's five clicks
to select all my text. And I want to go up here
and change the typeface. Now, when you hear people
talk about these things, sometimes they'll refer
to them as fonts. Sometimes they'll
refer to them as typefaces and sometimes
they're called font families. It actually doesn't really
matter what you call them. However, just to be clear, these over here are typeface. If I go along and
choose this one here, this is a typeface
or a font family. It's a family because
it might have more than one particular type because it's got
different sizes. Go back in there
again, let's find something else over here. Once again, this
is a type family, but Apple Gothic, regular. And if I made it, I don't know, 13
points, that is a font. So a font is a subset of the
font family or the typeface. As I said, Dorry, if you want to call them
fonts, it's absolutely fine. Only the very hard
core designers will maybe look at you a
bit funny if you do that. Anyway, you can select more. You can select individual words. Once again, I just double
click very quickly to get in and do some
changes to the text. Let's go and get some
more text in there. We've got more
options along here, and I'm going to
take you through those later on in
this whole course. But for the moment, you can
change the options in there. You can get your character
panel up over here. This changes the
individual characters. And you've also got a
paragraph panel over here to change the whole of
the paragraph. Try them out. By all means, just
click on things, see what they do, and we'll go through them properly
at a later stage. But just make sure you
know where they are. And if you want to
change the text color, well, you just go to your color. You know how to do
that, I'm sure, by now.
94. Text Flow: I've got some panels up here, so I'm going to go
to the window menu, panels, and just reset all my panels back to default so that you
can see everything. Now, uh, I've clicked
on this text, and I'm going to move the
bottom of the text up. Now, having done that, I can still see this text
over here and you might not. And it's to do this little I. If we zoom in a bit over there, you can see that
I there hides or shows the text which
overflows from the box. So if I click on that I there, now it's hiding that text, and I can choose to edit
the text and just say, Well, I don't want to see the
rest of it, or I can say, it doesn't matter about
what size the box is, I do want to see all
of that text in there. Now, what about if you wanted
to get your text to flow? And by that, I mean, I've got this little bit of text up here, and then I want the
story to get to there, and then I wanted to
continue on down here. Well, what I can do is I can go along to the little arrow. You see, there's a little
red arrow over there. And if I just click
once on that arrow, it gives me my text frame tool, and I can just go down here and click and drag to put in
some more text in there. So the text flows
from here into there. You'll see if I
do that? The text is going from there into here. If I push this up here, the last line says,
find your unique angle. I'm going to push that
over and then find your unique angle
is down over here. Now, what will happen if I took this bit of
text and I deleted it? Well, all the text will then flow into this frame over here. So I can pull that
out. I'm just going to select all the text and
make it a bit smaller. Over here. Let's just take
that down to ten points. So it's easier for you to see. And I'll pull that
back up again. So with these frames, you can then get one to flow from one into the
next into the next. I'm going to pull this
frame up over here. I'm going to click
on the little arrow. I'm going to say,
I want that bit of text to flow down here. And then I want it to flow
from here over to there. And there's still
some text left. I'm going to click
on there again and continue on down here. So all of my text will flow from there into there
into there and into there. If I change the size of this, the text then continue to flow from there into there
and into that one there. You notice that because I've got a frame which is going
from there into there, that little I has
disappeared from there, so you can't kind of
show the extra text because the extra text
comes in over here. If I take this one up,
this is the last one, I can then get the
I and I can show the extra text coming
through at the bottom. Try that out. You can make as
many of these as you want. You can get it to go from
one page to another. You can delete
them. You'll never lose your text
because it'll always be in one of the frames
that you've got left. Get rid of that one
there. There we go. There's all my text
back there again. Try it out and play with it
and have some fun with it.
95. Text Columns: I now, if you want to divide
your text up into columns, there's two ways to go about it. One way is you can actually make your frames the
size that you want, and then you can go
and you can click on a little arrow and go
up to the next bit and click and drag down to get your things into a
column like that. Or, and this is so much easier. I'm going to get rid
of that. I'm just going to take this
and pull this across. What we could do is we can
go up to the Window menu, go down to text and
remember the text frames, find the text frame panel. And over here, under columns, if you can't see it, by the way, just click on the little
arrow over there, you can choose how
many columns you want. So I'll click on that, and
it's given me two columns. And you can see as
I pull this up, I can get it to just go if
I can get it to go up there we go to flow from one
into the other like that. And you can choose
how many you want, so I can go in here and I can
choose three should I wish. We've also got the ability here to be a bit more
specific about the numbers. So I can go in and I can
change the numbers in here and you can see
as I'm adjusting them, that one's adjusting, that
one's getting smaller. Once again, we'll
just pull that back. We've got a gutter, as well. The gutter is the distance
between the columns, so I can increase the gutter, or I can decrease
the gutter in there. Take that down a
little bit like that. My favorite part of the
columns is actually this little button
here that says balance text and columns because you can
see at the moment, we've got the two bits of text
and then third one there. And I could actually
go in here and try and pull that up to try and get it to balance
much quicker to just switch that on it'll
automatically balance for you. It doesn't matter what
you do over here, making this bigger or smaller. It will just keep that balanced. Anyway, once again, as
always, try it out, it's the text frame option or the text ring panel in the
window menu under text, and you want the columns area.
96. Picture Frames - Intro: So now that you've
added your text frame, let's add pictures
into frames as well. And the great thing about
pictures is if you come from pixel and you come
across to layout, you'll find that your
layers are still there. But we're going to be working
within a picture frame, and there's a little
bit of a difference between just popping a picture in and putting it into a frame, and I want to show
you the differences and how they all work together.
97. Place Photos into Picture Frames: Let's bring some frames
to put our pictures in. I'm going to go over
here to the frames. These ones over
here, you can see they've kind of got a
cross through the middle. And I'm going to click and
drag a little frame like that. And let's do a
circular one as well. We have another one down here. Now, I can see these and they've got to cross
through the middle. But that's because
in the view menu, I've got preview
mode switched off. If you switch preview mode on, they disappear.
They're still there. If you click on them like that, you can still kind of see them. But I'm going to
suggest that you go to the view menu and
just switch preview mode off so you can see the
actual shapes themselves. Now I want to bring in
a picture into here, and I can either do that by clicking on the one that I want, or if I deselect them both, I can then just bring
the picture in and click the frame I
want to put it into. I'm going to use
that method for now. So I'm going to go to File
and I'm going to use place. We use place in Affinity
rather than import. So I'm going to go to place over here and I'm going to
go and find an image. Now, you can use absolutely
any image that you like. For this, I'm just going to pick an arbitary one over here. And you can see it's
actually my curses changed. And when I go over that one, it shows me what it looked
like in that place. I haven't clicked yet. I'm
just moving over them. I want to bring that in
so I'm going to click once and it comes right in. Now, the picture itself
is inside a frame. So if I move the whole picture and frame,
let's say, up to the top, I can grab the side
of the frame and I can pull it out like so. Now, you can see as I'm
pulling this around, the picture is kind of well, it's scaling up and down. If I go to this bottom
one, once again, that picture is scaling as
I'm dragging this around. So I'm going to pull that
out to the side like so. If I then want to zoom into
the family over there, I can go to this
little Zoom button down here and I can
actually choose to zoom into the
picture like that. If you want to move
the image around, go to the middle to
this little well, fork or arrows, and you can just click and drag
to move it around. You can also go up to this little circular
arrow and click to rotate the picture inside that frame. Let's do that again. What I'm going to do is I'm
going to select it this time, so as opposed to not
selecting it last time. I'm going to go to
File and Place, find the picture
that I want to bring in. I don't know what this is. Let's have a look.
Oh, it's a house. Perfect. I'm going
to click on open, and it should come
straight into there. Now, all I've got to
do is go and zoom in a bit like that. Let's move over the picture, click in that middle
bit and move it around. If I want to move the
whole thing around, I can just put it
around like so. Now, if you actually go down to the bottom
on this one here, you can see there are
two little circles. The inner circle allows me to change the size of the frame. The outer circle changes the
frame and the picture size, so I can do both
of them like that. So do watch out for that. I'm just going to pop that over the corner like so. But
do watch out for that. When you click over there, if you do see those
little double dots, you can then just use them to
either change the shape or the size of the frame or the outer one with the
frame and the picture. And you can use the slider
to zoom in and out of the picture itself and lastly
move around. In there. I'm just going to move
this up a little bit, so the land is just about on the bottom
of that picture. Like so. I think that'll look quite
interesting like that. Anyway, do try that out. Have a bit of a play
with some picture frames and changing the zoom, moving them around in there and generally getting
to know them.
98. Working With the Stock Libraries: Let's bring in some
more pictures. If I go over here, you'll see that we've
got pages assets. We've got something
else called stock. Now, stock are stock libraries, and there are two libraries that are actually
included in Affinity. And you might have to
click on the I understand button to get into them so that you've read
the fine print. But these give you images
which are royalty free. Now, these are very similar to the Unsplash library that I was getting the pictures for that you've
been using so far. So in stock, we can choose
either Pixel B or pixels. I'm going to go
back to Pixel Bay over here, and as you see, you can actually even look for vector files so you could use
them in your vector area. Now, if I go over to Pixels
or the Pixel Studio, you can actually get to the
stock in there as well. Now, what I'm going to do is I'm going to go across here
and search for something. I have clicked on the
Inderstand button over there. I'm going to go and
search for something, so I'm going to say forest. So maybe this is a
brochure about holidays in a small cavern, in
the forest somewhere. So forest over there, I'll press Return or
Enter to have a look, and we've got some lovely pictures here inside the forest. So I'm going to find something. Oh, that looks
amazing, like that. Now, if I were to
click on this picture, you can see it selects it. If you double click it, it actually opens it
up in the website, so you can have a
really good look at this in here as well. And this is in the
Pixabay website. But you can also drag
your picture straight in. Now, if you do this,
look what happens. I'll drag and drop
It's taking time. There we go. It is huge. If I zoom out, you can
see the pictures so big, and I'm going to have
to actually come in and try and get it down
to the right size. We'll zoom in a bit over here. I'm just using
Command and plus to zoom in or Control
and plus on the PC. So I've got it to
the right size, and if I want to
crop down a bit, because I don't want to see
so much of this foreground, I'm sort of interested
in that bit there. Grab a corner and
try and crop it. It won't allow me to
crop this picture. It just keeps the
whole picture there and scales it up and down. So how can we get
around that problem? Well, if you go along
to your picture frames, and before you start,
put in a picture frame. I'm just going to
draw a picture frame over here like that. Let's go right up to there. And then take my forest and drag and drop it
into the picture frame. Takes a moment to
just come over. It is coming over. Now the
pictures in a picture frame. So I can go over here and I can scale it up and
down. In there. I can go to the corner
and I can scale it and I can scale the
frame independently. I want to push this
up a little bit like that and then maybe scale or zoom in onto the picture to just see
part of it over there. So instead of just
dragging it in over there, why not make a frame first, and then you can just drag the picture into
the frame and then you've got all the control
that we had before. Don't forget with
these images here, as well as the text, it's like when we were
working in vectors. We've also got layers so I
can go to my layers here, and I'll be able to see that
picture is above that one, so I can drag that over there so we can bring the
other one on top of it. Try it out. So go along. Have a look at the libraries in there, search for something, any picture you like, and either drag it in or better still, put it into a frame. So make the little
frame in there. If you want a perfect
square or circle, hold down the Shift key
while you're doing it, and then drag that straight in. I'm just going to bring a
little toatstool over here, drop it in and wait while
it pops in. Try that out.
99. Add an Image Stroke: Now, this picture that I brought in down here,
I can barely see it. If I click on it, what
I can do is I can go along and I can
find my stroke. Here's my stroke panel. If you can't see it, window menu and go down to
your studio options, your panels for your studios. And I'm going to
increase the stroke width around the
outside of that. Then just so that it blends
in a little bit better, but I can still see it
as a separate picture. I'm going to go over
here to my color. Make sure I'm on the
stroke, not the fill. So the stroke there, click
on the little eyedropper, and I'm going to go and sample a color from the
picture somewhere. So let's just choose a bit
of a brown maybe in there. Let me do this one
again. I'll click on this picture over here. Once again, go over
to the stroke, increase the stroke to
whatever size I want. Over there. And let's
go back to the color. Once again, I'm on the stroke, choose the eyedropper and sample a color from the picture.
100. Adjust Your Images in Pixel Studio: Now, firstly, if you want
to replace a picture, you can just go along
and drag it straight in. So over here, I'm thinking
I want to get rid of that one and bring in
a different forest. I like that, so I'm
just going to drag it, drop it in there, and it will replace it for me straight away. That's rather nice over there. Now, the other thing is, if we want to go and adjust
any of these pictures, we are in Layout mode. All we've got to do is go
over to Pixel mode over here, and you can see I've got
my layers up in here. Remember, if you can't
find your layers, go to the Window menu, go down to General, and
the layers are in there. So what I want to
do is I want to adjust this picture of the family and just make it
look a little bit warmer. So I'm going to go to the
picture of the family. Now, I don't know
whether you've noticed, but this is very different
to when we were here before. When we just opened up a picture, and I'm
going to do it now, I'm just going to go and
open up a picture over here, so not specifically to do
with that particular one, but we just open up
in a separate window. Your picture looks like that, and the little icon on the left hand side is kind
of like a pixel. Over there. Now that we actually
have been working in Layout mode and we've been putting our pictures
into frames, you can see the little
icon actually is across, so it shows that
it's in the frame. If you click on
the little arrow, then you can actually
see your picture which is inside the frame. There's the little
frame icon over there. Now, I'm going to click on that picture there because
I want to warm it up, and I'm going to go to
my adjustment layers. I'm going to go
down. I'm going to find color balance.
Remember color balance? It was a while ago, I
know. Color balance there. And instead of
correcting the color, I'm going to just add color. So I'm going to say, I
want this to be warmer. Now, warmth would be orange, so orange would be a
combination of red and yellow. And I'll just pull those
up to make it really nice and warm because the bottom picture is lovely and warm, so I'm just trying
to match that. Now, if I switch this on and off, you can
see the difference. Oh, it's a bit
cold. There we go. It looks so much warmer, and it just fits with the
picture underneath it, as well. Now, what about if I wanted to adjust this ittle one over here? I go over there, and
I'm going to go down, and I'm going to adjust it using, I think, black and white. I want it to be a black
and white picture, so I click on there, and you can see the
problem straightaway is that everything goes
black and white. But we can get an
adjustment layer to just effect one object. And I'm going to do that by dragging this little icon here and dropping it on the
icon of the picture. Now you can see that what's happened is the adjustment
layer is clipped. It's only affecting
this picture in here. I can double click on
the adjustment layer. I can go and make my changes, and I think I'll just mess around with a few of these bits until I get this
look that I'm after, maybe something, something
like that. Close that down. So at the moment we have got the adjustment layers,
only affecting that layer. If I open up, you can see, there's the adjustment layer
and I can still switch it on and switch it off
if I don't like it. So do try that out from layout. You can just go to
Pixel and you can just work with these layers
with adjustment layers. But don't forget if you only
want to effect one layer, drag and drop it on the
little icon itself. I'll do one more
just to show you. I'm hesitant to effect that picture because it's
such a beautiful picture, but I'm going to do it anyway. So let's go over here
and I'm going to go HSL, and I'm going to make the
colors go a little bit weird. Oh, let's use those
sort of blues in there. Now, it's affected
absolutely everything, so I'm going to drag it
and drop it onto the icon, so I move until I see
the icon is highlighted, drop it on there, so it's
now only affecting that one. But the great thing is,
nothing is set in stone. I can still see the
adjustment layer. If I double click,
I can go and make any changes that
I like now that I can see what it's doing. And I think I will just intensify the color a
little bit like that. Try it out. We'll
then go back to Lout mode and continue
working on this. But
101. Add a Shape to Show Text: Let's clean up all these panels, so I'm going to go to Window. I'm going down to panels, and I'm going to say reset to reset them all back
again to the default. And we'll pull that
out over there. And by default, I mean
the default position. So one last thing. If I want to add some
text to this document, text is going to
be very difficult to read if I were to put some text on there
or down over here. So what I tend to do is if I'm going to put
text onto a picture, I tend to put it onto a shape. Now, I'm going to go
across to Vctor over here. Can you see what I'm
doing with this example? I'm showing you
some stuff when you work in loud, then
you go to Pixel, then you go to Vector Studio, and you just jump around
between the studios. That's really what I'm trying to get here to help
you to understand. So I'm in the Vector Studio, I'm going to go over to
my shapes over here, and I'm just going to draw in a little shape over
there where I want to put my text in
maybe down like that. Now, I'm going to go
back to out mode. And over here, we've
got the color, and I can change the
color to anything I like. I'm going to change the opacity, so I'm just going to
pull that down like so. So we've now got a
shape over there. And we can then put
our text on top, and the black text
will be readable. You can adjust that
as much as you want. Whoops. Let's make sure
that we're adjusting it correctly to whatever
sort of level you want. Now, sometimes you might
want the opposite. You might want to have
white text on there. Well, just change
the color to black. And same again, you can affect the little rectangle sapacity and then put your white
text on top of that. So let me go and just get
some white text over here, and I'm just going to click and drag over there and
find some text, and we just paste that bit
of text straight in there. Copy that pasting. I can't see my text
because it's black on a black background, but
I'm going to select it. Go up to here and choose
white for my text like that. If you want multiples of these, hold down the option
or the old key, and you can just make a copy. Once again, we'll
just pull that down a bit and maybe this is going
to go along the bottom. Alright, so. And then I will just for ease of use because I don't want you to watch me do the whole thing. Again, you know how to do this. I'm going to just make
a copy of that bit of text in there and get it to go over to there
and just hide the bottom bit of
text from view. Right. Although you can
see these little bits now, if you want to go
to the view menu, go to preview mode, and you can just
switch preview mode on, and they will disappear. Now, I'm sure yours
looks nothing like mine because I haven't
said, do this, do that. I just wanted you to
experiment with it. But try it out. If you want to start again
and do another one with some pictures in here,
don't copy mine. Just think of your own
things that you can do with this particular example. And don't forget you're
working between layout, pixel and vector
mode in there. I
102. Text Wrap: I brought in a picture, and it's in this frame. I just brought in from
the Stock library. I just searched
for steam trains. And what I want to do
is I want to get it to fit into that frame quickly. Now, if you go up to the top, you'll find that there
are some properties here, and I could just say
scale to Max fit, and very, very fast, I can get it to fit in there. Can try some of these
other ones out, as well. If I say none, it will go
back to that size there. I could scale it to a
minimum fit so it'll scale at the top and the bottom or fit at
the top and the bottom. But I'm going to
scale to Max fit. I don't like using
stretch to fit because that distorts
the picture. Now, let's go down to
this one over here. So I've put an image
inside this circle, and we'll just move it up
just a little bit, like that. Actually, maybe I'll
just move the train inside the circle over there. And what I want to do now is
I want to get the text to wrap around that picture. So to use text wrap, you click on the
picture, not the text. I know that it sort of seems strange because you'd
think it's a text wrap, but you click on the picture, the object you wanted
to wrap around. Go up to the text menu
down to text wrap, and you'll see it says
Show text wrap settings. Now, we're going
to click on that. And these are all
the different things that you can do for text wrap. So jump means that if your text is kind of
in the middle there, it'll stop above it and
then start below it. If you've got square, I
can click on the square, and you'll see
it'll actually wrap around the square
shape over there. The one I'm interested in is this one over
here called tight. If I click on that,
then it actually wraps around the picture itself
rather nicely, I think. You got an inside so you can get it to just appear
on the inside. You've got an edge, so it'll go on the outside
and the inside. But this is the one that most people use this
tight over here. Now, it's quite tight
to the picture. So I'm going to go down to
the distance from text. I'm going to switch on the link, and I'm going to increase
that distance so it'll move away from
the picture as well. Now, I'm going to go to the
view menu and just switch my preview mode on so I can see the whole
thing like that. And, of course, if
I move the picture, the text will move as well. Now, this leads us
to another problem. Let me go and get my
preview switched off again. I'm going to make the
train smaller over there, and I'm going to actually, I'm going to use this over here to just scale
it over there. Now it's not fitting properly, so let's use one of these
buttons here to just force it to go into the
middle. There we go. I went to the second one, we forced it into the
middle, right, so now, I'm going to move it around and put it in
the middle of my text. So it's going right
in the middle, and the text goes around it, which initially, when you
look and you think, Wow, that looks pretty good,
except try and read it. The incredible steam
beast on that side, blah, blah, blah,
you just can't. So do be careful of doing that. If you want to do
this, go to your text, and what we want to
do with the text is to get it to go
into two columns. So I'm going to go to the Window menu down to
text in the text frame, and we'll open up this one here, and I'm going to choose
two columns over there. Now, it still looks
just as impressive. But the difference here, and
I'll just hide my preview is that now we can read down
one side and then read down the second side
over there as well. Anyway, do try that out. Remember, the text wrap goes on the photo or the
picture or the object, not on to the text itself. You find the text wrap in text, text wrap, and show
text wrap settings. And don't forget if you want to get things into two columns, go to window down to text, and it's the text frame, and these are your
columns over here.
103. The BIG Project Using Everything You Have Learned Plus Some New Stuff - Intro: I this is the big project, and we're going to be
using things that we've done throughout
the course so far. We're going to be putting
together a multi page document, and we're going to have so
many cool things in there. We're going to be using
pictures that we're going to edit in Pixel. We're going to make our
own logo to go in there. You can see on the side there's so many things that we're
going to be creating in here, as well as some new stuff
that I haven't shown you yet. Anyway, I do hope
you enjoy this. If you don't like the
subject that I'm using, you feel free to actually create your own subject or find pictures for your
own subject in there. Anyway, I hope you enjoy
it. Let's get started.
104. Get Brand Colors from ChatGPT: I'm going to go over to
my vector mode over here, go to the winter menu, and I'm going to my panels, and I'm just going
to reset all of my panels so it looks
a little bit neater. I'm also going to go to
the panels here and just click between them and drag
them over a little bit. So you can see, as
I'm moving across, you get that little
line that appears, and I can just click and drag to get a bit more
space in the middle. Now, what we're going
to do is we're going to be creating our logo. We're also going to look for brand colors that we
want to use for this, and we're going to
maybe have a look at some typefaces or
font families that we want to use as well for the
whole of this brochure. Now, of course, if you're doing this for an existing company, you'll probably
have brand colors, and you'll probably
have the fonts, and you might even
have the logo as well. But this is the kind of
thing that we can set up right from the
beginning should we wish. Now, to do this,
we're actually going to use not Affinity, but we're going to use ChatGPT and get it to
give us some colors. So we've got the
colors ready to go, and then we'll do
the logo after that. But first of all, I'm
going to start off. I'm just going to do a
new document over here. Now, remember my logo
might be used on screen, it might be used on printing. So I'm just going to do
an A four page over here and I'm going to
make sure that this is in RGB mode as well. Now, once we get to the
screen side, sorry, once we get to the
print side of things, then we'll have to
talk about CMYK. But for now, let's just
create that little document. Now, I'm going to go in
and find some colors, and I've already done this
so you don't have to wait. But obviously, you can
try it on your own. I've gone to ChatGPT. And what I did was I told
Chachi GPT that I was creating a brochure called
Cello in the Modern World. You can see this is
what it's written back to me over here, and I want some
brand colors for it. And it's come back with lots
and lots of options in here. You can see palette option one, palette option two over there. So I said, can you give me visuals of the colors
I misspelled give me. Anyway, over here,
I've got palettes, palette one, palette
two, palette three. And then it said, Would
you like to create a single branded palette
image like a storyboard? So I put yes in there, and then I've asked it to
give me a visual of that. Finally, this is what
I was looking for. So really, I've
just asked it for a palette of colors for
Cello in the modern world. It's given me variations, and I went for this modern variation over
there, number one. So I've got some colors that
work together, finally. And we've got some numbers
underneath over here, and those are the numbers that
I want to use in Affinity. So those, if you don't
know about those, those are called hex numbers, and they will give us the
exact color that we need. Now, I can take them from there, or I can just go up
over here because it was this one over here, deep mahogany warm gold. You can see we've got
deep mahogany warm gold. That's the one that
I chose. And I'm going to take these
numbers here. Now, the easiest way
to do it is just copy the number I'm using my keyboard shortcut command
C or control C to copy it. Go back to Affinity, and I'm going to
just put these into some little
rectangles over here. So the great thing
about this is I can actually then see all the
colors right in front of me. So I've made a rectangle. Over here, we have
got our fill color, which is white, and that's
where I can paste that in. So I'll just paste in
that number, press Enter, and there's the first
number that I've got or the first color
that I've got in there. Go back to my move tool and then I can hold
down the alter the option key to make a copy
of that. Let's jump back. Over here to ChatGPT and take
the next one. Copy that. You can now see how
fast this is going to be because I can
just put that in, press enter, and once again, let's make another
one over here. These don't have to be
perfect, all lined up. It's just that I
can see them really and have a good idea
of how they look. We can put them into
a swatch later on. But I'll make sure that
they work for me first. Slate blue. Let's copy that
one back into here again. Pasted in the press return. Those three colors look
so, so nice together. Let's find the last
one over here, soft Ivory. So I'll copy that. I don't have to use
all these colors in my final document,
if I don't want to. Paste that in. Psston. And those are my
colors in there. Now, to get a better idea of how this would actually look, I'm going to be
building this document. It's going to be a
very dark document on a dark background, as
you've seen in the intro. So I'm just going to
take another shape and just put that over the top, fill that shape with black. Over there, and take it down, so I'm going to drag it down below those layers over there. So all the way down
to the bottom. Remember, don't drop it inside, drop it below so
you see the line. So I can see how those
will actually work against the black background,
and they work very well. Not sure about the mahogany, but it is there if I want it. But these two colors
really, really love. Anyway, I'm going to stop over there so you
can try this out. So make yourself
a new document in the vector area,
make some squares. Go along to ChatGPT and just tell it what you
want in plain English. I'm doing a brochure.
It's for a Cello. Give me some colors
for my branding, and then you can take
those colors and copy them across, if you like. If you want to use the
colors that I've used, just stop the video at
this point and copy down those numbers over there, so you'll be able to use them. Anyway, have a go with that and then we'll take it
on a little bit further. Y.
105. Add Colors to Swatch: I before we go any further, let's put these colors
into our brand or into our swatches so we can have access to those brand
colors in any document. I'm going to go over to
the swatches over here, and I'm going to you remember this from
earlier in the course, I'm going to make a new swatch, so I'm going to click
at the top there, and I'm going to say Add now is it a document or an application palette
that I want to add? Well, it's the application one. The document would only
be for this document. I want this to be available
in other documents as well. So I'll say Add application
palette in there. I'm going to call this Cello. And click OK. And now I've
got my colors in here. So let's just click on
this one over here, and I can go over there and I
can just add that color in. I clicked it. It's added in over there. Let's
choose this one. Once again, I can just
add that color in, and I can work my way
through the colors, adding them into my
Cello swatch in there. I think I'd also like to have black as one of those colors. I'll add that into the mix
as well while I'm there. I don't actually need these now, but I do find it's really
useful to have them up, so I'm just going to move
them to the side over there. It just helps me to sort
of keep on brand and think about the colors
and the style and the feel that I'm
going to be going for. Have a bit of a go with
the swatches in there, pop them into a new swatch so you'll have a new
swatch over there called Cello and that'll be
available for any document. But don't forget when
you're doing this, make sure it's an
application palette, not a document palette. Try it out.
106. Find Your Font Pairs with ChatGPT: I've chosen a typeface
that I really like. You can choose anything
that you want. And the one I've chosen is something called
All Round Gothic. I rather like the rounded
feel that I've got for this, and I think it could
work really well with my design because
Cello are very, very big and they're rounded. So I'm thinking that
that might work. This is also about modern cello rather than too much of this
oldie worldy stuff. So I don't want to use
anything too classical. However, this is for
my main headings. For the actual body of the text, I might like something a
little bit more classical or less obvious or less
rounded than that. What I've done is
I've gone to ask, once again, a language
model for some help. So remember, I chose this and it's called
All Round Gothic. When you do this, you could try something else
completely different. I'm going to go back to ChatGPT, and over here, I've actually
said to chat there. If I use all Round Gothic
for the main heading, what font will pair well
with it for the above brand. And it's come back with
some different variations. So all round Gothic, Minion Pro, all round Gothic and Laura. I don't actually have
Laura on my machine, although I could probably
go and search for it. I could also ask her
to make sure that these fonts that I could
actually get them, you know, it might be available
as Google fonts or finding them for free
on something like Defont. But at the moment, I'm
actually going to choose Minion Pro because I think Minion Pro could work
quite well with that. So I'm going to
test this one out. So I'm going to go back here. Now, remember, I want to use
this for my main headings. So I'm going to
use the text tool. I'm going to use
the frame text tool and just draw a little
frame over here, so I can see how that
would work with this. And I need some
text in there now, I could copy and
paste text from some or I can go to the text menu
down to insert and just say, add filler text to that, so it'll just fill it with some sort of
oramEpsen style text. Gobbledegook ready.
And I'm going to go and choose
Minion Pro over here. Minion, minion Minion Pro. There it is over there. That seems to work
really nicely with that. Those two typefaces
work well together. Now, if you've watched
any of my other courses, you will know that I've
got this thing about fonts and how close
they are to well, to comedian double acts. So if you've got a comedian
on their own, that's great. They can look however they want. If you put two
comedians together, you need to have one that is
a bit more traditional like this and one that is
slightly less traditional. And I don't mean off the
wall completely bonkers, but just maybe not
quite as traditional. And they work together
really, really well, and one works off the other one. It's the same with fonts. If you choose one that's more traditional and one which
is a little bit quirky, they'll work together
beautifully. Like comedians, if you
add a third one in, you're going to find that
they all mess each other up. It's exactly the
same with fonts. When you add a third
different font in there, the whole thing just falls
apart and it looks awful. So try to stick to two. Now, by two, it doesn't mean that we can
only ever use those. We could have a bold version
of this or maybe italic. We could have a bolder version of that one or an
italic version. So you can still work within
those two frames as well. Anyway, have a bit of
a go, find your text. And once you've done that, try some different sizes on this and see if it'll
work over there. So if that was sort
of a subheading, over there, maybe a
little bit bigger. Would that look okay? Those two together. This would work great as sort
of a huge title. That might work okay, but maybe we might
have to try something like I'm just going to make
a copy of that over there, and we'll just take that down. So we just got one
word in there. And maybe this could
be a title, as well. We had that, but we used
a bold version of that. Personally, I prefer it
with that one there, but there's no
reason why you can't just experiment with these and see what you get from them. Anyway, get yourself some type, and once you're happy
with that, just move it up a little
bit over there, so we've got the colors,
we've got the type in there, and then we're going to design our logo down here. Try it out.
107. White on Black Optical Illusion: And I have done another
version of my text. So I've put in a
black background, and I've copied that
across onto there, and I've made the text white. Now, why have I done that
as two different ways? Well, I want to see what it
would look like on black. Now, I know you think, well, obviously it's just reversed, but there's a little bit
more subtlety to it. When you look at text like this, the text white on
black tends to look thicker than the text
which is black on white. Look at the word Cello down there and the word Cello there. These characters seem
to be almost bold. Where those don't. And
it's not that they are. These are exactly
the same characters. That is all round Gothic there, and that is all
round Gothic there. They're both exactly the same. But the eye tends to see white on black being slightly
thicker in there, same with this text, same with that text over there,
but they're not. So I always like to check the reverse because I'm
going to be using some white on black text
for the final project. So check yours out
as well and have a look and see if you
still feel happy with it.
108. Draw the Logo from Reference: To do the logo, I need a bit of a reference
because I want to do the head of the Cello
as a little logo. So I'm going to go and
find some reference, and I'm going to do
that by first of all, going along to find an image
using the stock images. So if I go along
to the window menu and I'm looking for stock now if you can't see it in general, it's definitely in the
layout over there, so I'll choose stock over here, and I'm going to
type in Cello Oops. Then have a little
bit of a look. And what I'm looking for is just something with
the head of the Cello in it so that I can kind of get an idea of what it
sort of looks like. If you can't see
anything in Pixel Bay, try going to Pixels
and once again, have a look in there
and see if you can see what you're after. Back. I found a
picture over here, and I'm just going to drag this picture in and drop it in. Now, it is really, really big, and I find that a bit annoying. So I'm going to just undo that, make a little frame for it. So let's go quickly to layout, pop in a quick frame over there, and then when I drop it in, I'll just drop it into
that frame like so. I'm going to zoom in
so I can see the image right at the top over there. That's what I'm
really interested in. Let's see if we can go in
any further. There we go. So, I want to use
that as my reference. I can close down my stock now. So the head of a Cello it's kind of got a sort
of a square section here. I'm just making this into
really simple shapes. There's kind of a
squarish section there. There's a round
section over there, and then we've got the
four pegs over here. Now, I am going
to simplify this, and I'll just draw it over here to show you. I've got my pencil. I'm just going to put a color in for the pencil over there. So really, we've got this sort of round section at
the top over there, which is that section there. And then we've got, let's see, sort of a squarish section
which kind of goes down like that. Over there. That's roughly that
bit. And we've got some pegs goes there, not the ones up there, and then there's two more down here. You can see this is
incredibly rough, but it's just
enough so I can see the basic shapes over there. Right, let me get rid of that. And I'm going to
make it with shapes. So I'm going to start off
with a circle or an ellipse. I'll draw my elliptical shape in I'm holding down
the Shift key, so it's a perfect circle. Doesn't matter
what color you do. I'm then going to
take a rectangle, and I'm going to
make a rectangle. So this is the I don't know
the name of these things. Once again, any of you have
done my course before, you know that I like
musical bits and pieces, although I've never
played a Clllo, I do happen to like
them quite a lot. I think they sound
beautiful. But anyway, if you don't like cellos
and you want to do another musical instrument
that's absolutely fine. No problem. Just find something
with an interesting head. You know, it could
be a guitar head. The fender, strato casts got beautiful heads that
you could try and use. So I've got those
two shapes there. I'm going to take
them and I'm going to put them together using this little button at the top to just unite them together
into one shape. Now, this bit over here really
should be straight across. So I'm going to take
another little shape over there and use that to
cut off the bottom, remember, I'm stylizing
this whole thing. I don't want to be accurate.
I just want to be stylized, which really is, you know, most logos are
stylized graphics. So this is a really
nice simple shape. It's just round at the top
and it's long over there. Don't have anything too complex. Let's get the pegs in so I'll draw in a little peg over here. Now, I could try doing
these as circles. I know they were elliptical
shapes like that, but I want to keep it
as simple as possible, so I'm going to do a little
shape like that over there, and we need four of them. So we'll have one, I
think, one up there. Hold down the old key and
make another copy of that. And I'm looking at
the gaps over here. So we're not being too
accurate about this, but I'm looking to kind of keep that gap the same as that gap, the same as that gap, and then I can select
those to hold down the to the option key again
and drag them over here. I'll have those
going further down. Once again, I don't think the gaps are
quite right on there. Oh, let's put that right
at the bottom over there. I'm just using the arrows
to move this down, so the bottom of that circles kind of touching
the bottom of that. This might have to move across a little bit, and likewise, this one would have to come
in a little bit. Over there. Needs a little bit
of tweaking still, maybe those two need to
move out just a little bit. And then finally, let's just move these up a
little bit over there. I need to put in. You can use the rotate as
well if you need. I need to put in the little
lines that'll go across. So this is just going
to be a rectangle. We have a little rectangle
which you go there. So that's the first
one. Hold down the alter the option key. There's the second
one, third one. And fourth one over here.
Now, remember this is not about it's not a logo
creation class at the moment. I just want to give you some
ideas as to how you could go about creating some
simple shapes with this. Let's take all of those, and we'll go up to the
top and we'll unite them together into one
interesting shape like that. And I'll just scale that down. I'm holding down the Shift key
so I can scale it down and make sure that it actually looks right
when it's really small. A lot of logos, which
are too complex, look a bit strange when
they are that small. Quite honestly, it looks like it's falling
over a little bit. If this was a proper logo, I'd have to tweak that
around a bit more. But for now, I'm just
going to go back. I'm using Command Z
or Control Z to keep undoing until I get back to these shapes here, and
I can say, Well, actually, let's take those and
shift click on that one and see what it looks
like if I move that down to over there. Would that look any better? I think that's actually
a more pleasing shape, so I'll just unite them
together like that. And once again, take that down. You can sit and play
for ages until you get this shape that
you want right. I will then sit and fiddle
with this while you try that out and get some sort
of sort of shape in there. Remember, it doesn't
have to be perfect. You're just looking
for something which gives the feeling of the item, in this case, the instrument.
109. Use Text as Logo: Et's add a little
bit of text to this. I'm just going to take
this word Cello here, hold down the alter the option key to
make a copy of that, and see how we could work
with these two over there. So if I made this a
little bit smaller, I'm hold down the Shift
key to make it smaller. Maybe that would go on
the top of the O over there or on the top of the Ls. Um, like that. I
don't like that. It doesn't look
really good at all. Maybe I just keep the
logo on its own, or, and let's make this bigger again so I can
show you the next, but maybe I just want to
have a C in there for Cello. So if I take this and what I'm going to do is just double click,
remove the low. Let's get rid of yellow. Take my C, make the C white
there, make it a bit smaller. It's just popped out on top. Now, it's underneath, so
it needs to go on top, so I need to drag
it up in my layers. Let's pull the layers out
over here so you can see them all. Quite a few in there. I'm going to drag it all the
way out and above the logo. And then maybe I can just resize that a little bit like that, and we could have a
C in there as well. So this is another
possibility that I could have something along that
line for a logo as well. Let's try some other versions. I'll just make a
copy of that and get rid of the
little C in there. How about if we took
the word Cello, and we made these
two Ls angular, so it looked like
that was the neck, and this is the
head of the Cello. Now, I need to just
angle those two around. So I want to show you
how we can do that. And I'm showing this so I can
show you another technique. I'm going to go along
to vector over here. And what I want to do
is I want to convert this text into curves. So I say convert to curves, and now this text, instead of being editable text is actually editable shapes. You see if I get
my tool over here, at the moment, I can
scale it around. I can do the usual
things that I do. But if I go to this Node Tool, the Node Tool allows me to
click on the shape and then select the individual
parts of that shape. I'm just going to zoom in
a little bit like that. I'll click on this
and you can see I can now select those
two points there, or I can click on this one, and I can select those
two points there and pull them around and move them
as I want them to go. If I click on both of them, it won't allow me to select
both at the same time. The reason for that is because what we have here
is actually a group. If I click on the word Cello, you can see they all
select at the same time. If we look in the layers, and I know it's very dark in there, but that does say it's
a group of items. So I'm going to go up to the little word ungroup
there, click Ungroup. And now, if I use
this node tool, I can select both of those, and I can just select the little points that I want to adjust. And I think I want
to pull them over. So I'm going to select all
of those, grab one of them, and move them over kind of to the same angle that that's at. We can be a little bit
more accurate with that if I brought
this down a bit. Actually, that wasn't
a bad guess at all. I'm going to make
this a bit smaller. I'm holding down
the shift key to make sure it scales properly. So it'll go something like that, and we can have that at the top. That was a very good guess
on my part, actually. I'm going to move
that across and down. Now, this one can be
moved across as well, so we can just move that
into the right position. We can select those and move them individually
as well over there. Of course, you don't see
the two Ls there now, so I might have to just
move it up just a fraction, so it just sits just
above that over there, so you can actually still
read the word Cello in there. Anyway, there's just so
many things that you can do with these shapes,
experiment with them, try them out, mix
them with some text, take two shapes and
mix them together, so I can take another
shape like that. I could rotate this
one all the way round. I'm holding down the Shift key, so when it rotates, it
rotates in small increments. I could put them together like that and do something
interesting. Honestly, that looks
like a centipede, so I'm not going to go
with that one in there. But, you know, you can
do things like that. You could have one,
which was a pale gray, so it looks like a reflection. The list is just endless. As it happens, I prefer
this one just by itself or the little C in the
top. Try it out. Have lots of fun with that shape and use
it with the text, and don't forget when
you bring your text in let me just make
a copy of that. When you bring your text in, go to Vector and
convert to curves. And then when you click on it to select it with the move tool, you can then ungroup
it so you can get to those individual items on their
own in there. Try it out.
110. Check Size & Save: As you can see, I've done a
few variations over here. I took this, made
it a bit smaller. I extended that, made
it a little bit bigger, moved the characters around. And then I tried
it on white sorry, white on black, as well. Once again, just to
see if it works okay. The other thing that one
should be doing with any sort of logo icon is
to make it really small. And if you make it small, can people still
recognize the shape? Yes, they can recognize those. Actually, they can probably
recognize almost all of them. But sometimes if things are
too tiny, they're very, very difficult to see, especially if you've
got it on a smartphone. Anyway, once you've done that, and you've done
some variations on it, what'd like you to do? It's got a file and
we're going to save as, we're going to save this as Cello and this is going
to be our brands. Cello branding over there. Just save it where you can
find it again later on. Oh, let's try spelling
it correctly. Click on Save, and that's done. Now. If you close this down, it will still be there. Get that all saved up. Go
and have your cup of tea, come back, and we'll then move on to the next
stage of this project.
111. Set Up Brochure Document: Let's start our new document. I'm going to go to File and New, and we're going to create
a document for print, but we can also use this for just emailing
around if we wish. But we're going to
do it using CMYK. So I'm going to click
on the A for reset, and let's have a look at
the settings in here. We've got the size in
there. It's vertical. That's absolutely perfect. We've got the color
format which is CMYK. Now, the color profile with the color profile,
if I click over there, you've got all sorts of
different color profiles, and it depends on
where you are in the world as to which ones
you might probably use. For example, this US web swap is widely used in the States, whereas in Europe, we generally tend to work with FOGRA 39. There's all sorts of
different profiles in here. If you're not sure
of which one to choose, talk to your printer, if you really don't know,
and your printer won't tell you just use a
generic CMYK profile. It's not nearly as important
as making sure that the color format is correct and you're actually
CMYK in there. Now, moving down a
little bit over here, we're going to go to multi page. I've clicked on
multipage in there, and we're arranging these horizontally starting
on the right, and the number of pages we want in here is going to be four. So I'm going to put in
my four pages in there. Now, we won't get into masters until later
on in the course, so I'm going to leave
that switched off. Down here, I've got the
margins and my margins, I can choose any
size that I like. In fact, I'm going
to change these. I think I'm going to
just lock them together. I'm going to change them
all to 15 millimeters because I think that'll be a
better size. And the bleed. We do want to bleed in here because this is potentially going for commercial printing. So that's going to be 3 millimeters in there
that's switched on. By the way, I forgot to mention up here in
the multi pages, we are having facing
pages switched on, so the pages will be facing each other so we can do
double page spreads. I'm happy with
that. I'll click on Create document, and here it is. You can see the pages down here. We're in layout. I can see all the pages in there
for the front page, the inner two, and the
back page over there. So if you'd like to get that
far and make the document, if you can't see these
little lines around, just make sure that you don't have preview mode switched on. If you have preview
modes switched on, you won't see them. So once again, go in there
and switch preview mode off.
112. Place the Cover Photo and Add Text Under Cutout: Now, I'm going to go
to the first page, which is this one over here,
and the quickest way is to double click it
in the page's panel. So double click in there
and I'm on the first page. I want to put a picture in here, which is going to go
from bleed to bleed, and the easiest way to do that
is to make a frame for it. So I'm going to go over here, draw a frame from one bleed right the way
through to the other bleed. Over there, and then
I'm going to go to file and place that
image inside there. Now, the images are with
the rest of your assets, so I'll just find
mine over there. And the one I'm looking
for is this one over here. So I'm going to click Open
and place it in there. Now, it's not badly placed. I might want to tweak
it a little bit, so I'm going to go to
the Zoom and maybe just zoom in a little bit over there, not too much, and then just
move it across to the side. I think, just be careful that
you don't move all the way over and move out of the
bleed area in there. I think that's almost it. Let's just have
another look here. If I just pull this
over, just a fraction. Okay, I'm just looking at
these sort of edges there, so they're pretty pretty
much matched in there. Now that I've got
that, I want to go to the pixel side because I want
to cut these Cello heads, I think they're called heads,
the tops of the Cello out. So I'm going to go over
to Pixel in there, and I'm going to go across to
the Object Selection Tool. Now the Object Selection
Tool will allow me to move over this and select it. But the thing is, why
is it not working? Why why aren't things selecting
when I'm clicking on it? Well, it's because it's
actually in that picture frame. You see, if I go to the layers
and click in that layer, I can then see the picture in there. This is
just the frame. There's a tiny icon
of a frame there, and that's the image icon.
So I'll click on that. And now when I move onto this, you can see how it sort
of all of a sudden shows me the little lines
going across. Now, we don't have
to do a perfect selection for this at all, something pretty
rough, to be honest. So I'm going to go over here, I'm going to say I want
to select that bit there. And then I'm going to
go to the add option, and I'm going to add in this
bit and that bit over there. Well, I think that's
pretty perfect. I'm not worried about any
of this down here at all. Now that I've done that, I'm
going to copy and paste, so command C or control C to copy and Command V and
control V to paste. And what I've done
is I've copied the pixels into this layer here. If I hide the underneath layer, you can see, I've
just got those. I can deselect those.
Remember, Command D or Control D to deselect. And there's the top one there. So why have I done that? Well, it's so that when
we go back into out mode, I've got two versions of this, and I can put the text underneath the top one
and above the bottom one, so it looks like the
text is actually behind the heads of the
Cello. Let me show you. By the way, the easiest
thing now that you've got your branding is you
can just go in there. I can select the bit
of text in there, copy that, go back in here, and paste it in over there. And I'm just going to make
this a little bit bigger. Over there. And you can see now that if I move that
below the top one, it looks like it's actually
between the two of them. Now, having done that, I'm
thinking, You know what? That just says cell
at the moment, and I can't actually
see the whole thing. So I'm going to move
these two down. So I'm going to select this one. Hold down the now,
if you're on a Mac, it's command, if you're on a PC, it's control, and
select that one. So when I drag them down, now, making sure that you're
on your move tool, by the way, it will just
be moving those to it. Won't be moving the
text between them. I can go back to my text now. Maybe we zoom in a bit, maybe we can take this and
make it a little bit larger. Let's see how that looks. Okay, well, I think we
can pretty much read the word Cello in right, I'm going to stop there, so you can have a bit of a go
and get to this stage. So remember, when you
bring in your picture, do a frame for it first, so it goes into the frame. I'll make your life easier. Once you've done that, you
can then go into Pixel mode. Use one of the selection tools to select
the area you want. I've done mine very quickly. Just using the Object
Selection Tool. If you want to do it,
with more delicacy, using the freehand
selection tool, that's absolutely fine. You know, you can
go in there with the freehand selection tool. You can go to magnetic and you go around that edge as well. But do remember if you're
using these tools, make sure that you
don't just click on the layer that you
can see in there. Open up that layer and make sure you click on
the image in there. And once you've selected,
copy and paste it, so it comes in a new layer, go back into layout, and then you can put your
text and drag your text below those two layers to get this
kind of effect in here. Have a bit of a go with
that and get that far.
113. Try Blending Text Copy: I've moved my two Cello
heads over a little bit, so they're slightly offset. I thought it looked a
little bit better that way. You can do whatever
you want with yours. But to do that,
I'd select one and then hold down command
and select the other one, and I can then just move
them around in there. I want to make sure
that I do have the picture going right the
way to the bleed, though. The great thing about
this technique of putting something above other things is you can do it with
all sorts of things. For example, the text, if I select the text, I'm going to copy
it and paste it. So copy and paste over
there using the shortcuts, Control C, Control V, Command C, Command
V. And if I move this one above that layer there, let's have a little look. So what I've got is I've got that one above that one
and that one above that one. If I go to this top one
and change the opacity, we still see the other
one coming through, but you can see how we
can sort of control what it looks like on top of
the other image in there. Now, I don't actually
want to do that. I just wanted to show you
that it's a technique because if you just did
that straight on the text, it looked horrible because
that would go really, really light like that, but doing it like this means
you can get some sort of overlap on the text if you wish. And you can then just
adjust the amount of blend that you want
with those two shapes. As I said, I don't want that, so I'm going to actually bend that. You might want it on yours. It's entirely up to you. But do have a bit
of a go with that, so you remember the technique.
114. Add More Text: I want to bring in
another bit of text, so the fastest way, once again, is just go through
here. Copy the text. And paste it into my image. Now, pasting it into the image
means it's actually come in just above that
picture frame in there. If you were in the picture frame and your text came into the
picture frame over there, although it would
still work, you'd have to juggle it around a bit, making sure that it was
above the appropriate layer. But I'm going to drag it out so it's not in that picture frame. It's above the picture frame. We can then close down the
picture frame over there. The picture frames got the
two pictures, the two copies, and the text sandwiched
between them. So it Whoops. Doesn't mean that
it can't be moved. I'm actually going
to go to this layer here and I'm going to
change the size of that, and this is going to be my little bit of text to
go between those two. It's gonna say modern. So it's
going to say modern Cello, and I'm going to put in
the word life over there. Let's zoom right into
that over there. We'll move that out a
little bit over here, and I'll have modern and
I'm going to take that. I'm going to make
it kind of the same width as the E over there. So I'll sort of sit
on top of the E, maybe like that, and then just Whoops, didn't
mean to do that. And then just move
that up a little bit over to the right, I'm kind of looking at
the same height ever so slightly lower than the
top of the C in there. We'll talk about
how you can put in guides at a later
stage on the course. So I've got that. I want another version over
there which says Life, so I'm going to hold down Let me make sure I'm
on the right one. Hold down the alter the
option key to drag a copy. Once again, let's pop that
in there and change that to life. And I will zoom in. Just using my
shortcut to zoom in. That's going to be the
same height as the two Ls. So I popped it there so
I can see where it is. Hold down the shift
cue when I move it and just pull it
across over there. Right, I've got those two
bits of text in there, and I just want another
bit of text down here. However, the problem is
that if I put in some text, it will get a bit lost because
of all the detail in here. So that's the next thing
that we will be fixing. But anyway, get your
other text in there, any text that you want, and then we'll look at what
we can do with this.
115. Blend in a Shape & Add Tag Line: I'm going to go and
make a shape at the bottom here and use the technique that we looked
at earlier in the course. Now, we did that in vector, but you can do the
same thing in layout. I'm going to take a shape, and I'm going to put a shape in from the bottom of the bleed up, well, quite a
reasonable distance. And I'm going to make
that shape black. So in my colors over here, I'm going to go
over to the stroke, choose none for the stroke, go to the fill and pick black
for that fill over there. Then we can go to
this little glass, which is the transparency tool, and I can just click over
here and I'm going to start nearest the
bottom and drag up. Don't go too far
because you'll see that you'll get a horrible
line in this. Always stop before the end of the shape. So I can do that. And if I want a bit more
detail down the bottom, I'll just pull
this down further. So. So we can get
this lovely sort of darkening effect going on at
the bottom of that picture. If I just hide that
for the moment, you can kind of see
the before and after. It just helps to
lead the eye into the details over here and obviously the
word modern Cello. So I need another piece
of text down there. I'm just going to take
one of these bits. I'll take this modern Hold down the alter the
option key and drag it. Now, I've made a city mistake. I'm going to undo that. I forgot to go off the transparency tool. Let's just go up to
the move tool again and same again over here, making sure I'm on the text, hold down the alter
the option key and make a copy over there. Now, the copy is unfortunately
underneath this gradient. Now, I could move it
manually up like that, or I can go up to
the layer menu, say arrange move and
bring it to the front. So you can move
things to the front or to the back
very, very quickly. If you choose move
forward or back one, it just goes forward
or back one object. But over here, I'm going
to say move to the front, so it'll move right the
way to the top over there. I'd like you to say move to the top because that
makes more sense in here, but they use move to the front. I can then go in and change this text to anything
I like really. Let's say, um, School for music. And I'll just move that
into the right position. Put anything you
like in over there. Right, have a bit of a go with that. Bring your other text. Don't forget to do this
sort of darkening down. You can always go back to it and you can adjust
it if you like. You can switch it off
if you don't want it. But you can see how scof
music is hardly visible. When I switch this on, I
can see it really nice and clearly over there. It.
116. Add Brand Color & Lock: Now, before we move
on to the next page, I want to bring in a little bit more color to this because although we've got
this really dark black in there and the browns, which look really lovely, I'd like to have a bit of
a complimentary color. Complimentary as being
the opposite color on the color spectrum,
which would be blue. So I'm going to go back to
my brand guides over here, and I'm going to
bring in two colors. So this one here
and this one here. I'm going to very subtly
just put them in the corner, and I'm going to keep
those colors running throughout the different pages. So I'm going to copy
those, go back in here, paste them in, and I'm actually going to
make them a lot smaller. Something like that. And
they're just going to sit right in the
corner over there. I'm just going to line them
up pretty much with my text, maybe move them over just
a little bit like that. And so those two are going to create some continuity because we'll see the same thing again, not necessarily in
the same place, but on the different pages, and it will just help to give a consistency
throughout the document. What I'm going to do now is
to lock these things down. So I'm going to go to the
individual layers here and select them or you can just click and
drag over all of them. You can see you can
select them very quickly. And we're going to
click on the padlock up here to just
lock all of them, so I can't touch them and
move them by mistake. Right. And we're onto
the second page. Now, if you notice when
I was on this page here, I could see the
layers for that page. If I click on this page, my layers goes blank
because there's nothing on this page at all. So don't when you go
into the second page, think, Oh, my goodness,
where's that other thing gone? Well, if you click
on that layer, it will still sorry,
on that page, the layers will still be there. Anyway, if you'd like
to get those colors in, select everything, lock it
down so you can't touch it, and then we'll move on to
this double page spread. A
117. Add Colors to Pages 2 & 3, & Add Panoramic Photo: I let's add in the background
color on these two pages. I'll use the rectangle, once again, go to my bleed. Do be careful because
it's really easy to actually go to the
edge of the page, not onto the bleed itself
when you do these. That's going to be black, and then I'm going
to be bringing in a picture which I want
to go across both pages. So I'm going to use the
frame tool and just draw in a frame once again from
bleed to bleed that's going to go over both of
those pages like that. Now I'm going to go
and find the image, so I'm going to go to file and place and I've given you these pictures in the images
in your images folder, and I'm looking for
that one there. It is I'm sure
that's artificially generated because we've got the animals in the background. I'm not too worried about that. I just like the picture. So that's the one I'm
going to be using. Let's move that out the way, and I'll click Open over there, and it'll pop right in. Now, because this is a document which
could be folded over, I don't want his face to be right in the
middle of the fold. So what I'm going
to do is I'm going to zoom in a bit using the Zoom option here. Like that. And then I'm going to move
on to the picture and just drag it over a
little bit like that. So we kind of get
him over there. If it's too big, we can
just go back a little bit. Like that. I think that'll
work really nicely. We can see the Cello. We can see the animal
in the background, and we can see him and he's
not in the fold of the page. Now, in order to stop me
from moving these again, I'm going to click
on the background. I'm going to lock that. I'm going to go to the picture, and I'm going to lock
that down as well just in case I move it by
mistake. One last thing. I want to take these
two little shapes over here and pop them in there. So I'm just going to go back. Now, these two
shapes were locked, so I'm going to unlock them, select them both, so
I can click on one, hold down the Shift
key, and click again. And let's go and copy them, so I'll use Edit and
copy over there. Lock them once again, go back to this layer over
here and we're going to paste. So I'm going to go to
Edit and paste over here. And you can see it pasted in exactly the same place
that it was copied from. So you've got those two
little colors in there, keeping the brand
style going throughout the document. Try that out. Background. Panoramic
picture across, two colors copied from there. Don't forget to lock
everything as you go. And, I haven't locked these. I should do what I say and do what I say, not
as I do sort of thing. Anyway, have a bit of
a go and get that far.
118. Cut Out B&W Image: Okay I want to bring in a black and white
picture in this corner. So I'm going to go
and well, open it. So I'm going to go
to file and open. Open up the picture that I want. So that's in with the images. And it's this black and
white picture over here. So we'll open that up. Now, this opens up separately
into the pixel area. I could have placed it
in there if I wanted to, but I just want to work
on this separately because it'll be
easier to show you. What I like to do now is to go along to the Object
Selection Tool. And I want to be able to select the various
parts in here. By the way, make
sure that if you are doing this on the image itself and it's actually in a frame that you've actually clicked on the picture
inside the frame. Now, I've gone to my background
or the image over there. I'm going to move
over and I'm going to click to add in that
little section there. And then I'm going to make
sure I'm on the Add option. I'm going to add in the
Cello over here as well. Add in that bit,
add in that bit, add in his leg, the bow. I think that's always
leg over there. We need to add that bit
in as well. This bit. And honestly, sometimes it gets to the point
where you just think, let's just go along to the
freehand selection tool. I'll use a straight
line, and I'll say, I want this bit here, and I want to add in
all of these bits. By the way, make
sure that you are on the add option up there. I'll just add in all
those bits around there. For speed, it's much faster
to do it that way sometimes. Oh, his finger there needs
to be selected as well. Let's go and get that.
Now, what about and more? The more you look, and
the closer you look, the more you'll see in there. Now, this bit we don't want, so I'm going to go to
the subtract option. That's the third
button. Once again, I'm still on the same tool, and I'll just click with a
straight line all the way around back to the start
again to get rid of that. Looking at his bow, there's an extra area here, and I'm going to remove
that once again, so go to the subtract, click over here,
click next to it, and just get rid of that
little section there. And if you wish, you could
then start to go in really close and clean some of
these bits up if you need. And I've just got
one last one here. Well, I'm hoping this
is the last one. No doubt I'll see something
else in a moment. So I'm happy with that. And I can now just go
along, select that, copy it, and go into this image here and paste
it in or this document, shall I say, and
paste it straight in. And there it is over there. Now, you can see
the images come in. It's not actually in a frame. So I can still click on
the outside and I can drag it around and resize
it to the size that I want. And I'm kind of looking
for something like that. I'm going to rotate it until his bow is horizontal
over there. I'll just put on the
line so you can sort of see as I'm dragging that, I want to be
horizontal over there. I'll explain why in a moment. But I'm kind of happy with him sitting in the
corner over there. If you want to do some
other things to it, you could actually before
you brought it across, you could go and, you know, lighten darken, et cetera. You can still do that now because that's a separate layer, so I could still go in and I could make any adjustments
that I want for that. So that's one way
to bring it in. The other way, as I said, is
you could put into a frame, and you could do it in
the frame, as well. Have a go and get to the stage where
you've got him in there, and also don't forget, rotate him around with
that little lollipop until that bow is
absolutely horizontal.
119. Add a Image within a Circle: Let's bring in another picture. I'm going to go down
to the circular til. I'm going to click and drag, and I'm going to hold
down the Shift key so I get a perfect circle. And I'm just going to move this along a little
bit over to there. What I want is another photograph
in there to help Well, so the image itself at the
top is not quite so isolated. It'll just help
bring the dark area at the bottom and the
light area together. So I'm going to go
and find the image. I'll go to file and place. And I've got a picture of of some violin violins,
cellos over there. I'm going to open them up and bring them straight
in over there. That looks absolutely perfect. And what I mean by
getting these two to sort of work together is we've kind of got the
wood color there. So we've got the wood
color down here. The black is down here, but there's some
black at the top. So it helps to just make the eye feel that there's some movement
between these two areas. Anyway, do have a bit of a
go and bring that image in.
120. Columns & Tracking: I'm going to bring
some text into here. So I'm going to go along
to my frame text tool, not the artistic text tool. It's the frame text, and I'm going to draw a
little frame over here. So nice big one. And then I'm going to go
along to the text. Now, I provided
this text for you. If you want to use your own
text, that's absolutely fine. This is a little
something that came from Wikipedia about Cello. I'm going to copy
that. So once again, Control C, Command C to copy it. Go back in here, click inside there and paste the text in. Now, the text is there. You can't see it.
You see there's a little flashing
e beam in there. It's black text on
a black background, so obviously you can't see it. But if you click a few times
and just keep clicking until eventually you
select all the text or just click and
drag across it, you'll be able to pick it
up and select it quickly, and then you can go over here and just change the
color of the text, in my case, to white. Now, remember with my
branding over here, I used, if I click on
this a bit of texture, Minion Pro for the body text. So I'm going to go back there again and just
select all the text. And I'm going to go
over to my fonts or typefaces to be
more correct about it. I'm going to find
Minion Pro over there. It is a little bit
on the small sites. I'm going to make it
a little bit bigger. I think 13, maybe 14 14 looks absolutely
perfect for that. The thing, though,
is that I want this text to be in two columns. So remember to get
to the two columns, you go to the window
menu down to text, and you find the
text frame panel. Then over here, I
can just choose two columns to get it to go
into two columns like that. Honestly, I think this
text is still too big. I think I should actually
go with 13 instead. Here we go. That looks better. And also, while I'm there
going to make sure I balance the text in the columns
at the same time. So there's my first bit of text. Now, let's have a
look at this and see how it actually looks. If we go to the view menu, preview mode, I can see what
that text is looking like. There is a little
word over here, one little word which is sitting right at the bottom,
that's the word type. And when you have these little
words all by themselves, you have to be
very, very careful with them because they
do look a bit strange. Now, if that went up to that line there and
were sitting up there, it would look even worse because they'd just be the
word at the top. By the way, these are
called widows and orphans. So just watch out for that or those little
words by themselves. Once again, I hate
to keep saying this, but later on in the
course, a lot later, we'll be looking at how we
can actually change these and change the text to move it
around a little bit better. For the moment,
I'm just going to select this bit of
text over here. So select this paragraph. And I need to adjust
that slightly. So if we go along the top, we've got lots of options
along the top here. One of them, by the
way, you can see is the number of columns
that we've got. We've got it set to two. I
showed you the menu way, but you can actually do
it from here as well. I'm going to go to
Window down to text, and the character options is the one that I'm looking for. There it is over there.
Let's pull that out. In character in the
character options, we can change an option
here called tracking. I'm just going to reduce
it just a little bit, and that will move all the text ever so
slightly closer together. And you can then see
how it jumps onto that page over there. If I went the other way,
so that was minus three, let's go to zero minus
one, two, three, four, five, eventually, I can keep going until it actually push more words onto that line. I think it looked better
the other way with a bit of minus there, you shouldn't be able
to see any difference between the characters and those characters in
there because it is so minor the amount
that I'm putting in. But just do be careful with that and watch out
for the widows and orphans on basically
words on their own. So if you want to get to it, you need to find the tracking. You select the paragraph that you want to
effect. Go down. It's this one over
here, the tracking, and you can change the distances between the individual
characters. Right, I'm going to stop there. If you'd like to
bring in your text. You might not have
that problem in there, but if you do,
check out tracking.
121. Text Wrap Around Bow: Let's bring in the
next bit of text. So I'm going to go
along to my text tool. I'm going to click and drag
a text frame over here. You can see that it's
actually put in two columns. Now, we can go up to window, down to text and the text frame, or if you ever look
along the top, you'll find it in there,
so I can actually just go one column like that. I'm going to go and find
the rest of the text. I'll go back to word I'm
just going to take this bit of text over here, copy that. And I'm going to
paste it in there. I'm going to select
all the text. And I'm going to make
it white over there. And as far as the typeface goes, it's going to be
exactly the same. It's going to be
Myriad Pro over there. And I think I've got that to 12. Let's take that to 13 over here. Now, I don't want the text to go all the
way across like that. I would just like it to
be sort of maybe over to a third of the way in there. So, now that I've got
that there, by the way, I'm going to put a little bit of text up on the side there, that's why I'm
moving it over, not just because I'm
being difficult. What I want to do now
is I want to go to the picture and with a picture, I want to go as we did
before up to text, text wrap, show
text wrap settings, and I'm going to click on the
tight version over there. So it'll just push the
text away from his bow. And I'm going to make sure
that all these are linked and just push it out just a
little bit like that. Now, I've pushed it out, and you can see the
word pianos just sitting all by
itself over there. Now I could get around that by trying to rotate him
a little bit and seeing if that actually
helps if I do that bit of rotation until I'm happy
with the way that's looking. There we go. That's
absolutely perfect. So the text is now flowing
around his bow over there. Let's put in some more
text over here as well. But before we do that, it's your turn to try this out,
click on the picture, go to text, go
down to text wrap, and just get it to wrap
around his bow shape.
122. Text Effects: I let's get a little
bit of text in here. So I kind of want to use the same size that I've got
on that school of music. So I'm going to click in there, get my layers out over here, and it was that
bit of text there, so I'm going to unlock that, hold down the alter
the option key, and just drag it
across into there, go back to this one and
lock that text again. So it's just a nice
fast way of getting the same size all
the way across. So this is going to say, I'm going to just take a
little bit of text from there. Let's have Bach. Over there. I'm going to hold down the alter the option key to make
a copy over here. By the way, when
I'm copying this, I'm also holding down
the Shift key that forces it to go just
horizontal like that, 45 degrees or vertical as well. So I can pop that bit in, and let's have somebody
else over here. So I'm just going
to select that. And I'm just going
to pick a name from down here, Sega SWGR. So I've got those
two bits of text in. They're looking good, but I want another piece of text over here, and this bit of text is
more just about the effect. So I'm going to take one of those bits, hold
down the old key, and make a copy of it, and I'm going to change the
text to what I want. And this is going to
be for Baroque music, so I'm going to type in Baroque. I've typed all in caps because I'm going
to rotate it round. I'm going to hold
down the Shift key so you can see it rotates in increments of 15 degrees. I know that I get it
absolutely perfect. I'm then going to
use my move tool and I'm going to take that and
move it right up like that. So I'm going to make this
quite big over there. This is going to go right
on the edge of the page. So it's almost going
to be cut off, so you're not going
to see all of it. It's just the effect
of text in there. I might actually make it
just a little bit larger. I don't want to be
too big over there. Now that I've got
my text in there, I'm going to go to
the opacity over here in the layers
and just reduce the opacity of that
so we can just get the effect of a bit of text, saying Baroque like that. Let's have a little
bit of a look. If I go to the view menu, I'm going to go down
to preview mode, and we can see how the whole
thing looks like that. I'm reasonably happy with that. Maybe my text needs to
come down a little bit, but I think I can live
with it as it stands. You can experiment,
even in preview mode, obviously, you can just go in and try things out
and say, well, what about if that
was over there, and we had a Let's get rid of that one
and just do return, so we've got a bit
of a space in there. Maybe I'll put another space
over here somewhere as well. So we have another
return in there, just to break the
text up a little bit. Anyway, it's entirely up to you. Have a bit of a play with
that. Do whatever you like. Put in the text over there, scale it up and down,
see what Whoops. See what works for you, and
don't forget to rotate it, holding down the Shift key, and you can still scale it. If you want to go wild
with the scaling, hold down the Shift key, and you can scale it that way as well. And then you use the opacity in the layers to just
make it a lot lighter. It doesn't have to go
all the way to the edge. You don't really
have to read it. It's just the effect that
we're looking for. Try it out.
123. Blend Photos with Transparency Tool: Okay, we're on to the last page. So let's bring in some
pictures for this page. So I'm going to
make a frame over here and I'm going to go and place my picture
in there so file and place. And I want to bring
in a picture of this busker. But there. So I'm going to make him or her a little bit larger
just a little bit and maybe move them
down a bit over here, something like that. And then I'm going
to put another picture on top of that one. Now, I'm going to make sure that I just lock this one first, so I'm going to click on
the padlock to lock it, so I can't move it by mistake. I'm going to do another
frame on top of that one. So once again from
the bleed through to the bleed it's a bit bigger than the bleed
that I was expecting. Let's just make it a
little bit smaller. And I'm going to go to file and place and place my second
picture on top of that. So I'm going to use
this seduction picture once again over there. And I'm going to make
that a little bit larger over there and maybe pull that
around a bit like so. Now, what I'd like
to do is I'd like to blend these two
pictures together. If I just hide that top one, I want to be able to see
both parts of this image. So I'm going to go over
to the transparency tool. And I'm going to click and drag on the top one to blend it. But when I do that,
nothing happens. I'm sure you've figured
this out already. Let me undo that.
Remember, you need to go into the picture,
not do it on the frame, but go into the picture itself, go to the transparency tool, and then I can blend those
two together like that. So it's exactly the same
as when we did that shape, but I'm doing it on a photo
on top of a different photo. Let's have a little
look and see if we can get those two
to look quite good. Now, I'll lock the top one and just unlock
the bottom one, and let's go and click
on the bottom one and move them around, like so. So I'm looking for a kind of
a combination of these two. And you can just
keep playing with them and moving them around
as much as you want. So same again, on
this image here, let's just see
we'll make it a bit smaller and move it
across a little bit. Mustn't go too far because there is a bleed that
I need to be in. Right, I'm happy with those two, so I've just blended them together into some sort
of interesting shape. It's a bit of a mess down
here, but don't worry, we're going to cover
that up shortly. Try that out, have a bit
of a go with a blend.
124. Add B&W & Levels: Now, of course, I want to make this a single color
maybe black and white. So I'm going to go down over here and I'm going to add an
adjustment layer to this. Let's find our black and white. And it looks okay, but you can see the blacks are not really coming
through as black. So let's put something
else on top of that. I'm going to put another adjustment on
here and I'm going to do levels now, with levels, I'm going to go to this
white level and put it over until we get some
blacks coming through. I think that's looking
a whole lot better. If I do the black level, you'll see it will actually take the whites up really bright. The black level, sorry, the white level will bring
the blacks up a little bit works a little bit differently to when you're
in RGB, doesn't it? So if I go to RGB here, now you'll see this
takes the whites up, and that brings the blacks up. So in RGB mode, at the moment, it's this
area that's got a gap. If I go to CMYK, it's the
other side that's got a gap. Anyway, just pull it around till you get the sort
of thing that you are after. I quite like that. Now, I want to put in a bit
of a shape in here, as well. So there's a lot of bit of a
mess going on around here, and I want to cover that up, and I want to bring in
some more color. So that's the next thing
that we're going to do. But before that, have a little bit of
a look at these two. Do a black and white
adjustment layers. Do the levels if you want,
play around with them, and be aware of the difference between doing the levels in
CMYK and doing them in RGB. I
125. Add Vector Shapes: Onto some shapes. What
I'm going to do is I'm going to go across to vector
mode over here, although, to be fair, what I'm about
to do could have been done in loud mode
with some shapes, but we're going to
go to vector mode. I'm going to zoom
out a bit over here. Now I'm going to
take a rectangle, and I'm going to put a rectangle over a large part of
the image like that. And then I'm going to take a
circle over here in ellipse. I'm holding down the Shift key if I want a perfect circle. If I don't want
it to be perfect, I can pull it out like so. I'm going to move that
one across onto there. I'm going to make it a
bit bigger, as well. So let's just tweak the shape of that a bit more, pull this out. So what I'm doing here is
I'm trying to get a shape, and I'm getting this
shape over here, so I'm not really that
interested in the top section. So I'm going to
pull that up a bit. Like that. It's this bit
here that I want to keep. If I select them both, both the circle
and the rectangle, I have to be very careful
because you'll see over here, it's also selected
the picture frame. So just be careful when
you're using this technique. It might be an idea
to actually go through and just lock
some of these things first before you go any further so you don't
touch them by mistake. Now, let me go back
and do that again. I'll just select them in
there. So those two there. And up to the top, I'm
going to use the subtract, and that'll subtract the foreground object from
the background object. You can see this is
sort of the shape that I was after over here. So we've just got a
solid color over there, and then the picture
is on that side. You can still change this and you can adjust the
shape in there. Now, kind of like that, but I want to give
it some color. So let's try a blue on that. And then this is
the bit that makes it really cool and
it's really easy. Hold down the alter
the option key, drag a copy of that, change the color, and then we can just
pull those together. And look at that. You get this lovely
effect with a line going from thick through
to thin up there. All I want to do now is to go in here and bring in our logo, so I'll go back to the branding, choose one of the logos
that I've created in there. I'm going to keep
this really simple and use one of these sort of
simplified ones over here, so I'm going to take that one. Oops, that one there, copy it, go back into here, and paste it in and just move it into the right
position in the bottom. Corner. Like that. So do have a bit of a go
with that crater shape. And the way that I did it was I took a rectangle first, like so, and then I took a
circle or an ellipse, and I drew the
ellipse over the top. So when we selected
both of them, I just want to be left
with this section here. Using the subtract the front, and that just keeps
me a shape like that. But obviously, I did it, so we were looking at this
area over here. Then made a copy and
moved the copy over. Do try that out, see how
you get on with that.
126. Adjust the Vectors: A Now, looking at this, it doesn't really fit in
with the rest of the style. We've got a black
background there. We've got a black
background there. Yes, that's black and white, but it'd be really
cool if I could actually have this
bit black as well, maybe the logo in white. But what about if I actually
did something which would match these little
shapes that I had there? So if, for example, I pulled the underneath
one up a little bit, and I could make it a bit bigger to pull that up, like so. And I made that one yellow. And then I made another copy
of that maybe down here. And I made this one black. So we've kind of got
the yellow bit there, the yellow bit there. Then I made another copy. I'm just holding down the
old key all the time. And that one, maybe
I made that blue. And then I did another copy, so holding down
the old key again. And this one over
here could be black. And we can just play
with these colors. And that way, oh, we don't
actually need that one. That one can go. We've got this sort of similar effect
to what we've got over there. In fact, I can just go to any of these and just
change them now, and I can move that one
maybe up a little bit, making sure that it's on
the bleed until it vaguely matches this one over here. We've got this really cool
effect now going through, and it keeps it in style
with all the rest of them. The other thing that
you might decide is, well, we've got all these
nice color pictures in here. Maybe they should be in color. And the great thing
is because it's actually a adjustment
layer that's on top, I can go in here and
I can remove those. So I'll just click
on the drop down in there because these are the
two that are being adjusted, and I'm going to go along
and just switch them off. Over there. And if I like that, yeah, maybe maybe
I'll go with that. Or I can go in there and say, Well, you know, this one
looks a little bit greener. So maybe I'll do an
adjustment layer in here that is a color
balance to change it. There is no right or wrong here. You can just sit and play
with all of these things. I'm going to go to
color balance there, and let's see what happens if we were to make it a
little bit greener. Mm. It's okay. A bit of yellow to add
to that might work. There we go. That's
better. It's got the similar feel now
all the way through.
127. Show the Logo: I I want to find my logo. So I'm going to go to
the View menu into mode, and I'm going to wire
frame over here. And let's have a look at
this in outline mode. There's my logo over there. If I click on it, you can see I can select the
individual parts. Here it is in the layers. So what I'm going to
do is just select the whole thing over
there. It is grouped. Mine happened to be grouped, but otherwise, you could sort of select these individually. So I'm going to select
the whole thing, and I'm just going to change the fill color to
white on there. Now, when I go back
from view mode, instead of wireframe, I'm going to go back
to Vector mode. I can then at least see
the logo down the bottom. We might need to put
a little bit of text in here with some
contact details. That's easy for you to do
you know how to do that now. You can actually then
select some of these logos. You can make them bigger. If you need, you can adjust
anything that you want. So everything on this document is pretty much fully editable, and you can change
it however you need. Right, so get your logo, make sure your logo is up, add some text should you need. I'm going to do that while
you're trying this out, and then we're going to look at saving this out in various ways. O.
128. Export the PDF for Print & Email: Let's make sure we save this. So file, save as. Hopefully, you should
have been saving a bit as you've
been going along. But I'm just going to save this someway that I
can find it again. So there's my editable file, and I'm then also
going to go along to File Export and choose
Export in here. Now we've got so
many different ways that we can export this out. I mean, starting from
the JPEGs over here. Now, with JPEGs, I
would suggest using the best quality that you have in there, if
you're going to do it. You'll find with a low
quality and to some degree, the medium quality, you can actually see the
difference in the images. The detail seems to just
completely get lost in there. But what we're looking for
is something for print, which is professional
commercial printing. So although I might send
a JPG to a colleague, I really want to use
the PDF for print. And over here, we've
got PDF for print. We've got press
ready, and there's a few other options as well. Now, you might find
that your printer said, Oh, could you send
us a PDFXA file? And then all you've got
to do is go down and choose that particular
type of PDF, and it will set up all
the options for you. But I'm going to go
over here and I'm going to say press ready in there. And then let's have
a look at some of the options over here. So starting from the top, we're going to do all
spreads over there, so rather than just
individual pages or current pages over here, and we'll go into the
advanced mode over here. Now, moving down a little bit, I'm going to say raster DPI. So when you convert a
vector file into pixels, it's called rustering that. And we want to make sure
that the pixel files are a good quality,
are high quality. So we're going to go
with 300 in there. You'll find that if the size of this file is too huge to send to people and they're not the commercial printers
that you're sending it to, you could reduce
that a bit as well. Now, the other thing is when
we've got images in here, some of the images might be used and they
might be very small. For example, this one over here, I took a very large image and made it really
small in there. So the resolution of that file is actually
really quite high, and we don't need
that high resolution. So we're going to have
downsample images. So if any images are above 375, it will downsample those images. And we've got so many
other options in here. I'm going to just
leave that switched on for all of the
settings in here. The color space, I just want to point out the
most important ones. The color space is
the CMYK color space, obviously, rather than RGB. The ICC profile, these
are your profiles like the web coated over
here or the Fogras. By the way, when they have things like coated and uncoated, coated means glossy,
uncoated means matte. So I'll just keep it as
the document profile because I set that up for
the document originally. Over there, we're going to
keep going down a little bit over here to
include the bleed. We definitely want
the bleed in there, and we're going to include
the printers marks in there. So all of the marks, whether they've asked
for them or not, we've included all of that. And you can see
it automatically. It just shows me how it's
going to actually be exported. Right. Once again, all of these, I will just leave
those out for now. I'm going to say export. And let's just export this out. So click on Save and it's exporting the PDF
with all of those options. Let's go and have
a look at this. So I exported it to my desktop, so I just need to close
down a few bits and pieces over here,
and there it is. So you can see we've
got the printers marks, these little let's
get rid of that one. These little targets here help the printer to align
the various plates. We've got the crop
marks over here. So this is where the
Gillotin would actually cut down those marks there and
across there across there. And once again, we've got our
double spread over there, and you can see the
little crop marks, more printers marks,
same again over here, crop marks, crop marks. And I would just go through
and just check that everything looks
acceptable on here. Obviously, I haven't checked the spelling or anything
like that at the moment. I'm just looking
at the document. We'll talk about spell
checks later on, but it's really easy
to find in the menu. Right, so that's done. I feel quite happy with that. I think it's looking
really good, and that's okay to send
out to the printers. Now, if you want to
send something out, but you don't want to
send it to the printers, you just want to email
it to a colleague. Well, once again, let's
go to Export over here. And in here, we can use some of the other
settings in there. So I'm just going to say
digital small file size. Now, the problem with
small file size, although it allows me to
email it out very quickly, it takes the size of
the images right down. You can see over here, we've got 72 in there, and it's downsampling
the images. Anything above 90, it
will downsample as well. Which if it's just
a quick look that they're having to see your
layout is absolutely fine. But if they start to look at the images and the
quality of the images, they'll look and you know, those images don't
look quite so good. So just be careful of that. You might want to use digital high quality
in there instead, where it actually takes
these rusa settings up quite a lot. I'm just going to do
the small file size for now because I want to show
you how bad it can be. And then once again, down here, we don't need the bleed and we don't need
the printers marks. Let's just click on Export. And we'll call this Cello two. Click on Save and let's
have a little look at that. So remember, this is the one which was a
lower quality one. And we're gonna have
a look over here. And we'll compare it
to this one for print. Now, this is the one for print, which has got the
higher quality image. And you can compare
it to this one over here where it was
the smaller file size, and the quality of the print or the quality of the
image is so much worse. Look at the detail in his
head and face and compare it to the detail on his hair, face, and hands over there. So be aware that if you use that option where you can take the file size
down and make it small, you are going to lower the quality of the
images in there. Either way, have fun with it, export it out in various ways, and don't forget to
share your work with us. We love seeing what you've
done. Have fun with it.
129. Well Done & Thank You!: Congratulations. You've reached
the end of this course. I'm sure you're
creating amazing work. Now, don't forget to
leave us a review. It really helps us to help to
build more courses for you. I also do courses in Adobe, as well as Canva and Procreate. Don't forget to follow me and
have a look at my profile. There is a level
two of this course, so start that right now. I'll see you in the next one. A
 Tim Wilson, Adobe Certified Instructor and Expert