Transcripts
1. Welcome and Introduction : Hi, everyone, and
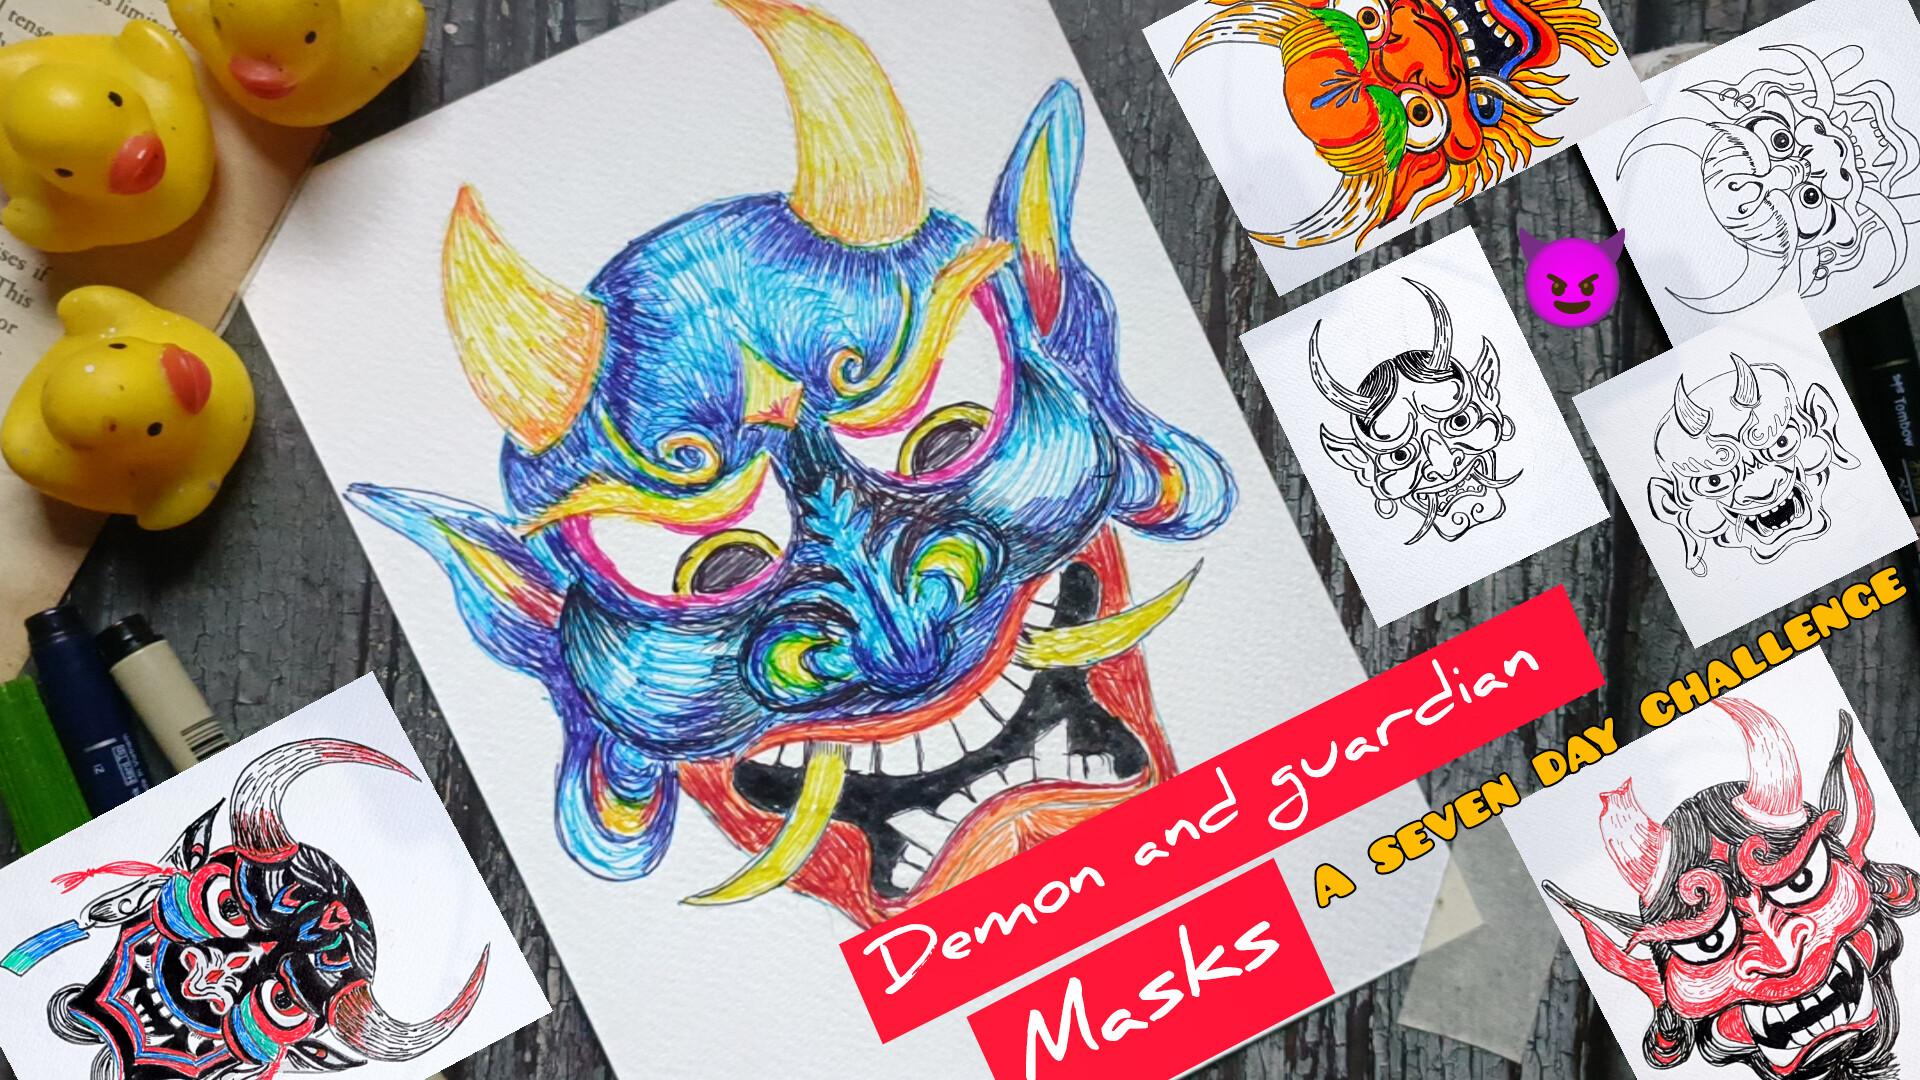
welcome to my new class. Demon & Guardian Masks are seven day paint
and ink challenge. In this class, you
will learn how to create seven powerful
haunting and beautifully detailed hot masks inspired by demons
and Guardians. Each day we will work
on one unique mask, exploring world expressions, dramatic hounts and
striking character designs. These are all the
seven projects, the seven masks of demons and the guardians that we'll be
attempting in this class. We will begin the
class with the basics, where I'll walk you through the supplies I'll be using and introduce essential pen and ink techniques such as hatching, cross-hatching and
stippling and scribbling. I'll also show you how to build strong mask form using
simple guidelines, making the drawing process
easy and approachable. After that, we will move step by step into the seven
main project, applying these techniques
to create expressive masks. Most of the lessons are
recorded in real time, so you can comfortably follow
along at your own piece. This class is beginner
friendly and even can join. You don't need fancy
materials if you like. You can complete
the entire class using just a single
ballpoint pen. Hi, I am Michelle
artist from India. This is my skill set profile. And these are some of the
class that are related to it. If you want, you
can check it down. You can find more of my work
on my Instagram and YouTube. So join me in this
exciting 70 challenge, and let's create something bold, dramatic and
unformatable together. I'll also demonstrate with
fine liner brass paints, sketch paints marker, so you can choose what
works best for you. You are free to keep
your mask monochrome or colorful depending
on your style. So these are the
three masks that you can do the coloring on your own. And then if you want
to make it a little bit more vibrant
and more colorful, you can also use the colored breast paint to do the coloring. And you can only use the simple paints that are available, the red, blue, plaque, and green to do the coloring. So you have got lots of option. So join me in this class, and let's create some awesome
and terrifying masks. I'll be seeing you
in the next video.
2. Class Project : For your class project,
you can create the Seven Demon & Guardian
Masks illustration, one for each day
of the challenge. You can follow along
with the daily license and recreate the same mask, or you are welcome
to personalize them by changing the expression, horns, sips,
texture, or pattern. You may use any tools you like. A simple ballpoint pen
is more than enough, but you can also experiment
with fine liners, breast paints, sketch
pins or marker. Feel free to keep your work, monochrome or add bold
colors if you prefer. Once you complete
each day's mask, I encourage you to upload your progress in the
project gallery. You can share your
final artwork, practice sets, or even
work in progress photos. Sharing your process
helps inspire other students and keep the challenge for
and interactive. And we have got
three outlines for the mask that you can
color on your own. So feel free to do a lot
of experiment and feed some very beautiful and vibrant color for the three masks. Most importantly, have fun, and I'll be seeing
in the next video.
3. Supplies and Testing the Pens: For this class, you will need pencil and erase to
do the sketching. Then you can use
fine liners to do the outlining and
adding detailings. You can also use
colored fine liners. So I have got this red, blue and green, fine
liner from Sakura micron. I have also got the bras paints, where this bras paint
from various brand. Then in here, I have got this colored ballpoint paints and masking tape to
secure the paper. Apart from that,
I'll also be using this colored bras paint to do the coloring for
some of the project. Mostly, I'll be using
this tombos bras paint for all the project for
most of the project. You don't need
this much supplies to do the project in this class. You can create all the project only using the blue, black, red and green colored paints, or you can only
use the black and red to create most
of the projects. In here, I'll be showing
you how I can create different kinds of lines using different paints in the
supplies that I have. So the first two, I
use the Tomboprspin. And here, I'm using
the Sakura micron to create simple
lines like this. In here, we have got the
colored sakuracron fine liners. The main advantage with
the paints are you can create uniform and
consistent lines with it. Then we have got
the breast pins. The main advantage of the breast pins over
the fine liner is that we can create varieties
of line dynamic lines, lines of art thickness. I won't be using it,
but if you want, you can use the breast pins too. Then I also have got the
gel pins, normal gel pens. For one or two of the
project, I'll be using it. The disadvantage with
this normal gel pain is that it takes a little bit of time to get dry and there is a lot of chance that it
might smerge a little bit. Apart from that, I also got
this colored ballpoint paint. So for one of the project,
I'll only be using the colored ballpoint
paint to do the coloring. If you don't have
this much supplies, you can use the normal available ballpoint paints of blue, red, green, and black colour to create most
of the projects. So here I have got the stain
colored ballpoint paints. As for the paper in here, I'm using 300 GSM
watercolor paper. Instead of it, you can use any paper of more than 200 GSM. It will do the work.
Apart from that, I'll also be using brass paints for one of the project.
This is optional two. So these we have
some of the supplies that we'll be using
for this class, and I'll be seeing
in the next video.
4. Ink and Pen Basics: Welcome to the basics in here. I'll be showing you
how I'll be creating different kind of
texture for the mask. Here I'll be showing
you examples of hatching,
cross-hatching, stippling, scribblings, and
a few more basics that I'll be using
for our projects. Mostly, I'll be using this kind of simple straight lines and sometimes a bit curved or
broken lines to create the texture to add
a little bit of detailing for the different
sections of the mask. So these are hatching lines. Hatching is basically a type of shading technique created by drawing parallel lines
close to each other. The spacing between the
lines control the value. Closer lines will create darker areas like
the second example, and the wider lines, the specing will create lighter
tones, the first example. Apart from creating the kind of sading like the second one, you can also create
seeding like this. For the upper part, I added lines that are a
little bit far away. And as I add more layers, the lines are a bit
more closer and there's creating sading effect. I'll be using this kind of
simple hatching lines to create a little bit of sading if required for some
of the sections. So these are some of
the other variations of the hatching
that I'll be using. Instead of creating
the straight lines, you can also create this
kind of slanted line. Then we have got this kind of
bit broken hatching lines. Here's another example of
uneven hatching lines. Apart from this, I'll
also be creating a little bit of curved
hatching lines, a combination of both
curved hatching lines and curved broken
hatching lines. So some of the sections like horns for the faces
or for the eyes, I'll be using this kind of bit curved hatching lines or
curve broken hatching lines. Here, as you can see in here, I use curved hatching lines. For this section, we have
used broken hatching lines. So depending upon
the requirement, we'll be using different
kind of hatching lines. Next we have cross-hatching. So cross-hatching
basically welds upon the hatching by adding another by adding
additional layers of lines that crosses
over the first side, each additional layer increases
the darkness and depth. You can create this kind of vertical and horizontal line to create the cross-hatching. Then you can also
create this kind of combination of vertical
and slanted line. Then you can also do
the seeding using this cross-hatching to make the original a little
bit more darker, you can just add more layers of different hatching lines to
make it a little bit darker. You can also create broken
cross-hatching to add a little bit more
characteristics to some of the sections. Generally, I won't be
using the cross-hatching, but if you want,
you can use it for some of the sections
of the projects. Next, we have got
this scribbling. Sorry, the lines
are not that much visible in here since
I used pink color, pink sakura micron to
do the scribbling. Basically, scribbling is a loose and expressive shading technique using random overlapping lines. It's great to create
rough texture. Are you using it a little
bit of this to create a little bit of texture for some of the section
of the cheeks. Next, we have stippling. Stippling basically
uses small dots instead of line to build
shading and texture. Areas with more dots are darker while fewer dots
create lighter areas. So this is the example
of lighter region. Since it is not that
much visible in here, so I decided to
create a little bit of denser region using stippling dots to create this kind of simple
circular sea. So you can use this
stippling dots to create any kind
of seeds and add a little bit of more texture and more characteristics to
the horns and the mask. Since this technique requires a lot of time, I
won't be using it, but if you want to
make the project a little bit more detailed, a bit more prominent,
you can use stippling. You can also do the
seeding using this. So here's an example of using stippling to create
a little bit of sding as for the right in here, I'm adding few dots, and I have increased the
spacing a little bit. The left side in
here is a little bit darker since I added
more dots in here. Stippling is an
excellent technique to create very
beautiful artwork, but since it takes
a lot of time, I won't be using it that much. And with these, we are done
with the basics hatching, cross-hatching,
scribbling, and stippling. Here are some of the extras. You can also create
this kind of patterns. You can create
additional patterns and design for some of
the section of the mask. Create simple patterns like
this for some of the sections to add a little bit of more
characteristics to the mask. Next, we have this kind of
simple roll like pattern. This is called scaling. You can create other kind
of scalings like this. In here, I just increase
the length a little bit. Instead of creating this
kind of curd scaling, you can also create
a little bit more. You can also create
a little bit of more pointed kind of scalings. You can experiment on your own. You can also incorporate
this kind of simple wave like hatching lines
for some of the sections. Next, we have curved lines. So for some of the section, I'll be creating this kind
of bit broken curved lines. In here, I just saw
a simple example of following the
seep of the eyebrow. Here's another one, following
the round seep of the eye. For some of the section, I'll be following CP and creating curb line along that C.
Here's another example. So this do not turn out the
way I ho, but for the nose, following the CP or
design or pattern, if I created for the nose, I'll be creating a
bit of curb lines following the design or pattern. For the mouth and a little
bit below the nose, I'll also be using
a little bit of curved line to add a little
bit of more detailings to it. Then here's another example. So adding this kind of curve line following
a seep of the mouth. So these are some
of the basis that we'll be using for our projects. And with these we are
done with this section, I'll be seeing you
in the next video.
5. Guidelines for mask: Welcome to the second part of the demonstration video in here. I'll be showing you
how you can easily create the simple
seeps for the mask. For all the mask, I'll be
using this simple guideline, starting with a straight line. With this straight line, I'll be determining the length of the mask and then dividing this straight line into
three equal sections. And for the upper
part, we'll be adding the eyes and the forehand
for the middle portion, we'll be adding the nose
and for the lower sections, I'll be going in with the mouth. And as required,
I'll be extending the lower portion a little bit for the beard or moustache. So this is simple guideline
that I'll be using for all the mask that I'll be
creating in this class. Now, let's put this into use. So starting with a
simple straight line, dividing into three
different section, three equal different sections. And now encircling
it with this oval s. For the upper section, we'll be adding the eyes, for
the middle section, the cheeks, and
the nose, and for the bottom section, we'll
be adding the mouth. For the middle section,
I'll be making it a little bit broader
since I'll be creating a little bit of fluffier checks and for the bottom section, a little bit of larger
mouth if required. In here, I'll be
adding the horns I'll be creating
this kind of bit curve or down C for
all the embrows. I'll be making a little bit of variation for all the embrows, but somewhat it will remain the scene like this kind of bit curve C. For the eyes, I'll be creating this
kind of eye socket. This will be seem to
I'll be either creating elliptical or oval C
for the eye socket. As for the nose, I'll be
creating this kind of nose. You can make it a bit
broader, bit bit longer, a bit smaller, bit crooked
or with no nose too. Mostly, I'll be adding the nose a little bit above the
intersecting lines. Or if required, I'll also
be adding it a little bit middle of it to make the nose
a little bit more rounder, a bit more grotesque. I'll be shifting the
nose a little bit up towards the eyes so
that the upper part of the nose will be touching the eyes or to make it
a little bit longer, I'll be adding the nose a little bit just below
the intersecting lines. As for the cheeks,
as I was mentioning, I'll be extending the middle
portion a little bit. So generally, I'll be creating this kind of bit rounder
see for the cheeks. For the mouth, I'll be creating
this kind of simple seep. I'll be making
variation for the seep. The upper portion will
be a little bit bigger. The lower portion will be a
little bit smaller generally. And now, for the jaw, I'll be creating generally
this kind of jaw. I'll also be making a little
bit of variation with it. I'll be adding the
larger franks at the top and smaller
franks at the bottom. And for the insides, I'll also be adding small tips. You can create a square
seep or you can also create triangular seep or
canine see for the teeth. I won't be adding any
tongues, but if you want, you can also add tongue
for the insides of the mouth. So this is optional. I'm adding ad on all
the three sides, the left chick, the right chick, and as for the bottom two. If you want, you can
proceed with it. Now for the ear, I'll be adding the ear just
beside the chick, and I'll be showing you three or four different
variations of the ear that we'll be
using in our project. I'll be creating
a little bit more detailing for the upper
part of the forehead, adding few lines or creating
few patterns or designings. So this is how we'll be creating the various masks
for this project. The main thing is that I'll be using the same difference lines, the vertical and
horizontal lines to divide into
different section. I'll be adding the eyes for the upper part for the checks, I'll be making the middle
section a little bit broader. For the nose, either
we'll be adding it above the intersecting
lines or just below it. For the mouth, I'll be creating
this kind of simpler see. The upper portion will
be a little bit larger. The lower portion
will be bit smaller. And now let me show
you another example, vertical and horizontal
lines dividing into three different
equal sections. Now creating the rough outlines for the eyebrows and the eyes. For this one, I
decided to create a little bit more
broader field to eat, so a little bit of this
kind of bit broader nose. For the cheeks,
too, I'll be making a little bit more
broader for this one, extending a line just below the eye socket to
create the cheeks. If you don't want to create
this kind of laff check, you can create a bit simpler
version of the cheeks. I'll also be showing you
that in one of the project. Now for the mouth, the upper
portion is a bit larger and the lower portion bit
smaller, creating fangs. Here if you want to experiment, you can create any
kinds of fangs. For this one, I decided to
create a bit larger one. Now, put the jaw. Let's
add the ear for it. For this one, I decided to
make the ear a bit larger. And instead of adding two
horns on each side of its fehend I decided to create
single horn in the middle. If you want, you can also
add ears on both the sides. This is our third
example for the mask. You have got the rough
idea how you can create any kind of masks by
following the simple steps, simple steps, the
simple guidelines of vertical and
horizontal lines. Now, I'll be showing
you different kinds of horns that you can create. Mostly, I'll be using simple
curved horns, but in here, I'll be showing you
five different kinds of horn that you can
use in your project. This is the simplest
of the horn, simple bit curved triangular same. Here's the second horn. So this is a little bit
smaller and bit broader. So Adding the outline
for the bees, and in here I'm creating
a little bit of hatching line to add
texture for the horn. Here's the third
one. For this one, I decided to make it
a little bit curvier and add this kind of
mid curvier seep to it. I won't be using this kind
of horn for any of the mask, but if you want, you
can proceed with it. Following the seep of the horn, I'll be adding these kind of bit curved lines to add a
little bit of texture to it. As I mentioned for all
the project, mostly, I'll be using the hatching lines to make it a little bit more darker or add a little bit
more characteristics to it. You can use both cross-hatching. You can use both cross-hatching
as well as a stippling. Here's another one,
a broken horn. The upper part is missing. Let's create one more horn. Here's another
one, the last one. So this is card on
the other side. These are the few examples of the horn that you can
use in the project. Mostly, I'll be using the first and the second
kind of horn. And for one of the project, I'll also be using the broken horn. Example at the top that I
sawed you with a single horn. I won't be using it, but if you want to proceed with that, you can also add single horn
for some of the projects. Here's a rough demonstration
for simple ears that I'll be using
for some of the mask. You are free to
make adjustment to the p and the size of the ears. Mostly, I'll be using the first and the second
kind of ears. I'll be adding a little
bit more details to it, but the overall IP
will be remaining the s. We'll be adding a little bit of details
for the inside. I'll also be adding earrings
for some of the ears. Feel free to
experiment and create other kinds of
variation for the ears. And lastly, let me show
you how I'll be creating simple teeth fangs for
the insides of the mouth. Simple curved fangs like this for the insides
of the mouth. Mostly, I'll be
creating this kind of bit normal teeth
for the insides. If you want, you can also
create canine teeth or triangular seep teeth to make it a little bit more terrifying. Now for the bottom
section, mostly, I'll be creating the fangs curd inside and simple
teeth like this. Mostly for the insights, I'll be completely filling
it with the black. So this is how I'll mostly creating the mouth
for the masks. For the insights,
as I mentioned, I'll be completely
filling the black. The upper portion will be a bit larger and the lower
portion bit smaller. If you want, you can also
do the outlining for this simple mass and the simple elements
that I have shown you. So here's how it turned out
when I did the outlining. I added a little bit of
texture for the horns, a little bit of texture for
the fangs and the teeth. And with these and then
with this section, I'll be seeing in
the first project
6. Horned Guardian Mask: Welcome to the first project
Horned Guardian Mask. This is the simplest, shortest and easiest
project of all, starting with the straight
line for the reference. As I saw you in
my demonstration, we knew I'll be dividing
this into three equal parts. Let's divide it into
three equal parts. After dividing this
into three goal parts, we'll be encircling it
with an oval shape. Instead of oval
sep, if you want, you can also use
circular seep or bit of elongated
elliptical seam. So depending upon the kind of face you are trying to make, you can just create
that kind of seen. We'll be making adjustment
to the oval sap later on. But for now, just
continuing on with this oval sap for the
remaining section of its face. Especially for this
middle section, I'll be making it a little bit broader for the
cheeks and the ear. And as for the lower
section, if required, I'll be extending it a
little bit for its jaw line. And with these we are
done with a rough see. Let's start adding details,
starting with the horn. So creating this kind of small elliptical
see for the horn, I'll be creating
your horns in here. Instead of this,
if you want, you can change the
placements of the horn. Here, I'll be creating this
kind of bit large curve horn. Instead of this, if you want, you can create other
kinds of horns. You can also create
broken horns. You can make it a
bit more thicker, bit more broader or more smaller or a bit more
larger, as you prefer. Let's divide it into
different sections for its eyes, nose,
and the mouth. For its eyebrow, I'll be creating half crescent
moon like safe. Creating this kind of
CC for the eyebrows. We have got this kind of crescent seed eyebrows
for our horn mask. Here, too, if you
want to make changes and adjustment to the
saves of eyebrows, you can do that extending
the eyebrows to the horn. With this, we are done with
a rough C for our eyebrows. Now for the eye socket, I'll be creating this
kind of elliptical C. For all the
eyes for our mask, we'll be creating this kind
of C for the eye socket. I'll be keeping all
the eye sockets spit large for all the demons
and the guardians masks. Here, if you want to make
it a bit more larger, you can do that, or you can
also make it a bit smaller. On both the sides
of the eye socket, I'll be adding more lines to make it a little
bit more distinct. Now let's add the nose. So depending upon the project, either I'll be adding
the nose just below the intersecting lines
or just above it, and we'll be trying
to create a bit of broader nose instead
of the broader nose. If you want, you
can make tiny nose, but I'll be making the
nose bit broader so that I can make the cheeks bit more
larger and bit more broader, as well as the
mouth a bit larger. And I'm creating
this kind of cheek a bit more broader cheek
for horn mask in here. And instead of this kind
of cheek, if you want, you can just keep it bit simpler and just follow
the outlines that we have created the oval se and you can just keep the
chicks inside it. But as I mentioned
for all the chicks, I'll be making them a
bit broader like this. And with these, we are
done with both the chicks. Now, let's do the mouth, creating this kind
of s for the mouth, a little bit curved in here. So now let's create the
large extended teeth, the fang for our demon mask. And as I was mentioning,
if required, I'll be extending the
lower side of the mask, so extending it a little
bit to accompany its jaw. And with this, we are done with the rough C for this mask. Let's add a little bit of more detailing
wherever required. I forgot to add the ears, so creating this kind of ear, a little bit elf like ear, a bit pointed ear for the mask. You can create any kind of ear, and if you don't want, you don't have to even add the ears. For the upper side, I'm
making it a little bit curved and a bit pointed
and for the remaining. And for the remaining section, I'm dividing into three
different parts like this. For the jaw in here,
I'll be making it a little bit curved and adding this kind of spiral pattern. If you want, you can
also add the beard in here like this on
both sides, too. If you want, you can
add beard or here. This is just a tough example. I won't be adding
it. I'll be just skipping this project
quite simple. Adding a little bit
more detailing for the eyebrows and the
upper part of its head. And in here, I'll
be adding here. So I'll be using the black to add the here on both
sides of the head. This is optimal,
if you don't what, you don't have to do this, adding the circular
C for the eyes. And with this, we are done with the pencil sketch for
this Gargan mask. If you want to make
changes in adjustment, you can do that. I'll be doing the
outlining like this. So let's start doing
the outlining. Here I'm using this tambo. Breast pint, do the outlining, you can use normal wallpint pin, you can use fine liner or
whatever supplies you have. I'll be doing the outlining, just going over the
pencil outlines, as well as adding a little
bit of detailing in form of hatchings and
a few more details. And I'll also be making changes if required for some
of the sections. So if you don't
have to stick with the outlines that
you have created, feel free to make changes and
adjustments as you see fit. For the eyebrows, the crescent step eyebrows
that we have created. So let's go over
the outline of it. So for this project, I
won't be adding any colors. If you want, you can do
the coloring on your own. I'll be keeping it quite simple and only doing the
outlining in here. Going over the
outline for its here. That's what the
accessories. If you want, you can add a little bit of
rings alongside the horn. You can also add earrings. I'll be adding the earrings. I have not created the
earrings in the pencil sketch, but for the outlining in
here with the brastbin, I'll be adding the earrings, going over the
outline for its ear. And as I was mentioning, this beside the eye socket, adding a little
bit of more lines to make it a little
bit more broader. For all the nose, I'll be making it quite
broader like this. Making it a little
bit more rounded like this for the upper
part of the nose. And yeah, with this, we
add her with the nose. Now, let's do the
outlining for its cheek. So we have got this
kind of bit curved and bit fluffy check for
our Guardian mask. Later on, I'll be adding
a few more lines, a bit more thicker and
broader lines for some of the sections to make it a
little bit more distinct. In here, on both the
sides of the eyebrows, extending this line connecting this connecting the eyebrows
to the cheek like this. With this, we are done
with the upper part. Now let's do the
remaining section. We have got the mouth, starting with the outlining the fangs. In here, I upgraded this
kind of quite large fang. Instead of this.
If you want, you can make it a bit smaller. Now, let's do the
outline for its lips. In the pencil sketch section, I did not add on teeth
inside its mouth, but in here, I'll be
adding the teeth, simple rectangular
see for the teeth. So with this, we are done
with outlining the mouth. Now let's add small
teeth like this. Instead of this kind
of teeth, if you want, you can add a little
bit of canine like see, bit triangular and sour teeth. Also, if you want, you can
peel the entire section, the insides of the mouth
with a black And yeah, with this, we are
done with the mouth, the fangs, and the teeth. Let's do the remaining section, the jaw of our Guardian mask, adding this kind of circular or spiral pattern for its jaw. And as I was mentioning, the bead and the hairs that I showed you earlier with
the pencil sketch, if you want you can
add more lines. If you want you can
do the outlining for those two, I want doing it. Let's colour the
eyes with the black. And with this, we are done
with the rough outlining. Let's add more lines to make it a little bit more distinct to add a little bit
more depth to it. Here, following the
curved sweep of the horn and adding this
kind of hatching lines, bit of broken curved
hatching lines. If you don't want, you can
just keep it simple as it is. You can use colored
bras pan or ink to do the coloring or you
can just follow along with me and do a little
bit of hatching to add a little bit more volume
to this Guardian mask. Moving on to the cheks adding this kind of curved
crescency for its cheek, adding it just
beside the nose to. So just by wearing the
thickness of the lines in here, you can add more
volumes and a bit of more depth to this
Guardian mask. Adding a bit more
lines just beside the eyebrow on both sides
of the eyebrows in here, the upper part, extending the eye socket a little
bit on both sides. Now, let's do the outline for
the ES that we create in. And for the ear, as
I was mentioning, I'll be adding two
earrings, one on each ear. This is the simple
s for the ear, adding a little bit of detailing for the inside of the ear, where the thickness of
the lines a little bit, make it a little bit dynamic. By dynamic, I mean wearing the thickness of the
lines a little bit. Try to do the same thing
for the second ear, the same kind of pattern that we created for the first one. And now, as I was mentioning, making it a little
bit more dynamic, wearing the thickness of the lines for some
of the sections, making it a bit more thicker, adding a little bit more
detailing for the ear. And finally, creating this kind of simple C for the earring. Adding the earring
on the second ear. And with these, we are done with the ear for our Gargan mass. You can keep it simple as it is, or you can just follow
along with me and add a little bit more
detailing for the nose. I decided to add this kind of
bit curved line in here for the lower section and kind of bit triangular
C for the upper part. The fangs, adding a little
bit of hatching lines, but curve hatching lines. With these, we add
with the fangs. And finally, let's add a
little bit more coloring, a bit more hatching
lines for the hair. So before doing that, let's erase the pencil marks, and then I'll be adding
more lines for the hair. Lightly erase the pencil marks. I see that the breast pan or the ink that you
have used has dried up. Otherwise, the
colors might smudge. While you will get smudging
of the colours on the paper, removing the erasers dust. Now adding another circle for
the eyes. Adding the hair. So once again, doing a little
bit of curved hatching, following the curved seep
of the head and yeah, filling the entire section
with lots of lines. Doing the same thing
on the side too. And put the edges of the hair line just above the eyebrows
that we have created, I'll be doing a
little bit of sading. Also make the upper
part a little bit more darker by adding
a few more lines, a bit of sading for
this region, too. In here, a little
bit of more siding, just above the Christians
eyebrows that we have created. And with these, we are done
with the outlining for our first project
horn Guardian Mask. And I hope you enjoyed it. And I'll be seeing you
in the next project.
7. Horned Crimson Demon: Welcome to the second project
Hunt Crimson Demon Mask. So let's start with the straight line using this straight line to determine
the length for our mask. So you can always
wearing the length of the mask just by wearing
the straight line. Now, dividing this straight line into three different sections. Depending upon the requirement, I'll be wearing the sides of this different
section a little bit, creating a bit of oval seat
for the face of our mask. So these are just
simple guidelines. I'll be making
changes as required, especially for the middle Saxon, I'll be making the cheeks of the demon mask a little
bit more broader. And with these, we are
done with a rough oval see for the face of
our demon mask now. Let's start with the horn with a rough sketch for the
placement of the horns. In here, I'll be
making the horns a little bit distinct
from its head. So creating this kind of
bit thicker s for the horn. Et's do a rough outline for
the eyebrows for our mask. So this kind of bed cove
see for the eyebrows. For most of the projects, mostly I'll be creating
bit curve C for the eyebrows and bit of large
oval C for the eye socket. So these are optional. If you want to make changes in adjustment to the
eyebrows, you can do that. Creating this kind of C, a bit large somewhat of
oval C or you can say elliptical C for the eye for
the eye socket for our mask. I'll be adding a
little bit more detail to it later on when we'll
be doing the outline. But for now, just
create this kind of bit simpler C for
the eye sockets. Now for the nose,
adding the nose a little bit above the
intersecting lines, as I mentioned, depending upon the project
we are creating, I'll be wearing the
placement of the nose. For most of the nose, I'll be making it
a bit more fluffy, a bit more broader like this. For this one, I'll be
creating some kind of patterns and
design for the nose. If you want to make the nose
a little bit more crooked, bit more uglier,
you can do that. With this, we are
done with a rough guideline for the nose. Let's do the remaining
sex in the cheeks. As I was mentioning, I'll be making it a bit more broader, creating this kind of
fluffy checks for the mask. And finally, let's do the
rough outline for its mouth. In here, I'll be
dividing the mouth into two different sections. We have got inner mouth
and the outer mouth. On both sides of
the outer mouth, we'll be adding lots of red. And for the remaining section, I'll be using black and white. The triangular saps will be the outer section
of the mouth and this sap and this sap will be the inner
section of its mouth, creating rough outline for
the pangs inside its mouth. Like the earlier
project, if you want, you can extend the
pangs a little bit more or you can
make it quite large. So as you see fin, you can
make adjustment and changes. Making the seeds a
little bit more cowed in here to accompany its jaw. And here, too, let's extend
the fest a little bit to accompany its jaw and so that's why I'm extending
it a little bit like this. In here, the jaw become a bit more broader as
compared to the checks. So extending the cheeks
a little bit more. Now, moving on to the horn. So for this horn, I decide to make it
quite broken like this. Moving on to the second
one. Simple horn like this. For this horn, I'll be adding accessories in the
form of rings. The rings on this side. On the other side, too, if you want, you
can add the rings, making the feat a
bit more broader, extending the line from
the horn to its chin. And as for the nose, I'll be adding more
pattern, as I mentioned, but for the upper section two, I'll be adding this kind of
simple designs and patterns. Now let's create its ear. In here, I decided to create
a bit of this kind of ear. If you want, you can
create pointy ears or you can create bit
curved or small ears. But here I decided to create
this kind of bit sharp ear. And if you don't want
to create the ears, you can just keep it
simple mask like this, or you can follow along with me and create this kind of ear. Here, I won't be
adding any accessories for the ear. If you
want you can do that. For this project, I'll be using only the blacks and the reds to do the coloring
for this mask. Instead of that, if you want, you can use other colours
to do the coloring for it. With these, we are done with
a rough see for the mask. I'm making some adjustments
wherever it's required, making some of the rings
a bit more broader, bit more thicker or making
it bit smaller if required. Here, too, if you want,
you can add this kind of beard just below its jaw. This is optional. I
won't be doing it, but if you want,
you can do that. Adding a little bit of
more detail for its ear, dividing into
different sections. Mostly, we'll be
using hatching lines to do the coloring for this one. You can create any kind of designs in the
pattern for its ear, its mouth, and its sees. With these, we are done with the rough outline for the mask. Let's likely erase it. Ensure that a small
section of it would remain visible so that we can use
it to do the outlining. Apart from this,
I'll also be sewing one more Crimson
Demon Mask later on. That will be a bonus project, a mask that I sowed in
the introduction venue. For now, let's do the
coloring in here. I'm using normal gel pen
to start with the horn. For the lower
section of the horn, we'll be doing a lot of shading. So using the hatching lines to the sading to make this
region a bit more darker. For now, just using this kind of broken lines to the
outline for the horns. Later on, we'll be making the outlines a bit more thicker. For most of the
section of the horns, I'll be using this kind of
broken hatching lines like this wearing the length of the hatching lines like this to create this kind of texture. As for the ring in here, the three rings that I
have created in here, I'm using black to
do the outlining for it. You don't have to do this. If you want to keep it simple, you can just create the horn. You don't have to also
create the broken horn. Instead of the broken horn, you can create the simple horn, adding this kind of
hatching lines to add a little bit of more
texture for the rings in here. Going back with the
red gelpin and doing the outline and going over the outline for the remaining section of this broken horn, making this ringing
a bit more darker. Now, let's do the hatching lines for the
remaining section. Adding a little bit more
line just below the ring. Moving onto the second
horn, later on, I'll be coming back
for the lower section of the horns and
adding more lines. Starting with the
broken lines to go over the outline
for the horn. I usually start
with a broken lines to add a little bit more taxin and give it a bit more organic
fen for the outlining. Instead of this, if you
want you can create uniform lines to
do the outlining. This region, adding a little bit of curved
hatching lines, I decided to make the side
a little bit more darker. Simple plain hatching lines, but broken hatching lines
following the curve sweep of the horn for the entire
section of this one. Instead of using black
and red for this one, you can only use black. That will be interesting too. Instead of using the paints to do the coloring and the
ins to do the coloring, you can use watercolor
or gauze if you want. Doing a little bit of
hatching like this. If you want, you can
also do a little bit of seeding along
with the hatching. Moving on to the eyebrows, outline of the eyebrows
that we have created. And here I decided to extend
the eyebrows a little bit, so feel free to make changes and adjusting as you see fin. Making the eyebrows a little bit more curvier
for the upper part. Let's define the width
of the eyebrows in here. Once again, I'm using
a bit of broken lines to determine the width
of this eyebrows, doing the same
thing for this one. Now, let's make the upper part of the eyebrows a little
bit more boozier. So creating this kind of hatching lines to make it look a little bit more textured. Let's feel the
remaining section. So using scribbling to
feel the insides with it. Instead of this, if you want,
you can do the siding or hatching or you can create a spiral pattern
following the canton, the cut sip of the eyebrows
and feeling it with it. Or if you want to fill it
completely with the red, you can use the red
ink colour to do that. But here I decided to create this kind of rough texture using the scribbling lines to fill the entire section
for the eyebrows. Apart from this, I'll also
be using this kind of scribbling lines to do the coloring for some
section of the mouth, as well as a little bit for the cheeks and a
bit for the ear. If you don't like
this, you can create other kind of pattern design
or you can simply keep it as it does extending the eyebrows a little
bit on more the sides. Now in here, as I
was mentioning, I'll be creating
simple patterns, so I decided to create this kind of so I decided to create
this kind of rectangular seen creating a bit of curved triangular seep
in here for the upper part. I'll also be using
a little bit of black to feel the
insides later on. And with this, we are
done with the eyebrows. Let's do the upper
part, the head of the mask that we have created. Like the earlier
project, we'll be using the curd hatching line to fill the entire
section with it. I'll be creating some kind of
a spiral like pattern just following the sep of the horn and then filling the
entire section with it. My spiral pattern,
I mean, like this, following the seep of the horn, doing this kind of
hatching lines, parallel broken hatching
lines to feel entire section. Instead of this, if
you want, you can cover the entire
section with the black. You can also do a little bit of sading to make some of the
regions a bit more darker, especially near the
horn and a little bit above and a little bit
just above the eyebrows. Adding it carefully in
between the eyebrow. Moving onto the other side, I'll be adding the lines for
the middle section later on. I'll also be extending a
little bit of the curved lines for the region below its eye socket and the
eyes on the other side, not the other side,
but on both the sides. Simple hatching lines following the curve set of the horn. I'll also be doing
the outline for the eyebrows with the
black later on to make it clear and bit more distinct from the
remaining section. Et's do the outline
for its eyes. Here I decided to
extend the eyes a little bit and making it
a little bit more pointed. Doing the outline
for the upper part to making this a
bit more thicker. For some of the regions, we'll be making the lines a bit more thicker to make it look a bit more bolder and
a bit more distinct. Making this region
a little bit more curved by dividing into
different section, a bit small triangular
steep and this kind of oval Iving small eyeballs. For the insides, I'll
be using red later on. Making this region a bit
more bolder bit more darker. Now, for the sides
beside the eye. In here, I'll be
adding the spiral pattern just like
the upper part. Before doing that, let's do the outlining for
the other parts. It's cheeks and the nose, using red to do the
outlining for the nose. Here, too, I'm making a
little bit of adjustment. You don't have to
stick with the pencil outlines that you have created. Feel free to make changes
and adjustment as required, making the sides a
bit more darker. If you want, you can also extend a part of the nose to its eyes. You can make it a bit more grotesque by making it
a bit more broader. Or apart from that, you can also make the nostrils
quite larger to make it look more uglier
and bit more grotesque. For the nose here,
I'll be creating this kind of star pattern. Instead of this, if you
want, you can keep it quite simple and
create simple nose. Here, for the one side,
I'll be using lots of red and for the other side
a little bit of black. For the sides of the eyes,
the triangular seem, adding a little bit of red, doing the same thing
for the insides, completely failing
it with the red. Let's do the rough
outlining for that cheek. Make the cheeks a
bit more rounded, bit more curfan doing the
same thing on the other side. For the outline
section of the cheeks, I'll be adding lots of red and doing a little
bit of staining. And for the remaining section, we'll be doing the
curb hatching lines. Creating a little bit more outlining for the pattern that we'll be doing
for the nose. We'll be feeling the insides
like this with the red, leaving a little bit of space
in between the outline and then feeling the remaining
section with lots of red. I'm doing this only
on the one side. If you want, you can do
this on the other side too to make it look a
bit more symmetric. Instead of this, you can also use black to
do the coloring, or you can keep it
simple as it is. Make the outlines of the
nose bit more distinct by going over the outlines and making it a bit more bolder. Just overlaying it and
making it a bit more wilder. Here's another outline. So these are the regions that I'll be doing a little bit of sading to make it look a
little bit more thicker. Doing the outline for
the other side too. Making this bit more curb. Doing a little bit of shading
to make it more darker. Instead of this, if
you want, you can completely fill the entire
section with the red, the outline section that we
have created or otherwise, you can just follow
along with me and do a little bit
of sading like this. I'm not creating a gradient, just doing a uniform shading
for the entire region, the entire outlined regions
that we have created. So this is a combination
of both scribbling and sding to make this
region bit more darker. The reason that I'm
making this bit more darker is to create a
clear distinction between different section
of the mask and to draw the attention a little bit more for this middle section. Now for the remaining section, doing this kind of
curved broken hatching to feel the remaining
section with us. Simple plain curved
hatching lines for the remaining section on
both sides of the cheeks. Moving on to the other
side, doing the same thing, simple broken curve
hatching lines. Instead of this,
you can also use the cross-hatching that will make it a little bit more interesting and add a
little bit more texture. Now for the remaining section, following the curved tip of the nose and doing
a little bit of hatching and doing a little bit of curve hatching like this. Now, for the sins,
as I was mentioning, doing this kind of
spiral pattern, following the curved
sweep of the cheek. Moving on to the
other side, doing the same thing,
outlining the cheek. Let's do this kind of curved hatching lines for the
remaining section. A in here, I did not
add another line, so following the canto
and adding more lines, For the remaining
section in here, I decided to fill this entire
region with the black, doing the outlining for
this rectangular s, feeling a little bit of
black for the inside. Let's make the outline of the noses a little
bit more distinct and adding a little bit
more detailing in form of the small
hatching lines. Adding more lines for
the remaining section of the nose and upper part
just beside its eyebrows. Let's do a little bit of
more outlining for its nose. This project is divided
into two different parts. This is the first
part, and I'll only be doing up to here and in the next part, we'll
be completing it. And with this, we are done with the first part
of this project, and I'll be seeing
in the next part where we'll be
completing this one.
8. Teeths and Fangs: Welcome to the second part
of the Horned Crimson Demon, continuing on where we left off, making the outlines a little bit more curved and a
bit more jagged. Let's do the remaining section. In here, I decided to
start with the ear, doing the outline
with the black. For the E two, we'll be using both the colors and simply
doing hatching lines. In here, I won't be using the broken hatching
lines with the black. For the red, I'll be
using a little bit of it, but mostly, I'll be using
simple curved hatching lines. Here, if you want
to add accessories in the form of earrings, you can do that, making the lower section of the
ears a bit more curved. And with this, we are done
with outlining for the ears. Let's do the outlining
for the cheeks, going over the red outlines. So adding it in here too. And I decided to divide
into different section, adding few more lines,
adding few more lines, two lines just below
the outline section. I'll be dividing the ears
into four or five sections. For three secons I'll be using the black and for the remaining two, I'll be using the red. Instead of doing this, you can create any other kind
of patterns and the design. In here, I'm using
red, and here, I'll be doing a bit of
curved hatching lines, the same kind of
hatching lines that we did for the upper
part of the cheeks, making it a little
bit more darker, doing the same thing
on the other side too, following the curve sip
of the ear and completely filling the entire region
with this kind of bit curve, broken or somewhat of hatching or siding lines Now moving into the
remaining section, the lower part of the
ear, a little bit of hatching lines in here. Now extending it and changing the directions a little bit, doing the same thing
on the other side. For the remaining sections
in here, the lower part, I'll be adding the red, and for the upper part, I'll
be using the black. So these are simple
and taint pattern and designs for the ear. If you want, you can
make adjustment. Instead of using
the hatching lines, you can also use the
cross-hatching lines. If you want to make some
regions bit darker, you can do the sading or you
can also do the scribbling. Later on, I'll be
adding more lines for the part with the black. For now, let's add a little bit more
detailing for the nose, making the sides of
the nose a little bit more distinct by doing the
outlining with the black. Now, let's do the outline
for its teeth and mouth, starting with the fangs, large ranks that we have created. If you want you can extend it a little bit more and
make it more larger. For all the teeth on the fngs I'll be using a little
bit of setting like this, a little bit of hatching lines to give it a little bit
more depth and volume. In here, I'm creating this
simple and rectangular C for the teeth. Instead of this, if you want,
you can create canine see, but triangular see for the
pointed and jagged teeth. For the lower part of its mount, I decided to make it a bit more broader. Create the teeth. We have created the fangs. Simple plain tips like we
did for the upper part. Make the edges a little bit more curvier by adding
more lines to it. This will be the inner
part of the mouth and we'll be completely filling my insides
with the black. And for this section, a
extended porton ofs mouth, I'll be completely
filling it with the red. Making the outlines
a bit more distinct. And for the lower part,
too, I'll be using the red. So now let's feel the entire
section with this red. So using small
hatching lines and doing sding to fill
the entire section. Instead of this, you can feel it uniformly like
when for the eyes. In here, I decided to keep
a little bit of texture. That's why I am doing this kind of hatching and
siding to feel this region. Now, extending the sides a little bit more by
adding more curved lines. And now for the lower section, creating the outline with
the red and we'll filling the entire section just like we did for the sides of the mouth. If you want, you can
make it a bit more broader or you can use
black instead of the red. Simply filling the entire
section with the red. And just below it, I'll be using more curved lines to create
the jaw for this mask. In a and soning I'll
be making this part. The lower part of the
horns a bit more darker, so adding more lines to
make it bit more darker. And yeah, with this, we
are done with the red. Doing a little bit
of setting for the ears to make it
bit more distinct. And yeah, with this, we
are done with the red. Now let's do the outlining
for its chant and then we will be done
with the second project. Let's divide into two different
section and then we'll be filling the
entire section with this kind of simple
hatching lines. For the entire section
Astin or the jaw, I'll be adding this kind of simple hatching lines,
curved hatching lines. Here I'm creating a bit of broken and bit
more dynamic lines to add a little bit
more volume to it. This is optional. If you don't want to create this kind of jaw, you can create
other kind of jaw. You can also create the beard just like I saw you in
the lier pencil sketch. And with this, we are
done with the jaws. If you want, you
can add the bean. For the remaining
section, puts in, doing simple hatching lines. Moving on to the left one,
doing the same thing, simple hatching line following
the seep of the ear. And with this, we
are done with this. And now let's do the outlining
for the eyebrows to make it look more bolder bit more distinct from
the remaining section. For the outlining, I'm making it look a little bit more
jagged like this. And with this, we are done
with the second project. I hope you enjoyed it. I had fun painting this one, and a, I'll be seeing you in the next
project, the third one.
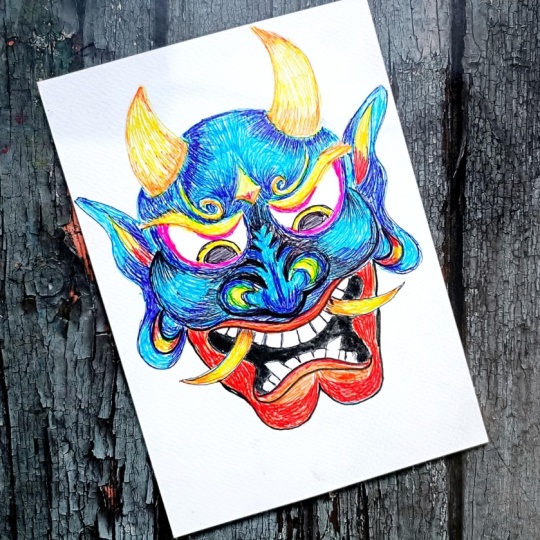
9. Stormborn Demon Mask: Welcome to the third project,
Stormborn Demon Mask. This is one of my
favorite from this class. For this, we'll be using
normal ballpoint paint. I'll be using colored, normal ballpoint
paint for this one, starting with the straight line to use this as the guideline, the guideline for the
length of the mask. You can always wear the seat and the sizes of the mask just
by wearing the length, the vertical length, and
the horizontal length. Let's divide into
three equal section. For this, I'll be
using four or five different colored wallpoint pen. If you don't have that many
colored wallpoint pen, you can only use
the simple blue, black and red colour
to do the coloring. Making this middle section a little bit broader
for the cheeks. Let's do the outlining for
the remaining section. With this, we are done
with the s for the feast. Now, let's create the horn. In here for this one, I'll be
creating bit smaller horns. Instead of creating this
kind of bit smaller horns, if you want, you can make
the horns a bit larger. And here, as you can see, I made this right
horn a bit larger. The left one is quite small. If you want to make them both of same size, you can do that. Let's do the rough outlining
for its eye socket, eyebrows, and the nose. For this one too, I'll
be making this kind of bed curved s for the eyebrow. You are free to
create any kind of sets and designs
for the eyebrows. On top of the eyebrows, I'll be creating this kind
of spiral design. I'll be using yellow
to do the coloring. Now let's create the eyes, creating the eye
socket for the mask. For this one, too, I'm creating
a bit larger eye socket. If you want, you can make
the eyes quite smaller, or you can also make the eyes
a bit more farther apart. Rough outlining for its nose. For this one, since I decided
to make it quite large, I'm adding the nose bit below the intersecting lines and
the nose is quite large. Extending the nose a
little bit towards the eyes and creating this kind of simple
pattern for the nose. Define the sep of the
cheeks a little bit more, making the lower
side of the cheek a little bit more broader. So by broader, I mean a bit more curvy for the
lower section. And with these, we are
done with upper part. Now, let's create a rough
outline for its mouth. This will be its mouth,
creating this kind of somewhat of x like
seep for the mouth. For this one, I'll be gritting two large canine and then
lots of small simple teeth. You can always vary the seeps
and the size of the mouth, the number of the teeth and
the sides and the sieves. Creating these kind of
large franks for the teeth. Here, too, I'll be using
yellow to do the coloring, a combination of yellow, a little bit of orange,
and a little bit of black. Let's create the teeth
for the bottom part. And here I decided to
create this two large one, and the other will
be quite small. With this, we are done with the rough outlining
for its face. Now let's extend
it a little bit to accompany the mouth
that we have created. So extending the
lower portion of this mask to
accompany its mouth. For this two, I
decided to create a bit more defined
and bit large curves for its chin or you
can say the jaw. Napper part, the side of
the head is quite smaller, so I decided to make
it bit more broader, extending it on both the sides. And with these, we are done with simple features
for the peace. Now we'll be creating the ears. I'll be creating this
kind of bit pointed ears. Making the lower part bit
more downer and a bit more curvian adding the ear
on the right side. You can always vary the seats in the sizes as well as designs and the patterns for the ears and all the other things that we
are adding for this mask. And yeah, with this,
we are done with a simple pencil sketch for
this stone bond demon mask. Let's slightly ease it, and then I'll be directly using the colored wallpoint
paint to do the coloring. Instead of this, you can
always use the fine liner or the ras pint to do the outlining
and use other colours, simple black and white
or simple black, along with the red and the
blue to do the coloring. Now let's do the coloring. So this upper part
is not that visible, but in here, I'm using yellow. So I'm directly using the
yellow to do the coloring, completely filling
the entire section with this, using this yellow. Using this yellow
to do the hatching and a little bit of seating, the upper part and the
lower part will be quite darker and the remaining
section will be a bit lighter. Make the outlines a bit more distinct by adding
more lines over there. And if it is a little
bit challenging for you, you can start with black to do the outlining first and
then add the color. Let's do the same in here, too. This horn a little bit
smaller than the right one. Simple hatching lines
and a little bit of sading to make this
a little bit darker. For this bus in here, I'm trying to create
this kind of bit rough textia for
the entire section. Make the upper part
and the lower part quite darker by
adding more lines. Add the yellow for
the other regions in here for the sea in
between its eyebrows. And now for the spiral pattern
just above its eyebrows. Here I'm adding more lines to
make it white more darker. Now for the eyebrows,
adding lots of yellow lines to
make it quite darker. Apart from the ellos, I'll also be using orange and
a little bit of pink tune. And with these we are in the
yellow for the eyebrows, making the lower part a
little bit more darker. In here, I'm going
with the orange. Primarily, I'll be
using this orange to do a little bit of outlining as well as do a little bit of sading for the upper
part and the lower part. Using it to do the outlining. And now, doing a little
bit of curved hatching. Small lines of varied
length in here. Make the lower vision
alphabet more darker. Now moving on to the right
horn, doing the same thing, doing a little bit of
hatching for the lower part, doing the same thing
for the upper part too, using this orange to do the
outlining a little bit, make the outlining a
bit more distinct. Now for the eyebrows, for
the eyebrows in here, I'll be primarily adding this orange for
the lower regions, as well as using this orange to do a little bit of outlining, doing the same thing
on this left eyebrow, a little bit for
the lower region and a little bit on this side, a little bit of hatching
along the side. Now for the spiral pattern,
a little bit of orange. For this gem like seep in here, a little bit of orange
for the lower section. And with this, we are done with the orange and the
yellow for the top. Now, let's do the coloring
for the upper part. In here, I'm using
this light blue. For most of the upper
part, I'll be using a combination of this sky blue, a little bit of dark
blue and black. Let's do the outlining first, outlining the eyebrows, the spiral patterns,
and other things. And then we'll be filling the entire section with this blue. Adding the blow in between
the spiral pattern. Doing the same
thing in here, too, outlining the spiral
pattern with this blue, adding the outlining
for this region, too. And now let's feel the entire
region with this blue. I'll be doing the same kind
of hatching that I did for the horn for small lines like this to feel
the entire region. Instead of using the blue color, you can use other
colour as you see fit. You can use green, that
will be interesting too. I'll be keeping the
length of the lines a little bit like this and filling the entire
region with it. If you want, you can also do a little bit of seating
with the blue. I'll be doing a small amount
of setting with the blue, but mostly I'll be
using the dark blue or the normal blue colored
wallpoint paint and do the seating later on. Surrounding the two horns with
the small hatching lines. And now let's follow
the contour of the horns and the
remaining section of its head to fill
the entire section with this light blue colored. You'll have to admit causes while adding it near the yellow. We don't want the
two colors to mix. Otherwise, it will create
somewhat of greenish color, and we don't want that. Now I'll be filling the
entire region with this. Just extending the
blue lines that I had created and yeah, a little bit of overlying of one layer on
top of the other. You can vary the length of
the lines a little bit. Instead of using this
kind of met hatching, you can also use the scribbling. For some of the reasons that are quite lighter, add more lines, following the contour
of this curve, see that we have created adding
the lines in that manner. And with this, we are
done with the upper part. Now for the remaining
section, just above mouth, I'll be completely
filling it with the blue. I'll also be using a little bit of yellow and the red later on. But for now, let's
do the outlining for the eyes and a little bit
of outlining for its nose. Going over the outline of the pattern that we
created for its nose. Instead of this kind of
pattern, if you want, you can make changes
and adjustment and create other pattern. Now carefully filling the
entire region with this blue. Follow the contour of the lines and try to fill it
in that manner. Going over the outline
for the cheeks. Outlining the checks on
this side, the right side. Now let's feel the
color in here. This beside its eyes, this beside it eye socket, adding it on the other side too. And I'll be filling the
entire region in here, both the checks with the blue, but before doing that, let's
do outlining for its here. For the year, I'll be
using combination of blue, dark blue, yellow, and
a little bit of red, doing the outlining
for the second year. Now, let's fill the entire
region with the blue. In here, I've
increased the speed a little bit since this is
your repetitive process, and this is going to take
a little bit of time. If you want to follow
along with me, you can just pause the video
or you can reduce its spin. Adding the blue lines for the patterns that
we have created. And yeah, continuing
on with adding the hatching lines for
the entire section. For the remaining white section, I'll be using a little
bit of black and a little bit of dark
blue to do the coloring, making the outline of the nose a little bit more darker with more lines and adding a little bit of lines,
just low its nose. And here, I've decreased
the skin doing the outlining for its
speech and the mouth. Using this blue to do
the outlining, later on, I'll be using red and the
orange to do the coloring, but for now, just using this
blue to do the outlining. This is optional
if you don't put, you can use the yellow orange and the red to do
the outlining later on. Moving on to its ear. So for the ear, I'll be
creating this kind of simple pattern or you
can say simple design. For this region that I
have created in here, I'll be using yellow and a
little bit of red or orange. And otherwise, I'll be feeling
the remaining section, the upper part of the ear
with the blue like this. For the lower part
of the EA two, I'll be creating a bit
of curb crescent moon. For the lower part of the ear, I'll also be using
yellows and the red to create a little
bit of crescent, crescent moon like,
creating of outline for the yellow s and then filling the entire
region with the blue. Now for the lower
part of the ear, creating this kind of
crescent boon see. Now let's cover the entire
region with the blue, following the rough conto of the crescent hound
seep that we have created and filling the
entire region with this blue. Moving on to the right ear
and doing the same thing, following the seep of
the crescent houn sep that we have created and adding
the lines in that manner, fill the entire region,
the lower part of the ear. And we'll be only
doing up to here. This project is divided into two parts. This is
the first part. And in the second part,
we'll be adding a little bit more detailing and doing
the remaining section, the lower part of its space. Three, two,
10. Mouth : Welcome to the second part of this project,
Stormborn Demon Mask. Continue on where we left off. In here, I'm using normal blue colored wallpoint pin
to do the coloring. I'm using this to
do a little bit of sadingF some of the reasons, are we making a
little bit darker? So overlaying this
blue on top of the light blue that
we used earlier. We'll be primarily using
this to create a little bit of darker region just
beside the horns, a little bit above its eyebrows, a little bit beside
its cheeks and a little bit alongside
its nose and ear. And here, I added
a little bit of this blue just beside its ear to make it a little bit more darker just beside its cheek. And for this region, too, for the present moonlight
s that we have created, to create a clear distinction between different parts
of the ears that we have created using this blue color to add a little bit of sanding. Also using this blue to do the outlining for the ear
that we have created. Now extending this
blue a little bit for this middle region to make it a little bit more darker. Just by using this blue and
doing a little bit of sading, you can see the clear
distinction that we have created in
between the two ears. This ear looks a bit more
crisper and a bit more defined. We'll be doing the same
thing for the other ear. But before doing that, let's do a little bit of
sading for the face, the upper part of its face. Adding a little bit
of blue in between the spiral pattern and just above the eyebrow
that we have created. Small hatching lines
and added care fully, we don't want it to
mix with the yellows. Now for this region in between the horn and a little
bit above its eyebrow, filling the entire region
with this dark blue, In here, just beside the
horn that we have created. Let's create a little bit of darker region by
doing a little bit of sading with a little bit of hatching and using the hatching lines to do a little bit of sading just by decreasing the intensity of the
lines a little bit. The region near the horns will be a bit more
darker with more lines, and as we move away from it, I'll be decreasing its intensity
by adding fewer lines. For this region in between
both the eyebrows, a little bit of
sading with this low. Let's do the same thing
on this other side, starting with a little
bit of sading in here. So the region near the
horn will be quite darker, adding more lines in here, and as we move away from it, I'll be decreasing
the intensity. Doing the same thing
in here between the eyebrow and the
spiral pattern, a little bit of sading
to sew a little bit of shadows and a little bit
of darker region in here. Moving back to the
horns and doing another layer of hatching lines
to create a little bit of sading for this region in between the spiral pattern and the square seed that we
have created in the middle, a little bit of seeding and
a little bit of hatching. Primarily, what I'm doing I'm using hatching to do a
little bit of seeding. The region where I want to
sew a little bit more dark, I am adding more lines, and as we move away from it, I'm just decreasing the
number of lines that I'm adding thus reducing
its intensity. In here, just above its
eyebrow and between the horn, I had not added that
many lines since I am trying to make this region a bit lighter and
the other side, the left side is quite darker. So on that side, I
added more lines. Doing the same thing for a ski. A little bit of seeding on
the same regions that we did. So a little bit of hatching and seeding on the middle section, a little bit for the upper
part and a little bit for the lower section as well as doing the outlining
using this blue. If you want to make
it a bit more darker, you can do the cross-hatching. Now, let's do the colour for. So using this blue to
do the outlining first. Just beside its eye socket
and in between the ear, a little bit of blue to make
this rein bit more darker. Using this blue to redefine the outlines a little bit more, going over the eye socket
that we have created and making it quite more darker
and bit more bolder. Go over the outlines
with this blue, adding more lines to
make it bit more darker. I'll be adding more blues for the cheeks and the nose
a little bit later on. For now, let's do the
coloring for its eye. For the eye in here, I'm
starting with this pink color. If you don't have the pink
color, you can use the red. Apart from the pink
in here for its eye, I'll also be using
orange in the red. For the edges of the eye socket, I added more pink, and as we move away from it, I'm decreasing its intensity and making the lines
a bit more thinner, doing the same thing on the
side, the right eye socket. Making it a bit more
bold for the upper part. Yeah, with this, we are done
with the lower section. Now moving on to
the upper section. For this curve
region, I'm adding more lines to make
it bit more bolder, add more lines for
the curved section. And with this, we are
done with the pink. In here, I'm using black to
create the is for the eyes, creating this kind of
semicircular C for the eye, and I'll be completely
filling it with the black, filling the entire
section with the black. To make it a bit more darker, you can do a cross-hatching, doing the same thing
for this other eye. And, yeah, with this, we
are done with the eye. Using a little bit
of black to define the see the pattern that we
have created for the nose, using this black to do a little bit of outlining
as well as a little bit of sading Let's make the seep of the nose a little bit more distinct and bit more darker. For the white regions
that we have in between the different pattern I
have created in here, I'll be completely filling
in with the black. Simple hatching lines
and do a little bit of sading to make some of
the regions quite darker. Oh Now extending the black lines
for the entire nose, going over the outlines of the blue that we did
for the nose and making it a bit more darker
by adding black on top of it. The sides of the nostrils, adding a little
bit more lines on the left side to make
it quite darker. Now just Milots eye. I'll be adding a
little bit more lines. As we did for the
second project, adding lots of line
for the sides of the cheek on both
sides of the cheeks, I'll be doing a little
bit of sating like this. For the edges, I'll be adding more lines to make
it quite darker, and as we move away from it, I'll be decreasing the number of the lines, thus
reducing intensity. Doing the same thing in
here just beside the nose. As we move away from it, just decrease the intensity by decreasing the
number of the lines. Make the outline of the cheek
a little bit more distinct, doing the same thing in here, a little bit of sading
with the black. Cover the entire region
in here with the black. Let's do a little bit of more
seeding in here for some of the reasons to make
it a bit more darker. And with this, we are done
with most of the upper part. I'll be coming back later on with more blue
and the yellows. But for now, let's do the
coloring for its mouth. And here I'm using orange. On top of the orange, I'm
adding a little bit of red, adding the red in between
the blue and the orange. Go let's make it a
little bit more thicker, so adding a little
bit more red in here. Now for the fangs, I'll be using yellow, but
before doing that, I'm using black to
do the outlining, since earlier I used blue
to do the outlining. If I add yellow on top of it, it will become green,
so I don't want that. So using black to
do the outlining for the fangs and the teeth. A little bit of setting in here, just for the upper
part of the fangs. Now let's do the coloring for the remaining section
for the lower part, and then I'll be going in with
the yellow for the fangs. For the lower part of its mouth, in here, once again,
I'm using orange. For the middle section, I added a little bit of more orange. Now going with the red, adding the red on
top of the orange, adding this red a little bit
on top of the orange and Ava wet And with these, we are done with
the red four now. Going back once again
with the black to do the outlining for the teeth
that we have created. Instead of this kind
of teeth, if you want, you can create fangs
like teeth bit more triangular or canine teeth. Dividing it into more sections. Let's create the outline for the teeth for the
upper part too. Let's divide into
different sections. Make the edges of the
teeth a little bit curvier to make it
look more realistic. And if you want to add a
little bit more detailings, you can do a little bit of
hatching for the upper part of the teeth treat with small broken lines to do the hatching for
the upper section if you want to do that. Now for the inside of
the mouth, in here, I'm using brat pin to fill the entire section
with the black. Instead of using the black, you can also use the
red to do the coloring. In here, I'll
increase the speed to do the coloring for the
inside of the mouth. If you want to
have the same kind of texture as the
remaining section, you can use the black ballpoint
paint to do the coloring. And now we are done with the black for the
inside of the mouth, and I reduce the
speed to the normal. Now for the remaining
sections mouth, I'll be using a combination
of orange and the red. We'll be doing the same kind of hatching lines that we
did for the other part, the upper part with the blue, filling the entire
section with this orange. This is going to take
a little bit of time. Apart from this orange,
I'll also be using lots of rain now with the lower section, the jaw or the chin or the raymond mask that
we have created, filling the entire
region with this orange. So for this project, I named
it Stormborn Demon Mask. Or if you have given other
name to your project, let me know in the
comment section. And with this, we are
done with this side. Let's do the same thing
on the other side. A little bit of more
setting in here to make this region
bit more darker. And with this, we are
done with the orange. And on top of this, I'll
be going with the rain. Going with the rain, I'm not going to cover
the entire section, but most of the section with the orange will be
covered by this rain. Instead of using this red,
you can use pink, too, or you can just keep it simple as it is with a
simple orange color. As compared to the orange
current that we used earlier, I'll be decreasing the
number of the lines, thus reducing the intensity
of the red a little bit. And as you can see, just by overlaying this red
on top of the orange, it's looking a bit more
vibrant and a bit more darker. For the bottom region in here, I'll be getting this kind of
s for its chin or the jaw. This kind of bit curved seam. Make the lower region bit more darker by
adding more lines. Yeah, this kind
of simple curve C for the chin of this demon mass, doing the same thing on
the other side tube. And with this, we are done with a combination of the
orange and the red. Adding a little bit of
red for the lower part. Doing the same
thing on this side, too, a little bit of red. And for the crescent
moon like see that we have created for the
bottom part of the ear, a little bit of
red for the edges, adding the red on
this second ear, a little bit for
the upper part too. And with this, we are done with the red and the
orange combination. Now going back with
the yellow to feel the remaining section,
starting with the ear. Now moving on to the lower part, the crescent moon like
sep that we created, adding it for this one, too. Once again, creating this kind of crescent **** like scene. Adding the yellow on the
other side too, the eyes, adding a layer of yellow on top of the black that
we used earlier, doing the same
thing in here too. If you want, you can
cover the entire region of the white of the nose with a yellow.
I won't be doing it. Now in here, I'm going
with the blue to fill the remaining section
of the nose with the blue. For the middle region in here, the circular part, I'm adding
a little bit more blue. I'll be making this region
quite more darker by using more darker side of the blue and a little
bit of black later on. Now going with a darker
side of the blue, adding it just beside
the crescent moon like seed that we
created with a yellow. Using this to do the
outlining for the yellow see. Doing a little bit
of seeding and hatching for the lower
part of the nose, making this region, the
region in between the nose and above its mouth a little bit more
darker with this bloom. Make this side, the left side
a little bit more darker by adding more lines too so that this region a bit more and dark, the light is falling
from the right, so this region is quite dark. Doing a little bit
more sading with this. So overlaying a little
bit of blue on top of the black that we used
earlier for the sading, extending the blue a little bit towards the black
on the other side. With these, we are
done with the blue. Now, once again, going back
with the black for the eye. Doing the outlining for the
yellow that we used earlier. Finally, using yellow for the fangs that we have
created for the teeth. So adding the colour
in the same men that we used for the horns, adding it for the second fang that we have on the right side. And with this, we are done with the third project. I
hope you enjoyed this. I had a lot of fun
painting this one, and this is one of my
favorites from this class. And yeah, I'll be seeing
you in the next project.
11. Sunfire Inferno Mask: Welcome to the fourth project
Sunfire Inferno Mask. For this one, I'll be using breast paint
to do the coloring, and this is going to be the most vibrant and colorful
project of this class. And if you don't want
to use the breast pain, you can use the
colored wall wine pin or normal jail pins, or you can just
keep it simple and monochrome using only
black to do the coloring. So this is all optional. In here, I've
already started with the straight line for
the height of the mask, and I have divided into three
different equal section. And right now, I'm just creating the oval sea for
the seep of the mask. This mask is going
to be a little bit different from all the masks
we have created so far. We'll be creating flam
like appearance on both the sides of the mask as well as for the
bottom section too. It's going to be quite
fun and interesting, making this section, the upper
part a little bit curved. Let's do the rough
outlining for the eyebrows. In here, I have
created this kind of simple C for the eyebrow. So you can consider this to
be the S of an orange slice. And yeah, this is a
simple C for the eyebrow. You can make adjustment
to the S in the sizes. In here, in this middle section in between both the eyebrows, I'll be creating simple pattern. And as for the horn
for this demon mass, it will be a little
bit different. I'll be adding rings on
both sides of the horn. Five or six yellow
colored rings, and the horns will
be coming out of it. Sketching out the rough
guideline for the horn. So far, we have created somewhat similar kind of
horn if you want to make changes to the seam and the sizes of the horn
feel feed into that. Very simple outline
for the horns. And the polygonal seep
that we have just added beside the horns
on both the sides, we'll be converting it into rings later on when we'll
be doing the outlining. And here I'm creating
simple outline for the eye socket
for this mask. Now let's move on to
creating the nose. For this one, I'll be creating a bit smaller and broader nose. Instead of that, if you want,
you can create a bit larger and crooked nose
or pointed nose. In here, the sides of the nose are touching the eye socket, a bit more broader and a
bit more flafier nose. Now for the cheeks. In here, for the Demon mask, the
cheeks are quite smaller. By smaller, I mean, the
width of the cheeks are not that much as compared
to the earlier project. If you want to make it
a bit more broader, you can do that. For this one, I decided to
make the mouth quite larger. So this kind of bit
larger see for the mouth, creating the fangs
coming out of its mouth. So this is a little
bit bend fangs. Instead of this, if you want, you can create other kind of fangs and other kind of teeth. Extending the lower
part a little bit, I'll be creating multiple
rows of teeth for the inside. For the bottom section on
the lower part of the mouth, I won't be adding
any fangs or canine. If you want, you
can add large fangs or triangular fangs in here. Now, let's create
a rough outline for the film like appearance. So we'll be creating
this kind of mean lines mean like appearance on both the sides
as well as for the bottom. And just beside and
below the horn, a small portion of the
ear will be visible. Adding the ear on this side, if you want to make the ear
bit larger, you can do that. So this is the rough simple
sketch for the demons mask. I name this project
Sunfire Inferno Mask if you have any other ideas or suggestions or
if you have used other name for the painting
that you are creating, feel free to see her in
the discussion section. And let's do the outlining. Once again, in here, I'm using Tomo Bras paint to
do the outlining. I'll be doing the outlining, as well as adding
more details to it. And if required, I'll be making the changes to the pencil
skies that we did. You don't have to stick with the pencil skies that you did. Feel free to make changes and adjustment as
you see for it. For the section, which I'm
not that much confident, I'll be using somewhat
of broken lines or bit lighter princ to do the outlining
in those sections like in here for
the eyebrows I did. In here, the upper part of
the horns, as I mentioned, I'll be converting this
into set of rings. So we have got this kind of rings on both
sides of the horn. Now, let's go over the
outline for the horn. Doing the same thing in here, the other horn extending it a little bit to make
it a bit more broader, adding it just
beside the eyebrow. Now, let's do the
outlining for the eyes. For some of the sections,
I'll be creating somewhat of dynamic lines by wearing the
thickness of the line. The section where I want
to draw that tension or to make that section a bit more bolder or a
bit more darker, I'll be adding more lines to make it a bit more prominent. Going over the
outlines for the nose. A little bit of this kind of parallel lines to sew
wrinkles present in the middle of the eyes in
between both the eyebrows. This is going to be
our simple nose. I'll be adding a few
more lines later on. But for now, simple
nose like this. If you want to add designs
or pattern, you can do that. Let's do the outlining for the fangs that we have in here. If you want to make cleanness, you can still do it going over
the outline for the mouth. Outlining the second fang. Now for the remaining section
of the nose and the mouth, are we trying to create a bit
clear distinction by making this line a bit more broader and a bit more
thicker later on. Making the mouth a little bit more curvier the
upper part of it. Simple outline for the mouth
of this inferno demon mask. Now for the insides
of the mouth, I'll be adding lots of tea, and instead of creating
all the teeth together, I'll be leaving a little
bit of space in between. I'm creating this kind of simple square like C for the teeth. Instead of this, if
you want to make it a little bit
more interesting, you can create canine like teeth or triangular
C for the teeth. The bottom section of its mouth, the large lip in here. And now let's do the
outlining for the cheeks. So this is a simple
sketch for the face now. Moving on to doing the
outlining for the ear, creating this kind
of pointed ear. Moving onto the left side, doing the same thing,
a bit of pointed ear. With these, we are done with a very simple outlining for most of the section
of the piece. Now we'll be adding more
lines to add more details and also making the sum of the lines a bit more thinker and
a bit more bolder. In here, for the middle section, I forgot to do the outlining, put the pattern on the design. Simple pattern like this. Now let's make the
eyes a bit more deal. Creating this kind of
bit more thicker lines. Adding small circular dot
for the eyes on top of this. Beside this, I'll
be adding yellows and another outline with
the black later on. Making the nose a little
bit more thicker. Doing the same thing
for the cheeks, making the outlines
a bit more thicker. The upper part of
the mouth a bit more thicker, adding more lines, doing the same thing for
this section in here, making it quite
thicker by adding more lines and giving it
a little bit more volume. For the fangs and the horns, I'll be doing a little
bit of hatching lines, a bit of broken
hatching lines to add a little bit
of texture to it. But in here, I just
did a little bit more outlining to make
it bit more darker. Adding the kind of
bit broken lines following the curved
sweep of the eye. Making some of the
section of the mouth a little bit more bolder
and a bit more darker. In here, I'll be using
combinations of blue, red and orange to do the
coloring for the face. For the horns, I'll be using occur for the rings,
I'll be using yellow. For the insides of the mouth, I'll be going with the black. And as I was mentioning, using
a little bit of hatching, broken lines to add a little bit of texture for the fangs, and doing the same thing
for the horns in here, a bit of broken lines following the court sip of the horn
that we have created. If you want to make it a
little bit more darker, you can also use a little bit
of cross-hatching to do it. Yeah, with this, we are done with both the horns
and the fins. If you want to add
a little bit of texture for each
individual teeth, you can do that, adding two more designs like this
for the pattern in here. For the eyebrows, adding a little bit more texture in the form of this
kind of broken line. Now I'll only be making some of the section a little bit more bolder and a
bit more darker. So just follow along with me. And if you want to make
changes adjustment or add other aliments or
accessories, you can do that. Let's slightly erase
the pencil marks. So as I was mentioning,
mostly I'll be using orange and red color for
the coloring for the face. For the mouth, I'll be using a combination of red,
blues and the orange. For the flame like mean, I'll be using yellows and the orange. Let's do the
coloring. So in here, I'm using bras pin
starting with the top. So carefully filling this orange in between the empty
spaces in here. Instead of this breast
pain, if you want, you can use watercolor gauze, sketch pin, acrylic
colored pencil, or whatever supply you have, or you can just keep
it simple as it is and use only the black
paint to do the stippling, hatching and create a
little bit of texture. Here fully filling
it just beside the rings that we have
created on both the sides. Now moving on to the nose. What I'll be doing in
here is filling the nose, both the sides of the cheeks and the ears with this orange. And then later on, I'll
be going with the red to add a little bit of more
coloring to it on the sides. Adding the coloring
for the ears. Completely filling the
insides of the ear. Insert that the ink
that you are using. The ink pin or the breast pin that you are using
is waterproof. Otherwise, the two colors
might merge later on, or the colors might get merged. Feel the insights for the nose. Completely filling the
insides with this orange. With this, we are done
with the upper part. For the lower part, now,
let's do the same thing, filling the insides of this outline section
in here for its mound. For the upper part,
I'll be using the blue. And with this, we are
done with the orange for now for the rings in
here, I'm using yellow. So completely filling
sides with it. Now using yellow to
create the main. In here, I'm not starting
with the outline, starting with a yellow
colored breast pain to create this kind of man. So flame like appearance
for both the sides, as well as I'll
also be using this for the bottom
section of its mouth, just below its chain to create
this kind of flame like appearance or you can
see lines like man. And apart from this, I'll also be using a
little bit of orange. And finally, I'll be using the
black to do the outlining. In this way, I'll be able to create somewhat of
organic feel to this flame like appearance that we are creating
on the sides. Instead of this, if you
are not comfortable, you can start with outlining first and then feel
the color insides. But with directly using the color to do the
coloring in here, you will get a little
bit more freedom and you can create
the flame like appearance and the man in any way or any
direction you feel. For the bottom section in here, I'm making the flames a little bit more rounder
and a bit more curvier. Instead of it, if you want,
you can make it a bit more pointed and bit more edgy
like the other two sides. And yeah, with this, we
are done with the yellow. Now for the ebbs in here,
I'm using the green. So using the lighter side of the green to do the coloring, apart from it, I'll also be using a bit darker
side of the green. So with these we are done with a green for
both the eyebrows. Going with darker
side of the green, since the light
green that we used earlier has not
dried up properly, so the two colors will mix a little bit and create
somewhat of gradient. And you can also see a little
bit of the green that is visible since I did not cover the entire section
with a dark green. Going in with the orange to add a little bit of more
retailing for the rings, just alongside the
outline section adding a little bit of orange. Instead of this, if you
want to you can also use ochre and moving
on to the flames, the main like appearance
that we created, adding this orange
particularly on one side. Instead of doing that,
you can also add the orange in the middle
or the other way, you can use the orange
to do the outlining. In here for the bottom section, I'm adding the orange for
the middle section of this film like appearance that we have created
for our mask. Adding the orange
on the other side. The same thing that we
did on the left side. Instead of using the orange, you can use red or ocher or any other lighter
seed of the color, adding it particularly
on the one side. And yeah, with these, we
are done with the orange. In here, I'm going with the red. So I'll be adding the red, particularly on the
outline section, a little bit beside and
above it like this to create a little bit of siding and to make it a little bit more
vibrant and interesting. Adding it particularly near
the outline section in here, just above the eyebrows, a little bit beside the
rings or the nose in here, just beside the outline
section to make them a little bit more
clear, a bit more distinct. Side of the cheek
it a little bit away from the outline section. For the bottom section, a little bit around
the curved section. And in here, extending the red a little bit
for the cheek in here. And yeah, with this, we are done with the red. Now for the eyes in here, I'm using a little bit of ocher, the outline that we in overlaying a little
bit of ocher in here beside the black
iris that we created, encircling it with this
ochre for the fangs, a little bit of ochre for both the fangs as well as for
the teeth we have created. Adding a little bit of
coker for the bottom teeth. And now let's feel the insides. So filling the inside of
the mouth with the black. Instead of using the black, you can use the red, and that will make it a
little bit more terrifying. Feel free to use other
colour, too, if you want. Or you can keep it simple as
it is white colored mouth. And with this we are done
with the inside of the mouth. Adding a little bit of
red for the outline of the eyes in here,
create bit smaller. Us the stroke to do
the outlining in here. Using the red to do
the outlining on one side just beside
the nose for the eyes. Now for the mouth. Mostly,
I'll be using the blues, but in here I added a little bit of red just below the teeth. In here, I'm going with the
darker side of the blue. So filling the outline section for the mouth with this blue. Instead of this, you
can use other colors. You can use orange,
you can use red. You can also use green.
Carefully adding the colour, we don't want the blue to mix with the orange
or the yellows. Now, let's do the coloring
for the upper part. With these, we are done with
the blue for the mouth. Now for the horns in here, using the same color the con
that we used for the fangs, not covering the entire section, just a little bit over hatching lines that we did earlier. Instead of this,
you can also use the grid to do the coloring. And with this, we are done with the horn and the
franks and the teeth. Going back with the breast pin, you do the outlining for the
claims that we have created. Simple outlining,
and I'll be doing the outlining for all the mains and the flames that
we have created. Since this is going to
be a repetitive process and will take a little
bit of time in here, I have increased the
speed a little bit. If you want to follow
along with me, you can just reduce the speed or you can just pause the video. Instead of using black to do the outlining, you
can also use red. That will be interesting too. Put some of the
section, if you want to draw a little bit more atencion, you can make the outline of that section a bit more darker. For the inside, the
middle section of the flames in here, for
the bottom section, adding a little bit of broken lines for the middle section, moving on to the other
side, doing the same thing. And as you can see, I'm making the lines a little bit more curvier to add a little bit
more organic touch to it. And yeah, with these, we are done with the outlining, adding a little bit
more detail for the inside of the face.
Small lines like this. Put the center in here, using the blue colour
to do the coloring. And with this, we are done
with this fourth project. I hope you enjoyed
this. This was very fun to paint the
Sunfire Inferno Mask. And yeah, I'll be seeing in the next project,
the fifth one.
12. Silent Fang Guardian Mask: Welcome to the fifth
project, Silent fine Gargan. The next two project this
fifth and the sixth one, I'll only be creating
the simple outline for the mask and you
have got the option, you can do the
coloring on your own. In here, I've
already started with the straight line
for the length of the mask and now let's divide
into three equal section. Somewhat of equal section. If you want to extend
it a little bit to make it a bit more
larger, you can do that. Now creating a little bit of ovals for the fees of the mask. For this mask, I'll be creating
the largest fang of all, also the largest ear. I'll also be adding
the accessories in the form of earring
for the ears. And apart from that,
I'll also be adding a little bit of more detailing for its head and the eyebrows. The eyebrows will be somewhat similar to the fifth
project that we did. In here, I made
the lower portion of its mask a
little bit smaller, but later on, I'll be
extending it a little bit. I just made it like
this if you want to add just the length of
the middle section, you can do that. Now, let's create the horns, a bit large and a bit more
curfer horns for this. Instead of this, if you want you can create other kind of horns, you can create broken horns
or instead of two horns, you can also create
one horn that I showed you in the practice. As I mentioned
earlier, I'll only be doing the outlining
after the pencil sketch. I won't be adding
texture or detailing or neither are we doing any
hatching or cross searching. So these two projects depends upon you how you're going to do the coloring or
you can just skip it simple paint and
ink illustration. Moving on to doing the
outlining for the eyebrows, the scene, curtsy for the eyebrows that we
have created so far. The eyebrows will be somewhat
similar to the last project that we did a little bit of
bossier eyebrow in here. For the upper part of its head, I'll be creating a little
bit of simple designs, creating a little
bit of this kind of design for the middle
section in between both the eyebrows and
I'll mix running it to its head to create
simple design later on. For now, let's do a rough
outlining for the eye socket. The same kind of eye socket
that we have created so far. I'll only be making a little bit of changes and adjustment to it, but it will remain
somewhat similar to all the eyes that we
have created so far. If you want to make
it a little bit more different, you can do that. Extending this middle
portion a little bit. And yeah, now we'll be
creating simple nose. In here, I'll be
creating a bit more broader and a bit
more grotesque nose. In here, I have shifted the second knife a little bit above. And now let's create the nose. As I mentioned,
this is going to be a little bit more broader
a bit more grotesque. If you want to make changes
and addin you can do that. I'll also be making the nose, touching both the eye
sockets on both the sides, making the nostrils a
little bit more larger. Now creating the
sides of the nose, touching the eye sockets. And with this we are done
with a grotesque nose. Now for the cheek. In here, since the nose is
quite broader and it's somewhat more
closer to the eyes, so the checks won't
be that much bigger. So creating this kind of simple
outlining for the cheeks, a little bit fluffier on the sides and a
bit more curvier, doing the same thing
on the side too. If you want to make
the cheeks a bit more broader and a
bit more larger, you will have to just adjust
the nose a little bit. H. Let's do the
outlining for the mouth. So the mouth will be a
little bit different from the other mouth
we have created. Instead of it, if
you want to keep it similar, you can do that. You can just create simple
C for the mouth and then add the fangs and
the teeth inside it. Now, let's do the
insights for the mouth. The curve rough see for
the mouth and inside it, I'll be adding two large
large and curvy fangs. If you are going
to color it using the colored ballpoint paint or sketch paint or you can
use watercolor or gloss, please see your project
in the project section. I won't be extending the piece in here since it's not required. If you want to add the bead or the mostest you can do that. I won't be doing it. So this will be the simple chin or
the jaw line for this mask. Now let's create the ear. As I mentioned, I'll be
creating a bit large ear. It will be extending
up to its chin. Instead of this, if
you want to make the ears bit smaller,
you can do that. But in here, as I mentioned, I'll be creating a large ear. I'll also be adding
lots of earrings. My lots, I mean, four or
five. This will be our ear. The lower part, the lobe of
the ear will be like this. Try to create somewhat of
symmetrical ear on both sides. In here, it became a
little bit more broader, so I'll be making
adjustment when I'll be doing the outlining
with the breast pain. And yeah, we are done with the rough outlining
for the ears, adding the eyeballs
for the signs, and as was masonin extending this to
create a simple design, simple pattern or design
for the forehead. Creating very large fangs, large and curvy
fans for this mask. Instead of this, if you want you can create smaller fangs. But as mentioned in the name, this is silent fang Garcin mask, it has to have large
fangs like this. Here's another set
of small fangs. For the bottom section, for the bottom part of
the teeth in here, we also have two
fangs like this. And for the remaining section, we have got the small
teeth like this. Here, too if you
want, you can make it a little bit pointed by creating it in
triangular C. And yeah, with this, we are done
with a rough outlining. I'll be adding more details when I'll be doing
the outlining. Let's do the outline. In here, I'm using Tombos breast
paint to do the outlining. Instead of this, you can use the sakura micron, fine liner, or you can use the
other supplies that you have or whatever you
feel comfortable with, starting with the hot
to do the outlining. To make it a little
bit more interesting, you can create the organic line just by wearing the thickness
of some of the lines. But mostly in here,
I'll be creating the simple lines to
do the outlining. You have the choice
to do the coloring in any way or any
fasten you prefer. Doing the outlining
for its eyebrows. For the upper part
of the eyebrows, I'll be trying to
create a little bit of bushier texture by doing a little bit of
hatching using small lines. Instead of this, if you want, you can treat other kind of appearance or other
outlines for the eyebrows. The simple pattern
or the design. I'll be adding a little
bit of texture in form of simple curved lines for the upper part
of its forehead. I'm creating a little bit more distinction in
between the horns, its forehead and the
remaining section. If you want, you can
add the rings here. The texture I was talking
about a little bit of more curved lines in here for the upper
part of its forehead. If you want, you can also create lots of wrinkles
for the upper part. You can also add
a single horn in the middle or you can add
a thou dye in the middle. That will be interesting.
Simple pattern or design like this in the
middle. This is optimal. If you don't want, you
don't have to do this. A as we are done with the
upper part, the forehead. Now let's do the
outline for the eyes. In here, I'm just going over the outlines that I have created. I'll also be adding a little
bit of more detailings. I'll be making some
of the section and a little bit more darker. Sides of the eye
sockets in here, making it quite darker. I'll also be extending
it a little bit, extending it on both the sides. Now let's create the eyeballs. You don't have plastic with outlines that you have created, feel free to make changes in adjustment to the pencils
that you have created, creating the iris
surrounding the pupil. Adding another lines in
here for both the sides. Now for the middle
section in here, a little bit of lines to sew
some wrinkles in the middle. Now, let's do the outlining
for our nose. A bit more. Dot a bit more fluffier
nose that we have created. If you want to make it a bit thinner or a bit
smaller, you can do it. But in here, I'll
be sticking with the outlines that I
created for the nose. Now, moving on to the chicks. We have got bit smaller
chicks in here. And instead of making this
little bit curvier like this, if you want to keep
it plain and simple, you can just extend it following the seep of the following the earlier soap that we created for the oval seep, p the mask. Adding a little bit of
detailing like this beside the eye socket and a little bit of lines like this on both the sides of the
curvier part of the chicks. Making the nostrils
a little bit darker by adding it by adding
the black inside it. And yeah, with this, we are done with the nose
and the upper part. If you want to add more
detailings, you can do it. Doing the outlining for the
fangs that we have created, large and curved fangs. If you want to make it
smaller, you can do it. Also, if you want
you can make the fangs a little bit straighter, or you can make the fangs like the dracula stee that
will be interesting too. For that, you'll have to
create large canines. Going over the outlines
for the mouth, the insides of the mouth, here we have created this bit curvier lines for the insides. Now for the other side, the upper part of the mouth, let's do the outlining
for its first and then we'll be adding the
remaining teeth and the fangs for the insides. Here, too, if you want to add a little bit more detailing, you can divide it
into more sections. You can also add large lips or if you want to
experiment a little bit, you can also add large
grotesque tongue coming out from its mouth, adding the fangs inside
its mouth and small tees. Doing the same thing in here, starting with the fangs and now three small
tips in the middle. Going over the outline
for it or the jaw. And with this, we are done with our main features for its feet. Let's do the outlining for its ears and
adding that teals. So for this sign,
the upper part, I'll be adding two earrings
on both the sides. Simple earring like this in
here for the bottom section. Adding more rings for the upper
side as I was mentioning. In here, I've just
created simple earring. Instead of it, if
you want, you can create more details earrings, doing the same thing
for the second ear, going over the outlines. And in here, if you
want, you can add the earrings for
the bottom section. I won't be doing it, but if
you want, you can do that. For this upper section, I'll
be adding two earrings, just like wedded
for the other ear, the ear on the left. Now let's add a little bit
of detailing for the inside. I won't be adding
my nude details, just simple plain lines like this for the detail
for the ears, adding it on the side too. Let's add one more line to
make it bit more detail. With these, we are done with a simple outlining for the mask. I decided to add the coloring for the insides of the eyes, leaving a little bit of white
piece for the highlight. If you want, you can also add the blacks for the
insides of the mouth, or you can use the
red for the inside. And with this, we are done
with a simple outlining for this Silent
Fang Guardian Mask. If you want to add more details, if you want to add more texture or pattern or design,
you can do that. But I'm satisfied with
it, how it turned out. So if you're going to colour it using any materials
that you have, feel free to see the project
in the project section. Now, insure that
the color has dried up the ink that you have
used to the ballpoint pen, and then lightly erase
the pencil marks. I hope you enjoyed this
Silent Fang Guardian Mask, and I'll be seeing you
in the next project with another simple sketch.
13. Laughing Demon Mask: Welcome to the sixth project,
Laughing Demon Mask. For this project
too, I'll only be doing the sketching
and outlining. You can colour it in
any way as you see fit. In here, I've
already started with a simple straight line to determine the
length for the mask. So this will be somewhat
of medium size. Let's divide into
three equal sections. For this one, I decided
to make it a little bit more broader compared
to the other projects. So we'll have
somewhat same ratio for the length and the width. Let's do the outlining for it. So somewhat of ovals for
the face of this mask. You can always experiment with the length and the
width of the mask. To make it a bit more longer, you can just make the two horizontal lines
that we are adding, you can just keep it somewhat close to each other for
the middle section. In that way you can
make it a bit larger. And to make it a
little bit broader, just increase the length
of the horizontal line. For this one, I'll be giving
you two examples in which you can create multiple
horns for this one. In here, I decided to
make the four header a little bit like this, a bit of a square like s, and I'll be giving
you two example of creating different
kind of horn. So in this pencil sketch, I'll be adding four horns, but for the outlining with a
fine liner or the breastban, I'll be only doing the
outlining for the two horns. So this is the first
set of the horn, a bit long and bit
more curvier horn. So for any of the
project till now, we have not created
any horns like this. So if you want to
proceed with this, you can create the
horns in this manner. Bit long and bit more
curvier horn like this. And apart from this, I'll also be showing you one another set of horn that
I'll be adding in middle, not middle, just a little
bit just beside the center. So here's another set of small
horns that is coming from the forehend. So
it's your choice. If you want, you can keep both sets of the horns
and do the coloring, or you can just keep one, the larger horns or
the smaller one. Now in here, if you want, you
can create hairs like this. So we have got
partisan in the middle and a little bit of hair will
present on both the sides. This is optimal. If you don't want, you don't have to do this. And you can always increase or decrease the width of
the horns in here, as you can see, I decrease
the width a little bit. Let's do the outlining
for the eyebrows, eyes, nose, and the mouth. In here, I decided to make the
eyebrows a little bit more defined and a little
bit more curvier. So let's create the outlines. I'm using the here
line as a reference and just using it to create
the outline for the eyebrows. Same kind of eye socket that
we have created so far, simple oval saps for
the eye sockets. Now, adding a little bit more detailing for the eye socket. Adding the nose just above the intersecting lines in here. So this is somewhat of
medium size for the nose. If you want, you can make it
a bit more broader or a bit more smaller or you can also
elongate it a little bit. Now for the mouth, for this one, I decided to extend both the sides of the
mouth to the eye socket. For our earlier project, I extended the nose to the eyes, but in here, I decided
to extend the mouth. If you want, you can
do either of those, you can extend the nose or you can extend the mouth
or you can just simply create cheeks
like we have created so far for all the projects,
adding the fangs. So for this, I decided to
create two sets of fang, larger fang on both the upper and the lower
part of the mouth. And for the insides, I'll be creating
simple smaller teeth. You can always
create large canine or triangular seeps
for the teeth. In here, I did not extend
it the lower portion. If you want, you can elongate
it a little bit and add beads and moustache
and other facial sir. So I created this kind of
see for the jaw or the chin. Now let's add a little
bit more detail for the facial feature. The region just below the horn, as well as adding the cheeks. So cervea checks like this. Now, connecting the
cheeks to the jaw. This is a simple outlining
for the fecal feature. I'll be adding the
ears later on. This is optional,
but if you want to create this kind of earring, for the last project, I'll be creating this kind of earning. And now let's do the
outlining for the ear. I won't be doing the outlining for the earrings like this. But I'll be adding one
earring for the left ear. Creating simple
seep for the ear. Try to make the seep of the ear symmetrical
for both the sides. And yeah, with
this, we have done with a simple outlining
for the ears, adding that teeth
inside the mouth. Adding it in here, too, now
adding the pupils and ri. I'll also be adding a little
bit more detailing when I'll be doing the outlining
for the insides of the eyes, a little bit for the
nose and a mouth. And as I was mentioning,
I'll be creating this kind of simple pattern or
design for the eyebrow, a little bit of detailing
for the insides of the ear. And let's add one more line for the ear on both the sides. And yeah, with these, we are done with a
simple sketching. Let's do the outlining. In here for this one, I am using the sakura micron fine liner. This is 0.5 millimeter
thick. Let's do the outline. For this, I decided to do the outlining for these
two horns in the middle. If you want, you can do the outlining for
the larger horns or you can do the outlining
for all the four horns. Like the earlier
one, I'll only be doing the outlining as
well as making some of the section a little bit more darker and a little bit
of texture if required. Otherwise, I won't be
doing any hatching or cross-hatching or creating
texture or pattern. For the regions that
you are not that confident or you are going to
create pattern or texture, you can just create this
kind of bit broken lines. And later on when you'll
be doing the coloring, you can just do the
uniform outlining. As I mentioned, if you want,
you can do the outlining for the other horn that we have
created. I won't be doing it. And also for the here
that I have created, I won't be doing the outlining. If you want, you can do the
outlining for the here too. In here, I'm doing the
outlining for the eyebrow. And instead of this kind of wavy pattern and design that
I have created in here, if you want, you
can create other kind of pattern or design. I'm creating this kind of simple designing for the eyebrows. If you want you can create
the Bussier eyebrow like we did for the
earlier projects, doing the outlining
for the second one. You don't have to
stick with the pencil outlining that you have created. You can make adjustment and
changes as you see fit. I'll also be adding this kind of crescent boon like seep on
both the sides of the eyebrow. Simple seep like
this. Now, let's do the outlining for
the remaining section. Doing the outlining
for the eyes. On both the sides of this oval eye socket that we have created, I'll be adding two
more lines like this, adding it on this side, too, and now adding
it just beside here. For the middle section in
here in between the two eyes, I'll be creating simple design. Later on, I'll be
doing it. But for now, let's do the outlining in here. Let's do the outlining
for the nose. You can change the seep
in the sizes of the nose, adding a little bit of
black for the nostrils. Extending the lines
in here a little bit. For some of the section,
as I mentioned, I'll be making it a little
bit more bolder than darker. So I'll be adding this kind
of thicker lines pecly near the outline region as
well as near the eyebrows, a little bit for the eyes, a little bit for the cheeks, and a lot for the ears. Moving on to knowing the
outline for the mouth. Et's do the outlining
for the fangs first, and then we'll be
doing the outlining for the remaining
section of the mouth. For the insides of the mouth, I'll be completely
filling into the black. Instead of the black,
you can use red, too. Moving on to the lower section. Now for the insides. We have got two
more fangs in here. Instead for the simple teeth, you can create this
kind of smaller fangs for the insides of the mouth, or you can just follow
along with me and create this kind of
simple, small teeth. And yeah, with these we are done for the insides
of the mouth, the teeth, the fangs,
and the outlining. Let's do the outlining for
the cheeks on both the sides, making it a little bit
more curvier on this side. Moving on to the
remaining section, the chin and the jaw line. And with this, we are done
with the outlining for the feas Instead of
using the fine liner, if you will be using
rust pin or sketch pin, the process will become
a little bit more easier to make this kind of bit thicker and
bit broader lines. Now I'll be adding this kind of thicker and molder lines for some of the regions to make it a little bit more highlighted. Adding it on both the
sides of the mouth. Now filling the insides with the black doing the
same thing in here. Instead of filling
it with the black, you can use other colour to
do the coloring later on. Now for the ice, filling it
completely with the black, leaving a little bit of white
spese for the highlight. Completely filling
it with the black, leaving a little bit of white. Making the other sides a
little bit more darker. Before that, I decided
to do a little bit of designing for this
middle section in between both the eyes. Simple pattern like
this. This is optional. If you don't want, you can
just keep it simple as it is. And yeah, I won't be adding
more detailings for the nose. Extending the lines from the nose a little
bit for the cheeks. Now moving on to this
lower part in here, adding this kind of simple
lines on both the sides and and feeling the insides with the black, adding
it in here too. Now, for the lines that
we created earlier, completely filling in with
the black on both sides. You can clearly see in here just by wearing the
line thickness, the mask looks a little bit more lively and a little
bit more defined. For the horns in here, doing a little bit of hatching. For the insides of the horn, I'll be adding a little bit of taxon in the form
of hatching lines. This is optimal. If you
don't want to do this, you can just keep
it simple as it is. But in here, I decided to do a little bit of simple hatching. I'll also be making the outlines of the horns a little bit more distinct by going over the outlines and making
it a little bit darker. I also decided to
create this kind of simple design on both the
sides of its forehead. Now, let's do the
outlining for the ears. For most of the
section of the ear, I'll be trying to
create a little bit of more bolder lines,
bolder outlines. For one of the
ear, the left ear, I'll also be adding
a single earring. Now for the insides,
the outlines wedded, I'll be making it a little bit more bolder and a
bit more darker. The three lines, the three curved lines
that we have created. Now let's do the same thing for the remaining two curved lines that we have for the
insides of the ear. The third and the final curved
line that we have in here, making it a little
bit more bolden and a bit more darker on the
upper and the lower part. Adding the earring in here. Simple circular earring. If you want you can also add the earring on the other ear, I decided to make this region
a little bit more darker, so a little bit more black in
here, just below its chin. And with this, we are
done with this section. Now, I decided to add a little bit more
texture for the fangs, so simple hatching lines for all the four fangs
that we have created. You can also add lines
for the smaller teeth. And with this, we are
done with the fangs. Let's slightly erase it, and I'll be adding a little bit more detail for some
of the regions. Or if you're satisfied with
it, how it turned out, you can just keep
it as it is and do the coloring or adding
more details on your own. Insure that the ink
has dried up and then do the erasing to avoid
the smudging of the ink. Now, let's feel the insights of
the mouth with them black. In here, I'm increased the speed since this is going to
take a little bit of time. And yeah, let's completely feel the insights
with this black. Instead of this black,
you can also use red. Now, these are the additional
detailing that I'm doing. If you don't want, you can
just keep it as it is. I'll be making some of the sets a little bit more darker,
a bit more bolder. You can just follow
along with me or you can just
keep it as it is. And as I was mentioning, let's make the horns a
little bit more darker. This going over the outlines to make it a bit more distinct. Doing the same thing for
this side, the second horn. Doing the outlining for the
lower portion of the horn. And in here in between
the two eyebrows, I decided to create this kind
of simple wheel like sea. Let's make it a little
bit more darker. Extending this a little bit. Making this lower section
a little bit more dark. Now for the outline some
of the regions of the ear, I'll be creating this kind of dynamic line just by wearing
the thickness a little bit. For some of the sections, I'll be making it quite
darker for the others. Only a single or simple
plain line will do the work doing exactly
the same thing that we did for the
left ear in here, for the right ear, making some of the section of
the lines bit bolder, adding it in here
to the left ear. If you want, you can
also make the outline of the cheeks a little bit more
bolder and a bit darker. I decided to make
the lower section of the mouth a little
bit more darker. And with this, we are done
with the sixth project. I'll be seeing you
in the next project.
14. Celestial Spirit Mask: Welcome to the seventh
and the final project, Celestial Spirit Mask. Let's start with
the vertical line for the length of the mask. For this one, I'll be
using multiple supplies. I'll be using black ink. I'll also be using
colored wallpoint pin, and apart from that, I'll
also be using a few gel pens. So this is going to be
multi colored project. You can use whatever
supplies you have. You can convert it into
monochrome by only using black. And if you don't have many
colored wallpoint paint, you can only use
the normal blue, black and red colour
to do the coloring. So far, we have divided
this particle line into three separate sections, and now let's create the oval
C for the C for the mask. For this one, I'll be creating a little bit of different
kind of earring. Here if you want to experiment, you can change the
ratio of the length to the width and
create other kind of mask mask with more width or more length
as you see fit. Now, in here, I'll be
creating the horns. Let's do a rough
outlining for the horns. So far, we have only created
the horns on the sides. In here, if you can create
the horn in the middle too. So a total of three horns. If you want to add
one in the middle. Simple curved horn like this. Here, if you want, you can add the rings like we did
for the third project. For this one, I'll be creating a
little bit of patterns and design for the forehead, and for the eyes, I'll be
using reds and the black. For the checks, I'll be
using multiple colors. I'll be using red,
greens and the blues, and for the mouth, I'll be using combinations
of reds and the blue. For the nose, a combination of a little bit
of black and red. But I mean to say that you don't need that many colored paint. You only need simple
paints like blue, black, red and green that
are easily available. Like earlier project in here, I have created the eyebrows and this kind of oval
s for the eyes. If you want to make changes and adjustment to the Cp of
the eyes or the eyebrow, you can do that you can create
or you can create any kind of pattern or designs for the eyebrows and
for the eyes, too. Now let's create the nose. For this one, I decided to make the nose a
little bit decent. But if you want, you can make
the nouns bit grotesque, a bit more fluffier,
a bit broader, a bit smaller, bit crooked. So you have got lots of
options to choose from. You can just follow
along with me and create this kind of simpler
nose for this mask. Now let's create the rough
outlining for the mouth. In here, I'll have to extend the lower section a little
bit to accompany the mouth. So before treating the
remaining section of the mouth, I decided to do a little bit
of outlining for the ears. Here, I'll be creating a
little bit larger ear. Larger ear like this. Try to create the ears a little bit more symmetrical to each other. In here, I'll be
creating a little bit of different kind of earring. If you want, you can create
simple circular earrings. For the eyes, I'll be
using multiple colors. In here, I'll be using red, and I'll be dividing the checks into three different sections. Just follow along with me
and create this kind of bit crescenc for the remaining
section of its cheeks. Now, let's do the remaining
section for its mouth. So as I mentioned,
we'll have to extend the lower porton a little
bit to accompany its mouth. Till here, I'll be adding
the mouth and I'll be creating this kind of
simple seep for the mouth. Instead of this kind of sp, you can create any
other kind of see. You don't have pustic with the outline that I'm
creating in here, feel free to make changes in
adjustment as you see fit. Now extending the face
to accompany its mouth. So I'll be making it
a little bit larger, following the curd shape of the mouth and creating
the jaw like this. Here, if you want,
you can create beard like this at the bottom. And yeah, this is the rough
outlining for our mask. Now let's add a little bit of detailing, starting
with the fang. For this one, I decided to
go with the smaller fangs, adding a little bit of
smaller fangs in here too. For the center of the
ear, I'll be adding small threads coming out
from its ear like this, at the earrings like this. So I'll be using red to do the coloring in here.
This is option. If you don't want
to do this, you can just keep it simple. And yeah, we are done with a simple outlining for our mask. Let's do the outline. In here, I'm using the Tombosprs paint to do the outlining. Instead of starting with that ras pine to
do the outlining, you can simply start with
the ballpoint paints or the colored paint
to do the coloring, or you can just follow along with me and
do the outlining. In here, for this project, I have increased the
speed a little bit. So if you want to
follow along with me, you can pause the video or you
can just reduce the speed. Outlining the eyebrows
and the eyes. Now let's do the
outlining for the nose, a little bit of black for
the insights of the nose, creating this kind of
currency for the nose, and I'll be creating
this kind of simple design for the nose. I'll be using a combination
of red and the black for the insides now for its mouth. So it will be divided into two or three different
sections For the upper part, I'll be using wills
and for the remaining, I'll be using red, doing
the outlining for its ear. In here for the middle section, I'll be adding red to create small thread coming out of it. Let's do the same thing
for the second ear. Leaving a little bit of
space for the earrings, now, going over the outline for the cheek and dividing
into different sections. This will be the
part of the eye, so I'll be adding red
later on in here. And for the cheek, I'll be using a combinations of
green, red, and glue. For the mouth, adding
another layer. For this layer,
I'll be using red. Now going over the
remaining section for the mouth and
doing the outlining, adding more layers in here. Let's do the outlining
for the fangs. Small fangs like this, creating small teeth inside the mouth. If you want to extend
the side of the fangs, you can do that. For the insides, I'll be going in with the
black later on. Now moving on to the earrings, creating this kind
of simple see, simple rectangular
sep for the earrings, adding the eyes for the eyes I'll be using
both blacks and the reds. In here, I'll be
creating this kind of wet curve and using by
using hatching lines. And yeah. With this, we are done with a
simple outlining. Instead that the ink has dried
up and lightly erase it. Now let's do the coloring. In here, I'm using gray color. This is optional.
So I went to sew a little bit of white and green underneath the coloring that
we'll be doing later on. So I'll be creating this kind of simple pattern and design. You can consider it to be a
primary layer on top of it. We'll be adding more layers with the different
colored paints. And yeah, I'm creating this kind of bit simpler
pattern and designs. If you don't have, you
don't have to do this, or if you want to
follow along with me, you can also use the pencil
to do a little bit of setting and then proceed with the colored paint
to do the coloring. Adding a little bit for
the insides of the eye, a little bit in here too, a little bit for the lower
section of the cheek. So mostly, I'll be adding it
just beside the outlines. The regions where I want to sew a little bit of green underneath
the layers of the color, and for most of
the sexon I'll be leaving it as it is the
white color of the people. I won't be covering the entire section with the colored ink, so some of the whites and
the greens will be visible. That's why I'm using
the grey in here. Adding a little bit in here
for the beard section. Let's add a little bit for
the upper part of the horns. In here, I decide
to make this region a little bit more uniform, so extending the
colors a little bit. And yeah, with this,
we are done with the gray now going in
with the blacking. So in here, I'm
using the bras pin. So this is Ziurataki's bras pin, and I'll be adding the blacks
for most of the regions, and I'll be creating simple patterns and designs using this. So simple pattern like
this using this black ink. In here, you can
see the visibility of both grey and
white a little bit. So that's what I
was aiming for with the grey and the
white of the paper. Instead of this, you can
create any other kind of design or pattern
as you see fit. Put some of the
grey space in here, I'll be leaving it completely blank like this, and later on, I'll be using other colours, the red, blue and the
green to do the coloring. This is optional if you want, you can cover the entire
section with the black or you can create your own
designs and pattern. Or instead of using black, you can use other colors
to do the coloring. You can keep it
simple as it is with either completely gray colored or completely white
of the paper. Moving on to the eyebrows. Go over the outlines
and then in here, I'll be dividing into
different sections. For the top of the eyebrows, I'll be using both reds
and blues later on. So creating the
outlines for the region in which I'll be adding
the colors later on, moving back to its
head and yeah, in here too, I'll be
creating simple patterns. You'll have to causes to feel the color for
the smaller regions. Instead of using the breastpin, you can use the normal
breastpin fine liner, ballpoint pain or you
can use skitchpin. You can also use the
gauze or water color to do the coloring
for the blacks. Now creating this kind of simple pattern in
here for this region. And in here for the
remaining section, I'll be completely filling
it with the black. In here, I decided to create three more lines so
simple pattern like this. In here, I'll be using
blue greens if required. Otherwise, I'll be
leaving it as it is. Now let's move on to the
remaining section of its face, putting it beside and below
the horns on both the sides. Now, I'll be filling the entire sexon in here for the nose. The white saxon in
here that we have, I'll be completely filling
it with the black. If you want, you can create patterns and designs
in here too. Carefully filling the black
for this white region. To make this process
a little bit faster, you can use the
watercolor brushes to make this bit more quicker. And when this we are
with this middle region. Now, for the section,
this billowed nose, I'll be completely
filling it with the black and a little bit of the black for the cheeks and a little bit and a little bit just besides its eye creating small thin streak
with a black for the cheeks. But but As I was
mentioning this region, completely filling
into the black. Carefully filling this
region with the black. And as I mentioned, you can always use other colour
to do the coloring in here or you can keep
it simple as it is a combination of both
green and the white. And yeah, with this, we are
done with this region now, let's do the coloring for
the inside of the mouth. In here, instead of
using the black to do the coloring for the
inside of the mouth, you can use the red
to do the coloring. I'll be coming back to do the coloring for the mouth later on, but for now I decided to do
the coloring for the ear, and I'll be creating
a little bit of simple pattern for
the insides in here. Now moving on to the other ear, the left ear, going over the outlines and making it a little bit more broader. Let's feel the
insides of the mouth. In here, I was not
able to record the coloring on the
other elements in here, but you can see what I did. I use red, blue, and the
greens for the upper section. I did a little bit of hatching to do the coloring
for the upper part. For the eyes, beside the iris, I added a little bit of red. For the lower section of
the eyes, once again, I use the red gel pen
to do the coloring and I use hatching lines to
create this kind of coloring. For the two sections
of the chicks, I use greens in the blues. Here too, I use hatching lines to feel the entire section. For the mouth and
here, I use blue for the upper part and
a little bit of red on both sides
for the upper part. And for the lower
side, I use blue. Here, too, I use the hatching
lines to do the coloring. For the earrings
that I have created, I use blues and green. For the upper part,
I use the blue. I divided it into three
different section and using hatching lines
to do the coloring. And for the thread
light thing that is coming out from there it's here, I use red, and here too, I use the hatching lines. I'm just creating this kind of simple pattern for the nose. I'll also be using a little bit of red to do the coloring. In here, I'm using
the brass pin Tombos brass paint to create this
kind of simple designs. You can just pause the video
and do the coloring on your own or you can just follow along with me and
do the coloring later on. In here, I'm making the
outlines of the eyes a little bit more detailed
and a bit more prominent. Now moving to its horn in here, I'll be
doing the hatching. I'll be filling
most of the region for its horn with
stippling lines, a little bit of broken
curb hatching lines. Apart from this,
I'll also be using a little bit of red
for the upper and the lower part of the
horn. This is optional. Instead of this, you can
keep it simple as it is, or you can use other colours to the coloring for the horn. To make it a little
bit more darker, you can also use
hatching, cross-hatching, a little bit of stippling
too to make it a little bit more darker and give it a
little bit more volume. Doing the same thing
for this horn. And with these, we are done
with a simple hatching lines. For the teeth and the fangs, I decided to create this
kind of simpler lines. Adding another layer of hatching lines in here
to make it a little bit more darker by using the hatching lines to do
a little bit of siding, extending it a little bit. Let's do the same thing on the
other side, the left horn, adding another layer of hatching
lines and using it to do a little bit of siding to make this lower part a
little bit more darker. I'll be doing the same thing
for the upper part too. For that, I'll
also be using red, creating this kind of simple pattern for the here and here. For the inside,
I'll be using red, going in with the red, adding a little bit of
coloring for the nose, the pattern that we
created earlier. So for some of those sections, I'll be filling it with the red. If you want, you can cover the entire section with the red, or you can use the
combinations of red, blues, and the greens filling the
reds just above the nostrils, a little bit of red, a little
bit of red in here too, the lower part of the nose. And as I was using
this d for the horn, so doing another layer of hatching to do a little bit
of siding for the lower part. So simple hatching
lines like this, doing the same thing in
here for the other side, simple hatching lines extending
it a little bit more as compared to the
earlier hatching lines that we ended with the black. For this region, the
white region in here, completely filling
it with the red, extending the red a little
bit on the side too. This region in here,
just below the blue, filling the red for the inside. Now, these are all additional
elements that I'm adding, so you can add the colors
wherever you think it's required or
wherever you want to add it filling the entire region of the mouth with this using hatching lines to do the
coloring with the red. And with these, we are done with the coloring for the mouth. As I was mentioning
for the horn, using this ray to do a
little bit of more hatching, moving on to the other horn and creating this kind of
simple hatching lines, simple curved hatching lines. And yeah, with this, we are done with the seventh and
the final project. I hope you enjoyed
painting this and I'll be seeing you
in the next video.
15. Another Crimson Demon Mask : Welcome to the bonus video. So this is another variation
of the Crimson Demon Mask. So we have got cars Demon mask. Starting with a simple
vertical and horizontal line to stretch out the
guideline for the mask. For this one, since it
was a little bit larger, I decided to remove some of the portions, the
repetitive portions. And yeah, so this is
under 14 or 15 minutes. Now let's do the C for the face, creating oval C for the face. For this one, too, I'll only
be using red and a black. Instead of this color
combination, if you want, you can use red and blue, you can use black and blue or
you can use green and red. The middle portion will
be a little bit broader. For this one, I'll also be creating the bead at the bottom. And with this, we are
done with a rough C. Now let's add the horn. So this one, the left horn will be small and
bit broken one, and the right horn
will be simple. Bit broken horns in here. A simple horn on the right side. Here instead of two
horn, if you want, you can add a single
horn in the middle. Now, let's do the outlining
for the eyebrows, the eyes, the nose,
and the mouth. For this one, I
decided to create spasly curved
eyebrows like this. Creating a bit of spiral pattern for the insides of the eyebrow. In here creating this
kind of simple polygonal C. Now for the eyes. This kind of oval
s for the eyes. I'll be adding the
letter portion of the eyes a little
bit later on. Now, for the nose in here and I desired to create a bit
simpler variation of the nose. I'll also be creating
this kind of simple design that I use for
one of the earlier projects. So this kind of simple pattern
on design for the nose. In here, I'm creating a bit
simpler version of the nose. If you want, you can make
it a little bit broader or any other variations of
the nose as you see fit. Let's move on to the
mouth and the cheeks. Extending the line from the
eye to create the cheek, extending the line on
the other side too. Now let's create the mouth. The mouth will be
somewhat similar to the second project we did. In here, I decided to create a bit smaller verson
for the fangs. If you want, you can
make it a little bit larger and bit more curvier. Adding the fangs and the teeth for the lower section
of the mouth, here to another set of fangs and smaller
teeth for the inside. As usual for the
insides of the mouth, I'll be going with the black
and completely feeling it. And on the sides, I'll
be extending it a little bit for the upper
portion just beside the fangs. And in this region,
I'll be adding the red. I'll be using the hatching lines to fill the insights
with the red, extending the fees a little
bit to a company's job. I'll be creating
the same kind of usual jobs that we
have created so far. Now let's create the ears, somewhat of same kind of ear that we have created
for the second one. If you want to make changes and adjustment to the
ears, you can do that. I'll be dividing the ears into three or four
different sections, and I'll be using both red and then black to
do the coloring. For the upper and
the bottom sections, I'll be using blacks. For the middle section,
I'll be using red. This is the simple seats for
the ear that I've created. I won't be adding any
earrings or accessories, but if you want,
you can do that. Adding a small
section just beside the horn to make it a
little bit more detail. So this is a simple
outlining for the mask. In here, I was not able to
record the earlier process, but I know that you can create this kind of simple
texture on your own. In here, I'm using tomos
breast pin and red gelpin. For the upper section,
I use straight, a little bit of hatching
and seeding for the horns. And for the forehead, I use
spiral hatching lines and follow the seep of the horn to fill the entire section
of the forehead. For the eyebrows, I
use red once again and used a bit smaller
hatching lines to fill the entire section. For the gem like
seam in the middle, I use the red hatching lines. For the eyes, I did
the outlining with the black to make it a
little bit more darker, and for the insides,
I used the black. As for the nose, I added
a little bit of rain on one side and created
this kind of bit crescent moon legs
for the other side. I also did a little bit of outline with the bottom
section of the nose. As for the cheeks, as you
can see, I only use the red. The upper portion or you can
see the outlined section, I used a lot of hatching lines to make it a little
bit more darker. And for the remaining section, I used bit of broken
hatching lines. Then for the beat,
just mellows nose, I used a lot of
hatching lines to make that region a
bit more darker. I added a little bit of red for the lower section
of the mouth, too. Right now, I'm just adding the simple kind of hatching
lines for the ear. As I mentioned, I'll be divided
into different sections, the upper and the lower portion. I use the black to do
the hatching lines. For the middle
section, I'll be using the red gelpin and
for the inside too, I'll be going in with the red. Now, doing the same thing
for the second year, starting with the
simple hatching lines, following the curve
seep of the ear, adding the same kind of
hatching lines a bit more curvier see in here for
the bottom section. You can also use
other color to do the coloring or the
hatching lines if you want. Adding the curved hatching lines for the remaining
section in here. And yeah, with this, we
are done with this one, doing a little bit of outlining
for the eyebrow in here. Moving on to the fangs,
starting with doing the outlining for the teeth and the fangs for the insides. Here, too, if you want to do a little bit of
hatching lines to add a little bit of texture for the fangs and the
teeth, you can do that. Making the outlines a
little bit more distinct by going over it and making it
a little bit more thicker. So extending the lines in here. Let's do the outlining for
the remaining section. Adding the outlining for
this seat of the fangs. And now let's do the
outlining for the teeth. So the teeth in here is
a little bit different. I'm making them a little
bit of this kind of see. If you want, you can
create normal teats like we used earlier, dividing the site porton
into different section. For the insides in here,
the larger portion, I'll be adding the ts and
for the other two sides, I'll be leaving it
white as it is. Now for the job in here, I'll be leaving a little
bit of space white, and for the remaining section, I'll be using the
hatching lines. So this portion will be
in white and in here, let's do a little bit
of hatching lines to fill this entire section. And just below it. I'll also be leaving a little
bit of white. Before doing that,
let's do the outline. This portion will be in white, but remaining section, let's fill it with the hatching lines. Try to make the sees a little
bit symmetrical in here. Now let's go over the
outline for the jaw and I'll be completely filling the entire section with the hatching lines. I'll be dividing
the hatching lines into two different sections. This will be the
first section with this bit more curvier
hatching lines following the curved seep
of the chin or the mouth. Doing the same thing in here, following the seep of the chin. Now for the remaining section, another set of hatching lines. If you want to do a
little bit of sading to make the regions a little
bit darker, you can do that. I'll be adding a little bit more black for the upper and the
lower ports and later on. For now, let's do
the hatching lines for the remaining
section of its mouth. Adding the hatching lines
in here on the side too. Completely filling
the entire region with this kind of
hatching lines. A little bit of seeding
for the upper region. Yeah, let's make it
a little bit more darker in here by
adding more lines. In here, as I was mentioning, I'll be creating this kind
of bear. This is Oon. If you don't want
to create this kind of facial here or the bean, you can just leave it as it is. Or you can also use
red to do the coloring in here or create this kind
of lines with the red. Making it a little bit more darker by adding
more lines for it. Now for the sides in here, I'm using red and completely
filling in sides in different in different
section by doing hatching. Now for the ears, the same kind of hatching to fill
the entire region. This quotes on the
white section, I wouldn't be doing
any coloring, but if you want, you
can do the coloring, you can create pattern or
design for the insides. Filling the entire sexion
in here with this red. Adding the red in here too, moving on to the second here and we'll be
doing the same thing, hatching lines to fill
the entire section. Extending it. Now, let's feel the crescent moonlight sap
that we have created in here. And with this, we are
done with the ear. Now, let's feel the
insights of the mouth. Removing some of the
smudged marks in here. Now, feeling the insights
with the black in here, I have increased the
speed a little bit. After doing this, I'll
be adding final details, doing a little bit of siding,
a little bit of hatching. So this is in a normal
spin, as I was mentioning, making the upper and
the lower region of the sides a little
bit more darker by adding more lines or completely filling it with the
black as you prefer. Adding it for the
bottom section. Now for this region in here, making it a little
bit more darker, completely filling
it with the black. And yeah, with this,
we are done with this final project,
the bonus project. If you want to make changes
in adjustment to it or add more elements to do more
coloring, you can do that. But I'm satisfied with
it, how it turned out. And yeah, I'll be seeing
in the last video.
16. Conclusion : Congratulations on completing
the Demon Gargin mask, a seven day pen
and ink challenge. Whether you finished one
mask or completed all seven, you said, we're really
proud of yourself for sewing up and
creating every day. Throughout this
class, we explored foundational ink techniques like hatching, cross-hatching, stippling, and
scribbling, and use them to build expressive
dramatic mask designs. I hope this challenge helped you gain confidence with pen and ink and inspired you to experiment with bold
lines and texture. If you have not already, please remember to upload
your class project. I'd love to see your
demons and Guardian mask, practice sets and
creative variation. And if you enjoyed the class, leave a review or feedback. It really helps me improve and create more
classes like this. Thank you so much for joining me on this creative journey. Keep drawing, keep
experimenting, and I hope to see you
again in my next class.
 Vishal Munshi