Transcripts
1. Intro: Hi. My name is Karla Alcazar and I'm a narrative Illustrator. I've spent the last few years doing editorial and commercial work and have also been doing lots of personal work which I tend to share, collaborate online. In here, I like to share my thoughts, my feelings or a bit of my day too. Recently, I have felt the need to connect with myself. For the longest of times, I felt like I missed the person who I used to be in the past. I always felt like I would like to talk to that person or to connect with her somehow. Now, I might not be able to do that with the previous version of myself, but then I realized that I can actually communicate with a future version of me, so that's the way I decided to write myself a letter and would like to write this letter in the ways that I know how to do best by illustrating it and creating a narrative for it. I would like to invite you to come with me in this journey and also invite you to create and illustrate a letter for your future self too. Maybe you find the idea of writing a letter to a future you a bit strange, but in the process, you'll also learn narrative and composition skills that you can use in your work if you're an illustrator. But you can also apply some of these skills in your daily life too. We'll start this class by talking a little bit about silver flexion and how can this be helpful in both our personal and creative lives. We will learn how to build a narrative skeleton, off of a little bit of self-reflection, and then we'll transform our skeleton into a narrative using a few tools. Then we will use that narrative to sketch and compose the illustration that will be part of our letter. We will go through some examples of illustrated letters as well, spot illustrations and thumbnails all on the way, and of course, I'll share with you my process of creating my illustrated letter. I see writing this letter as a form of self-care because we get to spend quality time with ourselves by making something meaningful, and of course, to learn and to put into practice some new skills. You don't have to be the most skilled drawer, painter or writer to take this class. As long as you enjoy the process of drawing and would like to do a little bit of self-exploration, self-care, and learn basic narrative and composition tools, then I'll think you'll have fun. I think your future self would love to see how much your drawing or painting skills have improved. Please don't feel any pressure to create something to polish. I would like for us to think of this letter as a gift to your future selves, and I hope that this project will inspire us to understand ourselves a bit better in the here and now, and to feel excited about where we're going. In a way, this is also a gift to our present selves. Hope you enjoyed this class and hoping you feel more connected with yourself by the end of it. I'm really excited to have you here. Now let's begin.
2. Class Guidelines: I'm particularly excited about this class project. I think we're going to have fun. As you might have guessed, based by the class title and the intro, today we will create a letter addressed to our future self. The point of this letter is to celebrate your present self and your life journey, to reflect in the here and now, and to create a bridge between who we are right now and who we might become in the future. I find this last part particularly exciting. To make it extra special, we are going to illustrate this letter and this will help us not to only have fun when we're creating the letter, but we we'll also learn a few tips and tricks to create an illustration that pairs well with text. Now before we dive into the first lesson, I would like to offer some general guidelines or things that you might want to consider that can be helpful when writing your letter, and to point out some technical aspects that a letter must include. Let's start with the things to consider. Number 1, when do you want to open your letter? Which version of yourself is this letter addressed to? I will suggest opening your letter one year from now. That's what I'm going to do with my letter. The reason for this is that I consider that a year is a significant amount of time that allow us plenty of room for us to grow and to become a different version of ourselves. I think that having a conversation with a different version of yourself can be quite interesting. Also, a year is a good amount of time for us to still remember quite a bit about our present selves, and also to not forget the fact that we actually wrote the letter. But of course, if you would like to open your letter sooner than that or maybe even later, that's completely up to you. But do pick a date to open your letter. Number 2, the next thing I would like us to consider is to keep this project expectation free. We want to get the fun and light so please don't feel any pressure to create something too polished or elaborate. I would also suggest avoiding writing statements such as, "Hey future me, I hope that by now you have that car you've been wanting to get or how's that new job working for you?" Because sometimes life gets tricky and sometimes things don't pan out as we expect them to and I wouldn't want your future self to feel disappointed or shameful for not have been able to achieve certain things that your present self wanting them to do or achieve. As an alternative, I would suggest to focus on what you're experiencing and feeling in the here and now. In a way, Let's see this experience as us catching up with a friend that can't quite reach to us. Now let's talk about the technical aspects of the letter. One, the letter will consist of one main main illustration. We will cover this a bit more in depth in the composition lesson, just roughly keep in mind that there will be one illustration, of course, we can add a few other little illustrated details, but I would like our main focus to be in the one main illustration. We'll see examples of that as well. Number 2, we will also include text in our letter. You can write as much or as little as you see fit, just keep in mind this to plan your composition. Once again, don't worry about this, we'll see a few examples when we get there. Number 3, and this is very important, in order to make it a little bit easier for us to start writing our letter, I would suggest picking a pivotal moment in your life right now. Picking a pivotal moment, it can give us insight of who we are right now and what challenges or even happy circumstances we might be facing in the present time. Are you experiencing any sort of changes at the moment? Is there anything of significance currently happening? Or maybe it has just happened that your future self will be able to recall easily. For me, it's moving houses. I'll tell you more about this particular change in my life to provide a little bit more context and to show you my process based on this particular moment, but we'll do that later on. Number 4, our letter must also include some of the self-reflective, narrative, and composition tools that we will cover in this class. These tools will help our letter to feel a bit more cohesive, which will help us to convey the message that we want to communicate to our future selves a bit more easily. Now, this all might feel like quite a bit, but please don't feel overwhelmed because we will be doing this step-by-step, and I'll be showing you examples along the way too. I would love to see what you come up with, so if you feel comfortable to do so, please upload your letter to the project gallery. Now I understand that this can be such a personal subject and you might not want to share the full letter, but if you're happy sharing snippets of it, maybe the process you followed, perhaps your sources of inspiration, that would be completely awesome. Let me reassure you that this is a safe space and we will all be respectful and kind to each other, so if you feel like sharing, I'm sure we all appreciate the gesture. You can also tag me on Instagram, if you decide to share your project over there as well. Now, just a quick note on the materials that we'll use.
3. Materials: For this class, I would like to suggest using analog materials to write and to illustrate our letter. It doesn't matter if you're more comfortable with gouache or watercolors or ink. Personally, I will be using markers and some colored pencils too, because it's the media that I feel more familiar with and the one I enjoy using the most. My go-to markers are Copics, and for paper, I will honestly use printer paper. It will bleed a bit, but I think it works pretty well with alcohol-based markers, and sometimes that bleed works quite well. Now the reason why I would suggest using analog versus digital for this class is that I would like us to work with materials that we can feel and smell. There are studies that show that working with a variety of textures and sensations can help us feel calmer. Neuroscientist, Dr. Kelly Lambert found that hands-on work satisfies our primal need to make things and could also be our antidote for our little cultural malaise. What I would like is for us to have a sensorial experience that we enjoy. Please use whatever media make you feel relaxed and calm. Another reason why I would like us to use analog materials for our letter is because personally, I feel that there is something really special about something done old-school, especially when it comes to letter since there's something that as a society, we're doing less and less off. Lastly, I would like us to try and embrace potential mistakes in a letter, I feel that fixing mistakes can be a bit more difficult when we work with analog media, so I would like us to embrace these mistakes as part of a creating process, and also as a way to embrace playfulness in our illustrations. If mistakes happen, so be it. Remember that we're not looking to create something perfect or flawless. We're looking to communicate something deeply personal. That's where we should be focusing on. Let's also remember when it comes to illustration, the message is always more important than the aesthetics. Now let's try to have as much fun as possible creating our letters so please don't feel any pressure, okay. Let's start.
4. Self Reflection: I would like us to take a moment to talk about the reflection and to tell you why I really wanted to incorporate this element into our letter writing process. Also share with you why self reflection can really benefit our daily lives and our art life as well. Maybe you've heard the word self-reflection here and there, or maybe this is something that you already been practicing on a regular basis or maybe you have no idea what this is. Just so we are in the same page list tells a quick definition here. Self-reflection in simple terms is the act of being curious about our actions, thoughts, emotions, well, ourselves really, ideally on a consistent basis. We become curious about ourselves when we ask simple questions such as why, how, or what regarding specific situations that might have happened to us throughout the day. One thing to consider when we self reflect is that our questioning must always be neutral. This is, we make it questions without casting any judgment on ourselves or thoughts or our emotions. For example, instead of saying, I overslept this morning, why am I so lazy? We could ask instead, why did I oversleep? Why am I so tired this morning? What can I do to avoid oversleeping in the future? Remember that we are approaching a situation from a place of curiosity, not from a place of judgment. Curiosity asks for explanations when judgment has already decided what something is or isn't. Self-reflection is a form of self-care because it helps us stay aware of what we need and what we feel. Once we know this would have more clarity, we can actually take care of those needs and to feel a bit better. Ideally, we want to self-reflect on a regular basis because then it becomes a habit, a very beneficial one. But what are the benefits I hear you asking? Well, the main and most amazing benefit is that self-reflection brings us closer to our true selves. This happens because when we question ourselves, we get to understand our motivations, our feelings, and beliefs outside of what others may expect from us or think of us. As Socrates said it, to find yourself, think for yourself. Having a better understanding of who we are as individuals can help us become better artists too. Since self-reflection can brings us closer to ourselves and bring clarity about our thoughts and feelings, we can then use this clarity to communicate in an honest way with our audience. Let's remember that art, all forms of it is nothing but communication. For example, for this class project, our letter, our future self will be our audience. We will aim to create communication that is clear between us now and us in the future. Another benefit is that by asking ourselves questions, we can easily identify if we want to do more or less of something and to then be proactive about it. Making decisions from a place of honesty can be really empowering. When it comes to art, when we self-reflect on things like what media excites us more, what color palettes or even themes we feel more drawn to, we can then more confidently explore inspiration sources and to find our own personal ways to incorporate those sources into your work. Also, if we approach what we do from a place of curiosity in our art life, it's more likely that we will feel more able to confidently explore new media, to try new styles, new color palettes. In a way, self-reflection can help you to develop or to nurture your illustration style. Another benefit from self-reflection is that it freezes from autopilot. I feel that as a society we are required to over function and although asking ourselves questions can't even seem obvious at points. Our pace of life really doesn't allow us to stop and ask this questions or to be more intentional about our habits. As a consequence, we don't even realize the whys and whats of our actions, motivations, or feelings. Sometimes being on autopilot can come in handy, but it can also stop us from finding creative ways to problem-solve. In art, autopilot can take the form of a creative rut and self-reflection can be really helpful here too. Recently I took on a project that was very long and the project had a particular theme that I had to follow. Although I loved working on the project, I also felt that my brain got so set on that autopilot mode. When I wanted to do personal work, my head thought that I was still working and I was still replicating` the theme and the color palette from the project. Then I started to feel a bit uninspired just because of the repetition and I was somehow unaware of that. It wasn't until I started to self-reflect, then I broke the pattern and things started to flow a bit more easily. I asked myself thinks like, why is it I don't feel particularly playful when doing personal work right now? What things or shapes I would like to be drawing more of? What colors am I drawn to in my real life that then I can incorporate into my illustrations? Is there anything in particular that could be fun trying right now? Now, how is all of this relevant to our letter you might be asking. Well, in the next lesson we will do an exercise that will require a bit of self-reflection, and this exercise will help us to write our letter. But before we get there, I would like to invite you to incorporate self reflection into your daily life. Being this your personal life or your art life. I really do think that it can improve the way we perceive ourselves and how we approach or craft to. If you're interested, I would suggest a few little ideas. Number 1, a very popular one, journaling. Now this doesn't have to be another long activity that you have to add to your daily routine that then it becomes a bit much and then you don't feel like doing. You can dedicate this activity just a couple of minutes by writing in a notebook just a single sentence about your day that you just had or maybe ask yourself questions like what was my day like? What was my favorite part of the day? Or if you're in for a long journey, I would recommend getting something like this. This is a five-year journal. You get to write a few lines per day. Each page represents a calendar day and it has a designated space for every year. When it's completed, you can see what you wrote on a given date for five years. This is pretty cool and if you're in for a self-discovery journey, I would definitely encourage you to get something like this. Number 2, card games. They're usually marketed as ice-breaker conversation cards, and they're designed to be played with other people. But of course, you can ask yourself this questions still. Number 3, there's also plenty of books that contain a lot of self reflective questions that you can find for more accessible prices on the cards. Number 4, of course, you don't have to buy anything to self reflect. You can write a few questions down and toss them in a jar. Every morning or night, take one out and give it a little fun. If you're unsure in what you write, we'll leave a template with more questions to self-reflect in the Resources tab. Now with a more curious mindset, we can start taking our first steps to writing our letter. See you in the next lesson.
5. Narrative: Okay, before we do the exercise I mentioned in the previous lesson, let's talk about narrative. A quick way to define what a narrative is would be, a telling of a collection of events that happened in a certain way. Technically a narrative as a story and we humans love stories. Jonathan Gottschall, author of The Storytelling Animal: How Stories Makes Us Human, says, "We are as a species addicted to story, even when the body goes to sleep, the mind stays up all night telling itself stories." I find this really beautiful. As a species, we have been telling stories for centuries. We like stories so much because they really help us to make sense of the world around us, how things work, and how we relate to other people too. Narratives allow us to connect emotionally with others and with ourselves. I personally think that's truly magical. Also, narratives can help us shape our thoughts and feelings in a more structured way, which helps facilitating communicating ideas to others. This is why I would like us to try and incorporate a narrative to our letter. Of course, if you would like to read a more freestyle version of your letter that's totally fine, but I would still encourage you to do this and hope you have fun. Now, narrative in and of itself is quite a lengthy and complex subject and we could spend hours and maybe even days talking about it. But for now, I would like us to go through some basic storytelling principles that can really help us to write and to illustrate our letter and to give it a little something extra too. I hope that you'll find this tools that I'm about to share with you useful and that you can incorporate them into your art practice as well. Now, let's start with narrative structure. This is a basic timing of a story and I'm pretty sure you have heard this before. In a story, there's the beginning where our characters or relevant elements are introduced. There is a problem that needs or wants to be solved by our characters or elements. Number 3, there's the climax, which is the highest point of tension in the story. There's a solution to our conflict. Lastly, there's an ending, when we prepare ourselves and the audience to part ways. A narrative structure is a framework of how we're going to tell a story. Now, with this being said, let's do our exercise. Our goal is to turn our pivotal moment, we will write a letter about, into a story. Let's grab some paper and let's divide it right in the middle. We're going to write situation on the left-hand side and on the right-hand side, we're going to write feelings. Let's focus on the situation one for now. I'm going to ask you just a few questions regarding the moment. Ideally, don't think too much about it and if possible, keep your answers short and let's try to think about the situation itself, not necessarily about how the situation made us feel. Let's start. Who was involved in your situation and what was the situation? In my particular case it was mostly me, because it was me who was moving houses. But family and friends and pets were also around, but it was mainly me. What was an issue in your situation? The house we moved in had so many things that needed to be fixed. There was a massive hole in the ceiling, for example. What was the worst moment of your situation? It was when I realized that there was no turning back that I was actually moving to that house. Four, what made things a bit easier? For me it was having the support of my friends and family. How did the situation come to close? Personally, I would say my situation is not over yet. I'm still getting used to change, but it's getting there. Okay, great. Now, let's do the feelings portion. Same rules. We're keeping it short and sweet and this time we will focus on how the situation actually made us feel. How did you feel when your situation just happened? I was shocked, excited, but mainly I was quite sad. What was your main feeling when issues started to appear? I felt overwhelmed and I also felt scared. What was the worst feeling in the whole process? The worst thing for me was feeling alone and powerless. How did you feel when things started to unfold? Relief, excitement. Again, how did you feel when things finally unfolded? As I said before, I don't quite feel they have, but I'm feeling a bit more at ease. We just did a little bit of self-reflecting and with this information, we can now start to structure the narrative of our letter. I wanted us to do this exercise because sometimes when we're telling a story, we can give this proportionate weight to either the situation or the emotions involved into the story. We might describe the event quite well, but we might leave aside our feelings regarding the event and that stop us from connecting with their audience, or we could do the opposite and we could focus on the feelings of it too much and then we forget to give those feelings contexts. That can be a bit confusing. In this part of our writing process, we want a balance of both. We want to explain why a certain situation caused a certain feeling and go from there. Having situations and feelings side-by-side can help us with the task. Now, our situation column is our narrative structure. We have a beginning, a problem or climax, resolution and ending. In the right column are the emotions that correspond to each part of the narrative structure. Now, we need to combine them to create the skeleton of our story. Don't think much about making it sound like a story right now. We will focus on that a bit later. For now, let's focus on giving our story a basic structure. I'll grab another piece of paper to write my first draft of my story. Let's look at my beginning. I am the main character, so to speak here. My situation is moving house. My feelings are shocked, excited, and mainly sad. Since I am the main character, I could start my letter from my own point of view. First I'm going to write my pivotal moment. I'm going to write it as if I was remembering that moment. My first feeling is shocked, so I'm going to write it down. Now, I would like to explain a little bit more in depth, why was I shocked or what caused me to be shocked at the moment? I'm going to elaborate a little bit more so I can give it a little bit more context. I'm going to be doing the same with the other two feelings, excited and sad. Over here, I'm just giving an explanation of why I felt a certain way. Now that we have combined both columns, situations, and feelings, we can do the same for the rest of our narrative structure. You can give your explanations or your self-reflection a lot of context or as less context as you need it. You can have a short narrative or a long narrative as well. Let's go to the second bit of my narrative structure and let's start weaving the feelings and situations together. Now for this bit, I would like to change the order of feelings. I'm going to write powerless first and then alone, I think, it just makes more sense to me. Let's carry on with our next bit. I find this part of the exercise quite insightful because, I think that it was difficult for me at the time to understand why I was feeling a certain way and this really helped. Now, let's go with the last bit. This is just going to be the easiest one, where this is the shortest one. Let's go ahead and finish that. Here you go, we have a narrative skeleton. Now that we have our narrative structure ready, we can now embellish it a little bit if we decide to do so. To do this, we have amazing tools called narrative techniques. These are ways in which an author can shape, so to speak, the message they want to convey in a story. These techniques can also help us to start envisioning what we would like to illustrate later on. As I have mentioned before, a narrative is a complex subject and when it comes to narrative techniques, there's no exception. There are so many different narrative techniques and they can be divided into different categories even. For practical purposes for this class, I will only cover a few, but I would like to point out two useful resources in the resources tab in case that you would like to explore more of this narrative techniques. For this class we will cover imagery and analogy. Imagery describes in detail what's happening usually, but not always, appealing to the reader's senses for example, the apple was juicy and sweet. Analogy is when you compare two different things with the purpose to show similarities for example, life is a box of chocolates, is a very well-known analogy. In our letter, we will try to incorporate one of these two, or we can combine them both. The idea is to edit our narrative skeleton into a way that is more visually engaging. I will combine them both and I will show you the process on how I do this. Feel free to edit your narrative as you see fit here. My advice would be to keep it as honest and also feel free to keep your letter as short or as long as you would like. I'll see you in the next lesson.
6. Writing Our Letter: Okay, it's time to write our letter. In this lesson, we will use our narrative skeleton as our basic framework to create our final story. To do this, we will start adding imagery and/or analogy to our skeleton. Our goal is to create a more visually engaging letter. This will give us ideas on what elements we could like to illustrate later on. If there's anything in particular that you described and feel drawn to, take note of it, and they will come in handy when we get to do our illustration. If we use a skeleton of my story as an example, it could look something like this. We're going to scan our narrative skeleton and we're going to find parts in all of this text that can be added, imagery too or analogy as well. I'm also going to be adding different bits, so it sounds more like a story. I'm going to start with the first paragraph: When I had to move houses, I was shocked. I'm going to change it to the day I decided to move houses because it sounds more like I'm telling a story. Also the word day, it's like imagery. It paints a mental picture in your head, so I'm going to cross that out. Let's go to the next bit. This bit says that I am shocked and I would like to explain how that felt to me. I'm going to write a description of how I was feeling physically and my chest felt both tight and empty. I think that's a good description. It's very accurate of how I felt. I'm going to say how it felt to me as well, and it felt like I've been struck by lightning, so I'm going to add that too. I'm feeling pretty happy with my first bit, with my beginning of my story. I'm going to divide that, so I know that's my beginning. I'm going to be using a different piece of paper to write the whole thing because it gives me more spacing, just adding notes on this one. Let me just write down that this is my beginning and let's go to our second bit, our problem. I'm actually going to divide each section just for me to have a clear idea on which part I'm working on. I'm going to start reading through that bit right here, and I'm going to write down a bit of imagery. I remember that one of the things I really wanted in my house were flowy curtains. Now, my original problem or situation here is that the house had so many things to be fixed. I could use imagery to describe what were the things that needed to be fixed. The paint was chipped and the walls were damp. This word here, overwhelmed, I think that I can describe a little bit more on how that felt. I am going to use an analogy. I'm going to say that I had the weight of the world on my shoulders. I'm going to write that too. In the next bit, I'm saying that I felt so sad, so I could use another analogy and can explain how the humidity on the walls felt like sadness as well. My house has a very difficult humidity problem, so I am going to write that down as well. Not about my house having a humidity problem but about the analogy of sorrow can feel like humidity or there is some sort there, so I'm going to write that down. Let's move on to our next bit. I like this. There was no turning back. I would like to explore that and think of something that could make it sound more like a narrative. In this bit, I would like to invert this bit, this was my new reality and there was no turning back. I think it sounds a little bit more fluid. Let's carry on. I felt so powerless. That can stay. I had to do this on my own, can also stay. I felt so alone. I have this last bit ready. I think it flows pretty well. Now let's move to our next bit. This is quite cool because I can connect the resolution with the last bit, feeling alone, because that's when my friends and family showed up. Instead of just saying that my friends and family showed up, I'm just going to say something that sounds more like a story, so friendly faces knocked on my door. I like this idea of the chipped paints and damp walls. I am going to repeat it here to explain how my friends helped me in that particular moment. They actually did help me with the house move as well, so it was really lovely this whole thing that they reminded me that things can be fixed. I am going to write that down still using imagery and analogy. Again, I'm just going to carry on with the house and I were no different, because that's exactly where my friends provided help in both ways, emotionally, and they actually helped me with the move, with the house, it was chaotic. But having their support helped me to understand that I could fix us both. I would like to add that too. If you can see here, I'm doing a little bit of self-reflection here. I'm expanding a little bit further on my situation and I'm explaining a bit more in depth how something made me feel. I'm using imagery and analogies to expand on those bits. This is the last bit, we're going to go and do the ending. The ending is still happening as I said. I haven't fully moved. Right now, I'm filming this in my new studio. If you hear a little bit of echo, it's because I don't have much furniture as we speak. But knowing that I have the support of my friends, the support of my family made me feel more at ease. I am going to write that down over here as well. In a minute I'll show you how my letter turned out. As I said before, at this point, I'm using self-reflection to expand on what I wrote on my narrative skeleton as in I'm elaborating a little bit further on to what happened and the ways in which I'm doing it is just adding a bit of imagery and a little bit of analogy into the mix. In this bit, just trying my hardest to make it sound like a story. This is just the editing process, just what I think it sounds more like I'm telling the story to a friend. Well, in this case, to myself. We have the narrative part of the story ready, but this doesn't feel too personal yet. Our narrative defines our current situation and tell us a little bit about who we are right now and how we perceive our current challenges or joys, and it will be cool to read in the future. But a narrative alone might feel a bit impersonal, doesn't feel like we're talking to a specific person. You could be talking to a massive audience. But at the end, this letter is for you and for you only. We need to make it personal. There are no rules here, it's your letter and you decide what you would like to include in it. However, if you aren't sure on how to add a more personal message outside of the narrative we just wrote, I would suggest thinking of an intention for your letter. This could be either a reminder for your future self, questions that may spark some reflection in your future self, hopes and dreams, and even advice. For mine, I'm going to add an intro saying hi to myself and a bit of an introduction to the narrative I wrote. My intention is to remind myself of my current situation right now and for that reminder to be some advice too. I'll include that in the closing of my letter. I would like to show you how mine turned out. Dear Karla, hope you're doing well. Have you had some water? I hope you had. I'm writing you from the past. I hope you still remember what it looked like. Right now it seems confusing. Even a bit scary. Maybe not as much as when things started to unfold. Remember the day I decided to move houses? I was completely shocked. My chest felt both tight and empty. The move was so sudden. I feel like I had just been struck by lightning. The idea of having a new beginning, a new place with white flowy curtains and plenty of room to just be was so exciting. But I was also heartbroken. I didn't think I would have to do this alone. Instead of flowy curtains, I found a house with damp walls, chipped paint. There was so much to fix. I felt so overwhelmed. I felt like I had to take upon the weight of the whole world or at least my own on my shoulders. The sorrow was creeping up on me, like humidity was doing to the walls. Then I realized that the house and I were no different. There was no turning back. This was my new reality. I felt so powerless. I had to do this on my own. I felt so alone. But turns out, I wasn't. Friendly faces knocked on my door and reminded me that chipped walls can be painted and the damp walls can be fixed. I felt so relieved. The house and I were no different. I could fix us both. I could create something good and felt a rush of excitement again. I didn't have to do this alone. Things are still being fixed both in the house and myself. I'm getting used to change. Has not been easy, but I can finally relax now. There are few this I would like to tell you, so you don't forget. Please remember that the house and I are the same. You can repair what needs fixing. You can always ask for help. You can always open a few windows and let a fresh breeze in. You and the house are no different. You can both be homes and I really hope you never forget that you are your own home. You have longed to be here for so long and you have arrived. You're finally home and you welcomed yourself in with open arms. I'm not sure what your challenges are, where you are right now, but whatever they might be, I'm rooting for you. I have the feeling that you are who I think you might be and I can't wait to meet you. Send you a big hug. I wish you lots of smiles and adventures and happy memories. Love, you. Now that we have our letter, we can start thinking of adding an illustration to it. But before we start planning our composition, I would like to show you a few beautiful images that I'll think you'll enjoy. See you in the next lesson.
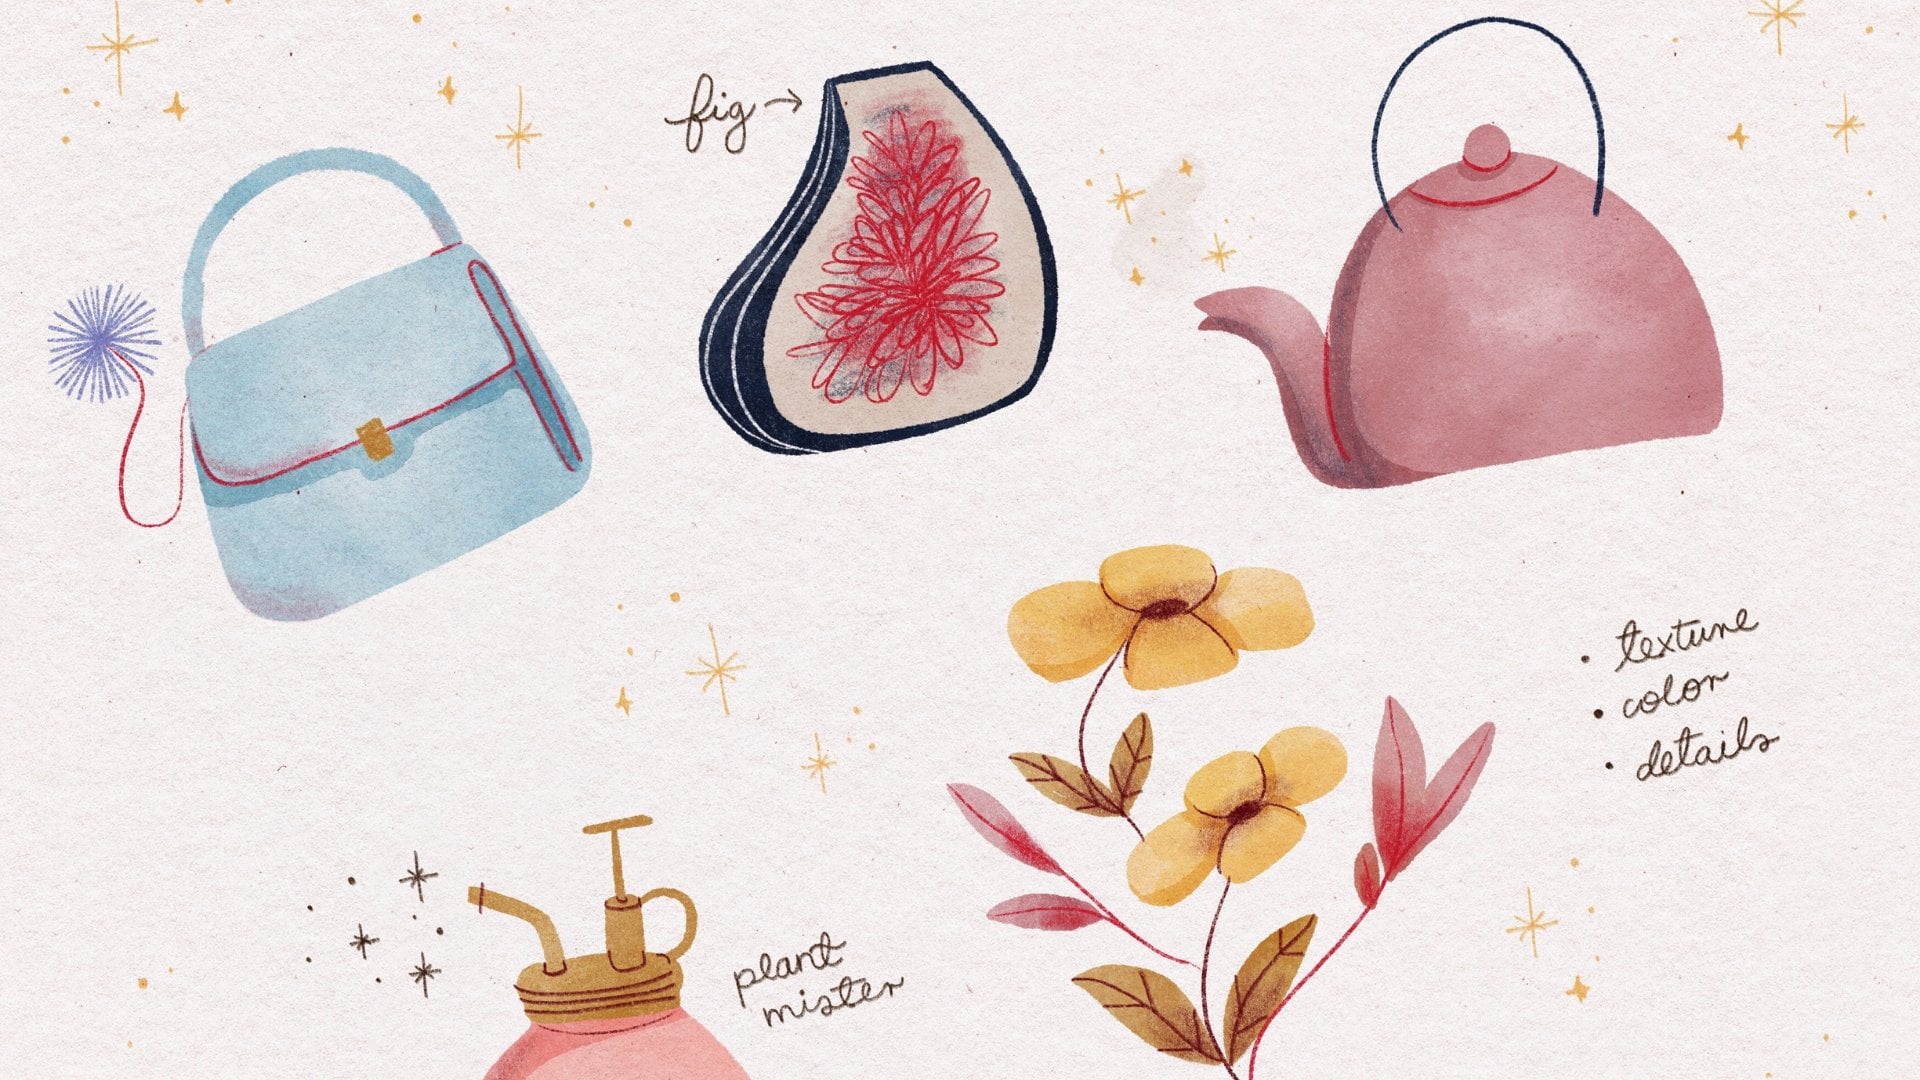
7. Inspiration: Now that we roughly know the length of a written part of the letter, we can start thinking about our illustration. I would like to share with you some beautiful illustrated letters done by amazing artists and writers. I really hope they inspire you as much as they inspired me. Let's begin with this beautiful letter written by Yves Saint Laurent. He wrote this when he lived in Morocco. We can see how much his location inspired him. We'll talk about composition in the next lesson. But I would like to quickly point out that the composition he chose, which is to place the written portion of the letter at the center really makes the illustrated elements to pop up. I really like the relative simplicity of his drawing. Let's remember that symbol doesn't mean bad or sloppy, and that we're allowed to create simple things and they can be really beautiful too. Personally, I think simplicity is amazing. Please don't feel any pressure to create something elaborate if that's not your thing. On the other hand, let's look at other example that might inspire you, if you like more complex things. This letter was written by English artist Edward Ardizzone. I particularly like this one because there's so much [inaudible] to it. In this letter, we can see that the illustration and that written portion share the same message. Perhaps this is something that you might want to consider for your letter if you find pairing, illustration, and words a bit daunting. Let's remember that we're not necessarily looking for perfection, but we want to create something meaningful. Also, that written portion of the letter is quite short. Ardizzone chose to spend more time in his illustration. Maybe this is something that you might also want to consider if you prefer to center your intention on the illustration rather than the written part. Talking about personal preferences, let's look at this other letter that you might find inspiring if you are a bit worried about using color. This lovely letter is by Shepard Ernest Howard, the artist behind the illustrations of Winnie the Pooh. I really like how he used the same dip pen to write letter and to do the illustration. Also, he wrote the letter not as himself, but as Winnie the Pooh and Piglet, there's even some spelling mistakes here and there done on purpose, also the illustration supports the written portion of the letter wonderfully well. There's so much simplicity. Without the written portion, Piglet and Pooh could be crying about a lot of different things. But when we read the letter, we know that they're sad for not being able to come to a party. So the whole letter feels more greaze of them. Joseph Lindon Smith is an illustrator known for documenting the excavation of Giza. In this letter he mentions that he is painting under a shower of gold, which he literally illustrates. Just like Ernest Howard, he uses the same pen to write and to illustrate the letter. Back to more heavily illustrated letters, this one is by artist Paul Bramsom. In this letter he uses his illustration to inform. He had moved to a new studio and he decided to draw it rather than explaining what that studio might look like with words. In these examples, we can see a few things in common. All letters were written with the author's actual handwritten letter. They were no trying to make it stylish, perhaps Ardizzone here with his head capital D here, but the rest isn't his own handwritten font. I really like this because it makes it feel more personal and makes it feel a bit warmer. What I personally like about these letters is how carefree they seem. None of these letters are perfectly drawn. Some of them look like part of their sketchbooks even. This is wonderful because to me it feels warmer again, and they just feel more personal and vulnerable in a way. The actual written message in most of them is actually quite short. If writing a lot of words make you feel a bit uneasy, don't worry, you're allowed to do whatever it is that feels right for you. Now when we're working on a project, it is very important that we have more than one source of inspiration. We need more than one source so our project can have more depth. It's not a carbon copy of our main source, and if for it to feel more fresh as well. Personally, I get lots of inspiration from real life. I think that one of the reasons why I find real life so inspiring is because we surround ourselves by things that are meaningful to us. Because we get to see them daily, we don't quite realize how inspiring they can be. They become so ordinary in a way, but we must remember that we allowed the things in our life for a reason. Inspiration from daily life can be the colors of your clothes. You can even try different types of combinations and different color palettes with the clothes that you already have in your wardrobe. I was actually quite inspired by this color palette in this dress, and that's what I used for this class. There might be certain objects that you might want to incorporate into your illustrations. Maybe something that a close friend said can be also very inspiring and maybe even certain shapes. Now, if you have taken any of my other classes, you know that Pinterest is a big source of inspiration for me. I really like to have everything organized in at hand. That helps my brain to organize ideas as well in a way and makes me more aware of the things that I want to incorporate or things that I don't necessarily need for a certain project, I think its a quite handy tool to have. Now with this things in mind, we can move to our next lesson and talk about some composition ideas to start drafting our illustration. See you there.
8. Composition: In this lesson, I would like to cover two important aspects to consider when we want to illustrate a narrative. These are extracting key concepts and thumbnailing. Let's start with extracting key concepts. Whenever we need to illustrate something from a text, it is very important that we keep in mind that whatever we decide to draw, it needs to support the text and ideally to enhance the text. In order to do this, we need to read our text and find the key concepts of our text or a narrative. These are parts of our text, that without them present, the rest wouldn't make much sense. Ideally, the key concept that we want to illustrate will make us either feel curious, excited, or a mixture of both. We want the illustrations to entice us, to make us want to read the whole thing. We can come across really exciting things to draw in our text, but we need to ask ourselves, do they really support or enhance our narrative? When working on editorial projects, it's pretty much standard practice to receive the story or article that you got to illustrate, to read it, and then you get a general feel of what the main idea of the article is, and then you can highlight paragraph by paragraph, the most important parts of the text. Then you decide if the highlighted bits can be exciting to illustrate or if they add value to the article. We are going to figure out keywords in our text. Right here, I've got my narrative that I wrote. I'm going to read through it real quick. I'm going to figure out which keywords are either exciting to draw or which words can be useful in the context of our illustration. Well, first off, I think it's really important to write here that it's all about houses. I think a house needs to be included in this. I'm going to write that down. I can look at the imagery I added. There's lightening, there is flowy curtains. As a tip, you can also highlight with different colors, different concepts if that works for you. For me, it's a little bit easier at this point just to quickly do a scan, but that could also be a really cool visual way to highlight. There's also chipped paint and damp walls. Well, actually no, I was going to write faulty walls, but that just leaves too much room to the imagination, so I'm just going to write what it is, chipped paint and damp walls. Feeling alone. That's an important one. I think also the key aspect of this illustration is that the house and I are one. Here it's not making sense. There's a lot of similarities. There's another here that I'm writing tight chest. I forgot how to write tight chest. I also felt empty. With these key ideas, I can start doing some rough thumbnailing and just brainstorm ideas. Sometimes you can find many exciting ideas in the text that can be illustrated and you might feel unsure on which ones to pick. This is when thumbnailing can be really handy. What's a thumbnail? A thumbnail is a rough sketch that will depict a general idea of a concept. These are really simple sketches with not much detail and done fairly quickly. They are also small, so we don't waste time drawing a larger scales. Since they're done fairly quickly and they're small, you can try many different ideas. I think that the greatest benefit of thumbnails is that allow us to make decisions risk-free. We can make as many as we want, and they can look whatever we like. In a way, thumbnails are some visual brainstorming. Once we have done a fair amount of thumbnails, then we can select the ones that we like best, and then we can proceed to explore that option a bit more in depth and start sketching our composition. Now, we will refer to composition to the ways in which we will arrange the elements in our page. In this case, the elements are our illustration and a bit of text. Our goal is to make the individual elements look as a unit. We may want to explore in our thumbnails, if we would like the text to be the protagonist or maybe the illustration to be the protagonist or maybe both in equal measure. We could also add some spot illustrations too. A spot illustration is a smaller and usually simpler illustration that stands on its own. That means that it usually doesn't require a background or it's very minimal if it does, and it's there to support our main illustration. It is time for us to start doing our thumbnails. Now, as a little quick tip or reminder even, don't think too much about what the thumbnails look like. This is all about brainstorming ideas to figuring out what things work, what things don't necessarily work too well. This is all about exploring ideas and just being playful really. The more playful you are, I think the thumbnails tend to be better actually, just because we are not afraid of incorporating new things and we get to feel there's a lot of freedom in the exploration process. At this part of the process, we will also like to consider the text. Now, my text is actually quite long, I would say, so I would need a lot of space to incorporate both the illustration and the text. Let's start thinking of possible layouts and let's just sketch. Now, for this part, I'm going to be using just printer paper for my letter as I mentioned before, so it's rectangular. My thumbnails would be rectangular. This is for my brain to have a better idea on how to arrange the elements in the page. Because if I do a square one, there is not going to be enough room for me to fit everything that I need to be in the illustration. The scale will be long basically. We need to keep in mind the shape or the format of our final illustration. I could also do it for me. I'm just going with my instinct here for me. If it's a letter, I think I would prefer this one. I feel like I have more room. Well, before we start with the imagery, let's just do a few rectangles. They don't have to be perfect. As long as they roughly keep the shape of the final illustration, then that's completely fine. Now, well, that's more like a square a little bit. Again, it's so important at this part of the process to not be precious about our thumbnails. What if I have the illustration right here and then I use the text here? That could be an idea. I'm just going to cross this one because I do want to stick to this one. I could maybe have a little illustration right here, and the text here has a regular letter. Maybe to make it look like those stationary paper, like fancy stationery paper, so I could just add spot illustrations here. I could do that. This could be the main illustration. I could have the text here and the illustration here. Again, we're just worrying about the layout right now. I could have the illustration right here and I could have the letter just doing spiraling like so. That could be interesting. Or I could also have a few and just add the letter here, the text. I'm not entirely sure about them. I could have the illustration down here and use the top bit, reverse this one. Now, we have this rough layout ideas and I think it would be very good for us to pick one, and of course, we can change our mind depending on how the illustration evolves. Again, at this part of the process, we're allowed to make mistakes or to decide different things. We don't have to be set on one idea. For me, I want to try this one. Having the text right here at the top and having the illustration on the bottom, maybe even surrounding it. Now that I have picked my potential layout, I can start brainstorming ideas. Let's see. Well, I'm just going to text. I am just going to draw a house, let's say, and I could add different rooms with different situations. I can have the lightening here, the flowy curtains here, feeling alone in one, and maybe having friends coming over. Maybe that could be an idea. This could work. I like that one. Let's keep brainstorming. Now, since I was too much in my head, I could draw myself thinking about the house, perhaps having the house right here, maybe having lightening like that. Having said that, I like the idea of my chest feeling tight. Maybe let's explore that idea right here. I didn't leave room for the text. Let me, for this one, text right here and the illustration will go here. That could work. For this one, let me just get rid of this because it's confusing. What if I draw touching my chest? But again to draw the house as if it was inside my chest. Me looking inwards, and I could add a little spot illustrations, maybe stars. I am actually feeling quite excited about this one. I feel really positive about this one. I could use a combination of this one. If the house is not too small, I could use one room for every emotion and having friends over. So that could work. That can really work. I'm very excited about that one. Let's try one last one and just see. Maybe I could try a different layout as well. Maybe I could try something like that but inverted. I could be sitting holding my chest in the house and I could just be sitting like that and the text could go right here. I'm going to leave a template in the Resources tab with ideas of templates if you're interested. Yeah. If you want to go check it out, that would be cool. Actually, I'm feeling really excited about this one. I think we have a winner with a combination of this one and this one. That could be a really good sketch. As you see it's just a quick process. It doesn't have to be something, I don't know, that you spent ages on of course, depending on the project and depending on the circumstances. But usually thumbnailing and sketching shouldn't take too much because it's all about exploration and it's all about finding new ideas, combining them, maybe abstracting certain things. Yes. This part should be fun. I hope that in this part you have fun as well. The exploration just makes you feel excited. It makes you feel playful and excited. I hope that now you have the desire to keep drawing and to do your final piece. Remember that we're not looking for perfection in our illustrations. We don't want something too polish. We want something honest in every single possible way, in our writing and in our illustration or our skills or whatever you want to call it. Once again, let me remind you that illustration and art, it's all about communication. If you manage to communicate something honestly and clearly, you've done a good work.
9. Illustrating Our Letter : In this lesson, I would like to show you my process of doing my illustrated letter. I'm going to show you a time-lapse and I'm going to walk you through my choices when I was doing the illustration. But I have been asked a few times to show the full process and that video exists, it's available. It will be in the resources section. It's a 45 minute video, but in the meantime please stay and check out this video, and see you in a little bit. The time has come for us to draw our illustration and to write our letter. For sketching, and I have mentioned this before in previous lives and sessions, I like using a red colored pencil to sketch. Also, if you have taken any of my previous classes, you know that I like to work with a limited color palette. For this one I'll perhaps incorporate six colors, maybe something like that. How many do we have here? We have six, four maybe let's add a seventh one or eight. If you want to do a more detailed sketch of your illustration before you do your actual final illustration, that's fine. I want to keep it playful, and I just want this to look as messy or as untidy or as unkempt as possible. Just start checking my sketches, all my thumbnails. Something like this. Roughly just checking my proportion, maybe something like this, something that is not too big. Personally, well anytime I actually prefer working on a smaller scale, I just feel like I have a little bit more control over my drawing. I'm going to start my illustration with the face. I don't know why, but I always like starting with faces. When I sketch, I like to keep it playful and flowy. I don't like to erase much. Only fits really necessary. Usually at this point, I always do referencing. But for this illustration because I want to keep it messy, I'm going to rely on my memory and I'm going to do a doll house kind of house. Right now I'm just doing the divisions in every room. I'm drawing a couch that I actually got. Over here I'm going to be drawing my friends, coming over are my dog and my cat. I'm just going to keep doing simple shapes, oops erasing there, and that's it, this is my final sketch. Now I am going to start inking my illustration or adding color to my illustration. I really like using these markers because they have different tips. They have a chisel tip and they have a brush tip and I think they're both really handy. Like I do the outline with the brush tip and then I eye everything in with the chisel tip. I usually like to use a brown liner for the nose and the mouth, but I didn't have it. For this one, I'm going to use the black liner and I'm going to add some shadows. I really like the combination of these particular purple with red. I think they work really lovely together, so I am going to be drawing this bushes right here with this purple. I'm going to be tracing over the faint lines that I did for my sketch and adding a few details with this white pen. Now I'm going to start coloring the house. This was a really good choice because I was running out of ink so still the paint does look chipped. I'm going to be adding a few shadows with this colored pencil and with the yellow marker as well. It's in the details. I think once you start adding details, the illustration starts to look a bit more alive. Now I'm going to add the background with this gray and I'm going to add more details using a mechanical pencil and my brush tip of my markers. I'm drawing my dog and my cat here. Now I'm adding a little bit of details that then I will use as spot illustrations for the rest of my letter you'll see. My final illustration is ready. This is what it looks like, and now it's time to actually start writing the actual letter. I'm going to start writing the date and know that I can actually start writing my narrative and my letter. I really like the imagery bits they stayed around the illustration. That is a coincidence, but I really like that. I'm also noticing that there are two empty spaces right here where they look quite empty to me, so I'm going to be drawing something in a minute. But yeah, right now I'm just going to continue with the rest of my letter because I'm going to need two pages. I'm going to be using this piece of paper that I was using to stop the markers from bleeding onto my board. I like this, it feels it's part of the same thing. It just makes it look a bit more cohesive I guess. Now I'm going to start filling in this little empty bits. I'm going to draw something circular and I'm going to be drawing a moon just because I feel that I need something circular and I'm going to be using this gray marker to color it in. I'm going to be adding a few details around the grading. These are going to be my little spot illustrations that I was telling you about, and I'm going to be adding them everywhere. Yeah, this is what my main page looks like. Now, let's check out the second page. Now, I would like to do a little spot illustration right here, something that looks again cohesive with this one. I might draw a moon right here, and I'm going to be adding a few sparkles and stars. I'm going to use the same gray to color it in and I'm going to use the same colors to do the sparkles all over the page. This is what it looks like. I really like the rounded bit right here, its really subtle but I think it works really well. I'm going to keep adding little details because I think it needs more details. This is what my final illustrated letter looks like. I'm actually pretty happy with the result. I think that it's got that messy look that I was going for. My handwriting is not the best, I was actually trying to do a little bit better here. But I'm overall pretty happy with how it turned out. It was actually quite fun. I think keeping it messy helped a lot to not feel any pressures while I was doing the illustration. I hope you have fun when you get to your own illustrated letter, and now let's go to the next lesson. See you in a bit.
10. See You Soon: Now that we have our letter, it is time to part with it temporarily. I feel a bit sad. Do you also feel a bit sad? But it's okay because we can make this departure a little bit more special. But before we do that, if you choose to upload your letter to the project gallery, this is a time for you to scan your letter or to take a few photos of it. I would like to remind you once again that this is a safe space so please feel reassured that it's okay to show your letter here. But if you choose to share just snippets of it, or maybe just some sketches, or even the sources that inspired you while you were writing the letter, that's perfectly fine too. Personally, I really love to see the behind the scenes and processes of every class project. Also, if you're on Instagram and decide to share your project over there too, feel free to tag me. If you don't have a scanner at home, there are several apps that can help us, such as Adobe Scan, SwiftScan, Google PhotoScan. If you have an iPhone, you can also scan a document. Just open your Notes app, tap on this icon right here, and you'll hit "Scan" and you'll get a PDF. Let's talk about the date in which we'll open our letter. I would suggest for it to be one year from the date you finish your letter. I like that there is a certain randomness attached to it as in it's not a significant date. I feel that to some degree that can add to the surprise. But you can also open your letter on your birthday, or maybe there is another important date that you might prefer to open your letter on. That's cool too. If this happens before the year passes, that's okay. Remember that one of the main reasons why we wrote this letter is to make ourselves a little special gift. If opening this letter sooner helps to make that moment extra special, that's perfectly fine. Or perhaps you feel that one year is too soon and you would like to prolong it a little bit more? Perhaps you want to forget that you wrote the letter so the surprise is even bigger? Then that's also pretty cool. Whenever you choose to open you letter, it's fine. It's your letter and you get to pick when it's the right time for you to open it. You might be thinking, "Okay, but what if I decide to wait a bit longer and then I forget?" Or maybe you are a forgetful person and you're worried that you forget about your letter full stop. Don't worry. I got you covered. There's a few different ways around it. Of course, you can go for the traditional reminder on the phone or laptop, or even marking the date on a regular calendar or planner. But I think my preferred method is to send yourself an email. I feel that this adds a little bit of mystery and it's a little bit more extra than the traditional phone or note reminder. If you have Gmail or Outlook, it's pretty simple to do. If you have a Gmail account, after you have drafted your email, click the arrow next to the blue Send button. Click "Schedule Send" and that's it. If you have an Outlook account, once you've started a new message, click on the "Options" tab at the top of the screen. Click the three dots in the bar on top. Select "Delay Delivery" from the top down menu. Under Delivery Options make sure the box next to Do Not Deliver Before is checked. You can use the drop-down option, or just type in the date and time you want the email to go out. Click "Close" when you're done. Another thing that you might want to try is to add a little something in your envelope. This could be a gift card from your favorite coffee shop and a little note asking you to maybe get your drink of choice, and then to take it to a park and go for a nice walk, sit there, and maybe read your letter, or maybe you can add a little bit of money with the same request. Or perhaps you would like to stay home and would like to add a nice teabag with instructions to maybe sit at your comfy couch and throw a blanket on, or maybe include a little bit of chocolate in there too. If you decide to include food, just make sure to check the expiration date, and the item is perfectly seal. Also, with things like chocolate, you will have to think about the temperature and the place where you will store your letter to avoid any messy melted chocolate disaster. Maybe overall keep your letter in a cool, dark place. This will also help the colors in your letter to stay vibrant if you use any colors. Remember that this is a gift and you can add whatever you feel that it will make it extra special. One last note, I would also suggest for you to not pick up the letter once the envelope is closed. Resist the urge to open it. You won't regret it when the time to open it arrives.
11. Final Thoughts: Well done for completing this class. I really hope you enjoyed it, and I really hope you got to spend quality time with yourself writing your letter. Maybe you'll think of incorporating in your personal and art life, some of, or maybe all of the concepts that we covered in this class. We covered quite a lot. We did some self-reflecting that something we used to build a narrative skeleton that then was transformed into a narrative. That then was transformed into our letter. We blue through some cool inspiration sources, abstracted the key concepts in our letter. We could then scatter illustrations to them and finally create an illustrated letter. Remember that this is a safe space, and there will all be kind and respectful. If you'd like to upload it, please do so. Before we go, I would like for us to take a couple of minutes. Let's take a deep breath. Relax your shoulders, relax your face. Especially if you're fawning, I would like you to celebrate your life today. To notice those little moments that make your day special. Please don't forget to give yourself credit for all the things that you're handling right now. I'm pretty sure that your future self, has a lot to thank you for. Thank you so much for joining me in this class. I really hope you enjoyed it. If you like to stay in touch, this is my Instagram and of course, follow me here on Skillshare to stay updated on future classes. Send you all a big hug. Please take care. Bye.
12. Bonus: Hi there, and welcome
to this bonus section. If you perhaps would like to do a little bit less introspection, but would still like to do
a class project and would still like to give your future
self a little something, then I think you might like
this mini-class project. I was thinking on gratitude as a part of
self-reflection and how sometimes we don't
necessarily give ourselves credit for
our own victories. It's precisely those victories that make us the people
who we will become, so I would like you to
grab some paper and think of something that you
have accomplished lately. It doesn't have to
be anything big, it could be something like, I started to use my phone less, or I started going
on walks more often. Or maybe it is something
big like I graduated, or a got a new job. It could be anything really. Now that you've got it, let's see what we'll need for this mini-project that will also be a fun exercise to warm up before drawing
something else and make it to try it whenever you feel a little bit uninspired. For this mini-class
project, you'll need paper. I will be using printer paper, but feel free to
use cardboard or any other kind of paper
you have laying around. For this mini-project, I suggest using media
that is liquid because it can help with texture and
with a sense of flowiness. I will be using markers, but you can also use squash, watercolors, or
even highlighters. Just make sure that your
paper can handle the media. For example, I'm
using printer paper because it does absorb
marker ink quite well. If you don't have
any liquid media, feel free to use
colored pencils too. We will be using a very
limited color palette because we don't want to overthink things and we want things to flow a bit
more spontaneously. In my case, I will only be
using blue and maybe red. If you don't know
what colors to pick, you can try selecting
them randomly. This could also be
a fun exercise to try and use colors you
wouldn't normally use. We will also need something
to add details with. It can be pens or a
colored pencils too. We're going to start by
folding our paper in half. This will be the area
we will use to doodle. If you like to draw in
a much smaller space, like it's my case, I would suggest
folding in half again. Now we're going to draw a blob. We can think a bit about
our composition now. We can do a central blob, leaving some room
for some details, or maybe a bigger blob, or even several blobs, or maybe a tiny little one. Don't overthink it though,
follow your intuition. I am going to do a
medium central block using this blue marker. I would suggest
protecting the inside of your paper because later
we'll use this side. But it doesn't matter much
if the color bleeds onto it. Here's my blob. Now that we have our blob, let's open our piece of paper. Remember that
accomplishment that we previously thought of? I would like us to write a short sentence thanking
ourselves for achieving that. In my case, this
whole house move gave me the opportunity to reconnect with myself and I'm so thankful to have
had that opportunity. Now we will write thank you for accepting the opportunity to
reconnect with ourselves, because remember that we're
talking to our future selves. You can write the
date too and sign it. At this point, you probably
guessed that we're doing a little thank
you card for ourselves, so ideally our front image would relate in some
way to our text, and this is when the
fun part starts. Now, in my case, how can we transform this
blob into something that we can relate to
reconnecting with myself? Let's remember that we have complete creative freedom here. We can add as many details as we want or as
little as we want. To me, this blob look like
it's hugging something, so I will be drawing
with a pen as similar blob hugging
the first blob back. Now with this light pen, I will add a face and
some arm definition. We'll also add a
face to the new blob and add some other
little details. Personally, I would
also like to include the word things to make
it look more like a card, so I will write it down here. You can add the text inside
of the blob too or in the spaces that you might have between blobs, anything goes. I would go for something
a bit more polished, so we'll use cursive. If you are going for
a polished look too, my advice would be to make sure that the letters
have more or less the same shape and
size that are aligned, and that there's more or less the same space between them. Here we go. We have a fun card to
give ourselves thanks for accomplishing something
that we should definitely give
ourselves credit for. I really like these
quick doodle exercise because they can really help us to think a little
bit outside the box. I personally don't
think that I would have instantly chosen to draw
this type of characters, but I do think that they work
quite well for this card. Also this is a color that
I never tend to use, so I'm really glad that I used it because
now I can think of other possibilities in
other ways and I can use this color for future projects
or for our future doodles. I would really like
to see your card. You can post it to
the project gallery so we can all see it, and I'm sure it will be very inspiring to see
your project there. Thank you for watching
this bonus section. Hope you had fun. See
you in the next one.
 Karla Alcazar, Illustrator and Teller of Tiny Stories