Transcripts
1. Introduction: Hi and welcome to
the DaVinci Resolve for busy people editing series. Today we'll be learning
the easy way to create a custom Instagram reel
for multiple uses. My name is Jason Georgiades. I'm a professional video editor. I have a master's degree in
filmmaking from CalArts and worked in Hollywood as a
professional editor for Vice, Warner Brothers, and
The Hollywood Reporter. In that time, I've also produced and edited
two feature films with commercial distribution from
1091 and Gravitas Ventures. One of the biggest
problems I face as a video content creator is making Instagram
reels or reels in general to promote my projects. As many of you know,
as a busy person, I just don't have time
to create hundreds of different variations
of video reels to promote my projects. So I create one
customizable reel, that means all I have to do
is adjust a few settings in that one customizable
reel to generate many different versions
over and over again. This course is for
busy people looking to save time making a simple, professional video reel
that can be modified to generate multiple versions
to promote your film, business, or personal hobby. By the end of this course,
you will learn how to create a customizable, elegant, and effective video
reel for Facebook, TikTok, Pinterest, or Instagram. That will be your class project. As an added bonus, Rosetta will show
you how to upload your reel to Instagram
and some quick tips on how to add music and hashtags to improve the
visibility of your reels. We'll be using a simple
step-by-step guide that requires you to follow along with each demo using
video files we provide to you. Later, you can simply drop
in and add your own video to this template in order to
create your own custom reel. All you need to get
started is a laptop or a desktop computer
with a working version of DaVinci Resolve
for Mac or Windows. If you're ready to begin,
let's get started.
2. Project at a Glance: Great. The first
stage will be to choose and add our footage. Remember to download that sample footage
in the project and resources section if
you want to follow along exactly like this demo. The second step will be to
add our color transparencies. The third step would
be to add text. From there, you can
mix and match any of those elements
to make hundreds of different types of reels from
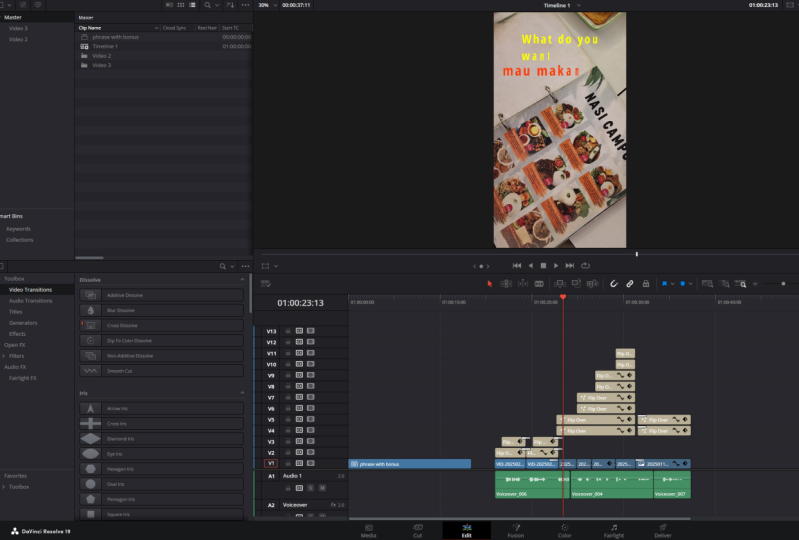
that one customizable real. This is the sample project
that I've provided to you in the project and resources section of the Skillshare tab. I'm just going to go
ahead and play it back using the space bar to get an idea of what we're trying
to create in this course. Great. As you can see, there's a few different
elements that we're going to need to manipulate and create. Each of them are customizable. Also, keep in mind there
is no audio and the audio will be added later using
the Instagram application. But for now, all
we want to do is work with the video elements. In the next lesson, I'm
going to show you how to import this sample footage
into your project.
3. Importing Sample Footage: Go ahead and create a new project and label it
whatever you would like. I've labeled it Matcha Demo, and I have imported the sample
footage into this project. In order to do that, go ahead and download the
sample footage that I provided for you in the
project and resources section of the Skillshare page. All you have to do is go into the Media Pool, right-click, and import media in order to get that footage into
your media pool.
4. Setup Your Resolution: In this lesson, we're going
to set up a project to display correctly in Instagram. Since most people look at
their phones vertically, we want to make sure that
DaVinci understands that and we also want to make sure that the reel is
displaying correctly, as people watch the
footage on their phone. Let's check it out. The
first step will be to create a new timeline to match the
specifications of Instagram, TikTok, Facebook reels, or anything that has a
vertical style format. I'll head over to my media pool, right-click, and under Timeline, Create a New Timeline. A new box will appear, and I'll go ahead and uncheck
Use Project Settings. This will allow me to
customize my timeline. Name your timeline here,
whatever you like. Then I'll just select Format, and then under
Timeline Resolution, I'll change this
to 1080 by 1920. That means that our Canvas or final output for
our reel will be 1080 pixels wide by
1920 pixels high. This will match the
vertical orientation of a cell phone where most people will be
viewing this content. Also, make sure that under
Mismatched Resolution, we have Scale entire
image to fit selected. I'll go ahead and click
"Create". There we go. As you can see, there
is a vertical canvas now for us to work in, in order to ensure
that our output will properly match a cell
phone for display.
5. Adding Footage to Timeline: So next up we need to add
some footage to our Canvas. Again, feel free to
use your own footage if you don't want to work
with the exercise files. What's nice about this reel
style is that it allows us to use footage
shot horizontally, meaning we can still
preserve the frame we shot, but we're essentially
just stacking those frames one on
top of each other. I really hate when I'm shooting something in a
horizontal format, and then I have to re-frame for a vertical iPhone display. This method allows us to
preserve the framing while also respecting the vertical format of the phone's display.
So let's check it out. I'll just double-click
our sample clip to have a look at what
we're working with here. We have a few clips here, and I need to choose which video will be on the
top portion of the reel, middle, and bottom. I think I'd like to start
with the matcha can opening, then mixing, and then pouring into the cup, like our demo. So I think that order will be a nice narrative flow in
order to tell the story. So let's start with
opening the can. I'll scrub to the top of
the clip and type I for in, to place our first edit point. Then I'll scrub or play back to reach the end of the clip. I'll hit Spacebar
to stop playback. Then I'll use my arrow
keys to step frame backwards to find the
very end of this clip. I'm using the left arrow
key and just hitting it a few times to get to that last frame exactly
where I want it. Doing this is also a
really great practice as an editor to dial
in on specific frames. I use the shortcut
all of the time. So, I'm just cycling
back-and-forth using the arrow keys until I get
to where I want to go. Now, I'll hit the O key
to place my outpoint. You should see a
white bar that now highlights the particular
section we want to put down onto our timeline. If I place my cursor
over the image now, you can see that two little
options appear here. You may have seen them before. That gives us the option of pulling down either the audio or video if we want to use just one or the other and not
both at the same time. There is no audio for this demo, so let's go ahead and
left click, hold, and drag down on
just the video icon, to pull this clip down
onto our timeline. You can place it
anywhere for now, but it's ideal to have it
start at the beginning of the timeline just for organizational purposes
and cleanliness. Let's go ahead and drag
our clip to the front of the timeline to start
working with it. Next, we need to position
the clip so that it appears on the upper
part of the frame. I'll head over to the Inspector tab on
the right-hand side. If it's not already open,
just click the small tab here and it'll open up. I'll make sure the
clip is active by left clicking it once
on the timeline. It will appear
highlighted in red, and that's how we know it's selected in order for
us to modify that clip. Once that's done, I'll enter these values in the inspector. For zoom, I'll put
the value up to 1.250 and for the
exposition negative, that's minus, so minus 22. For Y, we're going to put 2125. Now that we have our
top clip in place, let's get the other
two in place as well. I'll double-click my original footage here in the media pool. Then I'll use that
same in and out method to pull my
second video clip. So let's go to the
clip that we want to use here of the mixing. I'll press I to set my inpoint
and O to set my outpoint. Remember to use some arrow
keys here to pinpoint the exact frames you want to start and end the clip
with more accurately. Looks great. So let's
go ahead and again, just drag the video down, not the audio or both by left clicking on the video icon and dragging this clip down right
on top of the first clip, like this, like a
little pancake. This looks really
great. I'm not going to change the position
of the clip at all. Don't even worry
about where it is. We'll fix that and
adjust that later. Now for the third clip, I'm going to use
the same method. I'll press I to set my inpoint, O to set my outpoint. Again, I'm using the
arrow keys left and right to pinpoint the frames
more accurately. Go ahead and drag
the video down by left clicking on the video
icon and dragging this clip down right on top of
the second clips. We've got like three
little pancakes here. The second clip we dragged down should appear
in the middle here, which is fine, that's
where we want it. But the third clip
needs to be adjusted. That's the third clip that we put on top of that second clip. So let's adjust that clip. Make sure it's
highlighted as well. It needs to be in red
as you can see here, and go into the inspector. So for zoom, we'll
set this to 1.18. For the X we'll use 16 and for Y let's use negative
or minus 2069. Just make sure that when you
enter these values you are also pressing the
Return or Enter key in order to execute the values for lack of a better term to make sure that they're actually
registering. So everything is playing
back pretty good. I'm just going to slide
the clips to the left, just to stack them one
on top of the other. It's a pretty good way to just see all the
clips in order. Don't worry, we're
going to trim these up and make them look really, really slick in the
following lessons. But if I just play it back, you can see it actually
looks pretty decent on its own without any of the things we're actually
going to do to it. But, if you wait a
few more lessons, we're going to make this
look really, really clean. If you're having problems
manipulating the clips, you may even want
to double-click the clips in order to make sure they're selected
when you're doing these transform
control modifications. But we're going to need to do a little bit more to make it pop in the very next lesson. The hardest part of this
process is really just making sure things are
evenly spaced apart. It doesn't have to be perfect, but it will be slightly different when you're
using your own footage. Just make sure
that you're taking the time to play
with these X, Y, and zoom values just a little bit to make it the way
you want it to be. I've re-framed a
little bit here to make sure things
are nice and even. Again, please just take time
at this stage to get it just the way you like it in terms of spacing
for your footage.
6. Freeze Framing: Picking up where we left off, I have placed all three
clips on top of each other, as you can see in
our timeline below. Again, we're going
to worry about trimming them and making
sure they're perfect later. If you notice, as I scrub
through the timeline, it's about six seconds long, which is about right for
an Instagram or TikTok, Facebook, reel length,
that's pretty good. Six seconds is a really
good length to have when you're working with reals
as just a quick pointer. People's attention spans are
very minimal these days. We tried to keep these
videos as quick as possible when we're
creating the reel. What we're going to do
now is we need to focus on making sure that
these clips will freeze at each location so that they'll freeze and text
and color will come in. The way I'm going
to do that is I'm actually going to
use the right arrow key and I'm going to
punch it 12 times 1, 2, 3, 4, 5, 6, 7, 8, 9, 10, 11, 12. By doing that,
you'll notice I've actually gone 12 frames. That's why I love using the left and right
arrow keys so much. I'm going to make sure that
the timing of our real stays consistent by actually
knowing I've went 12 frames at a time as
I do this freeze-frame. What we're going to
do in this lesson is add the freeze frames. What I want to have happen here is on this first
clip, the top clip, it'll play for about 12 frames. Then it'll freeze. We're going to want
to do that for each subsequent video clip in order to get the style
that we're going for. Make sure all of your clips are stacked up just like that. If you took our busy beginner video editing
course, you know, my favorite Da Vinci resolve
shortcut is Shift Z. Sometimes students will
have their timeline zoomed in so much they can't
see what they're doing. If you ever get lost. Remember, Shift Z is your
best friend, Shift Z. Shift Z will allow us to
look at the entire timeline so we know what we're
doing and we have a good bird's-eye
view of everything. So it makes sure
all the footage, again is stacked
up nice and neat against this left side of
the bar starting at zero. This is the beginning
of our clips. I'm going to go ahead and
step 12 frames again, 1, 2, 3, 4, 5, 6, 7, 8, 9, 10, 11, 12. That's awesome. We're going to work with this
first footage right here. What I'm going to do
is I'm going to zoom in by pressing "Command Plus", it looks like an
equal sign here, but on Mac or Windows, just make sure you're
using "Command Plus". I'm going to select B for blade. I'm going to blade my
first clip at that point, at that 12th frame.
You follow me? Great. If you're with me so far, I'm going to use A to get back to my arrow because we want to
switch it back from B. B is blade, A is arrow. I want you to get used
to these shortcuts because they really
save a lot of time. I'm going to select the second half of the clip that we bladed from the first clip. What I'm going to do here
now is I am going to right-click "Change clip speed" and I'm going to freeze
frame this option here. Then I'm going to
click "Change." Watch what happens now
if I play back the clip. It'll go 12 frames and
freeze on the 12th frame. Excellent, that's
exactly what we want. I'm really lost
worry where I'm I. Shift Z, and we're back out. Let's do the same
freeze-frame technique with our second clip now. In this case, we want it to pause a little bit after our freeze-frame
in our first clip. At that blade point
Command Plus, I'm going to go
another 12 frames. Well, how many is
12? Well, we know because we just use the
left and right arrow keys. Let's get that
scrubber play head back to that blade point. I will count 12 frames to the right by pressing
the right arrow key. Ready? Here we go, 1, 2, 3, 4, 5, 6, 7, 8, 9, 10, 11, 12. Great. Now we know
that's 12 frames. I'll go and click B for blade. To get the razor blade active, I will cut right
at the 12th frame. I will select A for arrow. I will right-click
on this second clip, change clip speed, freeze
frame, and hit Change. Let's have a look.
Looks pretty good. This may seem
really fast to you, but for reels, you want to make
them fairly quick. It may seem fast. Again, feel free to
play with this if you want it to be 13
frames long or 14, 15, go for it. I just think this
works the best for what I think will
work best for reels, just to get information going. Lately, I've heard
people can't even watch videos past three seconds. I really try to make these
quick when I'm putting out these videos so 12 is a pretty
good number to go with. Great. Let's head to the third clip and modify that so we can
freeze-frame that out. I will put my play-head right at that second
blade marker, right here in our second
clip and I will count 12 frames 1, 2, 3, 4, 5, 6, 7, 8, 9,
10, 11, and 12. B for blade, A for arrow. To get back to our arrow tool, I'll right-click
on sample footage. The second half of the clip I will hit "Change clip speed". Freeze frame. Let's
play it back. Now, all three
clips are freezing, exactly the way
we'd like them to.
7. Adding Color Elements: The next thing we're
going to want to do for our real is we're
going to want to add those really nifty color mattes to each of these videos that
every time each one freezes, a different color will appear. How do we do that? Well, I'm going to hit
''Shift Z'' just to get a clear look of what
we're looking at here. You'll notice that we
have our freeze frames here ready to go and
we just need to make some room for some
handy-dandy color mattes. Let's go ahead and make
some room for those. What I'll do is I'm
going to click and drag to select these
top two tracks. With those selected, I'm
just going to hold down Shift and move
them up one track. As you can see, this
V2 is blank now. The reason I'm holding down
Shift is to make sure that as I move the clips
up on the timeline, they don't shift around. Shift allows it to snap
or lock in place so that our beautiful timing is
not affected at all. We need to do this
one more time. What I'll go ahead and
do is click and drag. I'm a click drager. I can't help it, but I really love it. I will hold down Shift and
drag up on that third line. Now what we have is
the sandwich effect. We've got two blank tracks, actually a third on top
for our third color matte. But that's exactly
what we want here. At this stage, we're
going to want to add some color mattes when
the clip freezes. Let's work with the first one. I'm going to go ahead and
go into the effects tab, which is right up
here. Let's hop left. I'm going to go to generators, as you can see here on the left, and I'm going to scroll down
until I see solid color. These are all elements
you can just drag directly onto the timeline and that's what we're
going to do here. First, I'm going to
position my play head, this little red marker, right on my cut point
for the first clip. We're going to start
working with this first module clip right here. I'm going to drag solid color as an element
onto my blank V2. I'm clicking,
dragging, and holding, and then I'm releasing my mouse click in order to place
that solid color there. I'm going to delete this
and show you one more time. I'm clicking down on Solid
Color holding down on my mouse, left-clicking
and dragging. I'm still holding and it will snap to my play head right
here and I'll let go. Let's check it out. It looks all funky. What's going on here? Well, it's because
our solid color is black and we don't want that. We're going to want
a different color. In order to modify this color, I'm going to head into
the inspector and double-click just to make
sure that you've selected it and making sure that
it's highlighted in red. I will go to generator,
not settings. I'm going to generator here and you'll see the color matte, color here can make
it whatever you like. Let's go ahead and click the ''Color swatch'', I
believe they call it. This will open up
another dialog box to select the color
that you want to use. You can use anything you like. For this maybe we use a
green or a neon-green. Have fun with it, do what
you'd like for this demo. We'll use a little neon green. We can always adjust them later so don't get too precious
with this right now. I'll click ''Okay'' and I'll then go into
settings this time. I'll head down and right here you'll see
an option for opacity. Meaning how transparent or
opaque you want this to be. Right now it's totally covering our image, so
we don't want that. I'm going to drop the opacity down and watch what happens. We're starting to see our image come through a little bit more. At this stage sometimes what I'll do is I'll go
back to the generator and adjust this color
a little bit to fine-tune it because what's happening is we're mixing that color matte with
the image itself. It might create a
new special color for you there that
you may not like, so feel free to adjust
it by going back and forth into the
generator setting here. This looks pretty good.
I'm happy with that. We need to add two more now. Let's go ahead and do that. Well, that was pretty
cool, although we're not using
it for this demo. Let's go ahead and
use the same tactic. Now I'm going to go to
the second edit point because now we're going to add a second color to
our second clip. I've got solid color
ready to go here. I'm going to left-click, hold, and drag right to that freeze frame point.
What's happening here? Doesn't look too
good. Things are disappearing, no problem. With the solid color selected, sometimes I double-click
just to make sure, I'll double-click
that solid color. Maybe we're going to change that to let's try a little red. How about that? I'm going
to select ''Okay''. But it's also covering our top image, what
are we going to do? Well, first, let's play with the opacity to make sure that this thing is
coming through okay. I'm going to go into settings on the right-hand side and
I'm going to change our opacity to 30. That
looks pretty good. But as you can see, it's
also covering our top image. We don't want that, so how do we fix that? Well, we crop it. At the top, you'll see
an option for cropping. I'm going to crop
the top of this because all we want is red
to appear as you can see. If you have to crop
the bottom, you can. But feel free to play
with these settings to get them exactly
the way you want. Sometimes I'll Zoom in a
little bit on this timeline, I'm just zooming into see this little color separation here just to adjust
it just a little bit. You can actually click
and drag to the left and right these values to
get them very accurate, which I'm doing here. That looks pretty good to me, nice and even, and we
have our red color. Again, if you want
to go back into generator and adjust
this color a little bit, you can by clicking that and just playing a
little bit with it. Feel free to do that. By clicking ''Okay'', it
looks pretty good to me. Let's head to the
third color matte now. I've got solid
color ready to go. I will hold down, left-click, and drag it to the right
and place it on that V6, is what I've got right now right at that third edit point. You can either drag
it directly to that edit point because we
have snapping turned on it. DaVinci knows that's where you want to go probably
and it guesses correctly. I usually like to go with the grain and work
with these types of things that DaVinci has active
for use at work with it. It has snapped to my
third edit point. If you're having trouble and
it accidentally doesn't do the right thing or place the color exactly
where you want it. Just I like to position my play head where I'd like that clip to go, in this case, it would be the
edit point itself, and I will drag my solid color
to snap to that playhead. This is our final color.
Let's adjust it. Here we go. Under color, I'll
double-click it, make sure it's active. I'll slide this to
the right to get our active colors here,
maybe we use purple. How does that sound?
Or yellow, maybe. Select ''Okay''. I go
into the settings, I'll change the opacity
down here under composite. Once again, the issue is this yellow generator is covering both of our colors
which we do not want. Do you remember how
to adjust this? Pause the video if you think
you've got the answer, it's just like in
class quiz right now. If you think you know
how to adjust this, pause the video and resume when you think you've
got the right answer. If you guessed
cropping in order to adjust this third and
final color matte , you are correct. I will crop the top of this
down until it looks good. I will adjust it
slightly by zooming in. You can use the
zoom function here. I will just cover up that black just to make sure it looks nice and clean
and there you have it. Again, don't worry
about the length, these little ugly tails, which we'll fix in a later demo. We just want to make sure that
this is working correctly. If I play back the clip, I'm actually going
to press ''P''. P is a great shortcut for seeing the whole Canvas playful screen. I'll hit ''P'' and space bar, pretty cool, and Escape
to get out of that. It's looking really good. Again, you can play
with these timings from the last lesson. You can make them 15
frames, 20 frames. But for our fast attention-seeking
Instagram lovers, I like to make sure everything
appears pretty fast. Congratulations on putting these color mattes.
We're almost there. We're going to add some
text in the next lesson, and we'll see you
back here for that.
8. Adding Text: Welcome back. What we're
going to do right now is add our text elements
to our reel, and what we want
them to spell out is organic milled matcha. That's what we've come
up for this demo today. So we need to add some text
to each of these blocks, which will take a little
bit of modifying. In order to do that, I will need to add them as elements to each
of these blocks. I'm just going to drag
this audio bar down. I'm clicking and holding
and dragging just to give me a little bit more room. Again, I'm working on a laptop, I work on a laptop very often. So screen real estate is
really important to me. So because we're not going
to be doing any audio. I'll just highlight this
bar and just drag it down to give me a little bit more room
because we're going to place our text elements
right up here. We're going to start by
going into the effects. If it's not already open, it should be from the last lesson, but go to effects
and then titles, and we're going to use a clever, neat little DaVinci text
effect called random right on, and as you can see, it's located down here. I really like it, it looks
pretty slick and clean. Also, if you're having
trouble finding it, go ahead and click the
search icon and click and type random right on and
you'll see it right here. It's a element just like every other element we've
pulled onto our timeline. So in that case, I will click hold and drag
it right onto our timeline, onto V7, and I will let go here, and if I play it back, you can see I hit Spacebar. It's appearing here, but that's awful and we
don't want that. We want to edit this and
make sure it's appearing at the top of our element here. In addition to this, it's
in the totally wrong place. I want it to start right
here at our edit point. Again, if you're too zoomed in, I'm going to repeat this
over and over again, that Shift Z is
your best friend. I want the text to come in right at that
first edit point, because when it stops on the first train,
text should appear. So I will click on our random
right on element here, drag it to the left, so it slams into our play
head or red line here. I'll click Spacebar, it's not coming in exactly
how I'd like it to, but we will adjust that. We've dragged this on, it looks pretty good. Don't worry about
the timing just yet. Let's just get it
in position and make some simple modifications. So the first word we're
going to write is organic. I'll head over to the
inspector if it's closed, just make sure it's selected. You'll see it
highlighted in white, and it's also
selected down here. I'll double-click it just to make sure I've got it activated, and under the title control, I will just enter organic
and for the font, let's go ahead and
use Georgia bold. Let's go ahead and locate that everything is in
alphabetical order, so pretty easy to find. Georgia and bolt, and I'm going to
do a playback just to see what this looks like, not bad, but we want
it to appear up here. So what do you think
we need to do? We need to adjust the size
and also the position. We can do that by
first going into these settings and adjusting the position just like
any other element. So in this case, what I'm doing is
I'm left clicking the number and sliding
it to the right. I'm clicking holding and
dragging to the right, and I'm seeing the changes occur in real-time as I do that. I'm going to do the
same thing with the Y, and we've got it in
the middle there. So again, I'm just
left or right click dragging the number
in order to get it exactly where I want
it now, it's too tiny, so let's go into the title, and I'm going to left-click and drag the number here to
make it bigger or smaller, or feel free to use the size slider to make it as big or small
as you want it to be. Obviously coming
off the page here. So again, head back
into your settings. I'm going to move
it to the left by cyclic sliding and
dragging to the left. Organic, that looks pretty good. I don't know if you can tell, but the texts itself
is a little light. It's actually not coming
through bright enough. So one of the things I like
to tell students to do is change the composite
mode to add, and it actually makes it
a little bit brighter. You can't really tell, but it really makes the
color that you're using pop, and again, feel free to
change the color if you like. Here, you can go into title
and change it to red, pink, blue, whatever you like, and that's actually part
of how we're going to change each reel to make them different every time we output a new reel using this
template that we're creating. So let's go ahead
and check this out. I'm going to play back. Not bad, but I think it
comes in a little late. I don't know about you, but
I think it's a little late. So what I'll do is I'll just slide it a little bit
over to the left. I'm just click, left-click and slide dragging it to the left. It's pretty good,
that's a little nicer. Another great way to do this
actually is if you zoom in and you want it to appear
right at a specific point, I will just move and scrub my playhead to the point
I want it to start, and I'll just drag my element right to that play head
like I like to do. So let's play it.
Wow, pretty deep. We've got organic. It's
like a little offset to me, so I'm going to go
back into Settings. Let's drag it a little
bit to the left. Organic. Great. All
we have to do is do this two more times for
the bottom letters. So let's go ahead
and do that. I am zoomed in. I don't like that. So Shift Z to back
right out again, and I'm going to slide on
another random right on, and what I'm going to
do is first position my playhead to the point where
I would like it to start, and I think I'll just
position my playhead a little bit to the left of
this second color elements. I'll drag it random right on. Over here are our title
element is ready to go. But we have a problem. Do I have to do all of
this all over again? So one of the things
that can save you a lot of time when
you're formatting text is just copy and
pasting the text element you just formatted in order to save all those beautiful
settings that you used. So one of the things that
can save you a lot of time now is just duplicating this text element in
order to save all of the beautiful formatting options that we apply to
it like the font, the color, or the compositing. But we just have to adjust a little bit of the positioning. So in order to save us time, this is a great
little DaVinci hack I like to use all the time. I'm going to just duplicate this text element by
clicking down on option. So I'm holding down the
Option button and I'm left clicking and dragging
up and letting go, and that will duplicate
this element. You could do that with
any element actually, you just have to option click and drag them to delete it and do it one
more time for you. So I'm selecting
the text element. I'm clicking and
holding down on option. I am, then left-click
and holding on the element and dragging it
up and it will duplicate. You can let go of
the option key. Conversely, you could just add the random right
on feature again. In order to edit this
at your own commanded, it will take you a little
bit more time to do that, to customize it again to match this other specification from
the original text element. But both work the same way. I like to save time as you know, because I'm a busy person. So again, option click drag up in order to get the
same duplicated item. So what's beautiful about that is all I have
to do is adjust one setting in order to get our text element in
the middle of the video. So what I'm going
to do is I'm just going with this highlighted, I've double-clicked the
random right on Element 2. I'm going to manipulate our
y setting and just drag it down by sliding my y
value to the left, and that way we've preserved all those beautiful
same settings from that original text file, and I need to do is just
change the text itself. So I'll go into title, I will type in milled, and of course, it doesn't
look the same as the organic. So feel free to
go into settings, and in position I will click and drag to the right
on our x positioning. You could even make it
bigger if you'd like. By going into title and
adjusting the size, settings, clicking and
dragging to the left here. We've got organic
milled, ready to go. We need to make a third. I'm actually going to
adjust this and make it a little bit smaller. I don't like that. There we go. I'm just flip-flopping
back and forth between these to make them
look a little slicker. So let's position
this because we don't want milled to come in
at the same time as organic. So let's just slide
it over a little bit. It's pretty good. I'm not too picky with these
to be honest with you. Because I think all the
information just needs to be delivered as quickly as possible when
you're doing these. So that within, as
you can see a second, we're getting a lot of
visual information going. Great. At this stage, we're going to need to add
the last text element. Do you remember how to duplicate this text element
and manipulate it? Do you remember how to duplicate this text
element and easy hack, pause the video now and
see if you can remember. So if you guessed
hold down option, click and drag up, you guessed correctly, and that will duplicate this second text
elements so that we can just manipulate
the third very easily. So I will go ahead and I will drag this third
element to the right, and with that selected, I will pull down the
clip to the third, pull down the text to the
third image by clicking and dragging to the left, and I will go into
title and I will click. I'll go into title and I will
select the word and delete it and put the word matcha
instead. It looks pretty good. I think the milled is
a little off centered, so I'm just going to go into
random right on Element 2 and position it to the right, that looks pretty good to me. So let's have a look.
That's pretty neat. I think I'm going to slide our Matcha over
just a little bit. As you can see it maybe too far. So how do we fix that? Well, one of the
ways I do that is with the timeline selected, I will use the left arrow key to step frame a little bit back to where I'd
like it to start, and simply click
hold and drag snap it to the red playhead,
and let's have a look. That looks pretty cool. So in the next lesson, we will play a little bit with the timing to make sure
this thing looks really, really spectacular and
we'll see you there.
9. Trimming Footage: Really great job getting all
of our elements in place. We've got great texts, we've got the color mattes, we've got all the video there. Right now, all we need to do is a little bit of housekeeping. We got to clean up these
little tails are super ugly. What we're going to do
is to determine when we want our reel to end
the timing of the clip. I think anywhere 6-10
seconds is pretty good. Let's dial in on that timing in order to figure out when we want our clip to finally end this beautiful formatting
that we've done here. On the timeline, you'll
notice that the numbers exist as you play
through the clip. I press Space-bar 3, 4, 5, 6. Maybe we want it to end
around the sixth-second mark. I think that that's pretty good. I don't think people
really watch beyond 5, 6 maybe even 10 seconds. I think six is a good compromise because
remember we're going to have to add that end card
with the call to action, the website or
whatever title card you're going to want to use
at the end of your video. Let's make sure all
of our elements here and on the
sixth-second mark, super-duper, easy to do. I'm just going to zoom
in by pressing command plus to get a little closer
to the play head position. I'm just going to click,
slide and drag all of my elements to snap to
that six-second location. If you're having trouble getting to that
six-second location, remember to manipulate the
left and right arrow keys, use them to get to
that six-second mark. I'm just using left and
right-to-step frame. I'll take my first
element here, select it, left-click, and drag
it to my play head. Great. Number 2, drug. Third clip, drag. Fourth element, drag. I'm not seeing this very
well, so I'll just zoom out. Command Minus, I will drag, and it's beautiful
because these are freeze frames can be an
infinite amount of time. It's a really, really great thing to use from time to time. I'm not seeing the
end of this clip. Could use this little
slider bar at the bottom as well to get to the right
and left of your clips. Drag that over. Let's drag this solid color to the right and this
one to the left, Shift Z and voila, we have a really nice looking. Good. Now, you'll
notice that the matcha disappeared and that's okay. This might happen on your cut, but it's not going to
be a problem because we're actually going to
trim this a little bit more when we come to the end card and final
stage of your reel. Way to go, way to make
it nice and clean. We'll see you in the next
lesson to finish this all up.
10. The Compound Clip: One of the things if you
haven"t noticed already that can get crazy on your timeline, is just how many
elements gets stacked together to create
something unique. As you can see in our project, We've got over 6-7 elements all stacked on top
of each other. It"s a little hard to see
things. It"s a little messy. What we"re going to do
is create something called a compound clip. What this does is collapsed
all of those elements into one clip that can
be easily manipulated. Let"s have a look. Welcome back. We've got everything
we need ready to go. But the problem is there"s a lot of floating elements here. It"s super, ugly, super messy, a lot of
elements here to manipulate. A really great way to
consolidate all of these clips into one is by creating something
called a compound clip. That allows us to treat all
of these elements as one. It"s almost like taking
all of your pancakes and making one massive
pancake with it. In order to do that, what we"ll do is we"ll
click "Shift Z." That"s our little
shortcut to make sure we've see all
of our footage here. Then I will press "Command A"
to select all of our clips. I love compound clipping
and you"ll see why. I will right-click now anywhere
on these clips, anywhere. Just not in the gray. Again "Command A"
right-click on any of the clips and produce
a new compound clip. It will ask you to name this. You can name it V1 or Banana Rameau or
whatever you like, and I will click "Create." You"ll notice what happened
now is all of your clips have stacked together into one nice clean clip.
I"ll hit "Spacebar." Look at that.
Everything is there. But they"re just consolidated
in a very nice clean way. You might be wondering, what if I need to manipulate this again or change the colors? Well, check this out, in the media pool
you have your V1. Now if you double-click it, you will notice
nothing"s appearing. You actually have to right-click
this little icon and select Open in Timeline.
There you have it. One of the features I like
to turn on from time-to-time is the ability to switch back
and forth between timeline. Make sure if you"re into that, to just select this button here, and make sure under Timeline View Options that
this first option is selected. What you"ll see is
V1 listed here. If I double-click our Match a Demo sequence just
at our media pool, double-clicking that
you"ll see the two act of timelines working together so we can swap back and
forth very handy. You can see now you"re looking inside of this
mastodon clip here. You"re looking inside
this big beefy guy here. Any changes you make now to this will appear in this
compound clip. For instance, if I change, let"s say I change the
solid color to purple. I click "Okay",
you will see that reflected in the compound clip. Don"t worry your
changes are there. They"re just gift wrapped for you so that you can
work with it easier. Why would we want to do this? Well, we want to cut down on the clutter of your timeline. Again, organization is always
key when you"re editing. But also to add really cool, interesting transitions if
you"re using other elements. In the next lesson, we"re going to add
our final elements. We"re going to add
our end card and a really awesome transition to make this all come together. Stay tuned and we"ll
see right back here.
11. Create End Card and Transition: Congrats on making it this far. We've got everything looking
really, really great. We just need to add
an end card and a really fancy dandy transition. Super simple to do, especially if you're
a busy person. We'll get started by adding a solid color to our timeline
located in the generators. We use this earlier when
we were making our mats. I will just go ahead
and left-click, drag this onto our timeline
and anywhere is fine. I like to change this
to a cream color. I've got it pre-selected here but feel free to use
anything you like. I'll click "Okay", and we need to figure out when this thing is
supposed to come in. We set around the
five second mark. I'm just going to adjust
this a little bit. I'm going to see where
I'd like this to end. We had a little text drop
off from our compound clip. I'm going to left key-frame to maybe that position at the
five-second 10 framework. I will drag our solid color
block over our V1 clip, so what should happen here is the compound clip will play, and then hit right
to the solid color. That's what we want. Shift Z, and you can see our
full compound clip. Keep in mind that yes, I have overwritten
some data here, meaning I have positioned our solid color over
the compound clip, essentially eliminating
some of the information. However, all of that clip data is still there, so don't worry. It didn't go anywhere.
At this stage, we've got our solid color. Let's add a text block, something nice and fancy
for our call to action. I'll go into Titles under the
Effects tab here, Titles. Search for text box. Nice, I really like this one. It's really nice and slick, so I like to use this a lot. I will left-click and drag it
like every other element in DaVinci onto our timeline
and put that on the V2. Let's have a look here. Oh, nice, but I can't
see a darn thing, so let's go ahead and
edit these elements. We will go into the title, making sure that
this is selected or double clicking to make
sure it's selected. I will change the title to www.matchademo.com
great but it's all white we don't want
that maybe we want black. Let's go under color, right here under color. I will select black. Just drag this
slider to the right. There you go and click "Okay". That's half the battle, because we need
this white text box to turn black as well.
Well, guess what? Under the Box Color
and Shape tool here if I just click
this little arrow, it will give me
options to change that text box color super
handy and here we go. It's white, I will
click the white area, which will open our
modifier for color. I will just slide this to the right and
click "Okay". There we go. You can actually change the font for this as well if you
don't like Open Sans, feel free to use anything that you'd like
that you think looks slick. We'll go with Palatino for this one.
Really, really nice. At this stage, if we
play back our image, it's a little harsh;
don't you think? It just cuts to this title
card a little harshly. What can we do to
smooth this out? Well, maybe we can add a
little video transition, and this is the whole point
of adding the compound clip. We can't add a transition to all of these elements because it would
get really messy. We consolidate all of
the clips into one so that all of the elements
will get treated the same. In order to do that, I will go into
Video Transitions, and I will search
for Noise Dissolve, and you'll see it right
here, Noise Dissolve. Actually, if you run
your cursor over it, it'll give you a brief preview of what the effect will do. I think it looks
really neat as is, so let's go ahead
and left click, drag it onto our edit point. You'll notice what's happening here as I drag it
onto the edit point, it'll give me a few options. Let me just zoom in Command
Plus on our edit point. We can either drag it
on to an edit point, so that there's two little
handles on the left and right side of our
clip or to the left. Feel free to play with both, that's what I usually do. I'm just going to
make sure that it drags onto the left portion of the clip and that looks
pretty decent to me. I'm going to play it back, but I think the Matcha called to action is
coming in way too late. I'm just going to left click to activate that and
move it to the left. As I do that, I'm manipulating
the timing of that clip. That's a little better,
maybe to the right, so that as that
transition comes down, that beautiful logo comes up. That looks great to me. If you want, you can drag this element all the
way to the right, and we've got a
total clip length of 10 seconds, which
is phenomenal. That's perfect. Shift Z and let's have a look at
the whole final product. It looks pretty darn good to me. If you feel that
this is too long, let me show you a quick way of shortening this clip as well. For me, I think it's a little laggy in terms of the time it's taking to
get to this end card. It might be a little too long. Why don't we just move
everything to the right? Let's simply drag out edit point to the left where
we feel it should come in. What I'm doing, is I am, with the arrow selected, just scrolling over
to the edit point. I am left click holding down on the edit point and sliding it to the left, so let's see. I'm going to drag my text-box
again to the left to adjust our timing that's a
lot better to me. I don't really like to
waste time on the reals. I don't like dead space. I think things should be
dynamic and keep moving. If you feel there's a
little bit of dead space, I like to have that
transition come in right when the Matcha is done finishing
its little animation. Let's have a look again, great. I'm going to undo
that and show you one more time because that
can be a little tricky, and it's easy to mess this up. Just make sure you're on Shift
Z to back all the way out. I am going to left click the edit point and it's
going to turn green. I'm then going to
left click and hold down and drag that to the left. You can do the same
thing if you mess up, just go ahead and
do the same thing. Just left click on that
edit point not here, not here, not here
on the edit point. It'll turn green, and just slide it where
you want it to go, and then move your text element accordingly to where
you'd like it to come in. That's great timing.
I really like that. Let's drag our solid
color element to the left to make it
just nice and clean. Let's play it back looks really great
all the timing looks really great to me. We've got a really, really
great final template going. In the next lesson, we're going to figure
out how to adjust all these elements in
a simple way in order to create multiple reels
using this final template.
12. Duplicate Your Reels: Well done on creating
the new custom reel. In this lesson, I'll show you how to duplicate
that work you just did to create many different versions
of the same reel. Welcome back. We've created our final reel,
and that's great, but you can't possibly
be telling me I have to do this every time I
need to make a new reel. Well, the answer is no. We could use this template to make hundreds of different variations by adjusting the font text, the clips, and of
course the color bats. In order to do that,
here is what I do. I've got my created
final template here, and what I'm going
to do is I'm going to copy this compounded clip. I'm going to do that
by selecting it, I'm going to ''Right-click",
select ''Copy''. I will move my play head down the line on
the timeline here. I will right-click anywhere
and click ''Paste''. We've got a duplicated
version of our compound clip. Big deal, it's the same thing. How do I manipulate it? Well, the next step
is to right-click that and select ''Decompose
In Place Using Clips Only''. It uncollapses like an accordion
into the original clips. These are all duplicated
clips that we can now manipulate to our heart's
content. Let's do that. Let's go ahead and
change our footage, our mattes, and our text. The mattes and the texts take the least amount of work to manipulate again
because we just have to change the text and the
color. It's simple enough. It just takes a
little bit of time to manipulate these video clips, but it's really not a big deal. Let's go ahead and go into our sample footage and
find some new clips. I have a few more clips
that you can use. I've got the can opening, I've got water pouring
to the watcher bowl, and some more mixing. So maybe we'll use the
can for our first clip, and our second clip
will be the water pouring and then the mixing, is just fine for this demo. How do we go about replacing
this sample footage? Well, I'm going to
choose our first clip. Just like our original demo. Let's go ahead and find a point where we'd
like it to start. That's pretty good.
Right about there. I'll use the left and right
arrow keys like before. I'll press ''I'' for in and press ''Spacebar''. That's cool. Press ''O'' for out. I'm just going to drag the
clip down onto our timeline, just the video, not the audio. What I'm going to
do now is I'm going to apply the same effects, the modifiers, the positioning
to this clip down here. I will right-click
on our first clip, this first little BB clip here, I will select ''Copy''. I will right-click
our new sample clip, I will then say Paste Attributes or click
''Paste Attributes''. What we want to do is paste
the video attributes. I will check Video Attributes. Click ''Apply'' and
look what happens here. If I go over to this clip. That new clip has now
positioned itself correctly at the top of
the frame and we can make some minor
adjustments if we need to. At this stage, let's go ahead
and replace this clip with our first clip by deleting
the original footage. I'll just delete
this by selecting, here's our original clip. I'll just delete these two by clicking ''Delete''
on my keyboard. I will slide this footage over. If snapping is turned
on, as you can see here, it's this little magnet icon, DaVinci will guess that
you'd like to snap it to this starting position, and it's correct about that. If we actually play it
back, looks pretty good. I'll just zoom in a
little bit, Command Plus, and we'd like it to
freeze frame right there, right where our
solid color comes in because that's what
we did last time. However, I'm not too happy with where it stops, so again, you can adjust this
a little bit by, I'm just dragging the clip to the point where I'd like
it to freeze-frame. Maybe I want it to
freeze frame when the can opens. Simple enough. Get the clip to stop exactly
where you'd like it to be. What I'm doing here
is I'm just dragging the clip to where I'd
like it to begin. I'm just going to
click left and hold to the left to trim the
front of the clip, and it's going to freeze frame
right at this solid color, right where we positioned it. B for blade to make an edit
point there, A for arrow. Remember what we do next? I will select the second
half of the clip, right-click, change clip
speed, freeze-frame. Then I will just drag this
all the way to the right. What we have is our first
clip set and ready to go. We need to do the same thing
with the three other clips. I'm going to do
the second one for you with you right now, and then I want you to try to
do the third one yourself. Let's go ahead and find
the second footage now. I'm going to double-click
our source footage, and this time I'd like to
bring in the water bowl. How about right about there? I'm going to click ''I'' for in, Spacebar, Over out. I will then click
''Hold'' and drag just the video portion
down onto the timeline, and there you have it. Remember, it's
centering perfectly for this middle clip so
that's really great. All we need to do is drag this clip all the way to the left for our second clip
so I'll just delete these. I'm just selecting
the front clip here, Delete, the second half, Delete, sliding this into position, right where we would
like it to start. Fantastic. We wanted
to freeze frame, so where do we want
it to freeze frame? We want it to freeze
frame right when this second solid
color matte pops in. Let's just do that by moving our play head right
to that location, clicking, and dragging. I do that a lot on the
scrubber bar here so just drag your play head
right to that solid color. Hit ''B'' for blade. Cut right at that position, A for arrow. You follow? On this
right-hand side of clip, right where we cut, we're
going to convert that into a freeze-frame clip. I'm going to right-click, change clip speed, and freeze-frame. Excellent. We're going to
slide this to the right. We're extending the length
of the freeze frame. So when I click and drag it, it's extending the length of the freeze-frame and
that's what we want. We want it to line
up just like that, and if we play it back,
looks good to me. Let's go ahead and
do the third clip. Do you remember how to do
that? I want you to pause the video and remember, I'm going to
give you a little hint. You have to copy and paste the inspector settings.
That's all I'm going to say. I think I've already
given you too much, but go ahead and pause the
video and see if you can do the third clip. Welcome back. We're going to adjust and insert the third bottom clip by finding the last piece
of footage we need. I'm going to go ahead and click our sample footage to locate
our last and final clip. We'll use this string. We'll find a nice
little point here, I'm clicking and dragging on
this little timeline bar. I'll select ''I'' for
in and ''O'' for out. That should be plenty. I will then just drag down, click and hold and drag on
this video icon down onto the timeline to pull our
clip down onto the timeline. Phenomenon. However, it's
not in the right position. We want this clip to
appear at the bottom. How do we do that? Well, I'm going to copy the
modification settings of this original clip and paste them onto the new footage we
just put on our timeline. I'll do that by
right-clicking on the third clip settings here, I'm going to right-click and
say ''Copy'' right here, I will right-click
my new footage, and I will select
''Paste Attributes''. If you got this correct,
congratulations. I do this a lot. I copy and paste a
lot of attributes, and it will correctly
guess that I want to paste my
video attributes. Just make sure that
this is selected, checked, and say ''Apply''. What will happen now
is if we look at our new footage, there you go. It's right at the
bottom of the reel, just how we want it.
We're good to go. Let's go ahead and delete our original footage here because we don't
want that anymore. I'll just select it, hit
''Delete'' and I'll get the other one and select ''Delete'' because we're
getting rid of that third clip. We're putting some
new footage in. I will slide this into
position, the new footage, and it needs to freeze frame, right as this third
color matte comes in. Remember what we do here? Hit ''B'' for blade. I will blade point right
at that play head marker. That's why I always use the red play head marker
because everything snaps to it. Makes it super easy in DaVinci, I'll go to A for arrow, I will right-click
the sample footage, and I will change the clip
speed to freeze frame. Excellent. I need to
extend the length, the timing of this freeze-frame, so I'll just drag
it to the right. We should be good to go. If we play back this clip, everything looks nice and neat. In the next demo, what we're going to do is, we are going to manipulate the other
features of this reel so that we can create a different variation
of that original reel.
13. Adding Text and Color : Congratulations on making
a second template real, so that we can
start editing this. Manipulating the text
and the color matte is a very simple process because we've already
done the work. What you're going to
go ahead and do in order to change the colors is select whichever element you want to manipulate
and just adjust the settings right
in the inspector. I'm going to select
the first color matte. I'm going to change my color
to be a blue. Hit "Okay." I'll select my second color
matte and make sure to move the play head to the elements so you can see what you're doing as
you manipulate it. Because if you don't,
you won't be able to see what changes you're making. Make sure to move the play head, especially if you have the
viewer looking like mine. Again, if you want your
viewer to look like mine, go ahead and collapse the
inspector and toggle on this little feature
in order to see what you're looking at all times. I just have it this way because
it's hard for me to see everything I'd like to
see as I'm editing so I have everything
collapsed into one. With the inspector selected and the scrub play head scrubber over the element
you'd like to adjust. Just make sure that if
you're in this view board, that you're seeing
what I'm seeing. With the solid colors selected the second element
I'll go into color and change it to maybe deep purple. Click "Okay". For the
third color element, instead of purple, I've
selected it here in red. I'm just simply clicking on it making sure that
generator is selected, and we'll go with, how
about a nice yellow, about that, something like
that and I'll click "Okay. " Now we've changed
each and every color, and we'd like to
change the text. Let's change the text
to fresh organic mocha. Here is the first
random right on. Again, move the play head so you can see what you're doing. You might need to move it
a little bit down the line so you can see everything
appear on screen. I will go to random right
on and select "Fresh." For the second one, just make sure the second text element
is highlighted in red. Let's do fresh, organic, and mocha we can leave. What we need to do now
is obviously adjust the elements so that their
front row and center, because they're all look
a little bit messy. I'll go to the
first element here, and we need to pop this over, maybe even increase the size. I can increase the size
by going into Title, making sure that
this is selected. Title. Increasing the size. Fresh, nice, and big, and going into settings
now and again, I'm just sliding this bar here in order to make it
big, going into settings. I'm going to click and
slide to the left and right in order to get this exactly
the way I'd like it to be. For the second random right on, I'm just clicking that
in order to modify its settings, and again, I'm going to want to
make sure the slider or the play-head scrubber
bar is right where I can see the full text appearing
because I want to make those changes
and make sure that everything is looking great. Under title, I will maybe increase
the size a little bit, and drag on this
slider bar here. I'm going to go ahead
back into Settings. I want to position
this to the left by just dragging on my slider here. Looks pretty good. For
mocha, it's a little tiny. I'm going to select our
third element here, and just make sure
it's nice and big. I'll just go into Title. I know that this is the one I'm editing because it
says macho here. If I had something
else selected, it would say the word of the text element that
I would be editing. But in this case it's correct, it's says macho so
having that selected, just make sure you're going through slowly as you
make these changes. I'm moving by scrubber, head, play head here to the right so I can
see what I'm doing. Just increasing the
size a little bit. Going into Settings,
you get the idea. I'm going to position
this to the left and now we have three new words, three new colors,
and we are all set. I'll just hit Shift ''Z'' to check out what
we're working with here. As you can see, we have
our original edit, organic milk mocha, with three different
color mattes and three different
texts elements and three different videos, and we have the same here. Obviously, due to the tutorial, it's taken me a
little bit more time to talk you through this. If you do this on your own, it takes way less time and that's what we're here
to do as busy people. The demo itself, again, it takes a little bit of
time to walk you through it. But once you've
got the mechanics, you can essentially
just copy and paste this template multiple
times in order to create different variations of the same reel using the same custom
template just to make a few minor changes. In the next lesson, I'll show you how to compound the clip, add the end card and
simple transition.
14. Additional Compound Clip: Welcome back. Now we need to make a new compound
clip in order to create our end card and transition. Do you
remember how to do that? Well, if you do or don't, I'll give you a
quick review again. This is just info
we've already covered, but with the new reel
that we've created. In this case, I don't want
to do Command A because I'll be selecting all of my clips on the time
and I don't want that, so by hitting Shift Z, we're able to see
the entire timeline. What I do is, you know me, I'm a
click and drag or so, I'll just click, drag
my elements here. I will right-click and select new compound clip
and this one I'll call V2. I'll click "Create"
and there you have it. We have a new,
really nice, clean, I love clean editing when
things look nice and clean, and it looks really
phenomenal actually. It's a different variation
on our original reel and something that's almost ready
to go out into the world. We just need to add our
end card and text box. I can do that simply by copying these two elements because we already
have them made. Why would we want to
create two elements? We're all busy people here,
so we don't have time. I will right-click,
click "Copy". Move my playhead to the
point I'd like it to paste. I mean, you could paste
it anywhere really. I mean you could
just paste it here. Right-click anywhere and click
"Paste" and there we go. We've got a duplicated text
box and call to action. They're both selected because
you just pasted them and I'll simply drag them to
the left until they snap. Do this slowly. I'm not going very fast. I'm doing it slowly,
ever so slowly. If you don't like
this method, again, use the scrubber playhead
to your advantage. Just move the playhead
to the end of your second compound
clip and drag these two elements and
it'll snap accordingly. I'm going to zoom in here
a little bit just to make sure everything is
lining up and as you can see, there's a little bit of a gap. Again, I just need to snap to the playhead.
Just like that. I'm going to zoom
out a little bit, Command minus or Shift
Z. Let's Shift Z. As you can see, we've got the same timing, but we're missing our effect
or our transition effects, so I'll just simply
right-click on our transition, I'll copy, I'll select our
edit point, and hit "Paste". Now if that was too fast
for you, I'll undo that. You can simply, as you can
see under video transitions, just type in noise dissolve. This is the second way to do it. Go ahead and zoom in on
your edit point here. Command plus, to
get a little bit closer so you can see
what you're doing. I will left-click on
noise dissolve and simply drag the element onto
our transition point. It's a little hard to see. If you're having trouble
seeing it, remember, you can slide these
video track bars up. I'm going to delete this
and show you again. I can drag the video bar
up to see a little bit more and drag this to
see a little bit better, so let's check out
our transition. Beautiful. Again, you can edit this text box call to action with something else. You can put a logo there, any photo you'd like. You can change the solid
color element again. It's really up to you. Sometimes what happens is this transition
menu will pop up. We don't want that,
we want video, so make sure if you're having trouble seeing anything
you need to adjust, that video is selected. Maybe we change the solid
color, go into generator. I have this selected
but not transition. I'm going to go to
video, generator and we can change this to maybe match of color and
click "Okay" so mint. There you have it. I mean, there's multiple
ways of changing the reel to make it different than the first and you can use these
over and over again. You could even use
different transitions, so play around with all the different
really neat transitions that are created in DaVinci. There's just so much
to work with here. I'm going to go ahead and delete this transition to show you. I mean, there's so many, you
could use a diamond iris. There's so many
interesting transitions that you could use that
you've got a hundreds, thousands, and infinite
amount of variations to use. Congratulations, you've made two really successful reels based on the same
style and template, but they look a
little bit different. I really like the
style again because it actually adds a bit
of brand consistency to your marketing
efforts so that everything it looks the
same but is different, so your customers will look
at your designs and say, I recognize this brand, and it's a really
great way to have a consistent aesthetic across multiple reels on your account. In the next lesson, we will
finally export the reel and we'll show you how to upload
that reel to Instagram, where we can add some
hashtags and music.
15. Export Your Reels: You may have created more
than one reel at this stage. In order to isolate an export
each one on that timeline, you'll need to set some
in and out points on the timeline in order to
export them individually. Let's take a look. We're coming
to the finish line here, and the last thing we
need to do is of course, export this reel so
we can upload it to your phone for Instagram, TikTok, Facebook,
whatever have you. Here we go. We've got our created
reels and what we need to do is export the
ones that we need. What I do sometimes you'll see
I've created a third copy. I put all of my reels
on the same timeline. What we need to do is isolate which one we'd like
to export for use. Let's say we want to
export the second reel. What I need to do
is tell DaVinci I just want to export this part of my timeline because there are three other maybe
potential reels here. What I like to do is I'll
move my play head to the front of the reel
I'd like to export. I'll hit I for in. I will head to the
end of the clip, and hit O for out. You'll notice there's
a little black part that appears here. I don't like that. I think
I just wanted to end. I'm hitting the left
arrow key by the way, that's why you're seeing this
school bus of arrow keys. Maybe I'd like just to end
here right at this frame. I'm just stepped
framing to the left, and then I will click O for out. I'll hit O on my
keyboard for out. That will create an
in and out point on the timeline letting
DaVinci Know I just want to export this amount of
time on my timeline. Not the whole timeline, just
this part of the timeline. Once you have everything
selected here, I'll go into the little
rocket ship icon as you know, and here are my settings for reels that I'll
walk you through. This is the delivery
page as you know. First I'm going to name it 001, whatever you like, and browse to figure out where
we'd like to save it. I'll save it to our desktop. Click "Save". At this stage,
here are my settings. What I like to use under video, I like to use MPEG-4, H264, 1080 by 1920, it looks great. Use
vertical resolution. This is my frame rate,
automatic for quality. Under advanced settings,
I like to have these two checked force
sizing to highest-quality, force to bear to
highest quality. Of course we don't have audio, so I like to uncheck the
audio, and we're good to go. I will add this to
my render queue by clicking this button below,
"Add to Render Queue", which will pop it over to the right and I will
hit "Render All". When I hit this button,
you'll see what happens. It's just going to render the in and out point of my reel, and that's exactly what we want. Let's see if
everything worked out. Well, I'll head over
to the exported reel. There you go, 001.
There you have it. Congratulations on
creating your custom reel. You can now use this template
to create hundreds of new reels with different
configurations and pieces of footage. You could even use photos
instead of video and of course, apply lots of different
transitions and text elements. In the next bonus lesson, Rosetta will show you how to upload your reel
to Instagram and some really helpful
tips and tricks for adding music and hashtags.
16. Bonus: Airdrop Utility: For this video, and
all Mac users will be using AirDrop to share
the video with our phone. If you're a non-Mac user, you can use G-Drive, AirDrop, third-party software,
or other Cloud-based services to download the
video directly to your phone. If you have any issues
related to this, feel free to leave a comment, and we'll help you navigate this or any other issue
you're having. In the search bar,
please type AirDrop. This will open the AirDrop
feature on your Mac. At the bottom of this window, there's an option to select
who to share it with. I'll select everyone. That's all we need to
do for now to make sure AirDrop is turned on and
working for the laptop. Jumping to the phone now, just swipe from the top
right corner and diagonally across to activate the
smart menu on your iPhone. If you press and hold down on the upper left-hand
set of icons, you'll see a small
icon for AirDrop, hold down this icon
and select everyone. The icon will then turn blue to let you know that
the AirDrop is on.
17. Bonus: Airdrop Footage to Phone: Back on the laptop now, just right-click the reel
you've exported and select "Share" and you'll see a new window appears with who you would like to
share your clip with. Select your iPhone of choice. When you look at your iPhone, a message will appear to confirm receipt of the reel
from your laptop. [NOISE] Confirm and
the reel will be downloaded to your photo album. In the next video, we'll take
a look at how to upload, add music, and hashtag
tips for your reel.
18. Bonus: Import and Add Music: Open Instagram, go to
your account by pressing the small icon in the
lower right-hand corner, and then press on the plus
button on the top menu bar. From here, create a new Reel. Then in the bottom-left corner, select and choose your Reel. If you're not seeing
your Reel displayed, make sure now to tap Manage
in the upper right corner. Then select More photos
and then select your Reel. Then press "Done". You should now see
a Reel displayed. Tap this Reel and check the Reel to make sure
there are no mistakes, and everything is looking good. If everything looks great, press "Add" in the
top right corner. Then press "Next". At this stage, we've got
our video ready to go, but we'd like to add some music. Let's go ahead and press the tiny little
music icon above. This will open the menu to search for any music
you would like. For this demo, I'll search for Japanese tea and select
Japanese garden. [MUSIC] This sound is really nice and I think it would be a great
fit for the ad. You can select any part of
the song you wish by simply scrolling left and right on the song menu bar at the bottom. If you're satisfied, press
Done to review all of your changes and press
Next to continue.
19. Bonus: Edit Cover Photo: From here, I like to press on the Edit Cover option
here to select the best moment from the real to display on your profile grid. It will be the first
image your client or visitor will see when they
view your profile page. If you're not happy with
any moment in the real, you can select a custom
cover by pressing Add from Camera Roll and
choosing any image you wish to be the cover
photo for the real. At this stage, once you're
happy with the image, select profile grid to
adjust the image by dragging up or down on the
image to center your image. This will make sure
your cover image looks great on
your profile grid.
20. Bonus: Add Text and Hashtag Tips: The next step is adding
some custom text and hashtags related to your video in order to attract the right audience to
your reel and profile. For any reel, it's important to engage the audience by creating a call-to-action or
how you would like your audience to interact
with your video. For this demo, we want
our audience to visit our website and use a special promo code
to purchase matcha. Our first-line of texts
might be something like, 50 percent off premium grade
matcha this Friday only. See link in Bio for details. [NOISE] From here we'll
add a few hashtags that are relevant to your
ads such as matcha, tea, organic, tea lover, and maybe tea culture. Try not to use too many
hashtags as Instagram doesn't really like what
they call hashtag spamming. Use maybe five to 10
marks at any given time. When you're done, if
you like, you can also tag over
accounts related to your ad by pressing
"Tag people" and searching for an
additional account. If you have linked your
Instagram account to Facebook, go ahead, and check the box
here to share there as well. Check the box and
it will turn blue. From there, press "Share," and it will upload to
Instagram. [MUSIC]
21. Final Words: Congratulations
again on creating a custom real and uploading
it to your own account. We hope you enjoyed this
course and if you did, please take five
minutes to leave us a review, it means a lot. We would also love to see
the reel that you made, so please share it
in the project and resources section on
the Skillshare page. Thank you again for
your support and we hope to see you
in our next courses.
 Rosita and Jason, Learn By Doing