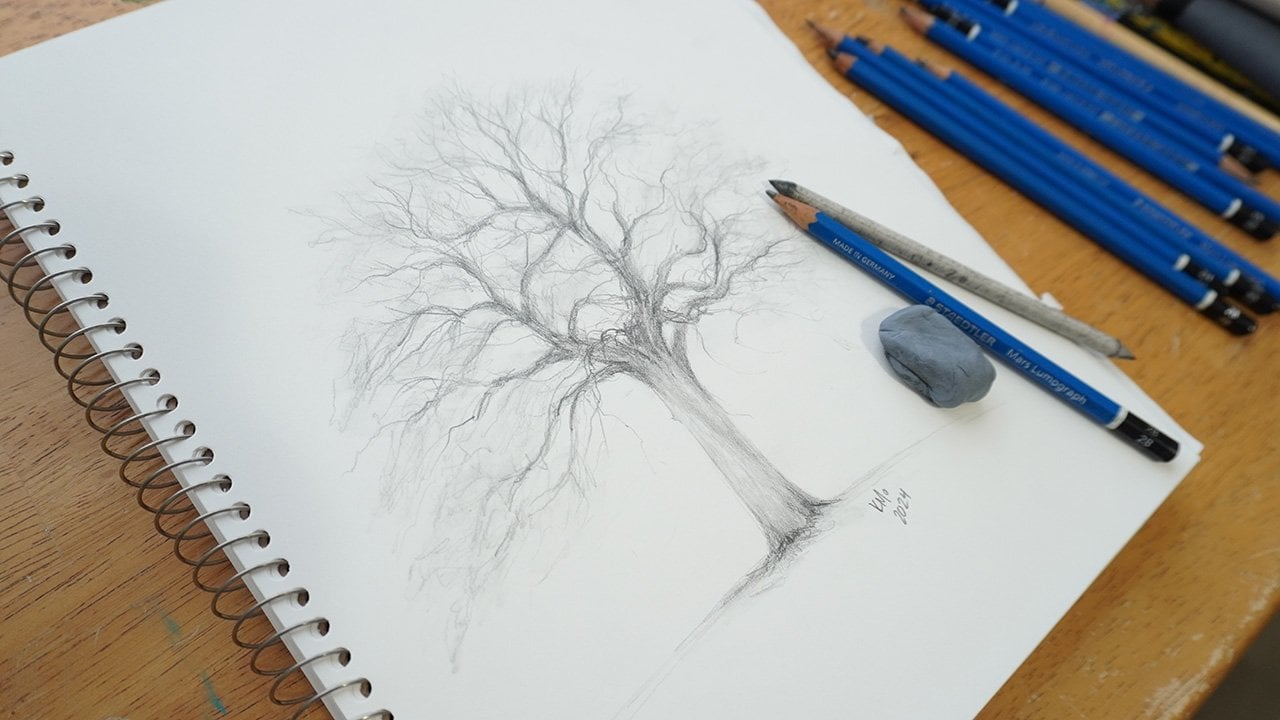
Transcripts
1. Intro: Welcome to class. My
name is Christina Moyer. Thank you so much for being here in today's drawing practice. We're going to be sketching a five by five grid
with cool shapes. It's going to be lots
of fun and great thing to implement into your
daily sketch practice, maybe once a week,
maybe once a month, throw it in there as an idea. In addition to whatever
you're already doing or maybe you're just starting and you're
trying to get there. You could do this
every day. But I'd like to add in some variety. So this is just one option. You can spend as long or as
little as you like on it. You can finish it
pretty quickly. I'd say, make sure
you give yourself about 15 minutes
at least to do it. But if you're in a time crunch, you can probably do it a
bit faster than that, too. So without further ado, let's find out what we need to get this done and
complete the project.
2. The Project: Love that these classes on this platform are
focused on projects. So we focus on the skills
to create a project. And what I love about that
is you finish something. You have something to account for the skills that
you've learned. You're not just
watching something and like, Oh, that's great. You're actually
implementing those skills, and a project really helps
motivate us to do that. So today's project is going
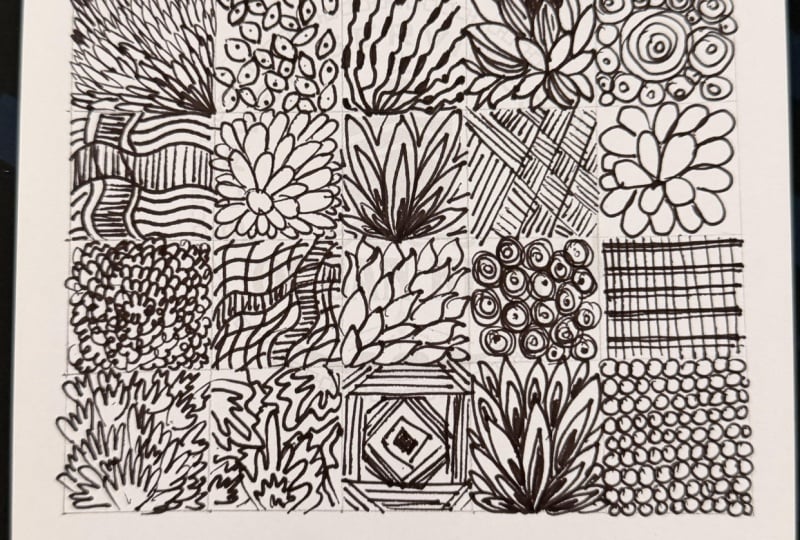
to be a five by five drawing. And it's simple. You
don't need to put it on any kind of special
paper, but you can. You could start in your
sketchbook and maybe do a draft. And if you want to
elevate it and use it and you're loving how it turned out, you
want to recreate it, you can always use a light
table to transfer it or just recreate it on nicer paper to give as a gift or on
a cart or whatever. So many possibilities. So many.
3. Materials: So what materials will you need to be successful
in this project? So one thing I really like
to use are micron pens. Basically, it's an ink that
when I draw on my paper, it's not going to
bleed or smudge. And that's really
important for me to avoid the frustrations
of smudging or getting it on your hands or just ruining your image
while you're working. We don't need to focus on that while we're trying
to build the skills of drawing and really training our brain to work with our hand eye coordination
type of thing, right? So all you really
need is a nice pen. You can use any pen
though that you like. So if there's something you
like to use, go for it. And you could use a
mechanical pencil or just a regular pencil. It's really pretty broad
for what you want to use. I'm going to start, though, by using a pencil
to draw my grid. So I'm going to want
a straight edge because I'm going to
like a straight edge. I want my squares to be equal, and I'm going to create
a five by five uh, grid on my paper, and I'm going to
use a sketchbook. So it doesn't have
to be fancy paper. My sketchbooks aren't
necessarily super pricey, or high end or
anything like that. You can just use the sketchbook that you purchased at an
arts and craft store, and really, that's all you need.
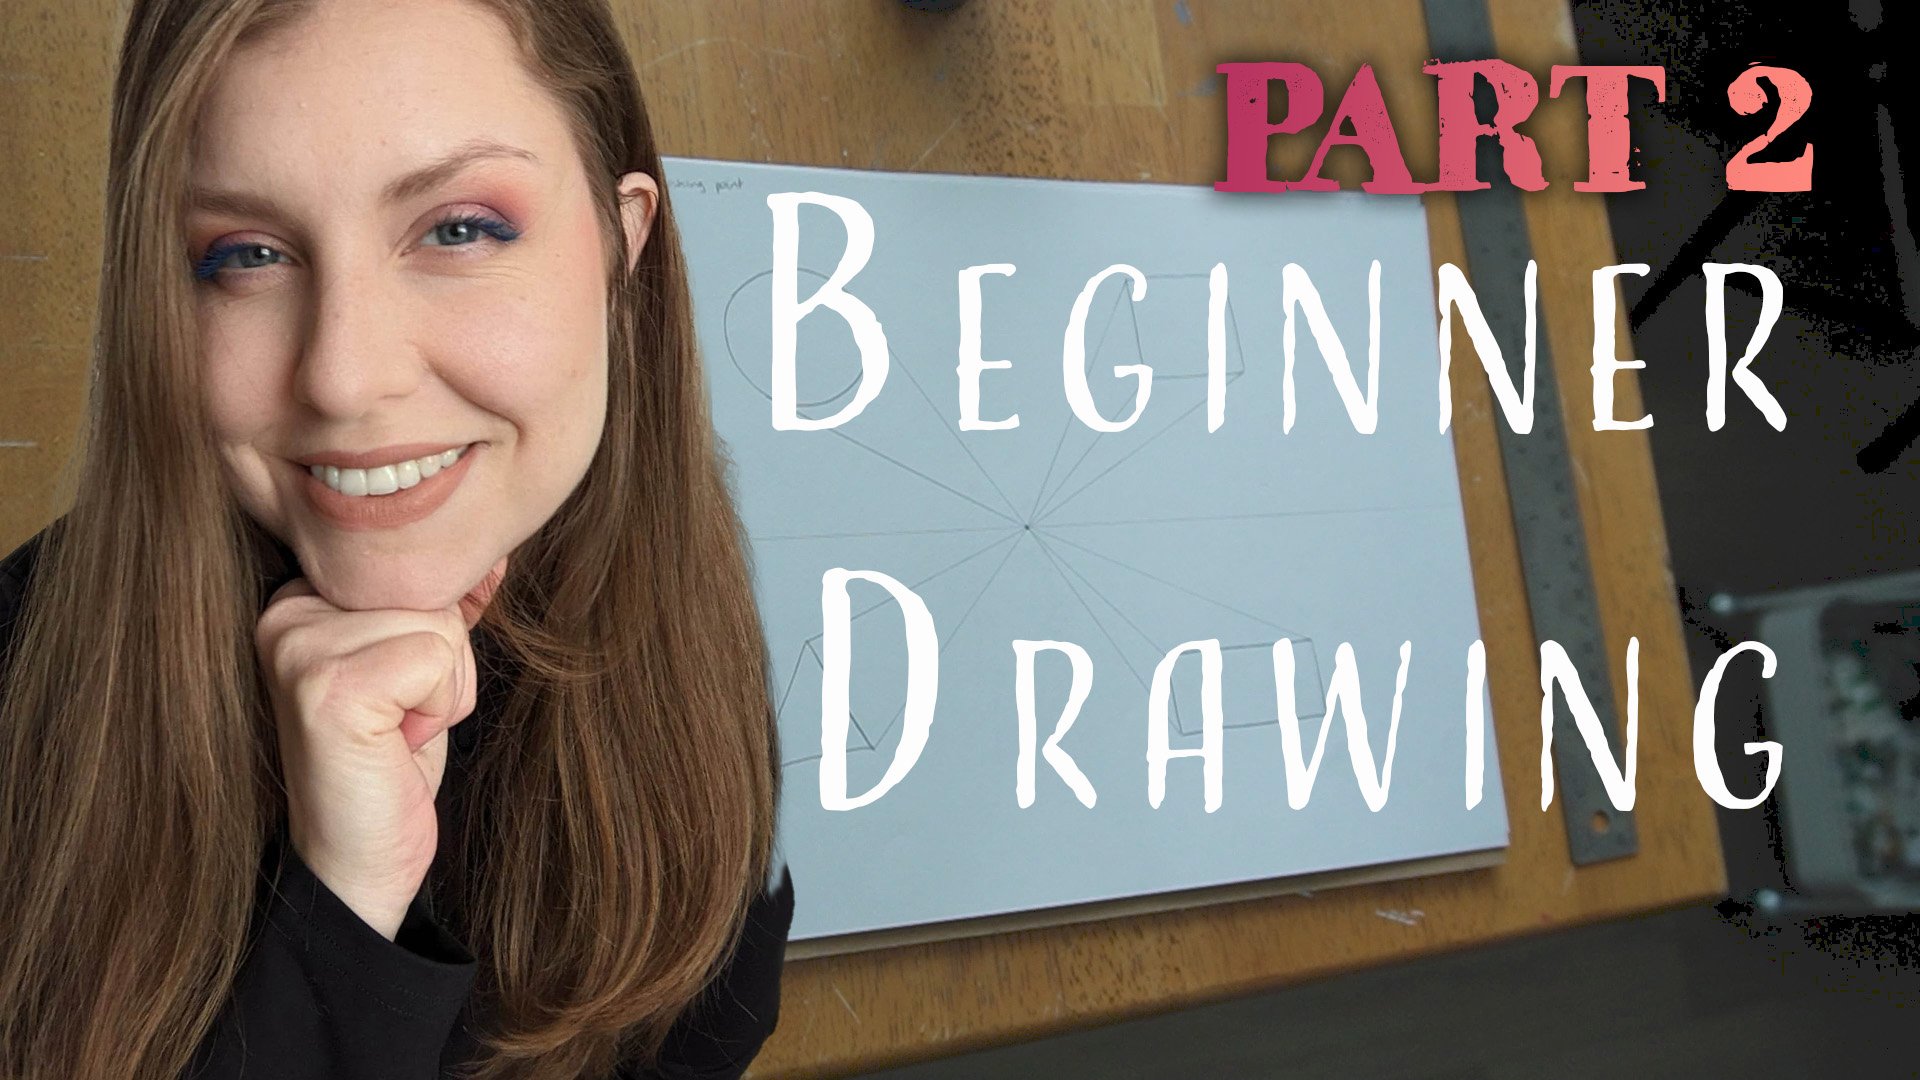
4. Drawing the Grid: Alright, now that we have
all of our materials, we can get started
with drawing the grid. This is the basis
for our sketches. So we want it to be pretty good. It doesn't have to be perfect. So if you are the perfectionist
type, that's fine. You can make it as
perfect as you want, but just remember that
we're just trying to create get ourselves
into our sketchbooks, get ourselves sketching,
and so I don't want you to spend too long
making your grid. But I'm going to do
one by 1 " squares. Now, if you're you know, you don't have as
much time or you don't have as big
of a sketchbook. You can do smaller.
You can do half inch. If you have centimeters, you can do centimeter by centimeter, do little tiny sketches. But 1 " is going to be great for the amount of space
needed to kind of create little doodles or little drawings and
practicing shapes. So if you're unless
you're really, you know, feeling like you
should go bigger or smaller, 1 " by 1 " is really good. So I'm finishing up
here with the top, so creating my outer box lines and just making tiny little
marks with my pencil. It doesn't matter what
pencil you use if you want the lines to be
erased more easily, then use a lighter pencil. Now I'm going to create
my vertical lines because I've marked all around. So it's gonna be a lot easier. I forgot to mark the
right side, though. I'll get back to it,
though. And you'll notice, you'll be like, Oh, yeah,
I need to do that still. I like to often work on not
just totally flat surface. So if you have a desk that has an angle on it or you
can set yourself up, I'm just sitting at a desk with my sketchbook
leaning on the desk, so it creates an angle. That's a possibility.
You can use your legs, if you're propped up on a couch, be creative, be comfortable. Yeah, or if you have an
actual drafting table that gives you that
angle, that's great, too. So we're just about
done the grid so we can get to the next step, which is the actual sketches. But you've done a
great job thus far, building that foundation. I
5. Get Sketching: Okay, it's finally
time to sketch. I know, I can feel like sometimes there's
so much preamble, but it's important stuff. So I'm using this
Micron oh three pen. It has India ink.
It does not smudge. It has nice clean lines. I really like it.
There's probably other brands as well
that do a great job. But this is just what I found. And sometimes when
you find something, you just stick with
it, you love it. So one thing I recommend
is writing the title. Write down the name of the
course, what you're making. Put a date on it, especially. And that way you can come
back to this if you need to. You're like, Oh,
when did I do this, or you know, 'cause
we easily forget. You think you're gonna
remember, but you won't. So just save yourself some
trouble and put it in the top. And make it easier. So I'm going to start on
this top left square. You don't have to start
at the top left square. You can start wherever
you'd like, but that's just where I decided
to just start. I'm going to start
this first one with some curvy lines and layering. So right now it
kind of looks like they're random shapes,
but in my mind, I know that I'm going to create they're almost like leaves or blades of grass that have some parallel
lines with them. So it's kind of a doodle type of square that I'm
starting with. And this is a kind of doodle
that I've done in the past. And so what I might recommend is start the first square
with something that is familiar to you or follow along exactly with my
shape I'm doing here. When I say exactly, I don't mean literally exactly. Just follow a similar
type of pattern. So see how I'm creating
layering with a pen. When you're doing
layering with a pencil, you could, you know, erase lines and that sort
of thing, but with a pen, you can't you kind of have to imagine where it's going to be. And it's not like I
have the whole thing sorted out in the beginning. I just start with some
curve lines and then leave space so that I know some are going to be in the
front, some are further back. So like I do not
need to be 100%. And then you can
add embellishments. Go with the flow depending on what you're wanting
to achieve here. If you have a focus of, Oh, I want to practice
this particular shape, maybe the whole five by five is going to be slight
variations of that shape. Are you working on
different curves? Are you trying to work
on a certain pattern, maybe shading with
like cross hatching, maybe you're going to do
different things with cross hatching and whatnot. So it doesn't have to
be what I'm doing here. So now I'm doing another
doodle type of thing. I think I'm going into
botanical kind of theme for this five
by five project. Sometimes you don't
know what it's going to be in the beginning,
and that's okay. For this particular thing,
you don't have to know. You don't have to have it all planned out in the beginning, but just start one square at a time and see
where it leads you. Maybe it's gonna be
totally different. Maybe it's not even gonna
be anything cohesive. And that's just fine. Sometimes you have
such juxtapositions that make it really
intriguing in a work of art. So don't even worry
about if it's like, Oh, no, like, should
I do botanicals? Like, just don't overthink it. That's the thing. So I just
started making shapes. And that's, like,
when I'm sketching on a piece of paper
when I'm in a class, and I'm just, you know, you
sketch on the sides of paper. I don't know if that's
you. That was always me. But it was always these
kind of botanical type of sketches and doodles. So sometimes an I, so maybe maybe you're going to have a whole
bunch of different Is create variations.
That's one thing. I think it's good to create some variation with whatever
you're deciding to do, whether that's just where the center focuses of something, whether it's, you
know, the quality of the line or whatnot. So in this one, you can
see that I've gone into some little pointillism
type of work here. It creates a nice variation to the one that's
beside it, I think. One with lines, and then now
we have these kind of petals and nice little
pointy, not pointy. I guess they are pointed
petals, but the pointillism, little dots that have kind
of a soft texture to it. So I'm digging it.
I'm digging it. And if you had
different sized pens, you could play around
with that, too. But again, remember this is just kind of play and practice. So if you're stuck
on what to do, just follow along
exactly what I'm doing. So I'm on to my next square. And I'm starting
with another like, kind of classic doodle
that I would kind of do. And I'm starting central, and it's just like these little U shapes
that are like petals. And this can be a
good practice to, um, when you're going
around like that, certain parts of the area of the round will be difficult for you and other parts will
not be as difficult. Like, just making a round shape can feel a little
bit more awkward, depending which way it's
facing, if that makes sense. So there's some
parts of it when I come around to the right
side, right there. I'm a little bit like
it's just not as round. And so this could be a good
practice for me to work on more shapes like this
or more doodles that are similar where
I'm having to make a rounded edge on the right side because I
can see that's a weakness. So this might even give you some indication of where you need to practice.
You might see. Hm, this looks a little off, and then you might need to
analyze it a little bit. And one great thing about
this is you can actually, if you have one that you're
like, I'm not really sure. This one looks weird to me. Can help me out. Like, that's one of
the great things if you create a discussion
or better yet, like, post your project so I can see it and give you feedback. If you're looking for
specific feedback, that can be super
helpful for me to know what your you know, even some background
because when you're doing an online
course, your professor, your instructor doesn't have as much background
information about you, which sometimes can be
great because they're coming with just a
fresh perspective. They don't really know you or anything else about
what you've created. Are you a seasoned artist?
They have no idea. So if you want to give me
any background that you think might be helpful or just what feedback
you're looking for, that can be especially great. So this next one,
this fourth one, I'm doing kind of
cross hatching, but not cross hatching in
terms of creating shading, but it's a cross hatching
brick kind of pattern. And it's a fun one to
kind of switch up. And I don't know if it really is a botanical
type of thing, but I think I'm sure it could
fit into that in some way. So like I said, like, don't worry
about making things. Into one genre or that
type of thing unless you're really trying to push yourself in a particular genre. In which case, I would say, keep going and try to make
sure it fits somehow. Yeah, so I'm just creating a little bit of a little bit of shading there by adding in
more lines in certain areas. It just almost gives it
that kind of basket weave a little bit more. And
then the last one. What to do for the last one? It can be hard sometimes when you've already started some, and then you're like,
Hey, how do I keep going? What should I do
for this next one? So I decided to kind of start similarly
to that third one, except what I'm doing
is I'm not lifting off my pen to create
kind of this flower. So I did just then lift off, but most of it I did without
lifting off and then just finishing off those corners simply because we're
doing a square, and I'm creating kind
of a rounded shape. But by going over the certain areas more tightly and just going over
it multiple times, I created, you know, more depth in those areas. Congratulations on
finishing the first row. We're ready to go
on to the next row.
6. Second Row: Alright, let's start
the second row. So one thought I had was, let's do the same
designs on the top row, except this time we'll do
it in a different order. But I decided I wanted more
space in between that. So I'm creating five
totally new designs. And for me, it's continuing in that botanical, like theme. Whether that's precise or not, it's kind of maybe
up to you to decide. But this is also a common design I've
done for so many years, most of my life, to some extent, maybe not the exact same. But yeah, I just like
to use a lot of kind of rounded shapes that come to a point and then varying sizes, add in some lines. It's kind of like filling
the little square with movement. And yeah, if you want to just use this a little bit
as almost a therapy session, you could just have a bit of
an art therapy thing going on as well that doodling
does lend towards. And even if that is the case, you're still going to find
improvement in your drawing, your hand eye coordination, and just the ease at
which you can make marks. So, the more you practice them, the better you're going to
get at making those marks, the more you're going to
be able to use that in other instances where you need to pull out those skills
for sketching and all that. So I'm doing these little
rosettes types of things. They're just little
swirls that I start from the inside
and then circle outward. This one's kind of
fun because you could actually start
with a really big one and do most of mine
are about the same size, but you could make it
so that you have, like, big ones and then
little small ones and all sorts of
things like that. Again, I'm implementing that
kind of layering system, so I didn't want
it to cross over, so I'd rather that it um kind of creates this
layering effect. So that's what I
liked about this one. And yeah, if I'd just
gone over top of it, it would have a
different effect. That's not to say that
that's wrong or bad, but that's just a
different option, an option I didn't want to take. So I wanted to have
kind of more of that piled up together,
stacked look. So yeah. I would be fun, though, now that I mentioned it
to do kind of ones with, like, bigger and then
smaller, that sort of thing. You can even take
one subject and then dissect it into
different squares. So maybe you're looking
at one plant and you're starting with the leaves and you're looking
up close at it. Like, maybe these are little microscopic an like an
analysis of this plant, or your garden or something or could just totally be random. Doesn't have to be
anything like that. Uh, these are just some ideas
that I'm putting out there. So some of them, I think it's
nice to create more space. So the little rosette one, it has a lot of lines in it. It's really covered. It makes it kind
of if you look at the total value of that
square, I guess, overall, if you were to create
an average of it, it would be medium, dark, and then or just medium. And then this one here,
I'm making it more light. So basically, if
you kind of blurd out each square to kind of see what the total value would be, then you can kind of help to
create more dynamic squares, which if you're more advanced, maybe that's something
you want to consider. Maybe you want to
make this whole thing go from really light to really dark
from one corner to the other and make it
kind of neat that way, or maybe you have a secondary
image that comes out of it. That could be really
cool um segue project. So there's all kinds of
things you can do with this. But the main idea and
focus of it for today, at least, or why I created it, is that you have some
sketching practice. And if you feel like you're a
slow sketcher, that's fine. You could work on speeding up. You can work on, Okay, I'm going to do one square, and this is my time limit, give yourself a time limit if you're trying to,
like, increase. Okay, so I've done a few,
and now I'm thinking, Okay, what do I want
to do for my next one? And so sometimes it could
take a little time, especially when you
get to this point where maybe you've
pulled out all of the you feel like you've pulled out all the
sketches that you've done, and you're like, Okay,
and that's right. Maybe look online for
some inspiration. If you look up some doodles, if you're kind of using pen, looking up doodles can be like abstract doodles or that sort of thing can be really helpful. So I'm going to start with
this kind of leaf shape again, and sometimes it's just a matter of making a thicker
line, a thinner line. Um, duplicating a shape
and then, you know, expanding it from that and then deciding whether
you want that to be the center or you
just recreating that shape elsewhere and
layering it that way. So this one I kind of created
that as the center focus, and then all of
the offshoots are, you know, directed towards
that center focus. They're kind of
coming off of that. And that's what I
decided with this one. So just creating
that bit of variety, continuing that
process of practicing, the line making that's in different areas and angles and
all those kinds of things. It could be fun to try
this project where you're just doing curves or
no curves at all. Like, try one where
no curves allowed. I think that would be really
hard for me because I really like that organic
curvy line thing. So that could be really good challenge if it's
something that you're not, you know, accustomed to or that wouldn't be
your typical go to. So I decided to start continue like re continue with
that very first square. So you don't have to
have ten different ones. You could just have nine
different ones and then start repeating and
when you're repeating, try to find ways to create
some difference in it. So you can see how
I'm creating these little I'm kind of blocking
out the area first, and then I'm starting to throw in lines in different directions following the shape that I've kind of the blocked
out shape that I've put in. It actually works really
well when you have the lines kind of
curving not perfectly. Like, they kind of have areas where they're closer
together and further apart. It kind of makes the shape
more three dimensional. So that's kind of an
interesting thing to try. So we're almost finished
with the second row. And you don't have to
follow the order the same, and I wouldn't even
encourage that. I would try to use each
square and say, Okay, which one is kind
of distant enough, but I don't want it
to look contrived. So, I guess, having tried to be somewhat randomized order kind of made it worked well for
my particular piece, anyway. So those are the first two rows. Guys think? How are you
doing with this project? I hope that you're enjoying it. Next up, we're just
going to continue this, and I'll help you see how you
can keep the pattern going.
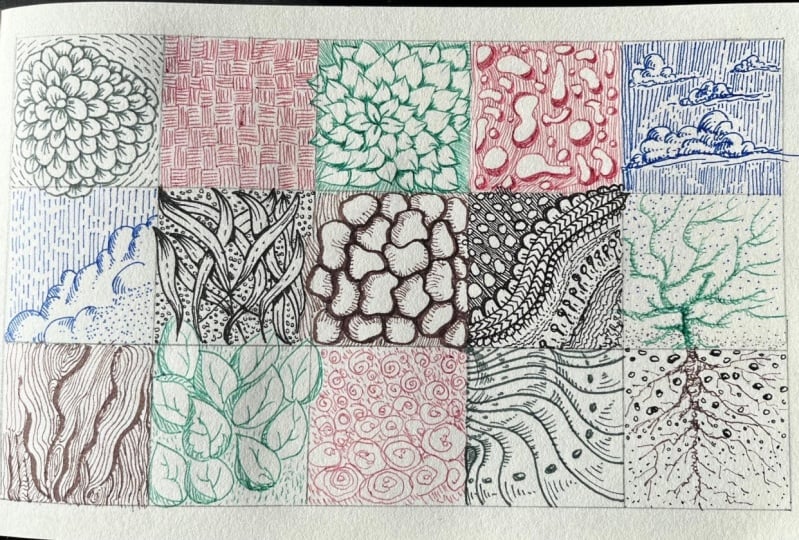
7. Continuing the Pattern: Okay, let's speed
this up a little bit because you've
seen all the patterns. So if you need to watch
at a slower pace, you can with this
program anyways. But I thought I'd speed
things up just a little bit so you can just
get to the end of which ones I'm continuing with because
I'm just repeating the patterns just in
different orders and making them just a little
bit in a different order, and just with slight variations. Okay? So maybe the center focus is somewhere else on the square. Maybe I'm doing a different
direction of line but I'm following basically the
same patterns that I've already created and just putting them in different in
a different order. So I'm trying to you know, when you're trying to do, like, a poka dot and you're
trying not to have some dots too close to one another and that sort of thing, that's what I'm doing here. I don't want everything to
look too precise in terms of, oh, this is just an exact
repeat of the first two rows. I want it to be more
natural looking. So we're doing kind of a
more natural looking thing. So Poka dots do not
look natural because they're you know,
in exact positions. But if you look at
stars in the sky, those look more natural, and I think the stars in the sky is kind of more where
I'm going with it. But I guess why I brought up
poka dots is because you're spacing them out so that they aren't too close
to one another. So that's part of it. So it kind of works
for both ways. It's like, I want stars
in the sky and Pokots because I want some
some spaces in between, but I want it to be
kind of randomized. So you can see how I'm
repeating some of the patterns, putting the different
center of focus, and, yeah, just making each
one slightly different. But practicing those
same curves and shapes. So it's giving my hand eye, getting that muscle
memory when you're practicing the same
shape again and again, and it comes quicker
to you so you can sketch faster in the future. So I mean, it's not that different in a way than
when you're working out. You know, maybe when you
first go to the gym, it's like, Oh, man,
this is brutal. But then if you go you keep going at it and you do
it every day or every, you know, three times
a week or whatever, then you're going to feel stronger and your
muscles will remember, and you'll just
get better at it. He'll feel more comfortable
and all of that. So now I'm back to the rosettes. And actually, this
row is kind of funny because if you
look at the second row, I'm almost doing an opposite start to
finish kind of thing, like I had that these
rosettes were the second one, and then those wavy
lines were the third. And now I have the
opposite of that. So sometimes it works that way, simply because we're on
the fourth row, right? And I'm trying to keep that distance and
that sort of thing. So I hope that the
speed of, like, kind of speeding things up a bit is helpful. That's
why I'm doing it. So I don't, you know, I'm not trying to take some
kind of shortcut or anything. I'd be happy to do the full, just regular um you know, time that it took to
actually draw it. If that is more useful to you, I'd appreciate your feedback on that. So please let me know. You know, This is for you guys, so I want to make it
what's best for you. But you've seen
the pattern, so I just thought it makes sense to speed things up
for efficiency. I thought you might
appreciate that. You can always go
back and repeat, and my apologies
for the lighting or the blurriness on
some of that there. I think maybe my lighting was
starting to get a bit dark when I was filming this part. When you're using natural
light for filming, the only problem with
that is just like your side background note here
is that can change, right? If you're not using
electricity lighting, you're using the sunlight. If it's hiding behind a cloud, it will affect lighting
in your videos. So if you're creating videos, there's a little tidbit for you and if you
don't, that's okay. Now you kind of know
why the lighting is why things might go a bit
blurry or look a little fuzzy. That's partly why you need
enough light to do that. This one I quite liked the outcome of
this particular one. This kind of it feels like
a close up of a flower, like maybe a dahlia or something like that,
chrysanthemum, maybe. And then, yeah, I just
really loved the look of it. The little dots do take
longer, but that's okay. It's worth it when the outcome is as it is,
it's worth it to me. So don't worry. I will
show you all of it. Once it's complete, you'll be able to get a
good glimpse of it, as well. So little Dates. And then which one
we're going to do next? Let's throw in this guy here, where it's my right side of the circle is a little
wonky at times. You see I even tried moving my pen the opposite direction. So you could try clockwise,
counterclockwise. You could turn your
page, but, you know, it's great to kind of get
a feel for and practice. Holding it a certain way, too. But certainly, turning
your page if you're trying to make it better
would be helpful. I would say. Okay, which
one are we doing next? This one, not lifting the pen? Well, you've lifted
a little bit. But it's almost kind
of some kind of daisy like flower definitely went
with a botanical theme. I'd like to try one that's not botanical.
Let's try opposite. Just to challenge myself
and be a good practice. I'll think of all the most difficult things for me to draw, and then we'll put that in, and it can't be
botanical, anything. Yeah, you can create your own
rules for drawing practice, and I love that. Okay, this one is good. We've got some layering,
a layered pattern. Love it. The last
square. The rosettes. Excellent. That one
was a really fun one, quite easy to do. I found. I don't always like when an instructor says
that this is so easy. It always puts pressure on you to, like,
do well with that. It just it's not fussy. And so I found it's
like it's I'm not sure. I just found it a pretty
simple one to do that, I didn't have to worry too
much, a nice calm one. So okay, here we go. This is my five by five. So snap a picture, and then you're finished. So I guess we're getting ready
for the conclusion here. I hope that you really enjoy how yours turned out. I'd
really love to see it. It's it's gonna be unique. Every person's
gonna be different, even if you copied the
same patterns that I did. I really excited to see it.
8. Conclusion: Thank you so much for joining
me in today's lesson. I hope you really enjoyed this little exercise and that you are proud
of what you created. If you are, please
snap a picture of it and post it in
the student gallery. I want to be able to see it. I want to be able
to comment on it. If you post it there,
I'll be able to do that and give you some feedback. I love personally receiving feedback from my
professors so that I can learn something
new or see what they thought was
interesting about my piece. So if you have specific feedback
that you're looking for, make sure to include that with your image when
you're uploading. Thanks again for being here. If you want to take
more of my classes, there are drawing and painting courses available right now, go check them out, and
we'll see you next time. Bye now.
 Kristina (Moyor) Choy, fine artist