Transcripts
1. INTRO: In my past doodling class, I have said that doodling is
a good way to be productive, especially if we
are lost in ideas, as it helps us to remember past ideas and info
in our brains. Hi everyone. My name is Dan
and I'm a self-taught artist. And I love everything about art. I love to sketch, draw in pen and ink, graphite, colored pencils, goulash, pastels in my most favorite
has to be watercolors. When I'm relaxing or waiting
for something or someone, I would just start
doodling. Today. I'm back with another
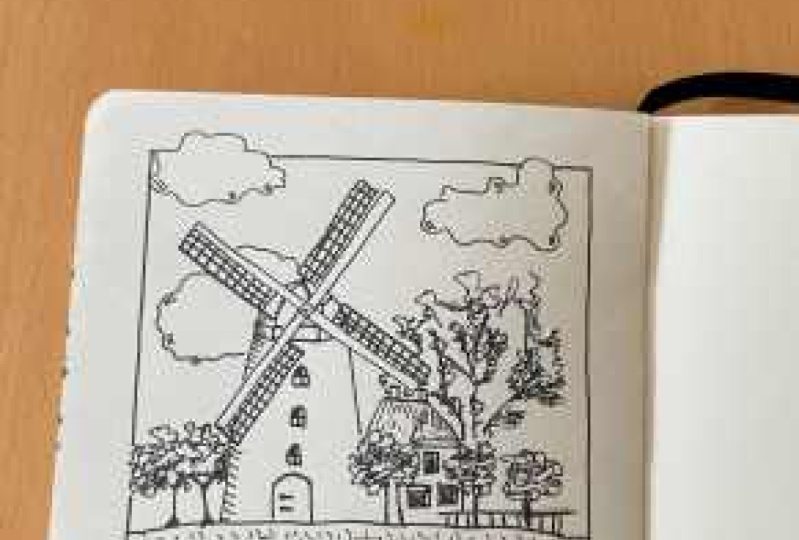
doodling class and this time it's going to be a whole landscape picture like what is shown here
in the picture. This will also be
your class project. This is quite a
simple during class, So no worry if you
are a beginner. I will get you through every step of the
process where we start by simplifying the picture in
the doodle friendly sketch. Then we will start
doodling over the sketch. Then it's time to draw a
frame for our picture. When drawing the frame, we are going to have
some elements in front of the frame and some
hanging outside it. This makes our doodling
out to the next level. In the final stage, some minor details edit
to add some interests, which makes our doodle at pumps. By the end of the class you
will have to do this picture. In addition, I
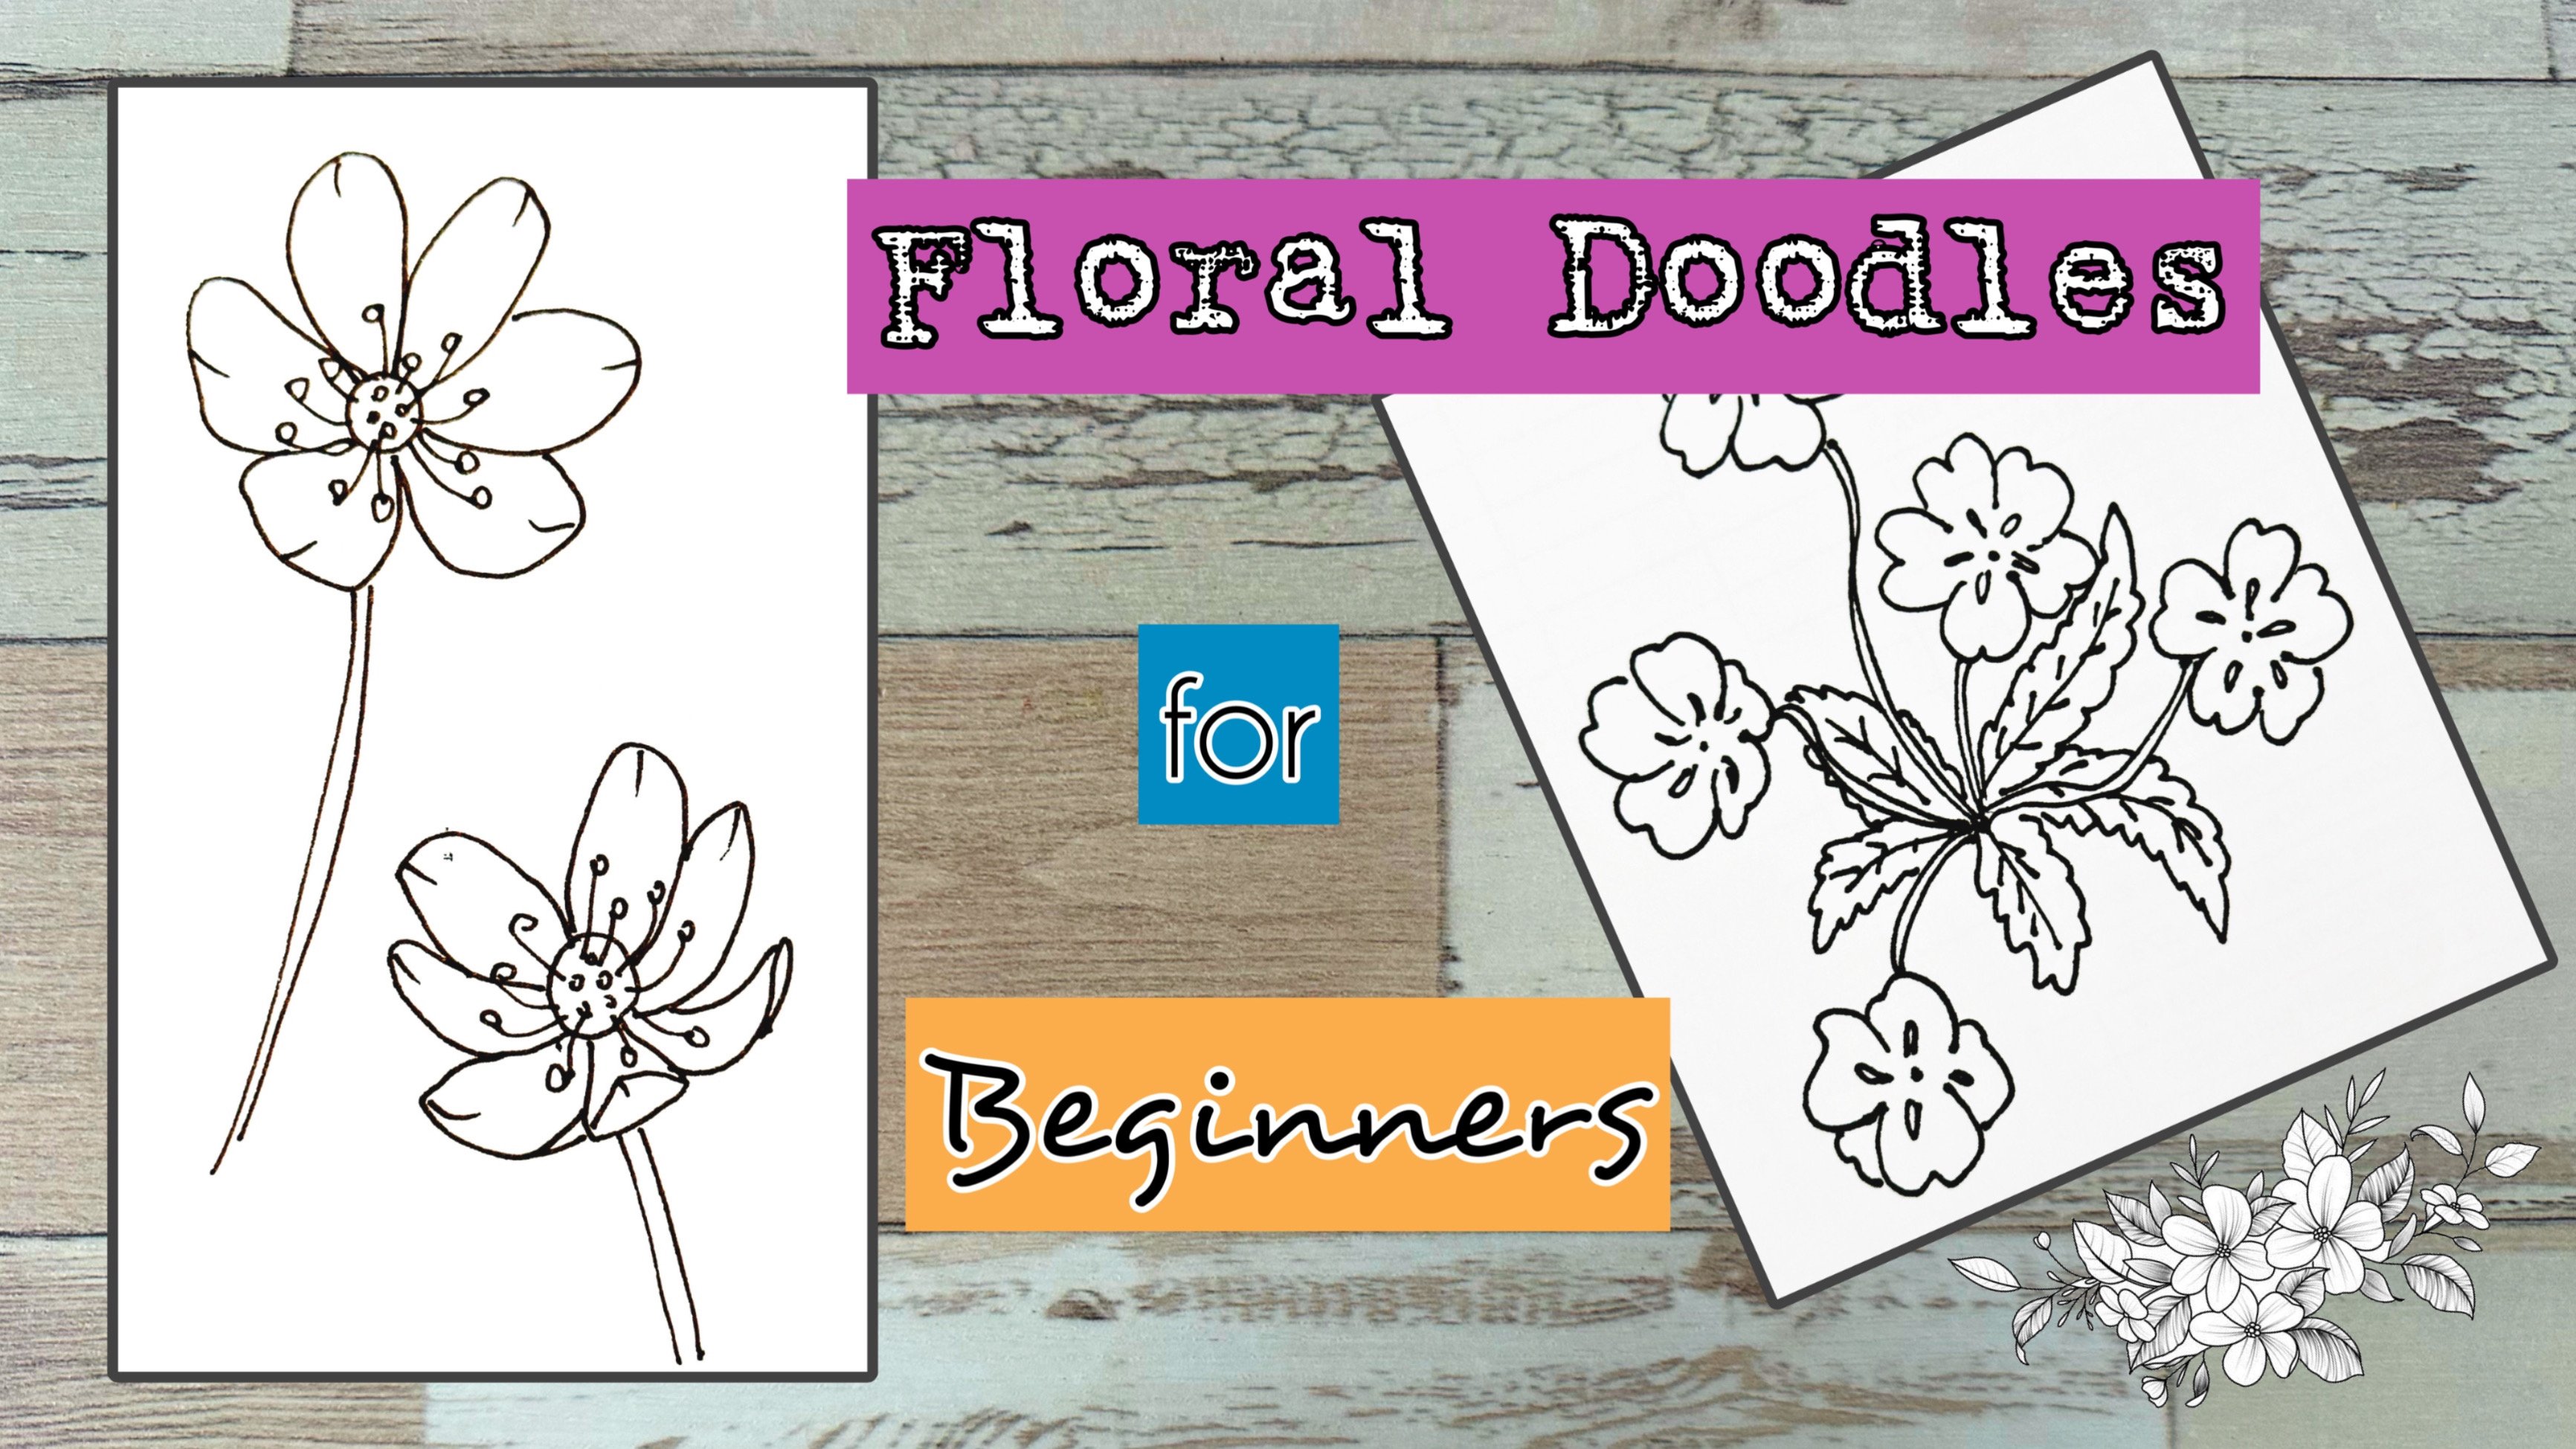
have also included these two extra
pictures for you to choose from for your
class project in case you wanted to do something
different from the windmill. Grip your supplies shown
in the next video. And let's get doodling.
2. SUPPLIES: Hello again. Here are
the supplies I use for this class is the minimum
quantity of supplies. First, we'll have benzos
is for sketching. You can use a normal pencil
or a mechanical pencil, whichever one you like. Next is an eraser. You can use a normal
soft eraser or a kneadable eraser
pen for doodling. You can use a fountain
pen or fine line. I like to use my
fountain pen filled with what the proof pigment
ink in black color. Try to use waterproof
ink if you have. Because in case in the future, if you would like to color
your doodle with watercolor, then your England come off. Here's a fine liner, which is also with
what the proof. I always find. What the proof in
a better choice in case I need to
color it in future. And also a brush pen. This is for filling up
dark spaces when needed. Is also in black color
in what the proof. And pepper, preferably
a smooth one. I have here paper
for Michael pens. Okay, here are all
unit for the class. Last but not least, you're
doodling companion. Okay, see you in
class. Don't be led.
3. REFERENCE PICTURE: Reference picture. Where do we look for them? In the internet,
books, magazines, etc. The easiest place
is the Internet. Of course, there are a
few places to look for. One of my favorite
place is Pinterests. Other places where you can get free images or
Pixabay and Unsplash, even though they are free, but please do credit. The owner of the pictures. Here is a picture that I
have chosen for this class. Grip your supplies and begin our sketch in the next lesson.
4. COMPOSITION: Composition in an adult is just the structure
of an art world. The structure consists
of a focal point, which is the point of interests and the balance of the painting. We are not covering things
like adding contrast. Values are tones here, stacy, so doodling
out without colors. Here's an example. The main focal point
here is the house. Then I added a
secondary focal point to make my art more interesting, or edit a tree. And more elements
or edit to make my art a little bit
more interesting. While planning. What do
I get into my artwork? I also make sure
that it's a balance. So adding the clock
to balance to the top left side and the bus
to balance the right side. This picture is complete, but I can still add some smaller details below
to add more interests. So I have added a path
towards the house and some small flowers
in the foreground. Now, I'm satisfied
with my composition. Let's blend the composition
of our reference photo. Main focal point here is the windmill and
secondary focal points or the house and huge tree. I have prescheduled as what's shown on the reference photo. With every elements inside. With details of the
fence and loss of flowers on the lower
part of the picture. And cloudy sky also, the composition in the
reference photo is quite good. But when we are drawing
everything shown into our art is going to be
too crowded or heavy, which resulted in an unbalanced. This is going to be
a doodle art and with all these heavy
clouds behind a windmill, our focal point is
going to disappear. So now we have to get rid of some elements so it's not too
overwhelming in the center. And keeping in mind the
balance of the picture too. Let's make another sketch. Still with the
windmill, the trees, the house, and some flowers
and of course the clouds. But make it less complicated. Let's catch the new
picture besides this one. For comparison. I'm sketching the three
main focal points first. Now, there are lots of
flowers in this area below. So let's just have some small flowers at
the back like this. Just below the
windmill in the house. And we can reduce this gap here. We can add bigger flowers in
front of the smaller ones. And now a tree on the left side, like in the reference photo. And we can add another tree on the right to balance
the picture. Then let's reduce some of
the clouds in the sky. Can just put one on top right here and another
on the top here. And maybe another one
behind a windmill. Then comparing the left
and the right picture, you can see that the one on
the right is more structured in balance without overcrowding
the whole picture. Let's look into the
reference picture again. As you can see that the
sky is full of clubs. When you are taking
photo with your camera is not always easy to
wet for clear sky. But in our art of this photo, we can change our preference to have a better composition. Let's apply this rough sketch into our final sketch
in the next lesson.
5. PENCIL SKETCH: Now I'm going to sketch on biomarker pet here on the right, which has a smooth
surface with reference to the rough sketch
that I have done in the last video
about composition. You can always roughly
measure the position of the placement of
your sketch by hand, like I'm doing here. First draw a line dividing
the land in the sky, or it's called the horizon. Same goes with the windmill. You can roughly measure
with your hand. The top part of the
roof of the windmill. After you have measured. That is a guideline. Then sketch the body of the windmill from below to
the top where the east. Always remember that
you don't have to copy exactly what was in
your reference picture. This is a doodling at a fine illustration for a
book or something else. So long as your
windmill does look like a windmill and not a
lighthouse, for example. Here I'm estimating
the precision of the three windows and
a door below them. And now the house
besides the windmill. All these positioning
is approximate, roughly adding in the
windows of the house. Then sketching a tree in between the House and the windmill. And another three on this side. Then the huge tree
behind the house. Just the rough shape of
the canopy of the tree. And all sorts, the bronchus. And adding another tree
here on the right. And to balance it off, a couple of more trees
here on the left side. Now the center part is done with all the focal points in place. Before sketching the place less mark the
intersection point. Somewhere here at the center. Now, draw two lines, cross each other
perpendicularly. Again, just an estimation. Don't have to be exactly
at 90 degree angle. Then it in all the Blitz. Now let's go for
the clouds above. Try to sketch the
clouds with curves and softness like cotton fluff. As you can see, the whole upper
part of the horizon is done and seems
to be balanced too. This open space down here will be filled with smaller
and bigger flowers. Later. We start with the bigger flowers for the
front part here first. Just sketch roughly
first and later we'll be making it more profound when
we start, our totaling. Will lift the upper part
blank first and let them, when we do our doodling
it into smaller flowers. We will be doodling this final
sketch in the next lesson.
6. DOODLING: Let's begin our doodling now. You can use any pen you prefer, an amusing a fountain
pen for this class. This is the final sketch from the last lesson
that we have done. You can start from whichever part of the sketch you prefer. But for me, I like to start
with the main focal point. And here is the windmill. Let's start with the center where the blood's intersected. Since this is a doodle, I'm not focusing on West
the light audit that is. So there wouldn't be
any particular shadows. So let's continue
with the blades. Now. First draw the frames of the blades from the
center outwards to the n. Continue with the
other three frames. You can turn your
paper or your pet, so it's easier to
draw, It's threat. Before completing the place, I want to draw the top part or the cap of the
windmill first. Careful not to
touch the England. It is still wet,
especially if you are using fountain pen
on the smooth paper. Here's a little smudge. Draw slowly if your
reference photo is too complicated or
too difficult to see, just use some imagination as what I see from
the reference here. The cap is sort of having a
hexagon shape at the best, or the neck of the roof. I have enlarged picture of the
windmill on the left side. Now, I'm quite satisfied
with it so far. Next we'll be drawing the
three windows in the dough. But before that, draw the
sides of the windmill fors. Now the Windows, adding a little details for
the windows, plus sign. And finally the door. With delicious, also. Interesting to add
a little details. Now we draw the line
for the length. Notice I didn't draw
a straight line with a ruler because that
wouldn't look natural. Now finishing up the blessed
by drawing in the cell, you don't have to count
how many lines per cell. Just draw by imagination
and have fun. Continue with the other triplets and turn your paper
so it's easier to draw is done. And let's proceed
to the house now. Starting with the roof top. Remember the chimneys
on the roof top? And some broken lines for
textures on the roof top. And a little window on top, and two larger windows below. We can also darken the two windows as shown
in the reference photo. Now for the trees, draw the trunk of
the tree first. Then add the leaves just by
scribbling with your pen. Do this motion for all
the leaves of the trees. The same for the trees
on the left side. That comes some areas in the
leaves for some interests. I'm adding a little more
leaves on this tree here, as shown in the reference photo, is a bit more bushy. Now there's a fence as shown
in the reference photo. So let's put it down. And for the huge tree
starting with the branches, the branches upwards,
you don't have to draw every single branch as shown
in the reference photo. This let it spread upwards and some broken
ones on the upper part. It looks more natural. After that scribble in all the leaves let
other trace before. Don't overdo this one as this tree have leaves
very sparingly on top. The central part is done. Now, we move to the lower
part of the picture. We're going to start with the bigger flowers here
on the foreground. Spreading across from
the left to derive. Don't have to draw with precise petals since
we are just doodling. We can also add in some leaves and grass in-between
the flowers. And especially on
the lower part. You will see why
it is necessary to do that in the next video. While waiting for my ink to dry, let's move to the sky
and draw the clouds. Remember to draw with
curves and make them look soft and fluffy like
cotton or wool. There's one down and
now for the second one, the third one behind a windmill. The main part of
the total is done. Next is to frame it up. I'll see you in the next lesson. I will teach you how
to draw the frame.
7. FRAME IT UP: This tutorial is
not completed yet. We will add a
little more details later after the framing process. Before we continue, let's
erase all the pencil sketch. You can use a kneadable
eraser or a soft erase. Difference between them is that the kneadable eraser doesn't
lift the fiber of the paper. This is bad, especially if you want to use watercolor letter. If you are using a
normal soft eraser, do not use it. To wrap very aggressively. If you use a smooth
paper is quite okay, but if it's watercolor
or rough paper, the fibers are
easier to come off. Now for the frame, you can use a ruler for a perfect line frame of free hand to have a
more organic loop. We will have some elements
hanging outside the frame. It looks more
interesting and unique. We can use a ruler or anything straight like a pen or
a brush as a guide. By placing my brush here, I can estimate how I'm going
to draw my upper frame here. Draw the frame
with pencil first. Or you can just be brave and
draw with your free hand. Just roughly make some
soft pencil marks to estimate your line. Then draw your line and
see if you like it or not. Again, turn your
paper or your pets or is much easier to
draw a straight line. And the other side, Back in your paper and check. And you can always adjust
your line if you don't like it or if it is out
of proportion. If everything is okay before you proceed to the next stage. Now take your pen and let's draw the frame that you have
met with your pencil. We will draw from one
corner to the other. Don't draw over the Cloud as we want the line behind the cloud. The cloud is kind of
hanging over the frame. Now turn your paper or pet and we start from bottom left up. Same as the Cloud. We want some plants here
to be hanging out of the frame and draw straight up till you
meet the other corner. And now for the right side, this cloud is also
out of the frame. These plants is also
out of the frame. As for the bottom part here, draw slowly as all the leaves are hanging over the
frame below here. Now it's done.
Step back and have a look and see if any
adjustment is needed. As for me, I think this
trend is to be outside the frame and lethal as it
seems to be crammed up. Remember, your picture might be slightly different from mine, but you can make it your own. Like maybe if you're blessed, are longer than they can
be outside the frame. We will add some details and some interests in
the next lesson. So make sure to join me
again for the final part.
8. DETAILS: Last part of this doodle
picture is to add just some minor details to make the whole picture
more interesting. So pick up your pen
and let's begin. First. I would like to
fill up all the gaps. Check on places
where you think is necessary to fill up the gaps. See if you're huge
tree here needs some more branches or
perhaps some more leaves. As for the clouds, draw a few curvy
lines here and there. This will make your Klaus look more puffy rather than flat. Now, there are lots of
small flowers down here, but we're not going
to do it now. Instead, I want to
show you how to make the lowest part of the picture
here looks interesting. To do that, let's
use a brush pen, but if you don't have one, just continue with your liner. I'm using this pen with a
small brush from Tombow, which is perfect to fill up
some small spaces within. It comes in many colors and mine is black in is Pittman base. And what the proof, this is how the pen
brush looks like. Let's start from this
corner of the picture. Fill up some empty gaps
with the brush pen. Draw some more
leaves with your pen or flowers to make the
bigger gets smaller. Once this done now pick
two, are we shading? Now? I'm adding some leaves in between the flowers
on the upper part. So it wouldn't look to empty. It will fill up the bigger gaps. Let's do the upper part here. Start drawing small
odd shapes at random to resembles
small flowers all over the top part here. As you approach to
the upper part, make them smaller as
they are further away. Now randomly draw some
small vertical lines to resemble grasses growing
in-between the flowers. And some horizontal lines. Interests is like wind blowing through the flowers and grasses. It some more leaves if you want, and fill up some more
spaces down below here. Now, back to the windmill. I'm darkening one
part of the window to show that the windmill doesn't
look like a cut out cut. But then I added some curvy lines on the
left side of the windmill to show it has the curve
and not a flat wall. Then at some straight
lines on the side of the roof top to balance
what we have done with the wall below and darken some part of the
house in the rooftop to some more curvy
lines on this Cloud. It looks quite empty
on the top part. Now it's done in make sure you
sign your name down below. Here, I added some curvy lines on the Cloud, which I forgot. In the next video, we will summarize
our whole process before we proceed
or class project. So see you after this.
9. FINAL THOUGHTS: We begin the class with
learning about composition. We learned about
the focal point, the structure of the arc, and how to balance it all. Then I met two sketches, the full detailed
one with everything appeared on the reference photo. Another simplified one, which
is easier for doodling. Then we use the simplified
one for our final sketch. After our final sketch is done, we start our doodling process. Both fountain pen or
fine liner can be used. But if you don't
have any gel pen can be another alternative. Oh, enjoy doodling
process in time-lapse. After our doodling is done. Next is to put our doo
doo picture in the frame. We learned about the
process of framing. With simple illustrated steps
of the framing process, you'll do, do picture looks
so nice inside a frame. Last but not least, details of a that for
some interests that pops. Time for your class
project instructions in the next lesson.
10. CLASS PROJECT: Now we have come to the end of the class and it's time
for your class project. You can do the same picture of the windmill from the
class lessons and perhaps make it your own with a little twist of
your own imagination. Or choose from these two
options I have here. First option is of Scotland, and second option is of Tuscany. Here's the one that I'm
doodling in this video. Sit back and enjoy the process, which is option number two. You can watch the
whole full version on my YouTube channel would
leave what the colors to do. Once you have done
your class project, please do share it
with everybody in the class project
section down below. And thank you and hope to see you again in future classes.
 Zainab Mohamad Ali, Artist and animal lover