Transcripts
1. Welcome to D5 Render course : Hello everyone. I welcome you to this
d5 render crash course. D5 render is designed to be a fully immersive and
intuitive tool to elevate rendering performance
across architecture, interior design, landscape,
and other 3D renderings. My name is Christian
path or Ana. I'm a civil engineer in 3D designer and I'm the
founder of creation renders. I have done more than 60 architectural and
structural projects, including expertise on virtual
reality, 360 views, etc. By subscribing to this course, you will be able to
learn photorealistic renderings and D5 render. And you will be able to advance your knowledge as a
beginner to advanced more than two hours of
lessons, import models it, and enjoy an instance sense of reality throughout
the creating process, outdated rendering tricks are now replaced by common sense, a gentle learning curve and
effortless reach for assets. With D5. It's never been easier or more intuitive to visualize a story. D5 render allows
you to transform your 3D models into impressive video
animations and images. It is a powerful real-time ray tracing technology software that test and plays on the new real-time
rendering engine. It helps you create
beautiful 3D rendering images and 360 presentations
with ultra fast rendering, excellent quality, and
more realistic than ever. If you have any 3D model design, you can set up your layout
with different materials, interiors, exteriors,
and additionally set the impact of lighting
fixtures and shadow. The software includes
many tools for designing objects and thousands of
tools from design to model. We can use animated 3D models, animated vegetations, lightings, and animated
vehicle movements. I welcome you to this
d5 render course. It will be amazed at how quickly you can learn from this course. I guarantee you, you will
not disappoint at all.
2. Introduction to D5 Render and How to Download : Hello everyone. Now we're gonna talk about
the final render salt damp. Before we are trying to explain about how to download and what is the free version and
what is the paid version? Pricing and all these things. I'll just explain to you about some basic features in the fiber and then what is
the different software? Actually the fiber bundles initially launched in June 2020. But before that they
also like a testing a demo version in
as a free version. After the June. Those are due. Andy David released officially and they were offering
at that time, they were offering a perpetual
license which was which ended in last year because India releasing the
if I render to plain old, they have ended perpetual
license and now they're offering pro version. I will explain it
in little bit time. So different render is
a brand new product, a brand new software. Compared with the lumen
and clean motion. You know that NVIDIA
RTX technology, Monaco, most cutting edge
technology given by the immediate graphic
cards they are using it. I mean, the DeFi render is using immediate BLS technology
and our DXE technology. And this d Phi Windows software is self-developed,
high precision, the global illumination and the de-noise technology to maximize UR and
video graphic card. Actually, I'm not saying that this V Pi release smoke bugging with the DMD graphic card. It's working but
some functions like the less things are not following the AMD graphic
cut at the moment. I hope they will upgrading, they will create more
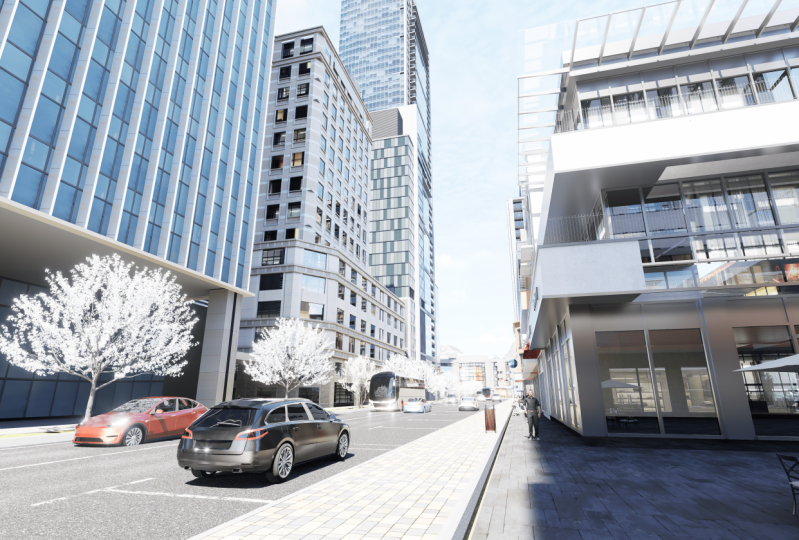
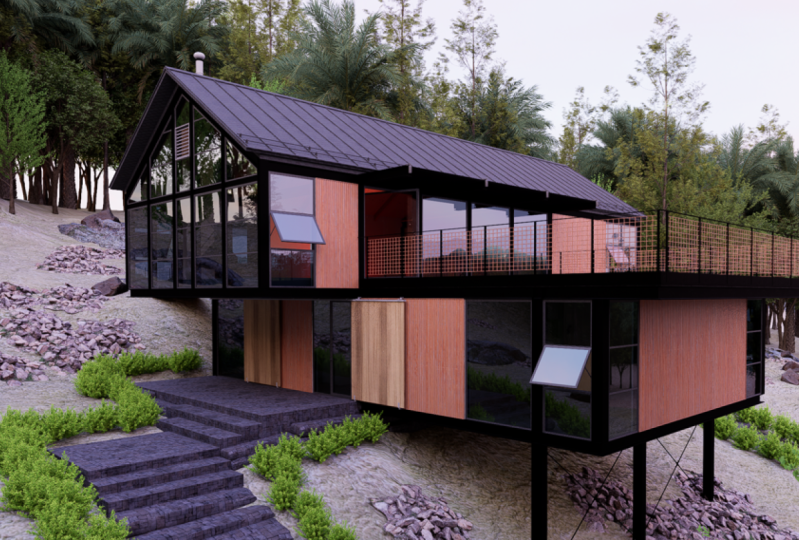
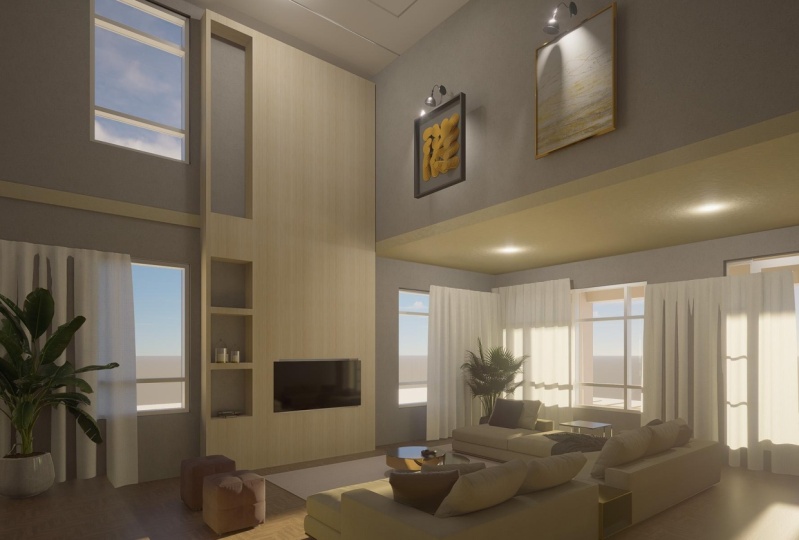
features to AMD cards. Actually, for D priorities of really easy flow to workbook. And you can create
architectural, interior, landscape, exterior, and
bring you a model to live. Actually. Now I will just
explain to you about the fire wind and
how to download it. If you just Google
it, if I render, this is the home videotaping
and here you have the different and hear the
latest version 2.1. Some renders, some people
have done and the special, special features
about DeFi render. Here, I will explain
to you about the pricing plan here you have a free download
in the pricing, I just clicked pricing. And here you can see the community license
is free actually. From this community license, you can get video and image
rendering has failed, but just remember that
it's a low-quality not you cannot do pull KO2 carrier
solution in free version. What the biggest drawback
is the acid library, because without a doubt, this acid library is the
key or maybe highlighted, most highlighted item
in a pro version. That means currently they
have annual license and a monthly license before they have the appropriate
to adolescent. Now they have indeed been
developed to 0 release. So here you have the asset
library and without a doubt, it's most useful and most
high-quality library I have ever seen in a 3D architectural
rendering, salt damp. When we are using it, you will understand it. You can initially you can try this free version and if you are satisfied
with the results, I know you are definitely going to satisfy
with the results. After that, you can
go to subscribe, I'll maybe you can have them
monthly or annual plan. Here. You can go
through D5 verbs. Actually. You can have this d Phi. These are the assets
collection, the dynamic assets, the characters, the furniture's, the P high college BBR material and the
vegetation libraries. Huge quality vegetation
library staff. And likewise, you
have partners aches. Why is it CISG render people? And the max tree
and the human are models built into this
leaf I were in the pool. You can directly download d
pi render from the software. You can install it. It's a very simple
process like this. And here you have the gallery. Some people have done very hyper-realistic friend
bearings form the D5 render. Actually the process
is really easy. I will explain it to
in future videos. I hope you can have an idea
about what is deeper and, and how to download it. It's a really powerful 3D architectural rendering
software in the market.
3. D5 Welcome Screen: Okay, now we have downloaded and installed the ED50
into software. Now we are on the welcome
screen enough DeFi software. Here you have a left panel, top-left panel, and
a bottom left panel. And here you have some
demos scenes here. So here you have new. That means if you want to have a new scene, just click here. If you want to open your file, just click Open here. And you can find your previous
work from reason tab. And here if you click that flow, you can find the plugins for this SketchUp release
max where I know Revit AKI kids Cinema
4D and blend it. So some of them have
live link actually, I have installed him some in
SketchUp treaties, max m, some other software so you can do it by yourself
if you have, if you are using these
kinds of software, just download and install them. Here you have most
important thing, that means the license
you are having. Currently I'm having
a Pro license. That means a perpetual license. Lifetime free upgrades. And here you have updates
for them and use the manual. And this is actually
the the bill country. And here you have
another examples given by the d Phi teams
disease, an interior pile. And this is an
exterior CT model. And here you have another file that between that means
its charge on the boat. Actually, you can download
these files and you can have a look on them because
they are already modeled. I mean, all the assets placed
and up to your preference, you can do it by yourself. If you want to have an idea about different than just
download and look through it.
4. Viewport: We'll just click this
New button here. This is the new viewport of
the DPI render software. Once you have opened the
default render interface, and you will be having
a beginner's guide. Let's just start it. And as you can see, they will give us the
d Phi render team has given us the manual types. Here you have selection tools, and here you have
some other functions. Don't worry about this
because I will explain you to in next videos about
these details. And here you have camera button, Display button, and a
navigational button here. And you have this type of manual here that can export
image and video. So I hope you, you will get an idea, a brief idea about
these manuals here. And here you have the orbit mode and the
mode that means that moments of the phi
renders software. Here you can click your
right mouse button. You can all be like this. And here you have
the ability to use these keys in your keyboard to go and move around
the your project. Likewise, you can scroll to sue. Here you have some asset window. Don't worry about this again, because I will
explain it to you in a couple of videos
about these things. Just click Next and you're done. So this is the main view port.
5. Selection Tool: Now let's find about these
selection tool here. If you just click here, you have move and rotate. You have scale UN
material picker here. In order to understand
about this function, I will just import asset
from the DeFi library. Here. I'm just gonna
click this tree here. Don't worry about these asset library that we'll be having a separate video about
this asset library here. Once you have imported this object from
the acid library or any third-party software, you can just click here. Here you will be applying
these three arrows. That means XY is it. And here you will be having some other rotational
functions like this. Here when you are clicking
in move and rotate function, you will be having
this kind of error. That means you can either
move these objects like this in any
direction you want. If you want to rotate
this like this, or maybe if you want to
rotate this like this, still you can be
able to do this. So here you have scale. That means these
arrows will be changed into like a rectangular
type, square type. That means you can change the size of this
object like this. Here you have a material picker. That means if you just click a surface from this
material picker, that means you can
apply a texture from the DeFi, texture library. You can change the surface of
this surface of the object. So you will be understanding
and near future about these bacterial picker
and everything. I'm just having a small
example about this.
6. Top Menu: In order to discuss
this top menu here, I have imported
model from SketchUp. I surely there are
two textures here. This white color in this
pinkish color here. Here you have a light. Here, you have pot and vegetation and the
particle functions here. As you can see, if you just
click this light button, you have for an additional
one type of light type here. These are the main light
tabs, point light, spotlight, strip light,
and the rectangular light. And the middle version 2.1, you will be getting
a stage light. For that. I will just click this point. I will just add that
spotlight here. Just add a strip light here. And I've just added a
rectangular light here. I will just make the the whole environment
a little bit darker. You can see this is d point light, spotlight. This is the strip light, and this is the
rectangular light. As you can see, there are many
differences among them. If you want to have a
point light like this, you can have point light. You can have the spotlight
here for a specific spot. You can have the
spotlight or maybe you can have the rectangular. Maybe you can have the
script light like this. You can change the size of trip. Or maybe you can have
a 100 like this. Here you have a different
type of right-side manual. I will explain it to next videos in it's
called inspector. When you click these assets, I mean these lights. So any of the
objects you will be having this kind of
familial here right side. You can change the settings, the rotation, the location, the size, and the
intensity of the light, and the bond angles. For example, for
this point light. Here, you have been
having a 20 intensity. You can just increase
it like this. You'll be getting
a higher intensity like this, this radius. See what happened
like this. Here. You have this control the visibility of light
source reflection. And you can change
the blend amount. That is a really good
example when you're using a global
illumination GI effect. If you want, you can enable it. If you don't want it, just disable it and you can change the color
of the light here. Here if I want orange
type of a color, you can change the
color like this. As you can see, this
is the spotlight. And you can change the angle
of the spotlight like this. You can have a support for
a specific sport like this. You can change the
radius and you can change the light
source radius. Like this. You can change the
angles of light, this anything you
prefer, you can do it. If you want to
move it like this. Here. If you want to increase
the size again for 1000, like this. So you can see this
is the light source. There's this yellow color thing. And here also, this
is light source. If you wanted to change it, or maybe 10 thousand maybe like this can have it and you
can change the color. Likewise. Now we will go back to data in, and we will just go for the
next option, this path tool. Actually, this part to Lee's, is basically if you want
to animate a character, 3D human or vehicle, you can have this
one because when I am doing a rendering or
when I'm doing an example, I will just use these character
and vehicle movements. Just remember that if
you want to animate humans and vehicles like moving, you have to use this function. And we will move onto the vegetation here you
have three options. The first one is brush and
the second one is scattered, and the third one
is spot the brush. What will be it is doing? And as you can see, when you click brush, you will be having
a green color. A circle like this, if you want to increase the
radius of the screen color, just increase this one. Here are actually the DeFi team has given these pro acids. Don't worry about this. I will do a separate video
about these assets just I just want to show how these
vegetation punches working. So that's why I'm
using these functions. In order to do brush settings, I will just click here, and it will take here. And I will just click
and paint like this. Just remember that if
you want to delete it, you can delete it like this, increase the radius.
And like this. We will move on to
the scatter function. Again. Just remember the
Scatter works on a specific surfaces like this. There are two texture type, that means two surfaces. For this one I'm just
adding this type of tree, the Citrus Limon, like this. For other service, I
will just add this one. We can see you can do these two. You are terrain. Don't worry about that. I will explain it
to you in example, when we are doing an example, the final one is
the path function. That means if you want to have
your trays or vegetation, so maybe if you want to have
any other objects in a path, just click like this,
left-click like this, or maybe like this, like this, like this, like this. And just press Escape if you want to escape
from the path. And again, just remember that if you want to add more trees
or different types of trees, you can just click these
other options as well. Just remember that. Also if you want to
increase the amount of trees or many other
objects in your part, you can have it from this
right side, may know, you just have to press escape
and just click this path. And you can increase the number of number of objects like this. So I hope you will have in an idea about how these
functions are working. If you want to increase the number of items,
just click here. And here you have, here you have number of items. If we wanted to increase it, just increase,
increasing. Like this. If you want to have them in a random direction, like this. Random spacing, like
this random offset. That means bigger your path. The size of the trees. If you want to add more
items to your object, I mean the part just click
here and add this one as well. And click here as well. Now you are added another
tree to your bot. Finally is the ad
particle option. Just click here. Here you have a dedicated
particle assets in a DeFi library. You have leaves, you
will have fired, you have smoke, you have motor fluids and
leaves. Many objects. You are water dropping in small. You can try this by yourself. And for example, I will
just show this pilot here. As you can see, like this. Hope you have understandable
this top menu here. It's a very important,
mainly in d Pi.
8. Right Side Menu: Let's talk about
this sidebar here. Actually you can find the
two important aspects here, environment and effect,
which you can directly affect your image or video
rendering, maybe your project. And sometimes you may be seen that there will be
another penalty. And the inspector,
that means you can click this object and
you can change the size, you can rotate them, and you can change the
location of the object. Likewise, for at the moment, I'll just click another place. And here in environment you are, you have GUN sky and HGRI skies. That means here, you can
apply your third-party or maybe a d Phi Winder HDRI
is for your projects. But we'll go with the
GUN sky initially. Here you have a panel that
can change your time. You are the modal time
according to your preference. Here you have the nighttime. Now here is a
morning or maybe in the 12 o'clock or
whatever you want. You can change it
really easily and you can change the
oxidation of NADH. That means that the sky, the sun location like this. Just lower it. Now I can see the sun here. Here you have another
three dot panel. That means you can change the longitude and the latitude according to your location, the project location,
for example, if your project is located on a Europe and you can change
the month of the day, month and the day of your
project you want to add. And you can change the
longitude, latitude, and the sunlight
intensity likewise, just from them that I'll
just click this button. And here you have
a better panel. And that means you can chain, as you can see now,
there are clouds. I'll just click here. Just click this real-time. Now you can see
these clouds moving. What you can do is
hear from this panel, you can change the amount
of clouds here like this and the speed of the
cloud like this really fast. And the direction of
the cloud like this. Here you can apply some better
effect like fog and thin. As you can see, if I
increase the fall, there will be a white
fog around here. I don't need at the moment, just remember that you can add these different kinds of
effects to your model. Or maybe if you want to
image or video specifically, you can add them
separate as well. And just remember that from fog, you can apply volumetric
lighting effects. And you can have been defect and separately
if you are modelling enabling because in leaf
I render they have given us some assets that is
compatible with the wind. That means that you are leaves and flowers and
moving with the wind. That is a really
realistic effect. Or maybe if you want to add
some volumetric lighting, you can still do it by
while you are doing, while you're working
in the model. Just remember that
there's another part that means the HDRI skies. Here you have a separate
deep I render a default sky. You can change this by Hera, sunrise, maybe like cloud. I'll just apply this party
Cloud as you can see, really high-quality STRS guy. So maybe you can add some
customized HDR from your own. If you have downloaded
from our internet or any other places,
you can apply them. And still also you can
apply some wind effect. We will move on to
the effect function. Here. You have
initially you have LUT, that means you can
apply your own lots. For example, I will just
applied a one Latium, that means desert.
I don't need that. I'll go with them
is modern action. And I will just increase or decrease the
intensity like this. If you want more like this, can change how the interface will different with the
biggest of these intensity. And here you have some
post-processing felt, that means exposure like this. Here you have a toggle
that can enable auto. I will just press
Auto and it will dramatically affect
my current model. And here you have Contrast
tab can change the contrast. And you can change
the highlight. Just reduce the contrast like descended exposure
little less than this. The shadows, the slope,
the white balance. Or if you need a little bit temperature related
to your model like this, or maybe blue method. That means that
sunlight, cloud areas. You will see a
bloom like pink and you can have lens effect,
lens flare effect. I will just show Joe's chi. It will just lens
flare as you can see, some decent other lens flares from directly from
Sun like this. And you can change
the saturation. I'll just prefer 0
saturation like this. And you can have some
color grading options that's up to you. You can change
these patterns like these are easily post shadows. Maybe a global, that means
point in time model. For the mid tones and for the highlights,
you can change this. And so it's a really
good functioning and surely they have newly
introduced this function.
9. Left Side Menu: Before moving on
to this, render, options, will discuss
about this ellipse. Decide minimum, top tier, a middle tier, and
a bottom tier here. Top tier is basically the every soft tasks
like file edit, BUN dosing there, and there's a special
button here important. That means you can
import SketchUp already to any other
projects from this button. And the third tab, this asymptote, that means the most important
have been DPI retina. Here you have a Create seen. That means you can add your
camera angles as images, then you can render it. Imager image rendering or
maybe video rendering options. Likewise, here bottom, you
may have this important, important items and
the object list. You can identify which
items you have important which items are
the assets types. Likewise, we'll discuss
about this. Here. You have File, Edit,
View, Insert tool, window help and prevalence
and some other options. Here, the pile is
really typical. That means save, save as
important a random button. Just remember that you can have two buttons for
importing assets. Important 3D objects from
a to D. If I render here is one and here there is
another one that call import. And when you go to the Edit, before we are going to edit, some of the objects will adjust. Click here. I'll just go to edit here and here you
have some typical functions. That means undo,
redo, duplicate. It means you can duplicate
another one like this. Lock and hide or
maybe flip like this. There's other one that
is called focus on. That means if you viewport
is too far and you want to focus on object or asset, just click this button or just click on your
keyboard like this, it will zoom in to your model. And here's another
fungi that means group. If you want to group it, just click Control in your keyboard and
just click others. This. And I'll just go to
edit, can group it. Now you can move this
group like this. Some other functions
lead and replace from a local folder or replaced
from assets like this. You can replace this tree to
a different tree like this. Or maybe if you
want to replace it, can still do it. Here you have beam. That means all sources
slide servers, same as we have talked about
these functions in display. Same thing, repeating
here as well. And the perspective
2 perspective orthographically you
light them Wireframe. We have already talked about it. And here you have
another one that means insert a point light, that means light teen types like this one, this add light. And here you have
tool that means similar to this tool
that means sizing, scaling and the moment rotation. Likewise, they'll go to the window and here you
can hide your left side, right side menu
bars and like this. And here you have preferences. There you can have, you can change your language. And here you can
save your timer, autosave timer, that's a
really important function. And the acid storage
where you are, you want to store USAID's from the d Phi online liability or maybe important items
from your own library. Likewise, here and there's another function called widget, which will, this was really
new release with the 2.1. Actually, in advanced
image rendering, you will get more
formats like JPEG, PNG, et cetera, and here. And once video
rendering you will get more resolution
types and the VRE, so I'm the beta
now is still here. And some stage light, we have talked about it
and color grading also. We have talked about it. This is a widget panel. You can enable low disabled it. I prefer these two are really
unnecessary currently. We are as beta, so it's up to you to
decide and stage light. Or maybe if you want to, want to change your color
grading settings, click here. And we'll talk about assets in a different video because it's
a humongous asset library, one of the most advanced, most realistic library
in any other software. Here There's another
option called NVDA or DLS S on that means, as I informed you in the
course overview video, DLS is. A function given by RTS
graph graphic cards. If you just click off, as you can see what happened, the global elimination and everything will be
changed like this, for example, I will
just enable it again. As you can see, the
detailing will appear because DLS is really
high-tech technology. And here you have your
license and you want to go back to welcome string
Just quick here. Likewise, I think we
have to talk about these functional and now we'll talk about this
create new scene. That means middle.
Here you have what you can do is just click here and it will add a camera
angle like this. For example, if you like this, if we want to previous angle, you can just click here. And it will go back
to your scene. Or maybe if you want to have
a different scene like this, just click this button at seen. And we'll just go
from here to here. Just remember that in every scene you can
customize UI environment. We factor those things hand. If you customize it, is belonged to the sales, not every other things. Just remember that if you
changing environment like this, maybe not like this. If you just refresh it, updated the scene from here, it will stay like that. And if you want to go
back, just click here. Now as you can see your previous where the condition
is appeared as well as effect and
all other things are specifically for the same. Just remember that it's a
really important thing. You can have many as
seen as you want. And this is the object
and the important item when you have imported 3D models from other software
will be appear here. And if you have used
some assets here, I mean, for example, these trees or any
other lighting or any other assets equal be displaying here and you can unhide it or you can
hide it like this. Or maybe if you want
to lock the item, then you cannot change it. You can still do it, at least. Now you cannot click and until
you unlock it like this. So just remember that these left side menu is really important because you
need to have scenes, venue or image or
video rendering. Just remember again,
each have a specific environmental effects
settings sets up to you can change it upon your request. And here you have a violin. Typical functions like
other soft tasks. In next video we will talk
about these assets function.
10. Asset Library: Now we will talk about these
assets punchline here. I'm just clicking here. Here you have three
different types of assets. The first one is material
and the second man is model, and the third one is particle. You have to remember
that these assets, I mean these PBR textures or
in model you have 3D models. All these modal and PBR
textures are online. That means you require proper Internet
connection to access it because it's having a relationship with
you or license. If you're free version or if you are having
a pro version. That depends upon your license. I'm in these oldies. Bro assets are depending
on depending on utilizing. And just remember
that in material you will be having
a ceramic fabric, glass, plastic,
stone wall and roof. Here also, you can have
subcategories like this. In each category you have
subcategories like this. For example, this PL2 had
ceramic tile and the boot flow. I'll just apply
this would flow to the surface and I will just
show you how to do it. If you want to
apply any surface, any PBL architecture, you
have to just click here. And it will appear paint like a paint brush
like a thing here. And you can now apply it. As you can see now
I have applied it. So don't worry about these
inspector manual year, this right side minima. I will explain it to
about this in next video. Here we will only talk
about these assets. Library. I said library. Here you have a pair. And the reason button, that means I have used this reason button so
you can access it. And likewise, you can explore by your own self about
these PBR textures. And I will want to have search item just click
here and you can search in the mass when we
are on the model, let me 3D. All your 3D assets are here. Actually. Asset 3D designer, whichever you
require, that means vegetation, human
speakers, interior, exterior objects, decoration,
CPE, buildings, any, anything you require
on these pro, asset library contains
actually one of them. That reason many people are using different
leaves because of this pro library they have, I mean, they have given
to their customers. Here, for example,
if you go to nature, you have Clinton deal. Trees, flowering
shrub that grass, winds hedge, whichever you require using this
pooled library ritually. That is why the main
difference between a free version and the
promotion easiest library. It has humongous of
high-resolution objects. Just remember again, these
are all online library. If you do not have an
Internet connection, you don't have an excess to use these models
in your model and just go through
these models you have stored in character
or an email for example, I will just go to
character here. You have business model. Just remember it will take
a small amount of time to appear these 3D assets, because these are from online, from the asset, Let's write. As we can see it, there
are plenty of assets here. For example, if you want
to have a 2D people, if you want to have animals, if we want to have furnitures, if you want to have begun at all these items are included. This asset library,
if you wanted to have the linked list. For example, if you wanted to
have residential building, it will be appear these are residential item there
they have provided us. I will just use this item
because I have downloaded this. You can see it's a
high resolution model. 3d model. It you can use in
your project wisely. And you have public buildings, road, for example, you
have traffic signs, street, landscape, like
the outdoor furniture, landscape light and etc. You'll have plenty of
items for me here. And now we will move
on to the particles. That means you have
a water effects, falling leaves and
many other items. You will be fine. The tier. Snow and rain effects. You will be fine these
effects as well. So just remember
now every item in this online categories from their servers and you
have to access Internet. And here, I have already
did these things. Can have a fire
wonder fireflies, you can have the mass fail. Here you have another
object that means a local. That means you can import item and you can save it in
this local library as well. For example, I have imported these items and I have included
in my local libraries. So if they never born
these local lab items, I will just use them and just remember that
you cannot estimate these objects because these are from third-party softwares.
11. Texture Settings: Now let's talk about
this Inspector tab. Here. You have to go to
material picker and you just have to click here. And automatically you will be getting this
inspector panel here. Actually. You'll be having a different
kind of maps here. Normal specular roughness,
metal thickness, and the ambient accumulation. Likewise, you have
here it means you and you can change the texture, stretch or saved and you can rotate the
texture like this, PBR materials like this. And you can have
tried planner here. I like to try plan to do is it will just correct you
are surface for example, like this for the complex
services, MPLS automatically. Correct the texture type like
this. Just remember that. And I'll just explained you
about these maps types. The normal map. Normal map is a bump map
at the need to create an illusion of depth on the object or
surface of suggests, like in our Any others hope tab. Usually you can
understand this because, because of this blue and
purple color, for example, you can just import a
third part D. Normal, lowest peculiar,
or any other maps. Refer here from you are
on a map like this, you just have to click here. And here you have some other
full type of thing here. This material and here this
is normal that because it can be identifying these is
in blue or purple color. Here you have a speculum. Usually a specular means how
black and white image in none PBR materials that determines the shine tender
reflectivity of the surface. Just increase it so you
can see more reflectivity. And if you just decrease
it less reflectivity, we'll just keep it as 0. Here you have roughness, which can give you an idea about smoothness and the
roughness of the surface. If I just increase it, they will automatically be rough surface slightly each
we just reduce it here. I'll just increase the specular. Then you can have an idea
about roughness like this. This is the rough and
it is really smooth. Ok, now you will
understand the mental. Mentally means at
greatest scale map. It's a great scale map. They are white represent
the fully metal sickness, and the black represent
the non-metal likeness. Okay, if you just increase it, we can see what will happen. Here. You have nonmetal, here
you have metal thickness. These ill. That means
ambient accumulation is a grayscale map which
contains lighting data. If you want to have, just increase it
and you can have the difference between
a 0, maybe one. Here you have another option. That means, that means
if you just enable it, will be, your service will be at potential light
source of thing. Just increase it to be
like this as you can see, the light source thing. So I don't need that one and you can change
the temperature, you can change the colors
and all these things. I don't need that at the moment. And here you have UV
and here you'll have an option to stretch it. Right. Increasing. You are stretch
from right side to the left means scaling up
your texture like this. I'm just clicking
my leftmost button, then I'm just going to let side. As you can see, us,
scale is increasing. If you want to decrease it, you just have to go right side. Here. You have upset. If you want to increase it
like this, what will happen? You can rotate it like this. Just remember that in each
normal specular roughness map, you can change the
settings in here also, you can change the
inverted button like this, and you can have individual UV, that means you are normal pair. This kind of a setting. That means you can add your
spreadsheet or safety. This is a really
advanced settings in a, these pictures, just remember that you can have
your own thing. And here you have another thing that means our
material template. For example, now I'm in
a custom material that, which means I have applied a BBR texture form d Phi
render acid library. But here you have
another option. Here it means strands beta. For example, if I
just click here, it will be transparent
like this. Just make it water. It will be like this. Material will be bored. You can have the fluid velocity like this and you
can have the depth, can increase the
depth like this, and have the specular
like this can change it. You can change the scale. That's okay. And here you have copy and maybe if we wanted
to have displacement, you have clothes
and the customer of a viewer to have
a video surfaces. You can have. You are, for example, for televisions
or any other screens. You can apply these
settings and you can apply your own video to play on it. Likewise and foliage, that means make plants true to life. That means you can
apply these to our third-party widget days
as we were having boarded. And you can make the grass okay. Like this. The whole
surfaces grass. You can change the
color to maybe green. Like this. That is up to you actually. I hope you will understandable these inspector panel try to do some more
examples by yourself, then you will get understandable these right sides
inspect them in.
12. Rendering Introduction: New lesson, everybody. So today we are going
to learn about image, video and Panorama rendering. In order to do that, I will just important model from SketchUp. Actually this model
is from 3D hardware. You can download it freely. Oh, if you are modelling, revit to any other brick
work or any other software, you can live Xin De Pi render. But here I'm going to, I'm just going to import
it from the SketchUp. This is the model I'm just
going to import, correct one. And once you have imported
it automatically, the scene will not
be a new viewport. It will be on this menu here. And it says my module aim. What you have to do is you
just have to click this one. And the model will be
automatically load like this and you can place
NCBI and your viewport. I'm just going to place here. It doesn't matter if
you just place here. So as you can see, you can still rotate the model or you can
change the height, or maybe you can scale it up. You can do any type of thing. Just remember that you
have imported that. We have to follow. Our procedure will proceed is
first we have to add some, create new scenes that bill
and save your camera angle. Then you have to add
textures to your model. So after applying textures
from the asset library, what you can do is you can apply some vegetation from
the asset library on the DeFi library. And you can add some 3D models like humans and some
furniture, etc. Finally, you can use some part tool to animate some
humans or maybe vehicles. Up to that, we can go through the image and video and reign. In the next video,
we're going to apply some textures
to this model.
13. Applying Textures to a Surface: Okay guys, now we will
do the texturing. I just want to
change this surface. What I can do is you
go to the Assets here. Here you have plenty
of assets like high-quality PBR
materials like vise. You have a ceramide fabric,
glass, plastic, stone. And each, each of these menus, you have subdivided some
other menus like for example, ceramic, you will have polished
ceramics and the ceramic. Likewise, here, I have click
this pin button and here you have wall paintings like
concrete surfaces or maybe, or any other surfaces like this. I have downloaded these
materials at the moment, so I will just apply this
material to the surface. What you can do is just
click this button. I mean, click this material and the material picker
icon will be appear on your surface and you
can apply like this. You have categorize
these materials in SketchUp or any
other materials. So deeper render we'll pick up the surface and some
different materials. I'll just apply this now. As you can see, if
you move closer and you can have a good
look on the material. I'll just close this
one and I'll just click this button and I will
just have the material pico, either you can click a button on your keyboard and material
picker will be happier. I'll just click
here and you will have a side menu like this. And here you have
a trip planner. If you just click here, you will see the service will
automatically adjust. Why? Because this trip
planner will adjust. You applied pictures
according to your surface. Just remember that
if you have service, just click describe plan
a button if you need, it will automatically
try to adjust. I'm I mean, it's
not a 100% perfect, but it will try to adjust. More realistic. You have normal specular and the roughness metallic
and the AON MSU. That means I could
just click here and it will dancer
light source thing. If we just increase the
intensity like this, see, it will replace the light and
Netflix Tesla and source. So I don't have,
I don't need it. I'll just click this button. And here you have stretch on
offset and rotate button. We'll talk about these things. If you need to change
the color a little bit, you can change this as well. Just click this pattern and I want to make it more darker, so I will do like this. Likewise, you can
adjust your material. Just remember that the Pi delivers plenty of options to
change your material type. And likewise, here I will apply another tile type of
thing, maybe a stone. Stone. I will go with the flow. You will have others. I will go with this thing. As well. As you can see it's a little
bit because at the moment, so I will just reduce
the size of it. Likewise. Now it's okay. You have different types of
materials in here. For example. I will give you
this Buton service. Little bit darker
thing like this. It's pretty cool, right? Yeah. So again, just remember that
How to change materials. I mean surfaces if you need because adding these DPI
materials will give more realistic a look rather than typical surfaces just
apply wherever you, wherever you can and
wherever possible. And I will add flow, flow type to this
surface as well. I will just remember to have you select the proper surfaces or otherwise you will
add another one. I will just increase
the stretch. That is too much, that is good. And I will add some
metallic polished metal onto the surface as well. This one. That's good. I think we have covered. So the texturing process, I will go with the expected. Like this. I'm a small look. Now it's almost good-looking. But I think having this ball will be a little
bit dull at this moment. So I will add a little bit dark of all to that one as well. And so we'll go with the paint. Paint. Yes. We will add some this. We will change the color of it. We will change it to a
little bit darker now. Now it's all good, I think
by next video we will be going to add some
vegetations and some 3D models. As a final video, we will let some moving
cars and we will add path tool to use some
vehicles and humans.
14. Vegetation: Okay, let's just have some
vegetation through our model. Here you have plenty of models from the DeFi
assets library. Here you have hard button, that means you can add this
to your favorite type. If you just click here, it will automatically to pay
for it and you don't need to go and find your
asset in this manner. You can find it under
the favorite tab. Just click here. And I will be adding
some vegetations here. You have plenty
of options to add vegetations if you want to add, like this slide individually,
can do it as well. Low, maybe you can
add bulk. Like this. Can have a small
radius like this, and like this, you can have it. There's another option as well. That means Align button. That means from this
line you can have vegetations or any
other asset like this. Now, I'll just go
with the grass types. That means ornamental grass. I will add some grass on the sound areas to
get more realism. Realism. I will just go with this. And actually if you
just click here, you can add 10 more than
one asset to your model. I will let this as well. I will let this as well, and the size will
be reduced to here. And the radius will
be a little bit more. If you just press this button, it will only aligned
to the terrain. And if you just press on, press keyboard button shift, then it will identify the
disease as only the surface. They will identify the
DeFi team like please. Now you can see this
black color boundary. That means I'm
applying to this one. So my grants effect
will not apply you into any other objects like any other surfaces
like this, ball here. This maybe destroy, do anything only applying to
the surface like this. Now, as you can see, other model leaves a
little bit heavier. So you can use this because
if you have a proper, I mean, high-end graphics card, you can still use this, but I will just
delete those things because meantime you are
properly card will be stuck. The D piping. Again, I'll just go with this. I will reduce the
density like this. I will just remove this one. I'll add randomly
because it's better. Just proved the density here. And I will just press
Shift button again to add. I'll just reduce my
radius here again. Increase the density like this. I'm going to do this. The boundary will
identify by dd phi team. I mean, this there will be no grass effect on the pavement surface
only on the surface. So I will go and add
to the side as well. Remember that you
don't need to fill your grass or any other
vegetation all around your model because it will
be then trying to lag you on software because
too many heavy objects. If you have a camera angle, that is why I said to
add a camera angle earlier because if you
have a camera angle, then you can identify
the boundary of that camera angle and just apply those vegetation only to
that camera angle area. Likewise, I'll be adding some grass effects
on here as well. Because my camera
angle will be on this. Let's press Shift button. Now we will add some labyrinth and some flavors like this. I'll try to increase the
randomness because then you are, sizes will be different. Sometimes there's disadvantages, truth like this and very small. I'll just download this
effect and I will just go to the board leads. We can apply some more
vegetation behind the model because
otherwise you will fill a void there. Quick here. Just increase the size. The randomness of these trees. Because the new increase
this random size, it will automatically generate a different type
of random trees. This will always go to your scene and try to
look from the sea. Now you can see some
void spaces here. So you have to avoid that. When you have a proper
image or video, the scene will be,
should be perfect. Because otherwise people think that these are very cheap legos, something because when you
are giving a client or maybe in UOP perspective, when you are making 3D model, the model have to be perfect. But it's, should be perfect
on the image or video, but the inside like the backend should
be like very messy. It's something like
but you should have a proper scene like this. Now we'll go back
to the thin man. Now, quite. But still we have to, we have to do very small type of
tree like this. Always just remember
that if used any model, the other reason that, that you can reuse it
from the reason tab. I have used this last this, so I'm just going to reuse it, just reduce it down. While I have added plenty
of vegetations to my model. As you can see, I have
added some clobbering wind, flowering shrubs
and lots of trees, and I have deleted some of the trees I have added earlier. You can do it by
yourself actually. So by doing that, you will be able to learn
how to use these vegetation, how to use these and the radius, density size, and how
to delete your models and how to assign your
model in inline like bison, you will be able to understand the asset library and
variable possibility. Just add this button
and then you can add your models to your
favorite tab, like fights. I hope you'll do it by yourself. This is the final scene. After you have
added many things, just update your
scenes like this. Now let's go with the
next video that is like adding some 3D models from the asset
library and somebody. Finally, we led
some moving object like vehicles and
humans to our model.
15. 3d Assets and Path Tool Animation: Okay, let's add some 3D models. That means humans to our model. And here you can apply
some 3D models from the DeFi wonder default library because its container
humongous number of 3D assets. Here you have character,
that means humans. Just go to this menu. I will add some 3D models
to my SketchUp model. I will just click this
dynamic only then only appear animated
objects in my menu. Like this, I will just add here. Just rotate it. Again. I will add some vehicles
to my parking slot here. You can see the other
piles on moving that because because other
model is animated model. So you can use it
to pay cable apart. I think we have added
some of the models here. So what I'm gonna do
is now I'll just gonna add a character movement
from this minimum. Just click here. As you can see now, my viewport will be appear like gray color circular thing. That means I can add
human walking model. I will add this model here, and I will define my pop as. From here. This area will be highlighted
on our gray color. And as you can see, once you have 1 here, your model will be
more from to here. And I will just extend
my path like this. Remember that once
you have added, just click this path
again and you can, you can edit your
path from here. You can add more models from here and you can
change the density. Density means how often your model will
appear on your part. Just reduce it. If you have one more
than one models, you can use your density here. And I'll just decrease
the width here. If you want to add more points
to other existing path, just click this button, then you can edit
you apart again. And here you can
duplicate your model. You can have multiple path
of this human movements. Now, I will add another part
that means a vehicle path. Here you have like, I'll just click this model here. This model here. I will just add my
path like this. As we can see now. I will just click
again to edit this. My path like this. I will reduce the
density and I will make it a single lane width. I will just produce
it little bit more. And here you can change
the direction of fewer. Awaken, let me be a trend
or right hand is up to your preference and just
produce a speed dance at 30. Now we will see, okay, now, to add more vehicles
to you are vehicular path. Just click here and just
click here as well. And likewise, our model
will be appear again. And just click here. I'll add this model as well. Just increase the density. Otherwise it will be a
little bit duller. My model. And I will just duplicate my regular moments
from here to there. But I have done this, I have clicked, I will click this duplicate button
from here, like this. And I will make it
different models. I will just the path and click Properties. I will add this car. Again, I have to click this. Remove this. I will add this. I will just reduce a bit of that and I will
change the direction. Now it's like two lane. Reduce the speed of this from
another angle of camera. Gets smaller. I had to change
my points because now it's okay. They can be some
mistakes like that. So don't worry about that. You can make everything correct by learning from these
kind of software. There are plenty of
thing you have to learn. Now I think this module
is going on the answer. Another option that
we have to change before to do image
and video and read. That means a
environment in effect. By next video I will do it. Hope you have understand about this path tool and
this 3D assets. Using these 3D assets
in your model.
16. Environment and Effect: As you can see, after
the previous video, I have added some 3D models. These are 2D model sexually. And I have some use some of the animated animals in
different asset library, that means butterfly
and this rabbit here. And these are like 2D
models I have used. Because now you are modeled, feels a little bit term reality
because of these using, having these models
in this interface. And today we'll talk about this environment and
the effects panel here. From here, you can change
your daytime like this. And here you can change
the offset like this. You can see instantly, you will get a more
realistic view from you interface like this. I will just reduce it to
have more sunshine to model. And you can use
because the default, by default d Phi having diva
is having these clouds here. And you can change the amount of clouds and speed
direction from here. I don't need fog at the moment, but I will add this
when defect here. Because of this wind effect. The models who are capable of
having this wind animation, it will animate because
of this window effect. Now, I will just go to here. Now, as you can remember, I have told you earlier that if you haven't
update the model, I didn't have an
update the scene one, scene two, the which you
have change already. It will not affect
the whole interface. It will effect, it
will go back to your scene one settings, what you have to do
is you just have to change your settings like this. Like this. I will have been defect and
I will just refresh it. Now, you are seeing while seen, one will be ready for you. Our settings like this. Change the offset. Little bit ten. By clicking this button, you can change the
sunlight in intensity. I will just reduce it like this. If you want to
have separate sky, this is defined sky. They won't have HDRI skies. There are plenty
of options here. You have early morning sunrise. For example, if you
are having this one, it will automatically change your model into
something different. And if you want to
have like sunset, it will change again
the whole model. Because having this HDRI
skies in your model, it will affect all
this all model. Without a doubt, it
will give more realism, but it's up to you
and evening glow. Now see what happened. Your model will be changed
like not like previous one. And here if you have
clear skies also. But at the moment I will go with the cheap
GUN sky effect. Here you have another
panel that means effect. That means you can change your model settings
like contrast, brightness, the slope, likewise, and the white balance
and those things. And at the moment these all
settings are by default, it's generated as auto settings, but I'm going to change
the exposure like this. See the effect will, this effect will
change your model. Now it is almost
change and gain, I will shame. Cloud amount. Html, sorry, Effect. Go back to the effect. And I will increase the
slope little bit and I don't need to change the
contrast and everything. Now it's looks good. Actual end. If you want
to have some LUTs, you can just apply it from here. Here you have sample modern thing, modern
dystopian action. Better to have like this. Now you will have a look
on how these settings work because you have to work by yourself to understand
about these settings. For example, if you need
to have color grading, you can have color graded also. For example, you can have
a little bit thing or maybe if you want a natural
like this, that's up to you. You can have many
options here, also. Some mid tones and
some highlights. You can change it
because I don't need to change because by default device giving a precise
color grading like this. So now we will, in an image rendering
at the moment, I have two scenes here and
they are actually from here, we can generate an
image rendering. By next video, we
will understand about how this image
rendering will work. And we will, from that video, we will move on to the
video rendering as fair.
17. Image Rendering: Now we are all set to
do some rendering. Here. Here you have
a couple of buttons, that means image, video
and the panorama, and the system VR button. So we will start with
the image rendering. Now we have two scenes. For example, this
is the first scene. This is the second scene. So we have not added any
settings to see number two. So what I'm gonna do is I'm
just gonna click this scene one and right-click here
and copy parameters. I will just click again the s2 and I'll just paste
parameters now. Now all the settings
we have applied in Cn-1 will be applied
to s2 as well. Only thing is I will just
change the offset here. I will just reduce the
sunlight intensity like this, and I will just click here. I think we will go back
to seeing one here. Here. If you want
to render an image, just click this button
and they answer, small window will appear again. As you can see, these are the scenes
we have added already. From that scene. Also, we can change the settings from here like environmental
and effect thing. We can change that as well. Here you have a couple of
farm settings as well. If you want to have an
image, just click Image. And this is a field of field. That means if you
just click 100, it will like this
because from this, you can zoom in or
zoom out your model. But I will stick with
the 90-degree button, but depending upon your aspect
ratio and the preset size, size, you have to change
the field of view. So I'll just stick
with the window. Otherwise, if we want to have
aspect ratio in 16 by nine, you can change that as well. Here, the preset size, I will.
18. Video Rendering: Let's talk about
video and drink. For video rendering the innate these
scenes one, twins two, or maybe any other
camera angles CPU have, because it's better to have some camera angle and some settings saved
to these scenes. Just click this
video rendering and another window will
appear like this. I'll use this scene
as my first frame. I'll just click this
add camera button. As you can see,
this camera angle is saved as my starting
point of video. So I will just move
my camera like this. I will just click this
add camera button. And here you have the
the duration button. You can change it to eight seconds or
anything you prefer. I'll just press eight seconds now with my duration
has been changed. And here you'll have
the refresh button. And here you can delete your
camera angle like this. Here you have another may know that means the
right-side Meno. Here you have the video type, that means the MP4
AVI. That's up to you. You can decide, I'll
usually go with the MP4. You can have the
resolution like this, seven hundred twenty eight
and eighty two K-OPT, okay? Up to here you have sequence so you can import the
channels as well like before. I don't need that at the moment. So here you can
have some setting. That means Easy Ease. Then that means from
one frame tool, moving on one frame
to another frame, you can have this easing
or ease in button. If you are, video
is like linear. Go with the linear. And if you want to slow
and ease out like this, just look at your camera
angles you set as well. Here you have like if you
have key frame intervals, just click Custom button. So I will add some
keyframe animation and for this model as well. So basically if we
just play here, these either, these are
my models currently. Currently our model is
already animated because of the Santa vehicular moments
and the pedestrian moments. So here I'm just going
to go this button. I just wanted to show you
how this key frame works. That's why. For example, I will just
reset this keyframe button. What you can do is you can move this animated asset from here
to anywhere on this model. That's not up to this model. You can have like animated
models from this, because you cannot use
this as a custom path. It's really difficult. It's better to have a
key frame animation. What you can do with
just click this button, add key frame button, and go to the next camera angle. Just place it anywhere
you want and refresh it. Now we just played, as you can see it now
you can see this, this bird is flying from
here to here like this. That is your key
frame animation. And other than that, you can have model
like making a scale from from small scale
to large scale. You can still change from this keyframe
analysis animations. If you want to have this key frame animation rate matching, that is from here. Now it will be a little
bit slower, like this. As you can see,
our frame rate is 30 frames per seconds or maybe 60 frames per second
that will match. If you want to rotate the
object, like likewise. Still you can do that as well. We will render this animation. It will take a little bit time. Just save it, and video
will be in progress.
19. Video and Other Settings: Let's talk about
some other details about this key frame animation. Just importer SketchUp model to demonstrate how
these animations perk. For that. I'm just importing
this box model. It's just a box. Just keep it here. As you can see, it's quite
large box currently. So we will move on to the video here and form the
starting image. That means for the
video camera anchor, I will just click this box, and I will just click this
key frame animation button. I just created it. So what I need is
I need to make it smaller in my next angle. From here, I will
just do like this. I will just make it maybe a 100. That means a very smallest size. I will just refresh my frame. And this is the
key frame we have. From the starting point. We are starting the
animation from here to here. But I need to make it like
from six to 7 second time. I need to finish it like this. So I'll just drag my
keyframe from here to here. I will just refresh it
again. I'll just play. As you can see now with
the moving my camera, my model will get smaller, and by the time of 6107 seconds, it will complete the animation. Likewise, if you
want to rotate it, if you want to
change the location, you can do it by here, by the keyframe animation. Another trick, I'm
gonna talk about these first frame
to have the sunset. But I need to change the, my time of rendering to
a different time depth. I'll just go to
the second frame. I just go to the
environment and I will just make it a little bit. Here. I will make it a little
bit darker like bison. I will just refresh it. Now let's build
play the animation. You can see with
the time, the dawn, I mean that the environment is getting darker will happen. That is the beauty of this
DeFi render video animation. And of course, other than that, we have this Render
Queue button. That means if you have multiple things like I have seen one and s2 at the moment, but you need to render
it liked at one time. So this is the one
you should use for that when the cube
here and here they are. So it says that no project. So what you can do is go to the image and just
click image one. And here you have a
button called Add to Render Queue that's added. And it will tick mark here. And for the scene to you will, you can add this
pattern as well. Now, there are two image rendering waiting
in your indicate. What you can do is
now we'll just click this render queue and click
All button and render. Then you are images will
be saved into one file, separate two files
into one forward. That is the thing. Again, there's another function that is called a panorama. For that simple as
that image rendering, you can click here
imagery or Panorama. And you can change
the preset size for Kd K or 16 K and just click
if you need channels, It's up to you or maybe
changed the format, just hit the Render
button and you will get a 360 view panorama
from these DeFi render. I think we have talked about most of the function
Mean TFI render. Now, it's up to you to
do a small example or maybe if you just send me a message through
any of the platform. So I can provide you this file if you need
need this file to get the knowledge because
I have image and video Randy reduced files already
built into the system. I mean, built-in to
the different file. If you need them. Don't copy. Just try to be yourself. Just try to add more
and more objects like 3D animations,
path animation. So likewise, and do
it by yourself and modify this model to
a more realistic way. Whatever you like. That will enhance your knowledge about DeFi render because it's a really good software
currently at the 2.1 version. But you know, this d Phi team has really responsive
and they are quite updating the software
very frequently also. So they have a roadmap. You can check that roadmap also. Then they have plenty
of new options to come through the roadmap. I hope they will improve
this one as well, because with the time, this interior, exterior and these image and video
renderings are quite easy. But with the design team, it's more easy than
others octets. So I hope that you will get more knowledge about the
software within this time. If you need, need to have any
of the is just let me know. And I hope you get what you need from this course
and thank you very much.
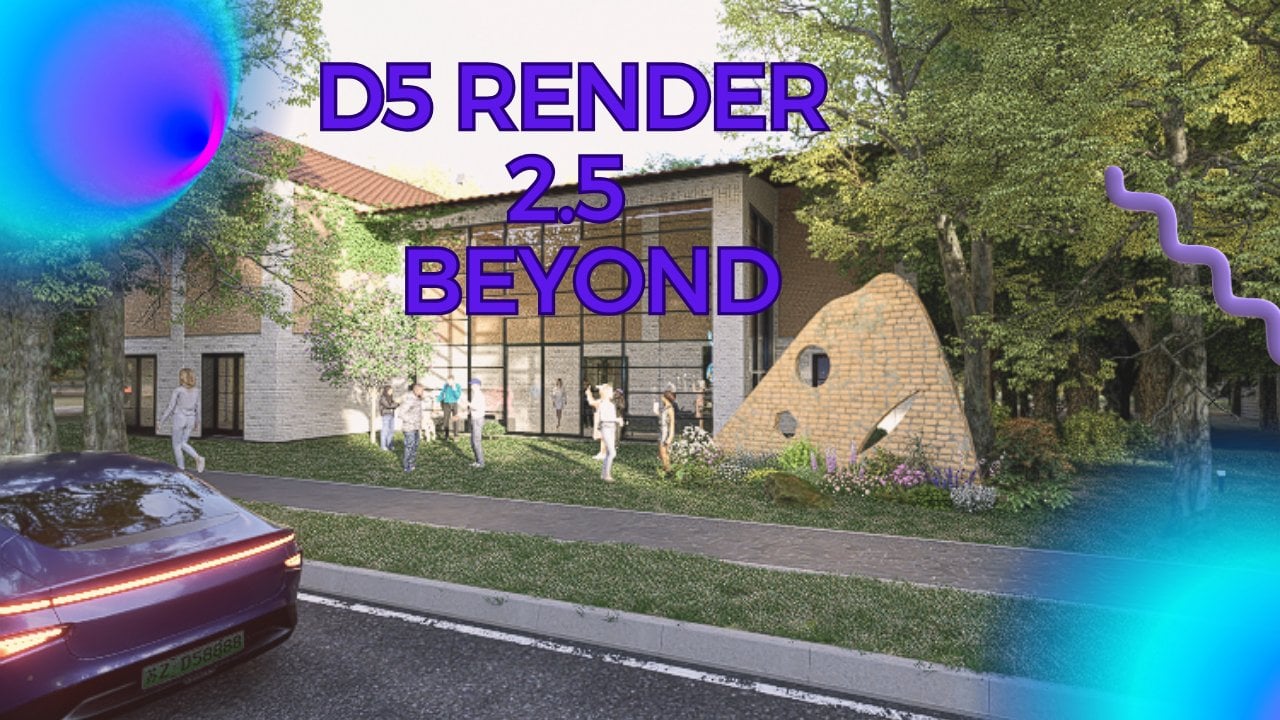
20. D5 2.2 update-Special Features: Hello everyone. So
we are back at the new with the full
render tutorial. This is, this is, this video is about DeFi
render to point to update. There are a couple
of special features like snow and rain, layer management decals
and the projector. Like why it's so
I'll just explain to you briefly about
these features. Here you have
precipitation button. What you can do is just click this precipitation
button and you will be having a rain
and snow effect. Now currently you'll be
having these rain effect very accurately and you can
see some fondling effects that you can control
here by responding here. If you just increase
his bonding effect, you will get more heavy ponding and here you can
change rain and snow. If we just scroll this button, this tab to or left to right, you will get snore, likewise and you will, you can change the intensity
of these snore or even by increasing this trend
button here, like this. So this spot in this
precipitation button, you will be fined in
environmental tab here. And it's a really handy must need special feature
in default render. So I'll just disable
it for the next event, next few Wendy's decals. If you go to assets, if you go to model, here, you will be having
this new details. You will be getting 154 decals. For example, if we just click this detail DRL like
three tabs, fraud, science damage, falls
damage payment, drainage facilities indicators
and waters frames for us. Likewise. So I have downloaded this file. If you want to place it, just place it like this. And just remember that you
can change the opacity, that means the transparency and you can change the sizes of it. Likewise, you can
change the location and everything you can change
from this account. That is a really handy
function and must need. Because having a
realistic rendering you must need, you must, you have to have this decals
presidency in your model. It's a really good function. Then the third option is, I'm just gonna talk about
this layer management. Here you will be having
a new tab like a layer, that is means default layer, the current older objects and materials that are present
in this default layer. In order to add some new layer, just click here, add new
layer and you can rename it. I'll just rename
it as vegetation. I will just add this
tree to this layer two. That means we can just click here and just click
this tree here, and just click
vegetation from here. And then automatically
you are layer. This tree layer will be
changed to the vegetation. If you want to hide this layer, just click here and the layer will be gone and
the tree will be gone. This layer management
is must need if you are having a heavy
like complex model. So it's really easy if you
are having some scenes and you don't need some
trees or vegetation, you can just hide
it from this layer. That is really good option. From this update on murder
you are getting on. The third one is a
global illumination. So as you can see, if you are comparing with
due to bind one or 2.2, you'll be having more
global elimination with these threes
and you will be having a good rendering quality rather than the 2.1 version. You'll be having more
material assets. Like for example,
you will be having a more characters and some vegetations as well
with this new update. These are really new characters and you will be
having animated one. I'll just click this
dynamic on the button. You will be having the motion. These things are so you can see. I'll just delete it down. Again. The one of the new
function needs of this layer management. That means if you want to have
just clicked nature here, the new function is
about the Brush History. What is brushes for means? For example, if you
are using brushes, if you're using some nature. Objects like trees, plants, grasses like these things. If you're using some this
brush function so you can optimize it or you can manage this
brush option really. I just show you how to do that. I'll just click this one and I will just click
this brush button. And here this is my radius
of this brush button. I will just apply
this grass things and you can do is just click this ground area from the mouse and here it calls
combine high highway. And as you can see from when you just click this combine highway
in this left side menu, you'll be having a
separate new Meno call a brush records. That means on this surface I have applied
three brush events, that means three grass
types and those things. If we just click here and you will get in
this brush history, that is this one. If you just click here,
you will be having this. What are the brushes
I have using this option and you can hide it. You can change the type of if you want to add other trees, just click this as sweat
and put this like this. And you can see more management with these
brushes and those things. So if you want to delete it, you can play eraser rather
than click and delete it. Like in previous version. It's a really handy one. Good one actually.
So the next one is the follow the focus
on depth of field. It means, for example, just go to the Camera button. Just enable this depth of field OF and just focus
on this person. Just increase the focus
to blur the background. As you can see in
previous version, if you just move your
camera movements, yeah, you will get your depth of
field will be disoriented. But with these updates, you can focus on specific option and you can
have your camera movement, whatever, whichever
you want like this. So you can see your
camera will be like focus only on this object and others will be getting blurred
and everything. Good job, good new function. Here also. In effect, there's a
new Fontan school tint and whatnot it. Here you will get in
some tint effects if you want to add some
of these tint effect on tour images and hear
us speak netted. That means like a camera. If you want to have like
these edges will be getting a little bit
darker like this. So there's another
optional, a projector. If you need to add
these options, you have to go to Preferences. Here you have each edge and I
have enabled the projector. Usually you don't get predict
unable. What is a project? That means you can have animated project so
that you can play some videos on a surface. It's a really good one. Actually, I can just click here and the project
will be unable. Just go to this light and you'll be having a
project like this. What you can do is
just go to it and you can add a video from your computer and have played
on this surface like this. These are the functions which are defined team has
brought to from this object. As I told you in
our lectures also. So d phi team will be like
they'll bring more updates, like more assets to
DeFi render software. With this in coming future. We'll be in touch so
I will be updated every uneven update
with these courses. So thank you very much again.
 Krishan Pathirana, Civil Engineer, 3D Designer